DIY flower pots made of fabric
 Fabric flowerpot
The old things always available at every summer cottage or country house can be used properly and turn them into not only a practical household item, but also an unusual decoration. In this article, we will continue the topic of manufacturing products from concrete mortar and cement, but this time we will consider how to create them using ordinary fabric. Such products, unlike flowerpots completely cast from concrete, can be easily moved around the garden, they are lightweight and also fit perfectly into any design you choose.
Creating a pot of cement mortar and fabric
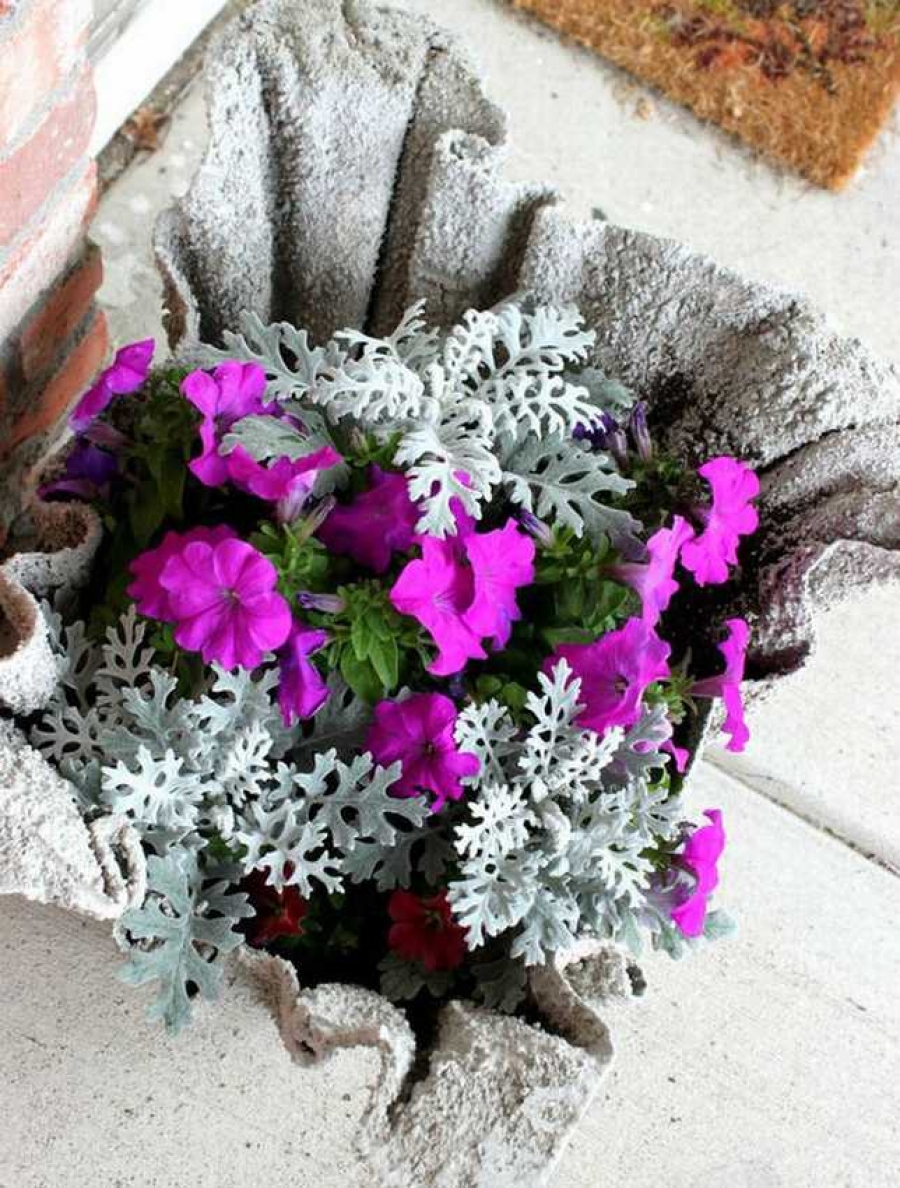
 For such flowerpots, Portland cement is well suited. As a material, use mainly natural fabrics, it can be ordinary old rags, terry or waffle towels, it’s okay if there are holes on the fabric itself, the main thing is that it should not be synthetic.
So, all you need is:
- a bucket or other container for the frame;
- piece of fabric;
- polyethylene;
- water, sand and cement.
Progress
- Prepare a solution for this mix sand with cement in a ratio of 1: 1 (do not make it too thick) and soak it with the selected fabric, the material itself must absorb the liquid.
- Wrap a bucket or other existing container with polyethylene and place it upside down so that you can dry the fabric moistened in the solution and allow its excess to drain. Polyethylene may be needed so that the resulting product can be removed without hindrance.
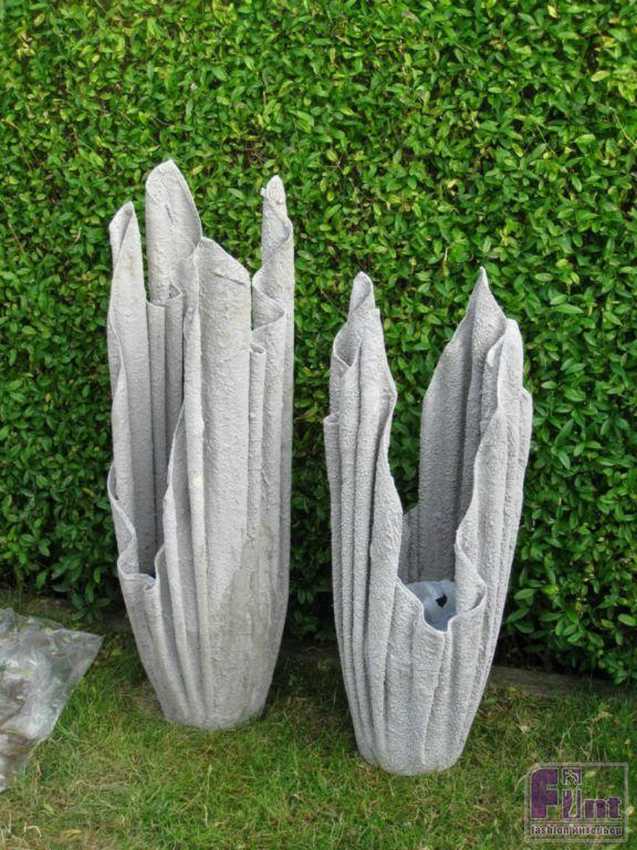
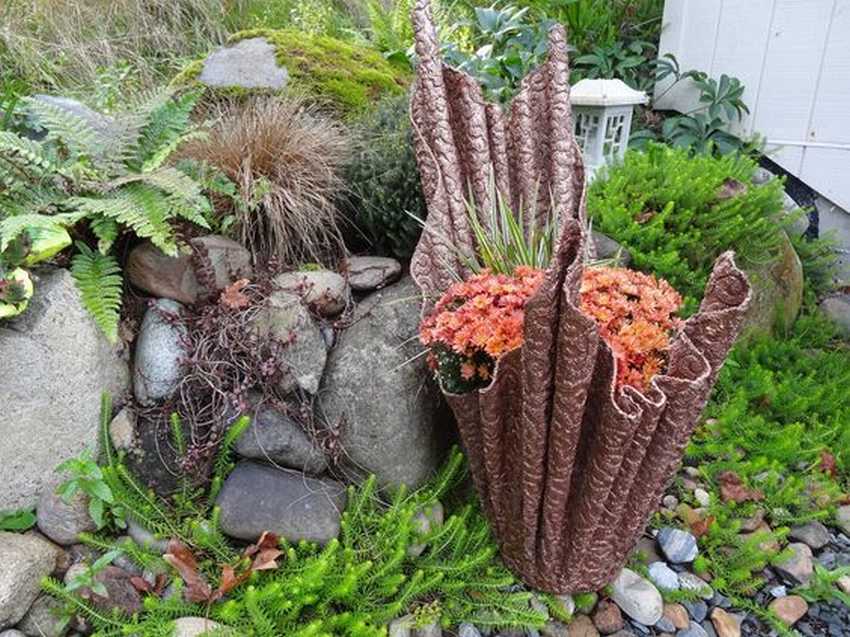
- After the fabric has been soaked, place it on an inverted bucket and gently straighten it, at the bottom there should not be any folds or creases, otherwise the flowerpot will have an uneven bottom. The folds below can be laid as you like.
- Now the flowerpot should dry, it can take a few days, later it will be possible to cover it with paint.


https://i.expert-h.com/en/vazony/986#sigFreeIddd35b26fd5
Flowerpot with a smooth surface
Material Required:
- 15% silicate glue;
- a large piece of thick cardboard;
- polyethylene.
Work stages
- Prepare a solution of cement, sand and silicate glue (in this case, it will be used instead of water) and put a rag in it. For cooking, use fine sifted sand, a little plaster can also be added to the mixture.
- Put cardboard on a flat surface and cover it with polyethylene.
- Remove the fabric soaked in the solution, lay it on top of the film and carefully align it. Place a container wrapped in polyethylene in the center and carefully turn over the resulting structure, while the fabric itself should be in contact with the container. Cardboard can now be removed.
- Leave the product to dry completely, after which you can remove the container from the finished pot. If you find any defects, cover the product with silicate glue, if desired, any dye can be added to the glue, this will add brightness and unusualness.
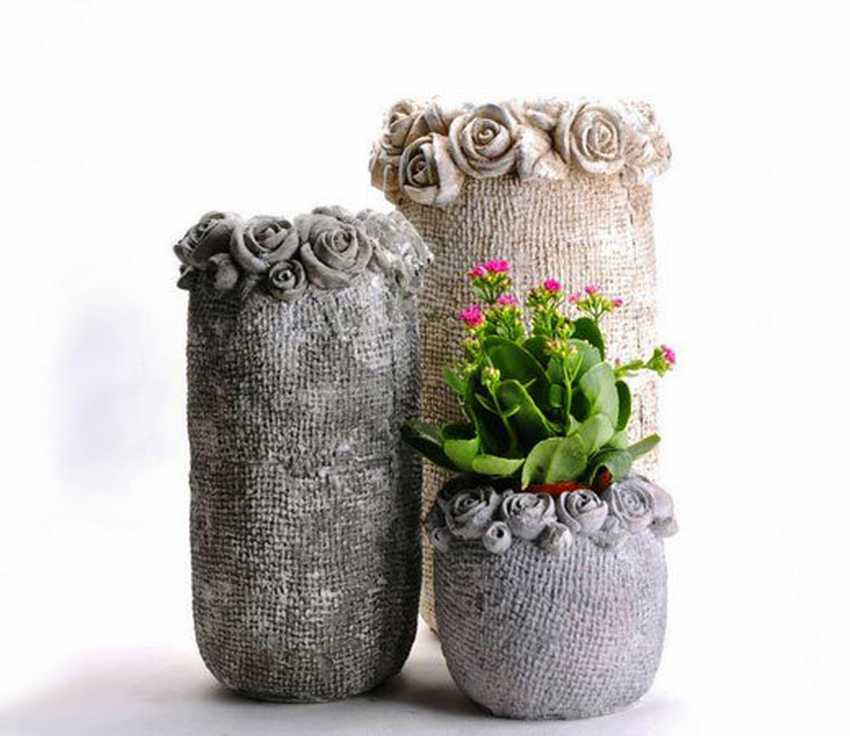
You can also use colored fabrics, as in the photo below, this will add an additional variety, besides, you do not have to spend time dyeing
On a note!
- It is advisable to prepare a mortar with cement and sand for each product separately, even if you plan to make several, while it is quite possible to use the remains of the previous one.
- You can prepare the drainage hole in advance, just before you lower the fabric into the solution, fold it several times and cut a small corner.
- In order to get a cache-pot, use the same manufacturing technique, in this case you do not need to make a hole in the bottom.
- You can fill the soil in the plastic bucket itself, then at the end of the work you will not need to clean it.
Flowerpot with a print
The principle of manufacturing such a flowerpot will be the same as in the case of creating a flowerpot with a smooth surface. The only difference is that paper with a pattern will be used here (while it should not be glossy) or printed fabric.
Scheme of work:
- we cover the cardboard with foil and select the place where the print will be located, grease it with silicate glue, put a piece of cloth or paper on top and also cover it with glue, leave everything for 10 minutes;
- we spread the fabric soaked in the solution, set the bucket in the center and turn it over, check that there are no creases in the place of the bottom of the pot;
- leave the product to dry completely.
On a note!
- If you want to create a flowerpot with high sides, use a rectangular shape.
- For sharp, symmetrical edges, square the material.
- If you prefer the smoothness of the lines, carefully cut the edges, then they will turn out rounded.
Decorate the finished product with various elements from the fabric.
Instead of fabric, you can use burlap, while flowers added along the edge will help to create an original design.
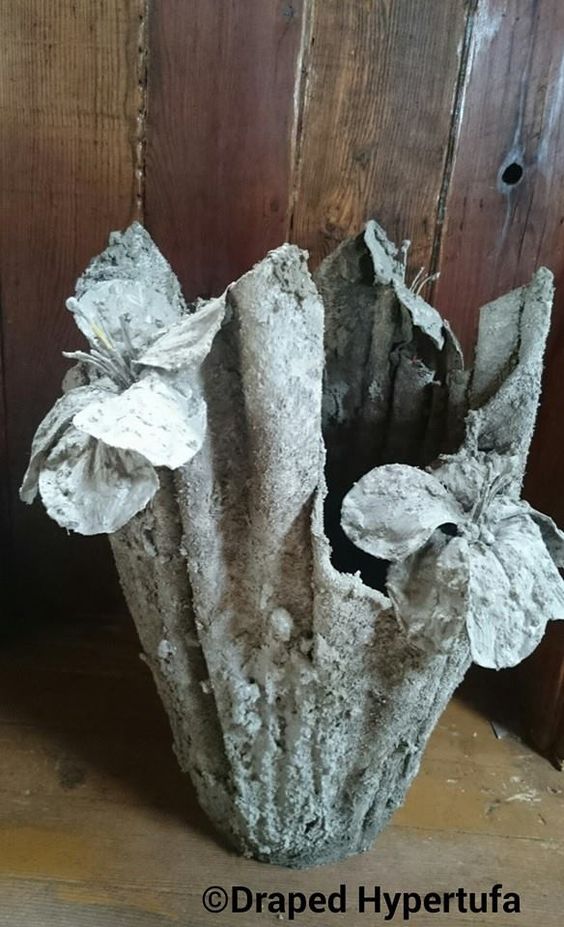
Flowerpots of fabric decorated flower pots
All that is needed is: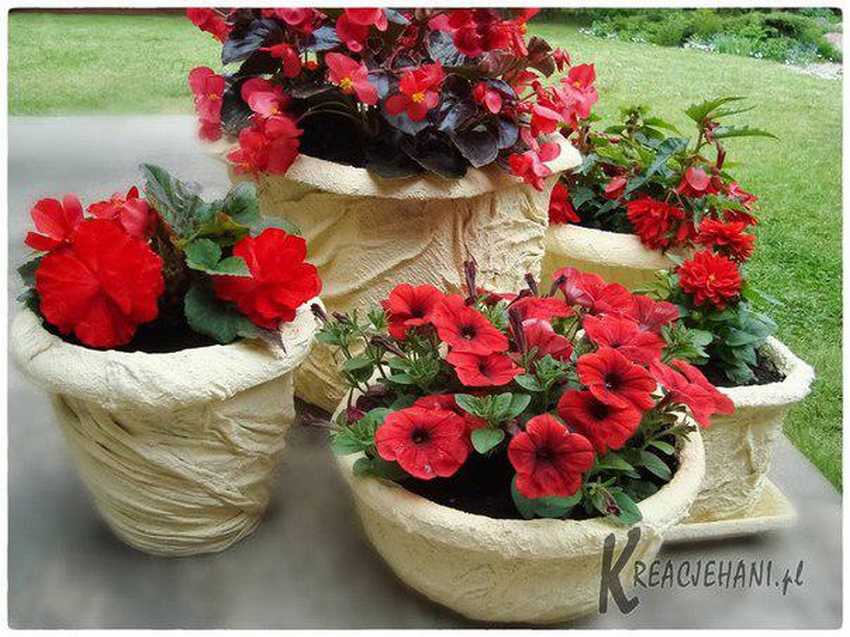
- flower pots or buckets;
- cement mortar;
- old rags;
- acrylic paint.
Stages of work:
- we prepare the solution and soak the rags in it, when they are saturated enough, decorate them with flower pots, creating folds;
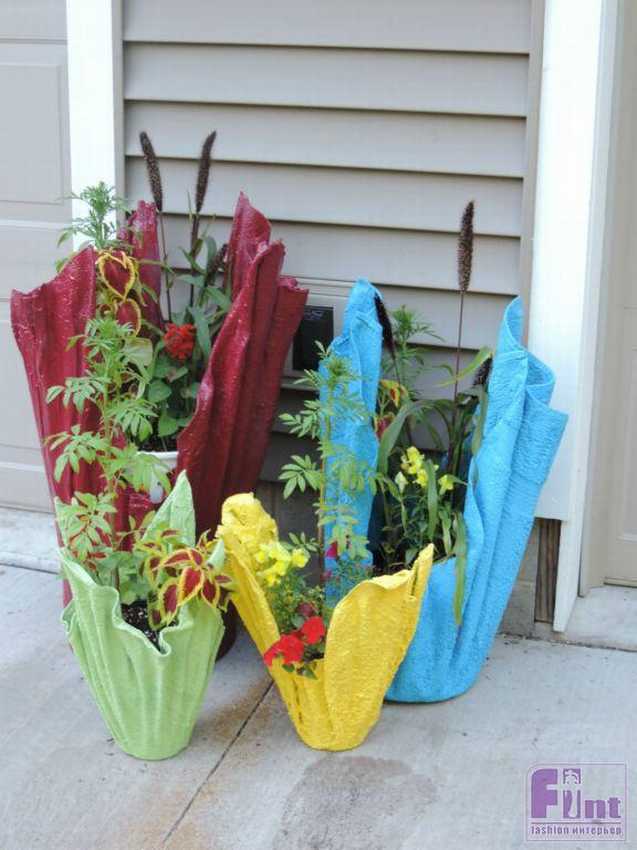
- after drying, you can cover the fabric with a hardened solution with acrylic paint on top.


https://i.expert-h.com/en/vazony/986#sigFreeId09c1bae064
Photo Gallery: + 60 photos - ideas for your garden


https://i.expert-h.com/en/vazony/986#sigFreeId4aa8f616df