How to make a children's house cheap and fast. Master Class.
 do-it-yourself children's house
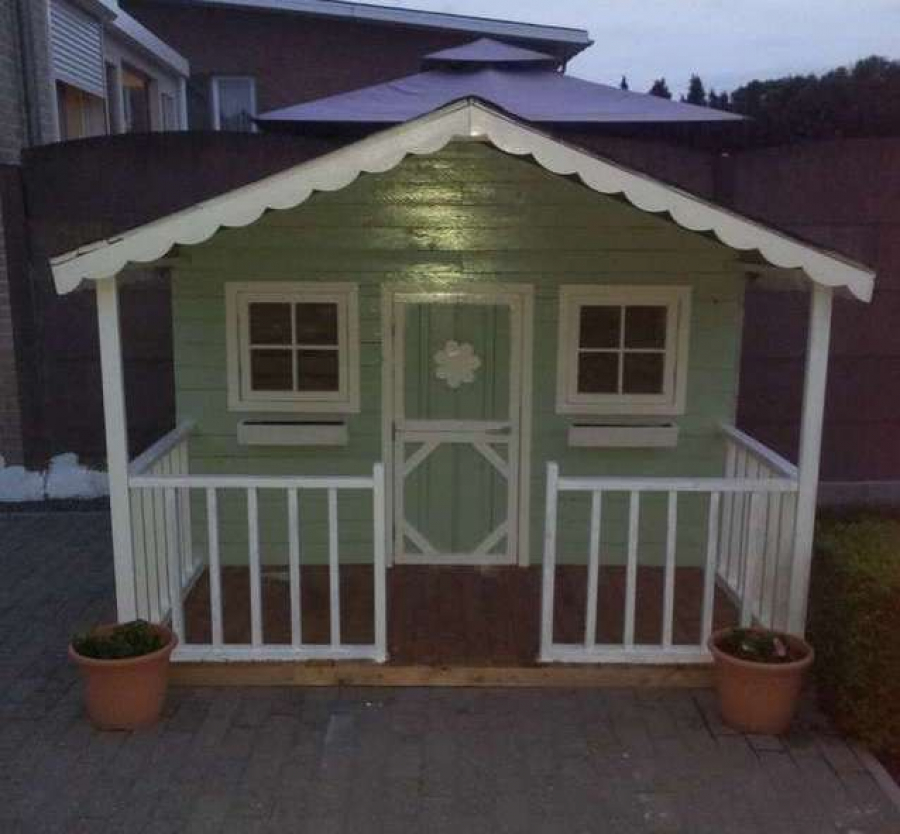
Great budget option do-it-yourself children's home. Why budget? Because only used materials were used here - pallets, old boards and trimming of sawn timber from a carpentry workshop. The main costs are the purchase of screws, paints and plexiglass (acrylic glass, as it is safer for children). Time and used tools according to your capabilities. The total dimensions are 260 x 260 cm, the project is shown below on a diagram made on a computer. How to make a children's house with your own handsRead the instructions below.
- Preparing pallets. Break all pallets and remove nails, screws, staples, ... use a crowbar or a large flat screwdriver.
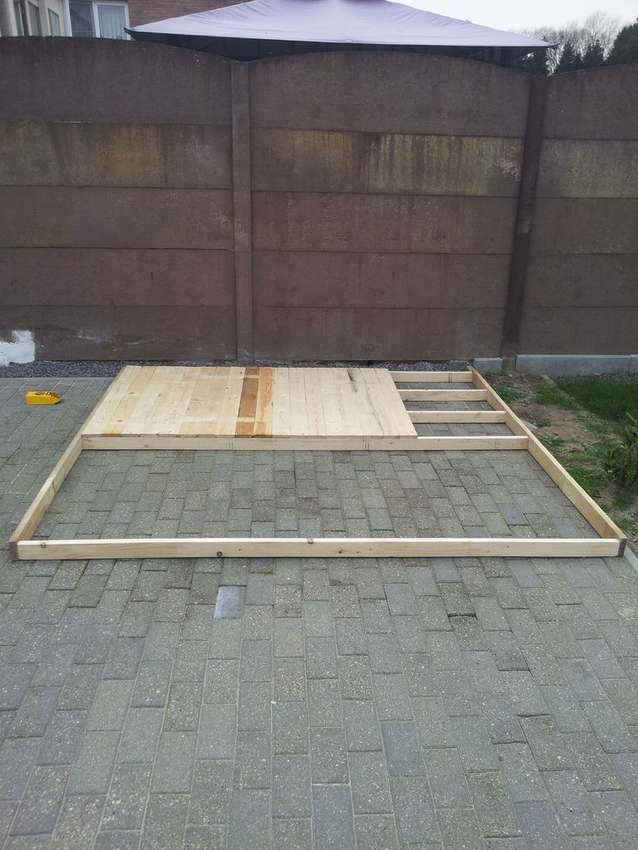
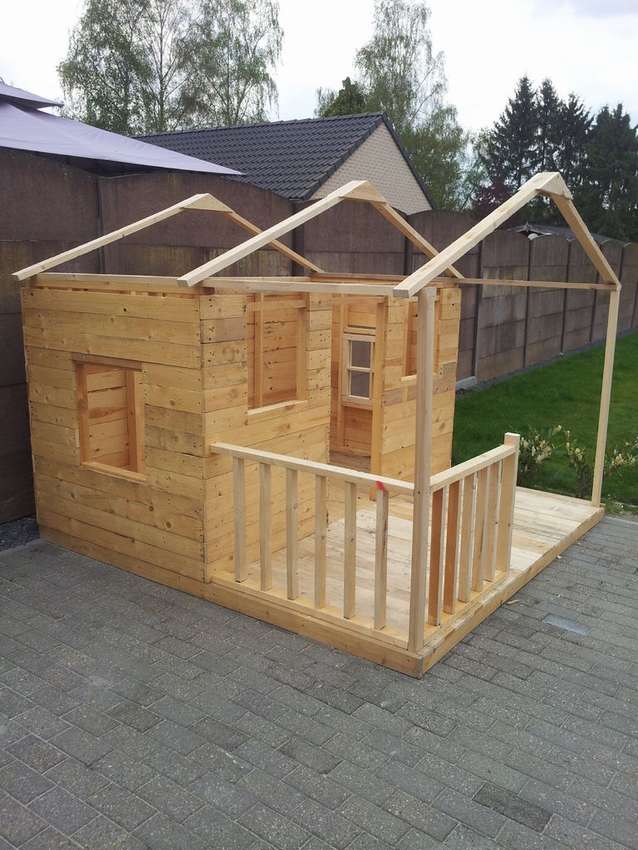
- Base creation. To create a square base, the author used boards measuring 260 cm. In the interval, the same boards, cut to 4 cm, 2 cm on each side to fit between the outer boards. Everything is screwed with 8 cm screws. The floor is made of boards of pallets.
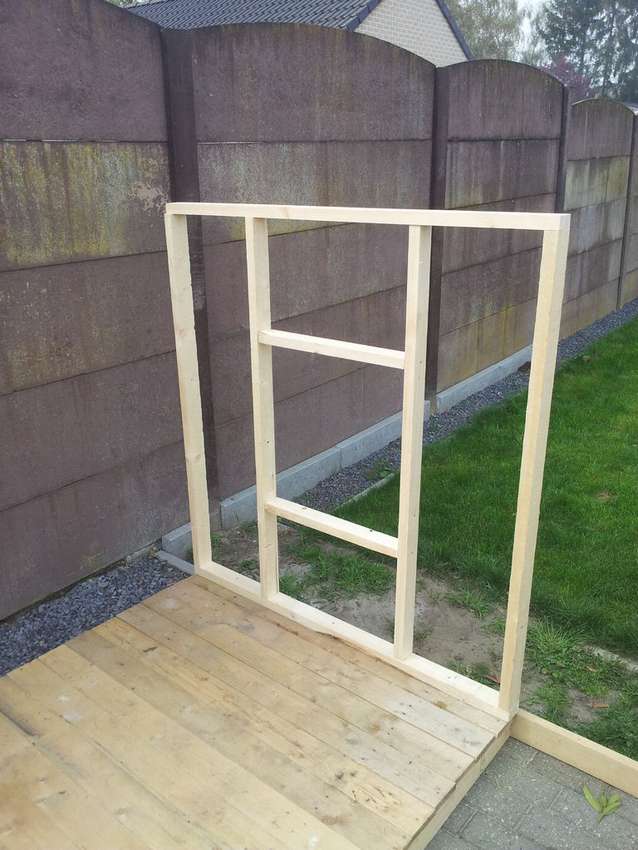
- Wall frames. Each frame must be assembled before installation (2 on the sides, 1 front, 1 rear) on the base. The photo shows what the wall frame consists of. In the center is a window opening of 50 x 50 cm. The dimensions of the frame are 130 x 130 cm. Where the boards are attached, use pallet beams. You need 2 such frames. Attached them to the base with 8 cm screws.
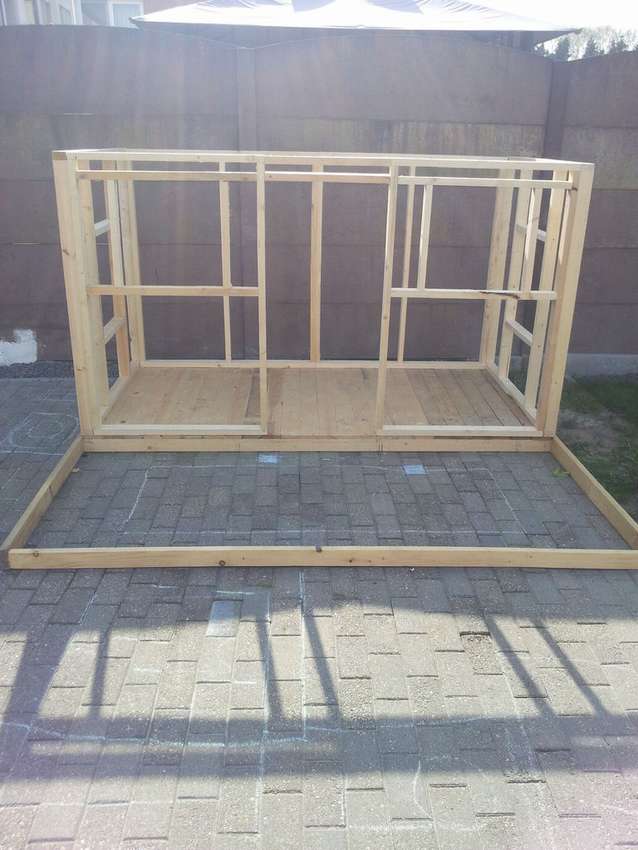
- Front frame with two whole boards at the top, for stability. The left and right sides are the same. On each side there is an opening 50 x 50 cm for windows. Here they are located abovethan wall frames. Doorway 60 cm wide and 115 cm high. The frame is screwed to the base, and the wall frames are screwed together with the front frame.
- Rear frame. Use beams across the entire width to connect to the wall frames. Lay the inner beams vertically to create support. Screw to the base and wall frames. After this step, all the crossbars should be connected to each other and the base.
- Side boards. Each side of the wall contains 13 boards attached from bottom to top. All boards are fastened with 4 cm screws to the beams. You need to cut the boards on the sides of the window openings. On the back, 2 columns of 13 boards were used. This is the back, so no one will notice. A total of 78 boards were needed, that is, approximately 12 pallets of 7 boards.
- Building a porch. There are 2 roof support beams inside the base frame and diagonally bolted with several screws. 8 beams went to the roof, 2 of which are installed horizontally over the walls.
- Roof. On the roof, screw 2 large rectangles of plywood. If they do not cover the entire roof, add 4 boards from pallets on each side. Screw on the sides several boards with a patterncarved with a curly saw.
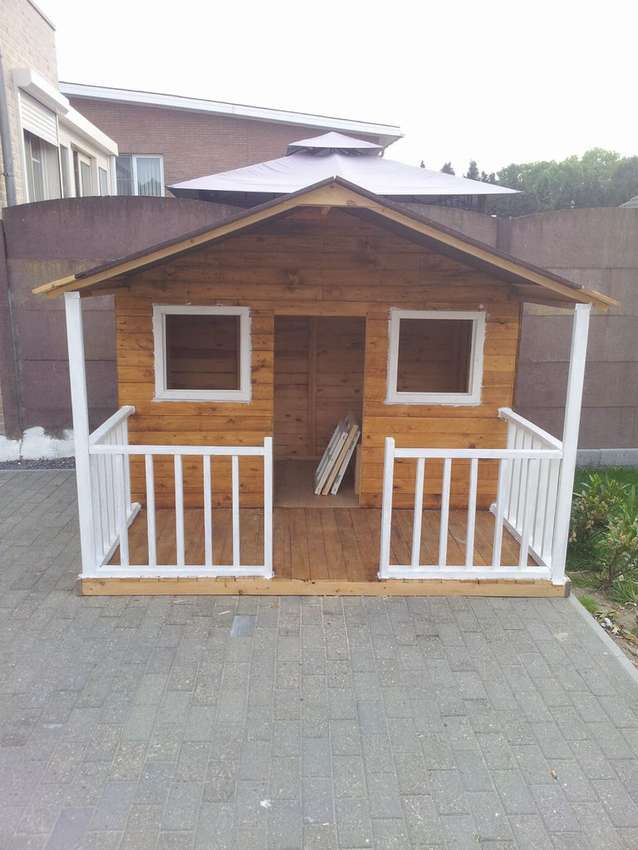
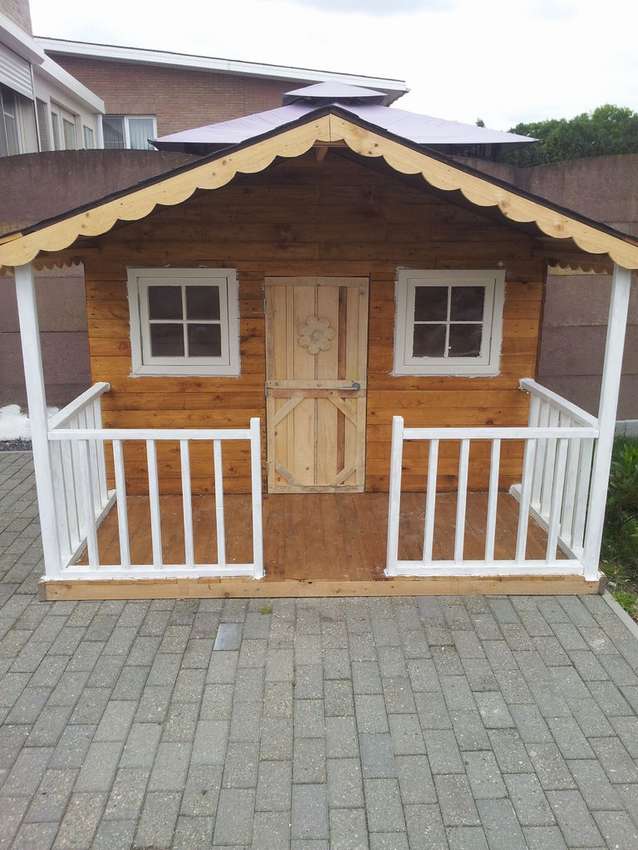
- Grinding. Sand all parts with a grinder. Apply impregnation. The roof is covered with dark gray tiles.
- Window. Each window in this playhouse can be opened from the inside and closed again using small latches.
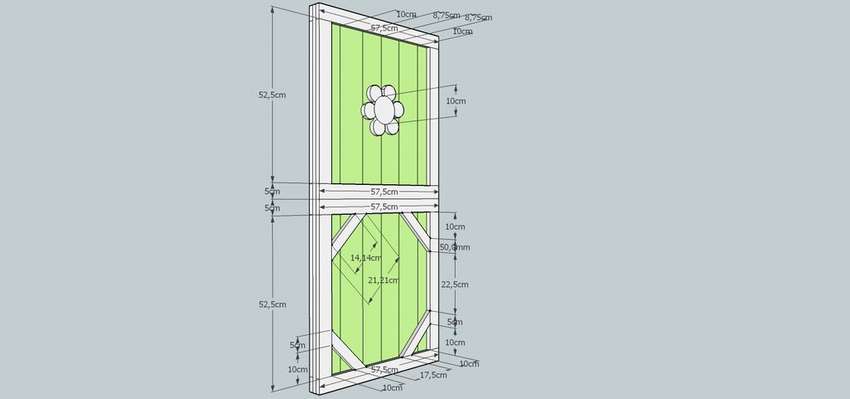
- The door is made of three parts. Each is made from boards of pallets.
Final result. Paint inside and out and the nursery is ready.


Here is a short version of the instructions and step-by-step photos, the full version on the site, the link below.
If you plan to do do-it-yourself children's house, it’s better not to put off, children grow very quickly. Need ideas? Here is a great article on this topic: "Do-it-yourself children's home 1000 photos, drawings, instructions» https://i.expert-h.com/en/detskie-domiki/detskij-domik-svoimi-rukami-1000-foto-chertezhi-instruktsii. It presents several options for making children's homes with your own hands for every taste and color!
Hello, I am the author of this article, so I look forward to asking questions for this article in the comments below, I will answer all !!!
If you have questions on another topic, ask them on our forum, we will answer you
- Two baskets of paper in 5 minutes (Master class)
- How to make a simple and compact table for a milling cutter from plywood
- How to make a soft headboard tile (Instructions + step by step photos)
- Cinder block benches: a convenient bench in 55 minutes
- How to make a bed with a niche: saving space (Master class)