Do-it-yourself wooden veranda: 300 photos, step by step, master classes
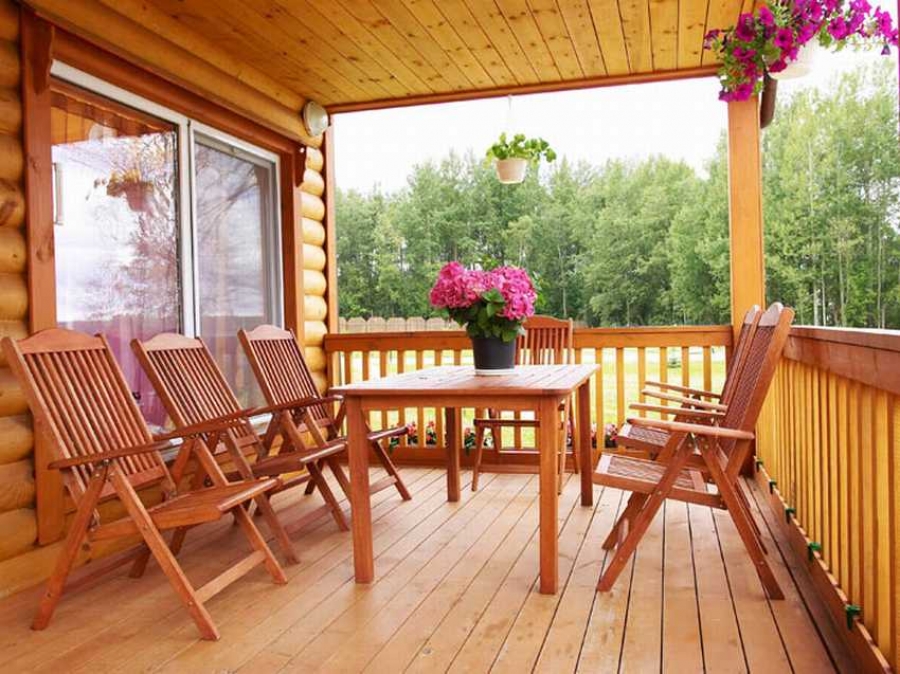 Wooden porch
The presence of a veranda in a country house or a suburban area is not an easy opportunity to ennoble and decorate your house, with its help you can easily increase the available space and get a usable area, which is especially important for small buildings. But even if you already have a spacious house, then, for sure, appreciate all the advantages that lie in the wide functionality of the veranda.
The content of the article:
- Types of wooden veranda
- Types of foundation for the construction of the veranda: columnar and tape
- On a note!
- Building an open veranda
- Floor materials
- Large photo gallery: building ideas
Types of wooden veranda
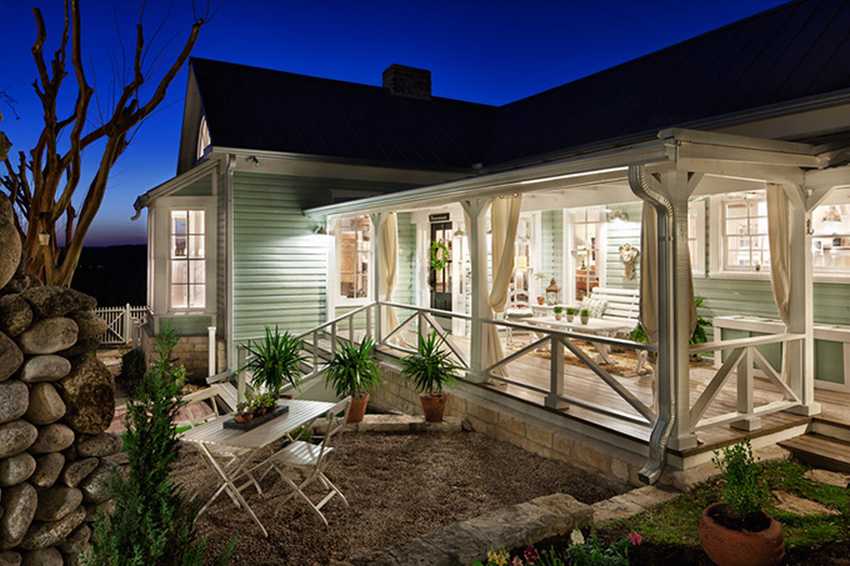
The veranda is a full-fledged extension with a foundation, walls, windows and a roof, which can be built into the house immediately at the time of construction or can be attached either from the main entrance or from the back of the house with access to the garden or courtyard.
In this article, we will consider options for building a veranda of wood, this material is much easier to process than other materials, so you can create such a structure with your own hands alone. There are several types of such designs:
1. open
2. closed

3. warmed
4. unheated
During construction, it is possible to provide for the possibility of changing the position of the windows, with their help it is quite simple to adjust the temperature inside the room
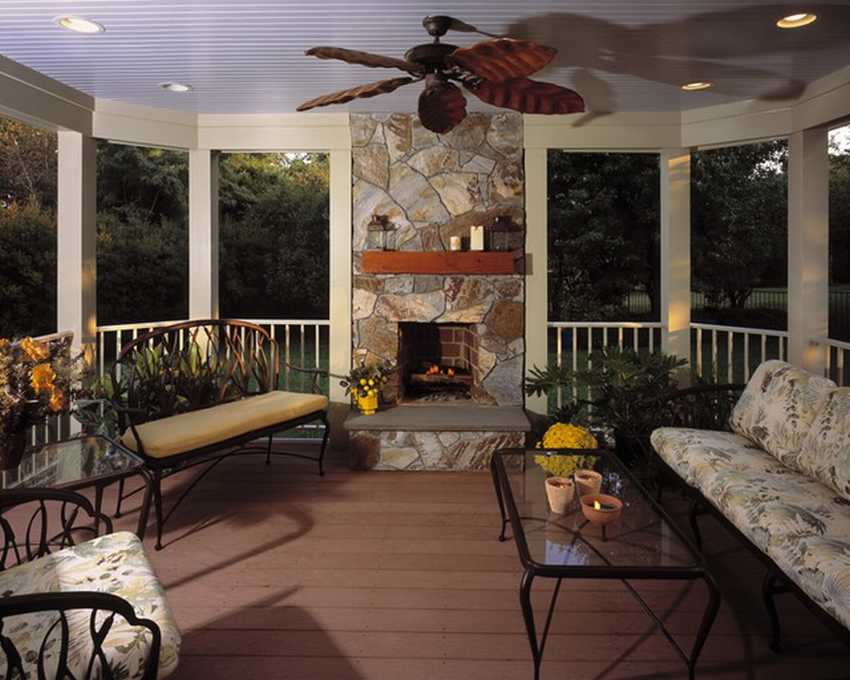
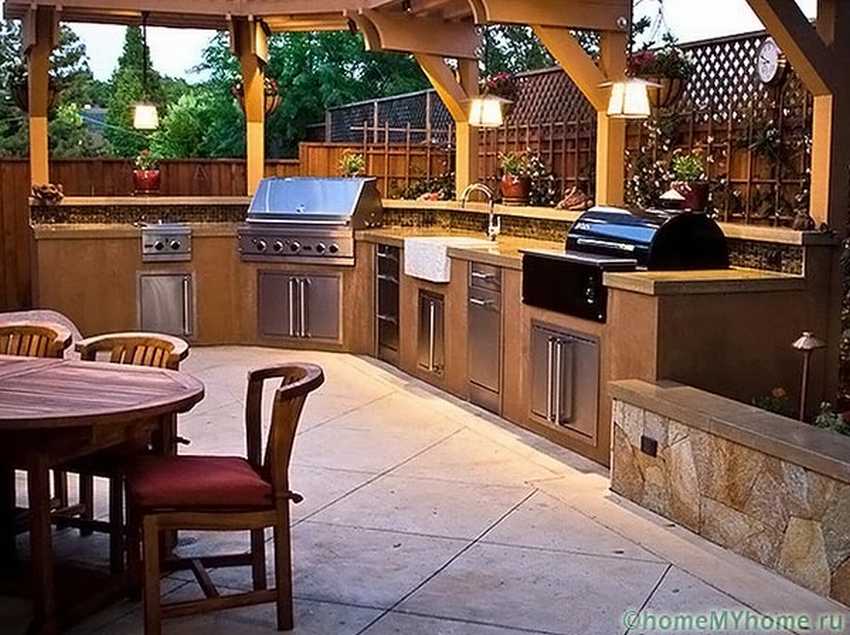
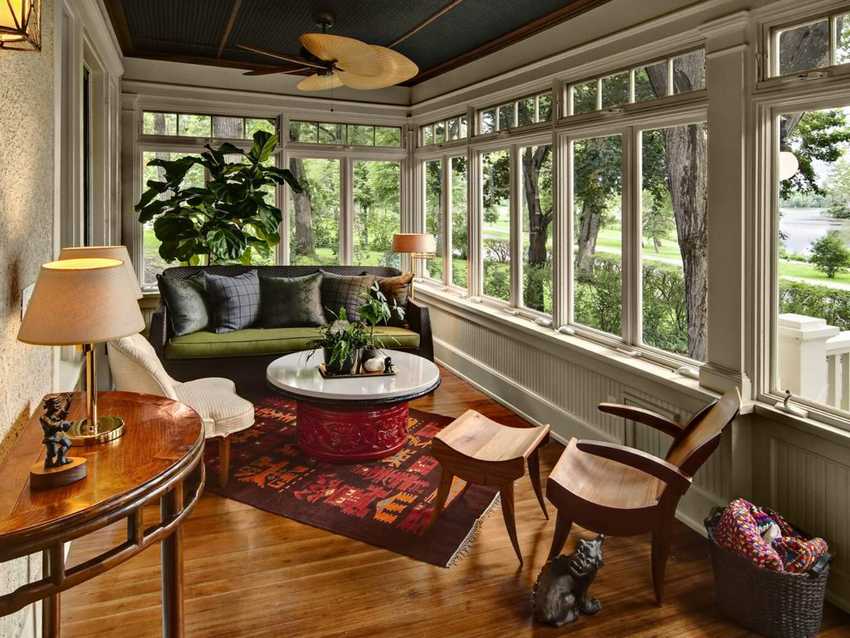
The design of the veranda opens up wide opportunities for the implementation of various ideas, for example, you can install a fireplace on it
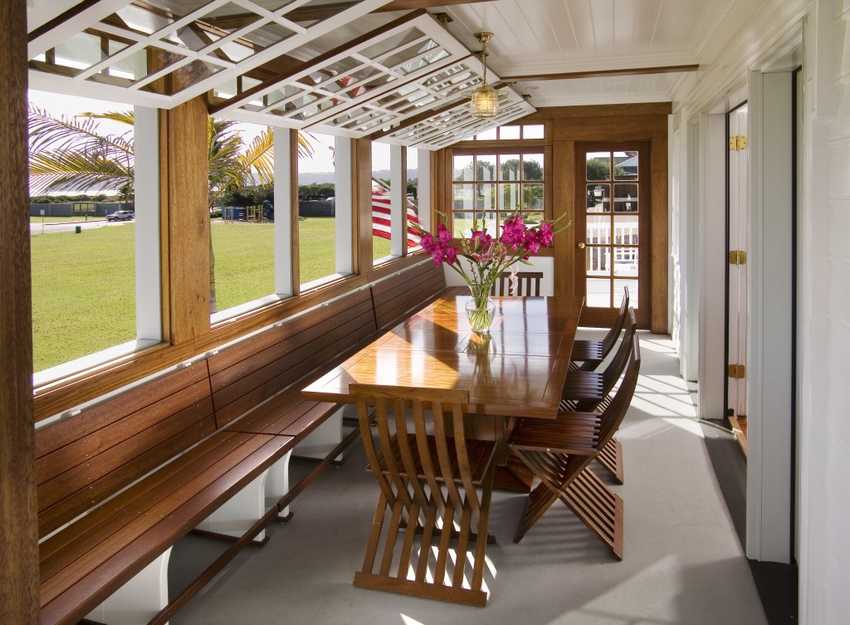
The veranda can also be used as a kitchen, dining room or even a living room.
Types of foundation for the construction of the veranda
Most often, verandas are built on the bases of columnar or tape type, Let's consider how to execute both options independently.
Column foundation
This option is the simplest and least costly, its essence lies in the installation of individual supportsthat dig into the ground.
Stages of work:
- Before starting work, pre-mark, then you can prepare pits for supports, their depth can reach up to one meter, but focus on the quality of the soil and the weight of the structure itself;
- fill the bottom of the pits with sand and gravel, pour concrete mortar on top;
- the veranda should evenly rest on the foundation, To do this, it is important to place all the supports on the same level, to protect them from moisture, use bitumen mastic and a roll waterproofing insulator.
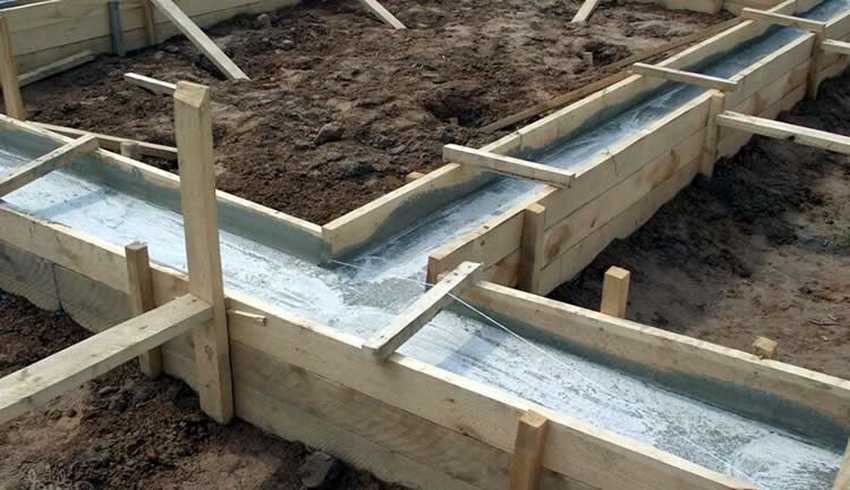
Strip foundation
Such an option suitable for heavier structuresFor example, made of bricks or building blocks. It is more time-consuming, and in addition, it will require a lot of effort and skill from you, because in case of an error the tape may be damaged, which will certainly affect the entire structure.
Manufacturing process:
- After completing the necessary markings, dig a trench and level its walls and bottom;
- expose the formwork from the boards based on the height of the future concrete support;
- fill the bottom of the trench with a layer of rubble and sand and carefully tamp;
- lay the reinforcing mesh; for maximum strength it is recommended to use cells measuring 10x10 cm;
- pour concrete made from a mixture of sand, cement, water and gravel, then smooth the pouring well and leave to dry. Do not forget that concrete, especially in hot weather, must be moistened with water to prevent cracks.
On a note!
- When choosing the type of foundation, be guided by the feature of the soil and the total mass of the future structure. Structures made of wood, unlike structures made of bricks or blocks, can be erected on columnar supports.
- Do not forget that all parts made of wood must be pre-treated with antiseptic agents.
Building an open veranda
Before starting construction it is advisable to think over the project, this will allow you to calculate the required amount of materials and avoid possible errors. You can find the finished project in open sources or independently prepare a simple sketch and contact the design organization with it. Then, with all the required documents, you will need to contact the architectural department, after the completion of the coordination, you can proceed to the construction itself.
Step 1: marking the site
- Remove the topsoil along the perimeter of the future structure and level the surface.
- Drive metal or wooden pins in the corners of the platform, then install intermediate pegs every one and a half meters in the same way and pull the rope between the pins, it will serve as a guide for you.
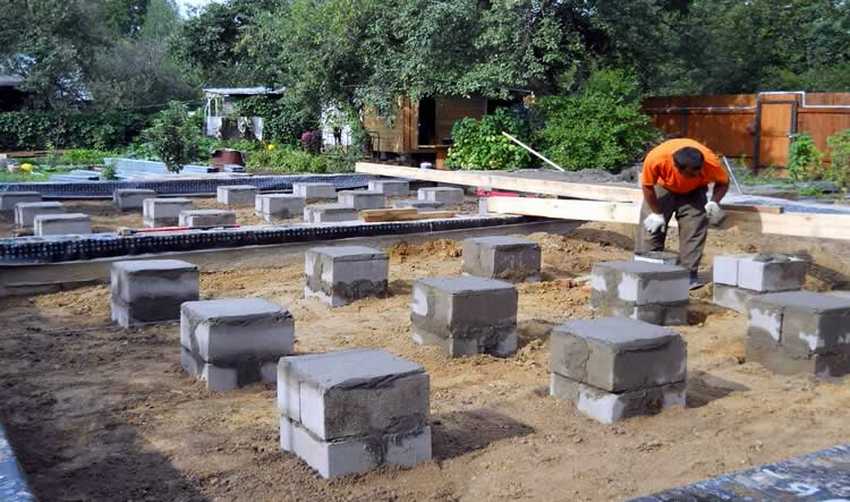
Step 2: laying the foundation
For a light veranda made of wood, a columnar foundation is perfect, the technology for its manufacture has already been described above.It is best to erect a veranda on a separate foundationUnless, of course, it is not being built simultaneously with the house. To do this, leave a gap of several centimeters between the foundations. The depth of the supports themselves should be equal to the depth of the foundation of the main house.
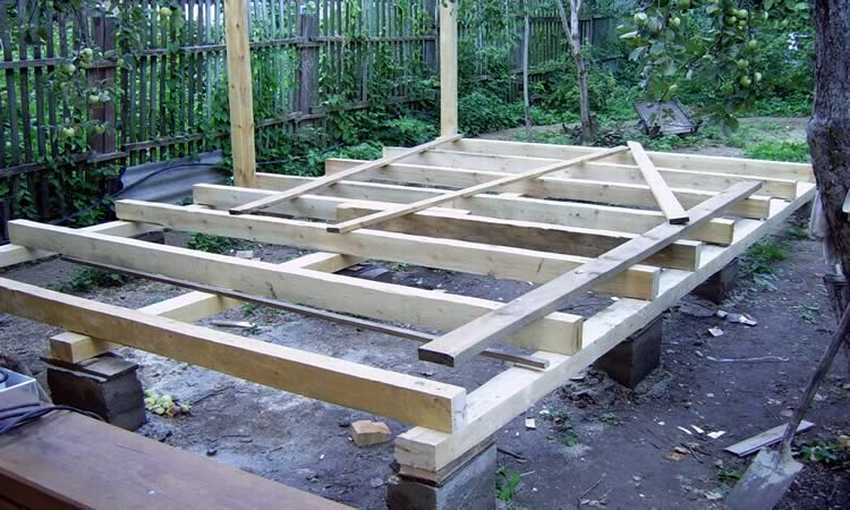
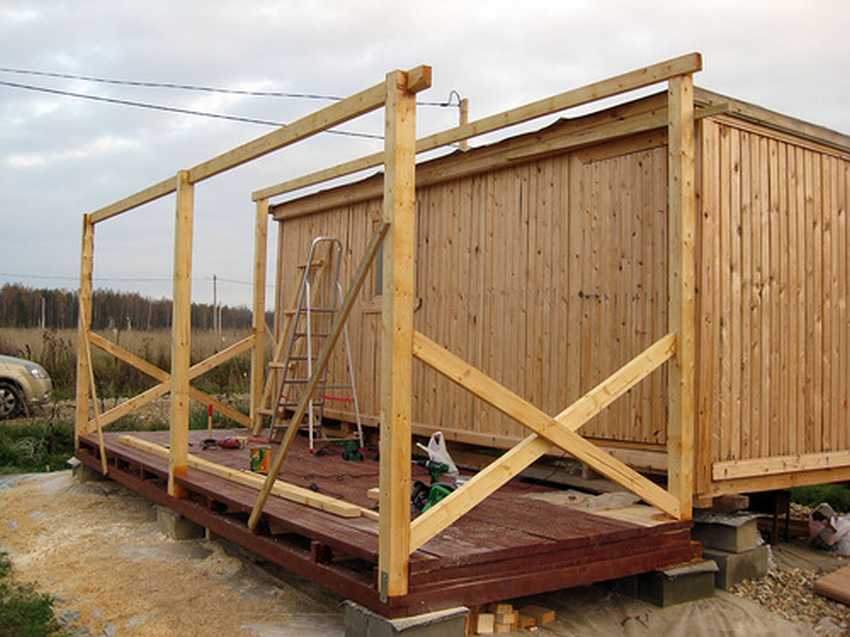
Step 3: create a building frame
After making the foundation, you can install the frame. For this stage of work, you will need a wooden beam, part of it will go to the lower trim, that is, to the base of the floor of the veranda, the other part - to the racks and supports for the railing.
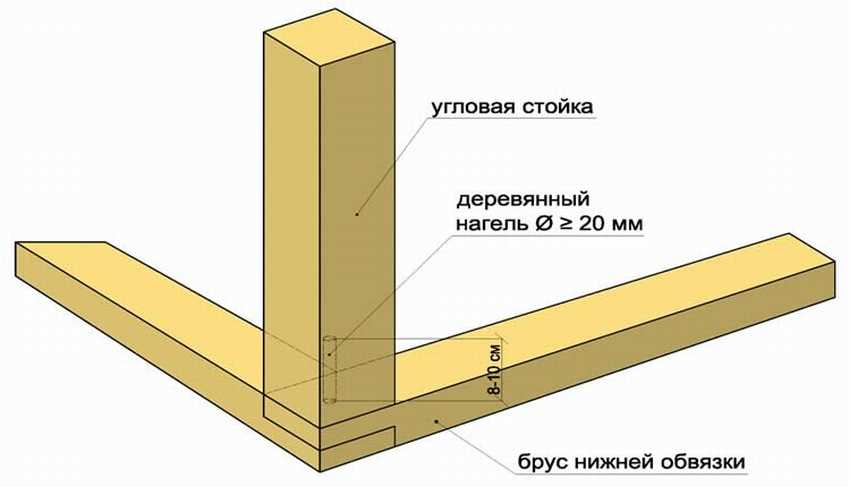
Bottom harness
- Cover the foundation with roofing material and lay a beam on it.
- To prevent the frame from moving, leave a few scraps of steel reinforcement in the upper part of the foundation, make holes in the boards at the exit points of the steel rods before laying, lay the beam, and then bend the ends.
- After tying, according to the same principle, place several transverse bars of the same cross-section in pre-marked and sawn grooves in increments of about one meter and connect them with long nails.

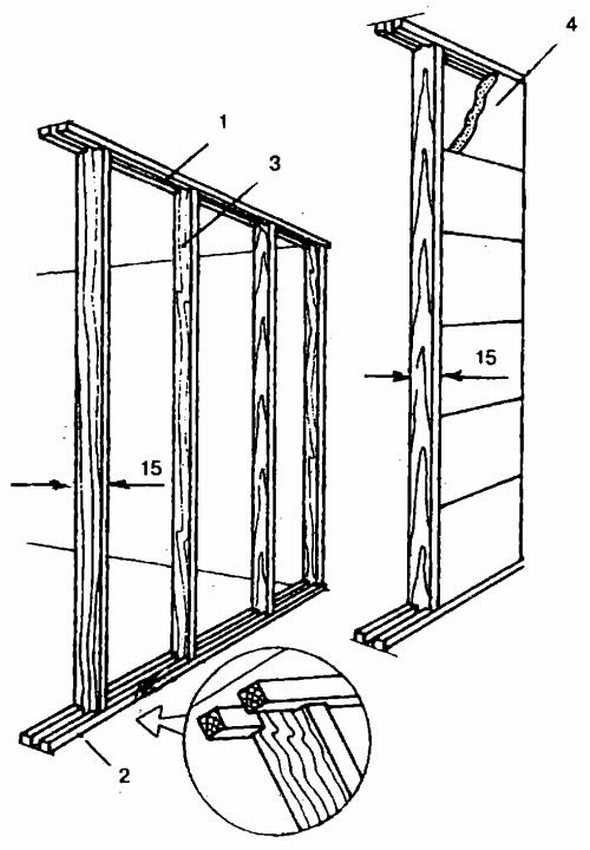
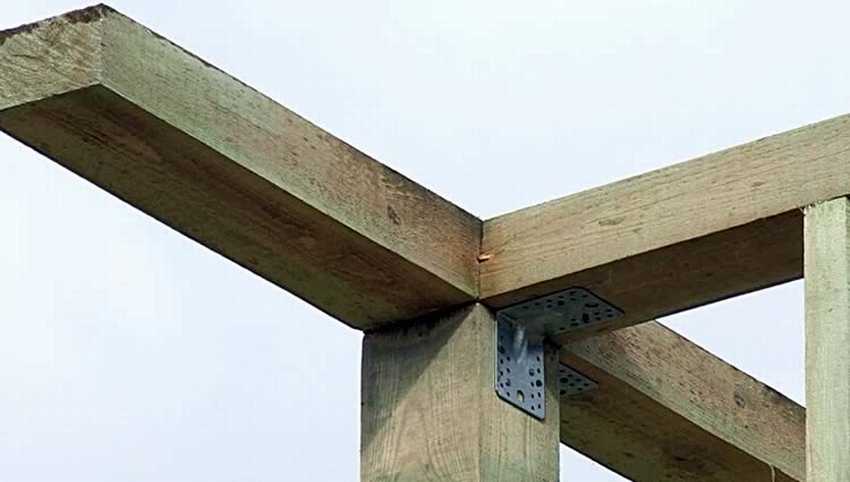
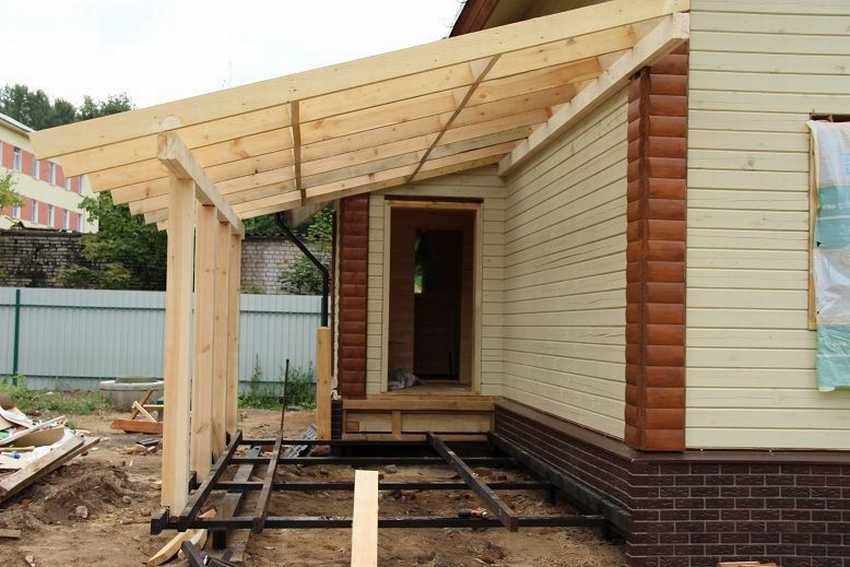
Rack Installation
- To prepare the supports for the roof, install several vertical bars at the outer corners, as well as along the wall of the house, their length must be at least two meters.
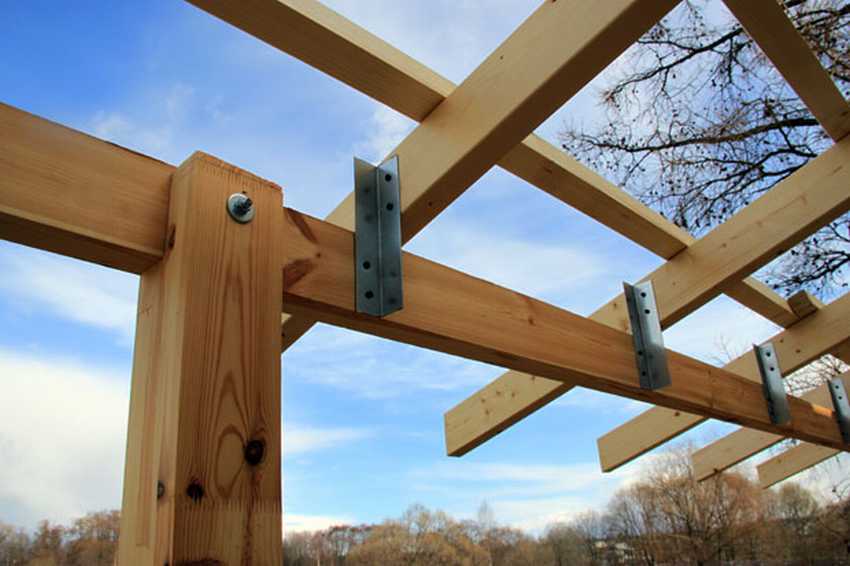
- Attach the racks to the strapping with self-tapping screws and reinforce with steel corners.
- The upper harness is made of planed timber (assemble it in detail), then install it on the ends of the racks and attach to them.
Step 4: floor installation
If you want the veranda to be heated, when installing the floor, you will need to immediately provide a heating system so that the heating is autonomous, it is best to make warm floors.
- The subfloor is mounted on racks made of timber, for this, fix the boards placed on the edge with furniture bolts.
- Cut the protruding bar above the boards to get a flat platform.
- Lay out the logs and frame so that the flooring is below floor level.
- Lay the wooden boards on top.


https://i.expert-h.com/en/veranda/veranda-iz-dereva-svoimi-rukami-300-foto-poshagovo-master-klassy#sigFreeIdb0262483b5
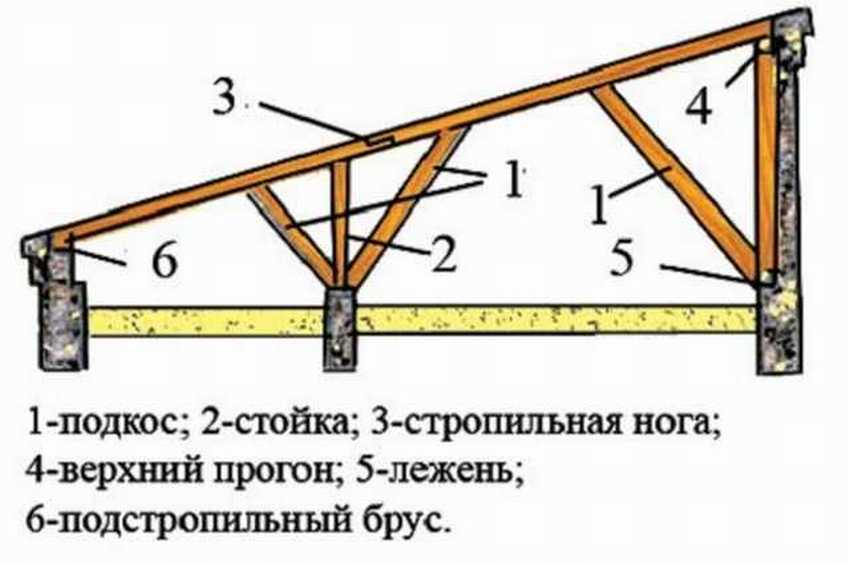
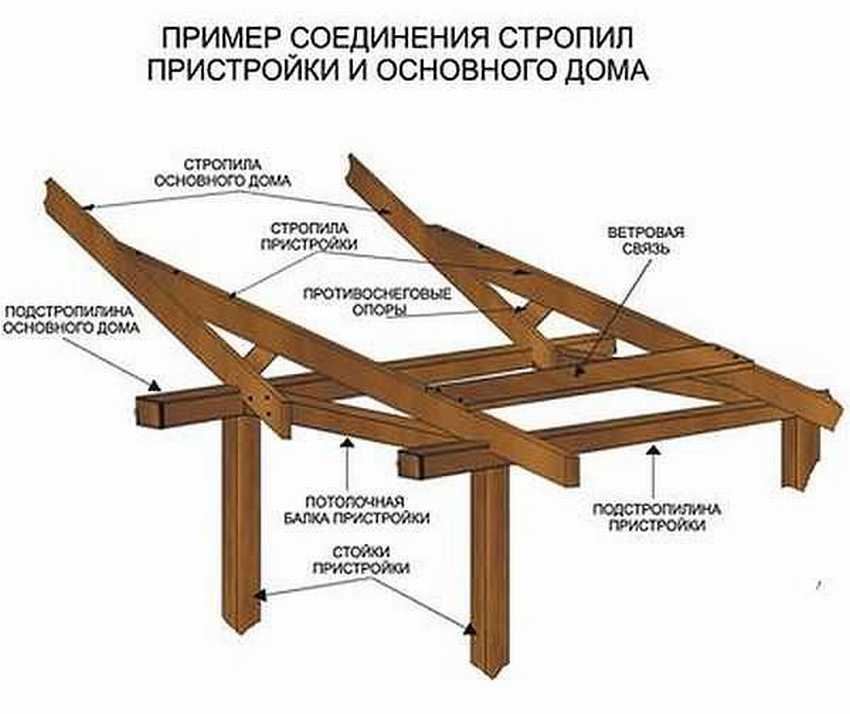
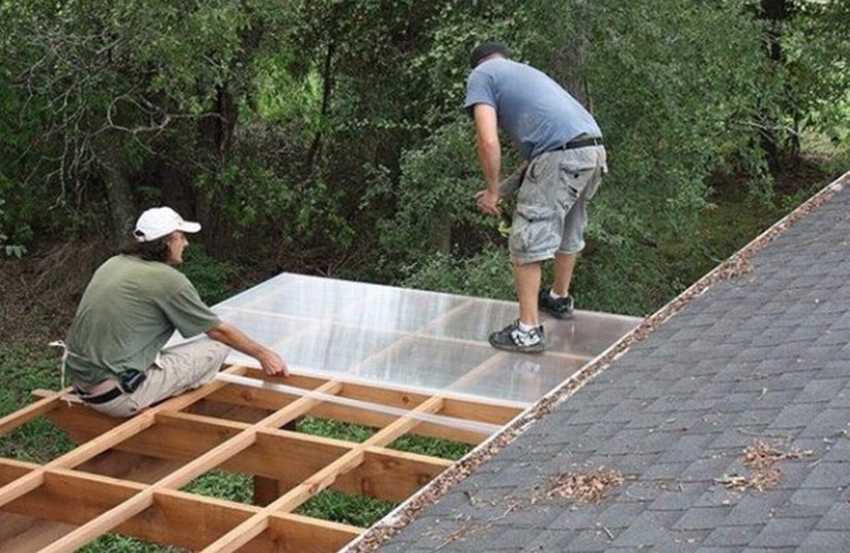
Step 5: roof installation
The roof frame is also made of wood. During construction, it is important to provide the necessary slope to avoid the accumulation of precipitation on it.
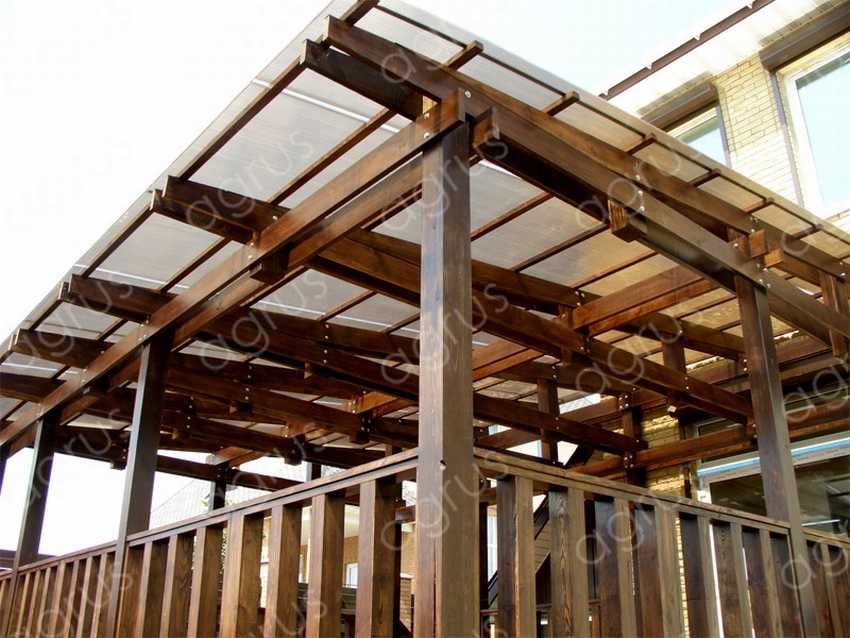
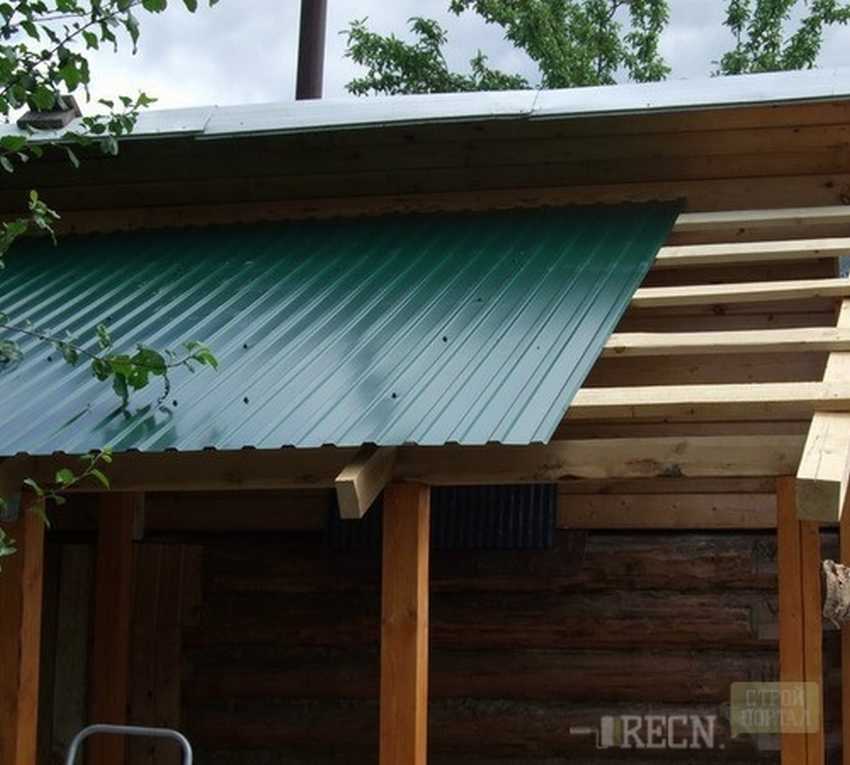
Materials for the roof can be very different: corrugated board, glass or colored polycarbonate, thanks to which you can give the roof a domed shape. The choice is yours.
Polycarbonate Application Example
The use of metal sheets
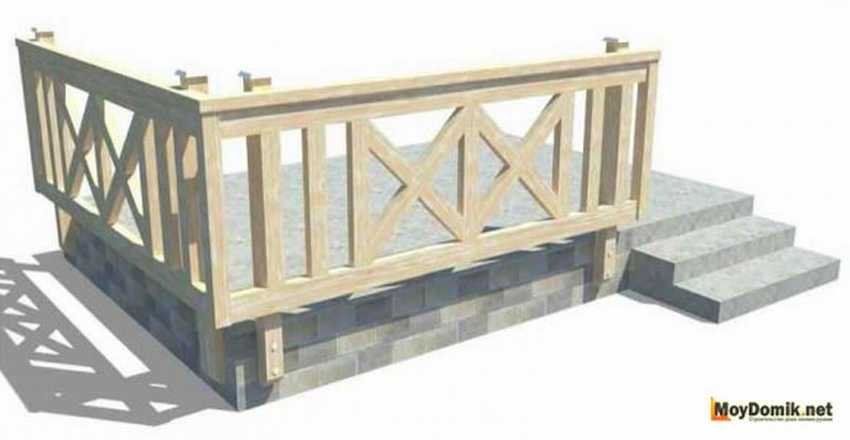
Step 6: finishing and installing the railing
Railings and fences perform both protective and decorative functions, besides they can be used when installing additional lighting, as well as hanging flower pots on them. There are several variations of fences made of wood:
horizontal
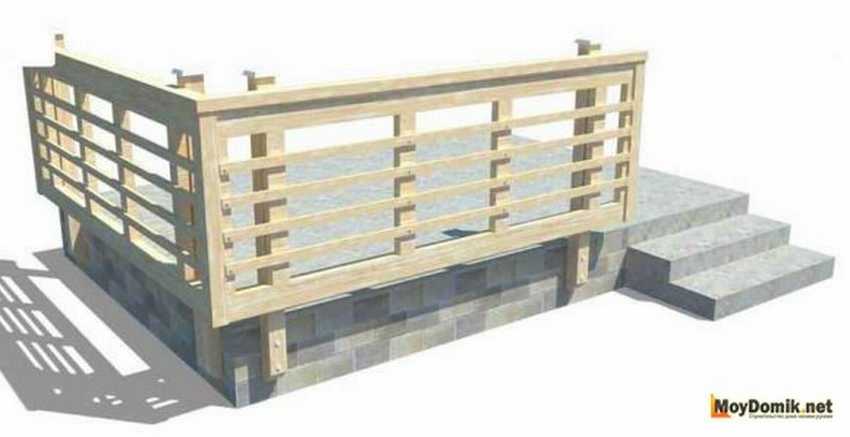
vertical
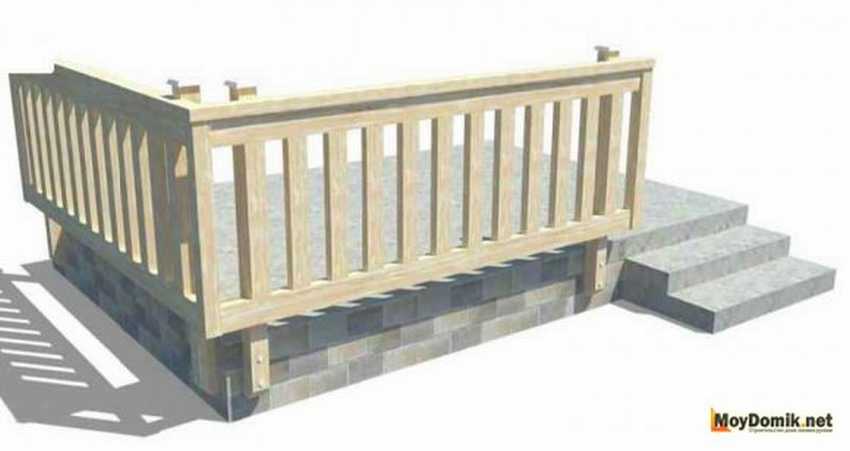
cross
Work sequence:
- determine the height of the fence (the optimal height is about one meter);
- install supports, the distance between them depends on the type of structure and the weight of the individual elements, they can also protrude beyond the railing and thus support the roof.
- set the railing, they can be given an unusual look with the help of balusters.
Floor material
The most suitable material for the floor of the veranda is a larch board, since it has many positive characteristics:
- not susceptible to mold, insects and fungi, and also tolerates moisture well;
- has a beautiful woody structure;
- it is easy to process with protective compounds.
Another practical option would be to use artificial floor material such as decking., It is especially suitable for an open veranda.
Photo Gallery: Ideas for Building


https://i.expert-h.com/en/veranda/veranda-iz-dereva-svoimi-rukami-300-foto-poshagovo-master-klassy#sigFreeIdc6a2c8499e