How to make a comfortable and durable hammock from adhesive tape: a budget option for creative summer residents
 adhesive tape hammock
Ribbon Hammock (colored tape) allows you to create the perfect place to relax without spending a ton of money. Great budget option for any occasion. If you liked the idea, then read the full step-by-step guide on how to make the perfect one. do-it-yourself tape hammock. To do this, you do not need to be an experienced craftsman, to be able to sew, plan and saw - you only need desire and patience.
Materials:
- 3 large rolls of scotch tape
- 2 wooden rods 1.2 m long and approximately 3 cm in diameter
- Strong rope or rope
Instruction how to make a hammock with your own hands
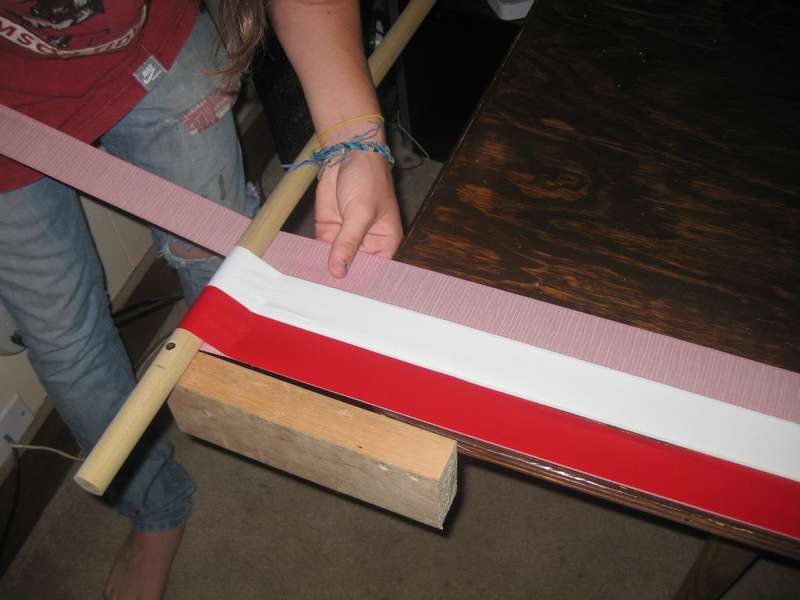
- Since you know that tape is very sticky, you’ll need enough large flat surface. Release the adhesive tape with your fingertips so that it does not deteriorate with your hands. To avoid creases, find a large table, then you can accurately and evenly stick the tape.
- Do simple device, as shown in the photo. That is, fix two 2x4 blocks of 30 cm long on the sides of the table. The distance between the anchor points of the dowel must be slightly larger than the width of the hammock. Here it is approximately 90 cm.
- Then just do a few long adhesive tape loopsusing 3 colored rolls of scotch tape. Simply remove air bubbles to avoid jagged edges and creases. A little pressure on the back will be a great idea for creating a bubble-free pattern. Do not leave gaps between the loops, and do not allow them to overlap or touch.
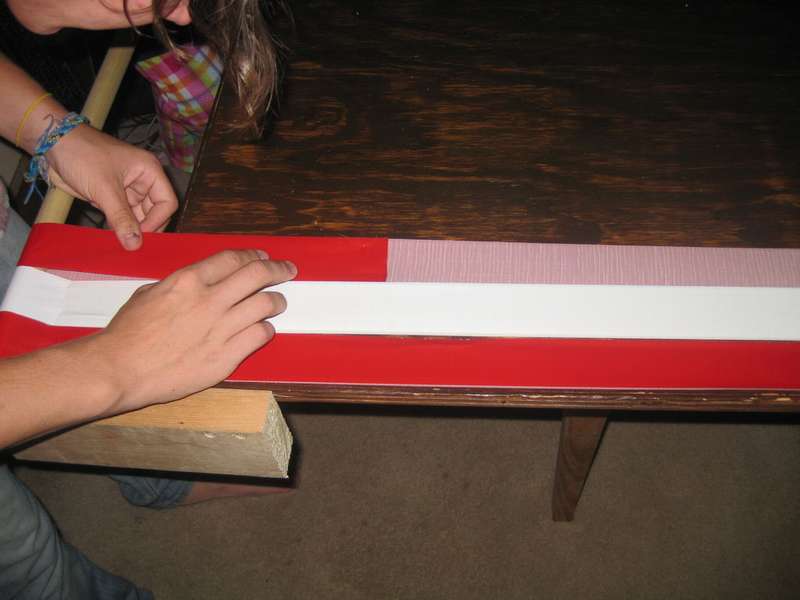
- Now the next step is weaving the loops. The process is a bit complicated, but you can mark the places where the cycle begins and ends. Measure the length and count the loops needed to fill the entire area with an equal spacing between them.
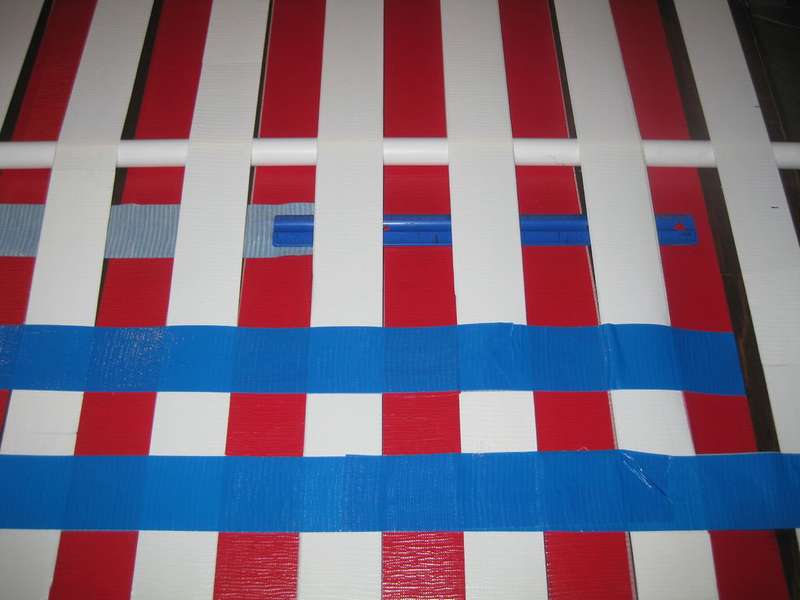
- Important thing, which should be remembered before starting weaving, is that the side facing up is the bottom. Take a ruler and mark where the edges of the tape go along two outer loops on each side of the hammock. To make the same pattern as in the photo, start outside from a mark about 5 cm from the end, and then make marks every 20 cm. Move to the inner loop and make a mark 15 cm from the end, then every 20 cm.
- You need to give more thickness and strength to your pattern. You can use the ruler throughout the entire weaving process to maintain accurate distance and create a loop plane.
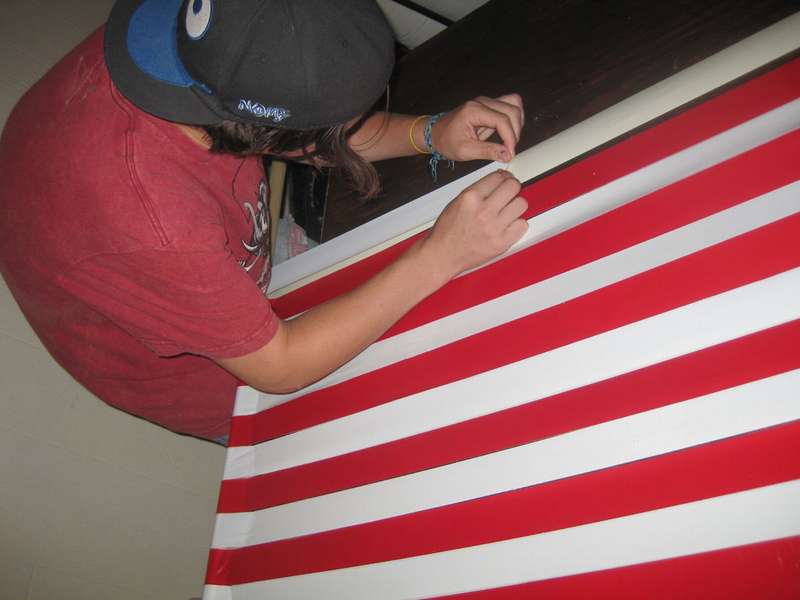
- For weaving, the author used a half-inch piece of PVC pipe (you can take the broom handle) to separate the loops, then the ruler as a shuttle to go between them. Creating these loops is the same as before, sticky side up, then fold. Be careful not to stretch the outer hinges when bending.
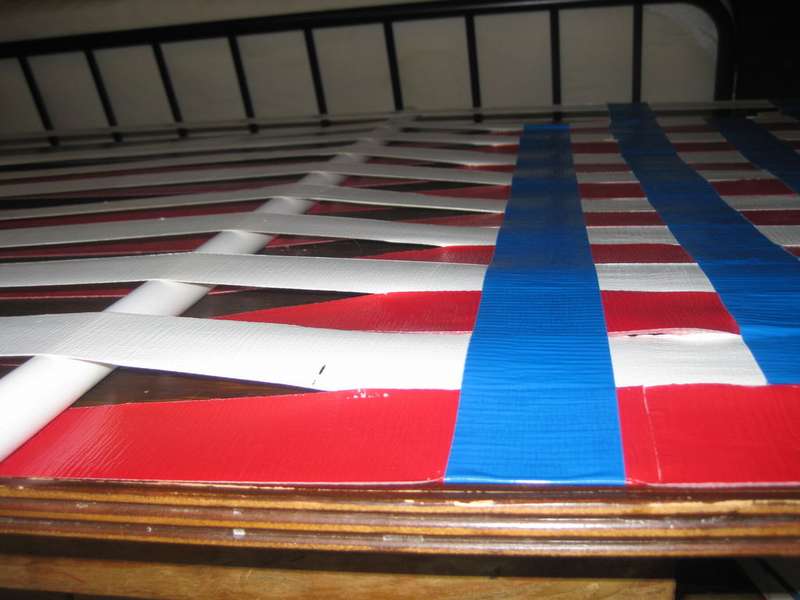
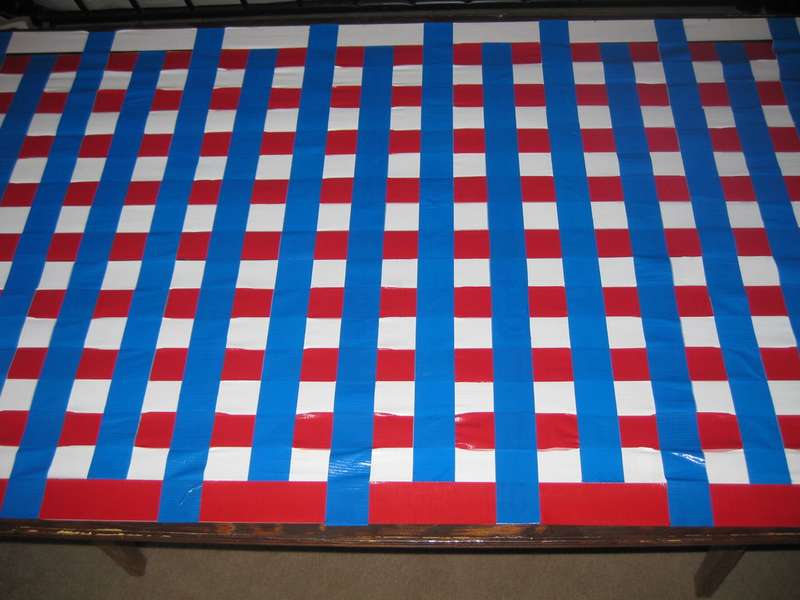
- Down side. When weaving is finished, the surface will look as in photo 7. Remember, at this moment the bottom side is still up. Only the upper part of the loop is woven. noteas weaving moves up and down. This is because there is an even number of long loops. An odd number will move inside and out.
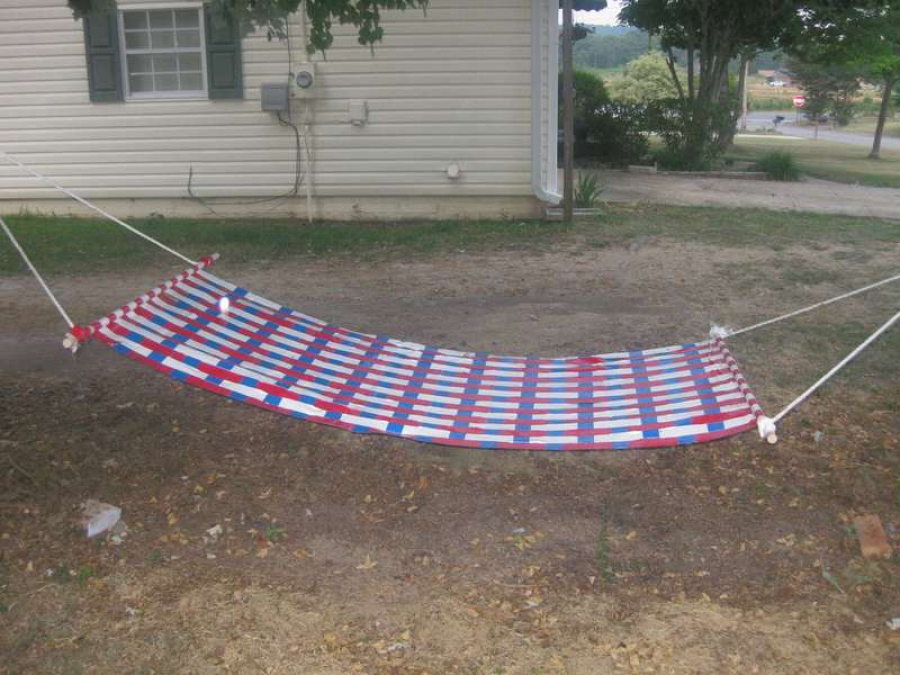
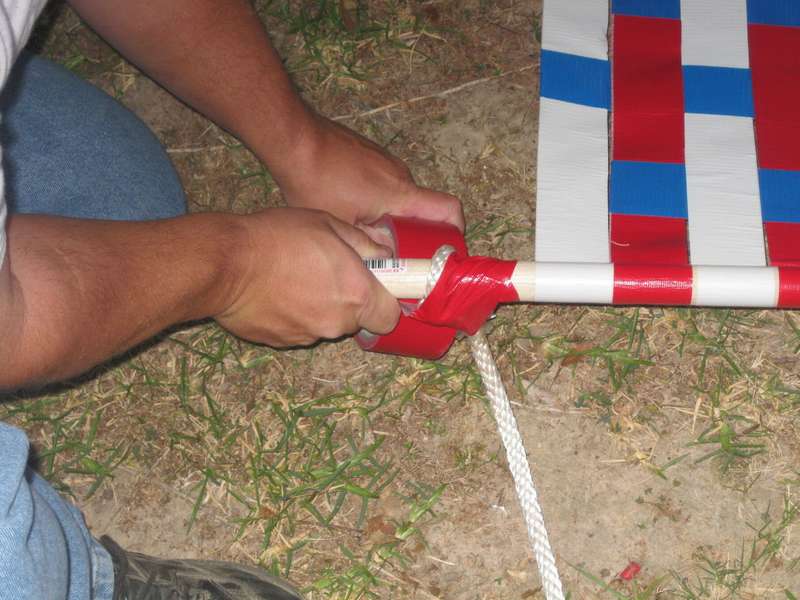
- Now attach the rope as shown in the photo. The length of the rope will be approximately 3.5 m and tied to a hammock on both sides. To prevent the ropes from slipping, fasten them with duct tape! Wrap the rod, knot and again the rod on the other side of the knot.
- Find suitable trees, hang a hammock and relax.


Need more interesting ideas how to make a hammock with your own hands? Then read the big article “Homemade hammock. Original ideas, photos, master classes» https://i.expert-h.com/en/gamaki/samodelki-originalnye-idei, just for people with imagination and creativity.
Hello, I am the author of this article, so I look forward to asking questions for this article in the comments below, I will answer all !!!
If you have questions on another topic, ask them on our forum, we will answer you
- Two baskets of paper in 5 minutes (Master class)
- How to make a simple and compact table for a milling cutter from plywood
- How to make a soft headboard tile (Instructions + step by step photos)
- Cinder block benches: a convenient bench in 55 minutes
- How to make a bed with a niche: saving space (Master class)