How to make a tool cabinet: simple, roomy, with lockable doors (drawing + step-by-step photos)
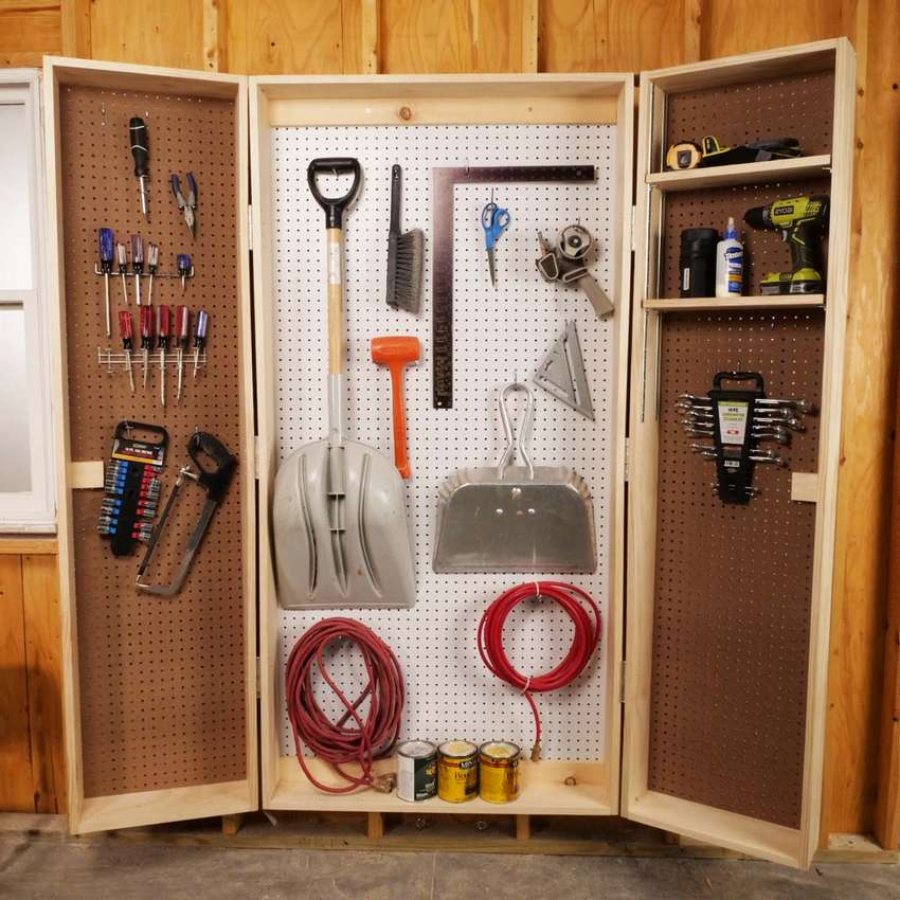 tool cabinet with doors
Tools and other items that pose a potential danger to children must be stored in a locked cabinet. If you are looking for a suitable project for your workshop, do this do-it-yourself tool cabinet. The main advantage of the design is its spaciousness - the back of the cabinet and door frames are equipped with adjustable shelves, that is, you can store twice as many tools in it than in a conventional cabinet. Due to this, the cabinet takes up less space. Hooks and tension clamps at the back of the pegboard and on both sides of the doors give you plenty of room for extra storage.
And one more significant advantage, to collect do-it-yourself locker very simple, it takes assembly less than three hours, and the project is great for beginners.
Necessary tools:
- Drill
- Hot glue gun
- Miter saw
- Necessary materials:
- Perforated board - 2 sheets 4'x8 '(122 x 244 cm)
- Board 1x3 6 '(182 cm) long
- Board 1x6 8 '(244 cm) long
- 4x4 locking pad
- 6 loops
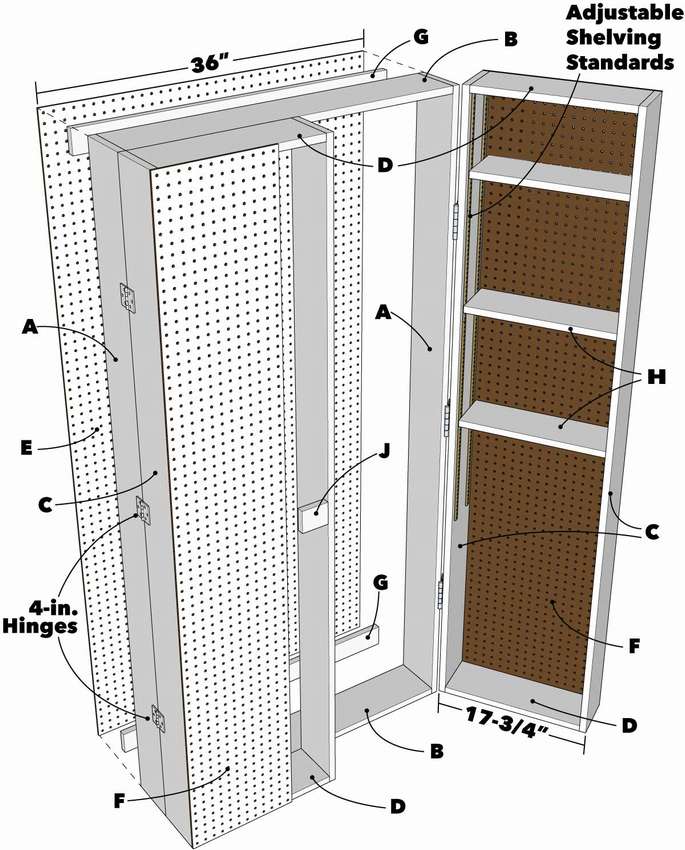
Chop 1 × 6 boards in such sizes:
- Two 212 cm each for the sides of the center box (A)
- Two 88 cm for the top and bottom of the center box (B)
- Four 182 cm for two door frames (C)
- Four 41 cm for the top and bottom of the doors (D)
- Four 41 cm each for shelves (H)
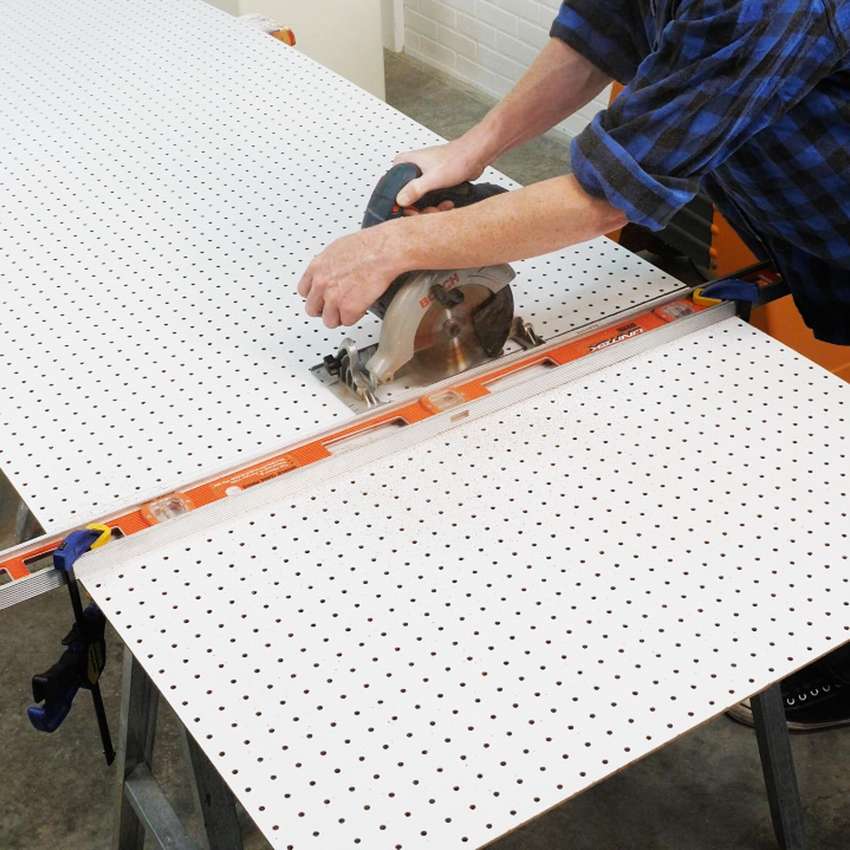
Cut peg to the following sizes:
- One 36 "x 6" (91 x 15 cm) for the central check box (E)
- Two 17-3 / 4 ”x 6 '(44 x 182 cm) for door pegs (F)
1 × 3 board
- Two 34-1 / 2 ”boards (88 cm) for mounting rails (G)
- Two 3-in. parts for locking block (J)
How to assemble a cabinet with doors for the workshop step by step. Scheme below in the first photo.
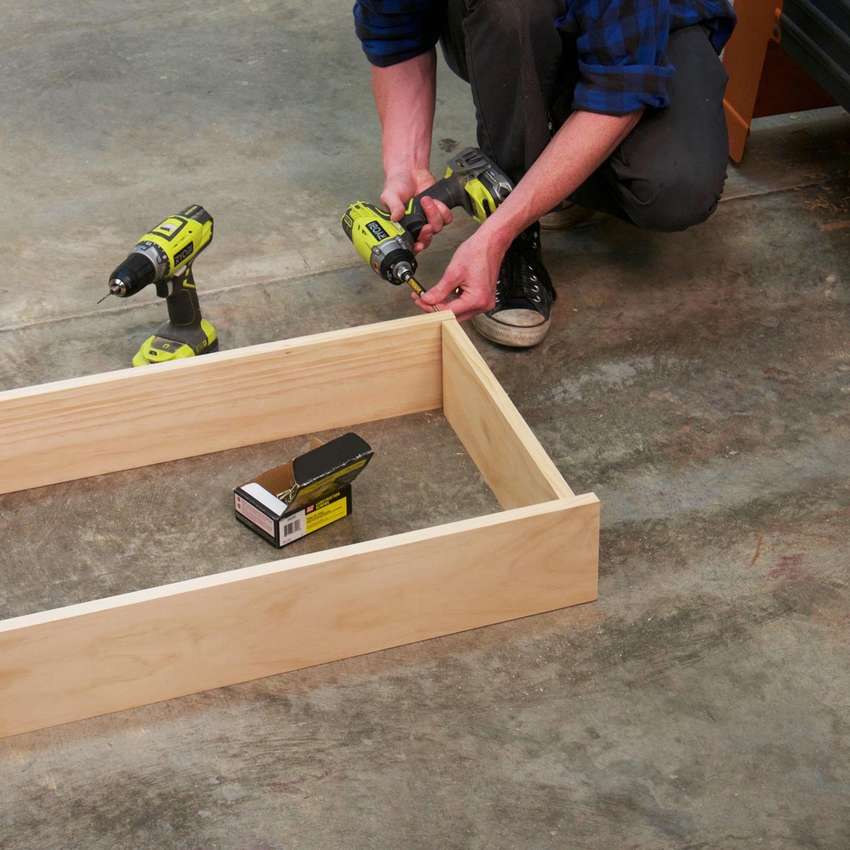
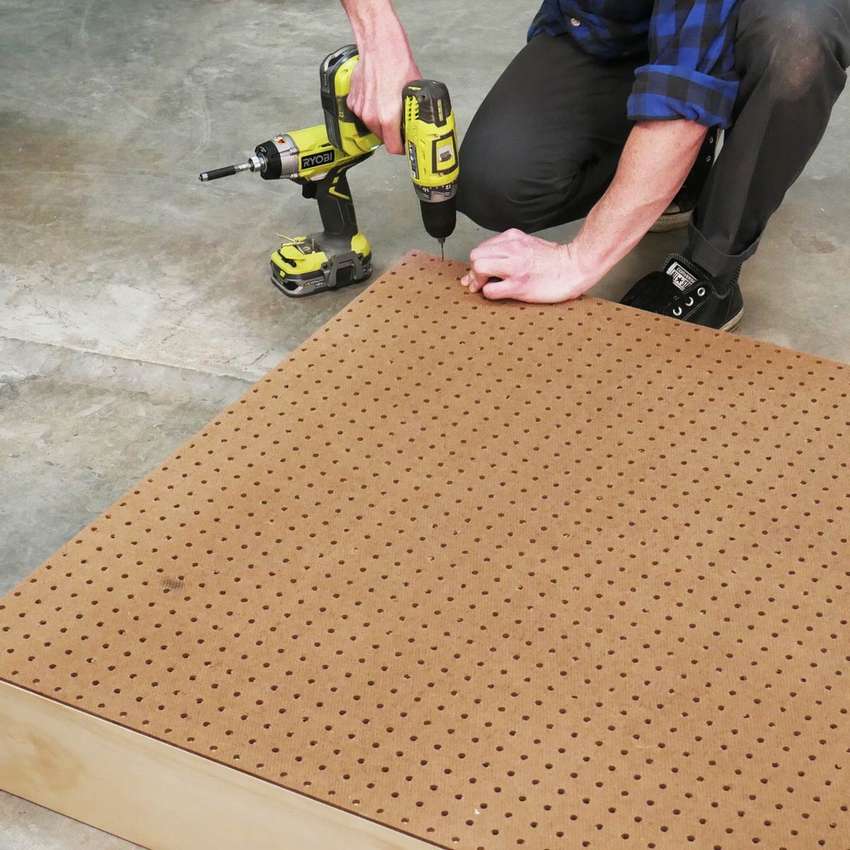
- Assemble the door frames. Use drywall screws 1-3 / 4 inches (44 mm) to hold all joints together. Attach the peg (F) to the edges of the door frames with glue and wood screws.
- Collect central box frameby screwing the top to the sides. Attach the peg (E) to the center box.
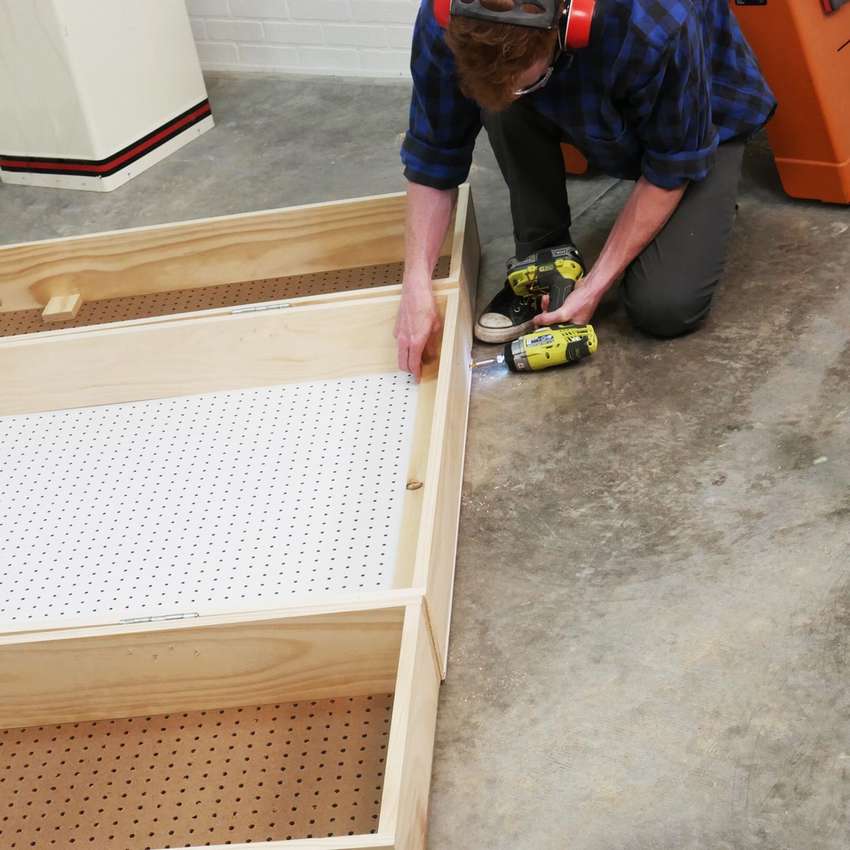
- Place the center box on the floor with the hole facing up. Lay the door frames on top of the center frame. Line up and attach the butt loops with screws.
- Attach the two mounting strips (G) with glue to the inside of the center box on the top and bottom. Fasten drywall screws in mounting plates (G).
- To make the shelving, cut the adjustable rail to the desired length and attach with screws. Saw the shelves to size.
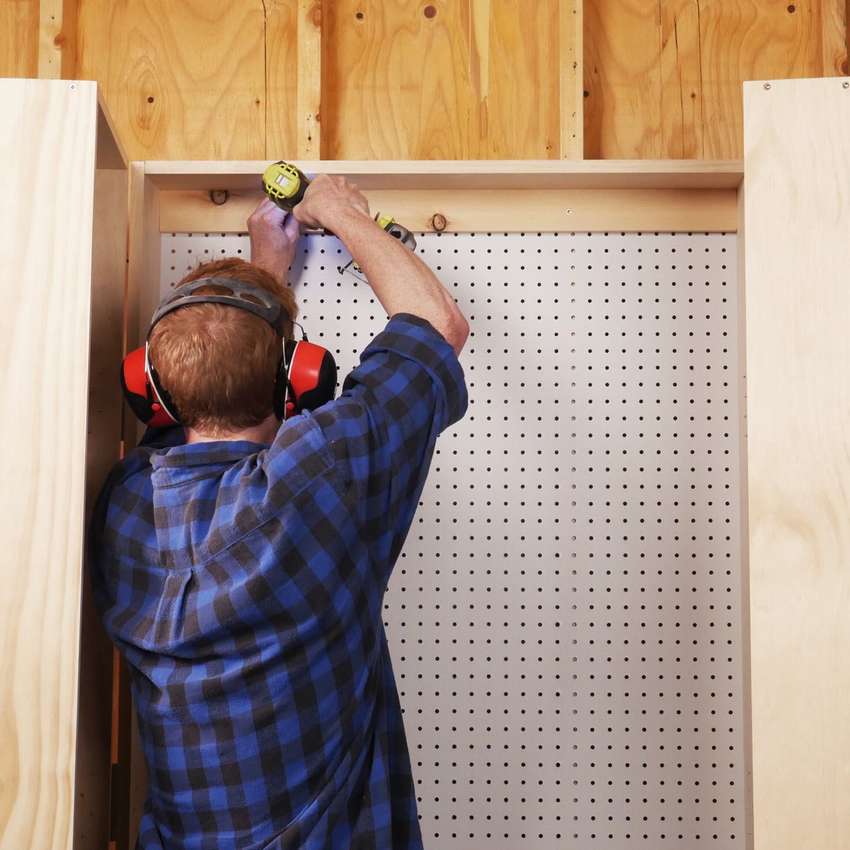
- Attach tool cabinet to the wall with studs using 10 cm drywall screws.
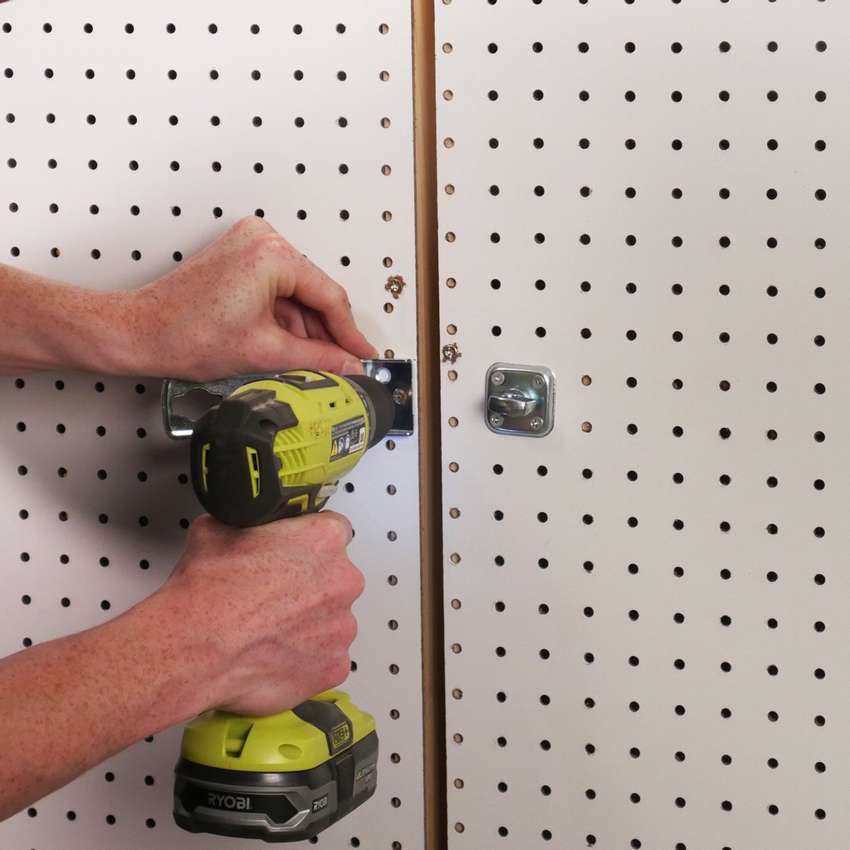
- Attach the latch. Glue the long patch blocks (J) onto inside door, 90 cm on top. Screw the deadbolt locking parts into the blocks outside the doors.
Tool cabinet with doors ready.


If you have a workshop, a garage, then a tool cabinet will be needed in any case. In the big article “Tool cabinet. Do it yourself. 800 photos, drawings, step-by-step instructions» https://i.expert-h.com/en/shkaf/dlya-instrumentov You can choose the right option for any room. And also learn how to do home workshop tool cabinet - on the balcony, in the pantry or hallway.
Hello, I am the author of this article, so I look forward to asking questions for this article in the comments below, I will answer all !!!
If you have questions on another topic, ask them on our forum, we will answer you
- Two baskets of paper in 5 minutes (Master class)
- How to make a simple and compact table for a milling cutter from plywood
- How to make a soft headboard tile (Instructions + step by step photos)
- Cinder block benches: a convenient bench in 55 minutes
- How to make a bed with a niche: saving space (Master class)