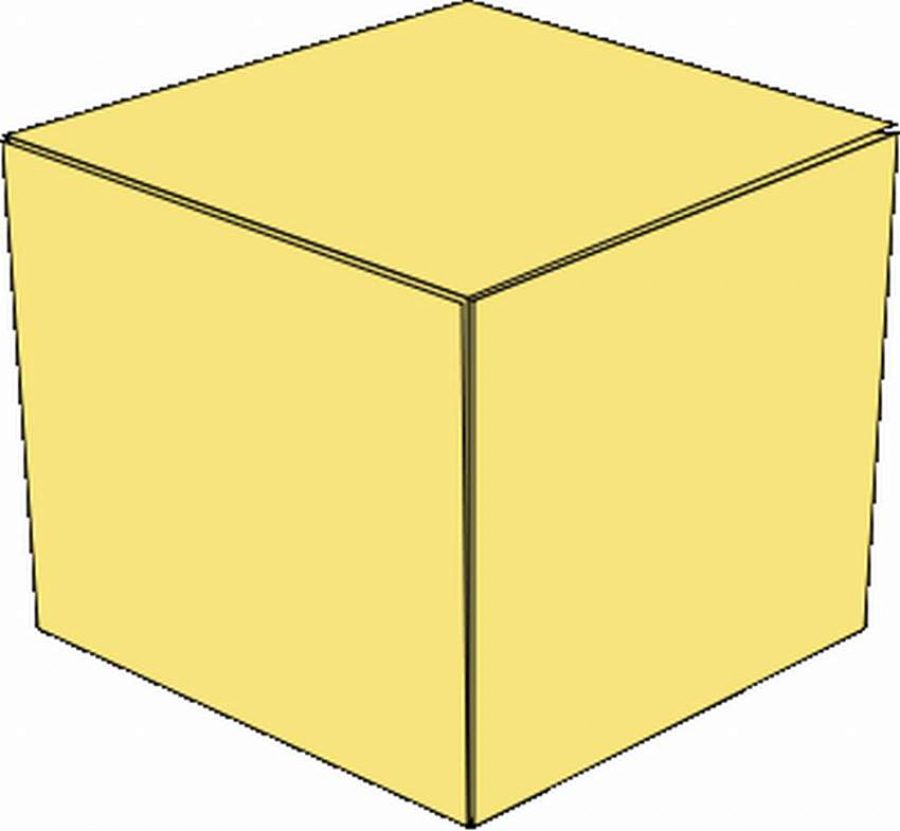
Origami paper cube: the perfect model without creases or crevices
 origami paper cube
Anyone will say that a cube, a simple form, until it tries to fold out of paper, this can be quite a challenge. If you search the internet, how to make an origami paper cube, then, most likely, you will find a variant like "water bomb" or a model based on a ball. There are different ways, but all have flaws. Basically, these are excess folds, and also the irrational use of paper on the outer surface. The author of this model managed to fold an almost perfect cube without folds and seams on any of the faces, which has no cracks and holds its shape quite firmly.
Step-by-step instruction, how to fold an origami cube out of paper
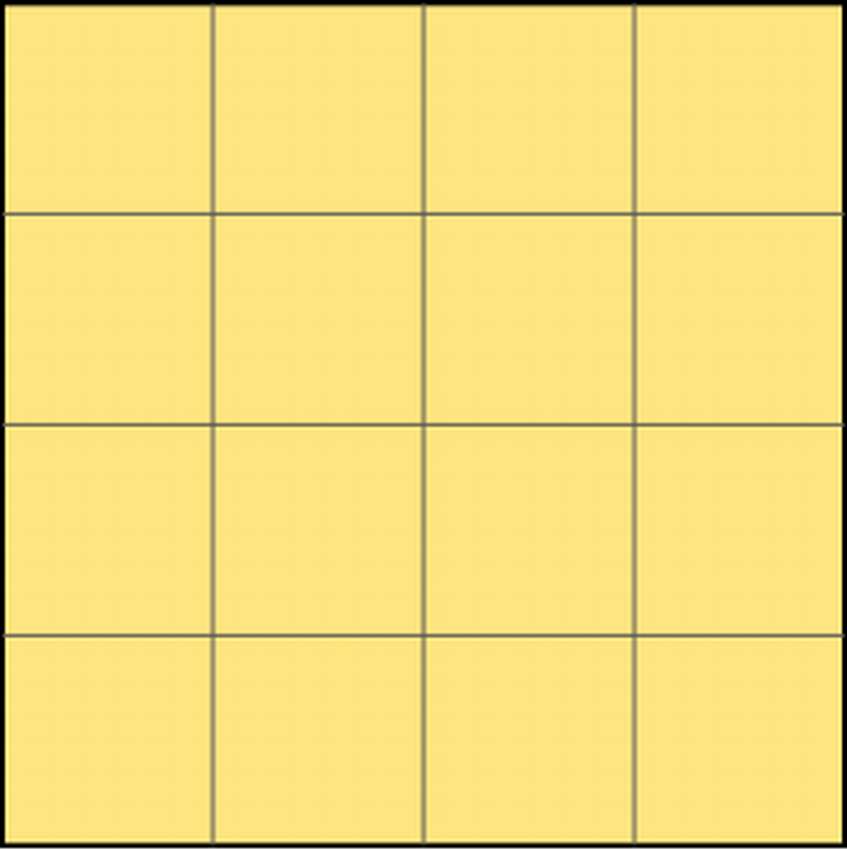
- Make a 4x4 grid. from a square sheet of paper
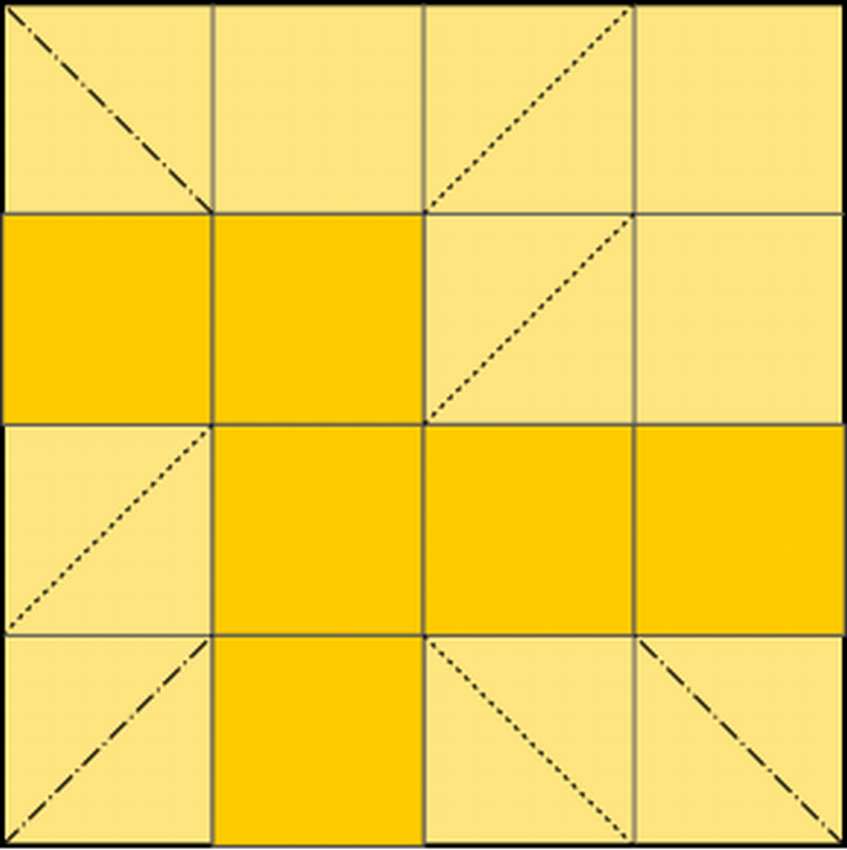
- Pre-bend three folds with a mountain and four folds of a valley, as shown in the figure. There are six dark orange squaresthat form the outer faces of the cube, and the rest will be tucked inward.
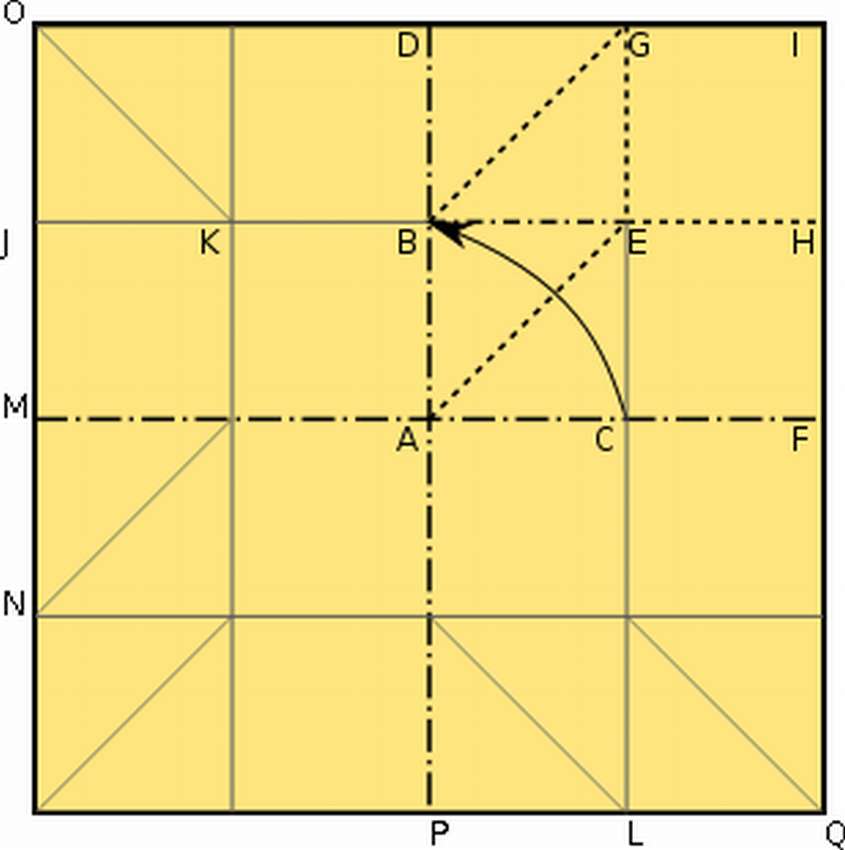
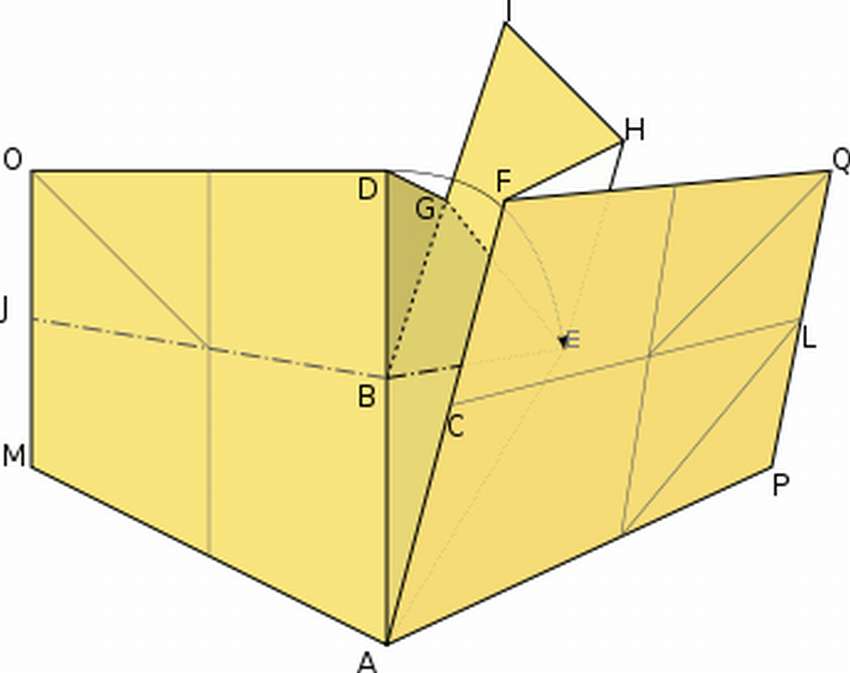
- At the next stage (photo 3) VERY IMPORTANT bend existing bends in the indicated directions. This will greatly facilitate the folding process. Move point C to point B, folding paper without creating new wrinkles.
- When you roll the shape, point A in the center of the sheet will form one of the corners of the cube. Now move point D to point E (which is hidden), while allowing fold BJ to bend at an angle of 90 °.
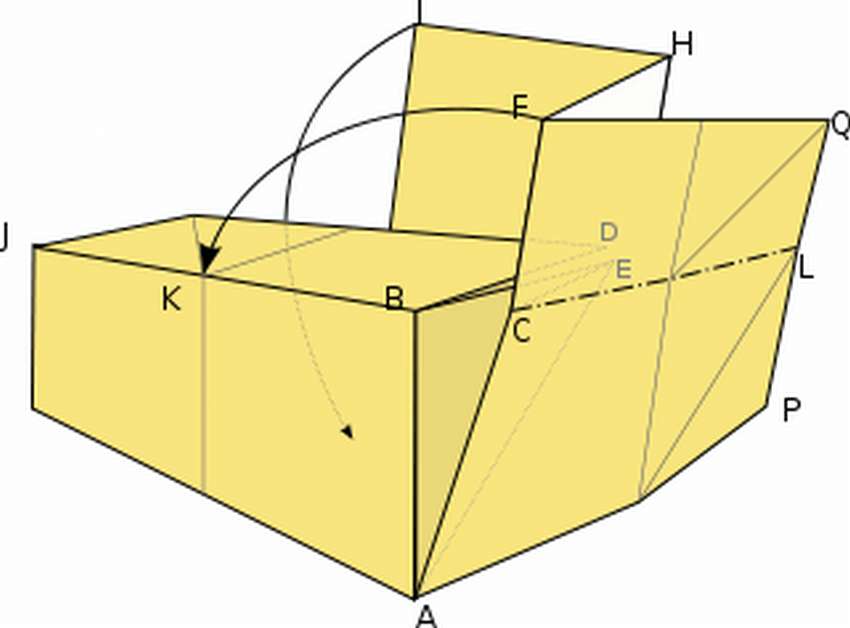
- Now lower the point F to fit the point K, allowing the crease CL to bend at an angle of 90 °.
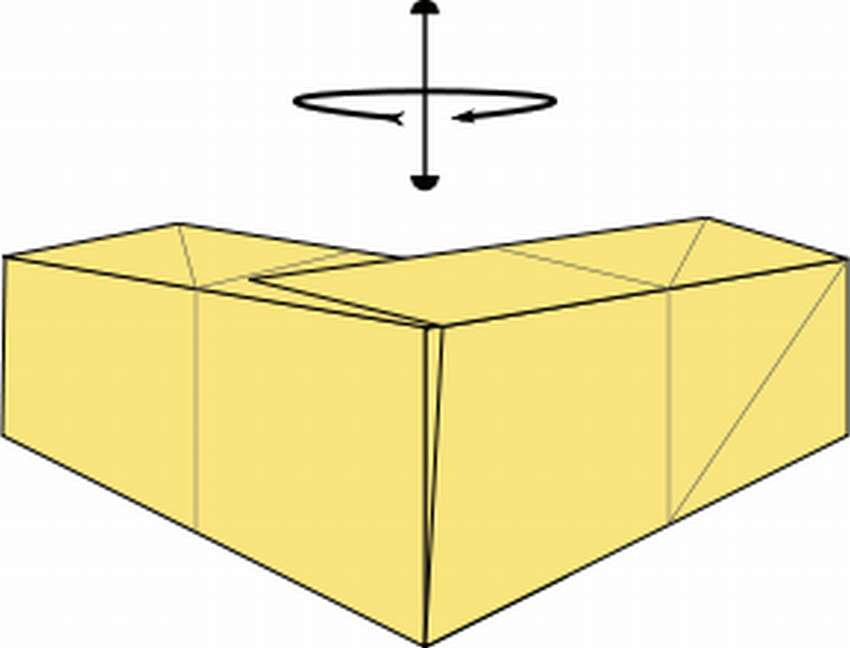
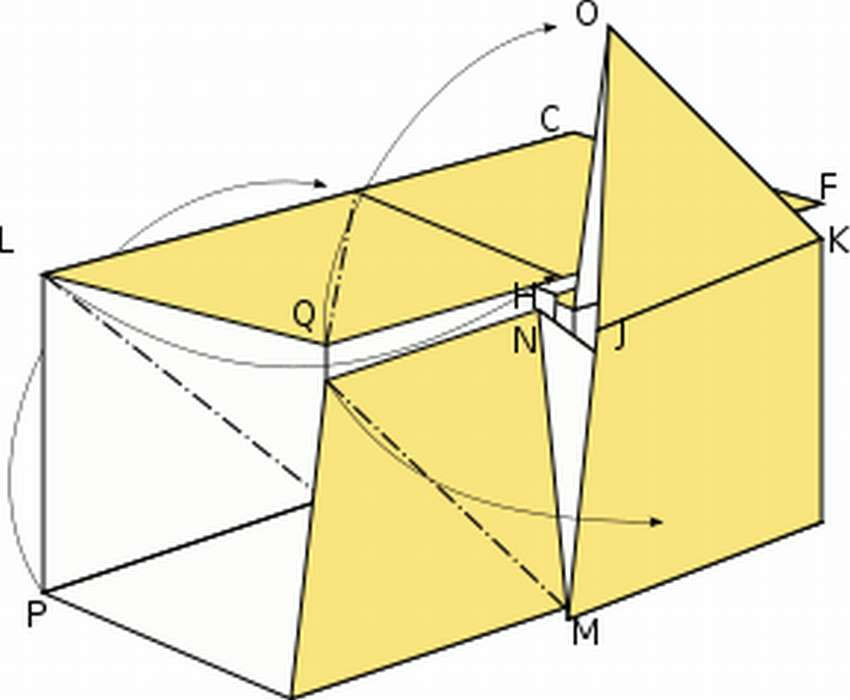
- You should get a form that looks like in photo 6. Then you need to rotate 180 ° around the vertical axis to see the other side.
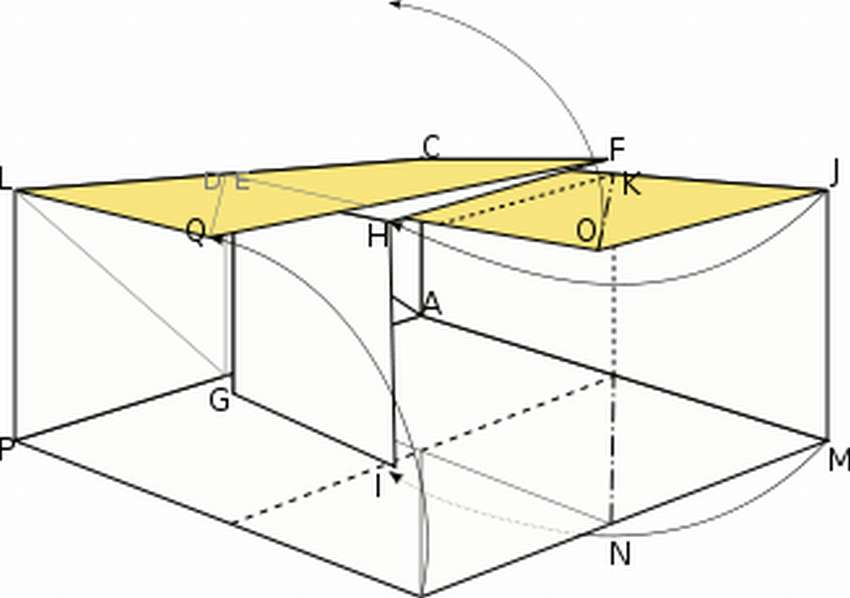
- Move point N to point H by rotating around an existing fold. At the same time, the edge between J and M will also rotate to connect the edge between H and I. The corner of the paper at point O will go up, like the point N, which should be tucked inside the figure.
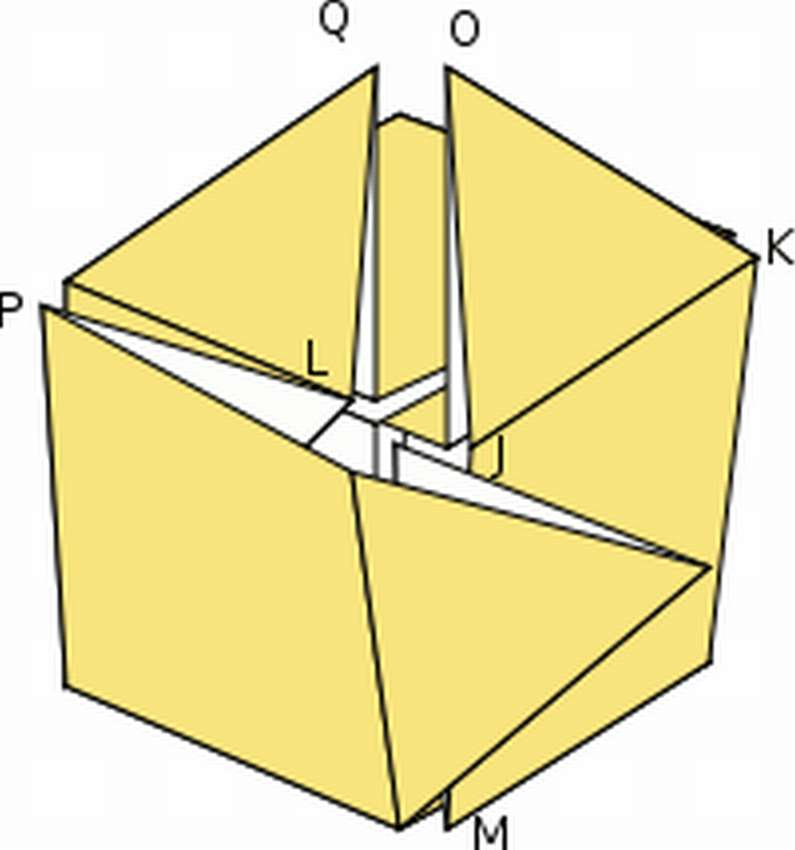
- Move point L to point H. Then point Q closes at the corner of the meeting O at the top, and you have three trianglesprotruding from adjacent edges of a cube.
- You should get a full cube with three convex right-angled triangles. Each of them fits perfectly with a pocket on an adjacent surface.
- Carefully thread all the triangles into the adjacent sleeve.
- Now you have right cube, without folds and seams on any of the faces, without gaps at the corners and edges. This model optimally uses the amount of paper on the outside.

You can learn more about paper cubes in an informative article: “How to make a paper cube. Step-by-step instructions + 300 photos» https://i.expert-h.com/en/iz-bumagi/kubikwhere 12 different examples are shown with step-by-step photos, diagrams, templates and other useful information.
Hello, I am the author of this article, so I look forward to asking questions for this article in the comments below, I will answer all !!!
If you have questions on another topic, ask them on our forum, we will answer you
- Two baskets of paper in 5 minutes (Master class)
- How to make a simple and compact table for a milling cutter from plywood
- How to make a soft headboard tile (Instructions + step by step photos)
- Cinder block benches: a convenient bench in 55 minutes
- How to make a bed with a niche: saving space (Master class)