How to make a bed with a niche: saving space (Master class)
 bed with storage
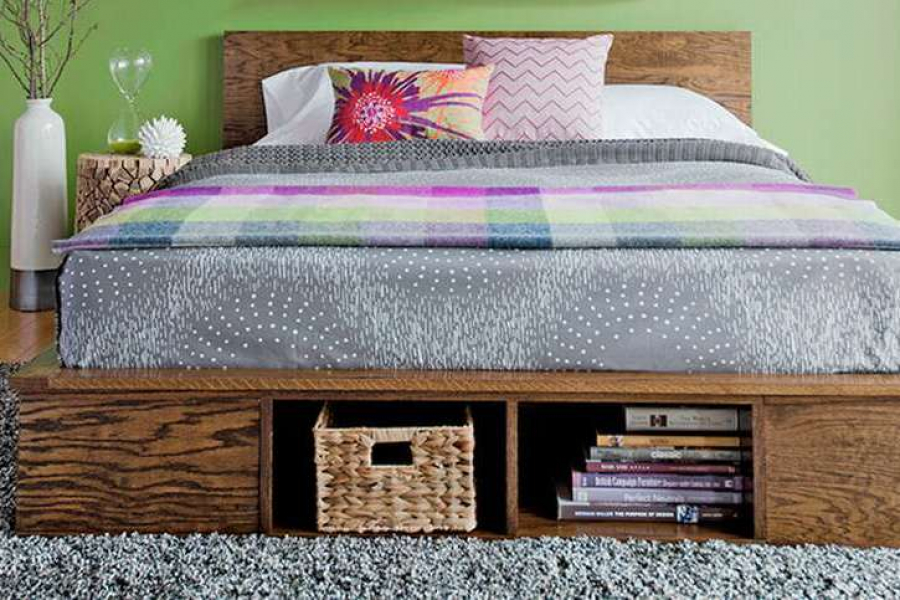
Ask anyone what they need more in the house, and they will immediately answer: you need more space! For many, this is really an urgent question: where to put everything when the cabinets are already full? One answer to this dilemma is make a bed with do-it-yourself storage drawers. Here is a good example of such a design. This comfortable bed on the platform is made of plywood, can be fitted into a mattress of any size and significantly saves space in the bedroom.
Tools:
- Circular saw with a ruler
- Grinding machine
- Cordless Drill with Countersink and Nozzles
- Hex keys
- Iron
- Clamps
- Wood glue
- Roulette
- Fine sanding discs
Materials:
- 8 meters of iron edging of red oak 20 mm and 5 cm x 244 cm
- flat head screws
- 5 cm flat screws
- antique bronze nuts
- 4-1 / 4-inch x 50 mm antique bronze connecting bolt
- Walnut wood impregnation
Instructions on how to make a bed with niches
Base
- Cut the plywood into small sections to create the lower and upper parts of the side casing, dividers, side backs and end casing at the back.
- Fold the partition above and below. Align the ends of the upper and lower panels of the side covers on the gantry and lay out the space for the partitions.
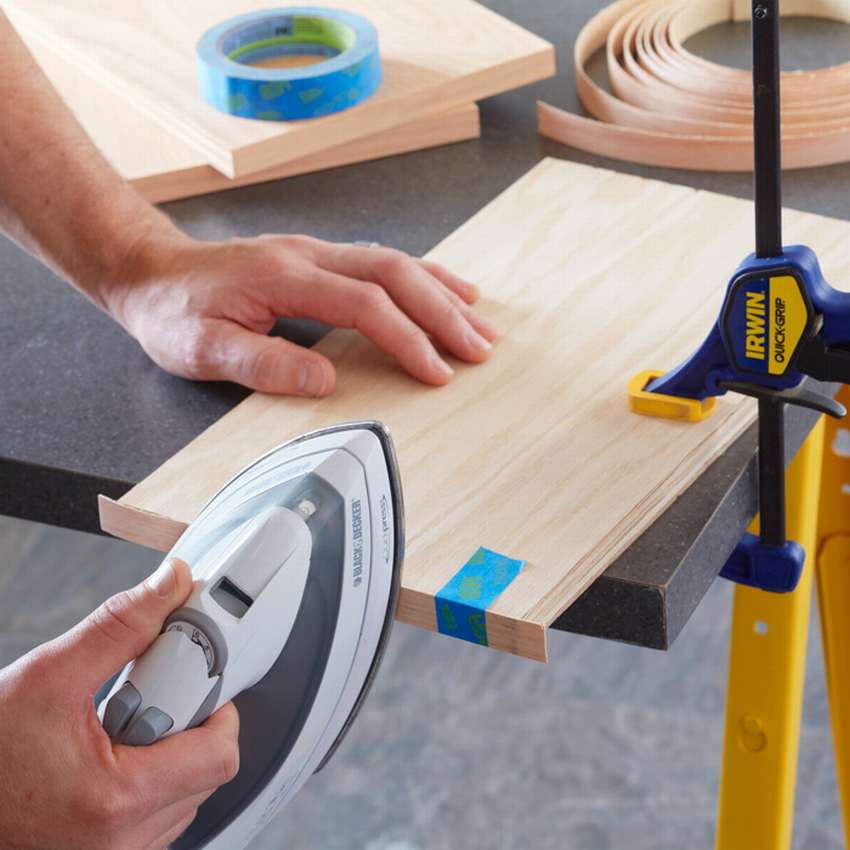
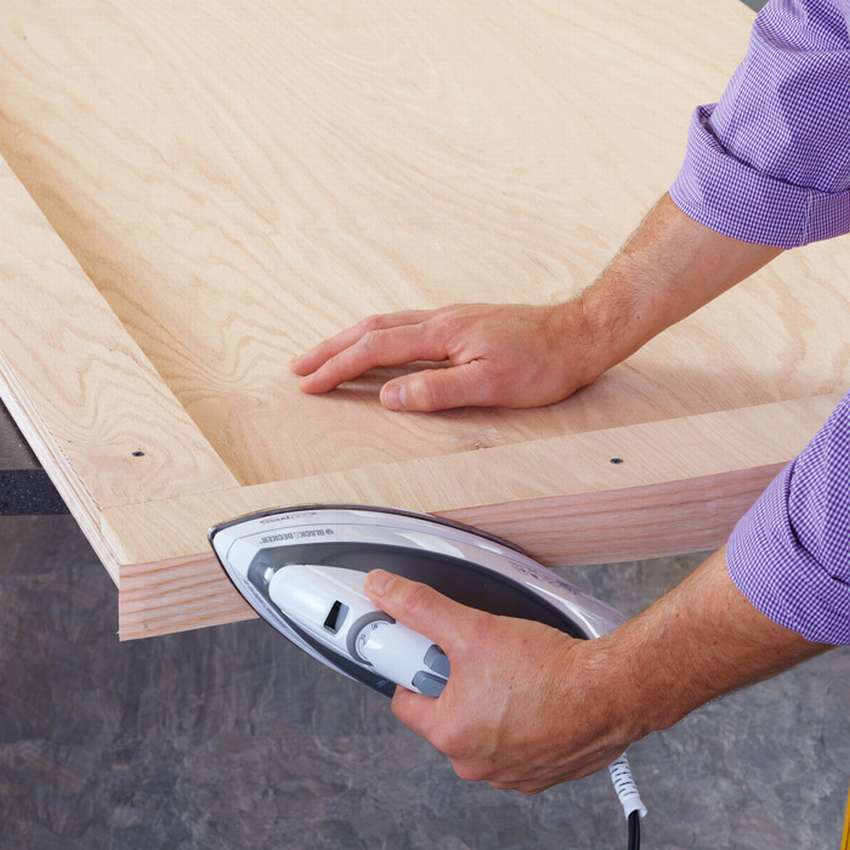
- A few ribs of plywood should be covered with veneer tape. After marking the edges, cut pieces of tape 3 cm longer than the edges.
- Use iron on cotton mesh to activate the glue, and press the plywood against the edges of the panels.
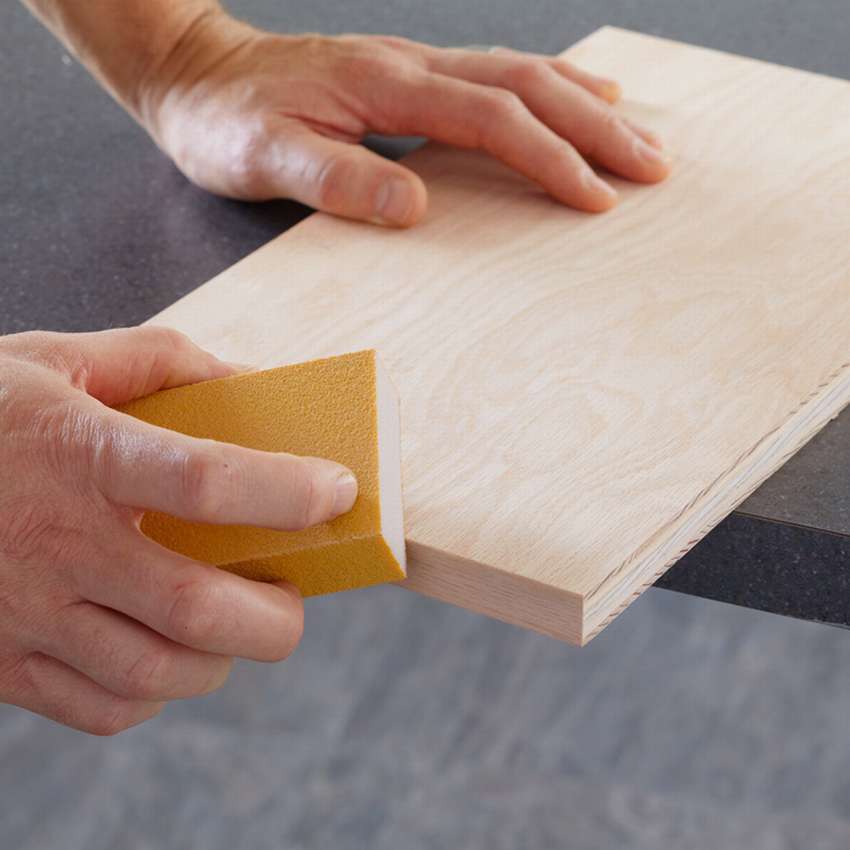
- Sand the edge of the veneer to create finished panels. Allow the tape to cool for several minutes, cut off the edges, sand the panels and trim.
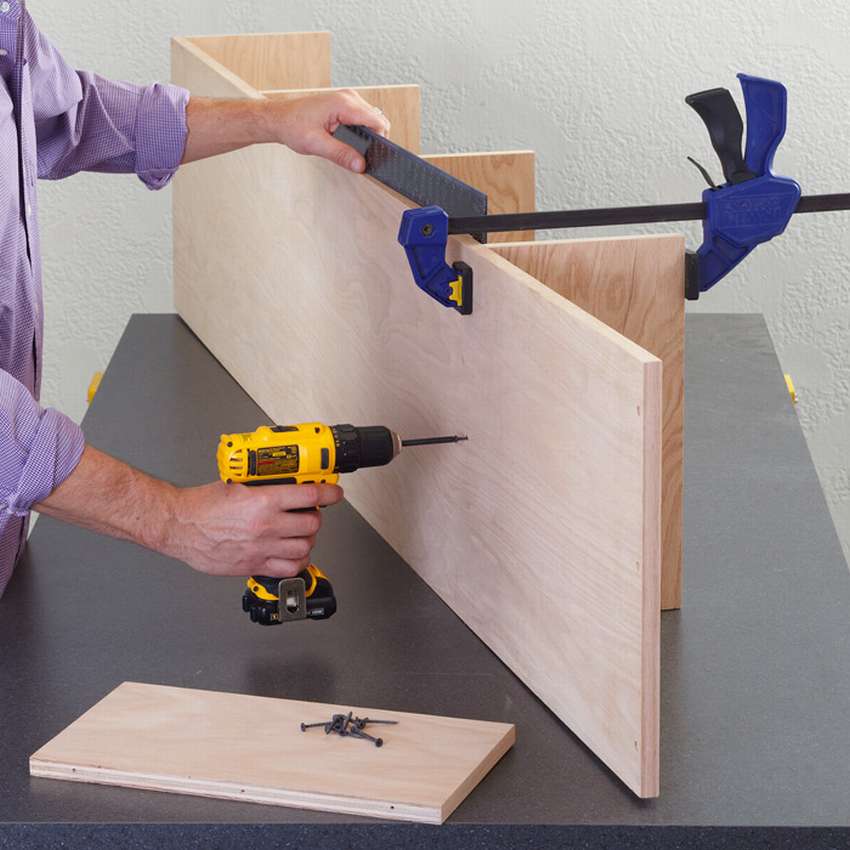
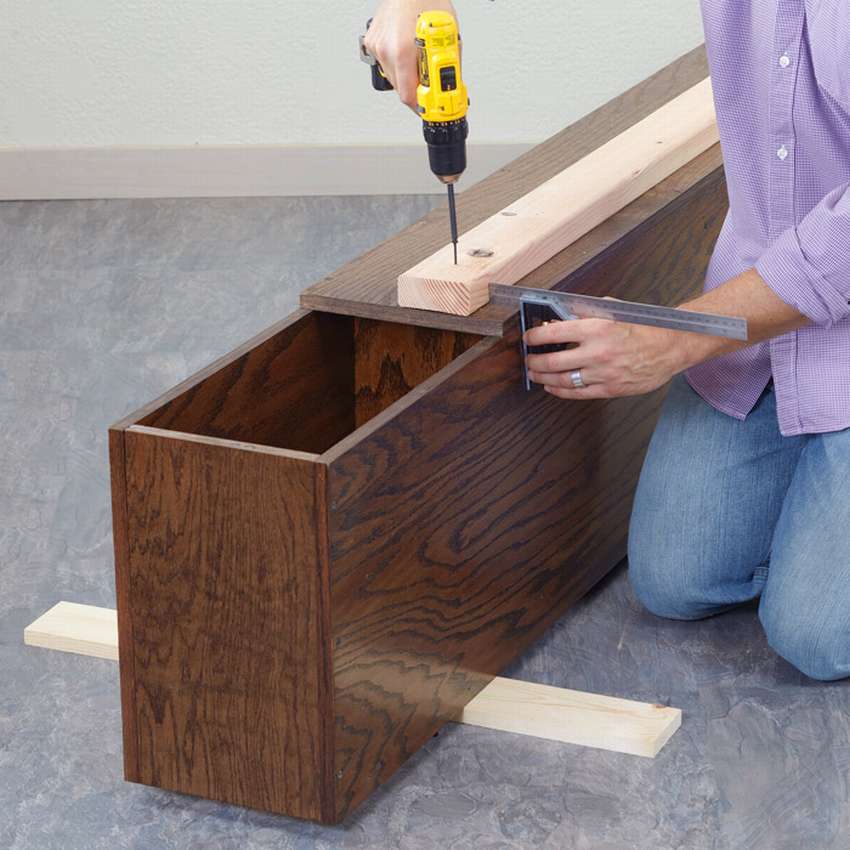
- Attach the partitions to the base of the platform.
- Apply glue to the partition, install on the base and fasten. Each separator will be pinned three screws and glue.
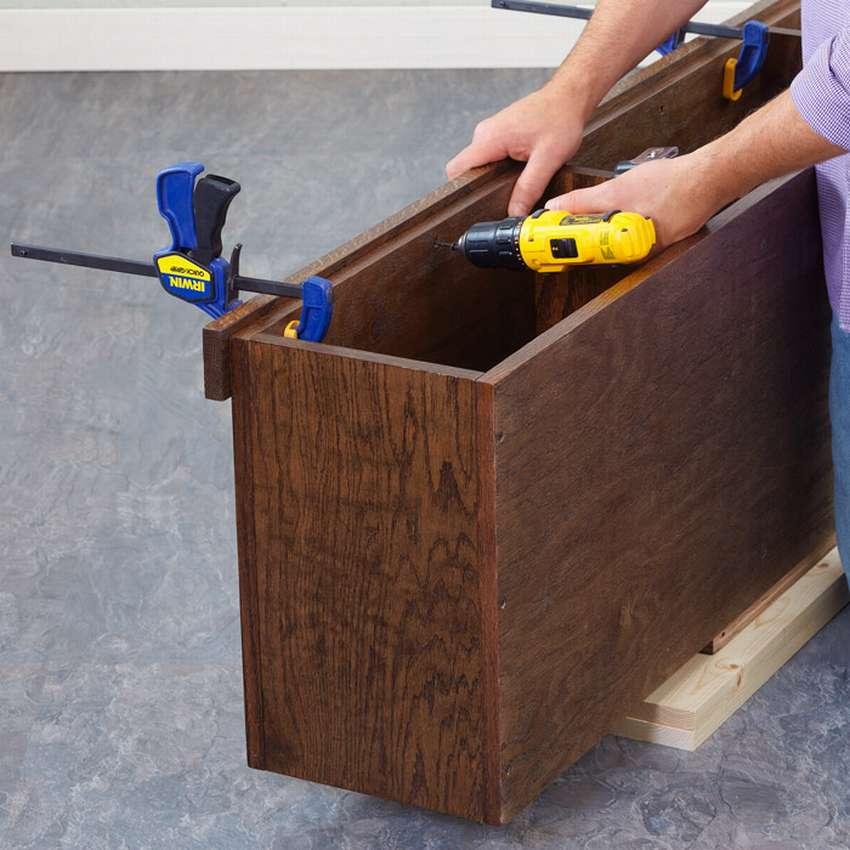
- Glue and screw the upper part to the body. Attach the side back to the partition with screws, but without glue. When the first enclosure is complete, assemble the second and then the back, following the same steps.
Headboard and mattress support
- Add a wide edge of veneer to the panels with an iron. Trim the headboard panel, frames, and guide to size and assemble with glue and screws. Cut veneer edge 5 cm wide and secure with an iron. Trim and grind the excess.
- After the glue has cooled, cut the plywood and sand it.
- Cut the side guides and the end guide along the length and grind.
- Cut the side supports, strips of 2 cm plywood.
Complete assembly
- Remove backs of cases and impregnate. After the dye has dried, apply three coats of satin polyurethane.
- Install the side supports in the side enclosures.
- Add side strips, they should be flush at the ends of the head and hang from the sides and the side of the footboard by 15 mm.
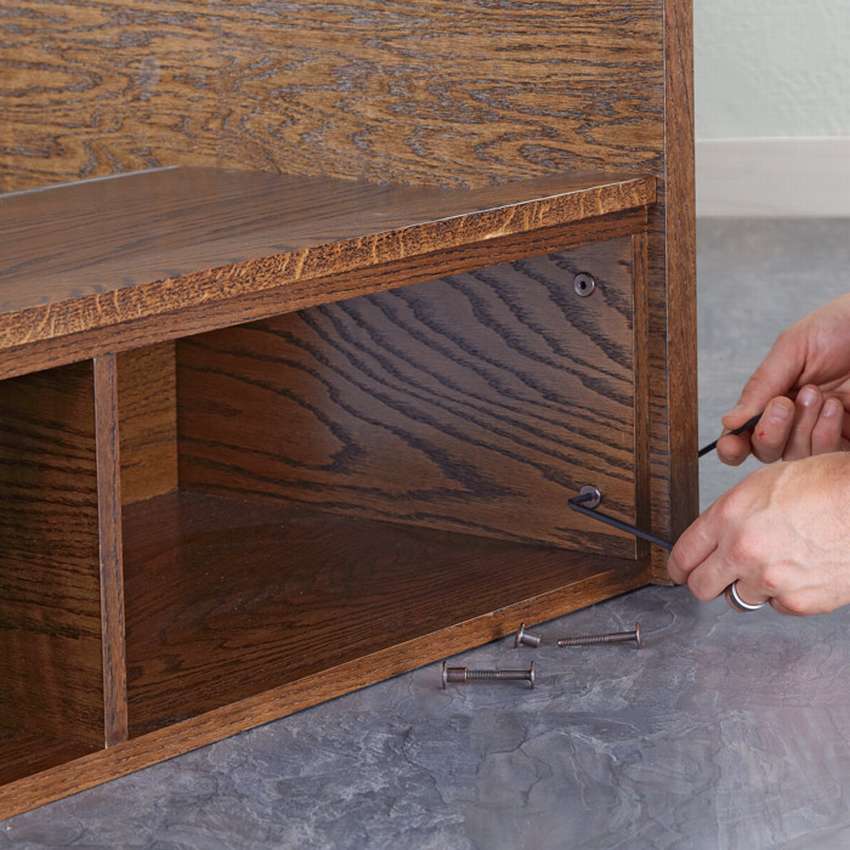
- Attach the headboard to the platforms with the connecting bolts.
- Install the end guide across the bed base between the side rails so that it hung over the end of the base by 15 mm.
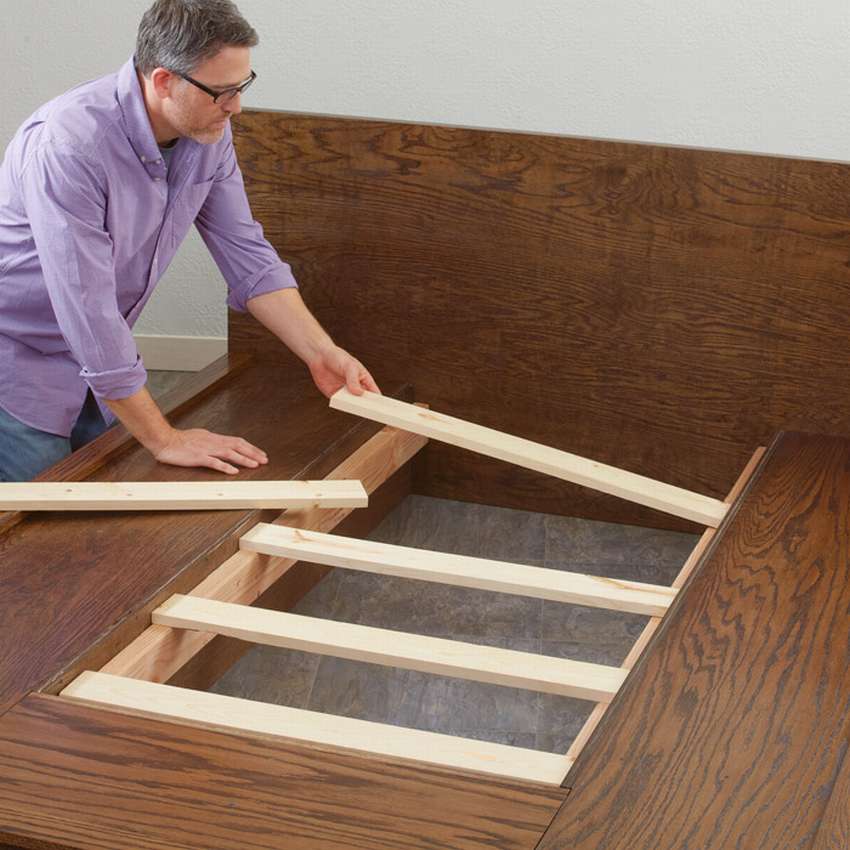
- Install the rails on the side supports. Lay the evenly spaced rails on the side supports and install the platform on them.
- Slide the bed against the wall and put the mattress.

The idea of organizing storage under the bed is not only reasonable, but also economical. If you are looking for suitable options, read the large article “Bed with drawers for storage. DIY 800 photos, step-by-step instructions» https://i.expert-h.com/en/krovat/s-yaschikamiwhere 20 great examples are presented. There is also a description of how to make storage boxes under the bed.
Hello, I am the author of this article, so I look forward to asking questions for this article in the comments below, I will answer all !!!
If you have questions on another topic, ask them on our forum, we will answer you
- Two baskets of paper in 5 minutes (Master class)
- How to make a simple and compact table for a milling cutter from plywood
- How to make a soft headboard tile (Instructions + step by step photos)
- Cinder block benches: a convenient bench in 55 minutes
- Steampunk style lamp: how to make a table lamp from water pipes