Do-it-yourself flower pots from tire covers
 Flowerpot for flowers
Do-it-yourself things, as a rule, give us special pleasure, and if this thing was created from ordinary materials left as unnecessary, for example, from an old tire that was no longer needed and eventually turned into a useful surprisingly beautiful part of the garden and summer cottage, this is doubly pleasant . Even such unsightly at first glance things can give a second life, while you absolutely will not need any costs, just a little skill and imagination.
Production of flowerpots from tires for garden and summer cottages
 Despite the existence of indoor flowerpots, most of them are used on the street. Gardeners have long appreciated flower vases, because it is convenient to plant in them those plants for which the soil must be of a certain composition, moreover, the climate can be regulated by simple transfer to a suitable protected place. Also, decorative flowers in a flowerpot create certain accents, attracting attention and creating an exquisite harmony in the garden. They can decorate the courtyard, stairs, paths and other places where there is no land. Outdoor flowerpots are usually made of natural materials, it can be ceramics, stone, clay or wood.
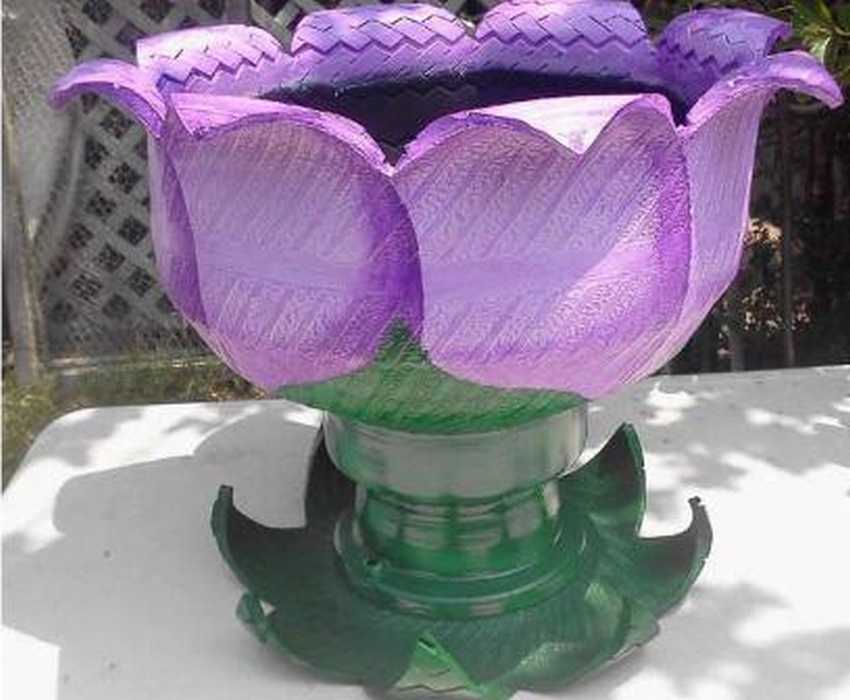
If you wish, you can make unusual ornaments from car tires, various flowerpots, flower girls, and some craftsmen manage to create them
children's rides and country furniture.
To work you need to have:
- the tire from the car;
- cement with sand and primer;
- paint and soap;
- stucco net or wire;
- crushed stone or pebbles of small size.
Step-by-step photos of making flowerpots from tires for giving


https://i.expert-h.com/en/vazony/vazony-dlya-tsvetov-iz-pokryshek-svoimi-rukami#sigFreeId609bb93f14
Step-by-step instructions for creating a flowerpot from tires
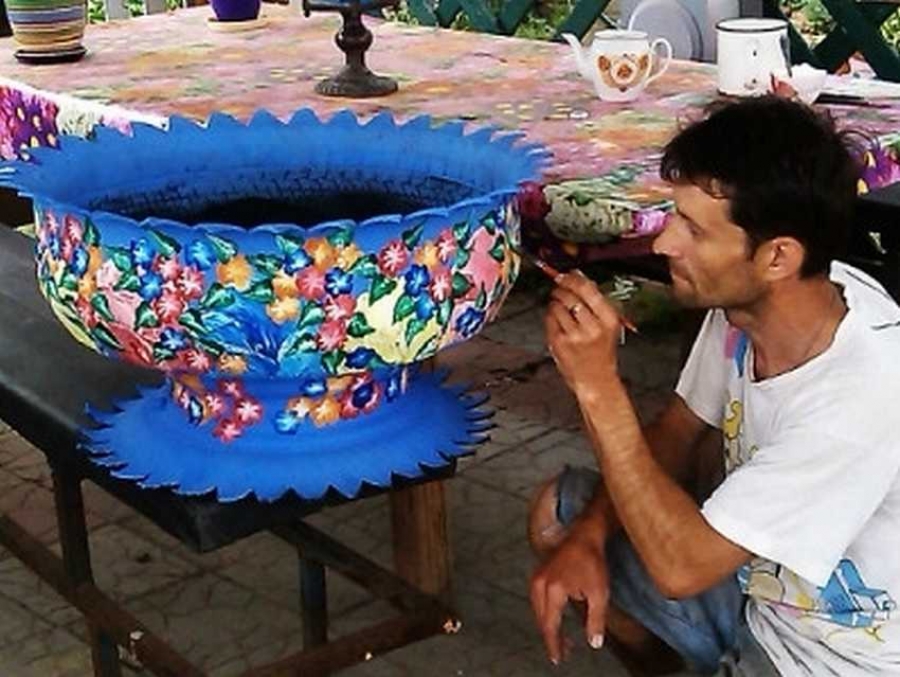
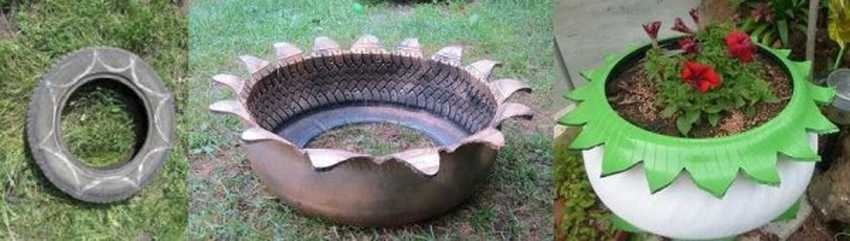
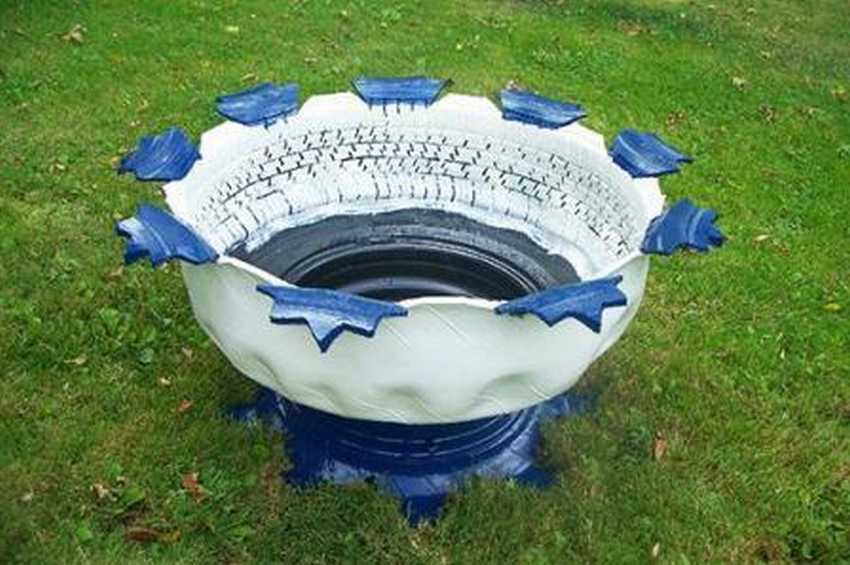
Preparation of the basics: first you need to draw a cut line and draw a chalk outline on the side of the product, which may be in the form of petals or fringes. The cut of the rim is carried out with a knife along the border of the transition from soft rubber to thicker around the entire tire. There is metal cord under the tread inside the tire, so it is better to use tires without it. But, if you have already decided to work with such a tire, let the cord serve as a natural border for which you need to make incisions from the center to the tread in the sidewall of the tire.
Cutting: 5-10 cm deep cuts can be made with a well-sharpened knife. The width of the rifling is any, but not less than 10 cm, since in the subsequentthey will be the basis for decorative elements.
Eversion of a tire: when the cuts are made, it is necessary to turn the tire inside out. They turn out like this: they step on the inside of the tire, take their hands by the edge and pull upwards and toward themselves. It is important to achieve the first result, for this, the edge is sequentially turned out, standing on the already inverted part so that it does not turn back, however, it is enough to unscrew a small area and the process will go on quickly and smoothly.
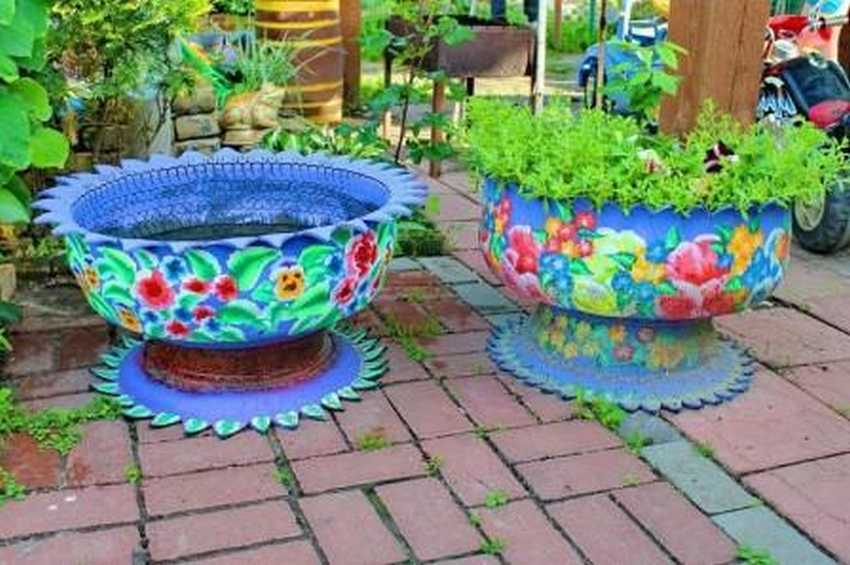
Decor: cover the disc and the rubber with a primer, the rubber sections between the incisions can be further shaped into petals, semicircles or triangles. Now you can paint the finished product, decorate with pebbles or apply an ornament.
It remains only to fill the mold with soil, but before that it is advisable to lay out a dense agrotextile material on the bottom and pour a layer of sand for drainage. You can plant your favorite flowers.
Varieties of the above model
You can make a flowerpot by removing the rim, then it will turn out without a stand and legs, as in the photo below:
Or make a leg from the previously cut part:

The foot from the rim looks very original:
How and how to cut tires?
Cutting the tire without proper dexterity is not so easy, but it is possible there are a few secrets:
- when cutting with a knife, it is better to grease the blade with solid oil, then it will be easier to slip;
- take a blade with a reverse tooth made of good steel;
- if you have to cut the tread, use a grinder;
- you can cut off the sidewall using an electric jigsaw, with a grinder in this case it is advisable to make only the first cut, since when it is used during cutting of rubber, a persistent unpleasant odor appears.
Making a concrete leg for a flowerpot
If you want your flowerpot to become a real work of art, decorate the disk with a solution of concrete and various stones.Here's how to do it:
-
first, wind the disc with wire or a plaster mark so that the mortar is firmly fixed to the rubber;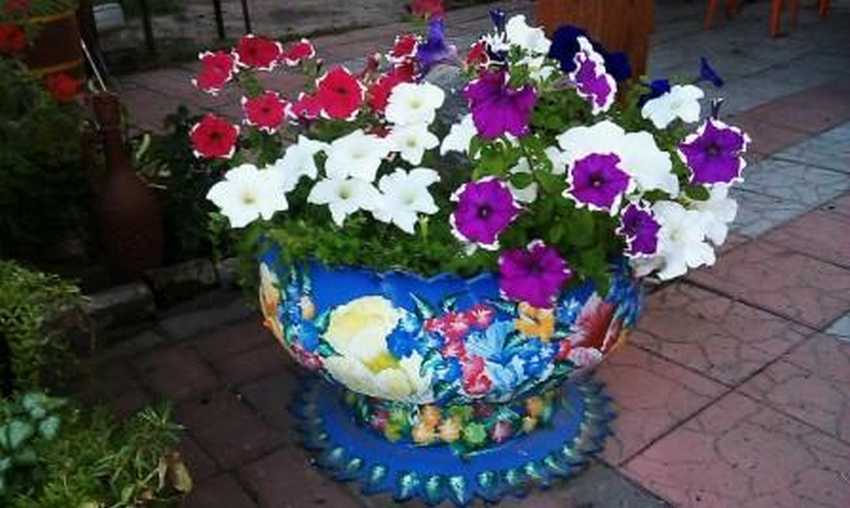
- knead a solution of water, cement and sand in the proportion: 0.5 / 1/3, make a solution of a thick consistency, then it is better to attach to the disk;
- use a trowel to apply the solution, as if sprinkling it. Immediately after applying the cement, you can decorate the leg of the flowerpot with pebbles, you can even use pebbles or broken glass of various colors for this. After fastening the mortar, the pebbles must be washed and the excess cement removed with a stiff brush.
So that the concrete foot does not crack, you need to moisten it with water for 3 days.
On a note!
- Low flowerpots placed below eye level are usually seeded with flowers covering their surface, as well as undersized flowers and plants. In such street flowerpots, bulbous varieties of flowers are planted - tulips, irises, daffodils, juveniles, as well as stonecrop, saxifrage, hyacinths, etc.
- It is worth paying attention to flowers specially bred for flowerpots - this is balsam, long-flowered, begonia, lobelia, primrose, nasturtium, in the flowerpot they bloom much longer than in open ground.
- If the flowerpot is on a hill or a pedestal, it is appropriate to plant flowing and ampelous types of flowers. It can be a bell, petunia, begonia, fuchsia.
Flowerpot in the form of a tea set, master class
Flowerpots in the form of a tea pair look very unusual, such a flowerpot, in addition to practical use, will be an excellent addition to landscape design. And most importantly - it can also be done with your own hands.
To make such a flowerpot, you will need: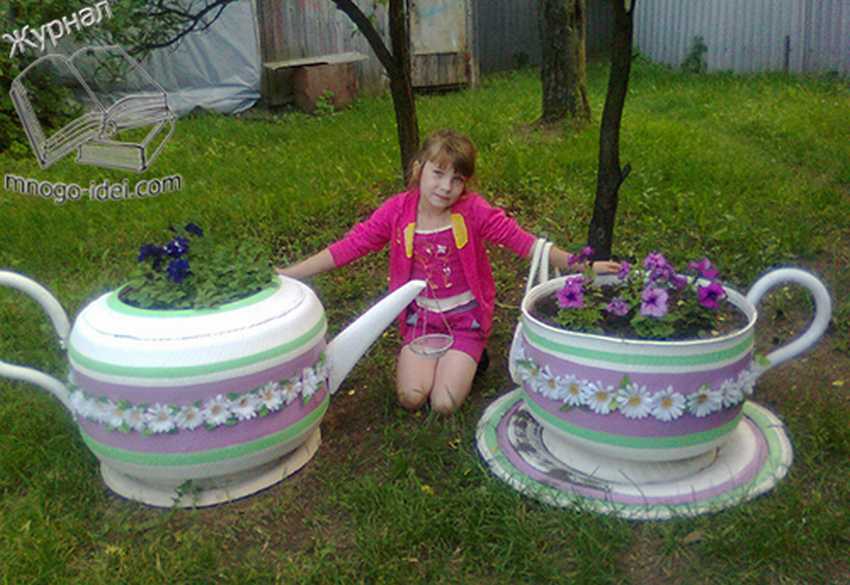
- 3 wheels of different sizes: from the truck, from the LAWN and from the car (13 size);
- tools: hacksaw, mount, sharp knife, screwdriver;
- self-tapping screws;
- brushes, foam sponge, stencil and paint;
- plastic pipe with a diameter of up to 4 cm.
Progress
- Pick up 2 tires of different sizes, from the one that cut the side surface more (in the form of a circle with a hole).
- Lay the cut-out part at the place chosen for the flowerpot.
- Lay a tire with a smaller diameter on the rubber circle and attach it to the base with screws, before mounting, make sure that the tire is located on the base in the center.
- Place the second large one on the installed tire, the side from which the side part was cut out should be on top. Now align the structure and connect both tires using self-tapping screws or wire.
- The handle for the cup can be made from a piece of hose or a plastic pipe, or you can use trimmed tires from other products.
- You can paint the finished product and decorate with additional elements.
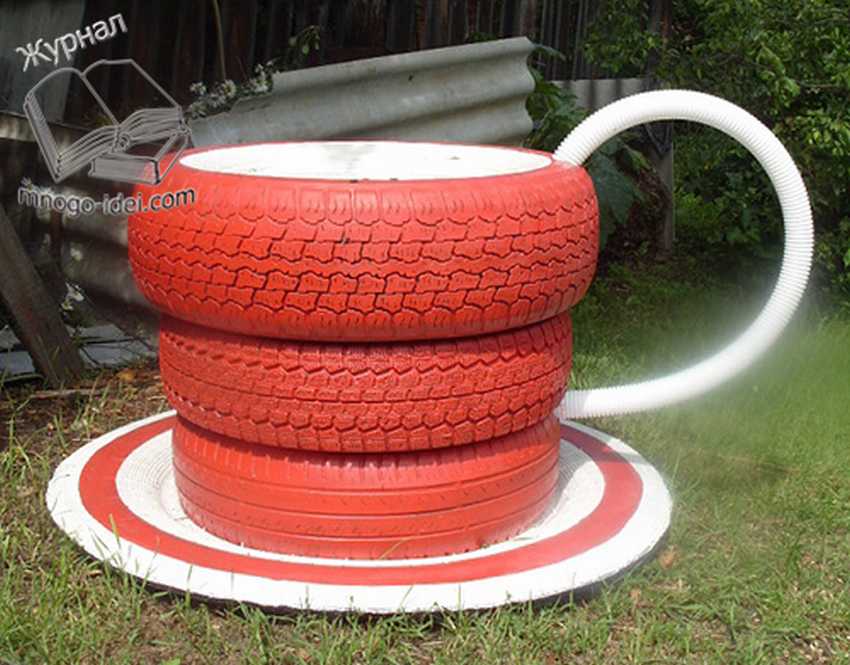
Flowerpot cup shaped do-it-yourself tire
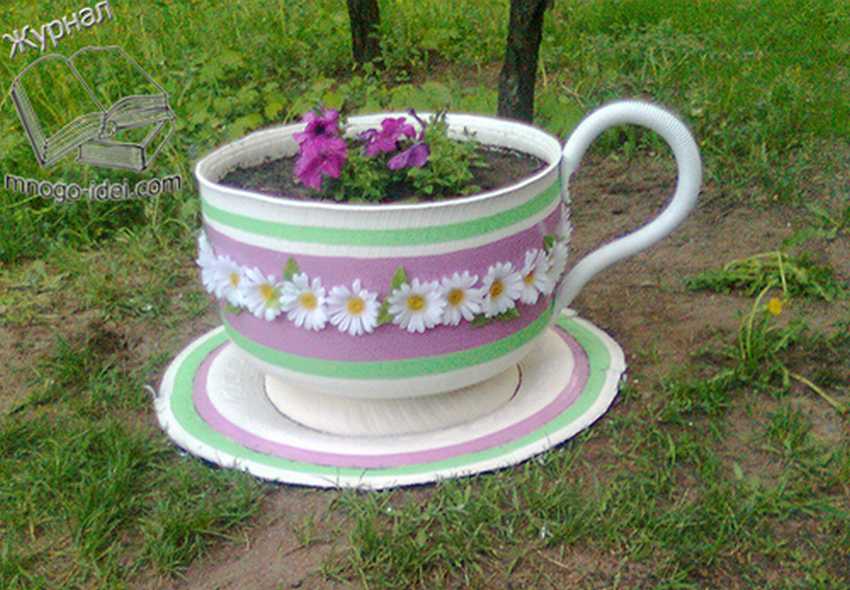
Let's look at how to make a beautiful flower pot from old car tires for a flower bed. Pay attention to how the flowerpot is decorated with plastic flowers around the perimeter. The author of the photo made a pen for a cup from a corrugated pipe.
This cup can be put in the country, in the yard, on the street and in the playground.
The step-by-step photos below show the master class for making cups from tires.
A phased photo of making a flowerpot in the form of a cup:


https://i.expert-h.com/en/vazony/vazony-dlya-tsvetov-iz-pokryshek-svoimi-rukami#sigFreeId0db23f2eab
Flowerpot kettle shaped do-it-yourself tire
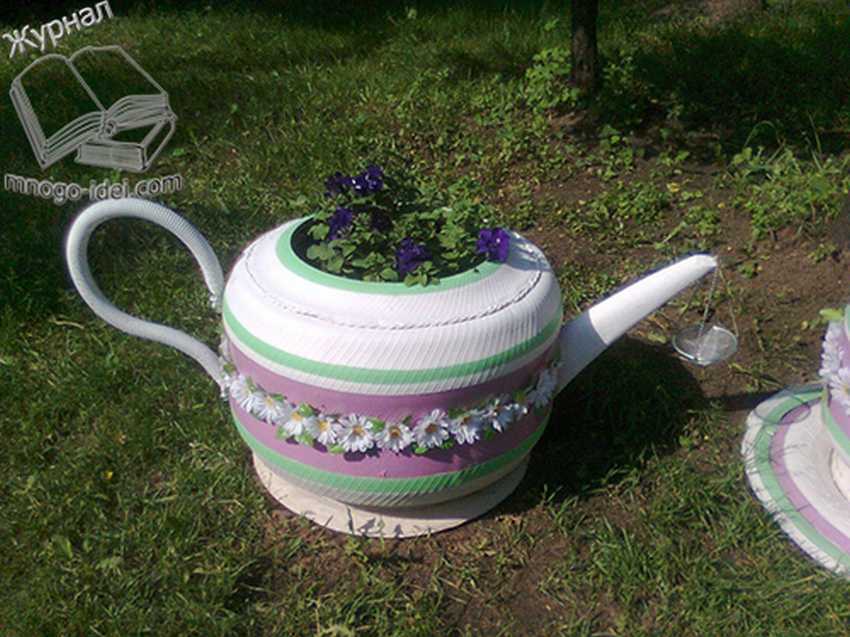 Here is an example of making a flower teapot from an old car tire. Pay attention that the author made a spout for a teapot out of wood, and the handle, as in the previous example, their corrugated pipe
A phased photo of making a flowerpot in the form of a teapot:


https://i.expert-h.com/en/vazony/vazony-dlya-tsvetov-iz-pokryshek-svoimi-rukami#sigFreeId4a69c1e16f
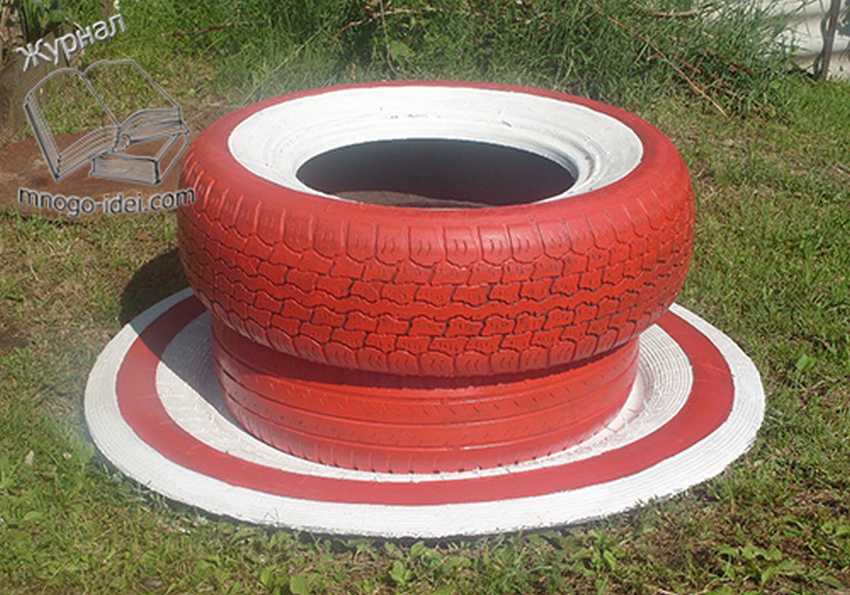
Another version of a flowerpot in the form of a cup on a saucer
For one such flowerpot, you will need 4 tires, while three of them should be small, and one should be large (from a tractor or truck). A large tire plays the role of a saucer for a cup, it is placed on the ground, for greater stability of the structure, the lower tire can be dug into the ground. A piece of hose or plastic pipe is also used as a handle.
Advantages and disadvantages of tire products
- simple and understandable manufacturing technology;
- the ability to achieve interesting forms due to the characteristics of the material;
- wide scope of imagination for landscape design;
- low costs (especially in the presence of unnecessary tires).
The disadvantages include only the peculiarities of the chemical composition of tires, the fact is that with prolonged atmospheric exposure, whether it be the sun or rain, toxic substances begin to be released from the tires into the soil. Planting berries and vegetables in such products is undesirable.
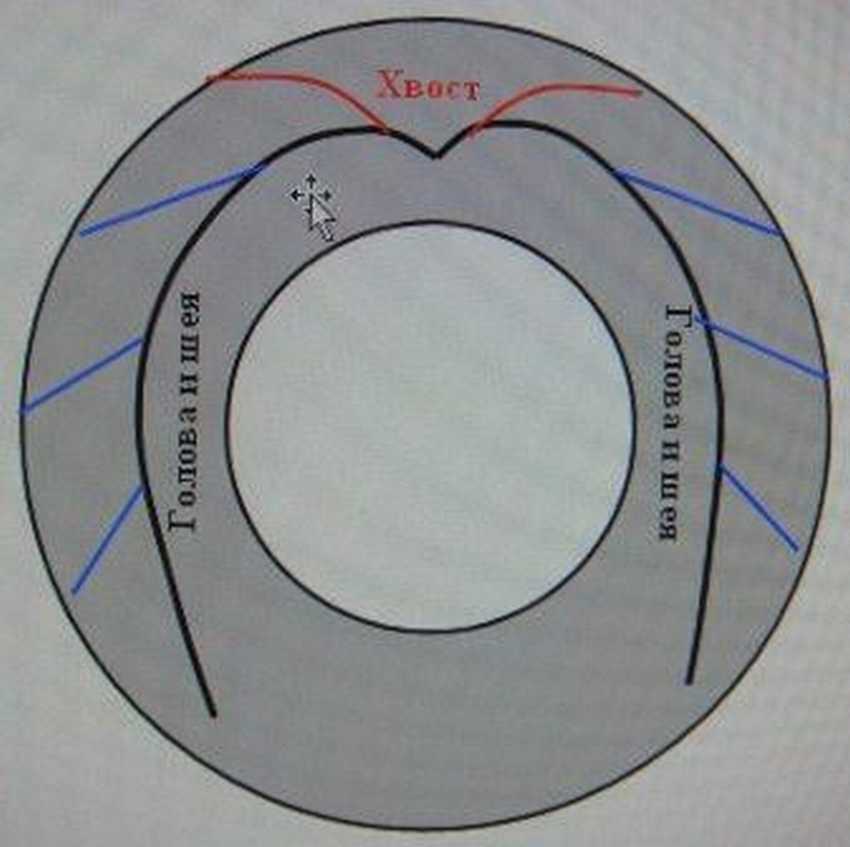
Flowerpot in the form of a swan
An original flowerpot can be made from tires if you give it the image of a swan.
Work stages
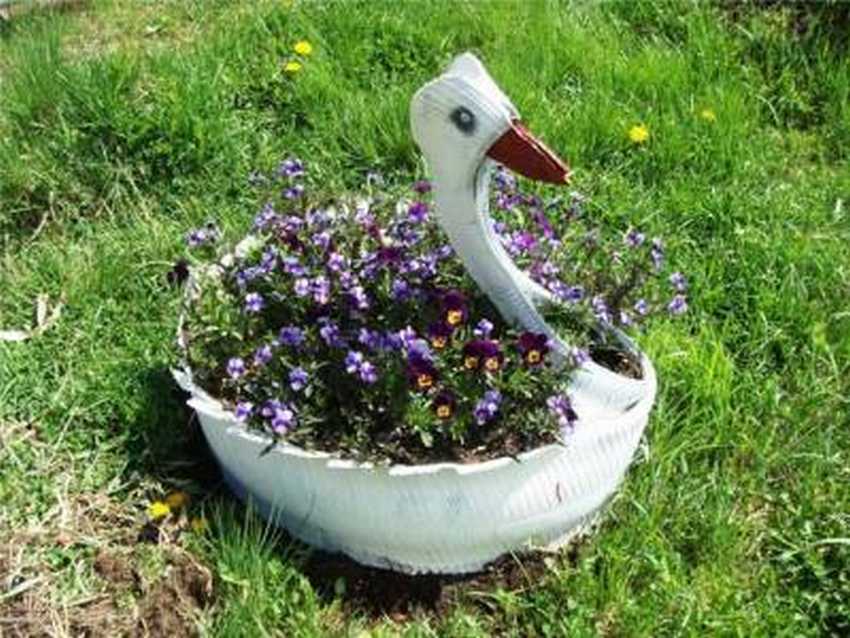 Do not cut the inside of the tire; this will help maintain shape.
- Step back from the edge of the tread 3-4 cm and make cuts on both sides parallel to the existing circle. Dimensions - approximately 2/3 of the surface, with wings made from wide parts on the sides, and a bird’s neck from a narrow part in the middle.
- From the middle part, cut a piece and form a triangular head at the end.
- Turn out the cut tire. The wings should turn out, if necessary, refine them by making incisions to simulate feathers, the wings can be given any angle of inclination.
- Color the resulting product and leave to dry. After that, you can place the pot on the desired site of the estate, fill the hole with earth and plant the plants.
Tire swan cutting scheme
+ 100 photos of various ideas for making flowerpots


https://i.expert-h.com/en/vazony/vazony-dlya-tsvetov-iz-pokryshek-svoimi-rukami#sigFreeIdc056a7b172
- Do-it-yourself wooden veranda: 300 photos, step by step, master classes
- DIY wooden bench: photos, drawings, master classes
- DIY hanging flowerpots and flowerpots
- Do-it-yourself room flowerpots for flowers: master classes +223 photos
- Flowerpots from bottles with their own hands. +300 photos. Master classes