DIY chair for children: 280 photos + Drawings Dimensions Instructions
 DIY baby chair
Now we will consider the manufacture of a do-it-yourself highchair for a child with and without a back. Check out step by step photos, drawings, mock-ups and instructions for the most detailed photo master classes on creating simple, ordinary and original models. At the end of the article we placed more than 800 photos a variety of chairs for children and also a large photo gallery of stools and chairs for adults. The material used is wood and plywood. It is not at all difficult, simple and fast !!!
The note: Check out the article -
Children table DIY 800 photos, diagrams, step-by-step instructions
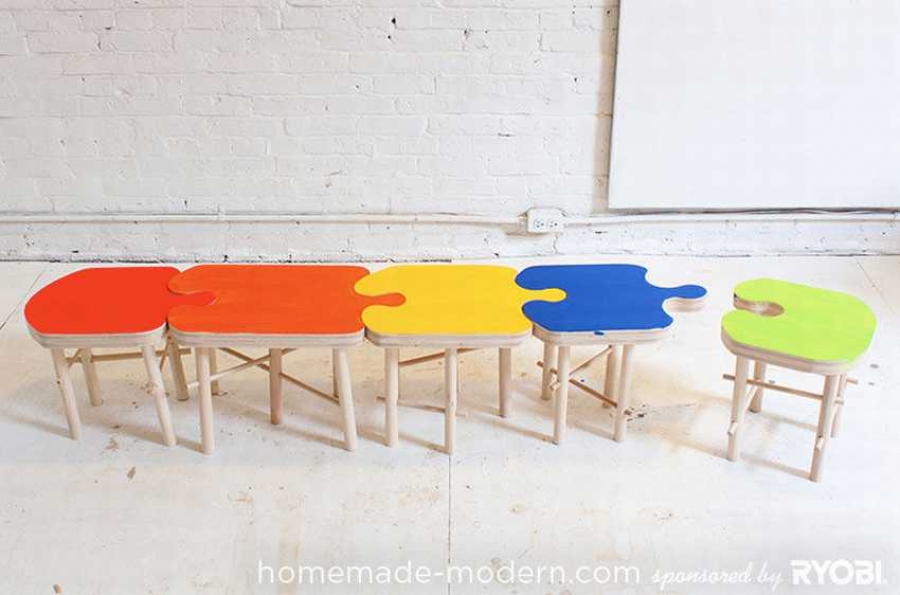
A stool-chair in the nursery in the form of puzzles.
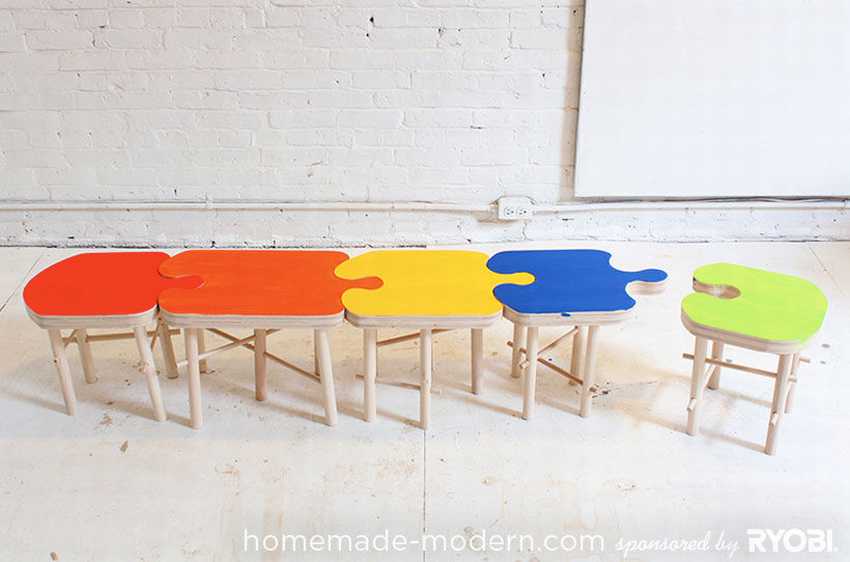 These chairs are great for children and can go to the playroom or nursery, and so will be a great solution for kindergarten. The seats of the chairs are made in the shape of puzzles, and therefore, if necessary, these chairs can be combined into a single benchthat in certain cases can be very convenient. You can learn how to make such chairs with your own hands from the step-by-step photos located below.


https://i.expert-h.com/en/stul/940#sigFreeId801b16ed49
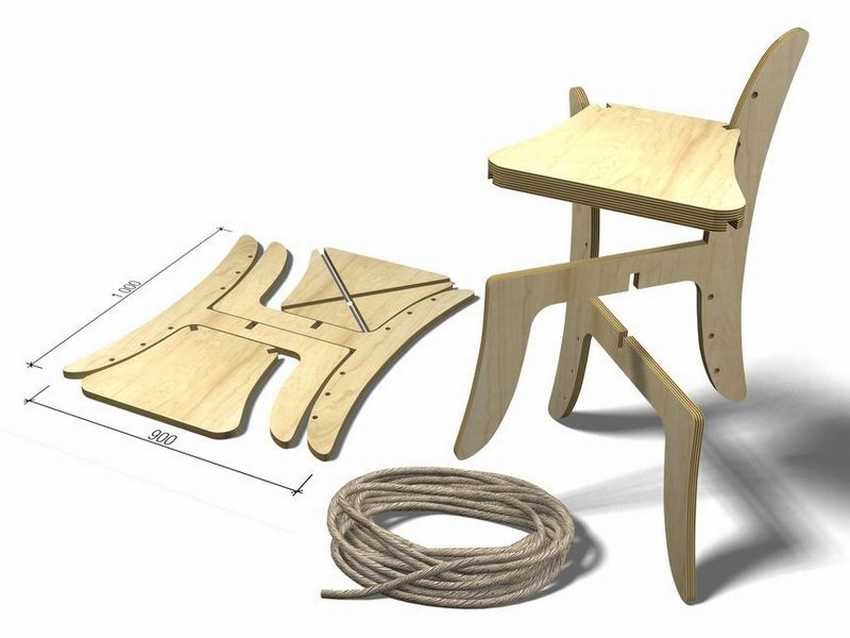
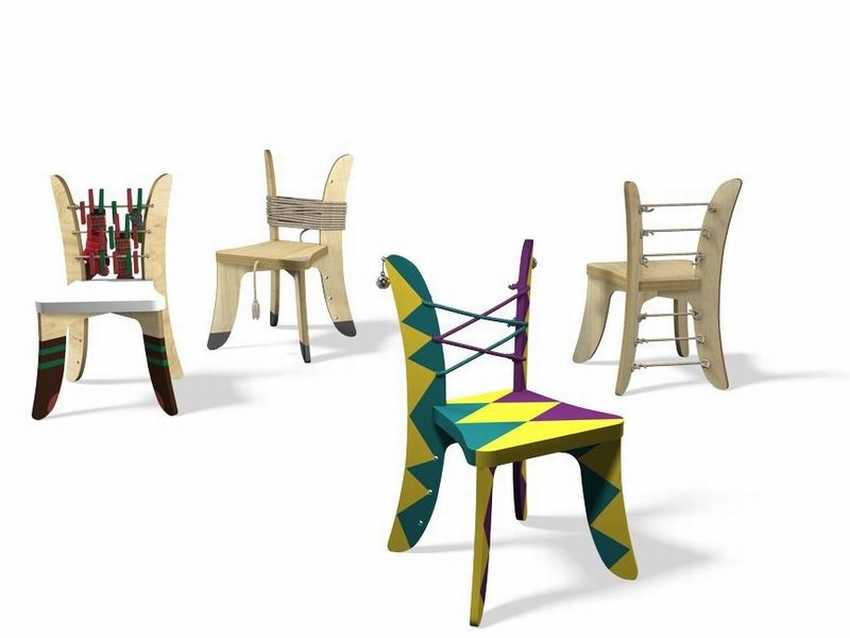
Children's folding chair made of plywood drawings.
Do it yourself
Cut out of plywood
A simple chair for a child with a back.
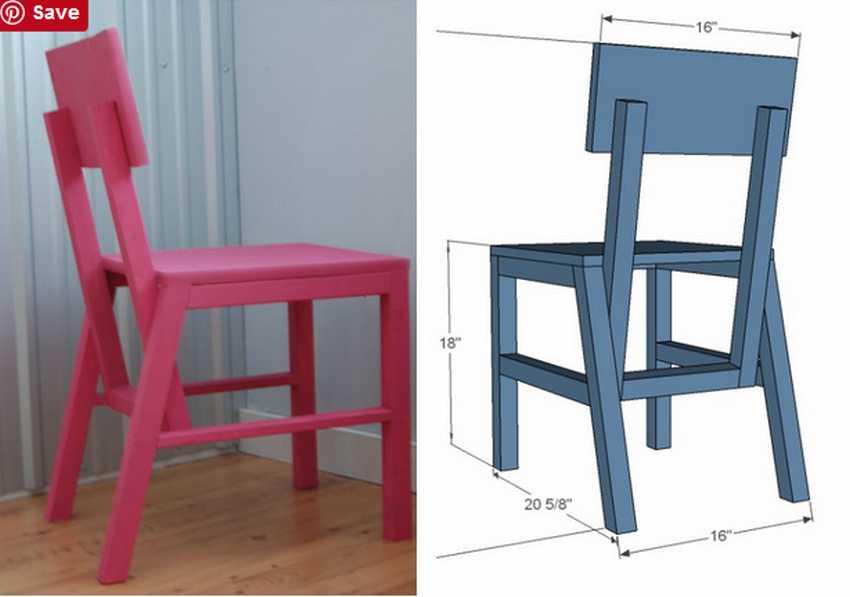 Drawings and assembly diagram
See the drawings of the assembly diagram of a simple wooden kitchen chair below in the gallery of step-by-step photos. In this model, we can note a very simple solution for fastening the back of the chair, in which you can not bother about the strength of the backrest with the rest of the chair and maintaining the angle of the backrest.


https://i.expert-h.com/en/stul/940#sigFreeIde2866c7044
Highchair with bent plywood backrest
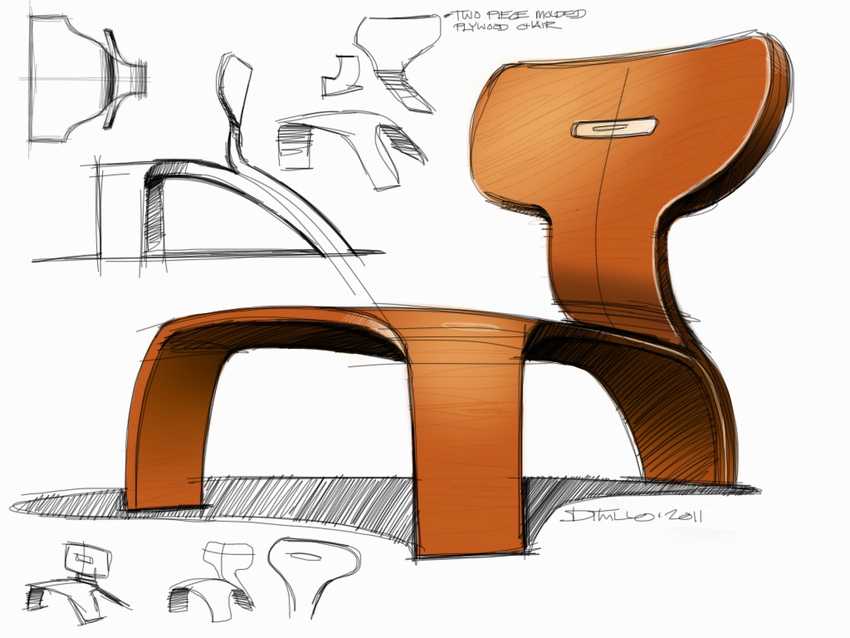
High chair for self-feeding.
Blueprints. Sizes. Schemes
You can make such a chair a table for feeding children with your own hands their plywood 24 mm, as the author advises. Look at the drawings and sizes and a step-by-step master class for making such a chair below. We advise you to order sawing of parts according to the specified drawings in the nearest furniture factory, which saves a lot of time. Do not forget to carefully sand and cover the countertop with eco-friendly material.
Master Class


https://i.expert-h.com/en/stul/940#sigFreeIded66a9c627
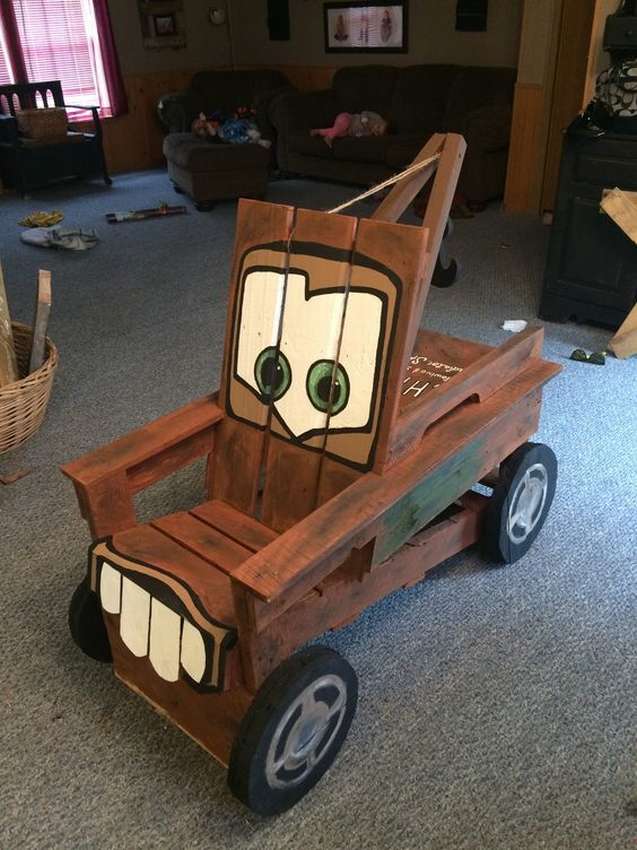 Chair for children in the form of a typewriter tow truck Meter
It’s a great idea to make a chair in the form of a character Meter cars from the cartoon "Cars". You can make this Adirondack chair and planks from the pallet. Below you can find photos of them taken from different angles.


https://i.expert-h.com/en/stul/940#sigFreeId1d42a69e7d
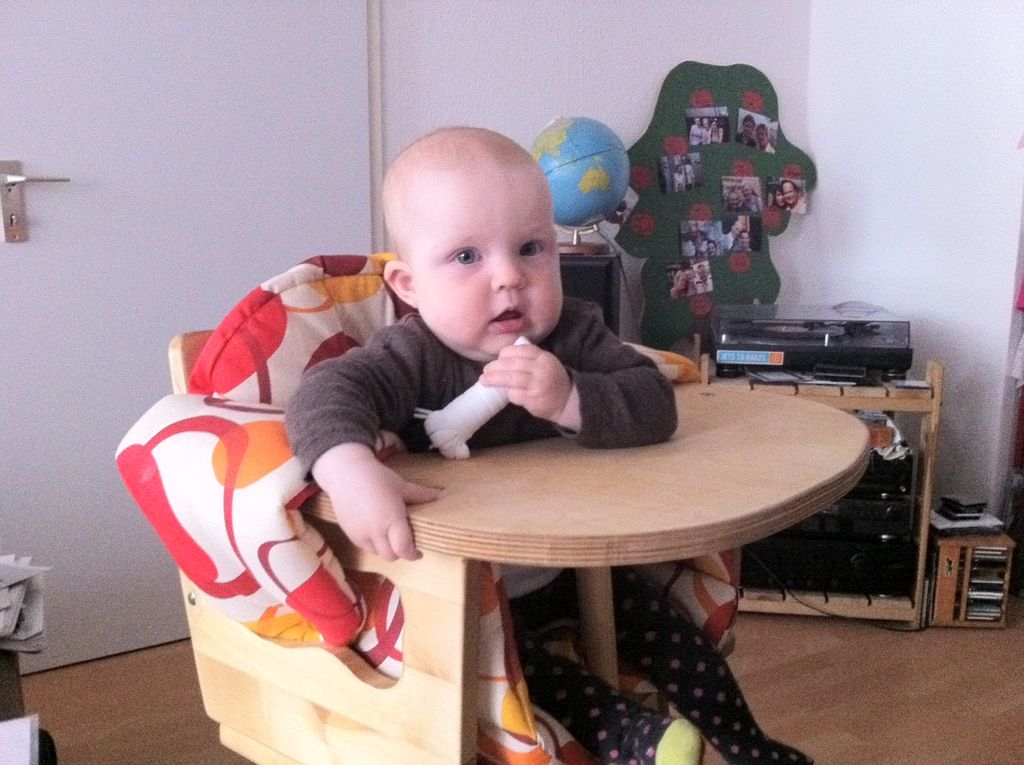
DIY Kotokota chair with height-adjustable
OR
A growing chair for children.
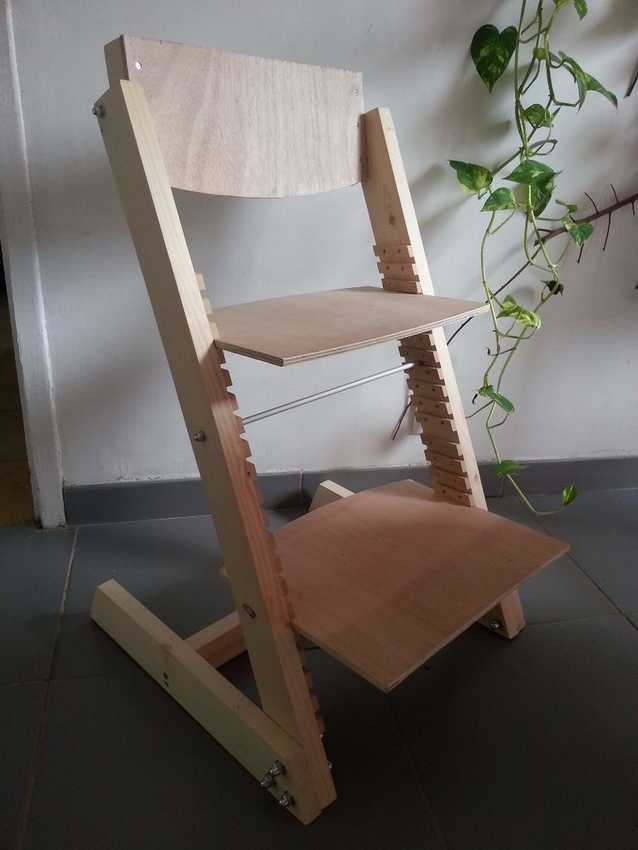 A chair for a schoolboy adjustable in height can be made with your own hands, called a kotokota and is sold in many online stores. Below are photos of the assembly of such a chair. If you make a trailed table, then turn such a chair into a highchair.


https://i.expert-h.com/en/stul/940#sigFreeIdc7e58f2f77
Children's plywood chair
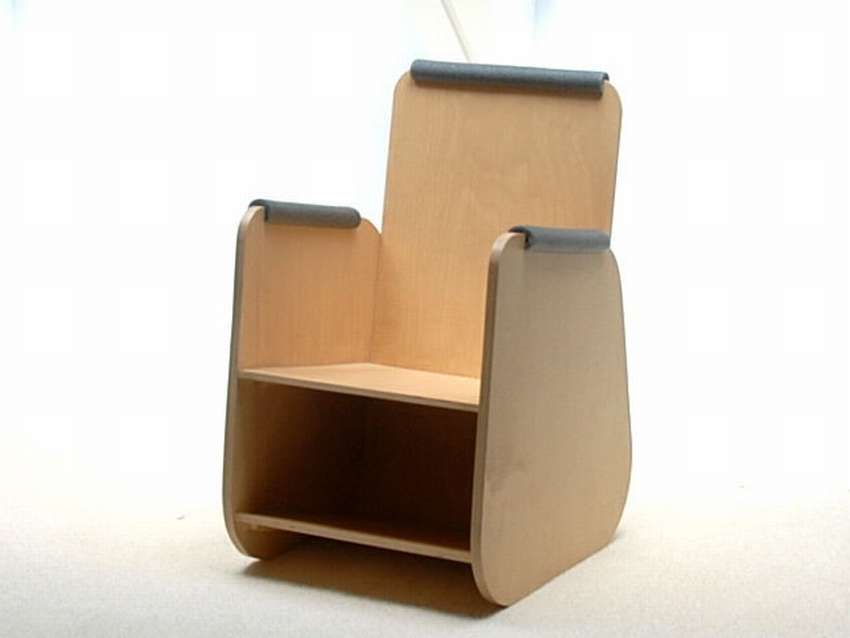 Plywood, the material is relatively cheap, convenient and therefore quite popular. After repair or reconstruction, usually a lot of scrap remains, which ultimately ends up in the waste container. Shown here how to turn plywood trim into a comfortable chair for children. Basically, the chair is made like a box, which makes it simple, durable and lightweight in order to resize according to your needs. For the manufacture of bolts and screws are not needed, as the whole structure is torn on glue. In addition, you can change the shape of the side panels in this way changing design as you like.
Design and materials. To design this chair, you only need to know the height and weight of your child. Knowing them, you can make any form of side panels, because the assembly method is the same.
You will need:
- 2 side panels: two sheets of plywood (50 x 50 cm)
- Seat panel: 1 sheet of plywood (35 x 35 cm)
- Back: 1 sheet of plywood (35 x 65 cm)
- small wooden beams to support the back
- glue
- small nails
- 3 bars (needed to create a rigid frame while the glue dries. Must be shorter than the width of the seat (!)
IMPORTANT! The strength of the seat is determined by the accuracy of assembly and the quality of the adhesive. therefore the width of the seat panel and the width of the rear panel should be the same and straight!
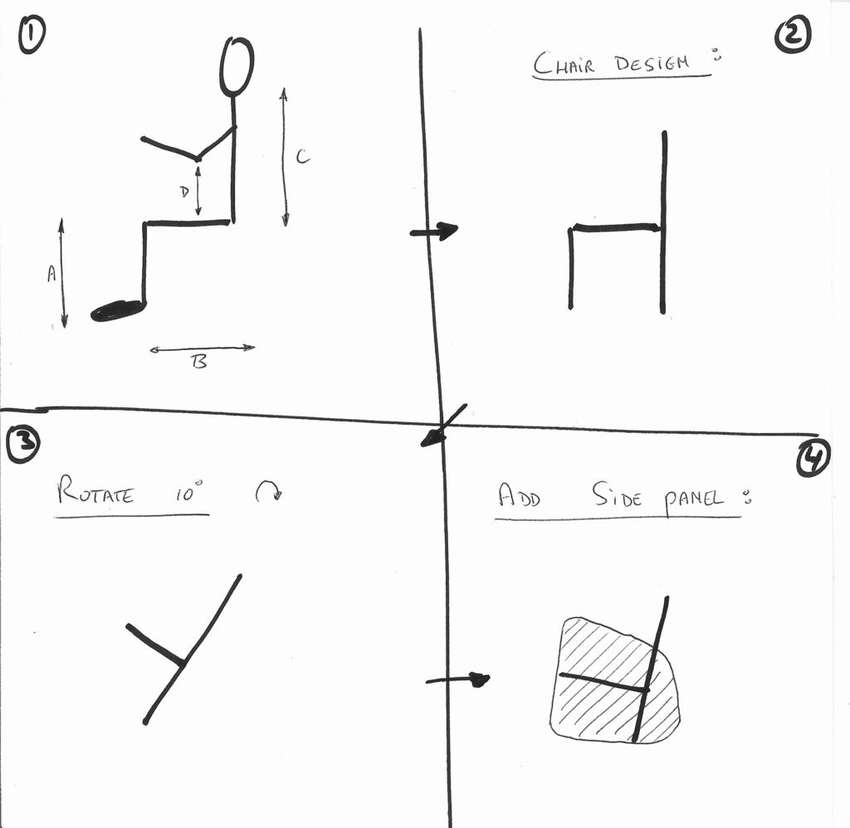
- Screw the two large plates (side panels) into the corners.
- Set the dimensions of the side panel of the seat.
- Cut the profile.
- Specify the dimensions of a specific angle (radius of approximately 10 cm).
- Saw off the plywood along the radius, now you have two identical panels.
- Glue parts
- Glue the wooden blocks on both side panels (according to the dimensions of the sketch). These bars must support the seat panel and rear panel.
- The second panel should be identical.
- Assemble the two side panels with 3 bars. Apply glue to the slats on the rear panel and on the sides of the rear panel. Replace the back cover so that it touches the floor.
- Apply glue to the seat panel and reinsert it. Wipe off any remaining glue.
- Clamp the construction with clamps, if you have any. After the glue has dried, remove the bars and round the remaining corners.
- If you wish, you can make a small shelf under the seat panel.
- Coat the finished structure with varnish.


https://i.expert-h.com/en/stul/940#sigFreeId306b757d21
Children's chair table - two in one
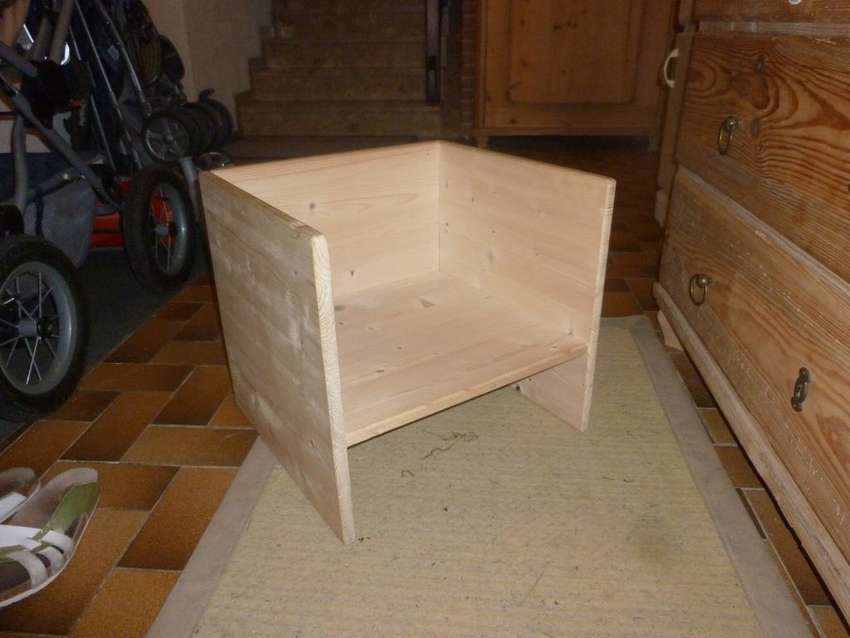 Functional baby chair, which can also serve as a table. There is a position in the form of a chair, the height can be changed at your discretion and position in the form of a table. This design is really very simple to do, look at the step-by-step photos and you will see this. Surely your children will really like it.
So, let's begin !
Sizes. Cube 400 mm x 400 mm x 400 mm. Very simple;)
What is needed:
- 2 sides 400 mm x 400 mm
- Back 400 mm x 364 mm
- Seat sheet 364 mm x 382 mm
- measure and cut the material
Give the edges the correct shape, the author did it with a chamfer. If there is no milling cutter, the usual sandpaper will do, but you will have to sweat. In general, grind the edges and surface. Now you can glue all the details. Take a few clips to make the structure solid. The last step is grinding again. The author does not use any varnishes or paints, considering that this is not necessary for children's furniture. Maybe he is right. Moreover, you can provide this opportunity to children.


https://i.expert-h.com/en/stul/940#sigFreeIdd4a5c264b9
Schemes and drawings of chairs 200 photos


https://i.expert-h.com/en/stul/940#sigFreeIde91a930190
200 photos of chairs
Classic, original, hi-tech and retro - all you can do with your own hands


https://i.expert-h.com/en/stul/940#sigFreeIda3f7c00c55
Drawings of wooden stools


https://i.expert-h.com/en/stul/940#sigFreeIdce51082e5b
Wooden stools 300 photos


https://i.expert-h.com/en/stul/940#sigFreeId2a634b9e09
- Brick grill: 44 drawings, 18 projects + photos
- Collapsible barbecue: 50 drawings, 20 master classes +300 DIY photos
- ✿ Flowerbeds:> 34 turn-based master classes + photos (248 ideas) - do-it-yourself
- DIY sauna in the apartment: bathroom, balcony, storage room. Projects and photos
- Shelves in the bath with your own hands: +200 photo. Drawings of bench benches in the steam room