DIY kids table 800 photos, diagrams, step-by-step instructions
 do-it-yourself children's table
For parents, the purchase of children's furniture is a troublesome, but pleasant event. True, at the present time is also costly. But it’s not necessary to buy everything, you can make a children's table with your own hands, high chair, crib. And do not worry that something will not work, parental love is enough to make the best table in the world.
Start with a simple chair such as a chair. Believe me, this experience will come in handy, children will grow up, and soon they will need a desk or desk for the student. Check out this article, here are examples of do-it-yourself children's tables and chairs, so nothing is impossible.
- DIY table and chairs
- DIY desk
- School desk
DIY table and chairs
 How to make a children's table with your own hands
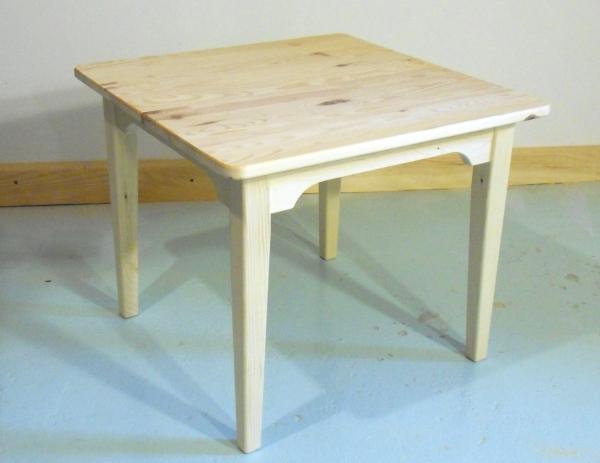
A very simple option, with these step-by-step photos you will learn how easy it is to make a children's table with your own hands. The dimensions are not indicated here, you can determine it yourself, let the child put his elbows on the table and reach his temples, his back should be straight. This will be the optimal height for your table.
If you want to approach the question correctly, use the table.
The manufacturing process is shown in sufficient detail, so that if you have the necessary tools, it will not take much time.


https://i.expert-h.com/en/stol/detskij-stol-svoimi-rukami-800-foto-skhemy-poshagovye-instruktsii#sigFreeIdd3fd8b0e26
 How to make a children's table and chairs in pictures
Do-it-yourself children's table and chairsif you have the appropriate tools and accessories. This article provides many examples with step-by-step photographs, but for greater clarity, I also present a master class with step-by-step pictures.
There is such a wonderful site WikiHow, here as in the comics, the process is depicted very colorful.


https://i.expert-h.com/en/stol/detskij-stol-svoimi-rukami-800-foto-skhemy-poshagovye-instruktsii#sigFreeId9e4fe5205e
Children's table with shelves
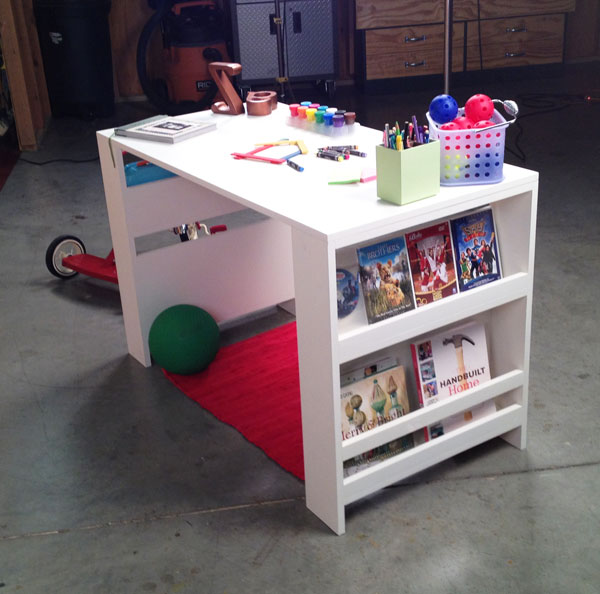
You can make such a table with shelves yourself, especially without ruining the family budget. If your children like to draw and do needlework, shelves are very useful. therefore the idea of making a table in a cabinet is very functional. How to make such a gift for children, look at the step by step photos with the indicated sizes.


https://i.expert-h.com/en/stol/detskij-stol-svoimi-rukami-800-foto-skhemy-poshagovye-instruktsii#sigFreeId56a75f395b
 DIY table and chairs for children
Each parent wants only the best for their child, but the best is usually the most expensive. Design your own nursery, which could be better than DIY table and chairs for a child. This kit is made of disassembled pallets, even a photo is attached :). Therefore, in material terms, the project is very profitable, and how to make it, look at the phased photos.


https://i.expert-h.com/en/stol/detskij-stol-svoimi-rukami-800-foto-skhemy-poshagovye-instruktsii#sigFreeIde2197ad9d1
 DIY baby chair
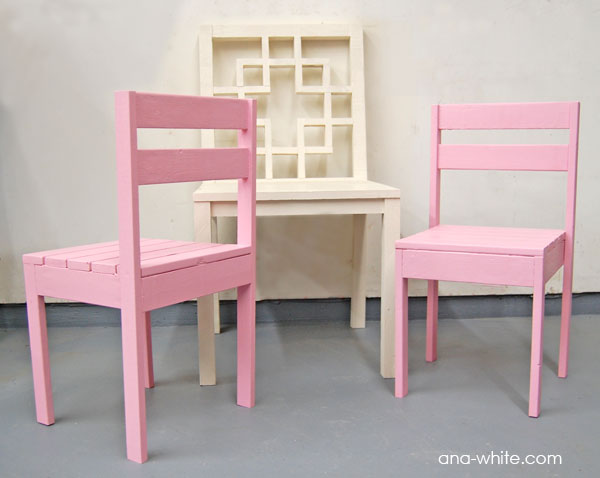
If you are busy with a table, you need to know how to make a baby chair with your own handsOne cannot exist without the other. So what should it be? Not expensive lightso that the child can calmly lift it, enough strong, because it is unlikely that children will sit on it calmly, well, and beautiful. This is exactly the option that is offered in these photos.


https://i.expert-h.com/en/stol/detskij-stol-svoimi-rukami-800-foto-skhemy-poshagovye-instruktsii#sigFreeIda54a1b77a0
 How to drag a baby chair with your own hands
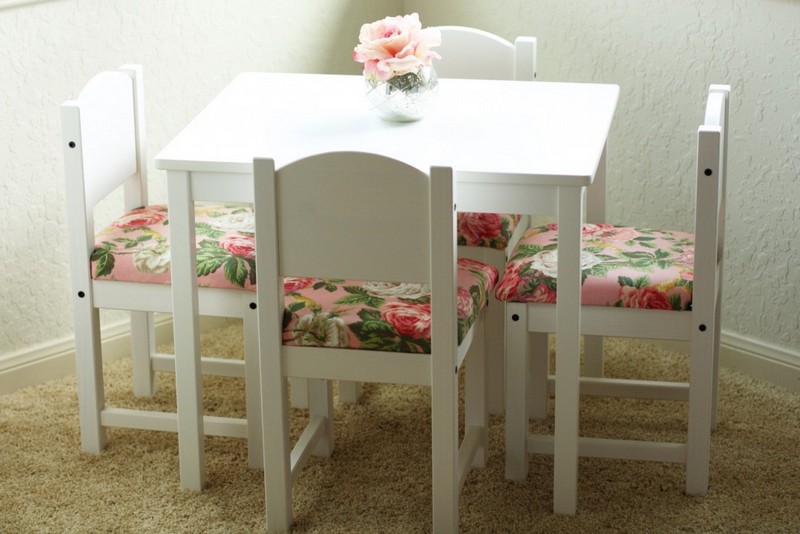
A comfortable and durable chair for a child is great, but you can add more personality, if you drag it with a beautiful cloth. There is nothing complicated about it, and it doesn’t matter whether you made a chair with your own hands or bought it in a store; good upholstery never hurts. See what a beautiful composition, and below in the gallery the order of work.


https://i.expert-h.com/en/stol/detskij-stol-svoimi-rukami-800-foto-skhemy-poshagovye-instruktsii#sigFreeId77719e9d89
It can also be done in a slightly different way..
- Buy ready-made pieces of paralon, cut to size, they are in most major fabric stores.You can also buy the required batting thickness at a fabric store. You need a thin batting, which is usually used for upholstery. It is necessary to soften the edges and give a beautiful look.
- Cut a square piece of fabric, 5 cm larger than the seat of the chair, this is necessary for stock, to secure it to the base of the seat. To fasten, it is necessary starting from one side, to bend and fasten the fabric from the center out. If you have a nailing gun, then the work, of course, will go faster.
- After completing one side, go to the opposite. Now pull the fabric tight to secure to the bottom of the seat. Please note that the fabric should not be too tight, if pulled too hard, it will not look very nice.
- The tightest corners last, start from the front. Cut off excess tissue to avoid accumulation.
- This part of the job requires patience, so take your time to fold and tuck the corners until you get a neat fit. Bend and stitch first in the center and then the sides.
- By fixing the front corners, you can go to the back. Again, you need to trim the excess tissue, but be careful not to snag the excess.
- The fabric is folded and tucked around the hind legs, then sewn under the seat.
- To add protective vinyl, more is cut out above the seat than on the seat and secured with paper clips to the edge (not under) of the seat.
- Glue the decorative edging around the edge of the seat using hot glue, it will cover the brackets nicely.


https://i.expert-h.com/en/stol/detskij-stol-svoimi-rukami-800-foto-skhemy-poshagovye-instruktsii#sigFreeIdbac72953ba
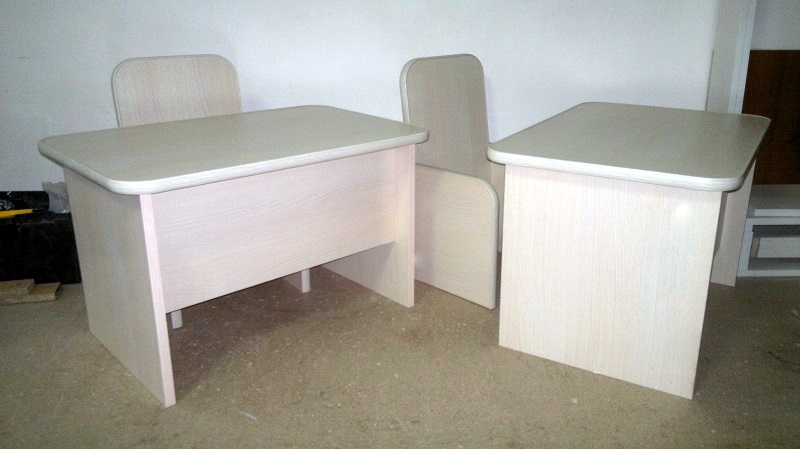
 Children's table with side shelves
An interesting solution, and perhaps the easiest option for self-made children's table. Two mini cabinets with shelves and top countertop. It is designed in size so that the child can work behind him, if necessary, you can make a high chair. Take a look at the step by step photos and make sure that it is really very simple.


https://i.expert-h.com/en/stol/detskij-stol-svoimi-rukami-800-foto-skhemy-poshagovye-instruktsii#sigFreeIdb498f89b1c
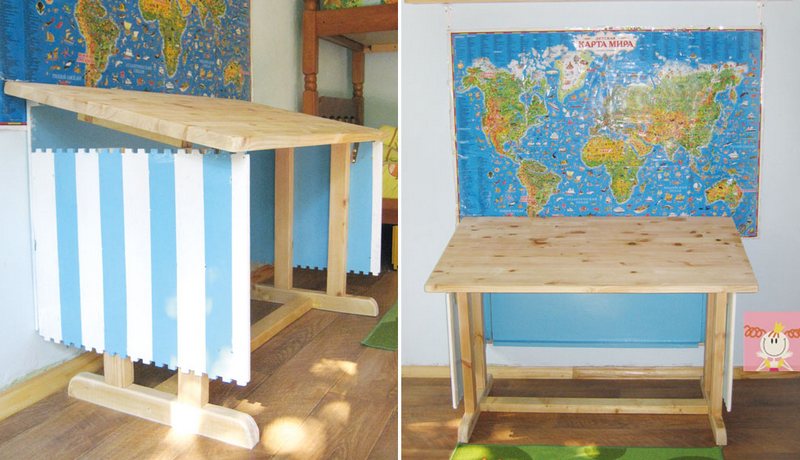
Do-it-yourself folding table in the nursery
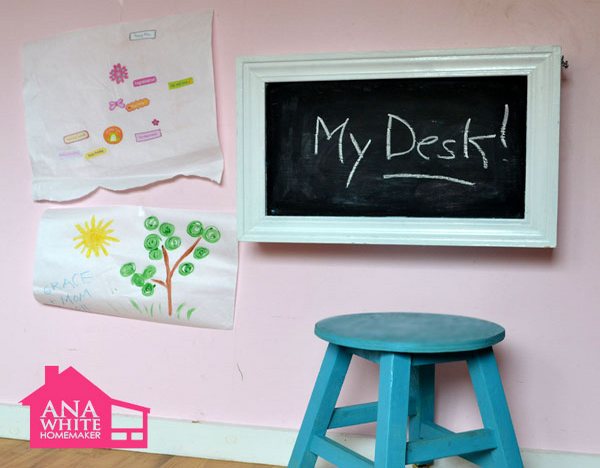
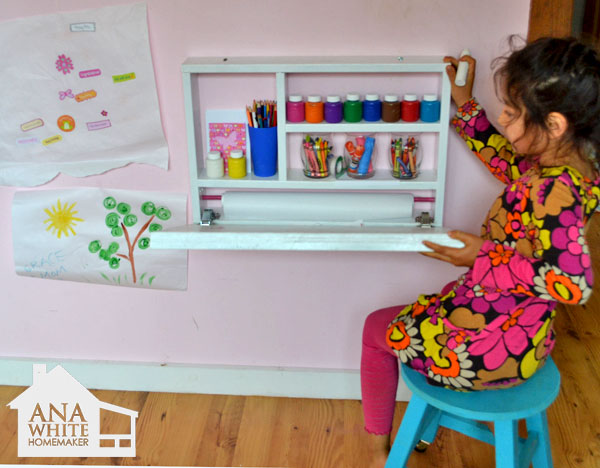
Folding table good solution for a small children's room. This table, when closed, does not take up space, and can also serve as a blackboard for playing school. In the open, it is ideal for children, you can write, draw, there is a place to store art supplies.


https://i.expert-h.com/en/stol/detskij-stol-svoimi-rukami-800-foto-skhemy-poshagovye-instruktsii#sigFreeId837a602006
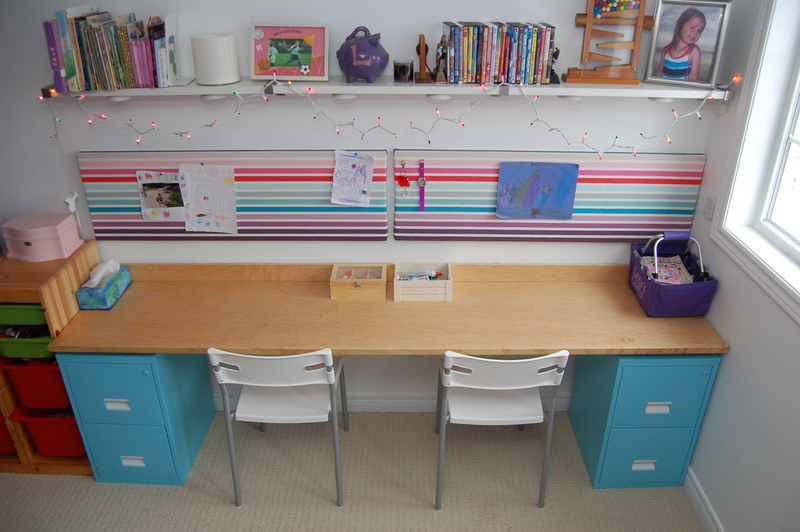 Long table with drawers
If space permits, you can make such a long table with drawers. Do not buy a similar design in the store. The main task, firmly fix the countertop to the wallbelow in the gallery with step by step photos you can see how this is done.
The rest of the details, in this case the iron bins of the bureau, can be bought, they serve for various purposes, including an additional support for the countertop.


https://i.expert-h.com/en/stol/detskij-stol-svoimi-rukami-800-foto-skhemy-poshagovye-instruktsii#sigFreeId51c612ac83
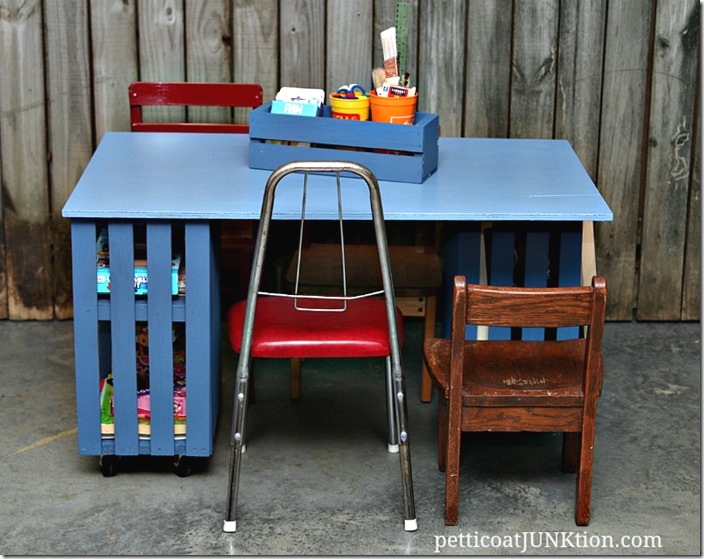
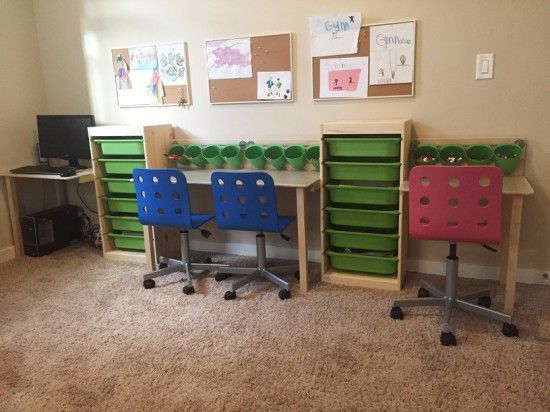 Do-it-yourself long gaming table
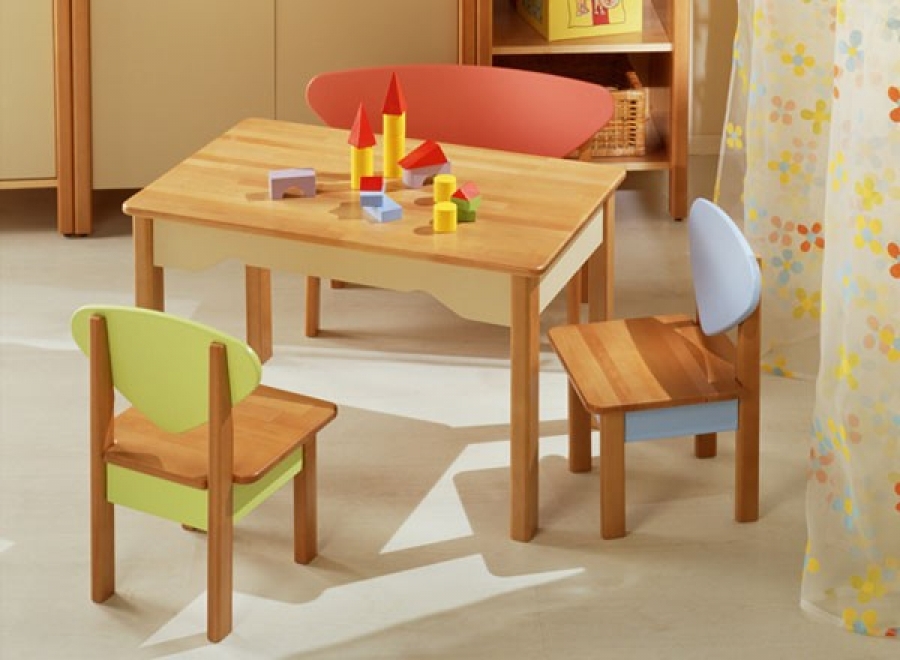
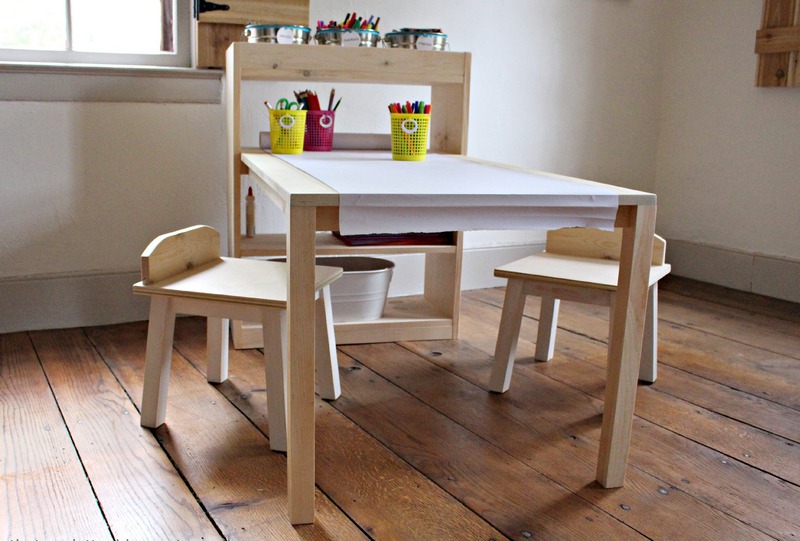
A table for three children from 3 to seven years. Convenient and simple design, not only for children, but also for parents. Side supports are small cabinets, here plastic shelves are used as shelves, you can replace them with wooden or cardboard. An interesting idea with buckets on the top shelf.


https://i.expert-h.com/en/stol/detskij-stol-svoimi-rukami-800-foto-skhemy-poshagovye-instruktsii#sigFreeId89a1237877
DIY table and chair
 Time passes, the children grow, and soon you begin to think that it is time to get a children's table, convenient and safe, at which the child will be able to study. Such a children's table and chair can be made with your own hands., the main task, to determine the size.
You can make a measurement in this way
- The distance from the heels to the knee, this will be the height of the legs of the stool.
- We place the child on the stack of books and measure the distance to the right angle in the knee.
- The height of the table is the distance from the floor to the child’s bent elbow.
- The height of the back of the chair, the distance from the floor to the neck.
Do not forget that children grow quickly, so for all sizes add two centimeters. Then we draw the assembly diagram, a professional drawing is not needed here, the main thing is that everything is clear with the dimensions and where which part is located. By the way, you can buy special acute angle silencers, good protection and look beautiful, moreover, you won’t have to bother with processing.


https://i.expert-h.com/en/stol/detskij-stol-svoimi-rukami-800-foto-skhemy-poshagovye-instruktsii#sigFreeIde6633307ce
Author Dmitry Rekun
 How to make a table and chairs for children with their own hands
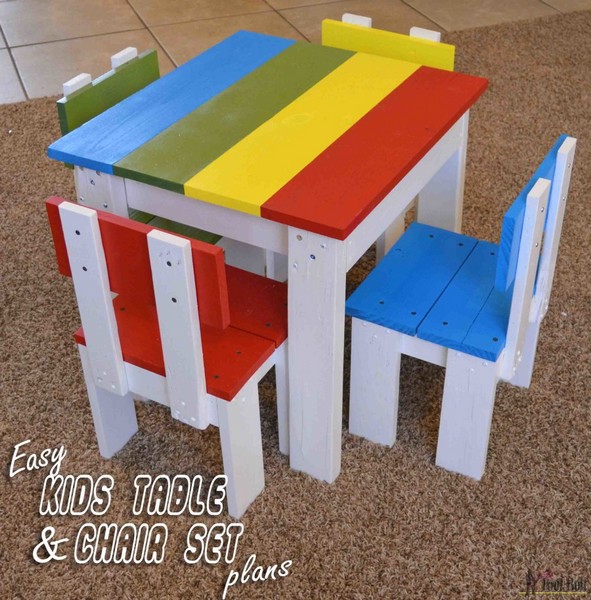
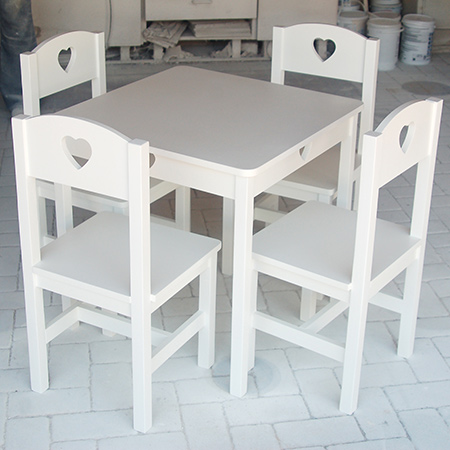
This kit is just perfect for the kids room. Below is a master class, how to make a table and chairs for children do it yourself. Although the kit is painted white, you can color it to whatever you like. The tabletops and corners of the chairs have rounded edges so that the kids do not accidentally stumble and get injured. Height suitable for children aged 2 to 8 years (depending on size). The chairs have beautifully carved hearts in the backs, which are repeated in an apron around the table. According to the author, construction is very strong and reliable. Below are step-by-step photos of the master class for making the kit.


https://i.expert-h.com/en/stol/detskij-stol-svoimi-rukami-800-foto-skhemy-poshagovye-instruktsii#sigFreeIdb1f582f8a0
 Cardboard table for a small child
This table for a small child made of cardboard and it won’t cost you anything. Lightweight, portable and great for small children. Your children will be able to write, draw and do their favorite activities while sitting comfortably on the couch. It will also help keep the sofa clean. This is a very simple but practical piece of furniture that you can make for your little ones. All you need is a few cardboard boxes, why throw them away, it's better to do something useful.


https://i.expert-h.com/en/stol/detskij-stol-svoimi-rukami-800-foto-skhemy-poshagovye-instruktsii#sigFreeId51f377469a
 Small picnic table
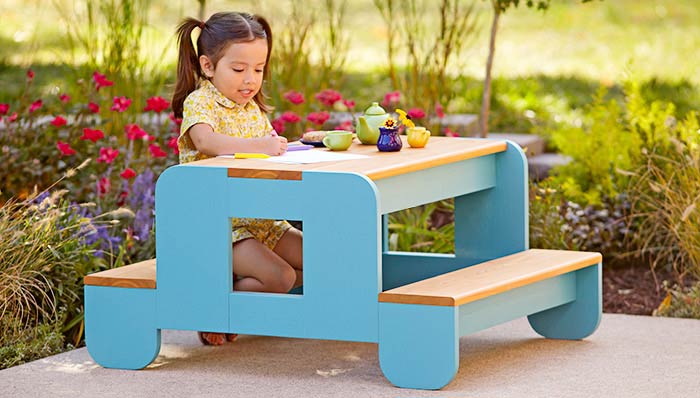
Such a picnic table can be made with your own hands in a couple of hours, children will surely be delighted. Parts can be ordered in furniture stores, or made independently, if possible. Assembling the frame is not difficult even for a novice master, look at the photo how it is done.


https://i.expert-h.com/en/stol/detskij-stol-svoimi-rukami-800-foto-skhemy-poshagovye-instruktsii#sigFreeId5ab9a6deee
 Large children's picnic table do-it-yourself
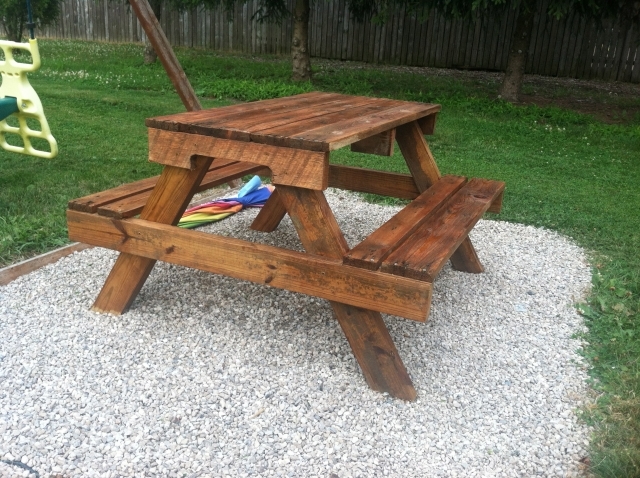
Who is interested in tables, this design is probably well known. Specifically, this model is designed for children, although the table is very strong, so that adults can also have a good time. Start by attaching the table mounts (shown in blue in the photo) as shown. Secure the countertop with screws by drilling holes in the lower supports. Remember to leave a small gap between the boards. The details highlighted in step-by-step photos in blue show the sequence of their fastening.


https://i.expert-h.com/en/stol/detskij-stol-svoimi-rukami-800-foto-skhemy-poshagovye-instruktsii#sigFreeIdc77e867c5e
 Children's picnic table made of pallets
One more option of a children's picnic table the same design, only made of pallets. The sizes can be used the same as indicated on the diagrams in the previous post, and the assembly order is shown in this gallery. Even an example is given of how you can color a countertop :)


https://i.expert-h.com/en/stol/detskij-stol-svoimi-rukami-800-foto-skhemy-poshagovye-instruktsii#sigFreeId5cf54ed7df
 Decorating a children's table with colored tape
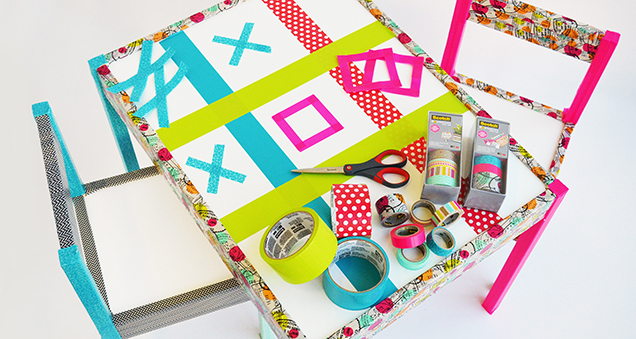
Of course there are many ways how to decorate a children's table, in this case, you can fantasize to the fullest. Same way decorating a children's table with colored tape I liked its originality and simplicity. See how you can make a tic-tac-toe field out of a countertop. Figures (tic tac toe) can be made of cardboard.


https://i.expert-h.com/en/stol/detskij-stol-svoimi-rukami-800-foto-skhemy-poshagovye-instruktsii#sigFreeId92869dc9ba
Children's touch table
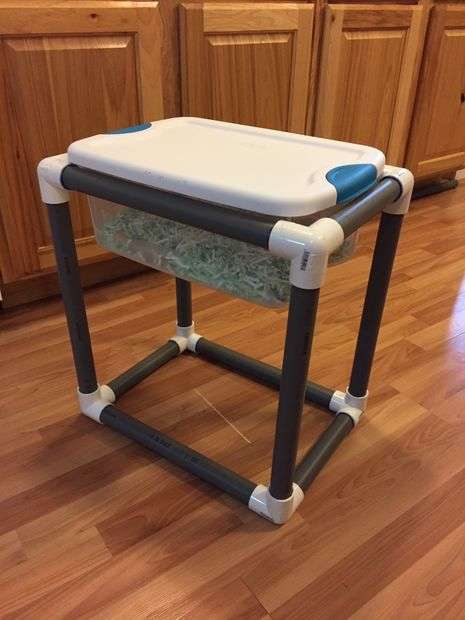 Children's touch tables (or sand and water tables) are an important component of early childhood development. They are considered mandatory to achieve the best indicators for the development of motor skills, knowledge of the color scheme and much more. The table presented here is portable and multifunctional, you can fill it with any material that you like, and just snap the lid on when the child finishes studying. Buying in a store can cost you a tidy amount, so It’s more profitable to make a children's touch table do-it-yourself from PVC pipes, at least for this project, provided by the author of this photo.
The most expensive component is a pipe cutter, so if you make several tables, you can save a decent amount.
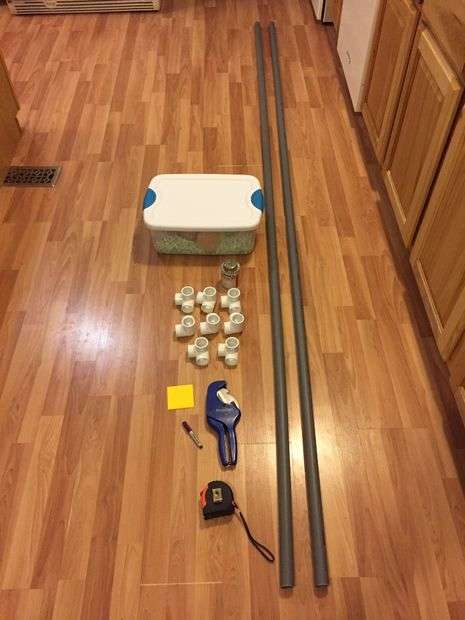 Shopping list:
- PVC pipe
- PVC connectors
- PVC pipe cutter
- Glue for plastic
Most stores sell 2 types: schedule 40 and 80 of white and gray. The price is almost the same, but the gray material, according to the instructions, is more durable. The author recommends buying a 1-inch size, large sizes just make the table more bulky, and it’s more difficult to cut the pipe.
- You will need 2 pipes3 meters each, regardless of the style of table you make. If you have difficulty transporting, you can cut the pipes in half at the store with a hand saw. It takes a lot of effort, but it's still better than buying a 1.5 meter pipe. Because they will charge you a little more.
- You will need 8-pin connectors. Be sure to buy 1 inch pieces to fit your pipe.
- Buy a ratchet tool kit. Face mills are very easy to use and make a clean cut.
- Buy PVC glue
 Find a good plastic container. An ideal bath should be:
- rectangular, not something with sharp edges. It should fit well into the space you make.
- Durable. Every child will check this quality of the container.
- Transparent. The ability to see through the bottom adds extra features to the game.
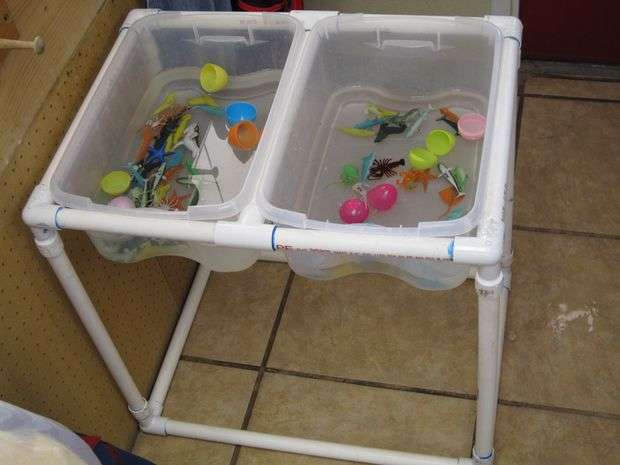
- If you are making a double table, buy two bathtubs.
In addition to what you bought, you will need:
- Notebook
- Measuring tape
- marker
- Paper towels
Highlights to watch out for
- Measure the pipe. Unscrew the tube on each side without a cap and measure from the center of one pipe to the center of the other. Record this size. Now write this number! Pay attention to the photo, the ends of the pipes lie on your knees, this is to measure from the right place, so that the pipes rest on the bath. Then turn the bath a quarter turn and measure again. Do not forget to write this size!
- Mark one cut at a time, because you never know when you accidentally ruin something, and you will need to cut a new piece. Do not worry if you need to redo something, because there is still a large piece of pipe in stock.
- Make the first cut, then three more, as in the photo. When you're done, you will have two channels for the two sizes you recorded. The pipes will be too long, but everything is in order.
- Collect 4 pipes, this is called a “dry fit” because there is no glue yet. Fit tightly, this will provide a good fit when you go to the gluing step. Pay attention to the order in which the author collects the details.
- Now measure how much you need to trim. Measure from the inside edge of the pipe to the edge of the tub. This is what you need to cut the pipes. Be sure to write it down! When cutting off excess pipe, be sure to save the leftovers.
- Another dry landing. This time the hopper should sit nicely inside the pipes.
- Cut 4 more pipes. Disassemble the dry fit, then use these pipes as a template to trim another set of 4 pipes: 2 long and 2 short. When finished, you will have only 8 cut pipes, or 11 for a double bath.
- Then assemble two rectangles from freshly cut scraps.
- Measure and cut 4 legs
- If you make a touch table for a specific child, measure the distance from the floor to the armpit, and take a couple of centimeters. This is the size of how to cut the pipes.
Time to glue! This is where paper towels come in handy. The glue has an applicator (foamy little ball) attached to the inside of the lid. Use it to cover both the end of the pipe and the inside of the connector. Close the lid, the glue dries very quickly. Quickly insert the tube into the connector until the glue has dried, and do not worry if you do not get a perfect joint. There will be no water flowing through these pipes, you just need to get a sturdy structure when the children rest on it. - Immediately after tightly insert the tube into the connector, wipe off any excess glue from the seam.
Recommended Build Order
Following the specified assembly order, you can assemble without interruption, without waiting for the glue to dry.
- Short pipe to connector A
- Long pipe to connector B
- Second long pipe to connector C
- Same thing on connector D
Immediately after gluing on the second connector, while the glue is still wet, press the connectors on a flat surface to align. Rotate and firmly press the other sides of the connectors. Now everything is smooth and beautiful.
- Add a short pipe to connector C
- Glue the same short pipe to connector B
- Complete the rectangle
Immediately after assembling the rectangle, before applying the adhesive, lay it on a flat surface to align the new connection with those that are already installed.
Repeat the entire process of assembling the rectangle to make the second rectangle.
If you want the touch table to grow with your child, the legs can not be glued, so they will sit tightly in the connectors. Install the bathtub, fill it with something funny (shredded paper in the photo), and your table is complete!


https://i.expert-h.com/en/stol/detskij-stol-svoimi-rukami-800-foto-skhemy-poshagovye-instruktsii#sigFreeId5786b2dd98
Schemes and drawings of children's tables
-

-
-
-
-
-
-
-
-
-
-
-
-
-
-
-
-
-
-
-
-
-
-
-
-
-
-
-
-
View the embedded image gallery online at:
https://i.expert-h.com/en/stol/detskij-stol-svoimi-rukami-800-foto-skhemy-poshagovye-instruktsii#sigFreeIdb0b59ddba9


https://i.expert-h.com/en/stol/detskij-stol-svoimi-rukami-800-foto-skhemy-poshagovye-instruktsii#sigFreeIdb0b59ddba9
Children's tables 100 photos
-
-
-
-
-
-
-
-
-
-
-
-
-
-
-
-
-
-
-
-
-
-
-
-
-
-
-
-
-
-
-
-
-
-
-
-
-
-
-
-
-
-
-
-
-
-
-
-
-
-
-
-
-
-
-
-
-
-
-
-
-
-
-
-
-
-
-
-
-
-
-
-
-
-
-
-
-
-
-
-
-
-
-
-
-
-
-
-
-
-
-
-
-
-
-
-
-
-
-
-
-
-
-
-
-
View the embedded image gallery online at:
https://i.expert-h.com/en/stol/detskij-stol-svoimi-rukami-800-foto-skhemy-poshagovye-instruktsii#sigFreeId0e1c471faf
DIY desk


https://i.expert-h.com/en/stol/detskij-stol-svoimi-rukami-800-foto-skhemy-poshagovye-instruktsii#sigFreeId0e1c471faf
 How to make a children's desk with your own hands
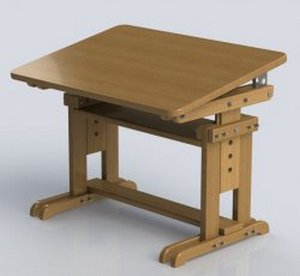
The workplace of a student is a serious matter. There are many nuances that must be considered so that the child feels comfortable and does not harm his health. You you can make a children's desk with your own handslike this versatile model with adjustable options. Firstly a little sekonomiteand then, who apart from parents knows best the individual characteristics of their child. The photo in the gallery shows the diagrams, manufacturing order, front and side views.


https://i.expert-h.com/en/stol/detskij-stol-svoimi-rukami-800-foto-skhemy-poshagovye-instruktsii#sigFreeId5cff4ca7b4
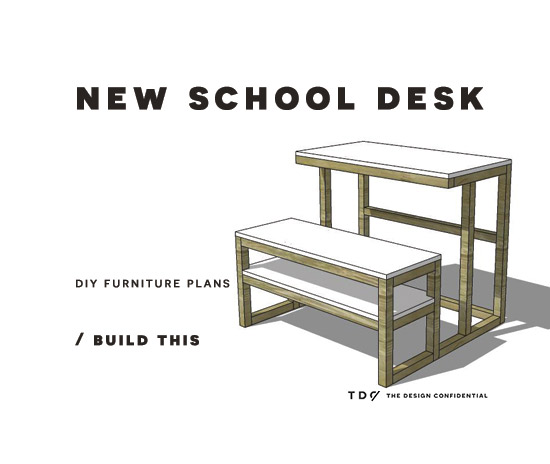 Children's desk with a bench
Like this you can easily make a simple school desk with a bench with your own hands. True, no adjustments are provided here, but this is offset by the ease of manufacture. The diagram is shown in step-by-step photos, the dimensions are in inches, but you can easily translate their centimeters, multiplying by 2.54.


https://i.expert-h.com/en/stol/detskij-stol-svoimi-rukami-800-foto-skhemy-poshagovye-instruktsii#sigFreeIdd314ca4c7a
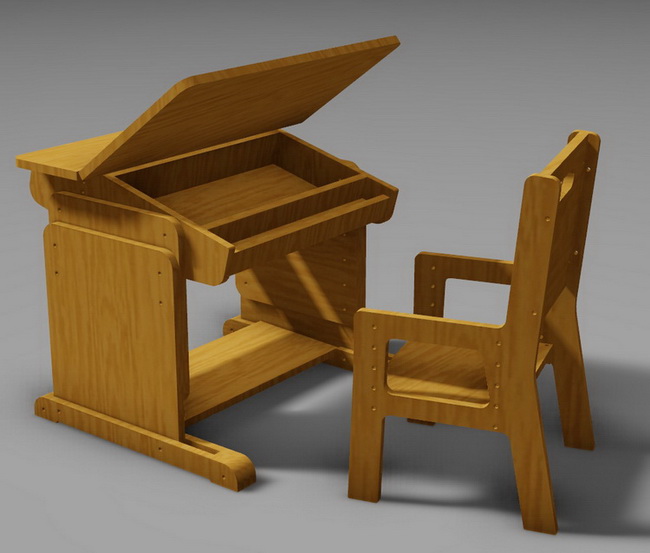
 School desk with drawer
Initially, this model of an adult table, like a bureau. But the author suggested use the model as a school desk, slightly resizing. In my opinion, it turned out not bad, such a stylish desk and can perfectly serve as a school desk. It is important to deploy 3mm hidden guide holes when connecting sections to each other. You will also need to reduce the angle on both side sections. Height of backrest 210mm and front side 102mm. Draw a line from the back wall to the front and saw off with a jigsaw.


https://i.expert-h.com/en/stol/detskij-stol-svoimi-rukami-800-foto-skhemy-poshagovye-instruktsii#sigFreeIdee8dcd499e
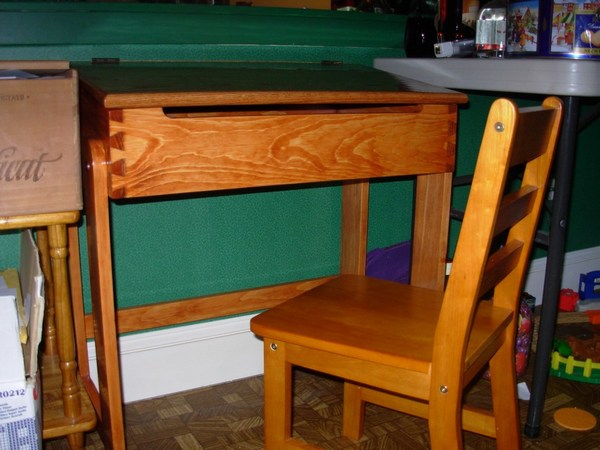
Do-it-yourself home school desk
 You can consider this home desk optionsimple but tasteful. According to the author, this work of joinery craftsmanship (by the way, made of natural wood) took eight days and only 1,500 rubles. Compare with the store price. See step-by-step photos below, as you can see, it’s quite possible to do everything yourself.


https://i.expert-h.com/en/stol/detskij-stol-svoimi-rukami-800-foto-skhemy-poshagovye-instruktsii#sigFreeId4b64b550ff
 Do-it-yourself desk and plywood highchair
The growing school desk has a lot of advantages, the main, of course, taking into account the age and physiological characteristics of the child, which allows you to maintain the posture and vision of the growing student. Well, the design and dimensions are understandable, it saves precious meters and will look great in any children's room. Here is a growing school desk and a stool made of plywood, which you can do yourself. OptiNest can be used to create curved parts. With this program, you can significantly save materials.


https://i.expert-h.com/en/stol/detskij-stol-svoimi-rukami-800-foto-skhemy-poshagovye-instruktsii#sigFreeId4ed6d25f60
50 photos of children's desks


https://i.expert-h.com/en/stol/detskij-stol-svoimi-rukami-800-foto-skhemy-poshagovye-instruktsii#sigFreeIddfcc530d48
School desk
 Classic desk for a student
Offered version of a simple desk for a student in a classic style. Although today many people prefer more modern options, with various mechanisms and devices, this is a matter of taste. But classics are classics, especially since a person with minimal experience in carpentry can make such a table. Step-by-step photos in dimensional schemes will help you.


https://i.expert-h.com/en/stol/detskij-stol-svoimi-rukami-800-foto-skhemy-poshagovye-instruktsii#sigFreeId6361a24bdf
 DIY kids table office
Interesting option of a small table for children, Suitable for a very small and beginner student. This model is made of oak, but it does not matter much, you can use any material. Also, the connections, the dovetail is used here, of course it is beautiful, but to fix it on simple connections.


https://i.expert-h.com/en/stol/detskij-stol-svoimi-rukami-800-foto-skhemy-poshagovye-instruktsii#sigFreeId1db48bf409
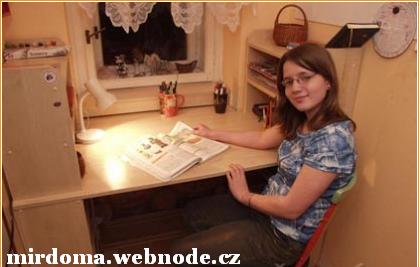 Desk for a student in a small room
What does a teenager need? Let your little place, your little table, but your own. Moreover, not every apartment can have a large table. It offers the option of a small workplace for the student, equipped under the window. A cozy desk for a student in a small room, with shelves and everything necessary for normal operation. How to do it yourself, look at the step by step photos.


https://i.expert-h.com/en/stol/detskij-stol-svoimi-rukami-800-foto-skhemy-poshagovye-instruktsii#sigFreeId1b5b1e2a79
Photo by ceskykutil.cz
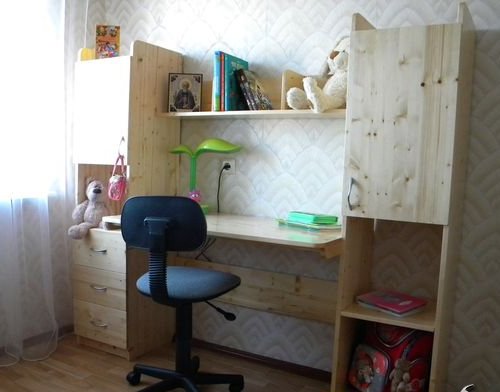 DIY large desk
If there is room, you can do do-it-yourself large desk. The model is made of furniture panels, inexpensive and convenient. The design consists of two blocks with a countertop and shelves fixed between them. Note, the tabletop protrudes a little, so you need to strengthen itb, children nevertheless, they can climb onto the table. See assembly procedure below for step-by-step photos.


https://i.expert-h.com/en/stol/detskij-stol-svoimi-rukami-800-foto-skhemy-poshagovye-instruktsii#sigFreeIddfb9ac4337
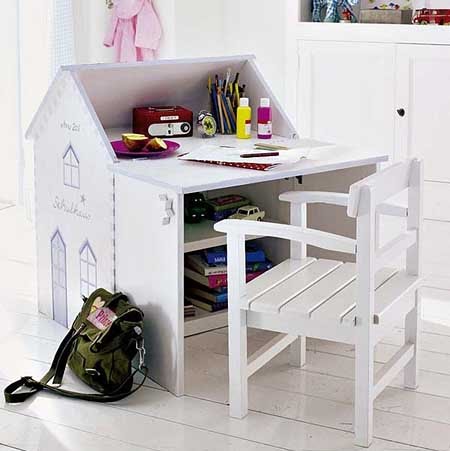 Original do-it-yourself desk for a student
An original table is suitable for both five-year-old kids and elementary school students. A very convenient and functional design in the form of a house fits perfectly into the interior of a children's room, practically does not take up space when assembled. During operation, the folding tabletop is fixed on open doors, on spacious shelves you can store books and notebooks, and in the upper office there are accessories for writing and drawing.


https://i.expert-h.com/en/stol/detskij-stol-svoimi-rukami-800-foto-skhemy-poshagovye-instruktsii # sigFreeIde905fd396e
 DIY do-it-yourself chair
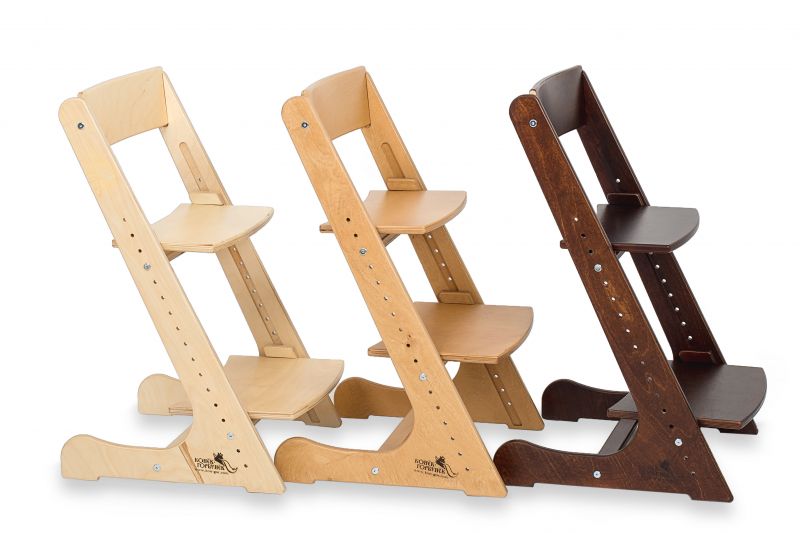
Perhaps, that the child should have correct posture, parents do not need to be reminded once again. Office chair with adjustments for a student is not suitable, the best solution is make a growing chair with your own hands. There are many options, you can see by looking on the Internet. but step-by-step instructions, unfortunately, are much smaller than the models presented. Maybe you will like this option, in the photo. The design at first glance is simple, but there are many nuances. For the design to be solid and stable, it is necessary correctly calculate the ratio of the location and size of parts. A diagram of the size you need can be found on the Internet, look at this link yadi.sk/d/-nS9on3WmbxdF, and see the assembly order in step-by-step photographs.


https://i.expert-h.com/en/stol/detskij-stol-svoimi-rukami-800-foto-skhemy-poshagovye-instruktsii#sigFreeIdbf1bf96cc6
 How to make a desk from drawers
How do you like this project? Once again we are convinced how wooden boxes and pallets are a useful thing. Do-it-yourself desk made of drawers, why is it worse than store furniture? There are shelves for storing books, you can make another small stand for stationery, cheap and cheerful, and looks pretty stylish.
And what you need? Empty wooden packaging, and wheels for mobility.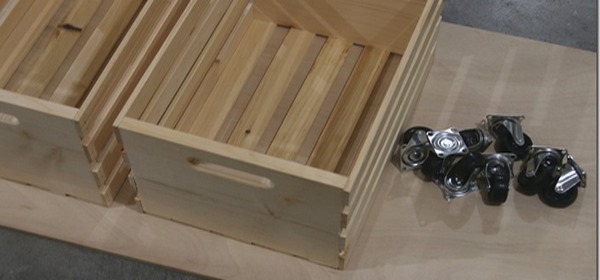
This is how it is done.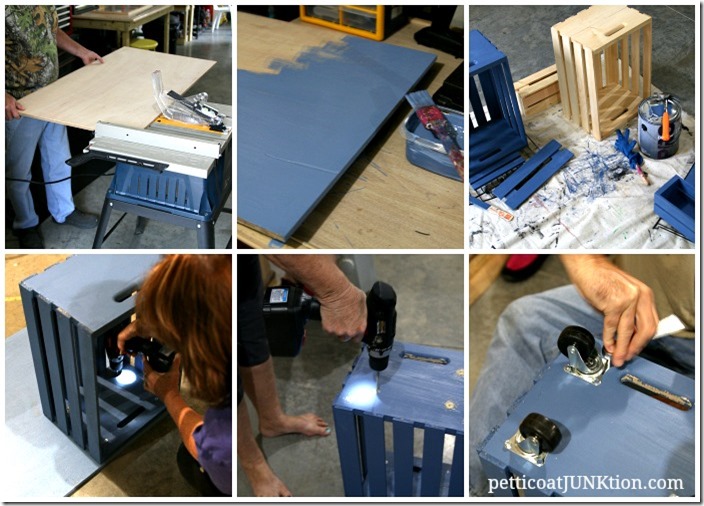
Very convenient, you can put a picture and have lunch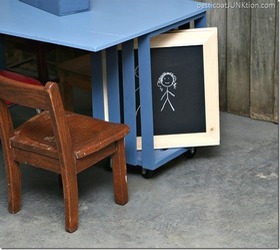
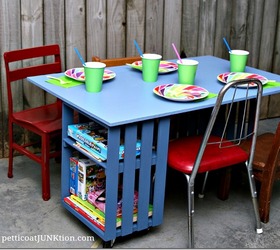
Posted by Katie Owen
Schemes and drawings of desks for a student


https://i.expert-h.com/en/stol/detskij-stol-svoimi-rukami-800-foto-skhemy-poshagovye-instruktsii#sigFreeId73bd7f6881
200 photos of desks for a student


https://i.expert-h.com/en/stol/detskij-stol-svoimi-rukami-800-foto-skhemy-poshagovye-instruktsii#sigFreeId48c49d34f5
Hello, I am the author of this article, so I look forward to asking questions for this article in the comments below, I will answer all !!!
If you have questions on another topic, ask them on our forum, we will answer you
- Two baskets of paper in 5 minutes (Master class)
- How to make a simple and compact table for a milling cutter from plywood
- How to make a soft headboard tile (Instructions + step by step photos)
- Cinder block benches: a convenient bench in 55 minutes
- How to make a bed with a niche: saving space (Master class)