Do-it-yourself corner shelf 230 photos: in the bathroom, in the kitchen or in the hallway.
 Corner shelf made of wood
Do-it-yourself corner shoe rack in the hallway.
 Let's see how to make a simple wooden corner shelf with rounded shelves to your apartment. This shelf is suitable for books, magazines, for shoes in the hallway, for soap accessories in the bathroom, for tools in the garage and also for kitchen utensils in the kitchen.


https://i.expert-h.com/en/polki/uglovaya-polka-svoimi-rukami-foto#sigFreeIdf90831c69f
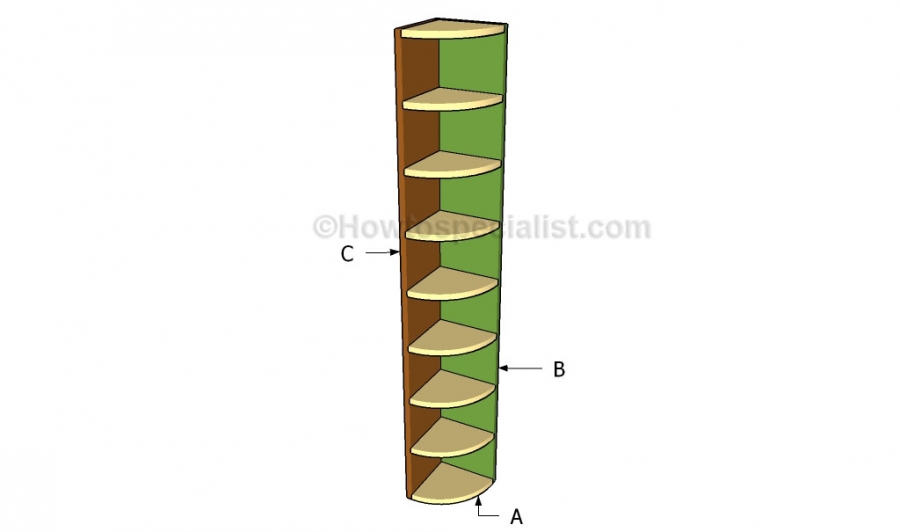
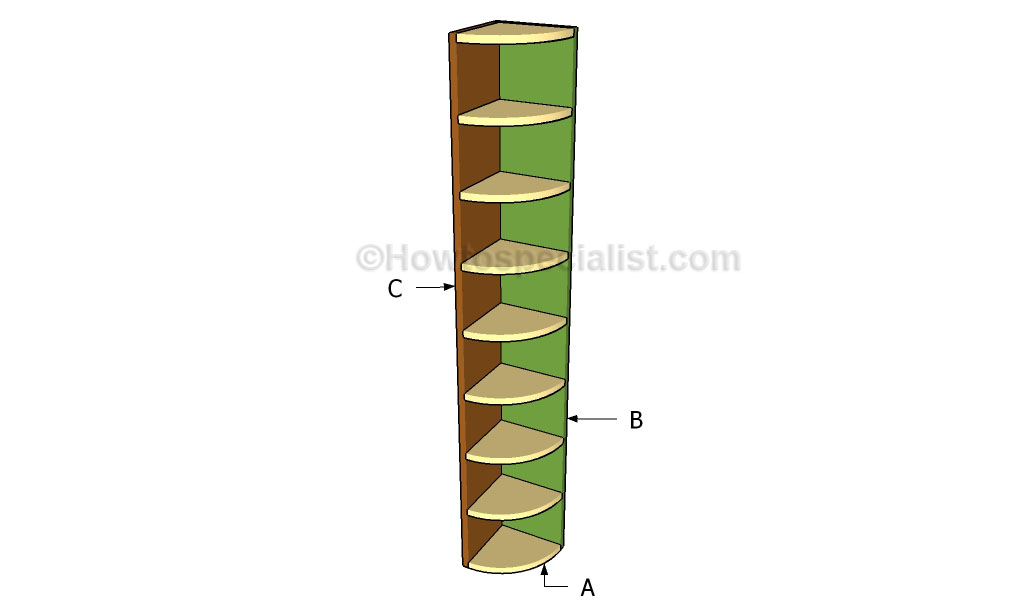
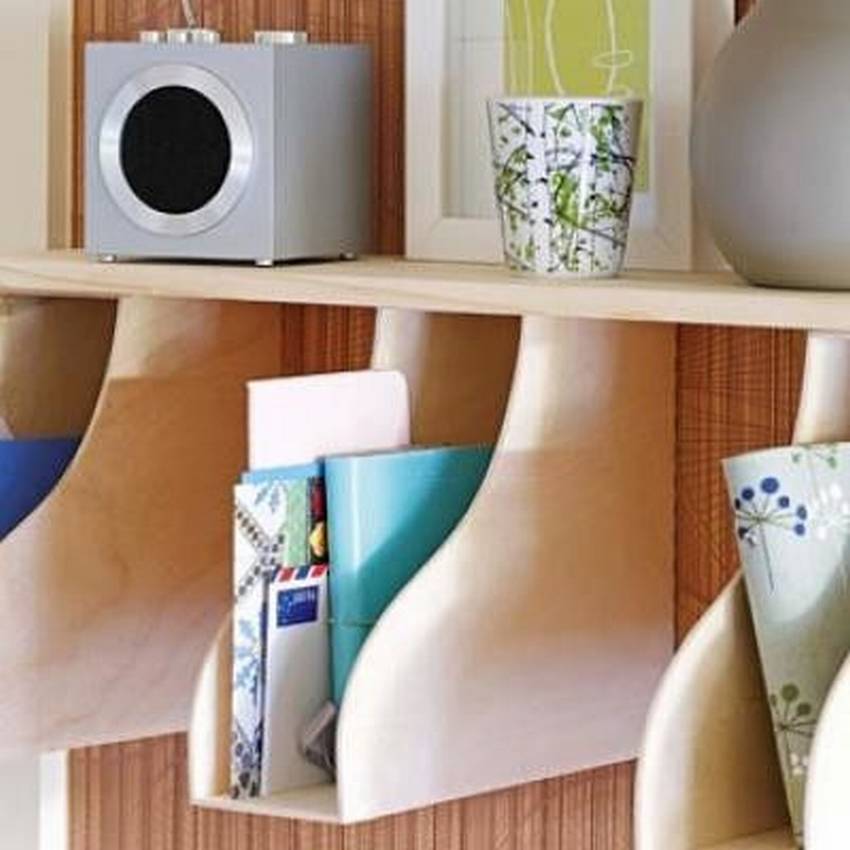
Corner bookshelf floor (cabinet)
(do it yourself in 2 hours !!! drawings and step-by-step photos of manufacturing)
 The author claims that he managed to make all the details of the shelf and assemble the entire structure in 2 hours. The rest of the time was spent on painting, varnishing and drying.
The very design of such a shelf of the shelf suggests that no nails will be needed to make it. Importantso that all the shelves sit very tightly in their places, so that the shelf does not swing. If the connecting holes have failed and some shelves are loose in their places, then the shelves in these places can be screwed on, or, as the author advises, just drive pieces and pieces of wood into the grooves.
We also recommend that you do not forget to screw the shelf to the wall so that it does not fall inadvertently)))


https://i.expert-h.com/en/polki/uglovaya-polka-svoimi-rukami-foto#sigFreeId03d06dd766
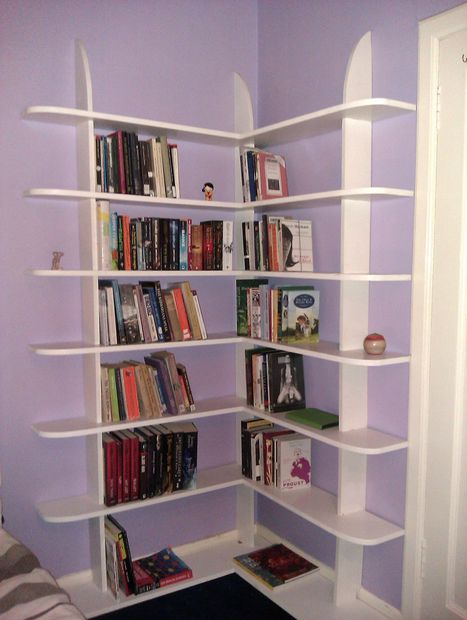
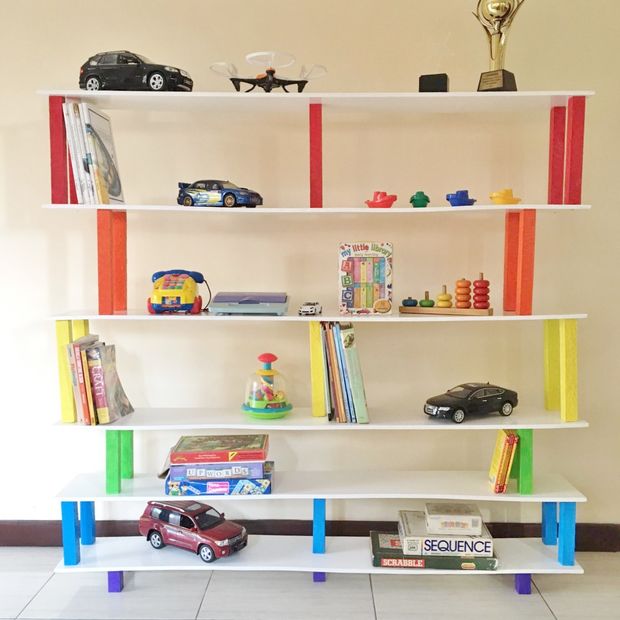
Corner Bookshelf for children.
Step-by-step photo of manufacture
 Let's look at how you can make such a corner bookshelf for your children’s room with your own hands. The author of the photo took 10 days to make this shelf. A day for each level, for sawing (he sawed everything at once), painting, installation. The levels are kept with glue, cox glue for 24 hours. Please note that when installing the shelf, the corner part of the plinth is removed so that the shelf fits snugly against the wall. The author also attached the top of the shelf to the wall for stability (this is not shown in the photo). See step-by-step photos of the master class below.


https://i.expert-h.com/en/polki/uglovaya-polka-svoimi-rukami-foto#sigFreeId7915e76601
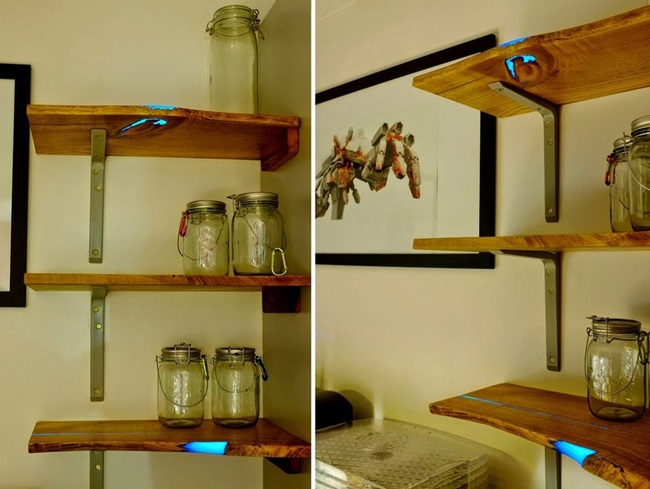
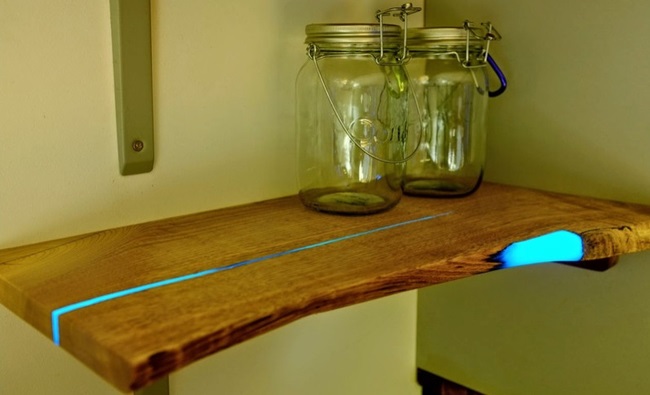
Corner bookshelf LED backlit
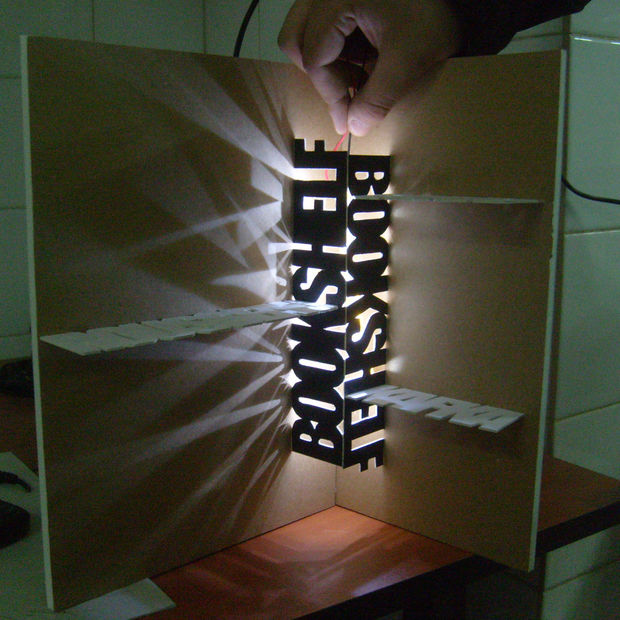 Such a shelf will create a cozy and welcoming atmosphere in your room.
You can cut the shelves yourself, or you can simply order at the nearest furniture factory. Just enter in the search the query "sawed chipboard by the size of the customer" and Yandex will give you those companies that are engaged in this. Just say what you want and they will cut everything for you in the best possible way, it will not cost much. Cheaper than your time for drinking!
BUT, we advise you to responsibly approach the choice of FONT, it should be so bold that the letters have as empty space as possible - so beautiful.
After you fasten the central boards perpendicularly, it will be possible to determine the markings for the LED strip so that the light is distributed evenly. This is nothing complicated, just do not miss this moment.
The central boards (angular) should be painted only on the outside, so that the inside retains its reflectivity.
Step-by-step photo of manufacture:


https://i.expert-h.com/en/polki/uglovaya-polka-svoimi-rukami-foto#sigFreeIdd1d88a59cb
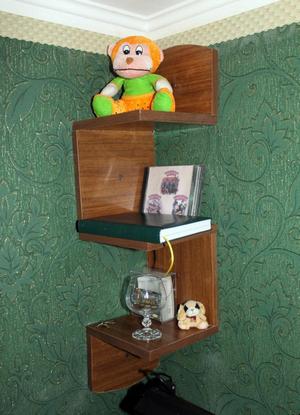
Wooden corner shelf in a semicircle
To make such a shelf with your own hands, you need a milling machine and a piece of MDF.
To give aesthetic, we recommend that you stick special tape on the ends, this is done with an iron)))
Step-by-step photo of manufacture:


https://i.expert-h.com/en/polki/uglovaya-polka-svoimi-rukami-foto#sigFreeIdde06219ec1
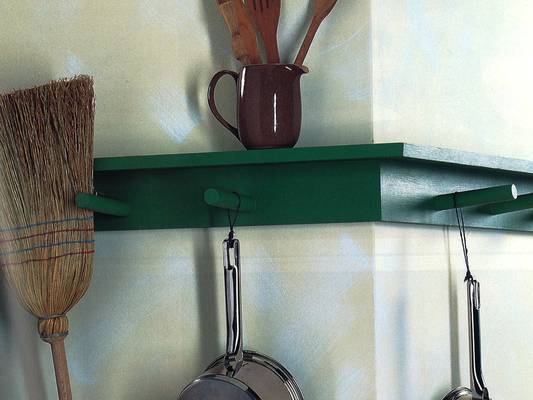
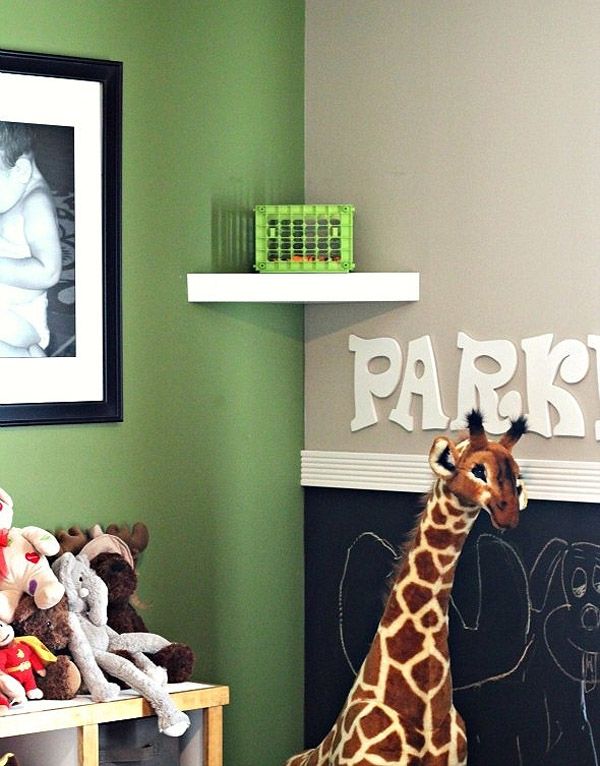
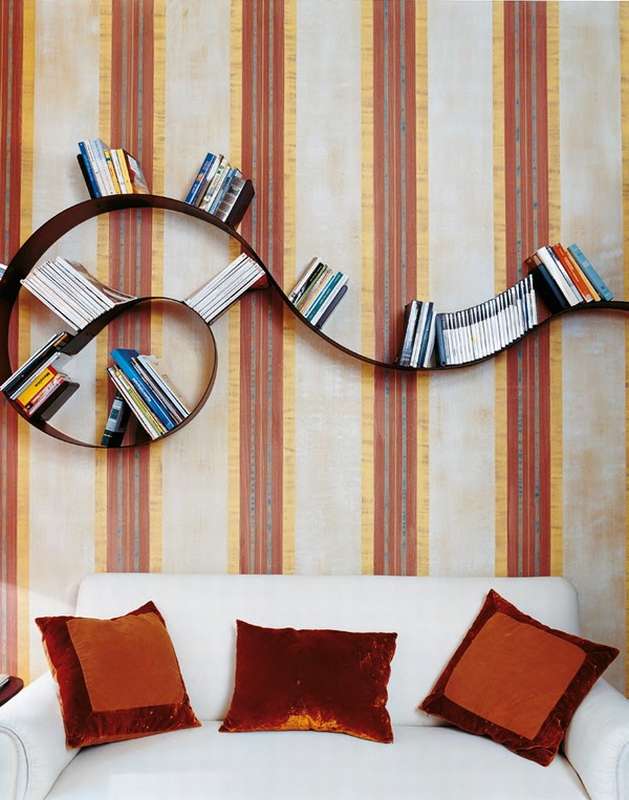
 Corner "floating" shelves on the wall
Look at an example of a simple hinged shelf at an angle (“floating” or “flying”, as they are called abroad), which you can do with your own hands.
"These shelves are called soaring because you can't see the mounts."
See below for step-by-step photos of the master class


https://i.expert-h.com/en/polki/uglovaya-polka-svoimi-rukami-foto#sigFreeId711d3f8871
From a wooden drive)))
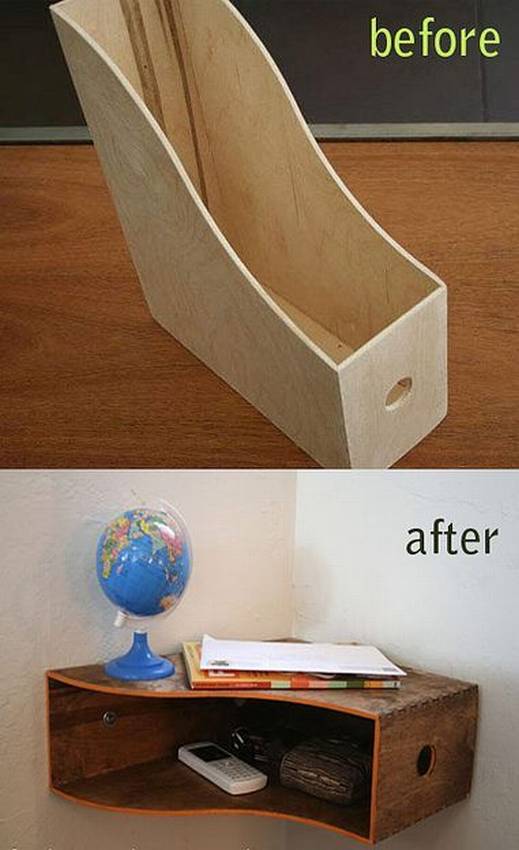
A very simple shelf, you only need the drive itself and a drill with dowels. Look at the options)))
Glowing !!! wooden shelf
Author idea designer Matt Brown
 To make such a magical corner luminous shelf with your own hands, you need embossed boards (with knots, notches, cracks of an unusual shape) and a mixture of polyester resins and fluorescent, luminescent pigments, you can buy on Ali.aliexpress.com/w/wholesale-pigment- resin.html
 Pour the mixture into the cracks and seal the cracks with tape. When pouring, use the level so that the shelf is completely horizontal when pouring. Also, when filling, make sure that the mixture does not spill over the edges of the cracks.
The next step is grinding. When everything dries, you can remove the tape and gently grind the surface.
Having finished grinding, cover the shelf with varnish-fixer in 8-9 layers
In the dark, the shelf will shine!


https://i.expert-h.com/en/polki/uglovaya-polka-svoimi-rukami-foto#sigFreeId22ae75cb13
If you distribute shelves with such luminous elements throughout the room, you get a beautiful planetarium.
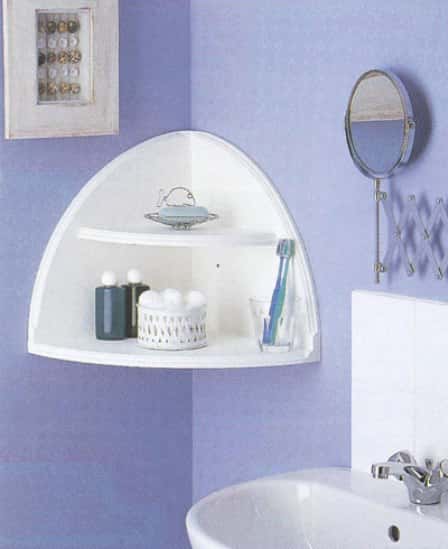
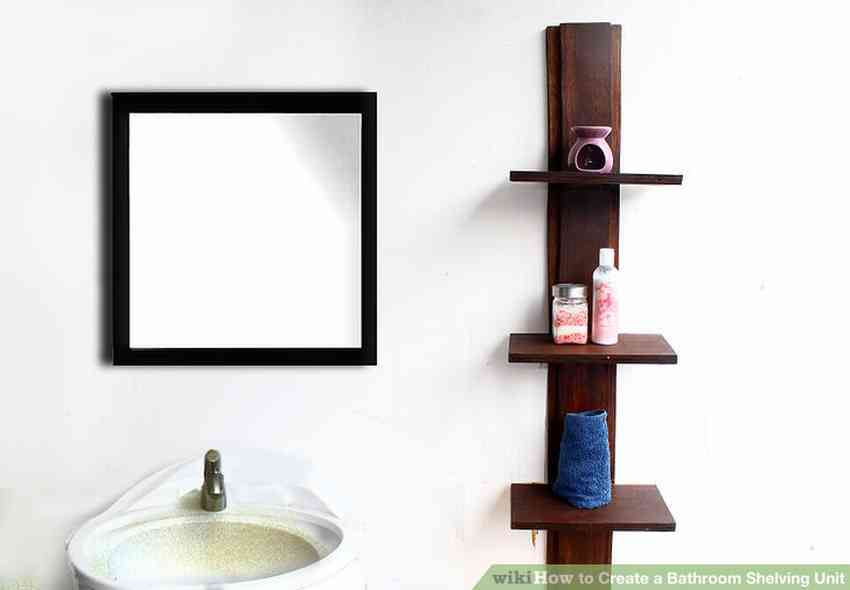
Plexiglass bathroom corner shelf
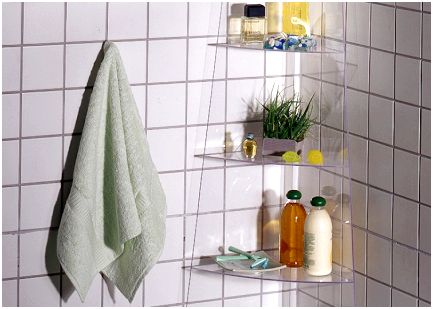
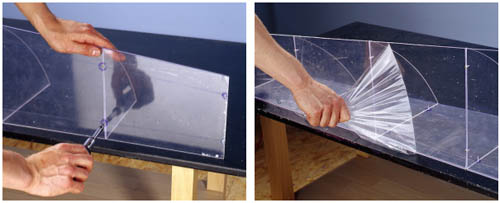
Constant humidity creates certain problems with the selection of furniture for the bathroom. One suitable option make a shelf for a bathroom from plexiglassIt is easy to process and most importantly, it is not afraid of moisture. Work will take several hours, but the shelf will last for years.
So, you need plexiglass, 2mm screws 24 pcs and a jigsaw. First, prepare the template and make markup on plexiglass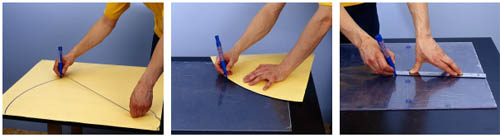
From plexiglass we cut out the shelves in size with a jigsaw and fasten to a plastic base.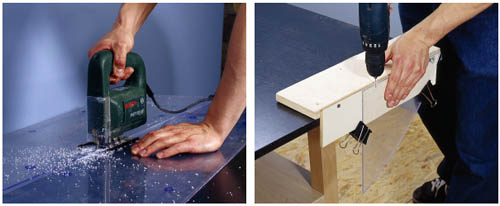
We fasten the structure and remove the protective film. The shelf is ready.
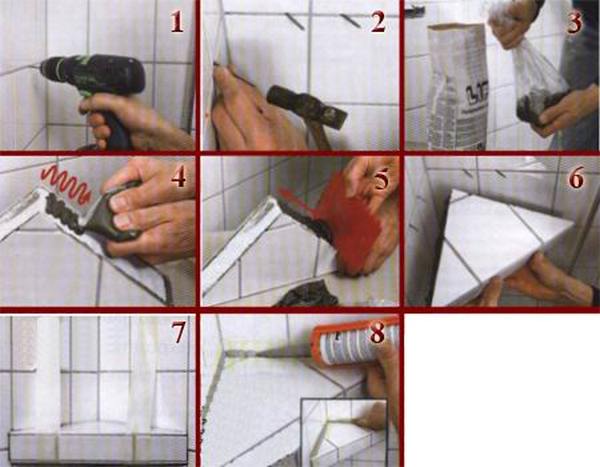
Corner shelf from building panel
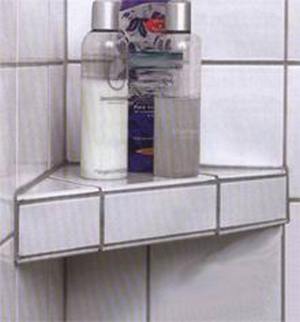
This corner shelf from the construction panel is best done during repair. For its manufacture, all that is needed is a couple of tiles, a section of a building panel and a mass for stitching. If you use the same material as for the wall, the shelf will look very harmonious.
Necessary measure the surface carefully, cut out the base and cut the tiles. Then we apply the solution and lay the tile.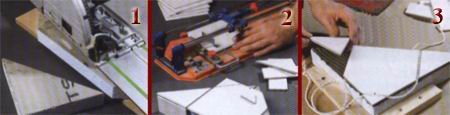 To secure the shelf, you must:
- hammer 4 nails
- drill 4 holes for dowels
- prepare a solution, it is convenient to do this in a plastic bag, there will be less dust;
- at the nails we bite off the hats and drive them into the dowel;
- apply a solution;
- we put the shelf on the nails;
- fasten with tape until the solution solidifies;
- we close the seams between the wall and the shelf with building silicone.
Of course, various accessories can be viewed in any furniture catalog, but this collection contains photos of bathroom shelves, which Rdo it yourself.


https://i.expert-h.com/en/polki/uglovaya-polka-svoimi-rukami-foto#sigFreeId8c49c63a1b
Small corner shelf in the kitchen
 If you have a free corner in the kitchen, you can make such a small shelf with your own hands. Vintage version, now no one exactly has this, accidentally saw on one Czech site. Not to say that it is very comfortable, but it looks unusual and simple, like doors. The site even includes step-by-step instructions, although so everything is clear. But you can see how our Czech colleagues make such shelves.


https://i.expert-h.com/en/polki/uglovaya-polka-svoimi-rukami-foto#sigFreeId9c5594a132
In the kitchen, there is usually little free space, but hanging cabinets are not always convenient to place in the corner, therefore, an extra shelf never hurts. You can take some ideas from this selection.


https://i.expert-h.com/en/polki/uglovaya-polka-svoimi-rukami-foto#sigFreeIda3e552aee9
 Do-it-yourself corner shelf in the hallway
This design is well suited if there is free space in the corner, do-it-yourself corner shelf in the hallway will solve the problem of small space well. In any case, it is better than putting some kind of bedside table, firstly, it should be very narrow, and secondly, the shelf is much more practical.
This is one of the types of “floating” shelves, that is, with hidden fixtures. The shelf turns out to be with a double bottom, where the mount is hidden. Step-by-step photographs show how this is done.


https://i.expert-h.com/en/polki/uglovaya-polka-svoimi-rukami-foto#sigFreeId4b559acec8
In this gallery you can see the options for shelves in the hallway, which you can do yourself.


https://i.expert-h.com/en/polki/uglovaya-polka-svoimi-rukami-foto#sigFreeIde0679aafe5
 Corner shelf in the nursery in 7 minutes
Here is such a small corner shelf in the nursery can be done in seven minutesIn any case, according to the author of these step-by-step photos. Judging by the pictures, it really will not take much time, of course, if there are materials and tools.


https://i.expert-h.com/en/polki/uglovaya-polka-svoimi-rukami-foto#sigFreeId51a31eee70
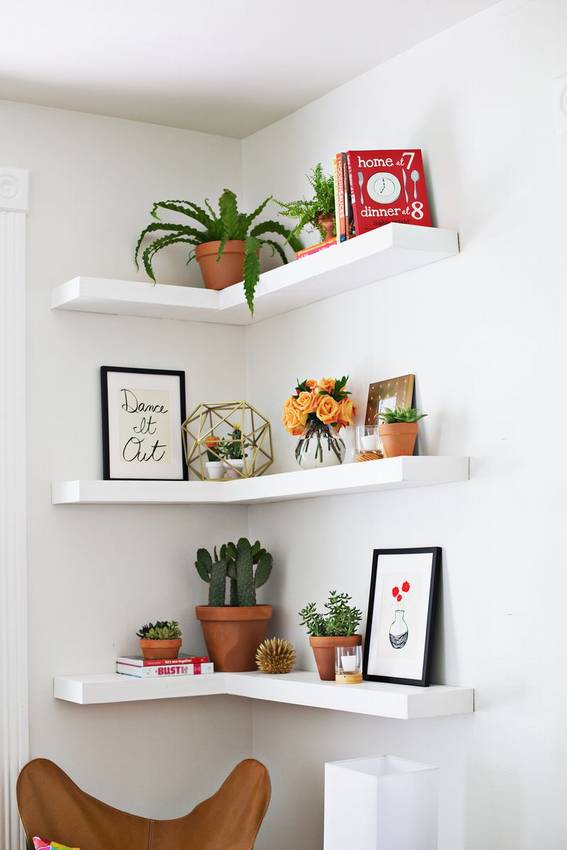
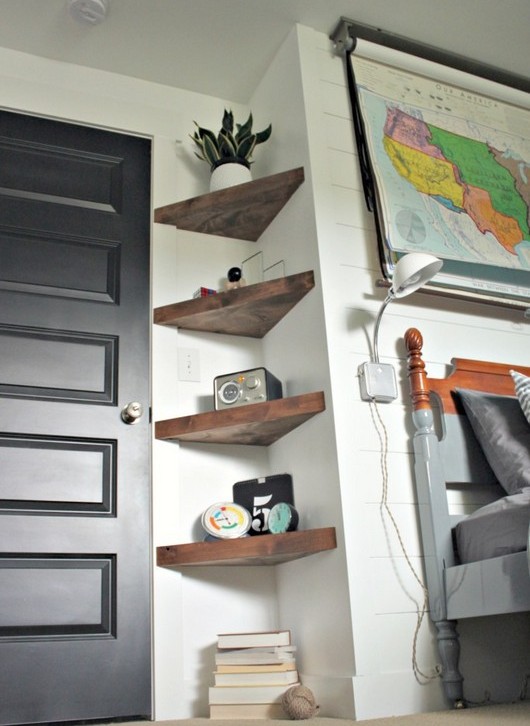
 Do-it-yourself corner wall shelf
Corner shelves look good in the living roomOf course, depending on the interior. They are made of different materials, in this case we use a furniture plate. To work, you need a drawing, you can sketch out the simplest scheme for yourself, as in the photo below.
Further, the entire manufacturing process can be seen in step by step photos.. In principle, everything is simple.
- Do the markup
- Saw the board in size
- Drilling holes for komfirmaty
- Then we drill holes in the wall under the dowels;
- We clean the edges and glue the edge tape using a heated iron;
- We assemble the shelf according to the scheme.
- Once again we try on a shelf against the wall, drive in the dowels.
- Fasten the shelf to the wall.
- We fasten hats of fasteners with plastic caps.


https://i.expert-h.com/en/polki/uglovaya-polka-svoimi-rukami-foto#sigFreeId49654ee13b
55 do-it-yourself diagrams and drawings of corner shelves


https://i.expert-h.com/en/polki/uglovaya-polka-svoimi-rukami-foto#sigFreeId402721b75d
Source 15 photos ana-white.com., Remodelaholic.com, other sources unknown
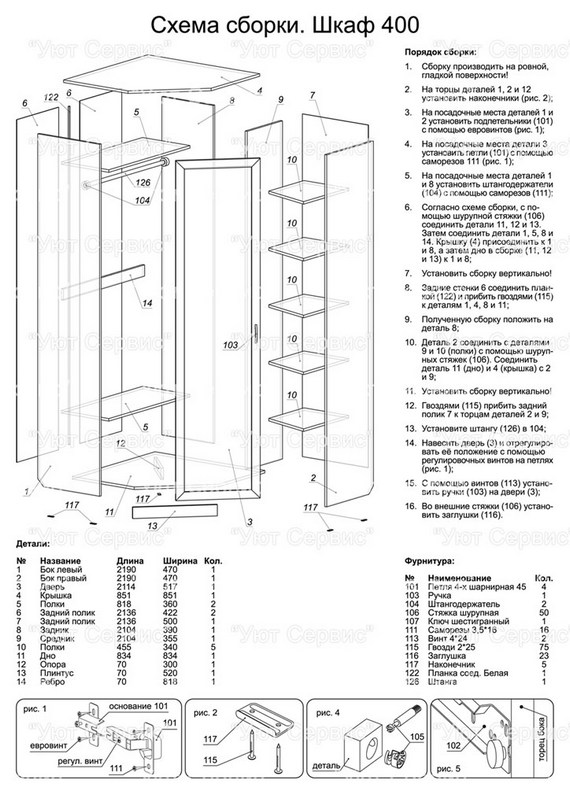
According to this scheme, you can assemble an entire corner cabinet yourself
The free space in the room is most often just in the corners, but meanwhile it can always be used to good use by placing a rack or a small shelf, and not only in small rooms, such as a bathroom, kitchen or hallway. With the right approach, corner shelves look very attractive in any roomadding variety to the interior. However, see for yourself by looking at this small selection.


https://i.expert-h.com/en/polki/uglovaya-polka-svoimi-rukami-foto#sigFreeId26c7a32090
shelves in the bathroom


https://i.expert-h.com/en/polki/uglovaya-polka-svoimi-rukami-foto#sigFreeIdeb4c86a6cb
= What can I make shelves of:
|
from wood
Example: DIY flower shelves 230 |
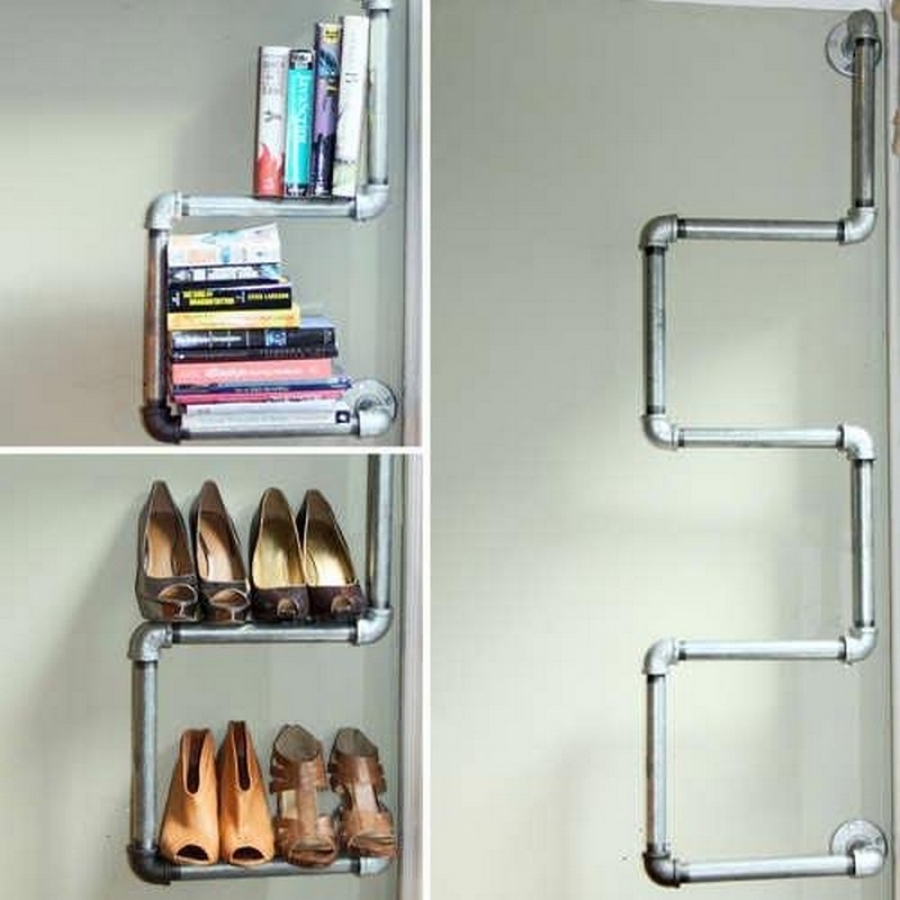
from metal pipes
Example: Do-it-yourself pipe shelves |
from PVC pipes |
|
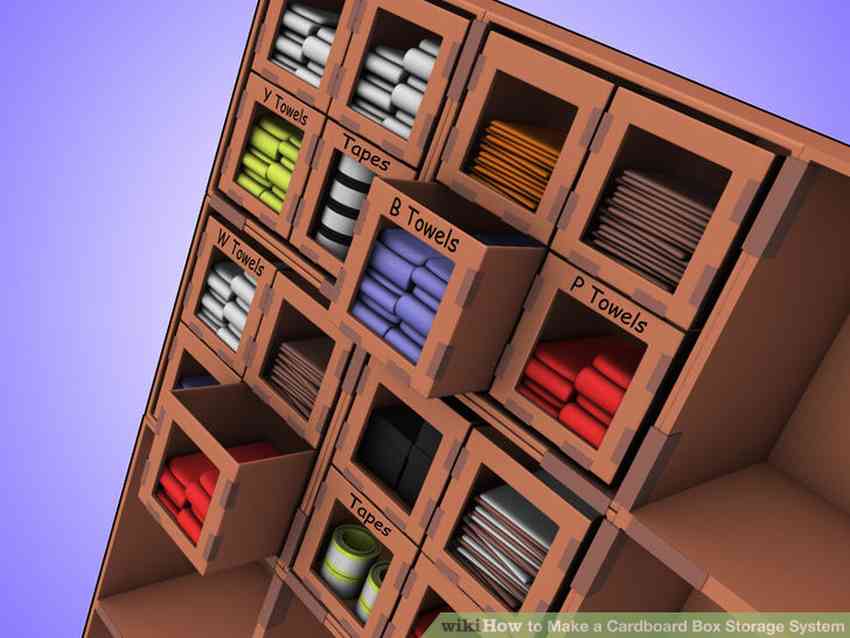
from cardboard
Example: Cardboard box shelving unit |
from paper | plasterboard |
|
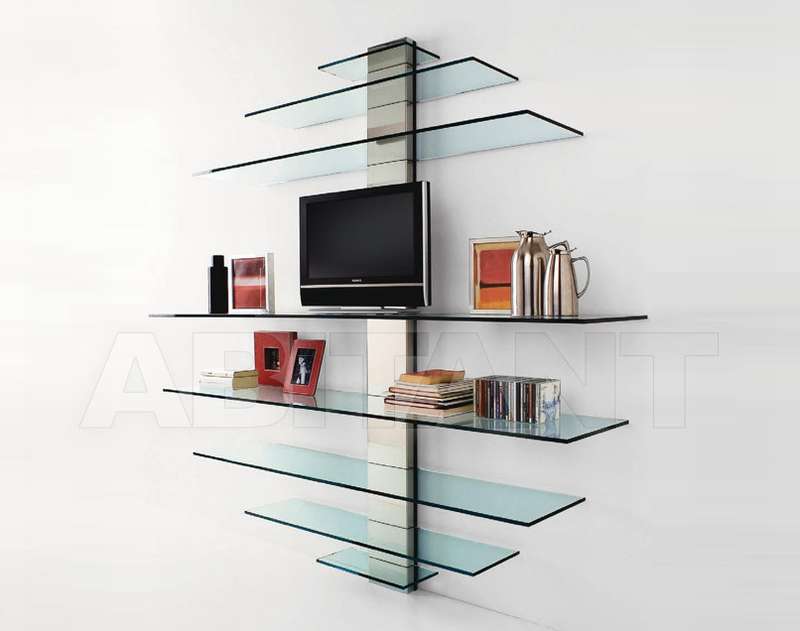
from glass
Example: Shelves in Art Nouveau style 180 photo do-it-yourself |
from old boxes
|
from pallets pallets |
| stainless steel | from glass | from old stairs |
| From bars |
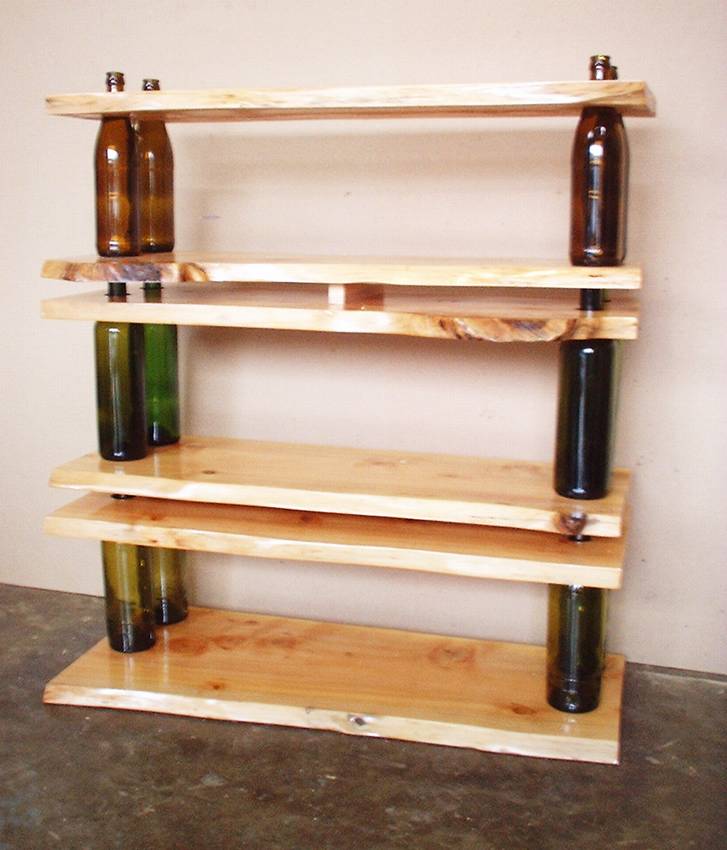
from bottles
Example: Glass bottle shelves |
from snags and branches Example: Book shelf made of twigs and snags |
|
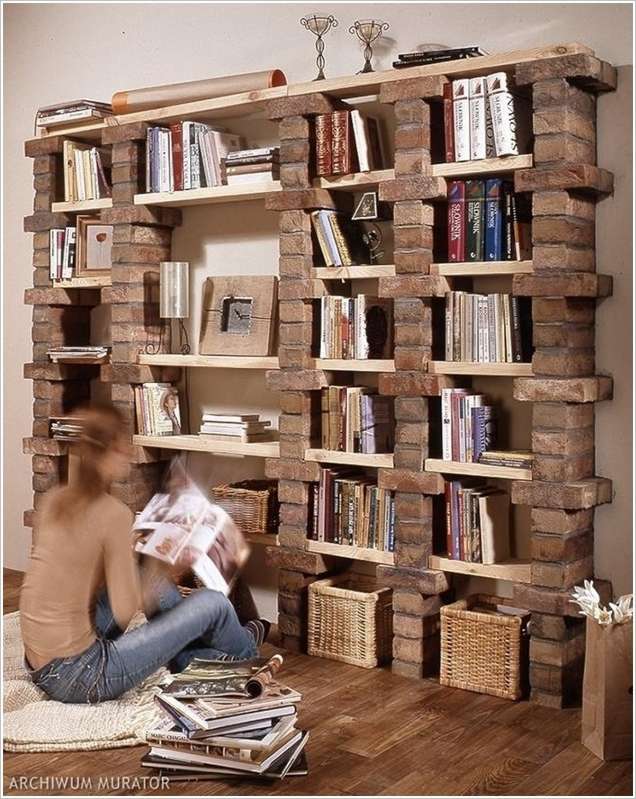
made of bricks
|
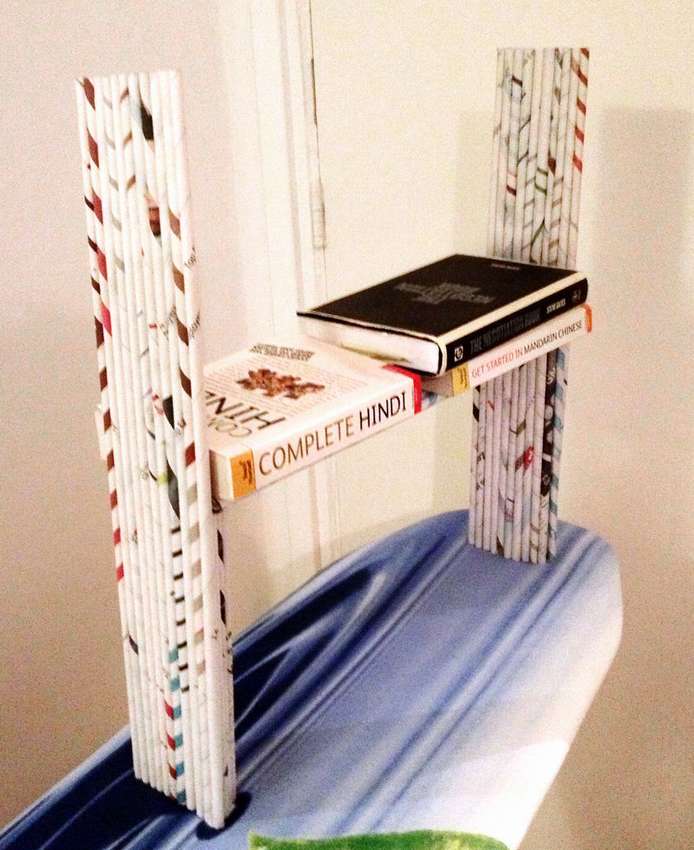
from newspapers
Example: Newspaper shelf |
From cans
Example: Do-it-yourself shelves in the kitchen: 456 photo drawings instructions |

= Methods of fastening shelves:
|
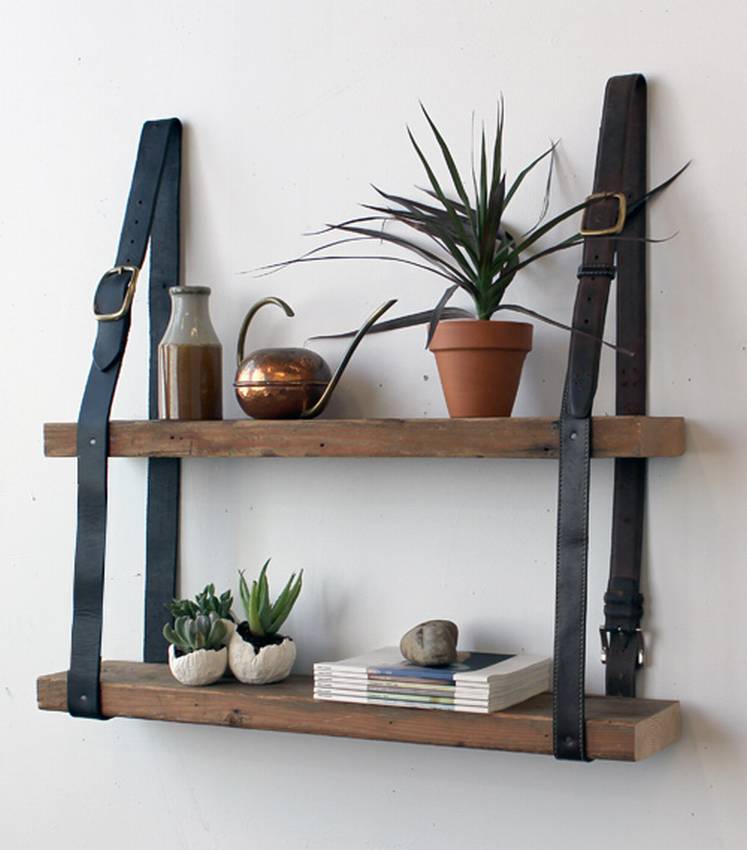
On the straps
Example: Shelves for books on belts |
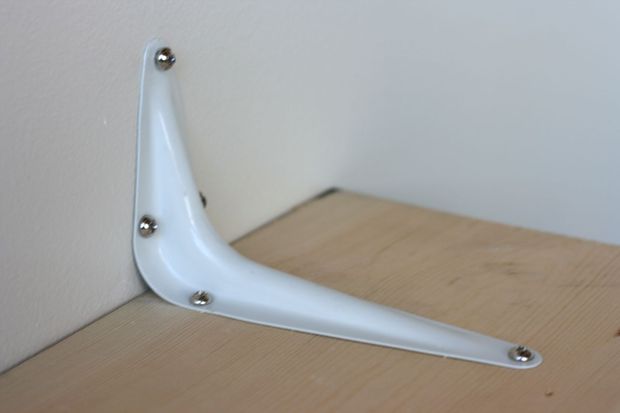
On brackets
Example: Inverted bookshelf |
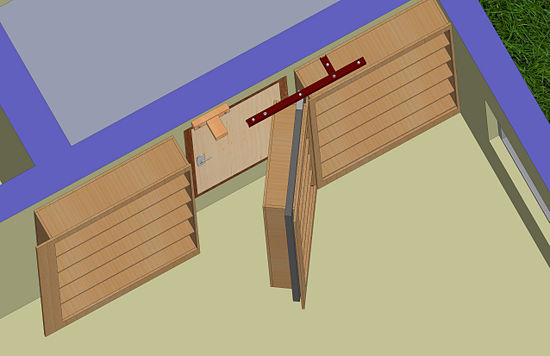
On hinges (hidden shelves) or articulated spiers
Example: Secret door - bookcase and shelfg |
| On the strings | On the ropes | On the pins |
|
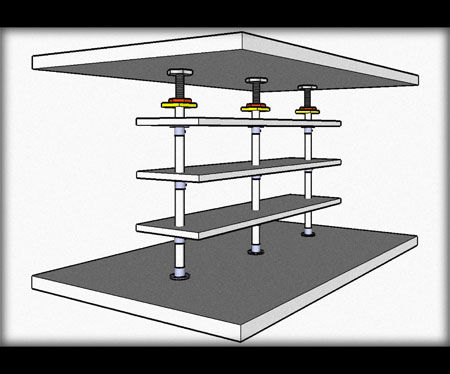
On the clamps
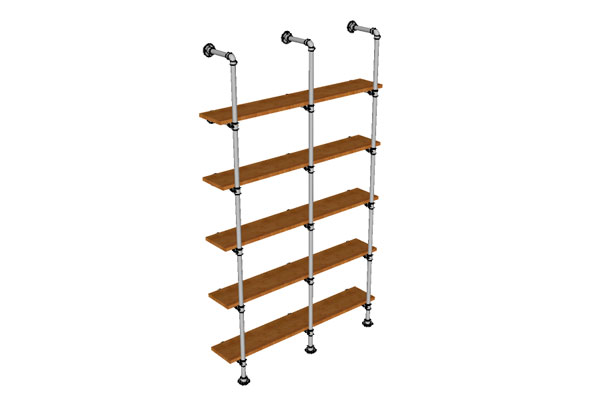
Example: Rack of 3 pipes from floor to ceiling. |
On perforated rails | |
= What are the shelves:
|
Corner |
Wall mounted
Example: Wooden shelf for bathroomss |
Mounted
|
| Outboard |
Floor
Example: DIY shelf in 45 minutes |
Under the ceiling
|
|
Shelving
Example: Do-it-yourself pipe racks: 180 photos, instructions, diagrams |
Whatnot |
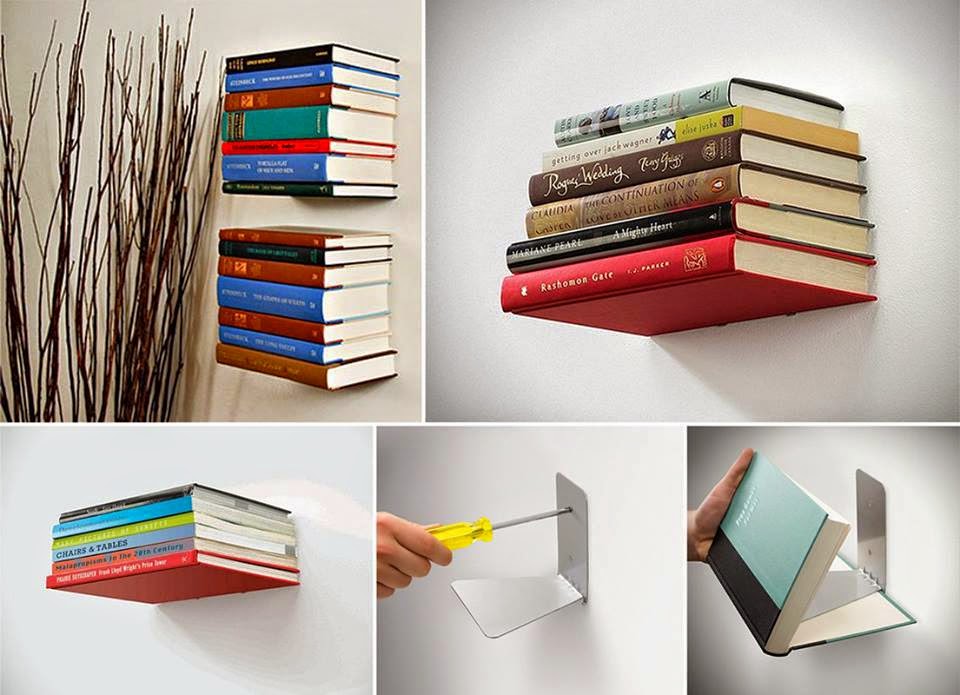
Shelf - Invisible
Example: Invisible bookshelf |
- Brick grill: 44 drawings, 18 projects + photos
- Collapsible barbecue: 50 drawings, 20 master classes +300 DIY photos
- ✿ Flowerbeds:> 34 turn-based master classes + photos (248 ideas) - do-it-yourself
- DIY sauna in the apartment: bathroom, balcony, storage room. Projects and photos
- Shelves in the bath with your own hands: +200 photo. Drawings of bench benches in the steam room