How to make a sandbox with your own hands in the country. Step by step photos. Blueprints
 Do-it-yourself sandbox
In this article we will consider the manufacture of children's sandboxes with their own hands for giving, for a country house, for a kindergarten and for a playground. Let's study step-by-step photos of making wooden sandboxes. At the end of the article you will find a huge gallery with photos of unusual and unique models of wood and all kinds of building materials.
Sandbox with two covers with a step by step photo
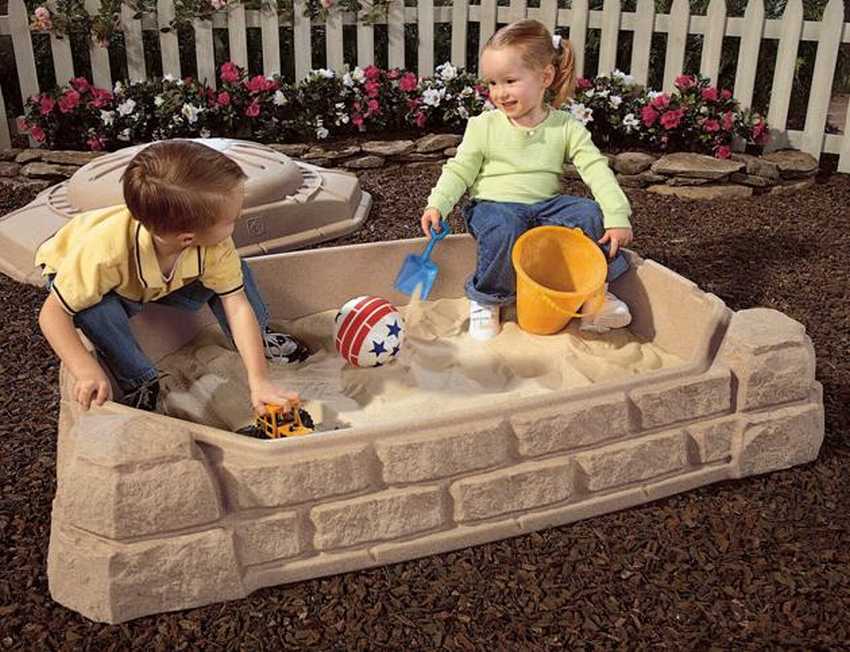
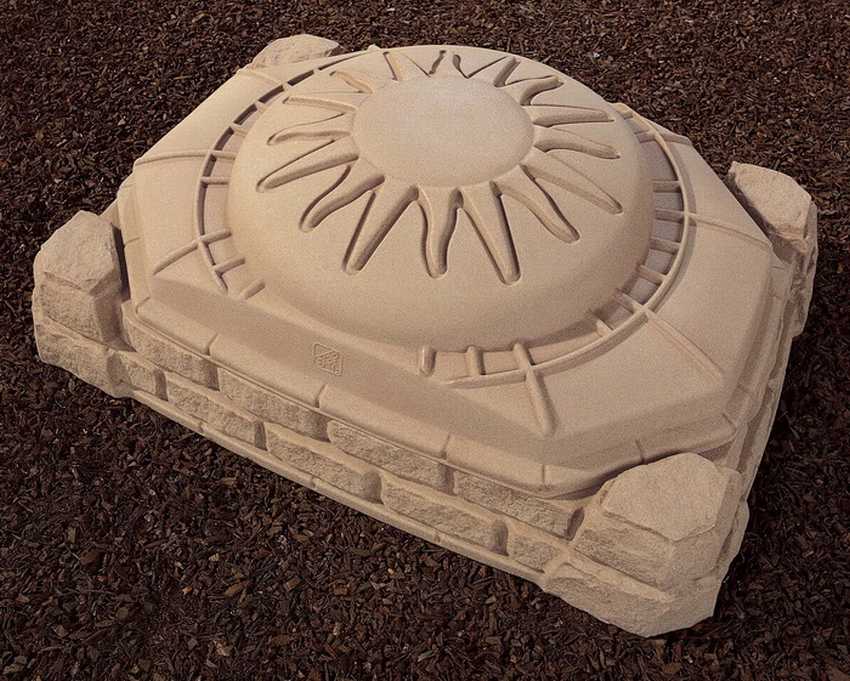
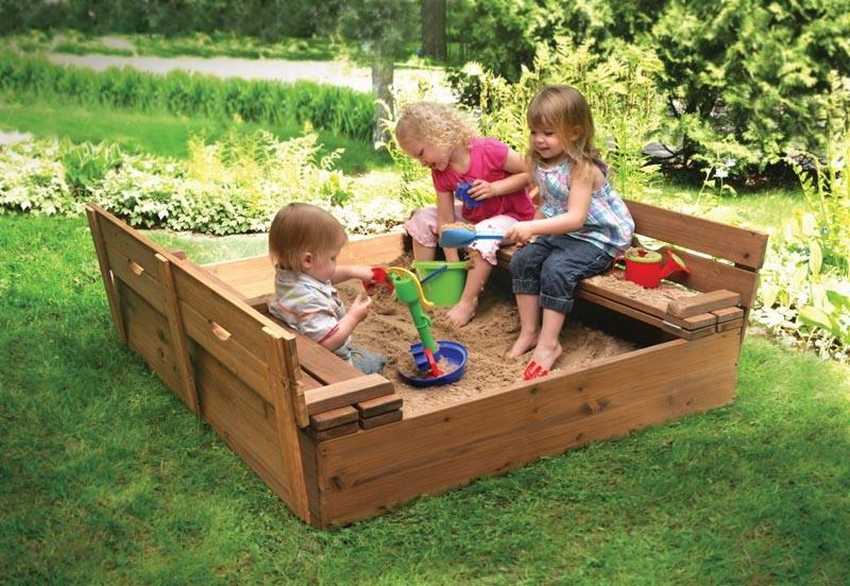 These photos are presented step by step instructions for one of the options for making a sandbox with a cover with phased drawings and diagrams. This option is very convenient to use, since the cover not only protects the sandbox from trash, rain and even animals, but also easily turns into benches.
Before starting all work, it is best to think over the scheme of the future design and determine the type of materials in advance. As for the latter, it is safe to say that many will prefer wood for these purposes, because working with it is much easier than with metal or plastic, the material is environmentally friendly, and its cost is much lower. Therefore this time we will consider the design of wooden boards and beams. For this we need:
- 8 boards with a size of 1500x150x30 mm (2 boards on each side of the side);
- 12 bars with a size of 700x50x50 mm (so we can fix the wooden elements of the sides);
- 4 boards with a size of 1500x175x30 mm (for the lower part and the base for mounting);
- 4 bars - 1500x200x30 mm (for the back of the bench);
- 4 limiters - 175x60x30 mm;
- 4 stops - 700x60x30 mm;
- 4 door metal hinges.


https://i.expert-h.com/en/pesochnitsy/960#sigFreeId329ad0c0ee
After we have prepared all the necessary materials and tools, we can begin to prepare the place and soil
- We install pegs around the perimeter of the sandbox and remove the top layer of soil with a shovel, it is advisable to make a depth of a little more than 25 cm in order to fill the hole with a ten-centimeter layer of gravel and sand.
- We level the surface and cover the bottom with polyethylene, having previously made holes in it, this will help to avoid stagnation of moisture in the sand.
- Also, do not forget to dig nine holes around the perimeter of the prepared hole, we will place the supports in them later.
We turn to the manufacture of the frame
- To do this, we construct sides from two boards, it is advisable to use self-tapping screws, bolts or metal plates.It is the bars that will connect the boards, they fasten the sides on the inside of the sandbox.
- We fix the boards to the upper edge of the board with the help of self-tapping screws, they will serve as the basis for the cover, then we fasten the door hinges to them. It is best to step back 35 cm from each corner.
- Now we need to fix two more boards, we install them on the opposite side.
We make a back for our seats
- We put two boards on each side, we fix the wooden parts with screws.
- We fix the limiters to the base of the seat, and so that the backrest has an emphasis, we install the bars.
We have left the final stage. We install the finished structure in the wells prepared in the ground and carefully fix it. The sandbox is ready!
On a note!
- Pine, linden or larch are less susceptible to decay.
- It is advisable to grind the prepared parts and treat them with an antiseptic in advance before assembly.
- The length of the beam depends on the height of the sandbox, which is determined by the age of the child. The optimal height of the sandbox is 300 mm, i.e. such that the child can step over it.
- The thickness of the boards should be at least 30 mm, this will provide sufficient strength.
- Plywood is necessary in the manufacture of complex structures, such as a sandbox in the form of a ship or a car, from which products of a round and oval shape are well obtained.
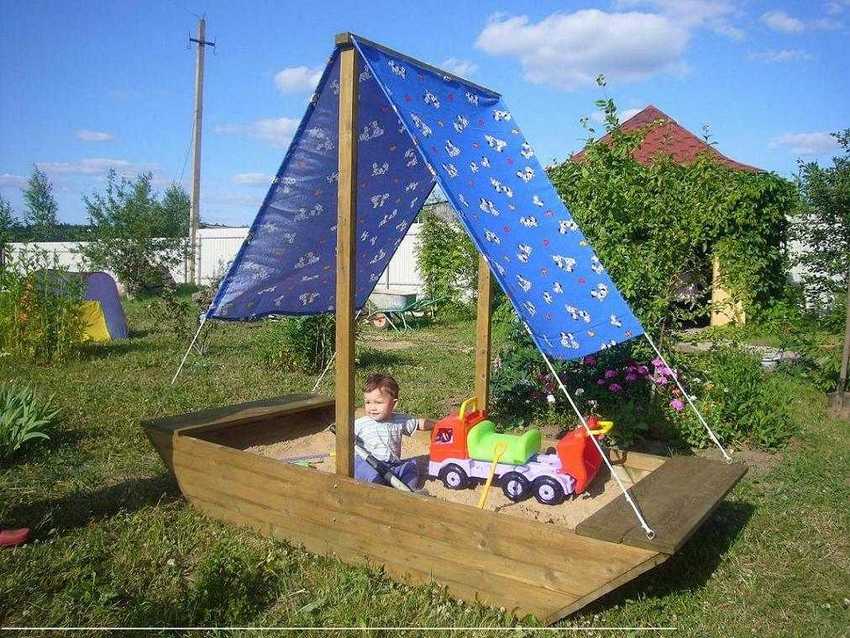
DIY sandbox in the form of a sailing boat
The children's sandbox is not only a place for games, but also a place for creativity. Children love to invent something new and unusual, even from the usual everyday things that seem ordinary at first glance, so they develop faster and comprehend the world around them. You can also help them with this, use a creative approach to create and equip a children's play area. This option may be a sandbox in the form of a sailboat or ship. Be sure this idea will appeal to little dreamers.In addition, this design has a purely practical aspect: a fortified awning will protect the child from sunlight and rain.
 For the manufacture we need:
- pieces of board with dimensions of 30 × 245 cm (for 2 sides);
- for 4 wide ends of the case - 15 × 115 cm;
- for 2 narrow body parts - 10 × 115 cm;
- for 2 masts - 10 × 180 cm (in each mast on one side we drill a hole for the rail);
- for 2 seats playing the role of a deck - 15 × 125 cm.


https://i.expert-h.com/en/pesochnitsy/960#sigFreeId86c6c4a528
Make such a sandbox yourself is not difficult.
- The basis for the hull of the sailboat is 2 boards (side parts), cut at an angle of 45 °, we connect them with two pieces of the board (15x152 length) using self-tapping screws and glue. We turn over our product and fasten both wide end parts, then also narrow.
- In the center of each side we place the mast vertically, on its tops two holes must be drilled in advance, in them we put a round rail.
- Now just sand the wood and fix the sail. Everything is ready! You can continue to fantasize and decorate the resulting sailboat with a steering wheel, an anchor, a telescope, to equip fishing rods, as well as paint with different colors or portray your favorite characters.
Sandbox paint
- Before applying the paint, you must use an antiseptic primer, it will protect the tree from various pests, and it will not darken.
- For painting a children's sandbox, it is best to use ecological acrylic paints based on water, they last a long time, dry quickly and have no smell. Such paints are even in the form of sprays.
- If you want to leave the natural structure of the tree visible, it is better to use translucent impregnation, usually it has a nice light shade. You can also varnish the product.
And here you will see 20 photos of the best sandboxes in the form of a ship


https://i.expert-h.com/en/pesochnitsy/960#sigFreeId1ca63f286b
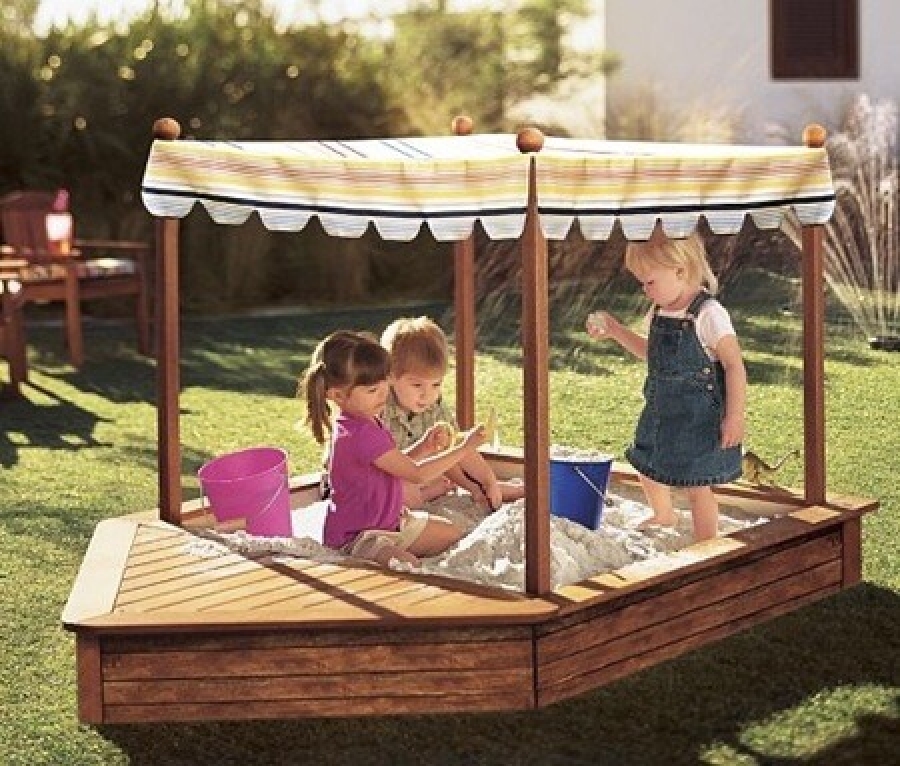
Wooden sandboxes with canopy and roof
A canopy or a roof is a great way to protect yourself from the summer scorching sun or to shelter from rain, in addition, this design is quite simple to manufacture. You will see for yourself. Consider one of the easiest ways to make such a sandbox:
- position four racks in the corners of the base or box (you already know how to prepare it);
- connect them with strips on top and make a binding;
- pull the tarp from the waterproof material onto the frame and secure with decorative nails.
If you add a rafter system to this design, you get a sandbox in the form of a house. There can be a lot of options.
Check out a selection of 25 photos of these sandboxes


https://i.expert-h.com/en/pesochnitsy/960#sigFreeId838321a28d
Sandbox in the form of a car
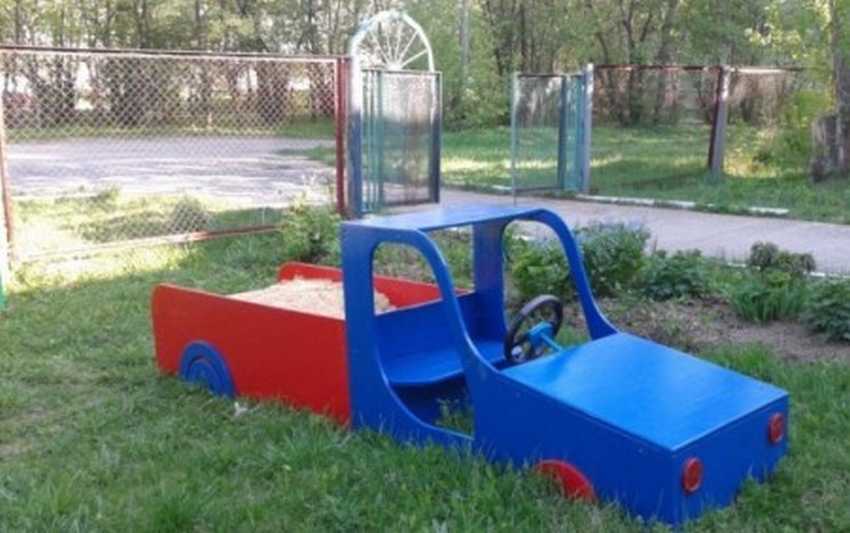 Another non-standard solution may be a sandbox in the form of a car, and making it with your own hands is not as difficult as it might seem at first. This design can be completely cut out of plywood or assembled from boards, it all depends on your skill, the availability of necessary tools, available material and time. In this article we will analyze the manufacturing option from plywood or OSB sheet.For this we need:
- standard OSB sheet 1.22 by 2.44 m 1.0 cm thick or several sheets of plywood;
- metal mounting corners;
- wood screws;
- door hinges, if you need to make an opening hood;
- jigsaw, sandpaper, tape measure, screwdriver;
- old tires, or cuts of thick logs or pieces of OSB, cut and painted under the wheels.
Parts that need to be cut for assembly:
- body side panels - 2 parts;
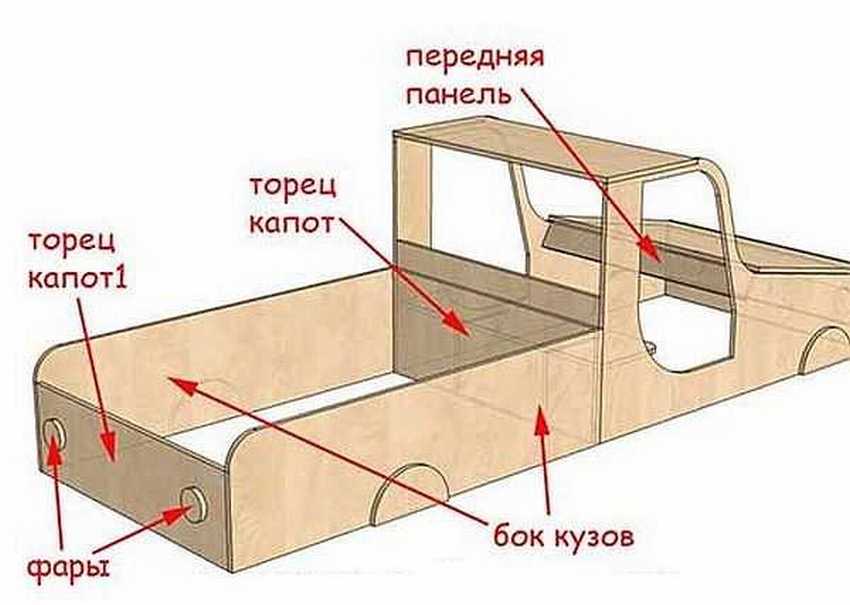
- body ends - 2 parts;
- cab side panels - 2 parts;
- hood - 1 part;
- bumper - 1 part;
- roof - 1 part;
- dashboard in the booth - 1 part;
- seat - 1 part.
Work Stages:
- first we sketch the details of the sandbox on paper, then mark it on a sheet of plywood;
- we cut out the marked parts with an electric jigsaw and carefully process the edges with coarse sandpaper;
- fromwe unite all the parts with the help of fixing corners (the seat in the booth can be strengthened with a piece of a thick bar);
- screw the hood cover with screws or fasten to two door hinges so that it can be opened;
- we paint the finished machine in two layers, you can simultaneously fine-tune small details.
When the paint dries, you can modify the resulting car: install the steering wheel, headlights, wheels, switches, in a word, all that you have enough imagination and improvised means. Below are the phased photos of the work.


https://i.expert-h.com/en/pesochnitsy/960#sigFreeId066ee50260
Another 20 photos of sandboxes in the form of a car


https://i.expert-h.com/en/pesochnitsy/960#sigFreeId447bee3c13
Which sand to choose?
Primary requirements:
- lack of impurities;
- easy flowability, sand should also be dry;
- lack of dust (to eliminate small particles, sand is usually washed and dried, or sieved through a fine sieve);
- hygiene (there should not be any insects in the sand).
Sand of appropriate quality with the presence of a certificate can be purchased at the store. It is better to give preference to river or quartz sand, there is also sand with a high clay content, such a composition is most suitable for modeling.
Car tire sandbox
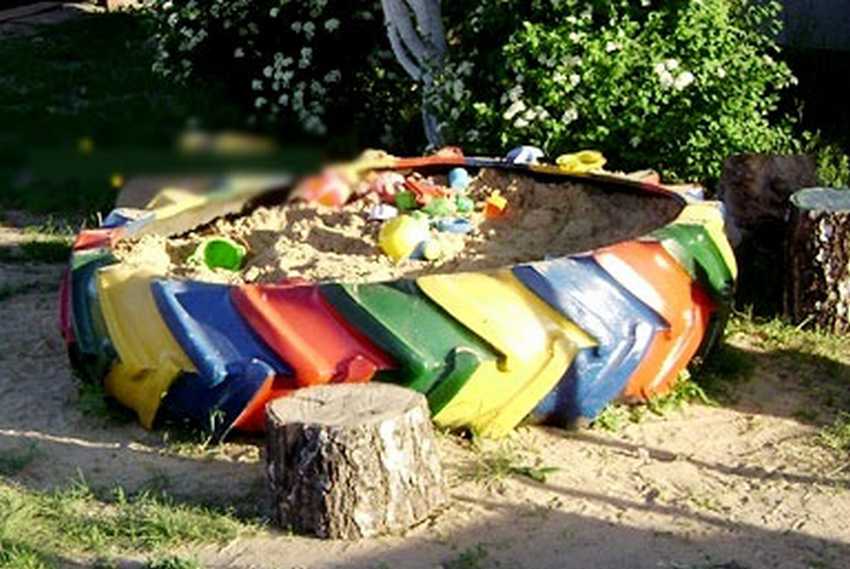 One of the popular solutions is a sandbox made of tires, it is very easy to do it yourself. The easiest option is a sandbox made from a wheel from a heavy truck or tractor. The main advantage of such a playground is the absence of sharp corners, which the child may get hurt. However, for greater safety, the ends of the tires can be softened with a conventional plumbing insulation or even a hose cut along and put on the rim of the tire.
 Benefits:
- minimum consumables;
- do not need to have construction skills;
- speed of manufacture;
- durability of operation.
We will need:
- ordinary shovel;
- waterproof paint (it is more convenient to use an aerosol spray);
- brushes, sand.
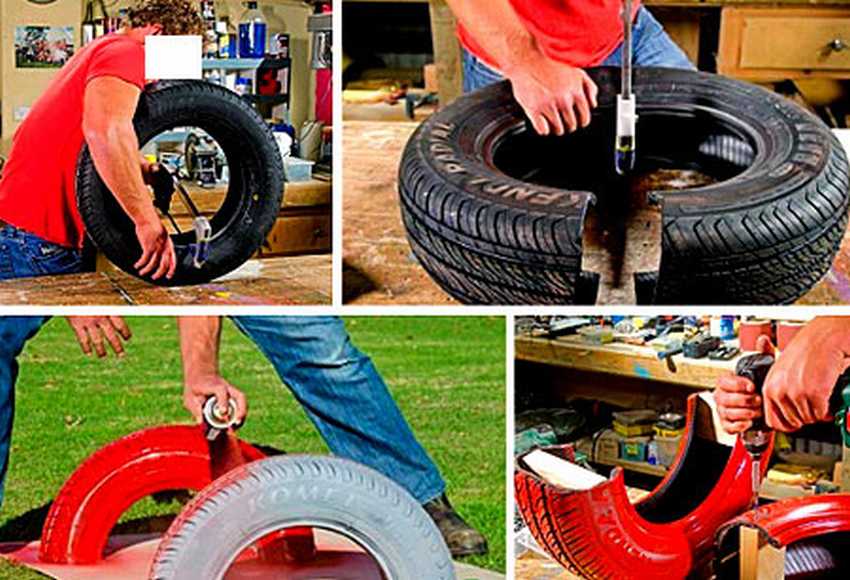
For making larger sandboxes (from several tires), cutting tools and fasteners will be needed.
On a note!
- To make a large sandbox, you can not cut the tires, but bury them in the ground vertically around the perimeter.Their location will depend only on your desire and imagination, so you can create a circle, rectangle, flower or even a boat
- The sandbox from the tire is very mobile, if necessary it is easy to move it to any place, you can place it on the terrace under the roof of the house.
- It is also easy to cover with an awning or a cover.
- Small car tires are easy to cut, it will not be difficult to make many different shapes out of them.
Sandbox with a house
Each child dreams of his own house - a cozy corner where you can play yourself and with friends. A wooden house, made by yourself, is perfect for this, because it can look like anything, and most importantly - it always looks real and solid. It can be built on the ground, and on stilts and on a tree. The sandbox itself can be located on the side or below if you decide to build it on stilts. When building a house at a height, it is necessary to provide stairs or ropes, through which you can get there. In addition, it is not at all necessary to be limited to just one thing; you can attach a slide to the house, and also set a swing nearby.
As a result, you can get a non-standard multifunctional game zone.
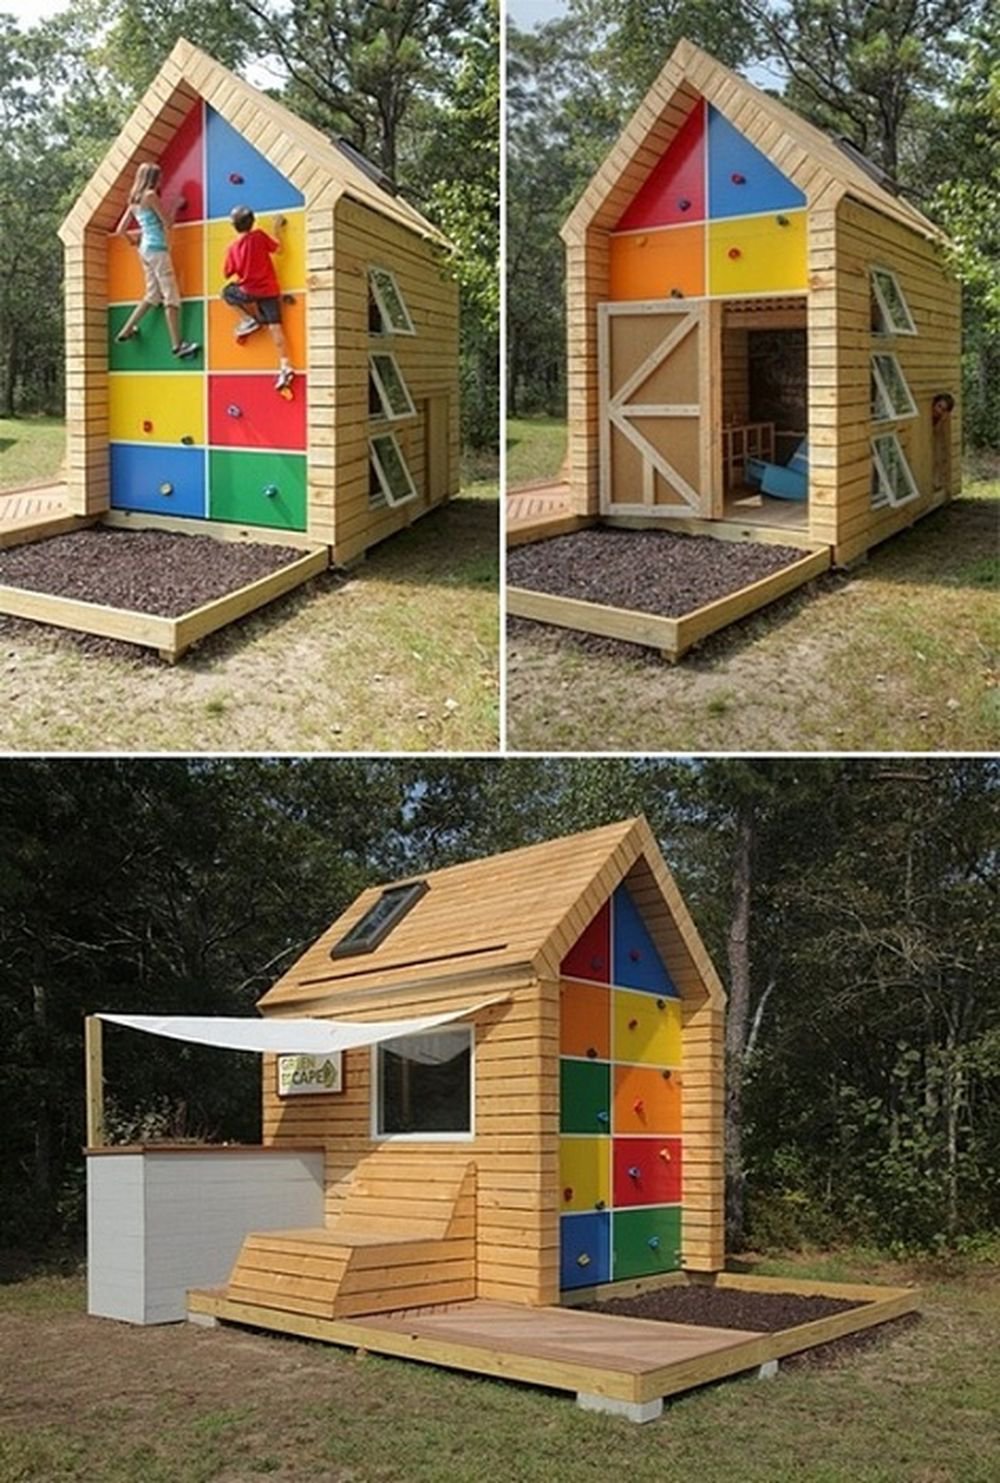
Here are some more options on how to make such a house:


https://i.expert-h.com/en/pesochnitsy/960#sigFreeId501362c805
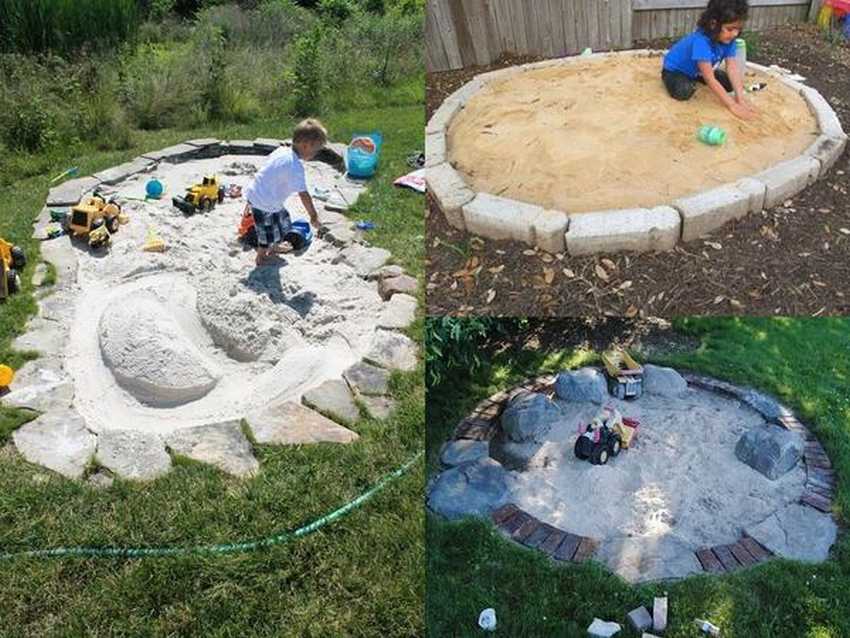
Sandbox made of stones
You can make a sandbox with your own hands also from natural stone of the most varied sizes and even colors.
To do this, you must:
- dig a shallow base (not more than 60 centimeters);
- lay out the largest stones along the contour so that the upper part comes to the surface, then fill it with earth and properly compact;
- apply cement mortar to the inner surface of the stones and lay the next row of stones (continue laying until the height reaches the desired level;
- let the cement dry well;
- apply sealant from the garden sprayer, then cracks will not form in the masonry. After a week, you can pour sand.
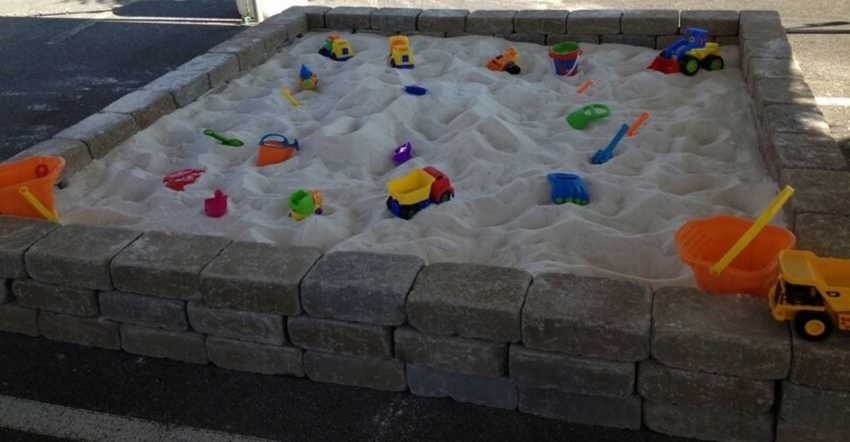
Stone, bricks and paving slabs will also fit as a fence!
Where and how to install a children's sandbox?
In order for the sandbox to serve for a long time, you should adhere to several recommendations in its manufacture and installation:
- do not leave boards unpolished;
- it is necessary to provide reliable fastening;
- It is advisable to use quality wood and other building elements;
- if possible, ensure the presence of shadow;
- near should be absentprickly shrubs and plants that can cause allergies in the child;
- electrical wiring, hoses, pipes, etc. also should not be near.
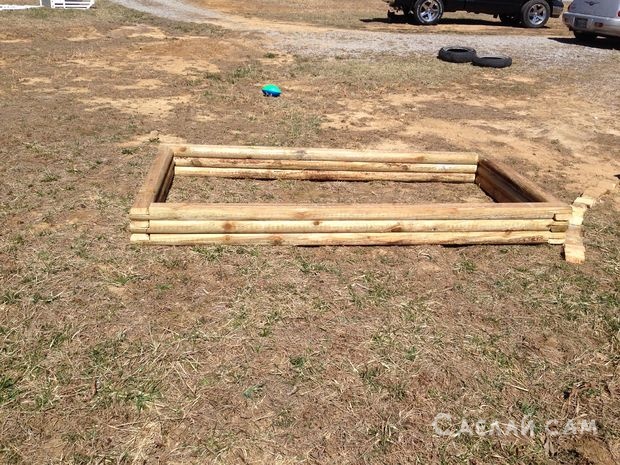
Sandboxes made of wooden posts and logs
Sandbox made of wooden posts can be made absolutely any form.
Work Stages:
- Before installation, you need to outline the contour of the future site (we draw the necessary figure on the ground);
- remove the turf and on the outside of the marked out figure we dig a trench equal to the width of the wooden posts to a depth of one bayonet shovel;
- you can make the top edge of the sandbox even by cutting columns of equal length, or you can experiment and depict, for example, a wave.
- before installing the logs in the trench, we will treat them with an antiseptic on a tree, then let it dry.
- arrange in the right order, cover it with earth and compact it properly. Pour sand, you're done!
And this may look like sandboxes from logs:


https://i.expert-h.com/en/pesochnitsy/960#sigFreeId212b28b84c
Making sandbox from logs, master-class
Do not forget:
- towhen all the boards have already been laid, and all the sizes have come together, you need to connect them using stakes, after making holes in them, t. e. the stakes pass through the holes in the laid boards and are driven into the ground, thus, the sandbox is fixed;
- cover the bottom with geotextile or polyethylene, it is also necessary to make several holes in it.
The photo below shows the stages of work


https://i.expert-h.com/en/pesochnitsy/960#sigFreeIda32214cf0a
Sandbox Care
- First of all, you need to monitor the cleanliness of the sand and clean it in a timely manner from debris, leaves and branches that have fallen from the trees, glass and stones and broken toys that have accidentally hit.
- Requires control over the amount of sand in the sandbox, it is advisable to timely replenish its volumes.
- At least once a year (usually at the beginning of the summer season) sand changes completely. Then you can make cosmetic repairs or scheduled painting, it all depends on the type of sandbox and its condition.
- At night and at a time when the sandbox is not in use, it is best to cover it with a protective cover or film.
Sandbox as a variant of landscape design
The sandbox can be not only a separate building, but also be built into the playground, or even become part of the yard.
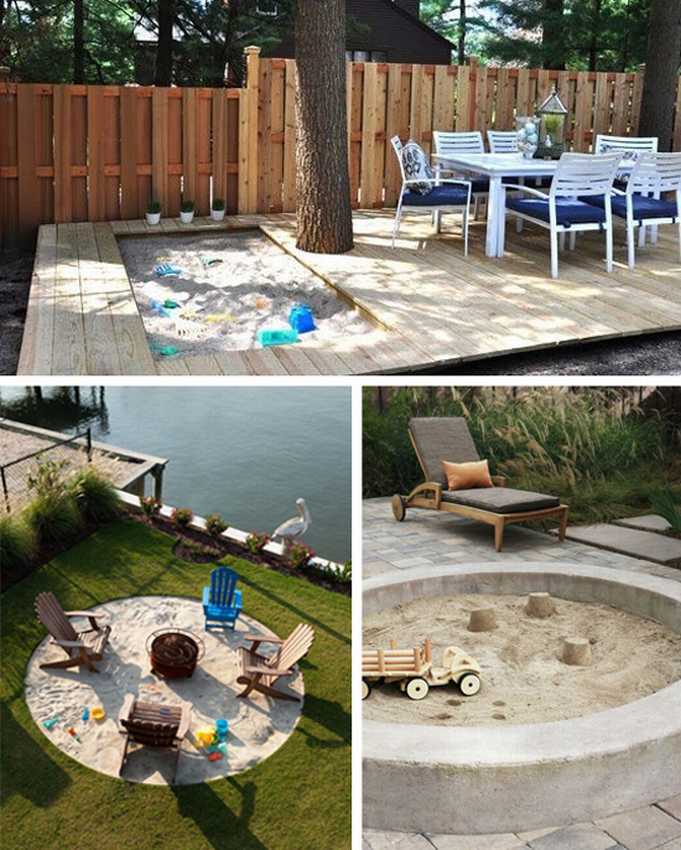
A few more options for arranging your country house:


https://i.expert-h.com/en/pesochnitsy/960#sigFreeId4fa304b02f
Photo Gallery: Ideas for Inspiration


https://i.expert-h.com/en/pesochnitsy/960#sigFreeIdcff3dda2d1
+ 40 schemes and drawings for the manufacture of sandboxes


https://i.expert-h.com/en/pesochnitsy/960#sigFreeIdcd5d624906
150+ photos of sandboxes with your own hands


https://i.expert-h.com/en/pesochnitsy/960#sigFreeId6465e7d0e7
- Do-it-yourself wooden veranda: 300 photos, step by step, master classes
- DIY wooden bench: photos, drawings, master classes
- DIY hanging flowerpots and flowerpots
- Do-it-yourself room flowerpots for flowers: master classes +223 photos
- Flowerpots from bottles with their own hands. +300 photos. Master classes