Garland of cones. Do it yourself + 200 photos
 christmas cone garland
Garlands are different, sometimes fancy, and some are simple, but all add a beautiful element to the home decor. If you want to know how to do do-it-yourself garland of cones, here are 20 examples with step by step photos - take a look and see how simple it is.
Holiday garlands can be made from pine and spruce branches, from tinsel, from beads and much more. On the Internet you will find hundreds of types of this jewelry. But of the many options, it’s cone garlands combine the beauty of nature and homeliness. There are two main ways to fix the bumps: tighten the screw with a ring or tie it on a twine (twine). All this is shown below in the master classes on step by step photos..
How to prepare bumps
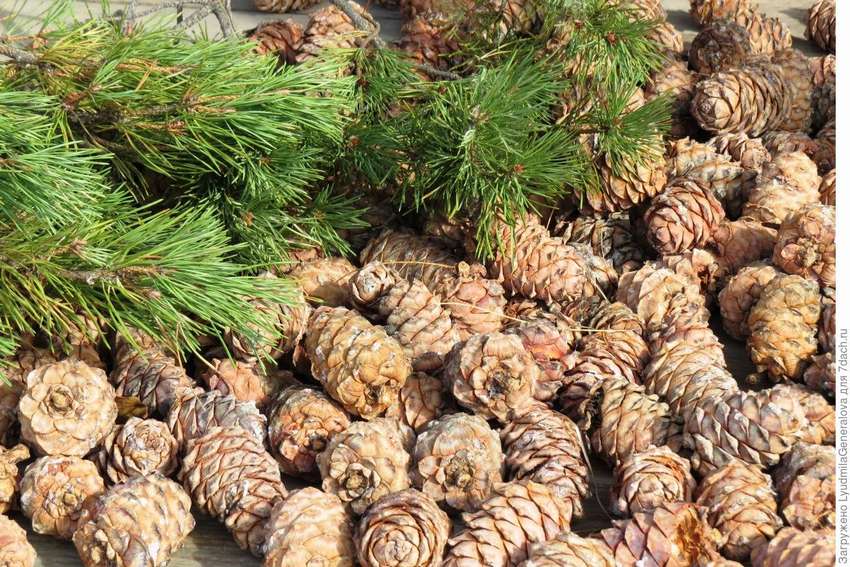 But first about the bumps ... if you collect from the earth, you will need to make sure that there is no living creature in them. There are two ways to do this. The first option is to bake in the oven. Spread the bumps on large foil-covered baking sheets and dry at 225 degrees for approximately 30 minutes. The second option - put the cones in plastic bags or small garbage bags with a puff. Put the bags in the freezer for a day or two and that's it.
Any of these methods work well.
New Year's cone garland
 Holidays are a great time of the year and the opportunity to do creative cooking of delicious food and decorations. If you like to do simple things, here is a good example, how to make a garland of pine conesas they say, nowhere is easier. it easiest craftthat you can do to decorate your house for the New Year holidays. Everything will go away from strength about 30 minutes.
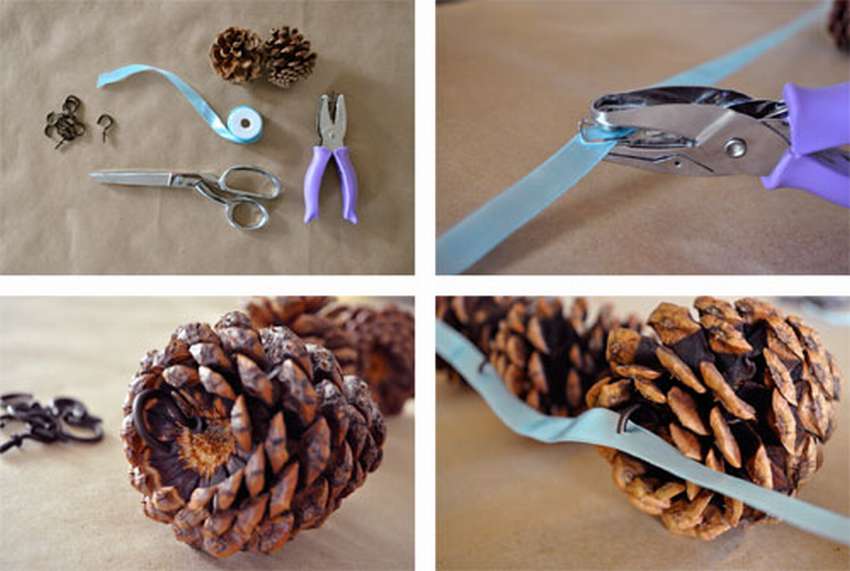
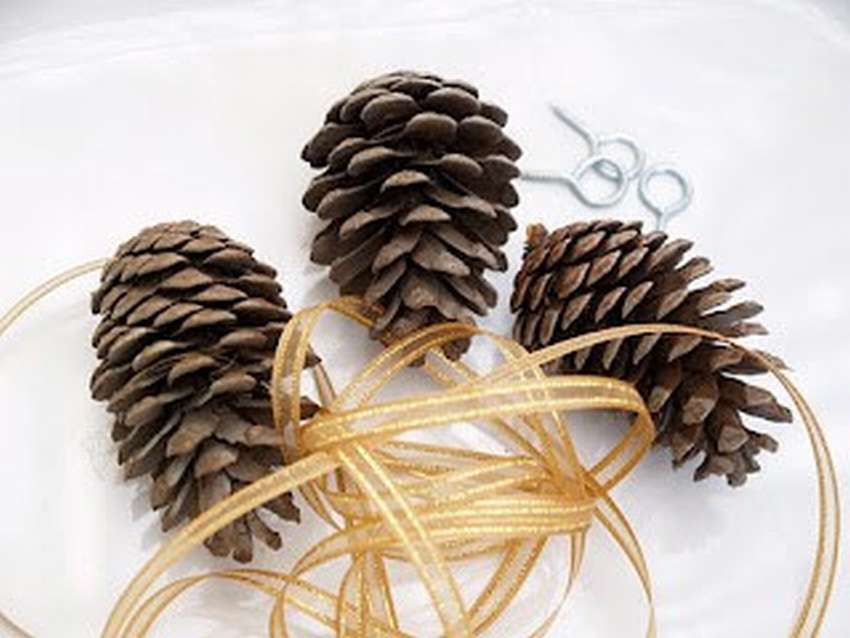
So, if you already have a supply of pine cones to hang them, prepare a twine or ribbon. You can use anything that you like, or something that suits your style. Additional accessories include a drill, ring screws and glue.
Step-by-step instruction
- Drill thin holes in the cones for screws. Although you can try to twist without a drill, this is how it goes.
- Before tightening the screw, dip in glue (any).
- Then simply thread the twine or tape through the rings. To prevent the cones from slipping, tie small pieces of transparent tape to the twine.
- You can fix it with finish nails, fist hooks or in any other way.
- For saturation, you can add another decorative garlandas shown in the photo. It is just thick silver paper embossed and stapled. In combination with a garland of cones gives a pleasant festive shade.


https://i.expert-h.com/en/iz-shishek/girlyanda-foto#sigFreeId77bcf08ac1
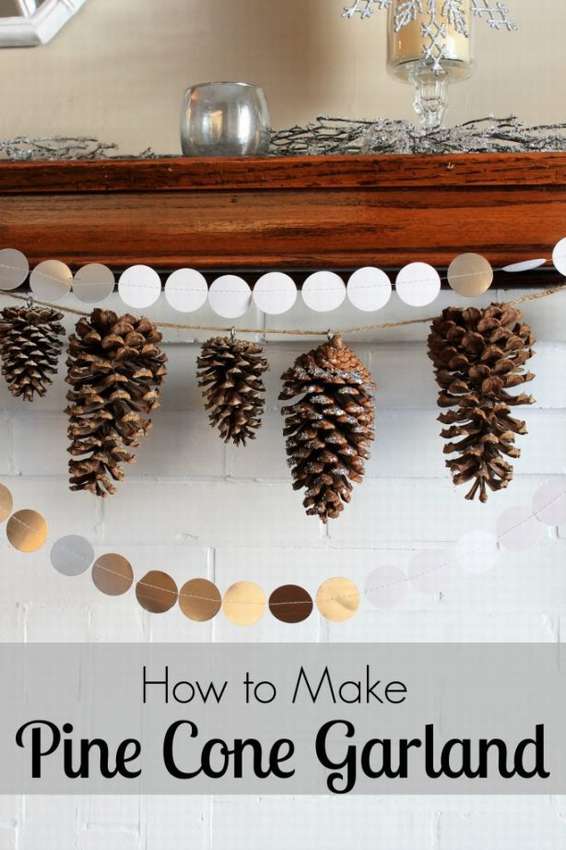
How to make a garland of cones
 Holidays are just around the corner, it's time to think about how to decorate your home. Simple cone garland and ropes, an elegant way to add a festive atmosphere to any fireplace, wall or entrance. The idea is simple, screw the screws with the ring into the bump and thread the tape. Step by step instructions with a list of necessary materials and tools can be read on the site.
Notes: If you do not have an electric drill, you need to screw the screws into the pine cones before drying them. Because if you try to spin into dry cones, they can crack.
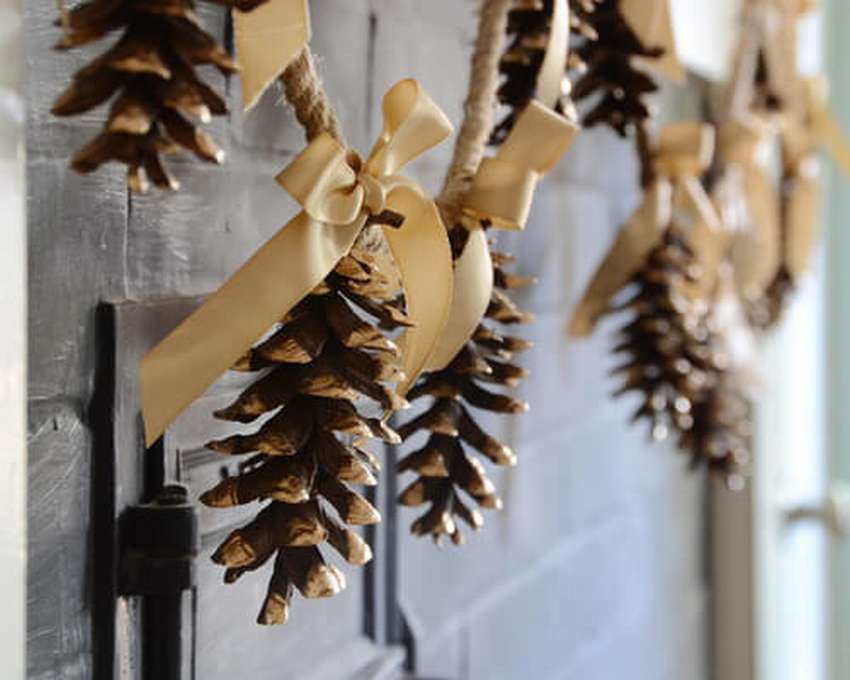
How to make a gilded cone garland, look at the step by step photos.


https://i.expert-h.com/en/iz-shishek/girlyanda-foto#sigFreeId021abdbb9d
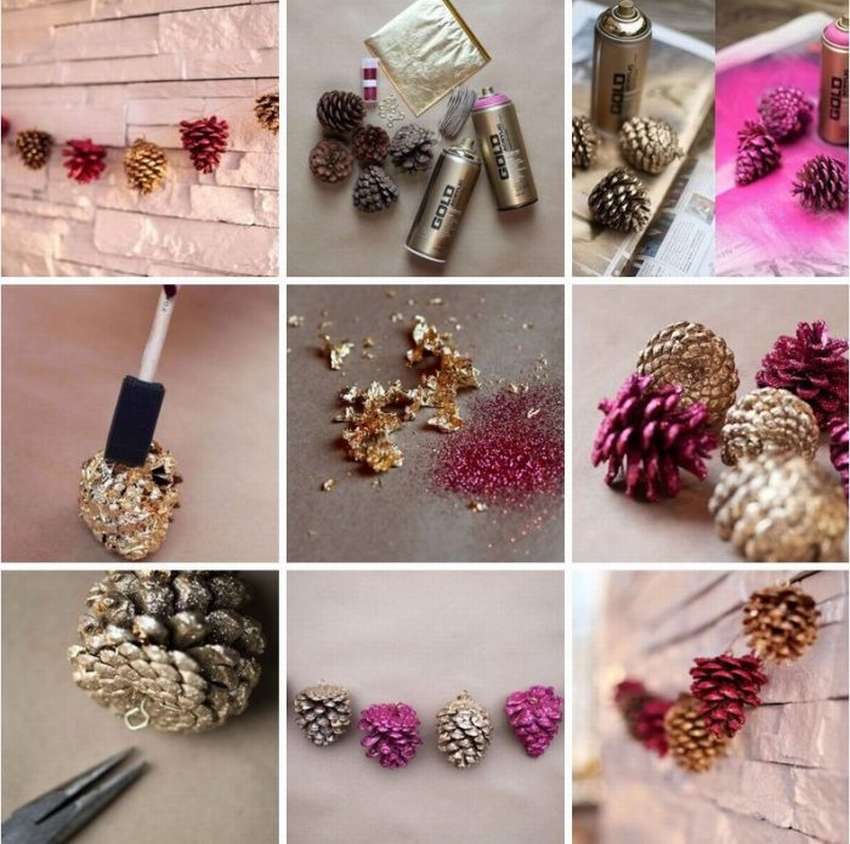
Garland of pine cones
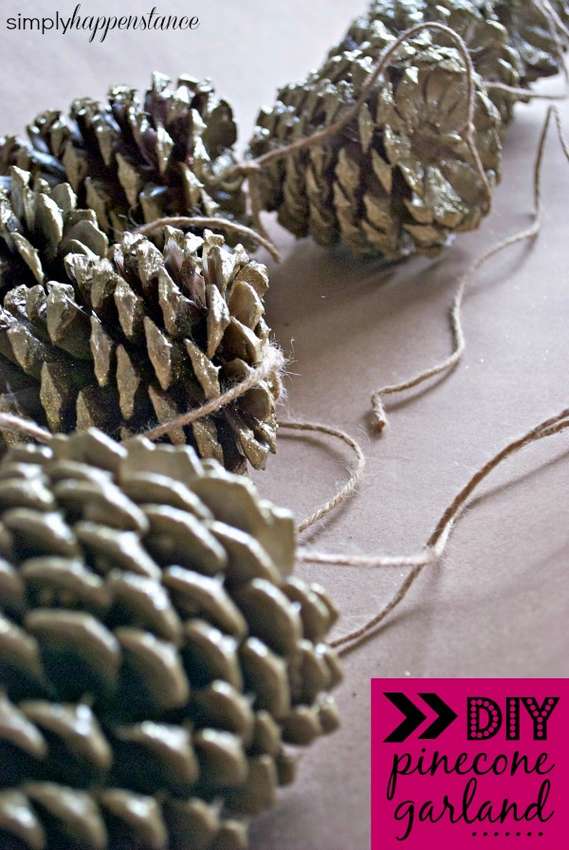 Such cone garland It looks natural and fits perfectly into any interior. So, for this decoration you will need: a metallic gold spray paint, gloss, screws with screws (the size depends on your cones) and jute twine, thread or ribbon.
Let's start! Here's what you need to do:
- Collect and prepare the bumps. Using cutting tools or something similar, remove all wood stems at the top of the cones
- Then use a pair of pliers to tighten the screws with the ring, or drill a small hole with a drill ... and then tighten the screws.
- IN well ventilated in an open room, apply a coat of paint from a spray can.
- While the bumps are still wet and sticky, sprinkle with glitter,
- If necessary, apply a 2nd coat of paint before sprinkling gloss.
- Let them dry for at least a day.
- Put the bumps on the twine, arranging them according to your personal preferences.
- To fix the bumps on the twine, tiethose nodules.
Hang a garland of cones in a conspicuous place to create a festive mood. See below the master class on step by step photos..


https://i.expert-h.com/en/iz-shishek/girlyanda-foto#sigFreeId7403e8c9da
Here is another very good example, how to make a simple garland of cones with your own hands. 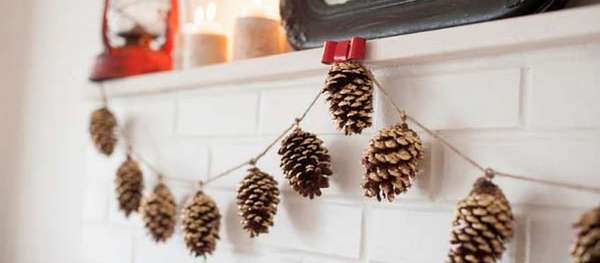 The procedure for making crafts from cones, see step by step photos. If you need instructions, a link under the gallery.


https://i.expert-h.com/en/iz-shishek/girlyanda-foto#sigFreeIdcb2b8d2f86
DIY garland of cones
It shows how very do it yourself simply and quickly with your own hands.
 Used in this case unusual way, instead of putting pine cones on the ribbon, simply tie the ribbon to each hook, then tie all the ribbons at the top and hang it!
 When determining how many pine cones you will need, screw one screw into the top of the cone. It takes a little practice and you may need to greasebut it is done pretty quickly.

 Here is another example of a garland when cones are attached with screws with a ring.
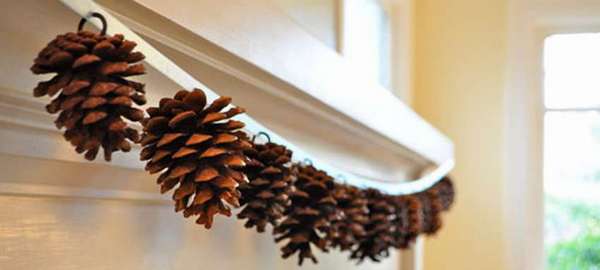
At the base of each cone, drill a hole, and screw screw with ring. By a rope threaded into this ring, a cone can be suspended anywhere. For example, tie to a long rope or ribbon, getting a garland of cones.
You can decorate this garland to your liking and the requirements of the situation.


https://i.expert-h.com/en/iz-shishek/girlyanda-foto#sigFreeId90ae8ec3ab
Garland of cones for decor
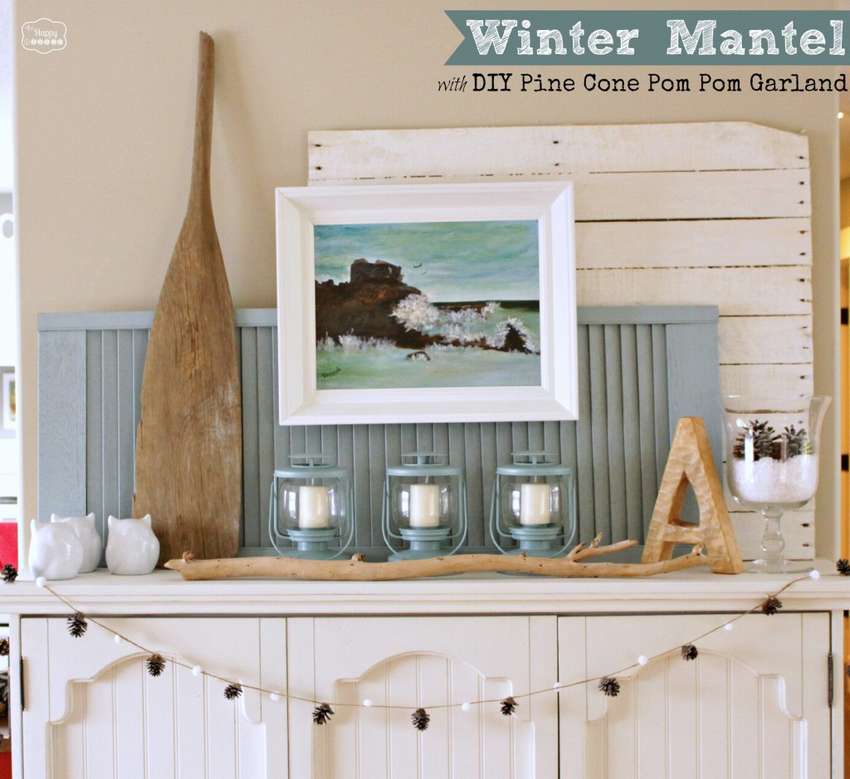 This cone garland will be the perfect complement to your holiday interior. All you need is jute twine and white pompons. Just decide how long your garland should be and cut the twine. Then glue the tips of the pine cones evenly spaced along the twine. Also use glue to add small white pompons between the bumps. To create a special atmosphere, use various items for decoration.
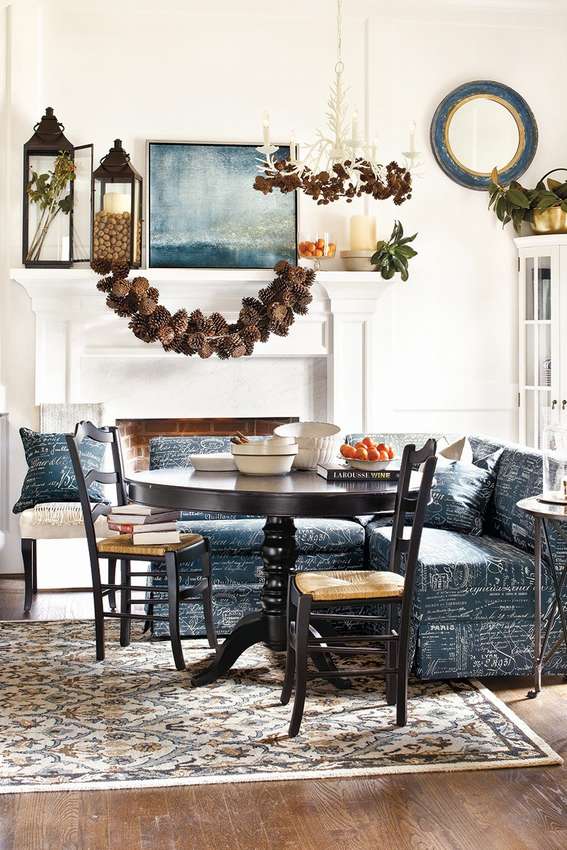
Composition, which was invented by the author of this project, you see in the photo. Blue-white and cream colors blend perfectly with natural wood tones and pine cones.


https://i.expert-h.com/en/iz-shishek/girlyanda-foto#sigFreeId5526f9380b
And such an example, cone garland fastened on a twine with screw with ring.
Christmas cone garland
 Garland of pine conesA great way to add some charm to your festive home decor.
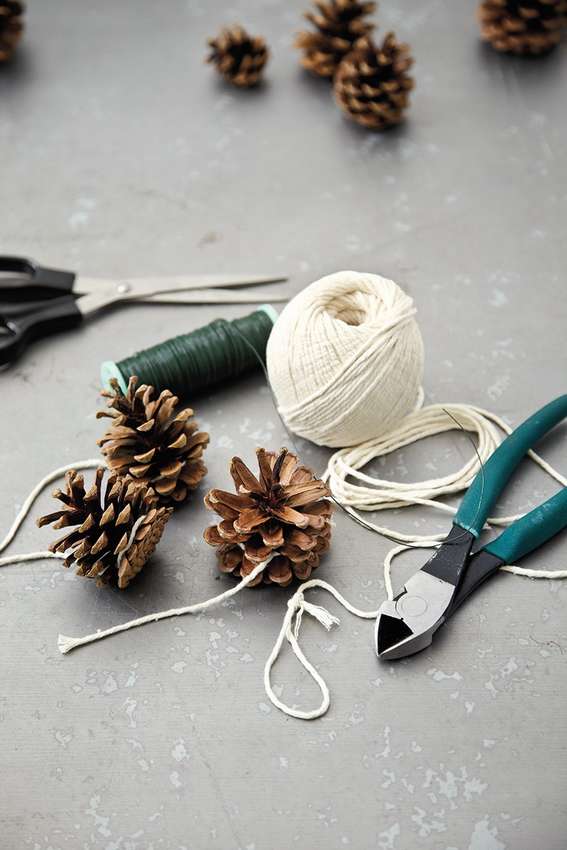
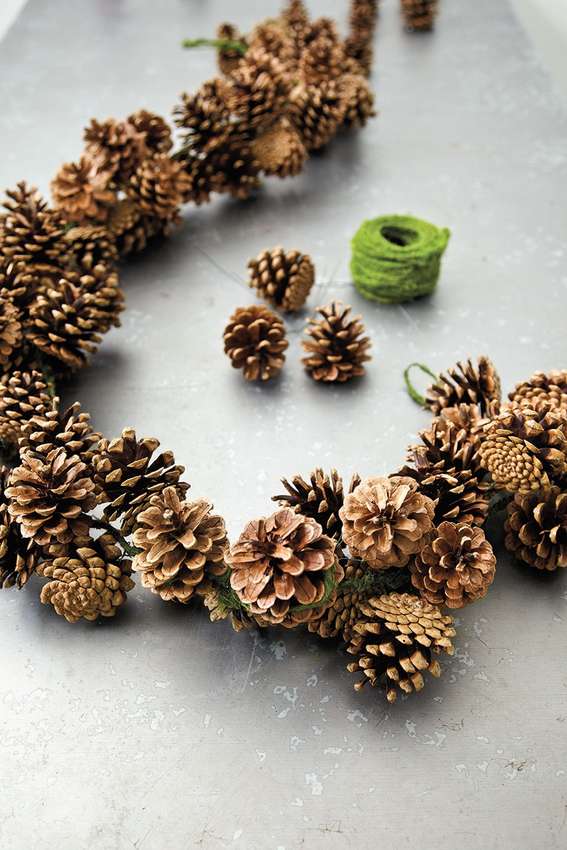
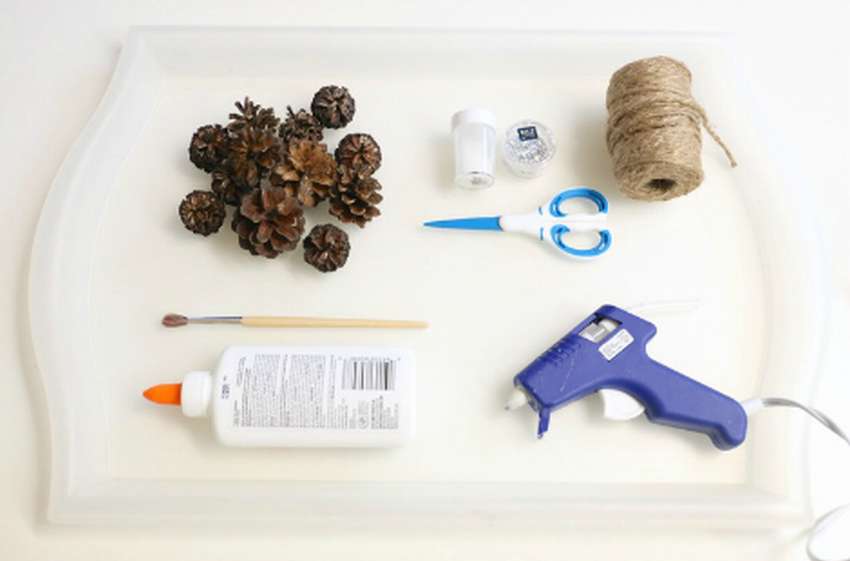
For work, prepare jet twine, scissors and many pine cones. You will also need pewter foil and a large sheet for drying. To make a truly complete garland, you will need approximately 90 pine cones. If you have a fresh batch of cones, then they must be washed under running water to remove dirt and juice, and then dried in the oven at 200 degrees for 1 hour. How to make a garland of cones with your own hands, look at the step by step photos.
If you have questions, use the link under the gallery, the site has detailed instructions.


https://i.expert-h.com/en/iz-shishek/girlyanda-foto#sigFreeIda644480d59
Simple cone garland
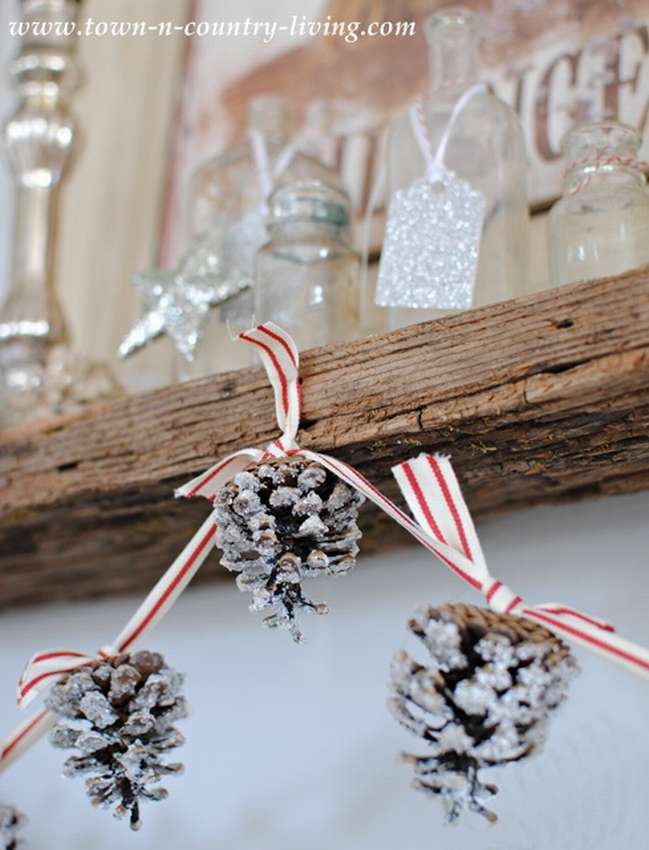 The simplest thing you can make pine cones, of course, a garland. It is very simple, and if you add some more decor so that the cones look as if they are snowy, then it is very beautiful. Use a brush to apply a large amount Mod podge (glue for decoupage) on each cone and add a good dose of Epsom salt. The salt will hold well if you do not shake the bumps strongly until the Mod Podge dries.
Using a hot glue gun, glue a short strip of tape on the base of each bump. Then, at regular intervals, tie on a long strip of ribbon to make a garland.
See this simple and cheap, the only expense is to buy a holiday ribbon.
See below for step-by-step photos of the master class.


https://i.expert-h.com/en/iz-shishek/girlyanda-foto#sigFreeId1a4a5ae741
Garland of cones master class
 Perhaps the New Year is still far away, but there is no reason why you can not celebrate the fall season, decorating the house with a garland. Here you will find out how to make a garland of cones. This is a really simple craft, which is best done by the whole family. Start with a walk, collecting pine cones and other gifts of nature.
So, if you have already stocked up with cones, then prepare another twine of metal wire, artificial flowers, sparkles and acrylic paint.
This garland will look great with natural cones, but if you want to add a little color, you can paint and glitter. It is not necessary to paint completely, you can add paint and gloss only to the tips of the scales, as you can see in the photo.
- To attach the bumps, simply wrap the twine around them and tie.
- For small cones, wrap them first with copper wire and then attach to the twine.
- To fix the flowers, cut small pieces of wire and then glue with hot glue. Attach each flower to the twine with a wire.
what wonderful in this garland, so you can hang it on the fireplace, above the window, through the wall - wherever you want, it will look appropriate everywhere.
Here step by step photos how to make such a garland of cones with your own hands.


https://i.expert-h.com/en/iz-shishek/girlyanda-foto#sigFreeIda9724aa209
Garland of cones of flowers
 This cone garland - not simple, but floral. That is, flowers are made of cones, and from them there is already a garland. It is done simply, but it looks very beautiful and unusual. Such decor is suitable for any holiday, it all depends on the chosen paint. If white and sparkles are suitable for the New Year, Christmas and winter holidays, at other times of the year you can admire the product in brown, green and any other tones. A dozen flowers take 5 to 6 buds, depending on size.
How to do it yourself, look at the step by step photos.


https://i.expert-h.com/en/iz-shishek/girlyanda-foto#sigFreeId882bea85bb
Cone garland with ribbon
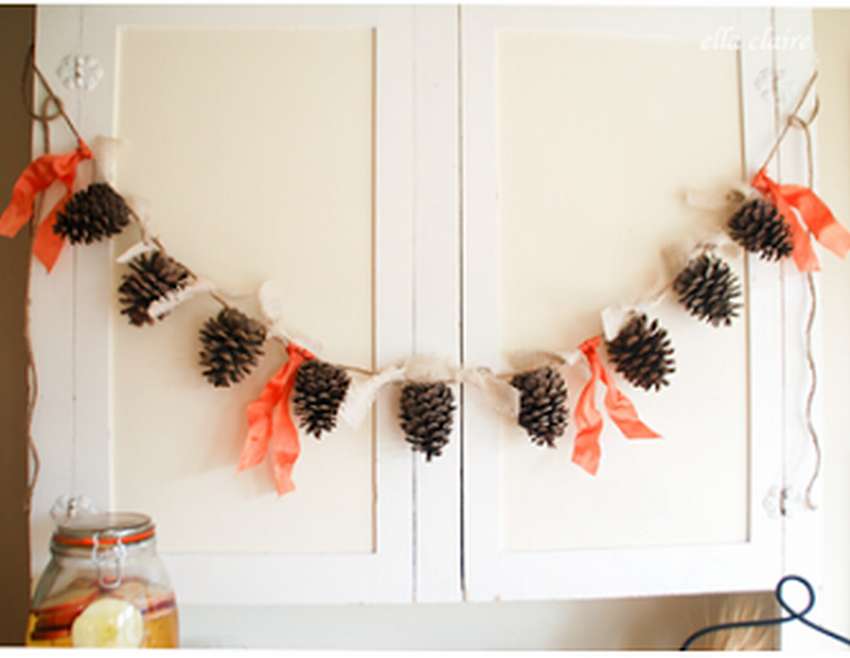 This is very simple cone garland. You will need a thick jute rope, tape and glue.
First, bend the jute rope at the point where you want to hang the first bump. You can start with mid rope and then alternately adding bumps on each side.
Apply hot glue to the center of the base of the first cone and fasten to the rope.
Keep repeating this until all the bumps are fixed. Keep a distance of approximately 10 cm from base to base.
Then simply tie small pieces of tape from the burlap between the bumps. You can still add long pieces of orange ribbon after every third bipod.
Make sure that all cones hang straight when you hang the garland. Below step by step photoswhere everything is shown in great detail.


https://i.expert-h.com/en/iz-shishek/girlyanda-foto#sigFreeId9b09534e87
How to make a New Year's garland of cones
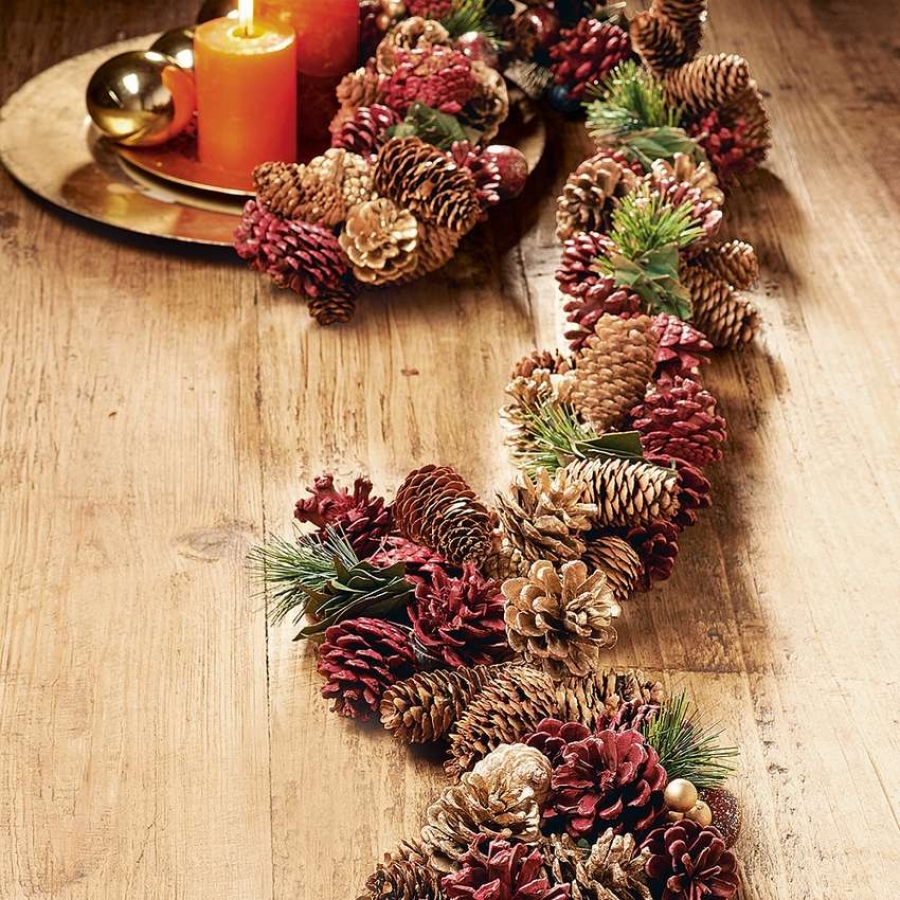
 When it comes time to get ready for the holidays, it suddenly turns out that your schedule is full. In the hustle and bustle of everyday life, it’s hard to find time to focus on the house. If you need inexpensive decoration in a short timesee an example of how to do do-it-yourself Christmas garland of cones. The beauty of this light decoration is that you can make such a garland right now and save it for the New Year. A cone garland conveys the natural warmth and texture of the season and is great for winter holidays. And, if you want a little “summer” in December, you can add artificial green leaves, hypericum berries and even flowers. Although it is beautiful as it is.
For a two meter garland you will need approximately 100 bumpsthick twine or wire.
- If you have decided on the length, prepare the wire and fasten the ends.
- Cut wires from 15 to 20 cm long and wrap part of the cones so that it is hidden by ridges.
- Take at least three cones or more, depending on how thick you want to make a garland, and form a bundle by twisting the wires together.
 Attach each bunch of cones to the garlandby twisting the wire around the twine, one by one, until the entire length is filled. Trim the excess and tie knots at the ends or make loops for hanging.
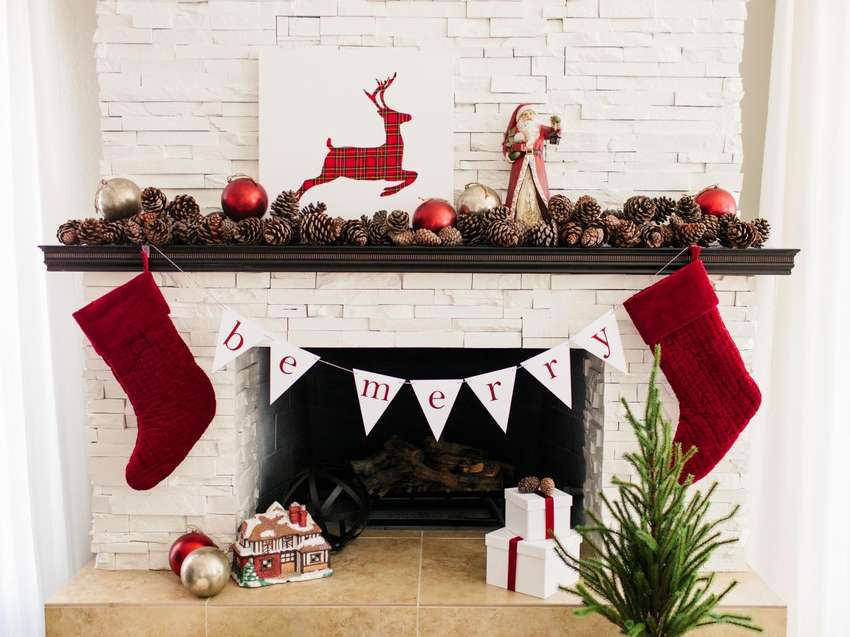
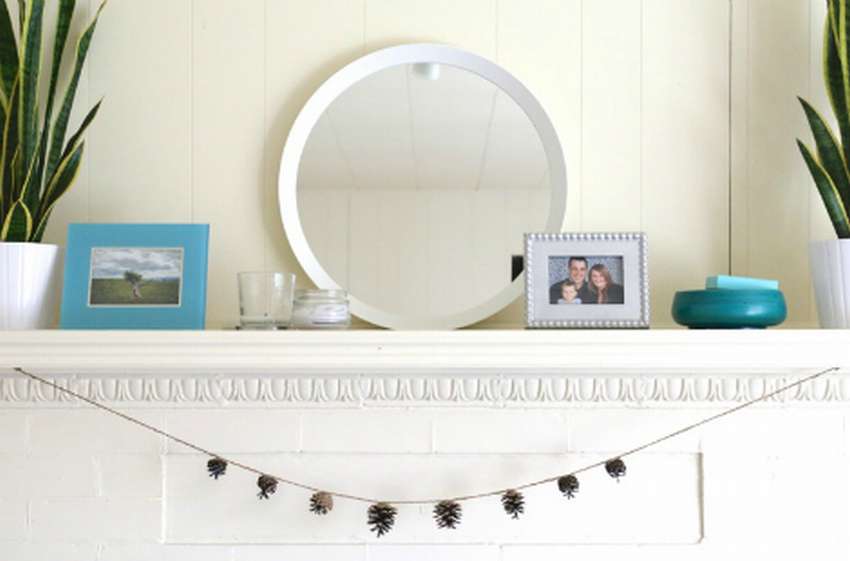
Garland of small cones
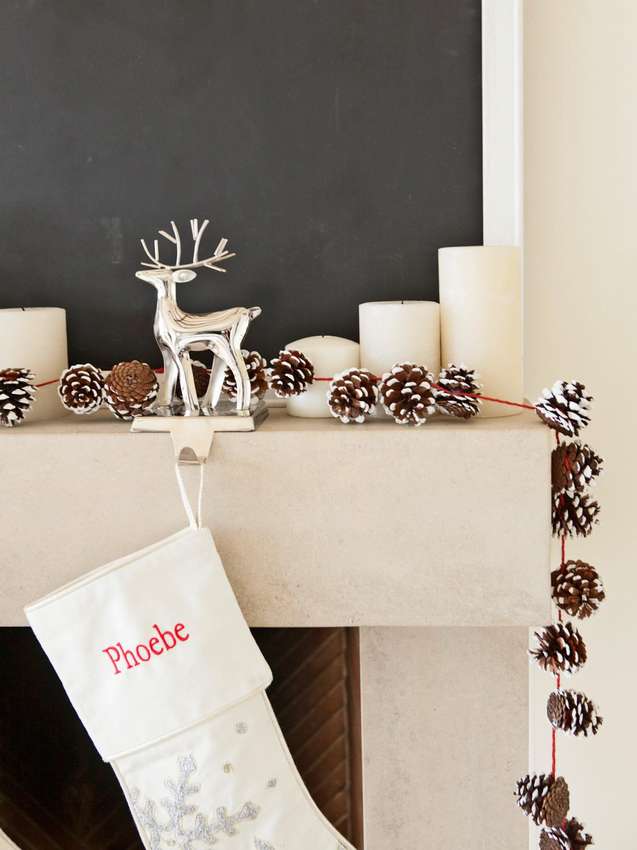 It's time to create a New Year’s atmosphere. Do garland of small cones and red yarn, lay on top of the mantelpiece or along the edge of the dining table. Here's how to do it.
Pour a small amount of paint on a paper plate and easily dip the cone so that only the tips of the scales are painted. When lowering, turn the bump so that each flake is coated with paint. Repeat with all the bumps and leave to dry.
Wrap the end of the yarn around the bottom of the bump and tie a knot. Keep wrapping while laying yarn under the flakesto fasten well. Once the required length is reached, cut the yarn. Fasten the pieces of yarn with a small amount of glue. After the glue hardens, drape the garland over the mantelpiece, railing, or anywhere else.
Necessary materials:
- small pine cones, white paint, red
- yarn or twine, glue gun, and scissors
- paper plate.
See below for step-by-step photos.


https://i.expert-h.com/en/iz-shishek/girlyanda-foto#sigFreeId9178008ada
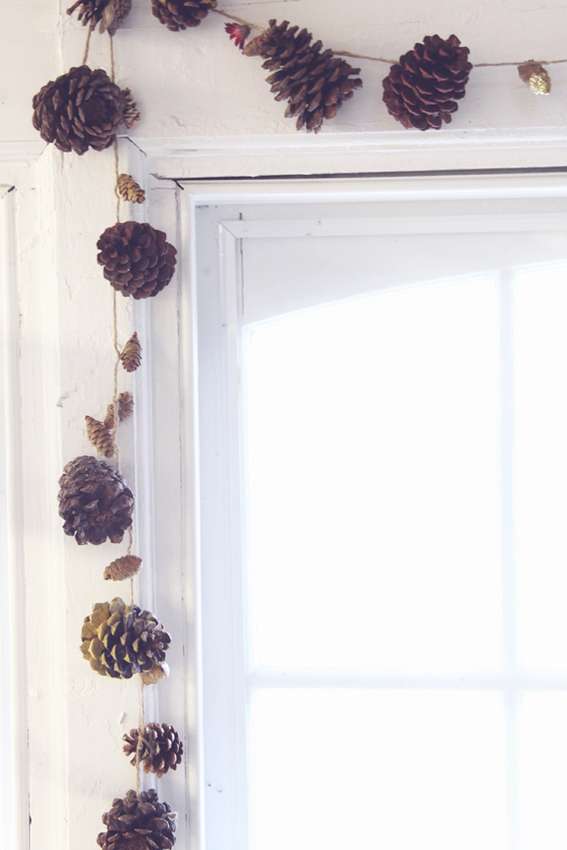
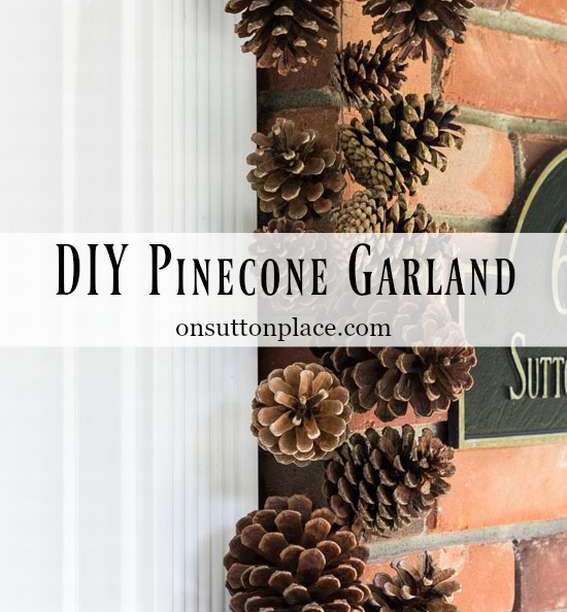 Garland on the door
It may be a little early to think about the New Year, but it is better to prepare in advance. Look simple step-by-step instructions on how to make a garland of cones with your own hands. Ideal for autumn decor, as well as for the New Year and Christmas.
To make a garland of cones, you will need ordinary floristic wire and twine.
It’s hard to say exactly how many cones will be needed, but I can guarantee that much more than you think.
To begin, cut pieces of wire of sufficient length to wrap around a wide part of the cones, with large tails. Use the pipeline method.
How to make a garland of cones instruction
 When all the cones are wrapped in wire, it's time to find out the length of the garland. If you want to hang on mantelpiece, just measure the length of the shelf and add about a meter. This garland would look great on stairs or around the window.
- If you have a long string, attach it to any base you use.
- Now all that remains to be done is to tie the bumps to the twine. To do this, simply wrap the wire around the twine. Adjust tails if necessary. About the ends ... you need to tie the end of the twine so that the bumps do not slip. Just tie a loose knot, attach a wire through it, tighten the knot, and then twist the wire.
- You can use large pine cones at the ends of the garland to add a little weight.
- And you can make the top part separately. Cut another piece of twine and fasten along the top of the door to the same nails that hold the side garlands. You can also do this in three sections. ... which is probably the easiest way. One on the left side, one on top and one on the right side.
- Again, if you are making a garland for a mantelpiece or along the top of a window, one piece of solid twine will be perfect. It is clear that there is no right or wrong way to make a garland, everything is learned from experience!
This is an interesting project, it’s a pity that there are no more detailed step-by-step photos, I hope the instructions were clear.


https://i.expert-h.com/en/iz-shishek/girlyanda-foto#sigFreeId4899d6b68c
Christmas cone garland
 Instead of using an ordinary store garland, make something interesting from natural materials. Surprise guests and save money. Here is an example how to make a christmas garland of cones. All will need at least 80 cones of different sizes and a floral wire. By the way, such a garland will be look great all year round.
It is necessary to cut pieces of wire of 20 cm for, wrap around the base of the cone and secure it by twisting together. Take three to four wires and twist them together to collect bundles of three to four cones. Then measure how long the garland will be and fold a few wires into a thick bundle. Fasten on it bunches of cones. New Year's garland is ready. See below for step-by-step photos on how to do this..


https://i.expert-h.com/en/iz-shishek/girlyanda-foto#sigFreeIdeb22aaa3b0
Backlit garland
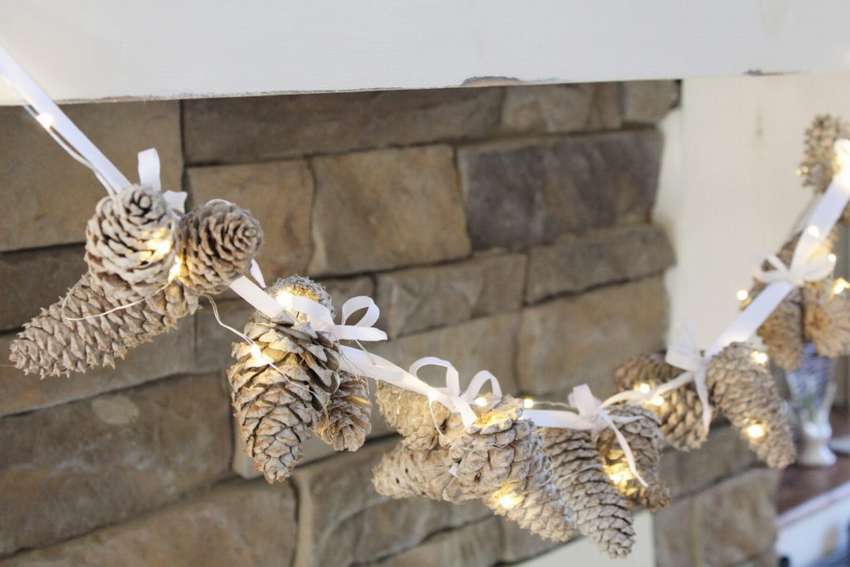 Beautiful Christmas cone garland.
Such an idea, tie the cones into bunches, fix it on a long rope and weave a New Year's garland with bulbs.
Detailed instructions how to make a garland of cones with your own hands read on the site.
Below are step-by-step photos.


https://i.expert-h.com/en/iz-shishek/girlyanda-foto#sigFreeId5499bd0f25
Sequined cone garland
 Highly a simple way to make a garland of cones, which combines natural materials and ordinary improvised means. To make it prettier make the bumps shiny. You can choose the color of your choice; here, white and silver were used for the snow effect.Pour some glue into a small dish or container and paint the upper half of the cones for a snowy effect, although if you paint the whole cone, it will also look very beautiful. Then generously pour the shine onto the glue that has not yet hardened and set aside to dry.
 When the cones dry, cut a piece of twine with a margin. Tie a small loop at each end of the twine. To attach the pine cones to the twine, first shake off the excess shine, then add some glue on the base of the first bump. Gently squeeze the twine into the glue and hold until seized. Start gluing from the middleso it is easier to distribute the cones in a garland. When you're done sticking, hang a garland of cones to see what you get. On the right, the photo shows what you need for work.


https://i.expert-h.com/en/iz-shishek/girlyanda-foto#sigFreeIdf2d46c1a70
Christmas garland for the fireplace
Here's another super easy way how to make a snow-covered cone garland.
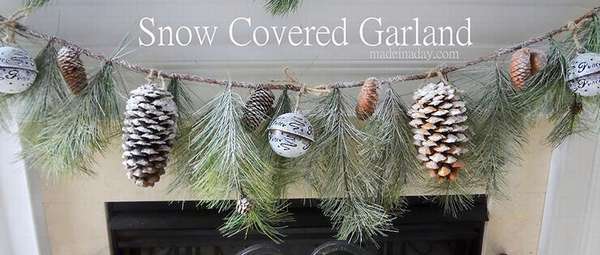 Just dip the gum-coated bump into Epsom salt and twist to fill the entire surface. Let dry for 24 hours. Shake off excess salt. After that, you can collect a garland. How to do it, look at step by step phabout.


https://i.expert-h.com/en/iz-shishek/girlyanda-foto#sigFreeId78160dd77e
Autumn cone garland
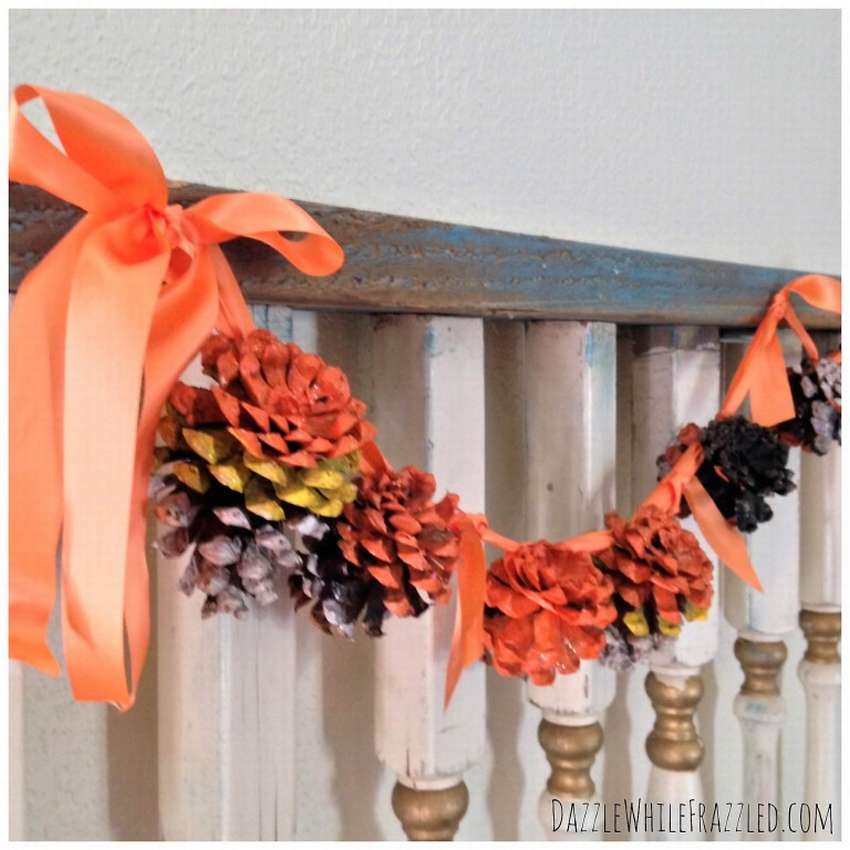 Here is an example how to make a simple garland of cones on the theme of autumnusing acrylic paints and tape. If you collected cones still raw cones, then the first thing they need to be washed and dried. Soak in the bath with vinegar for 30 minutes, and then dry for another half hour in the oven at a temperature of 200 degrees. Then prepare the tape and paints: orange, yellow, white and black. If you want a garland brighter, buy sparkles. Add some clear gloss paint. Cut a long piece of tape or string. Wrap the cones around the base and tie. Continue until you reach the desired length. Add a few ribbons between each pair of cones, just for beauty.
Attach to the railing, mantelpiece or around the door, adding a few bows.


https://i.expert-h.com/en/iz-shishek/girlyanda-foto#sigFreeId157eb775b0
Autumn garland of cones and willow
 Interesting idea, how to make an autumn garland of cones and willow branches.
Expert advice: if using a wire, bend it in half, wrap it around the branches, and then pass the ends through the loop, as if connecting a knot. Tighten and wrap the remaining end around the branches to secure them.
How to do it, look at the step by step phabout.


https://i.expert-h.com/en/iz-shishek/girlyanda-foto#sigFreeIdd34e5c5226
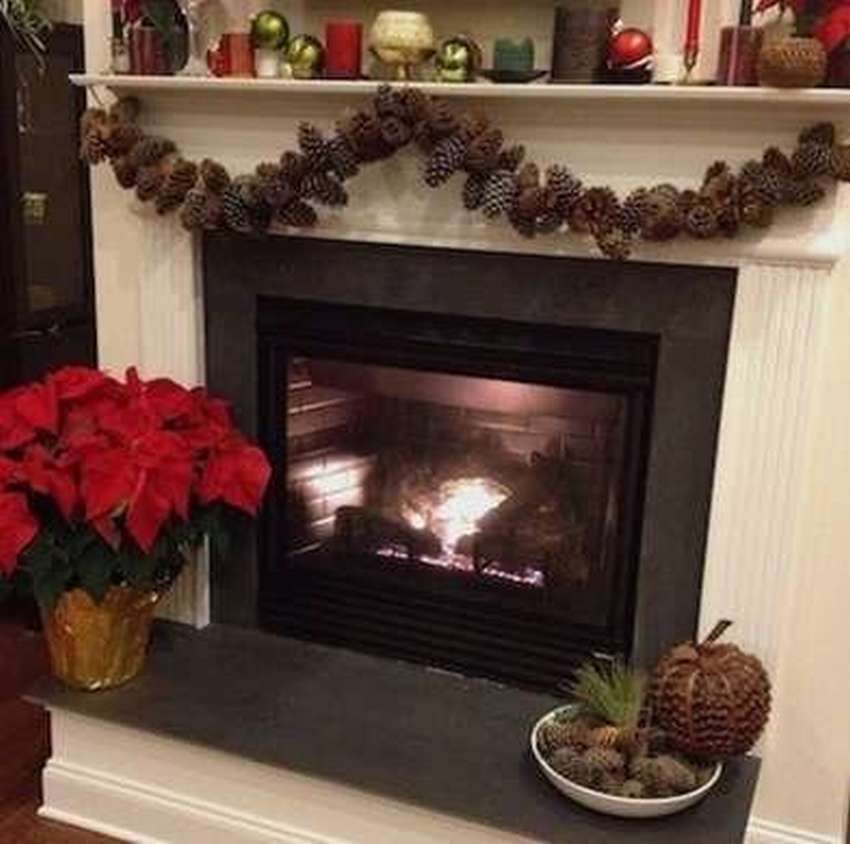
Garland of cones and twigs
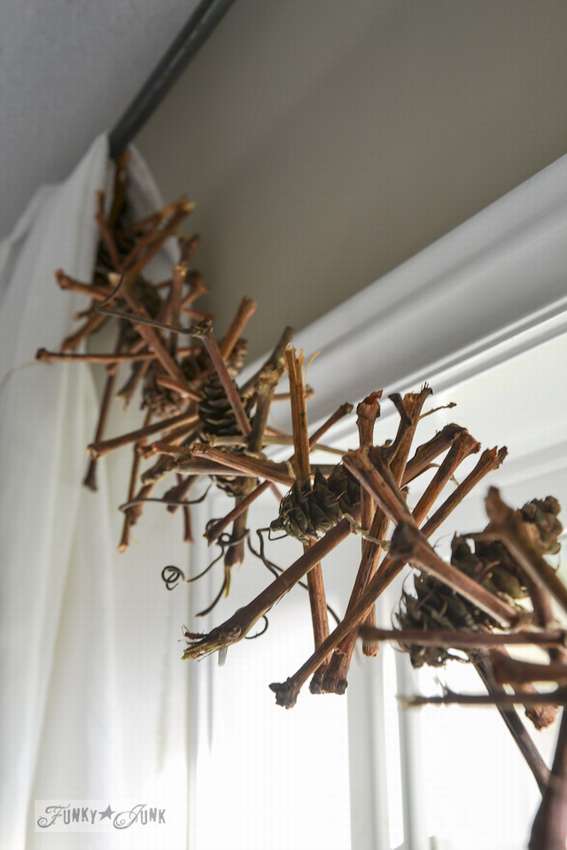 In this garland of cones and twigs used grape twigs. In the absence of dried grape bushes on hand, any twigs are suitable, preferably the same and more or less neat. The look of the finished product, a little rustic, but it is so conceived. Located above the fireplace, cone garland only emphasizes the sophistication of the atmosphere. It will not be difficult to collect the necessary material - sticks and bumps, this is not a problem. And the work, according to the author of this project, will take about 2 hours of free time.
- Take a piece of rope 2 times longer than the planned garland.
- Fold the line in half to determine the middle, and tie one of the branches at this point. Tie up for insurance again.
- Do this until the rope ends.
- Tie a bump every 7 sticks.
- When the rope ends, tie its loose ends with a triple knot.
In the same way, you can make several small garlands, then connecting them into one long one.


https://i.expert-h.com/en/iz-shishek/girlyanda-foto#sigFreeIddf7208135a
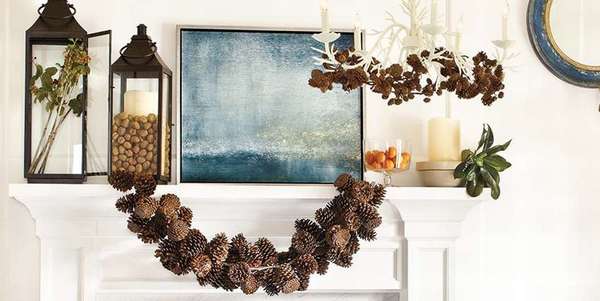
Big cone garland
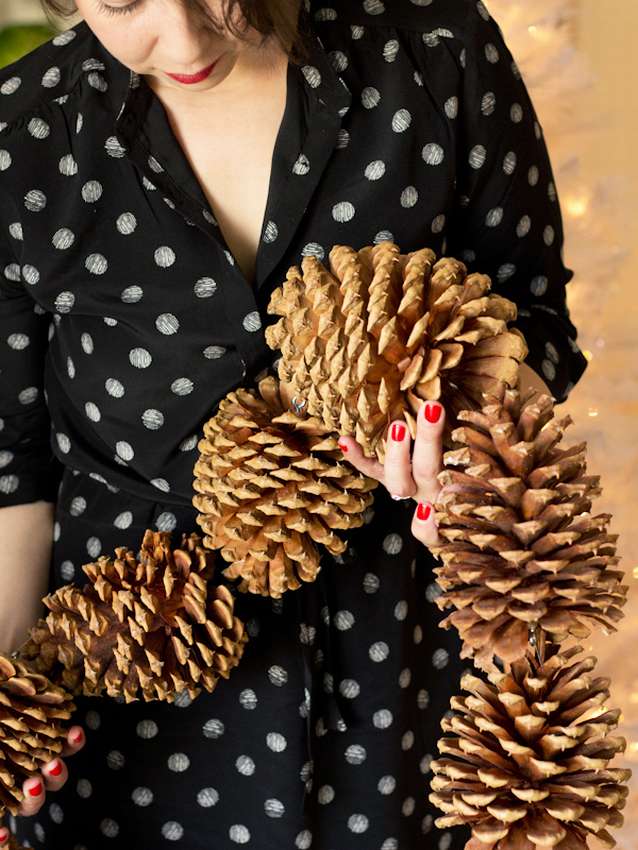 Are you ready for the holidays? How do you like that cone garland? You don’t need big ones, but if you can, you can do this giant cone decoration.
Materials: oversized pine cones, screws with rings, strong, transparent, not stretchable thread. Time: 1 hour
- First drill holes at the top of the bumps. Screw a screw with a ring into the drilled hole.
- Cut about 60 cm of thread and wrap the cones around the lower jaw. Twist tightly and securely with a double knot, leaving a few centimeters at one end and the rest of the thread at the other.
- Thread the long end through the ring in the first bump. Then stretch and wrap around the second bump.
- After making sure that the thread is tight, secure with a double knot and cut off the ends.
- Now that there are two cones, repeat the process and fill the garland to the desired size.
If you plan to hang, just make sure that the mount can support the weight of the garland.


https://i.expert-h.com/en/iz-shishek/girlyanda-foto#sigFreeId9240907f93
How to make a garland of cones and fruits
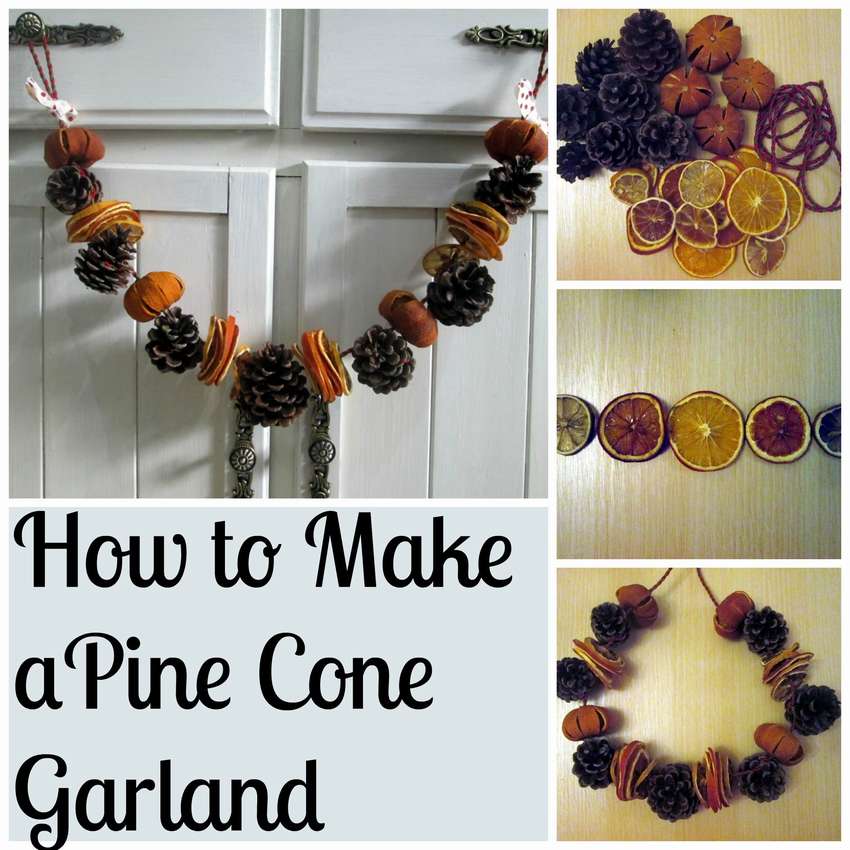 Garland of pine cones very easy to manufacture and has the added advantage that made from natural materials, and also looks beautiful and smells!
If pine trees grow in your area, then there are no problems with cones. In extreme cases, you can buy.
Dried fruits can be prepared by yourself.
You will also need: a cord 180 cm long, twine, dried whole clementines, 50 cm tape, a needle or a small piece of wire.
Used 7 pine cones, 4 dry clementines (similar to tangerine) and 20 dried fruit slices.
This garland is 80 cm long, including hanging loops.
How to make this fruit garland, look at the step by step photos. If you need instructions, a link under the gallery.


https://i.expert-h.com/en/iz-shishek/girlyanda-foto#sigFreeId5fb25b4b5c
How to flavor cones
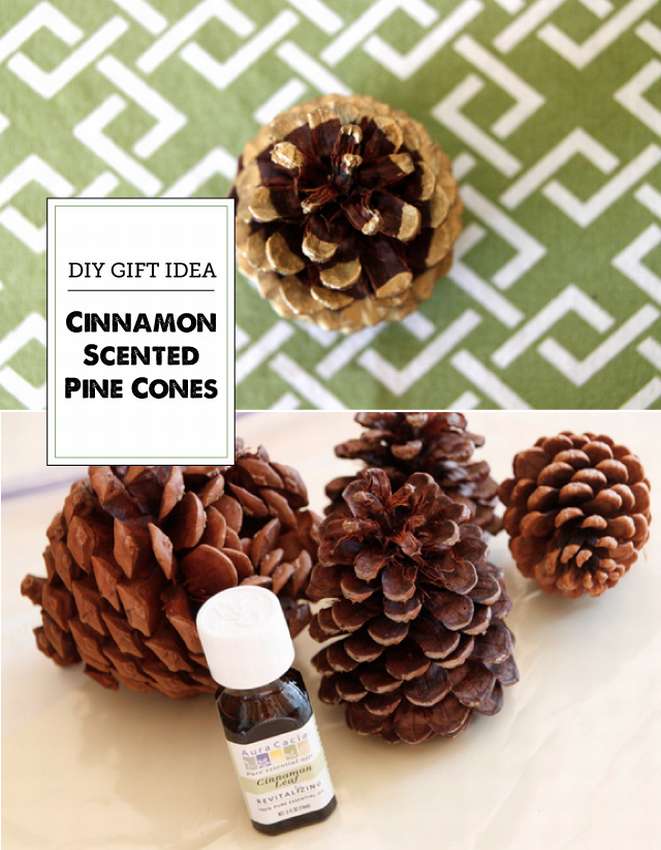 Cone garlands can be made not only beautiful, but also with pleasant smell. Here's a way to fill your home with festive cinnamon scents. Of course, you can buy aromatic pine cones in the store. But why, if you can do everything yourself for a small fraction of the cost? It is very easy! And most importantly, you can control how strong the smell is.
Here is how to do it ...
Make pine cones, cinnamon-scented essential oil (or any other scented oil you prefer!), A small spray bottle and a bag with a tight clasp.
- After collecting pine cones, lay them on a baking sheet and leave in the oven for one hour at a temperature of 200 degrees. This will open them, and also kill any living creatures or bacteria. Let it cool.
- Fill a spray bottle with a few drops of cinnamon oil and water.
- Put the pine cones in a large plastic bag and spray the cinnamon mixture in the bag. (just a few zilchs are enough).
- Shake the bag vigorously after spraying. Repeat this several times.
- The final step, close the bag tightly and put in a warm place.
The longer the cones are in the bag, the stronger they will smell. For moderate odor, approximately 5 days are required. If you want a stronger smell, leave it for longer.


https://i.expert-h.com/en/iz-shishek/girlyanda-foto#sigFreeIdd522708c5c
Garland of cones 100 photos


https://i.expert-h.com/en/iz-shishek/girlyanda-foto#sigFreeIdabf9b80202
Hello, I am the author of this article, so I look forward to asking questions for this article in the comments below, I will answer all !!!
If you have questions on another topic, ask them on our forum, we will answer you
- Two baskets of paper in 5 minutes (Master class)
- How to make a simple and compact table for a milling cutter from plywood
- How to make a soft headboard tile (Instructions + step by step photos)
- Cinder block benches: a convenient bench in 55 minutes
- How to make a bed with a niche: saving space (Master class)