Vase of cones step by step + 100 photos
 vase of cones photo
Looking for original ideas for crafts on an autumn theme? Make a vase of cones! It will give a natural shade to your home interior and goes well with any decor. A cone vase can be a wonderful detail for various compositions, for example, chic bouquets of leaves and dried berries or fir branches decorated with tinsel.
Craft a vase of cones has many other benefits. It can be used as a regular vase if you install a water tank in the middle, or purely for decorative purposes. But most importantly, it is very easy to do. Check out a few examples with step-by-step photos and see for yourself. In addition, you will learn how to make cute cone pot for succulents.
How to make a vase from cones
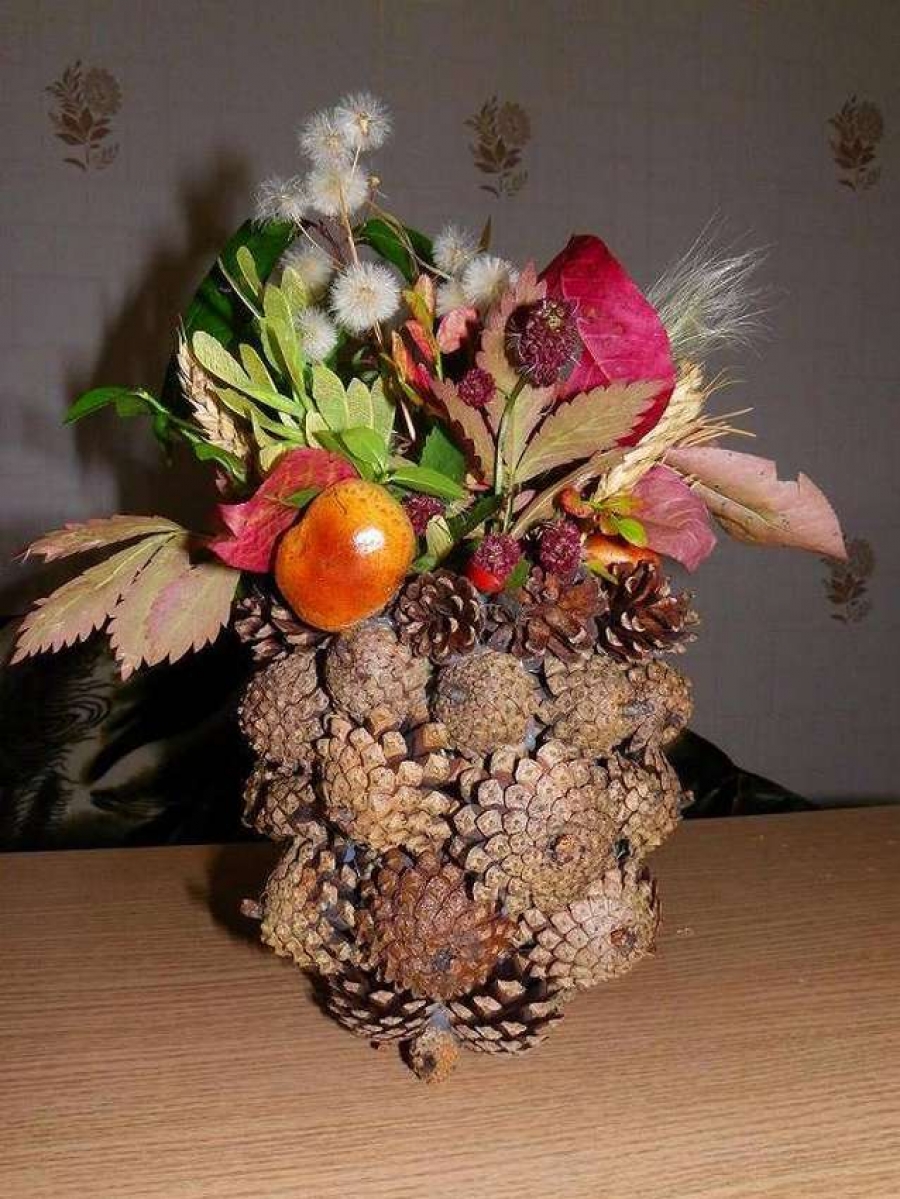
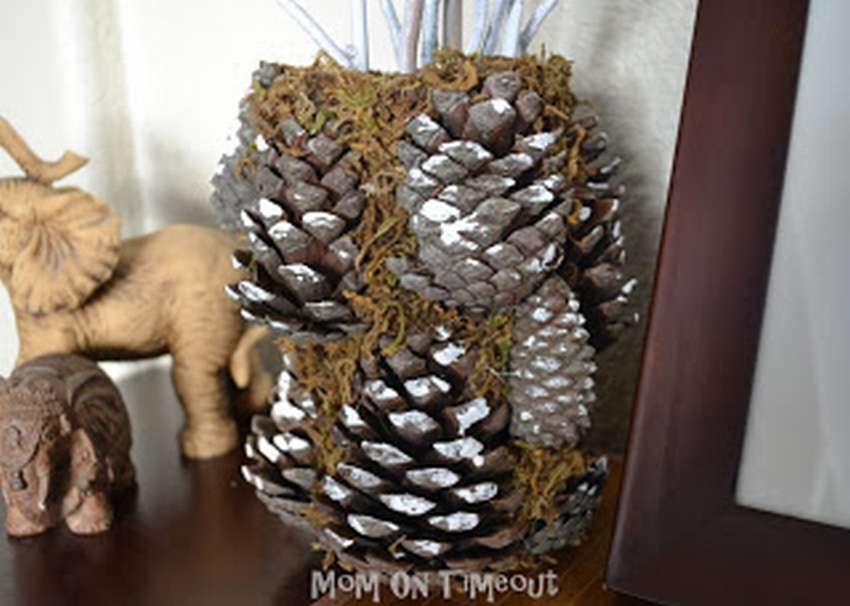 This is not only a beautiful craft, but also a very practical thing. Such a vase of cones can be used for its intended purpose - to pour water and put flowers. The idea is to cut the pine cones in the center and then glue the old vase in halves. Get a wonderful decoration for the New Year. The gallery below shows how to make a vase of cones step by step. In short, find an old vase, wrap it with thin cardboard, stick the cones on the cardboard, paint the tips of the scales white (or whatever you like), the spaces between the cones fill with moss. That's all beautiful crafts cone vase ready.


https://i.expert-h.com/en/iz-shishek/vaza-poshagovo#sigFreeId3858ac0008
Do-it-yourself vase of cones
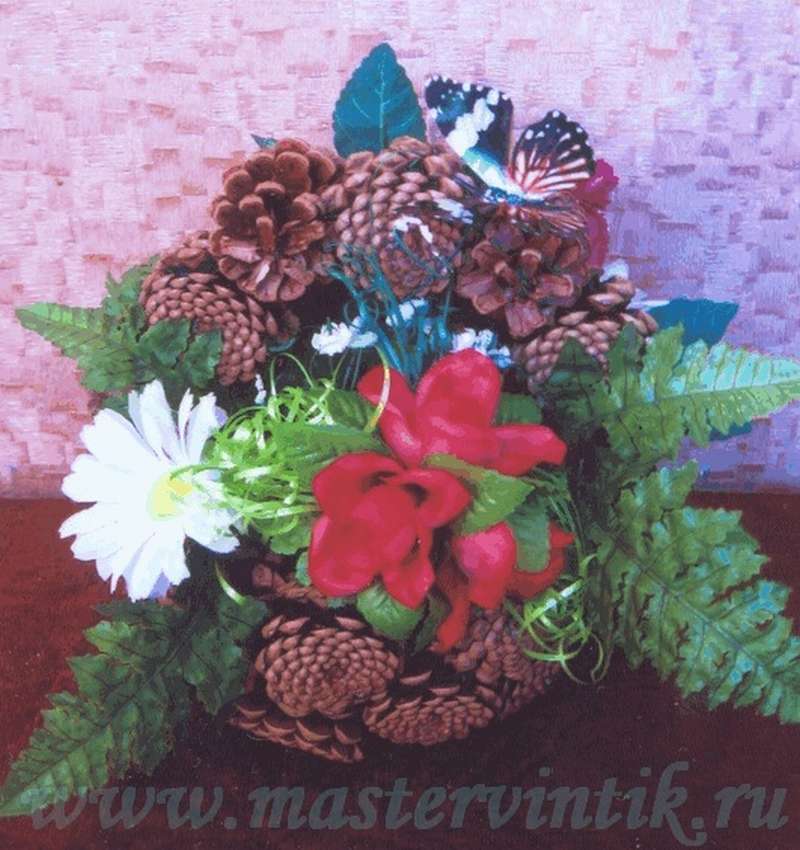 This example shows how to make a vase of cones original round shape. In connection with the upcoming winter holidays, an excellent craft for decorating the interior. However, this vase is suitable for all seasons, in autumn for a decorative bouquet of bright fallen leaves and dried flowers, in winter for wonderful New Year's compositions of fir branches. And in the summer, if you set in the middle some water tankyou can enjoy beautiful bouquets of fresh flowers.
Core tools for making a vase from cones, this is glue and thin wire. If you want to read the full instructions, the link is under the gallery. On the site you will learn not only how to make a vase of cones with your own hands, but also tips on how to prepare bumps for crafts.


https://i.expert-h.com/en/iz-shishek/vaza-poshagovo#sigFreeIdc4192fdbb7
Here is another similar example, how to make a vase of cones with your own hands.
 The principle is the same as manufacturing baskets of cones.
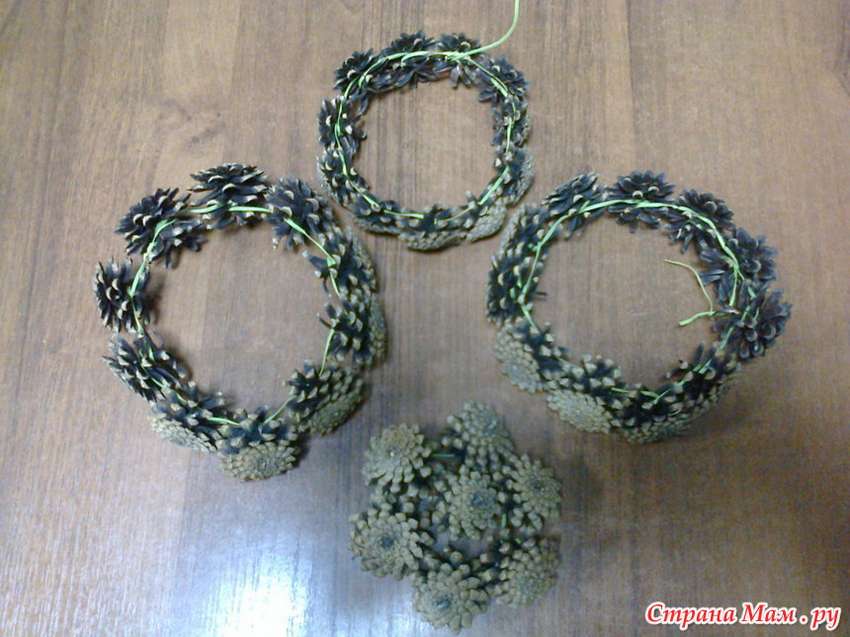
Step-by-step instruction
- Using wire and glue, make several rings of wreaths of different diameters.
- Then in the same way fasten the rings together, increasing the width of the ring.
- You start from the middle, completely collect the bottom, then add 2 - 3 tapering rings on top to give the craft a spherical shape.
- To make the bottom of the vase, collect the same ring, only of a smaller diameter, glue suitable cones in the middle in the middle and pass the wire intersecting in the center of the bottom.
- This is for reliability, and you can just stick it.
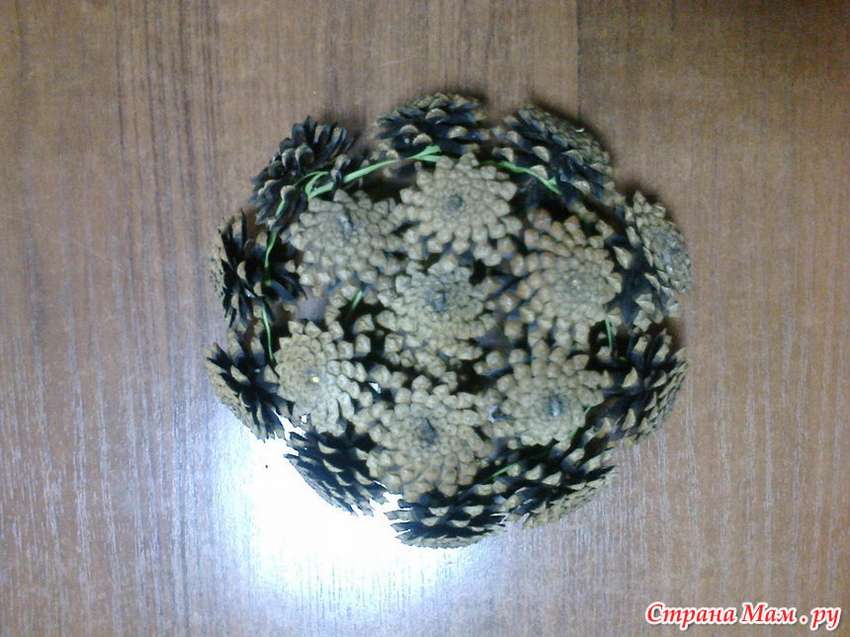 Can paint or varnish and a festive cone craft is ready.
Vase of cones master class step by step
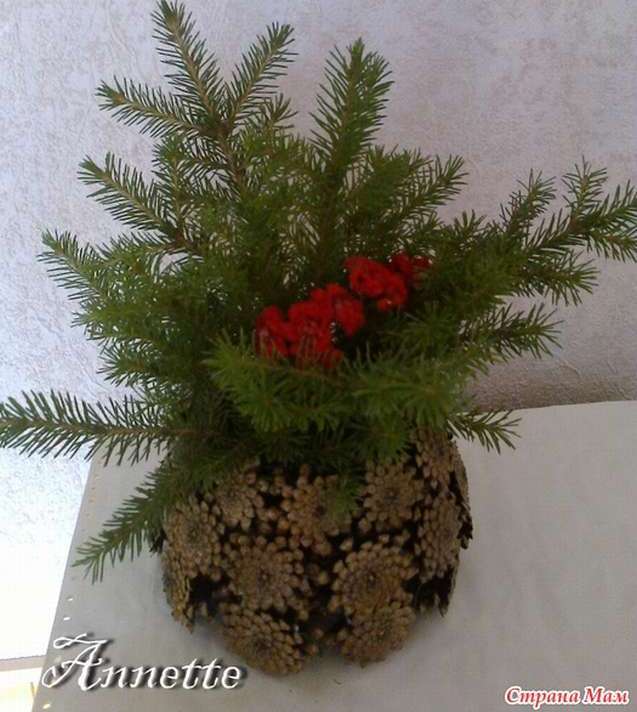
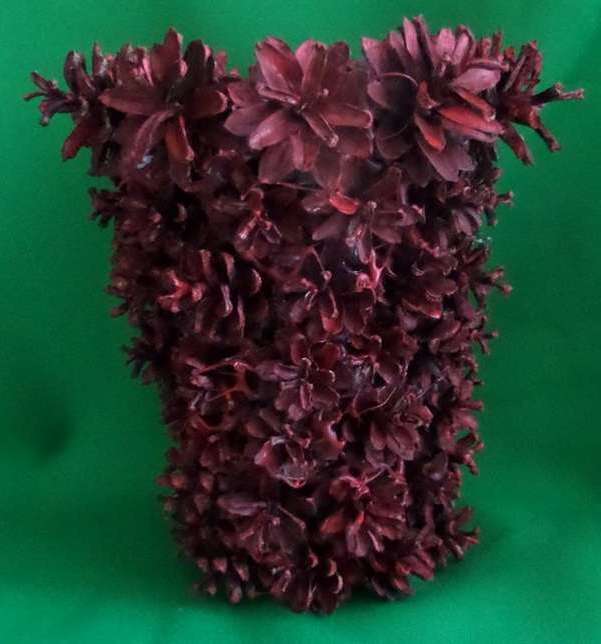 The easiest way to do do-it-yourself vase of conesIt’s just glue the necessary construction. Prepare a bunch of cones, more or less the same size, a lot of glue and be patient. Glue the first ring and then just build up, row by row. The crafts presented in the photo consist of seven rows several transverse cones on the crown of the vase, purely for beauty. Then in the same way you make the bottom, that is, several cones are glued together in one plane. Finally, cover the vase with a thick layer of paint to hide traces of glue.
Below see step by step photos, everything is simple and clear. If something is not clear, on the site (link under the gallery) there is vidio.


https://i.expert-h.com/en/iz-shishek/vaza-poshagovo#sigFreeIdcc6155313a
Cone pot
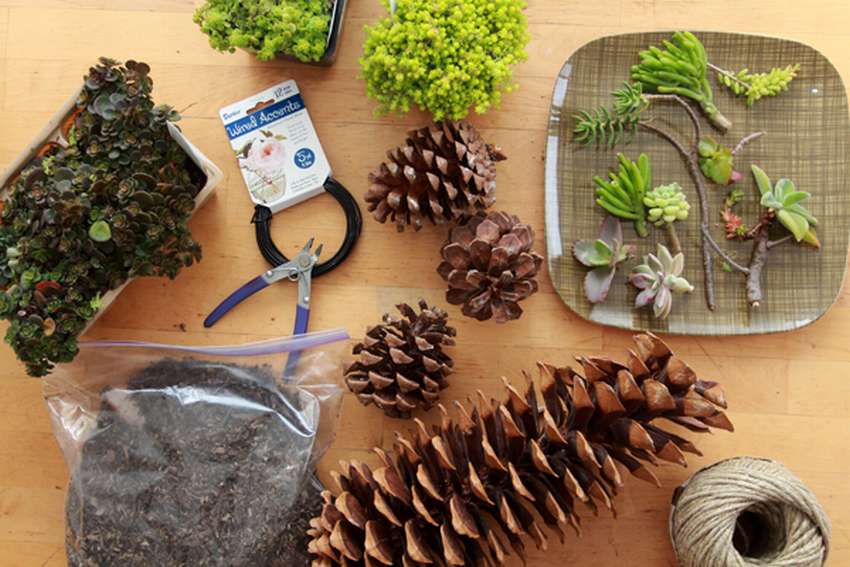
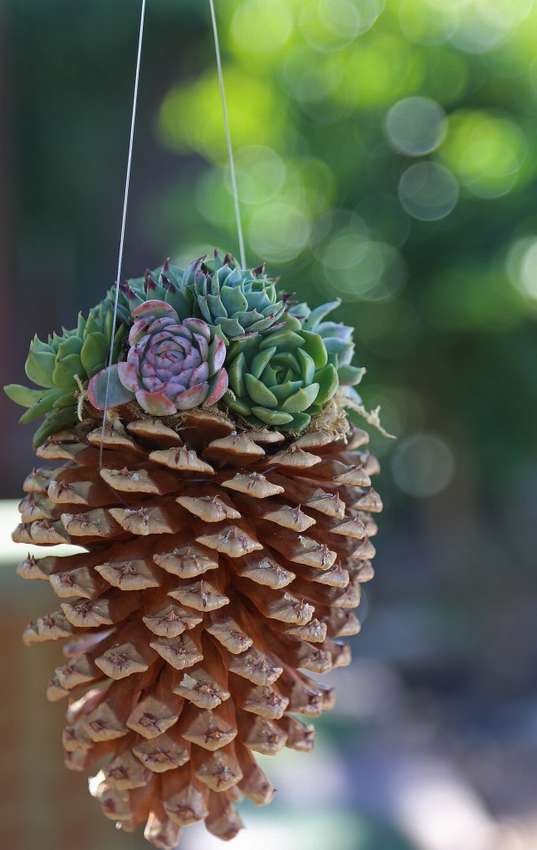 The root system of succulents is small, therefore very small dishes are enough for them. This makes it possible to use very original solutions like pots for succulents from cones. Try to pick a large bump in diameter 6 - 7 cm. The bottom of the bump must be slightly concaveto make it easier to fix the moss. Just use a pair of pliers to “bite off” a few pieces from the rod. Then prepare glue and about 2 meters of thin durable twine or fishing line. For work, you will need a small strong vessel to put the cone upright. To fill the pots, take moss sphagnum, some soil and a few small succulents.
- Lay the moss on the slightly concave top of the cone and glue it by spraying glue.
- Tie a cone with a fishing line a couple of times so that it fits snugly to the core of the cone.
- Tie the remaining free ends with a very strong knot of centimeters 15 - 20 from the bump.
- To be able to act with both hands, place the cone vertically in the prepared vessel (you can use the cap from the bottle with glue).
- Peel the stalk of the succulent from the soil and "children", leaving its length about 2 cm.
- Attach the stalk of the succulent among the moss and fix it until its own roots have developed.
- Hang and enjoy the original look!
The step-by-step photos below show how to make a cache-pot from cones for succulents. Master class.


https://i.expert-h.com/en/iz-shishek/vaza-poshagovo#sigFreeIdc4651949c0
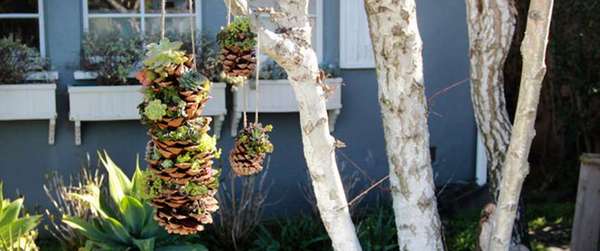
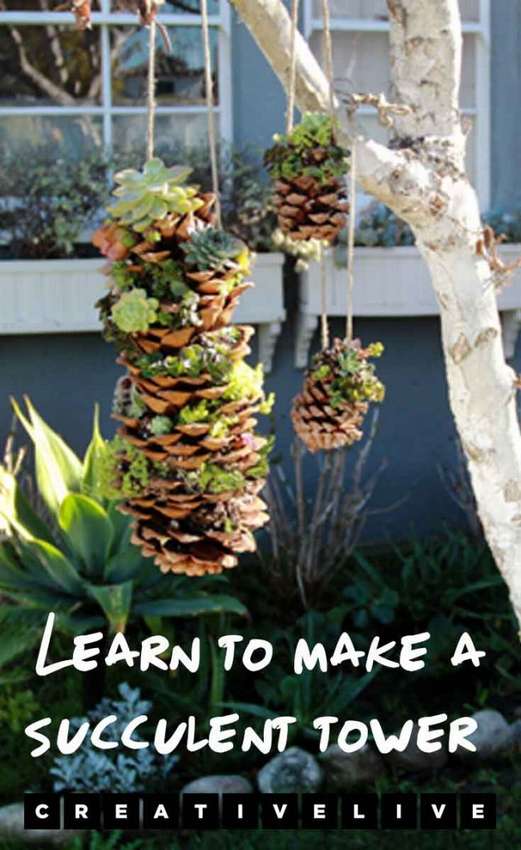 If you liked this idea, you can improve it and make a great hanging succulent tower of cones. This is a great creative solution that can be made indoors. This project combines the basics of floral design with standard pots making techniques. You will practice by carefully manipulating the plant material to beautifully succulents in this multi-story cone pot.
You will need twine, wire shears and soil for succulents.
Start by choosing cones that have open flakes, at least half. If you find unopened cones of a suitable size, then this is easy to fix, just drying them in the oven.
Fold a few scales with your fingers to make room for succulents, soil, and plant roots. Succulents do not need a ton of water, but they will dry quickly if you do not give them a little soil.
If you plan to hang your cones, cut the length of the twine to about 70 cm and wrap around the cone, about 3 cm from the top. Tighten the twine and securely. Then tie the loose ends of the twine into a solid knot.
 Take one of the succulents, where there is a network of thin roots and slightly moist soil. Lay the soil in the open corners of the cone and attach the plant. Use wooden toothpick or pencil.
One succulent can be attached at the top of the cone.by making a slight indentation.
After a couple of succulents are planted, cut the wire and carefully wrap it around the plants, carefully twist the ends. When the plants are fixed and take root, the wire can be removed. Do not forget to water the succulents, especially the first time, until they take root, it will take about a month. You can water with a hand sprayer.


https://i.expert-h.com/en/iz-shishek/vaza-poshagovo#sigFreeIdcb16a0b519
Vase of cones 50 photos


https://i.expert-h.com/en/iz-shishek/vaza-poshagovo#sigFreeIda0571c1e04
Hello, I am the author of this article, so I look forward to asking questions for this article in the comments below, I will answer all !!!
If you have questions on another topic, ask them on our forum, we will answer you
- Two baskets of paper in 5 minutes (Master class)
- How to make a simple and compact table for a milling cutter from plywood
- How to make a soft headboard tile (Instructions + step by step photos)
- Cinder block benches: a convenient bench in 55 minutes
- How to make a bed with a niche: saving space (Master class)