DIY birdhouse made of wood: step-by-step instructions
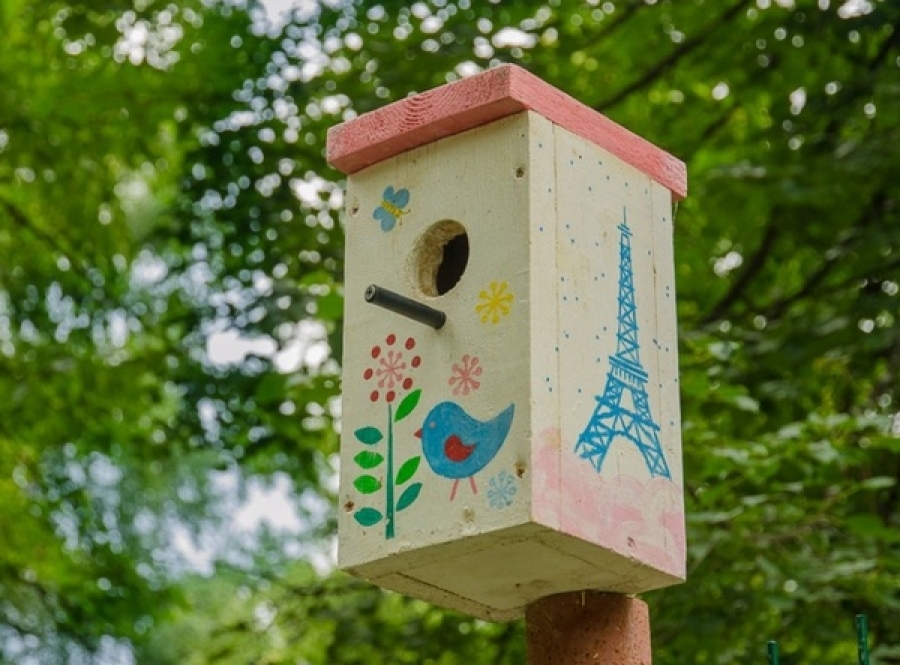 do-it-yourself birdhouse made of wood
Designing and making a birdhouse is an interesting and fun activity, it’s even hard to tell who is of more use to the birds or the master. Traditionally, bird houses are made of boards, and raw boards, this is the most suitable material for our feathered friends. Therefore, this article presents photos and instructions from which you will learn how to make a birdhouse with your own hands from a tree.
Birdhouse should be functional and preferably look good. You can always spend a little time to add some interesting details to the birdhouse, which turn an ordinary wooden box into an interesting and unique example of courtyard art.
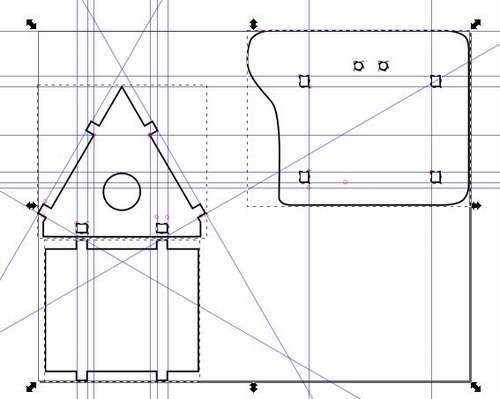
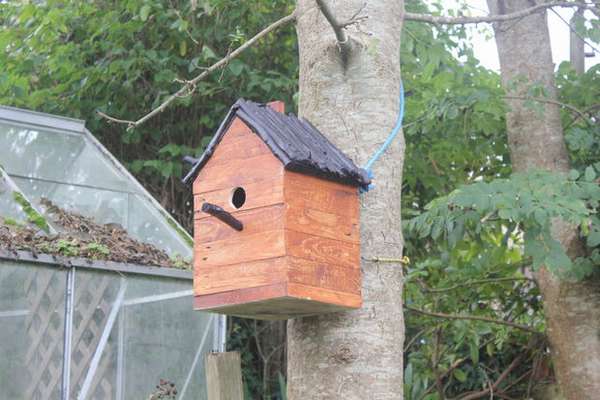
How to make a birdhouse from a tree
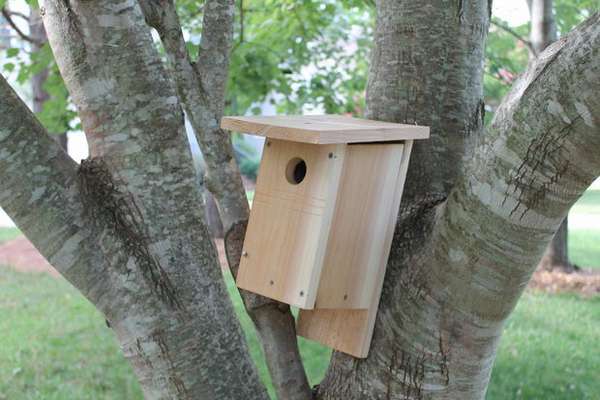
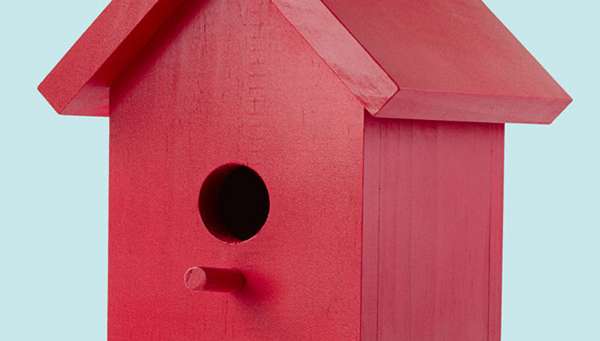 A project for a novice master. Do you want to know, how to make a birdhouse from a tree in one day from one board? Everything is very simple.
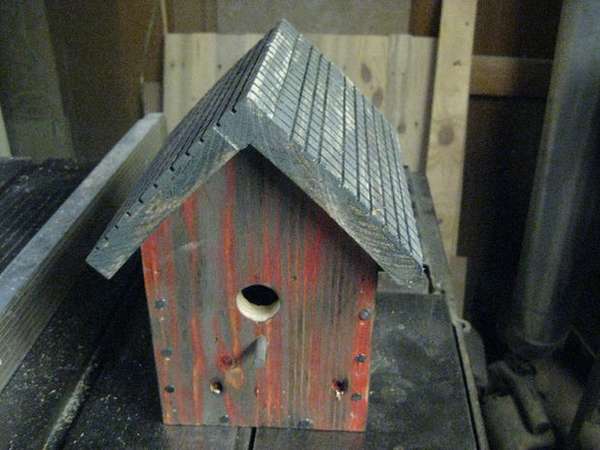
 Secure the sides of the rear panel
- Cut the board according to the drawing. Then make a 5 cm long perch. Sand all parts with sandpaper. On the front side, drill a hole with a diameter of 4 cm and another one for a pole with a diameter of 15 mm. Install the perch.
- Glue the two walls on the back.
- When the back and side joints are dry, glue and clamp the lower and front walls.
- Cut 2 cm from the length of one of the upper panels - to get an overhang on both sides. Glue the roof panels together. Use duct tape instead of clamping.
- Apply glue to the upper edges of the front and back and install the assembled roof.
- Use duct tape to secure the top while the glue dries.
- When the glue dries, remove the tape and paint the birdhouse.


https://i.expert-h.com/en/skvorechnik/1024#sigFreeIdd922954494
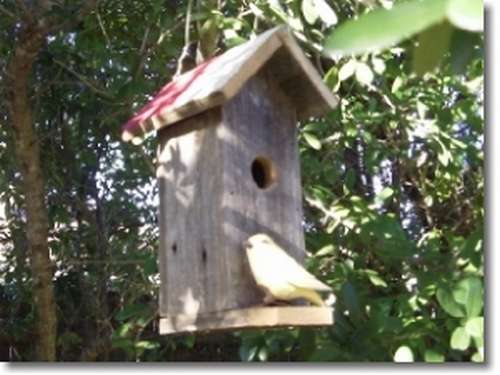
Wooden Birdhouse
 Simple instructions with drawings and dimensions, how to make a birdhouse with your own hands from a tree. This simple and neat house will surely appeal to the birds. You can assemble this reliable birdhouse for just a few hours, if you use the schemes presented here.
Keep in mind that you will also need to maintain your birdhouse by cleaning it after the nesting season. To make this as simple as possible, this project provides a hinged side wall that is held in place by a hinge or two nails.
You will need one board with a length of 120 cm, nails and screws.
Step 1: saw the board to the dimensions shown in the diagram. Cross the six parts and mark them.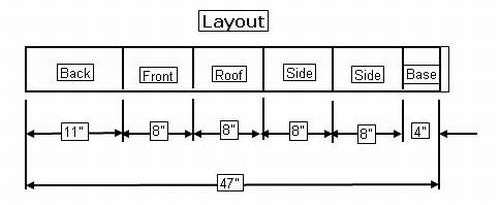 Step 2: Drill the holes as shown in the diagram.
Step 3: Assemble the birdhouse, first the back, right and bottom. For the front end, pre-drill holes. Then twist the back, right sides and front part from below, as shown in the diagram.
Step 4: Complete the build. Attach the roof as shown in the photo. Then attach the left side at the top with a hinge or two nails so that the wall opens for cleaning. In the lower left corner of the front, drill a hole through the front to the side so that you can insert the locking pin. Screw in a screw that will serve as a perch for the tap hole.
Sand and paint if you want.


https://i.expert-h.com/en/skvorechnik/1024#sigFreeId9febbcc784
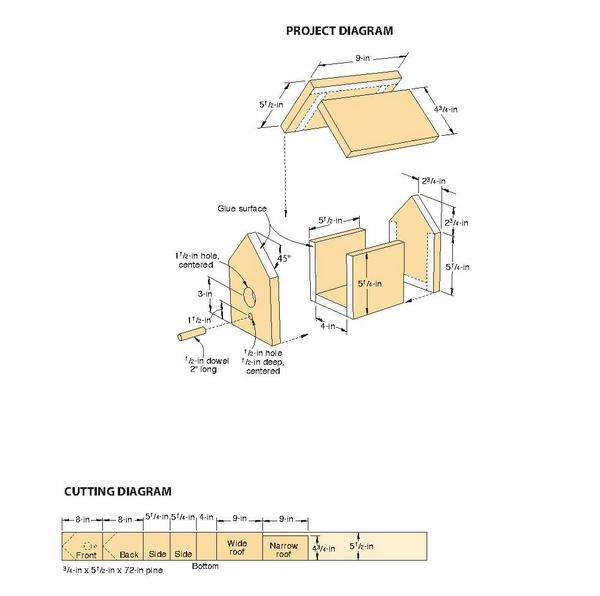
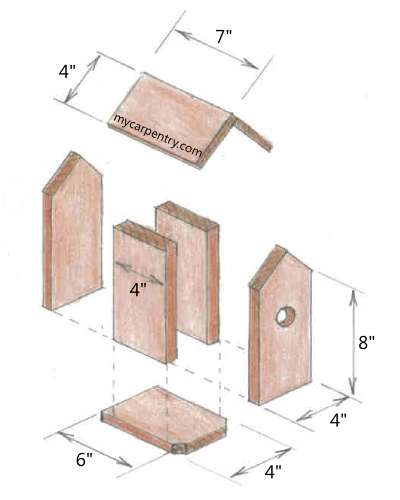
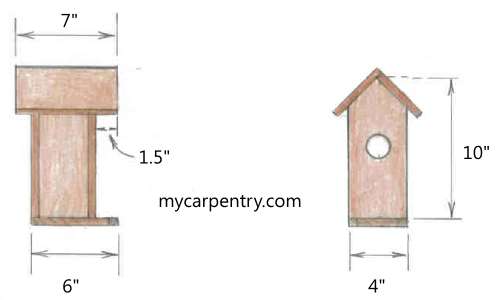
Birdhouse made of wood drawings
 This birdhouse is so simple that even a child can handle the job. Just prepare the glue and the finished parts for the children, let them collect wooden birdhouseand then, when the structure is ready and the glue dries, just fix all the details with nails. The assembly order with the dimensions of the parts that you need to prepare is shown in the drawings, the sequence of fastening of all parts is also shown there.
The thickness of the board in this case is 1.5 cm, in the drawings the dimensions are in inches, nothing complicated, just multiply these numbers by 2.54 - get the dimensions in centimeters. (1 inch 2.54 cm).
You need to cut such parts:
- 2 pcs - 7 ¼ inches front and rear walls - the longest point, cut the top corners at a 45 ° angle to make the house shape
- 2 pcs - 4 ¼ inches side walls
- 3 pcs - 8 ½ inch floor and roof parts.
The whole assembly process is five steps
Step 1: Attach the floor to the back wall, the trailing edges are flush.
Step 2: Attach the side walls to the back wall and floor.
Step 3: Attach the front wall to the sides and floor.
Step 4: One part of the roof should be 1/2 inch less than the other, with overlapping. Attach to the front and rear top edges.
Step 5 Then attach the rest of the roof.


https://i.expert-h.com/en/skvorechnik/1024#sigFreeId882078e843
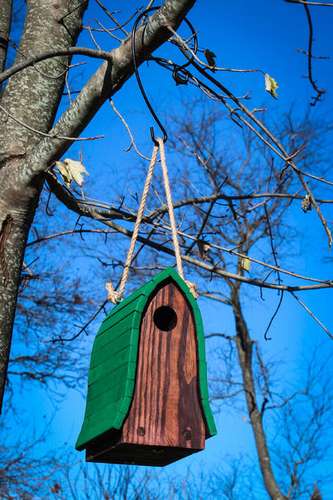
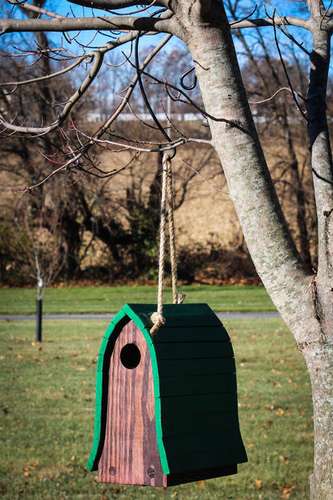
Double birdhouse with flowerbed
 If you have a couple of extra boards, you can make one like this double birdhouse with a flower bed.
You will need:
- 1x8 board 122 cm long
- 1x6 board 244 cm long
- Nails, glue, drill with drills
Assembly
- Saw four identical front parts, and then cut the backs 2 cm to the sides and bottom.
- Glue and nail all the walls, as shown in the photo.
- Cut the bottom and fasten, leaving a gap of approximately 3 mm for drainage. However, it can be done without gaps, but just drill holes
- Install the roof
- Drill a few holes in the rear for ventilation
- Set on a pillar, fill the box between the birdhouses with soil, plant flowers.
Very comfortable, and birds and flowers, two in one.


https://i.expert-h.com/en/skvorechnik/1024#sigFreeId1a244df36a
If you like double birdhouse with flowerbedLook another option. The assembly order is the same, so I won’t rewrite the instructions. Details are on the website of the author of the project.


https://i.expert-h.com/en/skvorechnik/1024#sigFreeIdbc54c95c18
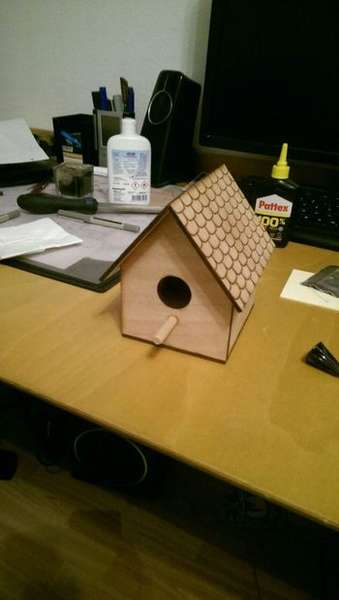
And here's how to make a double birdhouse with a flowerbed using CNC
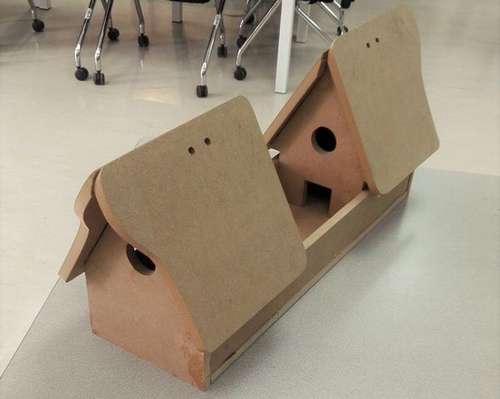 Material List
- CNC machine
- Plywood sheet
- Wood glue
- Rubber mallet
- Milling machine
Design or download
To draw figures, the author used Inkscape, a well-known vector graphics editor that successfully works in Windows, Linux, MacOS. It’s convenient in that you draw not with pixels, but with figures and formulas, that is, it’s easier to scale images. Although it would be simpler with parametric CAD software such as freecad or solidwork, it did the job nonetheless.
 Step 1. This design is based on MDF 11 mm thick, so you will need to change the design for the thickness of your material specifically for T-joints
Step 2: CNC
After editing the design in Inkscape or the vector software of your choice, export it as a PDF, then import the PDF for the Vcarve Pro CNC machine (if you are using Shopbot CNC).
Create toolpaths for profiles using the toolpath menu
Step 3: Assembly
After all parts are cut, follow the instructions on the attached images.
Use a rubber mallet to fit the pieces together, or wood glue if necessary
Step 4: Conclusion
You may have to fix the design to match the material you use, but with minimal editing you can have your own birdhouse in minutes.


https://i.expert-h.com/en/skvorechnik/1024#sigFreeId5744a9df77
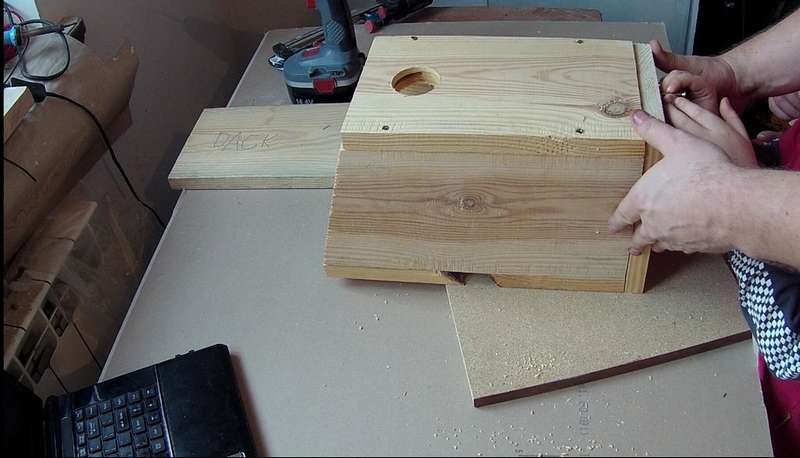
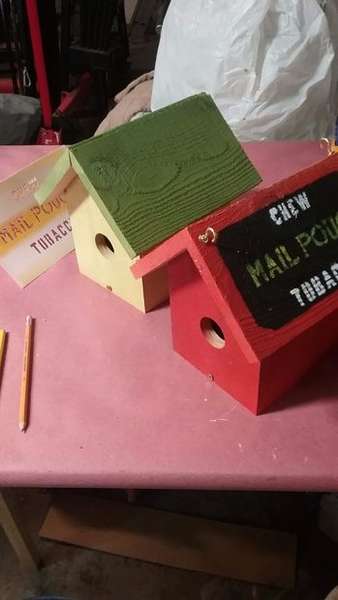
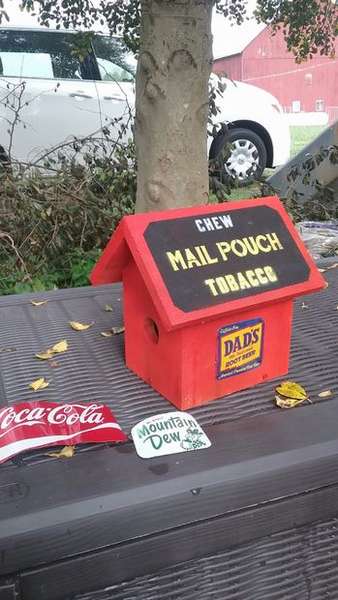
Birdhouse with feeder
 Following this instruction, you will not just make a safe house for birds, it is also for two apartments. In addition, your birds will not have to fly far to find food - the feeder is located directly on the roof of the birdhouse.
Materials: 13 cm wide board, saw, ruler, nails, hammer, grinder or sandpaper.
Dimensions for blanks:
- 15x20 cm, 20x30 cm, 5x30 cm, 15x32 cm (two parts needed)
- Middle part: 13 x18 cm (only one part is required)
- Trapezoid: 15 x15 x 30 cm (two parts needed)
Some assembly tips
- Before you start sawing, draw shapes, this will help to make a cleaner cut.
- When shapes are cut out, make sure the edges are smooth.
- Install the two parts 15 x 20 cm and 15 x 32 cm aligned together so that the two sides of 15 cm touch each other.
- Shoot down the pieces as shown in the photo.
- The cut-out part is 13 x 18 cm, this is the partition inside the box. When gluing, keep the parts straight so that the wall is straight. If you get a tilt, gently tap the hammer on it.
- Once the box is ready, install the roof. Nail the trapezoid to the 10 x 32 cm part. Be sure to do this on both sides. To make the roof reliable, nail the sides of the house from below.
- Color birdhouse


https://i.expert-h.com/en/skvorechnik/1024#sigFreeId63d62a1b5e
Beautiful birdhouses with their own hands made of wood
 First of all, the birdhouse should be functional, but nothing bad if you make it beautiful too. There is no universal birdhouse, the sizes and shapes depend on the birds who want to live in them. Research which birds are in your area, then sizing online.
In this case, the author chose a house for the sparrow, so the dimensions:
- Entrance - 33 mm
- Height - 240 mm
- Depth - 110 mm
Remember: the distance between the bottom and the entrance should not be short so that predators (i.e. cats) do not climb
Cut out parts of the birdhouse. In fact, you only need:
- two sides with the same size
- front wall
- back wall
- roof
 First, cut out the back, then you will know how to cut the sides and bottom. The roof should be about 5 cm longer than the entire birdhouse.
 - Make a hole for entry (use a drill or a sharp knife)
- Make small screw holes to prevent wood from splitting. Now connect these parts to the sides with screws. It's all!
Birds do not mind settling in a painted house, only if the colors are not too bright. Therefore, be creative and decorate your garden with beautiful birdhouses.


https://i.expert-h.com/en/skvorechnik/1024#sigFreeId119c9f6ccf
Simple birdhouse
 Do you know that every day the average wild bird eats insects at 1/3 of its weight? Often a small bird eats more than its own weight in one day. So do not underestimate our little feathered friends.
To protect your garden from pests, forget about chemistry, better make a simple birdhouse, and its residents will help you with your problems.
Step 1: Parts List
 Everything is very simple, you need 6 parts. It will take only one board, just do not use processed wood, it contains toxic chemicals that are harmful to you and the birds.
Step 2: Cut the sides. The sides have a slope, therefore, to cut this angle, set the saw at 11 degrees. To make the sides fit perfectly, saw them off at the same time.
Step 3: Drill an Entry Hole. Drill a hole about 8 cm from the top in front. It’s better not to establish the perch, why help cats, get to the nest, there is more harm than good from it.
Step 4: Build. This part is pretty simple.. Birdhouse is collected in only one way. Remember to make drainage holes in the floor. Use a good waterproof wood glue.
Step 5: The Most Important Step. Hang a birdhouse on a tree and enjoy the fact that you have done a useful job, creating a safe environment and controlling insects in your area.


https://i.expert-h.com/en/skvorechnik/1024#sigFreeId530998da34
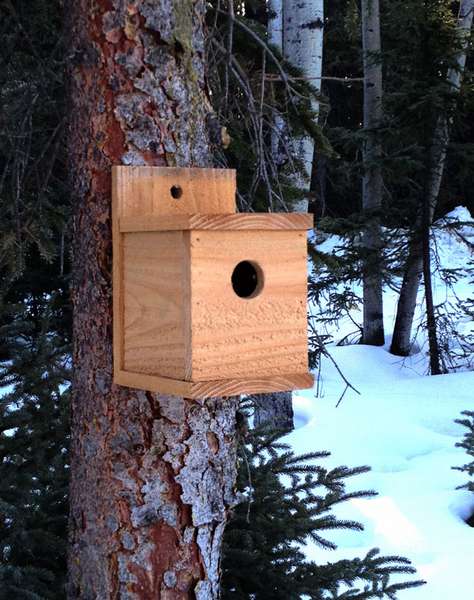
 Tall birdhouse
This treehouse can be made from one board for the fence, so the project will be free. The only costs are galvanized nails, which you will fasten the parts and the wire to hang the birdhouse.
Using the drawings below, you can get an idea of how all the parts of the birdhouse are connected.
Two side walls are 20 cm long. Two end parts are 25 cm long and the roof angle is 45 °.
 To cut off the ends, measure 20 cm on both sides and cut a 45 ° angle on each side to form a roof slope.
Attach the two end parts to the two side parts, keeping the bottoms flush as shown in the diagram.
Fasten the bottom and roof elements together using galvanized nails.
 Building birdhouses and observing the birds that nest in them is a great way to learn about the birds, their behavior and habitat.
How to make a simple birdhouse
 Do it yourself birdhouse, of course, the business is useful and necessary, as well as a good opportunity to work together with our children and teach them to love and protect nature. Here is an example of how to make a simple birdhouse, for this you will not need so many tools, and for children it will be fun and informative.
Tools and materials:
- Saw
- Milling cutter
- Straight bit (any size)
- A few 25 mm nails
- Hammer
- Pencil
- Roulette
- 6 screws 16 mm
- Drill
- Puncher 45 mm
- Screwdriver
- 12 mm plywood
- 6 mm plywood
- 8 mm wooden pin
- Wood glue
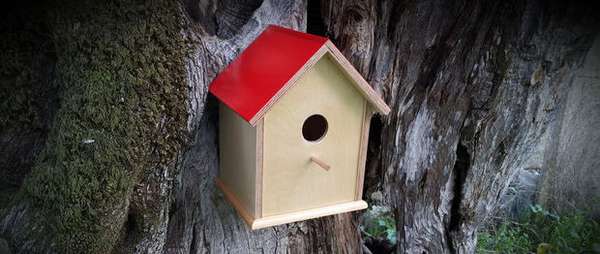
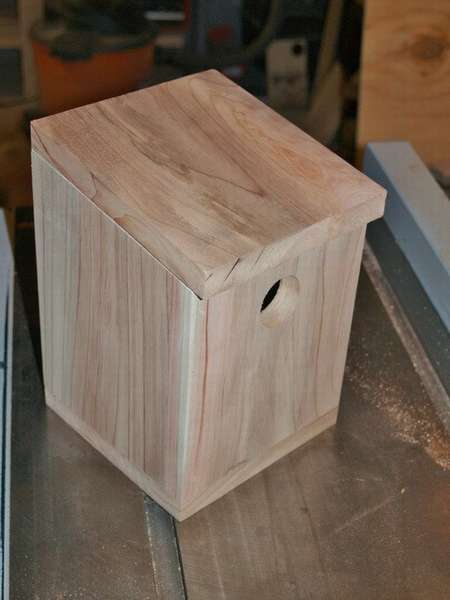
Step 1: Left and right sides
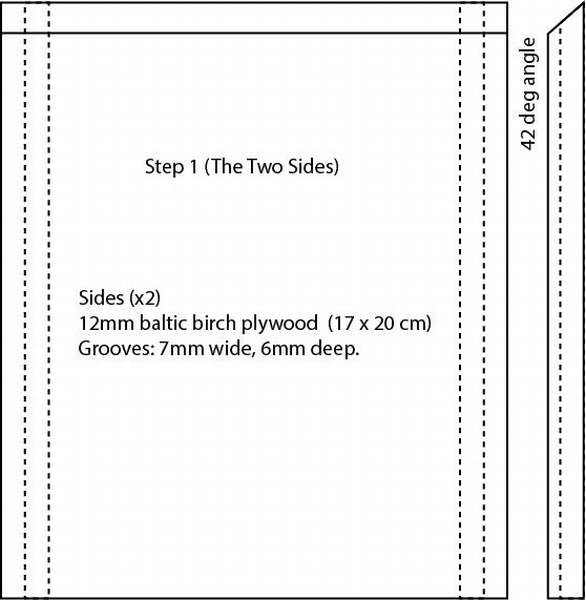 First we need to make the birdhouse sides. They are made of plywood 12 mm thick, and have a depth of 6 mm on both sides, 8 mm from the edge. The grooves should have a width of 7 mm. These grooves will hold the front and back sides of the birdhouse. This can be done with a table saw or router with a straight bit and guide.
Therefore, simply saw two pieces of 17 x 20 cm, and make two furrows on each.
Step 2: Bevels
Set the saw to 42 °, and make two bevels, one for each side. At this point, you need to make sure that the grooves are facing down when making bevels.
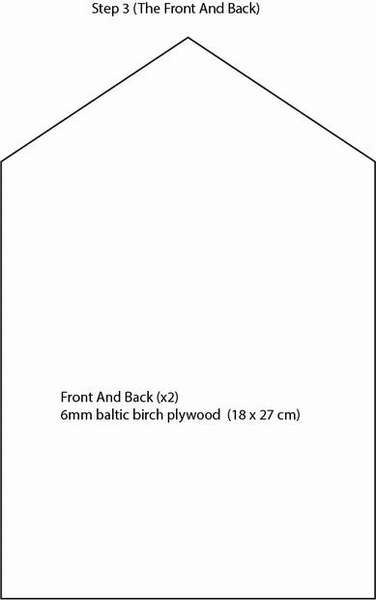
Step 3: Front and back sides
First, we cut two parts of plywood 6 mm thick (18 x 27 cm).
Then set the saw at an angle of 42 ° and cut two triangles on each side.
Step 4: Down side
For the bottom side of a 12 mm plywood, cut a sheet of 20 x 17 cm. Here we also create two grooves for the front and rear panels. The grooves should be 8 mm on both sides 6 mm deep and 7 mm wide.
Step 5: Assembly
We collect a birdhouse with nails and wooden glue.
Step 6: Roof
 The roof is pretty simple. Only two pieces of plywood 12 mm thick. One piece (16 x 21) and another (14.8 x 21).
Glue them together to form an L-shape. Then with nails we fix the roof in place.
Step 7: Hole and Hearth
For the tap hole, drill a hole with a diameter of 4.5 cm on the front of the birdhouse about 12 cm from the top.
For the pole, it is necessary to drill a hole with a diameter of 8 mm 2.5 cm below the first hole and use a wood glue to insert a wooden hearth 6 cm long.
Step 8: Removable floor for cleaning
Then you need to make a removable piece at the bottom of the birdhouse for easy cleaning. Mark a distance of 2.5 cm from each edge and mark the locations for the holes. Drill holes. Then use a straight bit milling cutter to make a hatch.
Finally, cut a piece of 6 mm plywood, install it in the hole and secure with screws. To facilitate access, you can tighten the hinges and latch.
Step 9: Pruning (not necessary)
Cut four parts and glue around the bottom of the birdhouse, for reliability, nail more with nails.
Step 10: Drainage and ventilation holes
Drill two holes for drainage and ventilation in the bottom. To do this, use a drill with a diameter of 8 mm or 10 mm.
Step 11: Done
Paint the birdhouse as you like, and apply two coats of varnish for waterproofing. Before you hang the birdhouse on a wall or wood, make sure that the paint and varnish are completely dry.


https://i.expert-h.com/en/skvorechnik/1024#sigFreeId97f953c4c5
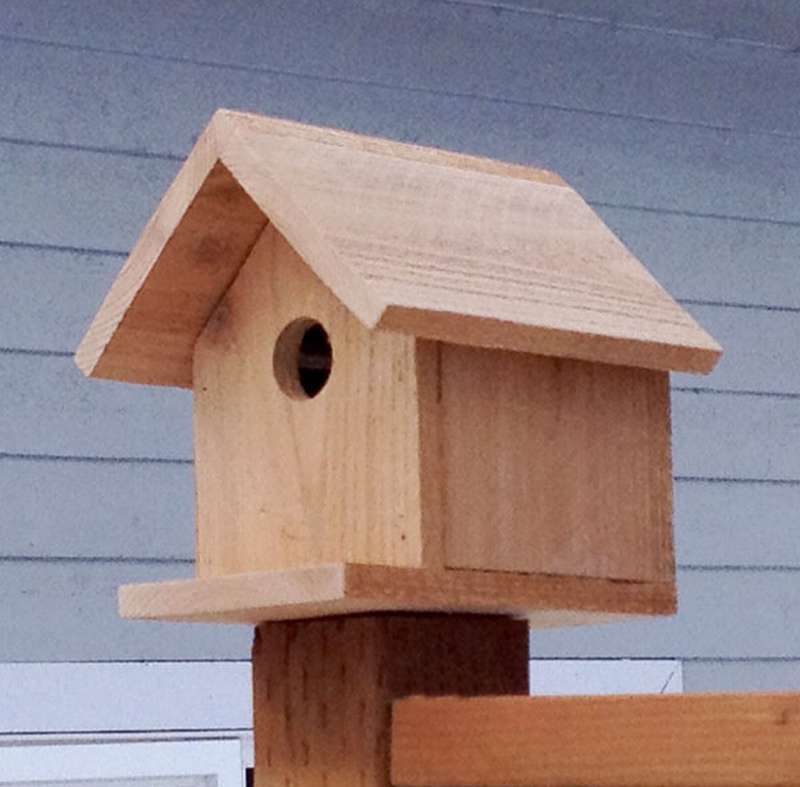
How to make a birdhouse
 Wooden birdhouse in the traditional style, which you can make from one board or cut and create an assembly kit for your children. This plan is designed for a board width of 14 x 1.5 cm. You can use other materials, for example, 1x6 boards, but since the wood is thicker, this can slightly change the final structure. Dimensions will need to be set independently, depending on what material you use. It is also recommended that wood glue be used for use in oil and outdoor environments. Take all necessary precautions, especially when working with children.Try to use even boards, check the angles after each step. If you are painting, wipe off excess glue, as the dried glue will not stain.
See the steps on the step-by-step photos and drawings presented in the gallery, if you need detailed instructions with a description of each step, visit the popular site www.ana-white.com, a link specifically to this birdhouse is under the gallery.


https://i.expert-h.com/en/skvorechnik/1024#sigFreeId04020d69f6
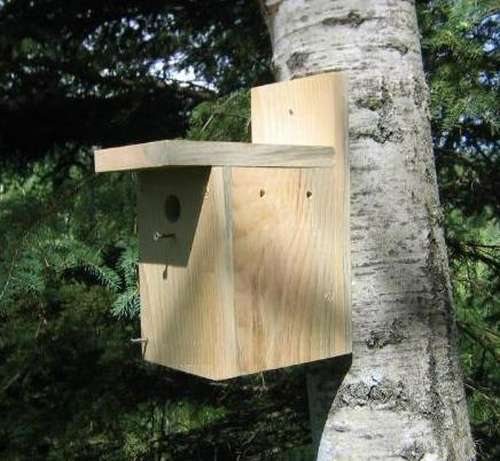
How to make a birdhouse with your own hands from a tree
 Birdhouse is a very simple design. However, for those who have no experience in carpentry, it can be a little difficult - especially at first - to assemble even simple designs only according to the drawings, without written instructions or advice on how to make certain parts. Therefore, if you are the first time make a birdhouse do it yourselfand these step by step photos will help you. Perhaps some of the nuances will not be clear, then you can visit the author’s website, the link to which is under the gallery, and read a very detailed instruction.
Here you can only find out about the materials you need. To make one drawer, prepare ...
- 2.5 x 15 cm board 1.2 m long for front, back, side and bottom
- Board 2.5 x 21 ms or 2.5 x 25 cm 28 cm long - for roof
- 4 cm galvanized screws or nails
The note:
Choose boards that are smooth on one side and coarse, rough on the other; this is ideal for building a birdhouse.
Tools:
- Combined Miter Saw
- Cordless drill
- Sander
- Roulette
- Clamp
And further, - don't paint your birdhouse! It may seem tempting to give the bird house a pretty look, but bright colors can attract predators, ruin the internal temperature or poison the chicks that will peck the waste paint.


https://i.expert-h.com/en/skvorechnik/1024#sigFreeId9a0a961657
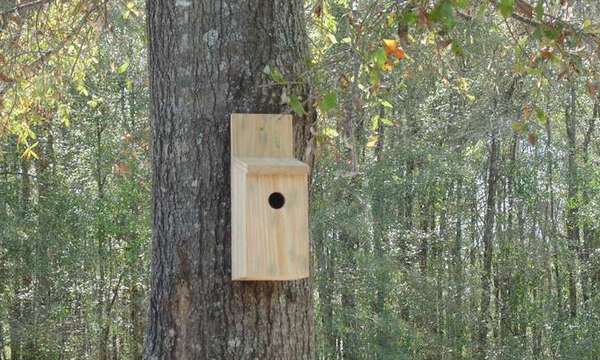
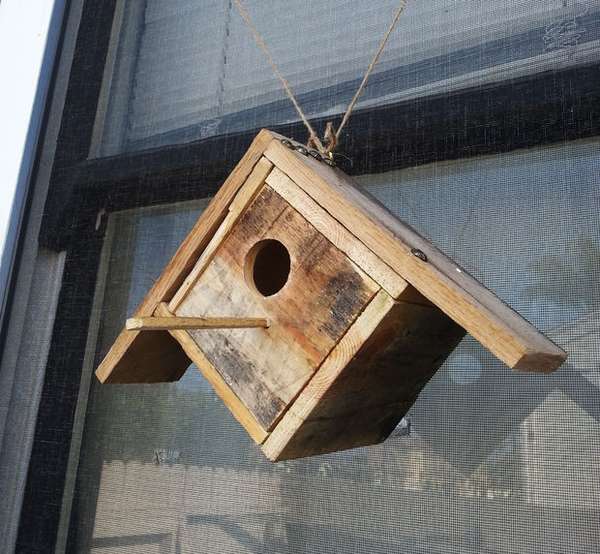
Birdhouse from one board
 You Will need:
- rough board 2.5 x 15 cm
- glue
- wood screws
Cut the board to this size:
- 2 pcs. 23 cm for the roof
- 2 pieces of 20 cm for the ends
- 2 pcs of 13 cm for the sides. You can make them a little shorter to provide ventilation under the eaves.
- 1 pc 10 cm for the floor
For the hole of the tap hole, select the appropriate size for the type of bird you want to attract. How to assemble a birdhouse, look at the step-by-step photos, the instructions are on the author’s website, if necessary, use the link under the gallery with photos.


https://i.expert-h.com/en/skvorechnik/1024#sigFreeId4269e6d468
Birdhouse from the pallet
 Example simple birdhouse, which the author made of pallets and an old case for CDs. The project was carried out without glue, so that the smell did not scare away the birds, and they could immediately populate.
First remove the cover from the case by carefully bending the edges. Then drill a hole in each corner.
- Dismantle the pallet. The board used by the author had a width of 15 cm and a thickness of about 1.5 cm. In general, 4 boards of 15 X 12 cm need to be sawn.
- Then make a notch of 4 cm. To do this, mark the center point of two adjacent sides of the 11 cm square.
- Draw a horizontal line between the two points.
- Make a vertical line from corner to corner, forming a cross.
- Measure 38 mm down from the horizontal line and draw a second horizontal line.
- Finally, draw two more vertical lines 2 cm from the center vertical line.
- It should be a box. Find the center by making X from corner to corner.
- Now there is a center for the entrance of the taphole, you can make a hole.
- Then drill a small hole under the entrance and install the perch, turning it with a knife so that it fits snugly into the hole.
- Assemble the walls so that the birdhouse is 15 cm deep. Then, fix the plastic window on the back side.
- Install the roof, for which saw off several planks, making one 1.5 cm shorter so that the roof is symmetrical during assembly.
- Screw the hook and hang the birdhouse in front of the window.


https://i.expert-h.com/en/skvorechnik/1024#sigFreeIda3dda77078
 Second example.
First you need, of course, a pallet. I think this is not a problem.
Then determine the size of your future birdhouse. Make a frame and screw it to the base.
After dismantling the pallets, cut to the size of the board, making sure that the bevel is 45 degrees to get beautiful angles. Glue them with wood glue and fix with clamps.
To make the roof, you will need two planks with a slice slanted at an angle of 45 degrees, so that the two halves meet exactly in the middle.
Then drill a hole to make the front door, the size of which will be determined by the type of birds that you want to attract.
At this point, you can attach the roof with a hinge and add a bolt to ensure safety. Important, so that the roof is hingedbecause the box needs to be cleaned at the end of each nesting season, so you will need access to the inside.
Finally, you need to add birdhouse mounting equipment. If you are installing on a tree, do not drill or hammer nails directly into the tree, use bungee ropes and cords instead.


https://i.expert-h.com/en/skvorechnik/1024#sigFreeId3231ffd256
Just another birdhouse from the pallet
 Tools: table saw, drill, gas burner, grinder
Materials: pallet, cheap water-based paint, water-based polyurethane
Before work, make sure that the pallet has been heat treated.
Disassemble the pallet and cut the boards into the following dimensions:
- 14 x 9.5 cm bottom
- 23 x 11.5 cm roof
- 23 x 13.5 cm roof
- (2) 14 x 13.5 cm sides
- (2) 20 x 13.5 cm front and back
How to collect a birdhouse, look at the step by step photos. To give the house an interesting look, after the paint dries, burn it with a torch. Handsomely.


https://i.expert-h.com/en/skvorechnik/1024#sigFreeIdd42ba8e221
Wooden birdhouse
 This is a very simple project to attract birds to your yard. It uses a combination of industrial pallets made from 2x6 boards and standard pallets with planks ranging from 10 to 15 mm.
Birdhouse Sizes:
- Tap hole: 38 mm
- Hole distance above floor: 15 to 18 cm
- Floor dimensions: 10 x 10 to 12 x 12 cm
Tools:
- A circular saw
- Drill, drill
- Roulette
- Pencil
- Compass
- Hammer
Materials:
- Pallet boards - 14 x 66 x 4 cm
- Boards for pallets - 9 x 51 x 1 cm
- Nails
- Hook (x2)
- Rope
- Paint (optional)
 Step 1: Frontal part
- With a circular saw, cut the pallet boards 12 x 25 cm.
- Then measure 4 cm from the bottom and center point at the top (6 cm).
- As for the profile, the design is up to you. The photo shows a simplified version that can be done using a compass.
- Please note that the bottom will be 4 cm thick, so you should exit this section directly.
- Mark the profile on the board.
- Then mark the place in the center of the profile up 19 cm from the bottom.
Step 2: Rear part
The back is the same as the front, with the exception of the inlet.
Step 3: Bottom part
The bottom is 12.5 x 12.5 cm from 4 cm thick boards.
Step 4: Roof
- If you want the bottom to be removable, just pinch it. This will align the bottom on the sides when attaching the roof.
- If necessary, it will be necessary to adjust the width of the roofs. Start with wide 25 mm planks.
Step 5: Sand and paint, although this is not necessary.
Step 6: Hooks and bottom mount.
Attach 2 hooks from above and use a jute cable for hanging. The bottom is held by screws and wing washers.


https://i.expert-h.com/en/skvorechnik/1024#sigFreeIdc41cac61ca
Modern birdhouse
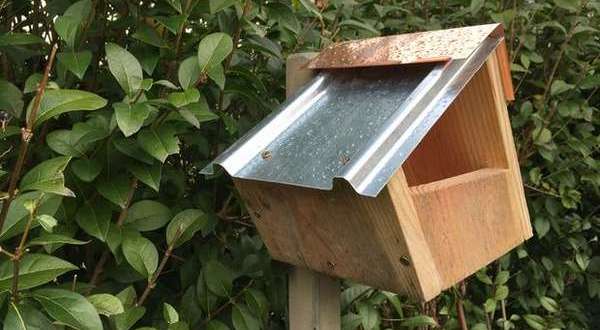 This unusual birdhouse the author made for a wandering thrush, a small songbird, about 25 cm in size, so the dimensions of the house are small.
Materials used for the project
- spruce board 8 cm wide and 1.2 m long
- 300 x 400 mm corrugated galvanized steel
- copper sheet 100 by 300 mm
So, the first step, saw off the board to the desired length and at the right angle.
- When the parts are ready, glue four walls and the bottom with glue.
- For ease of installation, use a nail gun to secure the seams.
- One or two screws are sufficient for each side.
- For a small steel roof, conventional corrugated steel was used.
- Drill screw holes before assembly.
- A skate made of thin copper is installed at the top of the steel roof.
Now you can fix your brother-in-law and wait for guests.


https://i.expert-h.com/en/skvorechnik/1024#sigFreeId76d7dfe607
Birdhouse made of logs
 A simple solution to make a birdhouse from raw log. All you need to do is find an old dry deck of the right size.
- Then cut it perpendicularly into four parts, so that the thickness of each side wall is approximately five centimeters.
- From the middle part, make the floor and the roof.
- In one side, at a distance of 15 cm from the top, make an inlet.
- Now fasten all sides with long screws, 2 pcs per side, 11 screws went into this design.
- During assembly, fasten the prepared floor with a screw to the inside.
- At
- install the roof, you can not fix it so that there is access for cleaning.
- That's all, the most natural and environmentally friendly birdhouse is ready, you can install.


https://i.expert-h.com/en/skvorechnik/1024#sigFreeId7549abe17f
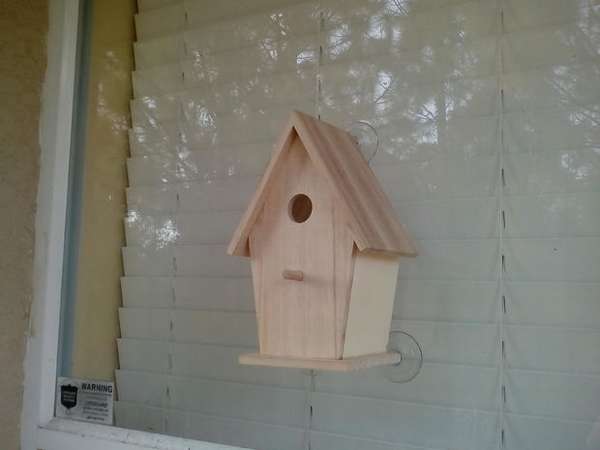
Birdhouse with a window
 Birdhouse with a window A great way to watch birds build a nest and even sometimes lay eggs. These unique bird houses will provide good educational benefits for your children. And it will be interesting for adults to observe how birds live in their nest.
Below you will help to see step-by-step photos of how to make a birdhouse with a window with your own hands.
As you can see in the photo, one board was used for manufacturing, a plexiglass plate and 3 suction cups attached to the back wall.
The assembly process is shown in step-by-step photos, just note that the upper part of the sides has an angle of about 10 °, as well as small brackets in front to hold the front on the sides.


https://i.expert-h.com/en/skvorechnik/1024#sigFreeIda6e8407cd3
Birdhouse Birdwatching
 The author made this birdhouse so that children can observe how feathered parents raise their chicks. This is an interesting project that can be used for many seasons. Build an open birdhouse very simple and does not require much effort. To do this, you can buy a ready-made birdhouse, or make it yourself. Then just cut off the back.
Buy 4 suction cupsto attach the birdhouse to the window. Insert a small nail through the center of each suction cup and nail to the back of the birdhouse. In this photo you see only three cups, the final product actually has four.
Clean the window surface and secure the suction cups. That's all, the tutorial for your children is ready, it remains to hope that the birds will like your house.


https://i.expert-h.com/en/skvorechnik/1024#sigFreeIdd33514e486
Birdhouse with birdwatching window
 If you like this idea, you can also make such a birdhouse for bird watching, it is informative for children and interesting for adults.
You'll need:
- Plywood (4 mm)
- Acrylic glass (4-6 mm)
- Glue
- 6 magnets: ⌀ 6 mm x 1 mm
- Wooden fork
Assembly:
- First you have to carve wood and glass parts.
- The next step is a bit more complicated. It is necessary to make a door to clean the birdhouse after the birds fly. The author used magnets, simply because he had them.
- It is necessary to drill holes for the magnets in two wooden parts, as you can see in the photo. Be careful not to drill the tree completely!
- Then glue the magnets in the holes. Only be careful to set the poles in the right direction!
- Now you need to glue everything together, the photo shows where which part should be.
- Birdhouse is ready.
You can attach hooks for hanging, or think of another way how to establish it in your garden.


https://i.expert-h.com/en/skvorechnik/1024#sigFreeId87c44400c5
DIY birdhouses drawings and sizes
DIY birdhouses for birds 200 photos
Hello, I am the author of this article, so I look forward to asking questions for this article in the comments below, I will answer all !!!
If you have questions on another topic, ask them on our forum, we will answer you
- Two baskets of paper in 5 minutes (Master class)
- How to make a simple and compact table for a milling cutter from plywood
- How to make a soft headboard tile (Instructions + step by step photos)
- Cinder block benches: a convenient bench in 55 minutes
- How to dol bed with a niche: saving space (master class)