DIY sandbox for children 500 photos, drawings, master classes
 baby sandbox
Sand is one of nature’s best toys. Children's imagination is enough for the most incredible ideas, from a formidable castle to a festive cake. There are no game rules in the sandbox, it allows children to compose and test hypotheses, gives sensory experience, which favorably affects the development of speech, and an excellent opportunity to learn physical and social skills.
However, let's not consider why in this article, but how to make a children's sandbox with your own hands. It would seem a very simple design, but it turns out there are many options and nuances. Here are just two dozen simple home-made sandboxes with step-by-step photos and a brief description, you only need desire, imagination and several hours of free time.
How to make a children's sandbox with your own hands
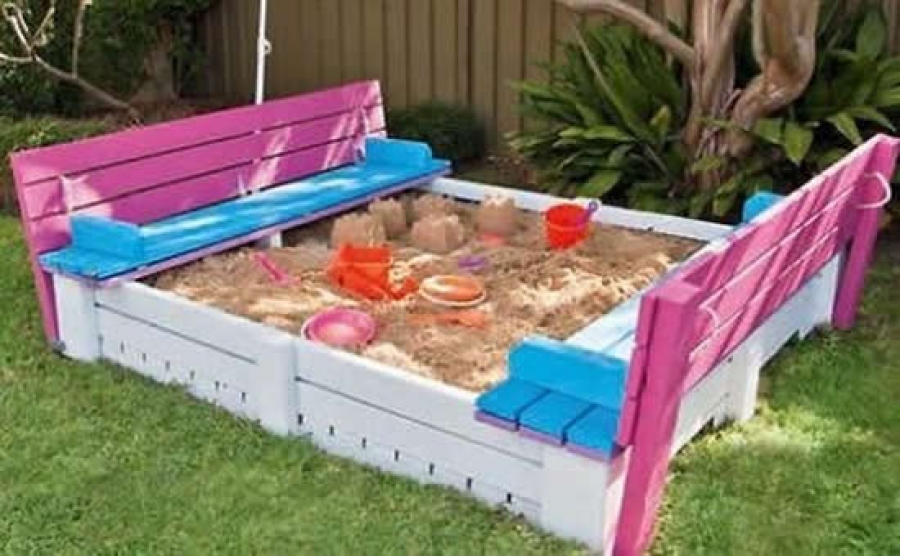
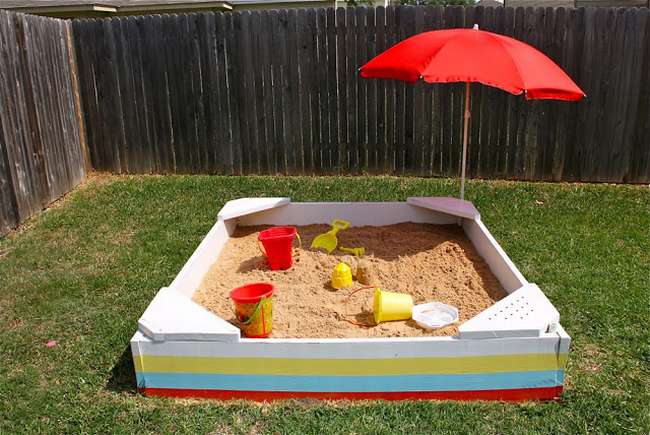 A simple sandbox with colorful stripes, benches to sit on, sand perforation holes, two places for attaching a beach umbrella and plenty of sand. That's the whole set, oh yes, and two happy children. Have you ever tried make a children's sandbox with your own hands? No? It’s actually very simple, you just don’t need to hire carpenters.
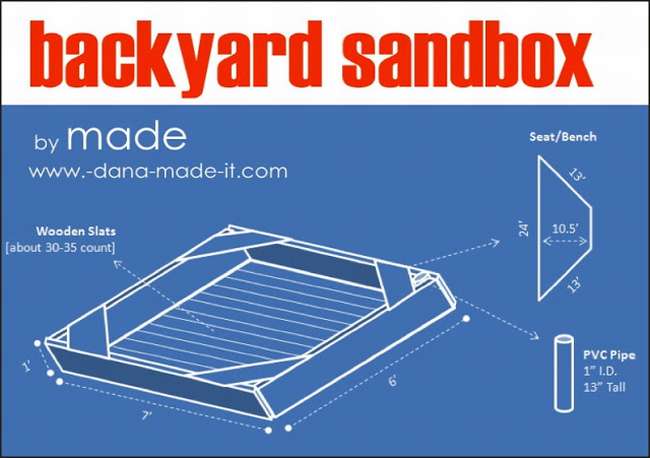 Here is a simple diagram, you just have to choose the right material and optionally refine the design concept. In this case box size 1.8m by 2 meter. The bottom consists of wooden battens. For improvised corner benches, which are ideal for dad and mom, you can use the remnants of the boards that went into the manufacture of the box. This is how the finished sandbox will look.


https://i.expert-h.com/en/pesochnitsy/detskaya-pesochnitsa-svoimi-rukami-500-foto-chertezhi-master-klassy#sigFreeIdadd12cfbcd
These benches also serve to strengthen the entire structure of the box. For attaching umbrellas in corners attached PVC cut pipes. To paint in such beautiful stripes, use art tape, apply stripes in turn, next, when the previous one dries. Below, see the order of manufacture and installation of step-by-step photos.


https://i.expert-h.com/en/pesochnitsy/detskaya-pesochnitsa-svoimi-rukami-500-foto-chertezhi-master-klassy#sigFreeIdfeb0e58109
 Children's sandbox with a cover
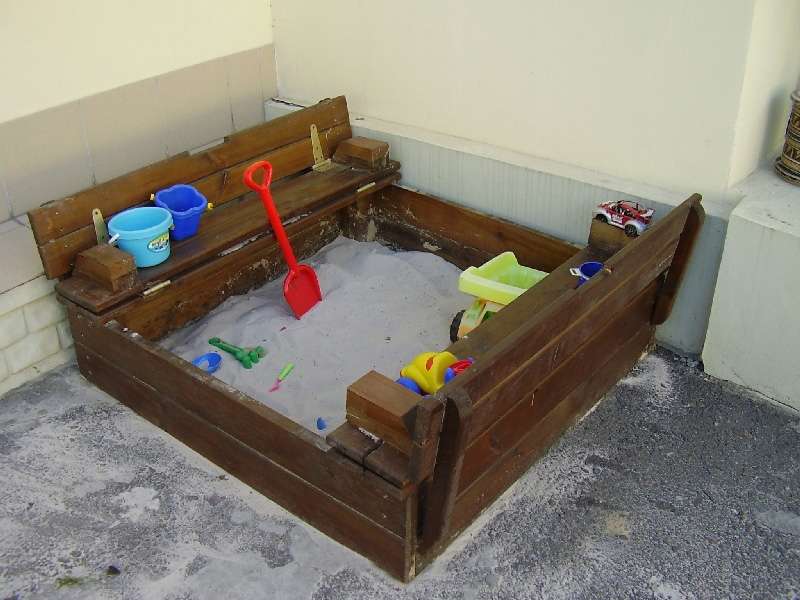
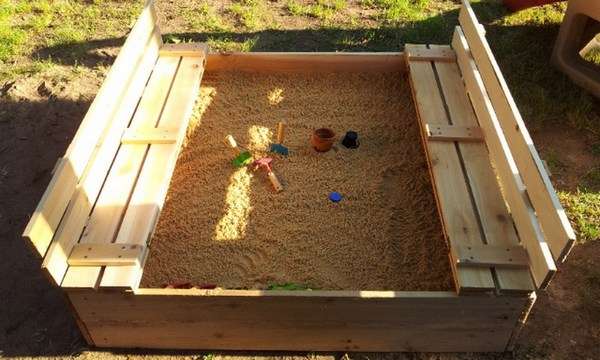
Convenient and functional sandbox with a cover and built-in seats are not difficult to do with your own hands. Buy boards and bars, polish them. You can start assembling. Corner bars should be long so that you can dig into the ground, use corners to strengthen the corners of the box. Still need wicket loops and paint.
When the structure is assembled, you can start painting, soak the “tails” that will be in the ground with a moisture-resistant liquid, you can use ordinary machine oil. Then start assembling the movable sandbox lid, for which add two more boards and attach the wicket loops. The sandbox cover will also serve as a bench. You look at all details on step-by-step photos, the drawing is not attached, do the measurements at your discretion.


https://i.expert-h.com/en/pesochnitsy/detskaya-pesochnitsa-svoimi-rukami-500-foto-chertezhi-master-klassy#sigFreeId773b6db125
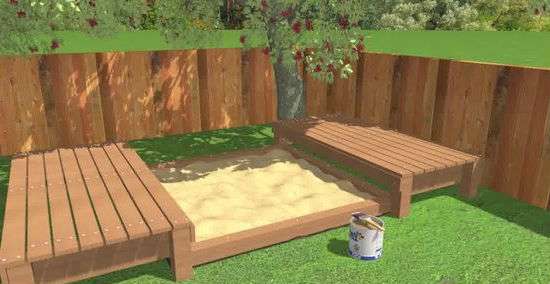
There are many such sandboxes, here is another one, only simplified, in this case the box does not need to be dug into the ground. Also convenient, the design can be moved if necessary.


https://i.expert-h.com/en/pesochnitsy/detskaya-pesochnitsa-svoimi-rukami-500-foto-chertezhi-master-klassy#sigFreeId3d31c69899
So it looks in the schemesOf course, not an exact copy, but to make it clear.


https://i.expert-h.com/en/pesochnitsy/detskaya-pesochnitsa-svoimi-rukami-500-foto-chertezhi-master-klassy#sigFreeId4b9cf3bbb5
 One more children's sandbox with a cover, which will protect sand well from animal excrement and other undesirable things, and at the same time let the water pass freely, preventing the sand from drying out too much. It is very important, since dried sand, getting into the lungs of a child, can pose a certain threat to health.In this design, the bottom is open, therefore, with free flow of water from above and dampness from the ground, sand will always be the desired consistency. As in previous versions, the lid also acts as a bench. When assembling, pay attention to the interesting idea of the author: to strengthen the back of the bench, which the child usually rests on when he gets out of the sandbox, make wooden rotary latcheswhich will firmly hold the back in an upright position.


https://i.expert-h.com/en/pesochnitsy/detskaya-pesochnitsa-svoimi-rukami-500-foto-chertezhi-master-klassy#sigFreeIda8cdd92243
DIY sandbox with a lid
 This version of the children's sandbox is different from the previous ones. here the lid is made in the form of two benches sliding along the box. It is very convenient, since they can be partly or completely pushed apart so that it is comfortable to sit, or so as not to interfere when you need more space. Under the sandbox, you need to dig a pit 30 cm deep, the bottom of which is covered agrofibre, this is a cheap and durable material that will provide a normal flow of water and will allow weeds to germinate. The fabric should cover the entire bottom and outer edges.
- To install the design, prepare the posts, which should be 20cm higher than the box.
- Install them on the sides and fasten with boards.
- Make sections and set them along the sandbox.
- Establish a cross-beam for fastening of the top levels.
- Fasten the cover to the center and side boards.
- Do not forget to make gaps in the cover so that there is free air access.
- Then assemble the second half of the cover.
- Pre-treat all wood with protective impregnation, and after installation varnish.
Well, the sandbox is ready. Do not forget that if you do not use the sandbox for a long time, you must periodically open the lid so that the sand is ventilated.


https://i.expert-h.com/en/pesochnitsy/detskaya-pesochnitsa-svoimi-rukami-500-foto-chertezhi-master-klassy#sigFreeIdcb20d31816
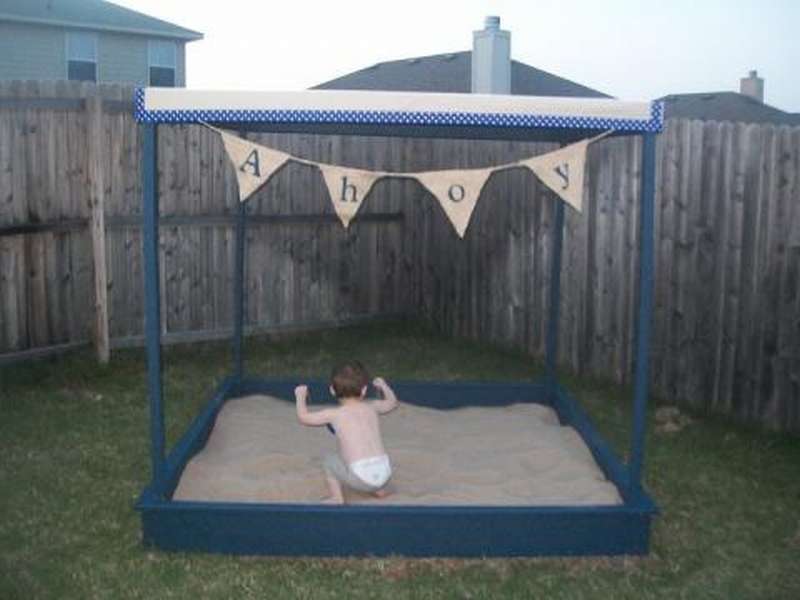
 Children's sandbox with a roof
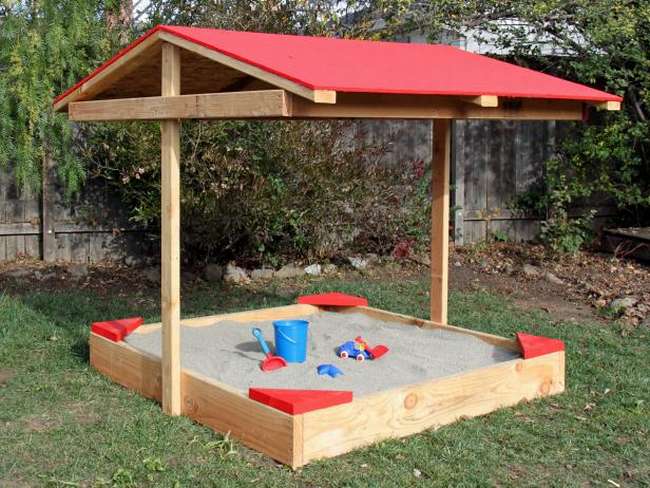
The roof on this luxurious sandbox help keep the playing area well shaded, cover from rain, prevent leaves and branches from falling. All construction, from start to finish, will take one day. Design ideas include corner benches for seating.
 In addition, the canopy is made high enough so that adults can join their children in the sand. The step-by-step photos show the entire assembly process.
- Start with the box.
- Pre-drill holes and align the corners.
- From the remaining scraps of boards, cut four triangles for benches, screw them to the corners of the box.
- Then, using a square, attach the vertical boards of the roof supports.
- Fasten the crossbar.
- Screw a new board between the two vertical ones from the previous step.
- Make a support for the roof. To do this, cut four bars to make a square.
- Mark the horizontal line down from the top of the risers.
- Take one of the bars and drill a hole in the center of the front side of the board (in the center from top to bottom, and in the center from left to right); put the screw in the hole.
- Lift this crosspiece perpendicularly and align with the line so that the crossbar is exactly in the center.
- Drill two vertical holes at each end of the crosspiece and fully secure the roof frame.
- Cut and install the rafters.
- From the sheets of plywood, cut out the roof itself and screw it at an angle on the frame.
That's all, it remains to paint and fill the box with sand.


https://i.expert-h.com/en/pesochnitsy/detskaya-pesochnitsa-svoimi-rukami-500-foto-chertezhi-master-klassy#sigFreeId94395d6fd6
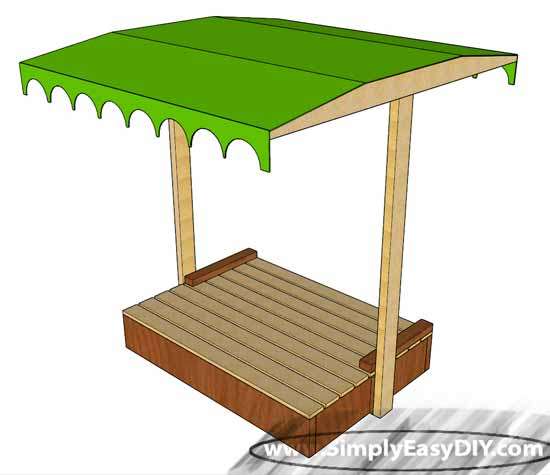
 How to make indoor sandbox drawings
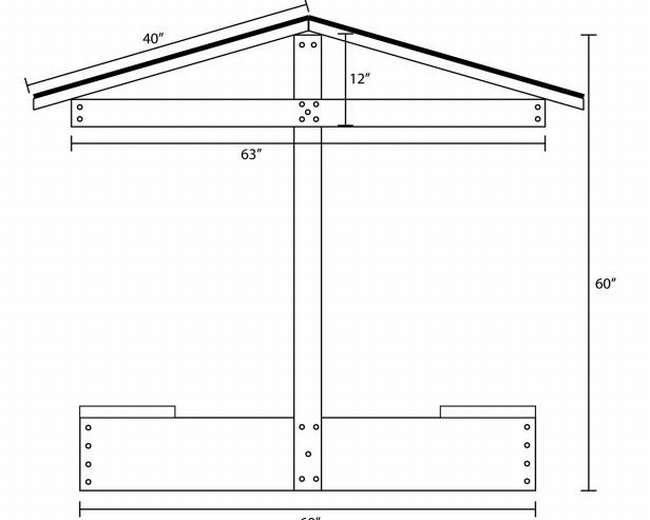
Shown here is another covered sandbox option, flat roof only. In step-by-step photos, the process is shown in diagrams, with dimensions, however, in inches (1 inch - 2.54 cm). When assembling, the main thing to remember is the safety of children, so make sure that all surfaces are sanded, the caps of nails and screws are carefully recessed.
Also make sure that the coating is suitable for use by children. The assembly order is fundamentally no different from the previous one, so it is possible without details.


https://i.expert-h.com/en/pesochnitsy/detskaya-pesochnitsa-svoimi-rukami-500-foto-chertezhi-master-klassy#sigFreeIdc92bb1b6f4
 Sandbox with an awning
Simple children's sandbox with an awning frame. The assembly order in the diagrams is shown in step-by-step photos, but in principle it is no different from other examples that are presented above. There are several nuances, be sure round sharp edges a sanding machine and sandpaper to reduce the likelihood of a hole in the fabric breaking.For added stability and security, you can cut the vertical postburying it about 30 to 40 centimeters deeper. If you live where there is a strong wind, this will help keep the tent from tipping over.


https://i.expert-h.com/en/pesochnitsy/detskaya-pesochnitsa-svoimi-rukami-500-foto-chertezhi-master-klassy#sigFreeIdd1bb063545
And here it’s not the diagrams, but the manufacturing process in the photographs. If everything worked out, the seats should fold down on top of the sandbox, creating its cover. Probably the most common area of frustration may be in getting the right clearance between the second and third seat segments. If you get confused, and they are very close, then you will not be able to completely close the lid. Dont be upset. Just remove the screws, slightly shift the loop, and try again. The top cover should hang over the base of the sandbox two or three centimeters, then firstly, no need to fix the handleto open the lid and secondly the child does not get his fingers caughtwhen will close it. Also do not forget that there should be a distance between the supports of the awning racks and the box so that the lid can freely open and close. Consider also that wood has the property of expanding from moisture, therefore clearance must be done with a margin.


https://i.expert-h.com/en/pesochnitsy/detskaya-pesochnitsa-svoimi-rukami-500-foto-chertezhi-master-klassy#sigFreeId7e21b3183e
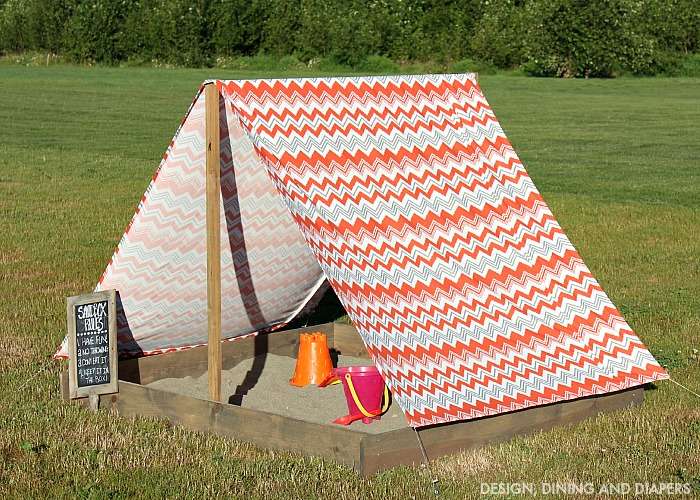 Sandbox in a tent
Roofs, umbrellas, that's fine. But it’s possible to approach the issue easier, to make just such sandbox in a tent - children love houses. No need to build a special frame, just fix a simple crossbar, pull the fabric and the tent is ready. Of course, the tent type of canopy has its advantages and disadvantages, but the option is not bad, we can say all-weather.
An important nuance choose the right fabricso that it protects against ultraviolet rays, and if it gets wet, it is not covered by mold.


https://i.expert-h.com/en/pesochnitsy/detskaya-pesochnitsa-svoimi-rukami-500-foto-chertezhi-master-klassy#sigFreeIdbf3cd4f61a
Sandbox table
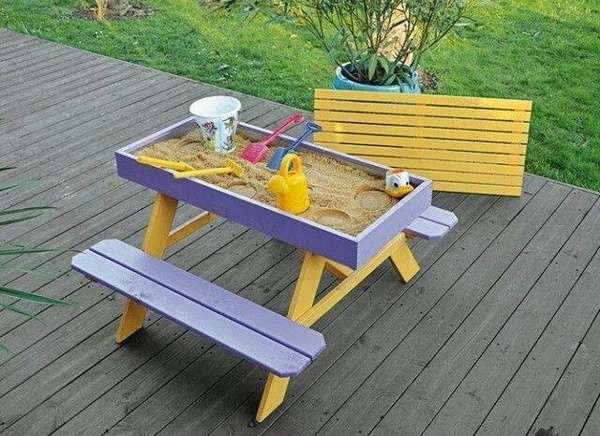 This children's picnic table with its built-in benches with a surprise. Remove the lid and see the internal sand compartment, where children can build castles, play with toy rakes, shovels, make cakes of sand, etc. The design includes a table with built-in benches. Ideal for a small kindergarten and summer cottage, a table can be placed anywhere, somewhere in the shade, no need to worry that there will be some rubbish, you can put it into the room or under a canopy for the night
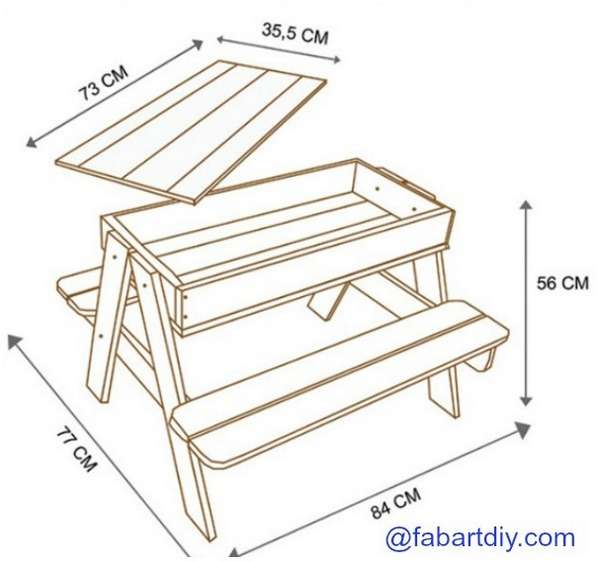 Two in one, sandbox and children's picnic table, This is an ideal solution for a summer residence, especially if you do not live there permanently. On the right is represented design drawing, as you see, the materials need a minimum, and a simple carpentry tool can be found in any home. Moreover, making it yourself is very easy. There are practically no costs, excellent, if you can find some old pallets, you just need to handle them well, and you can see how to make a picnic table here. You just have to add a sand box.
The table options can be different, here is a photo gallery with several ideas. Children's picnic table with sandbox is a good solution for those who have a small backyard or cottage. You can also put it indoors, if you want, to keep an eye on the children’s play while preparing lunch or dinner. For the manufacture of such a table, high costs are not required, it can be done in one day, you can even use pallets to save.


https://i.expert-h.com/en/pesochnitsy/detskaya-pesochnitsa-svoimi-rukami-500-foto-chertezhi-master-klassy#sigFreeIdae8abc5817
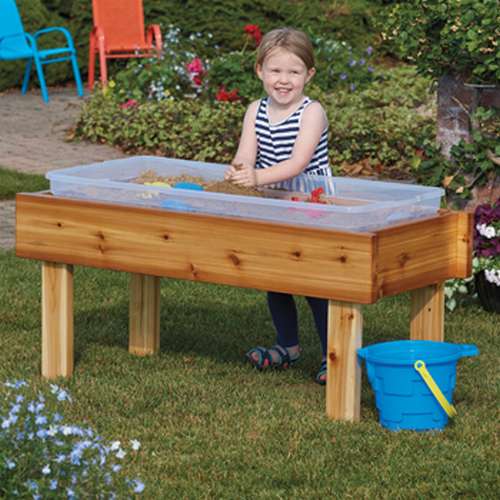 Sandbox table for water and sand
There is no way to go to the beach with children? Make a piece of the beach for your child on your site! Small table sandbox for water and sandOf course, the beach is not a substitute, but it will bring children a lot of fun. The idea is very simple, a container is installed in the table, which can be filled with sand or water, or both at the same time, if the tank has two sections. First you need to choose a suitable container, then make a table under it, as shown in the step-by-step photos


https://i.expert-h.com/en/pesochnitsy/detskaya-pesochnitsa-svoimi-rukami-500-foto-chertezhi-master-klassy#sigFreeId776f3efd17
Little table sandbox for children

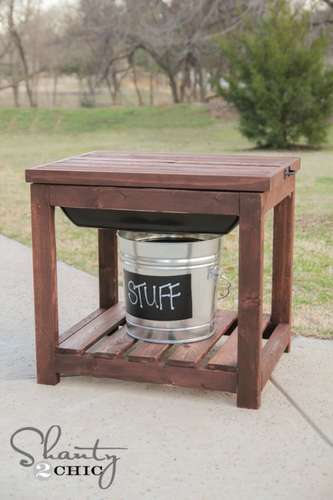 Another option regular children's table with built-in sand container. The idea is not original, but pretty. The step-by-step photos show how to implement it.


https://i.expert-h.com/en/pesochnitsy/detskaya-pesochnitsa-svoimi-rukami-500-foto-chertezhi-master-klassy#sigFreeId1a25853a9e
Children's little table sandbox
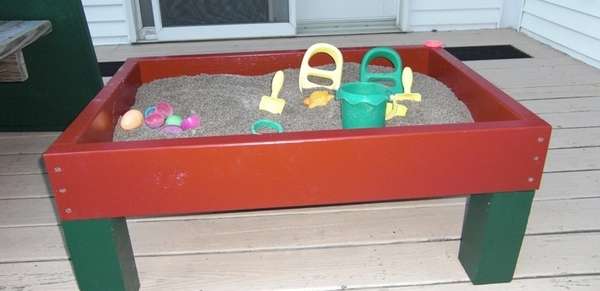 Very simple design for the smallest, this one children's table sandbox made two two-year-old babies, its height is 40 cm, a countertop with a box forsand 90 to 60 cm. You will need a couple of boards of 3 m, bars, a sheet of plywood and paint. First cut the workpieces into the necessary parts, carefully sand and paint. When dry, assemble the structure, I think there will be no problems with this.


https://i.expert-h.com/en/pesochnitsy/detskaya-pesochnitsa-svoimi-rukami-500-foto-chertezhi-master-klassy#sigFreeId538bb6c479
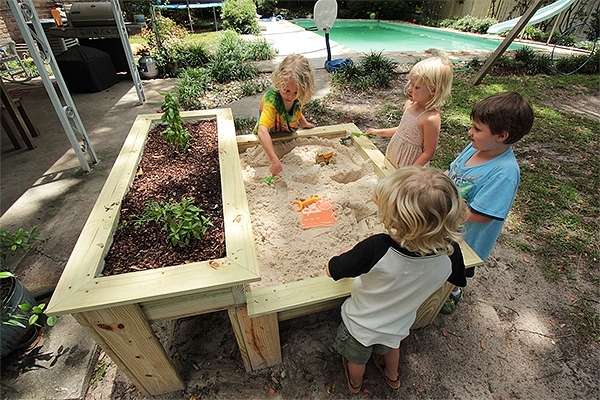 Children's sandbox with flowerbed
With the form and options of sandboxes you can think of anything. The more you fantasize, the more interesting it will be for children. The author of this photo offers make a children's table a sandbox with a small flower bed. A box for plants is installed on the trailing edge of the sandbox, and this is a game complex. A PVC pipe is attached to the box, to which a hose for irrigating plants is connected. It will also be useful for children so that they can fill buckets for playing with water.


https://i.expert-h.com/en/pesochnitsy/detskaya-pesochnitsa-svoimi-rukami-500-foto-chertezhi-master-klassy#sigFreeId301577880b
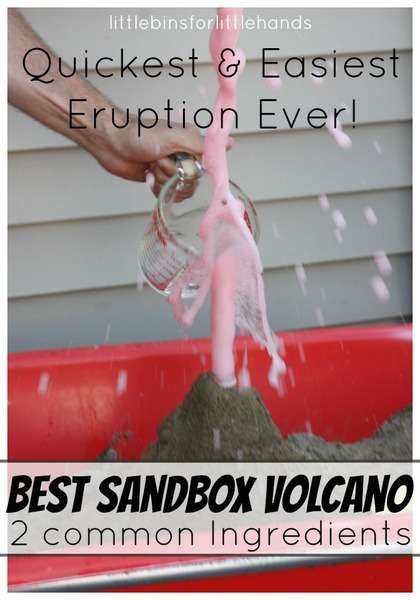 Volcano in the sandbox
This does not entirely relate to the topic of building children's sandboxes, but it definitely relates to sandboxes. If you already gathered do-it-yourself sandbox, why not mark this event with a small volcano eruption, children will be thrilled. When the weather is nice, try a simple experiment, it is the simplest and safest chemical reaction. All you need is a few simple household ingredients and a bunch of sand. In general, prepare baking soda, vinegar and food coloring (optional).
- Fill the bottle with water and add dye.
- Add about 5 teaspoons of baking soda
- Put on the cap until you are ready
- Build a slide of sand around the bottle
- Open the bottle
- Pour enough vinegar into the bottle
- Watch a huge eruption!
In order to turn out spectacularly, the main thing is that soda should be diluted in a small amount of water and pour more vinegar. It is advisable to experiment a little before the show in the kitchen. Then you can explain the properties of the ingredients to children. This will strengthen confidence in the new study of experience and curiosity in order to try new experiments!


https://i.expert-h.com/en/pesochnitsy/detskaya-pesochnitsa-svoimi-rukami-500-foto-chertezhi-master-klassy#sigFreeId93780239f8
Drawings of children's sandboxes, ideas and schemes


https://i.expert-h.com/en/pesochnitsy/detskaya-pesochnitsa-svoimi-rukami-500-foto-chertezhi-master-klassy#sigFreeIdddf84c878f
150+ photos of sandboxes with your own hands


https://i.expert-h.com/en/pesochnitsy/detskaya-pesochnitsa-svoimi-rukami-500-foto-chertezhi-master-klassy#sigFreeId6465e7d0e7
Hello, I am the author of this article, so I look forward to asking questions for this article in the comments below, I will answer all !!!
If you have questions on another topic, ask them on our forum, we will answer you
- Two baskets of paper in 5 minutes (Master class)
- How to make a simple and compact table for a milling cutter from plywood
- How to make a soft headboard tile (Instructions + step by step photos)
- Cinder block benches: a convenient bench in 55 minutes
- How to make a bed with a niche: saving space (Master class)