Children's sandbox to the country 23 photos Favorite
 DIY sandbox
Who needs something in the country, and children need entertainment. And if those older ones find something to do, then the kids need something to do. Moreover, so that they are in front of the eyes and in a protected place.
Therefore, parents should think about building a children's sandbox in the country. Although, what is there to think especially, there are plenty of sandbox options. Here are two dozen photos, whichever of them you will definitely like. Of course, it is important that the children also like it.
Things to consider when making a sandbox.
- So that it is comfortable, that is, that in size it matches the number of children who will play there.
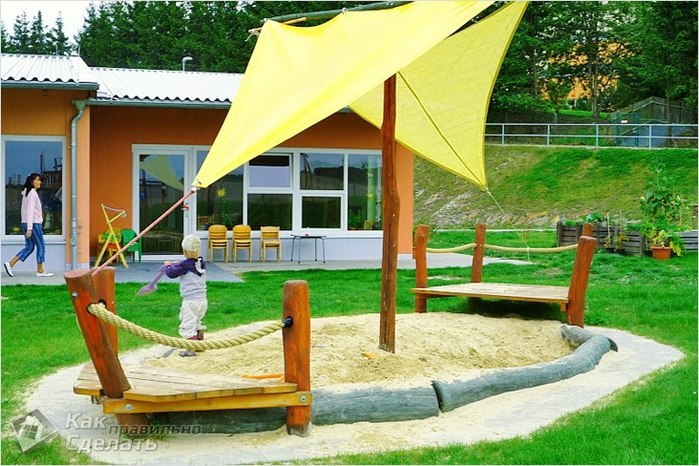
- It is advisable to provide protection from the sun.
- Place in such a place so that pets don’t go there and preferably not under a tree, otherwise something will constantly fall into the sandbox, and the birds, you know ...
- That the site was in sight, to constantly monitor what was happening there.
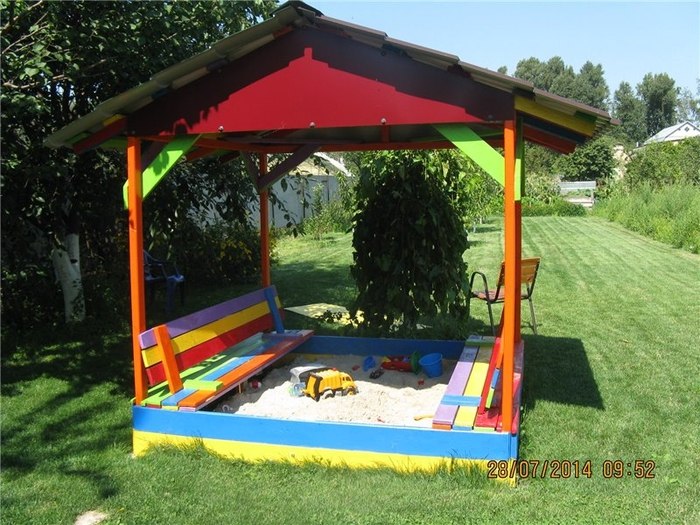
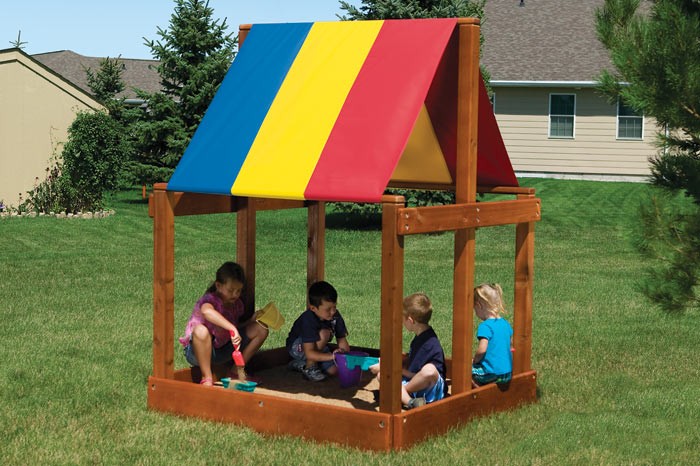
Children's sandbox houses
It is very practical to make a sandbox in the form of a house
You can even do that.
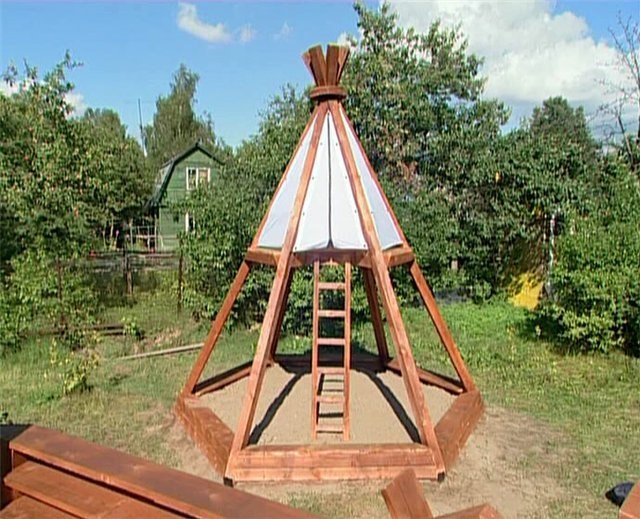
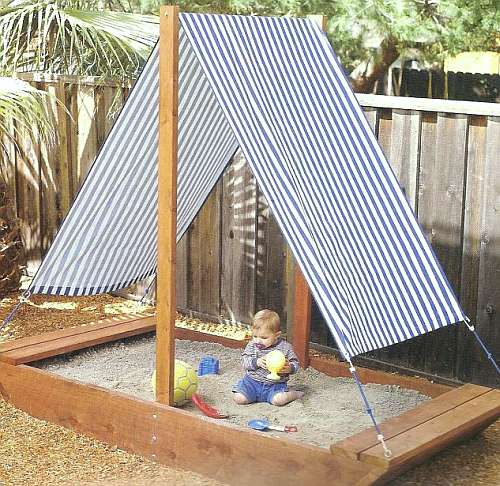
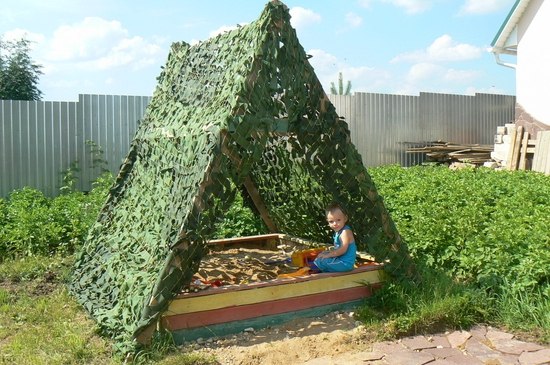
Or tents
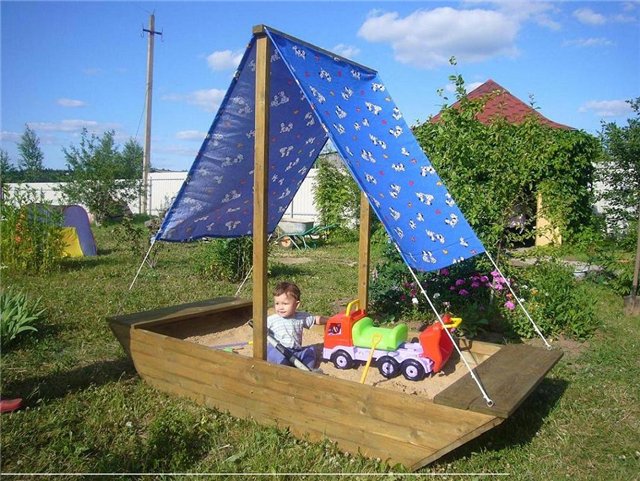
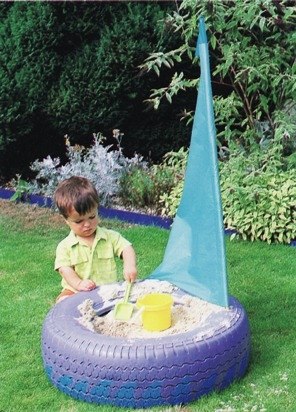
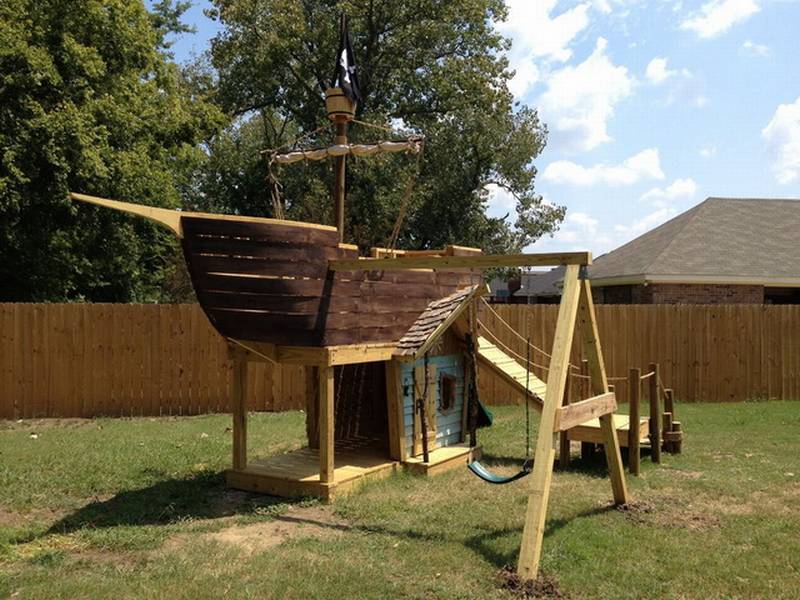
Very popular with children are boats and boats
You can even without a side
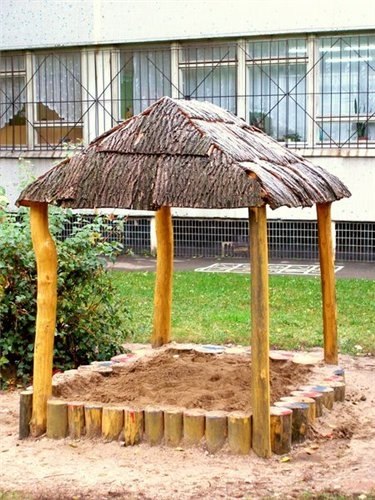
Beautiful do-it-yourself sandboxes
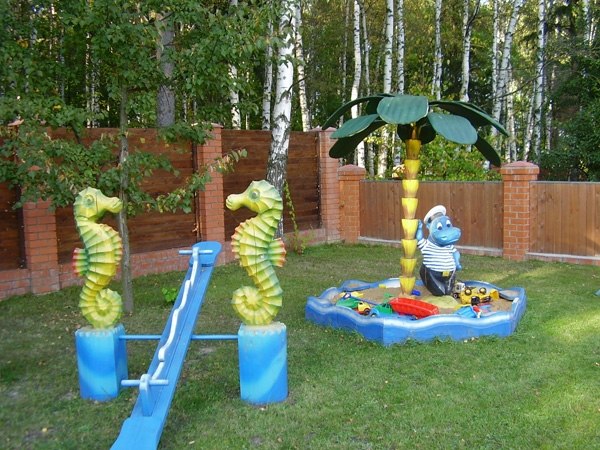
The sandbox should be attractive, for example, like here, in the form of a typewriter, or something exotic

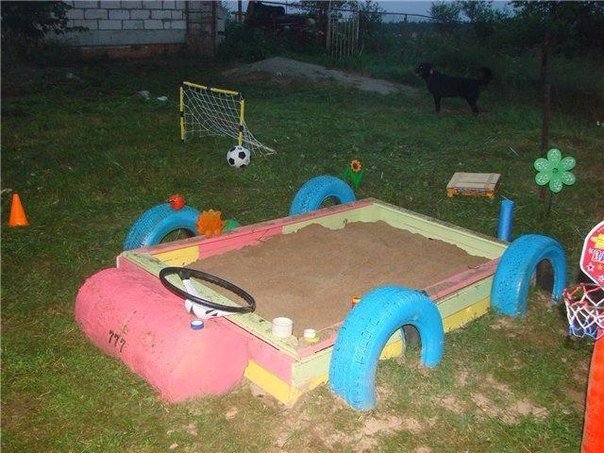 It's easy to make sandboxes of cars, just add wheels and the transport is ready. And if there is still an old steering wheel, then the kids will be completely happy. Old tires are very convenient to use for playgrounds, if you put them in order, paint, they are comfortable and safe to play
You can nicely decorate the side

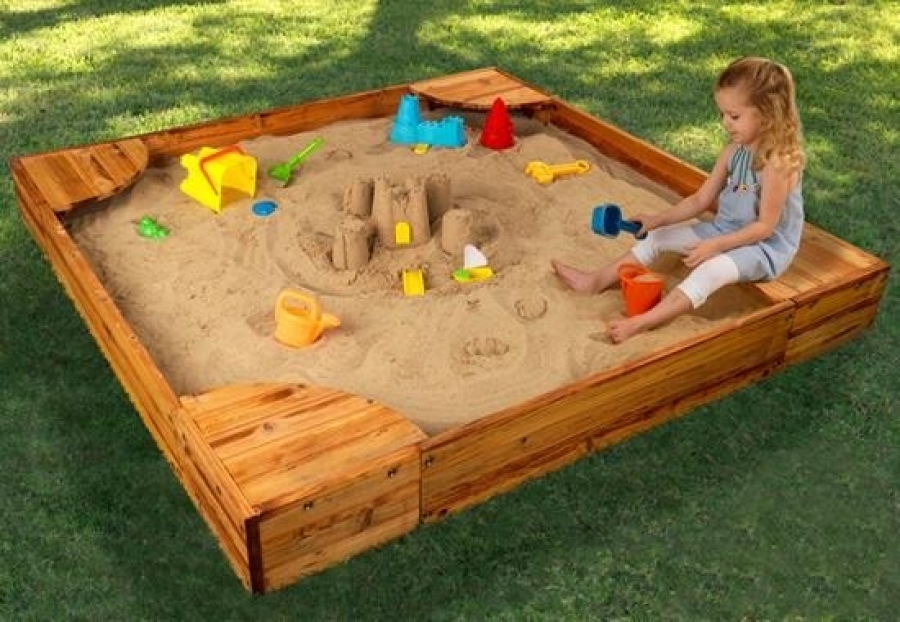
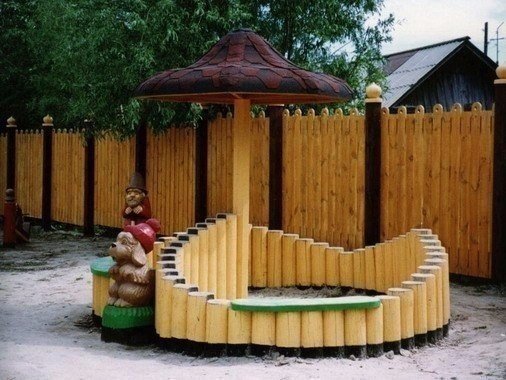
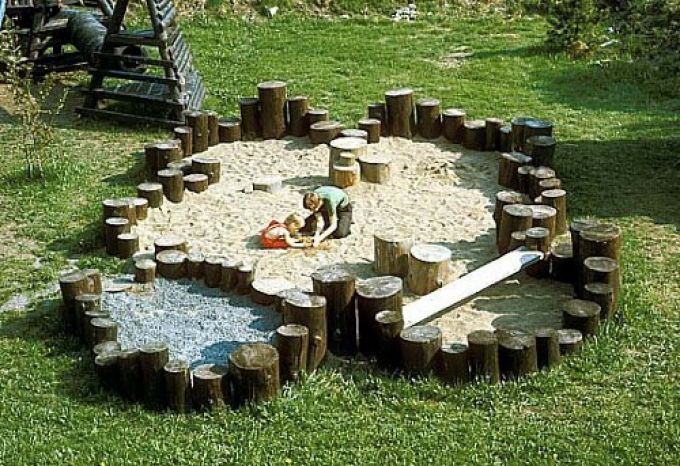
Sandboxes made of logs are very convenient, you can make a beautiful high side, as in this photo, a nice mushroom, also from a log, and as you can see, it turned out a very nice sandbox with a bench. And if you still put a couple of cute wooden figures, you can even send today to the contest "Best Sandbox of the Year."
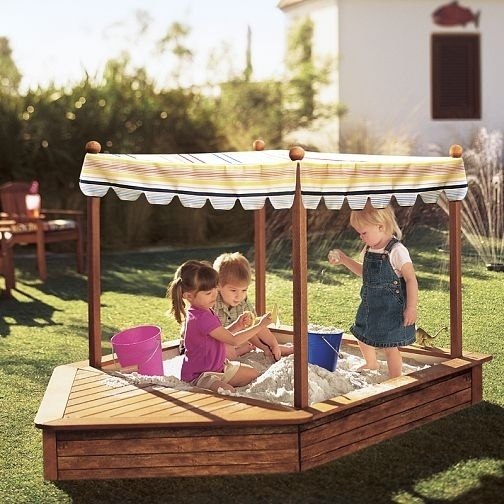
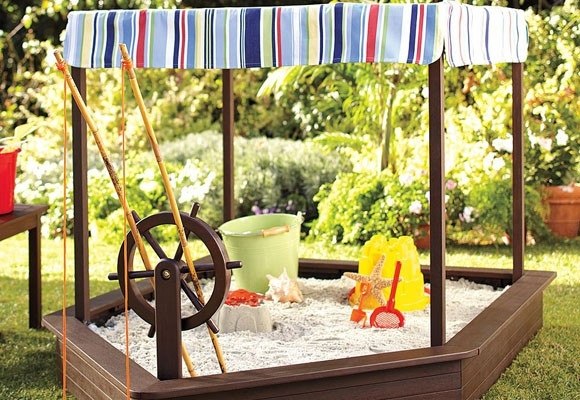
Children's sandboxes with a cover
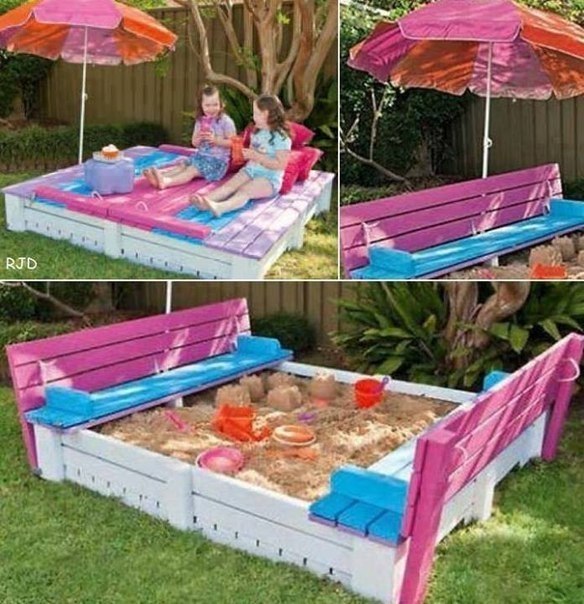
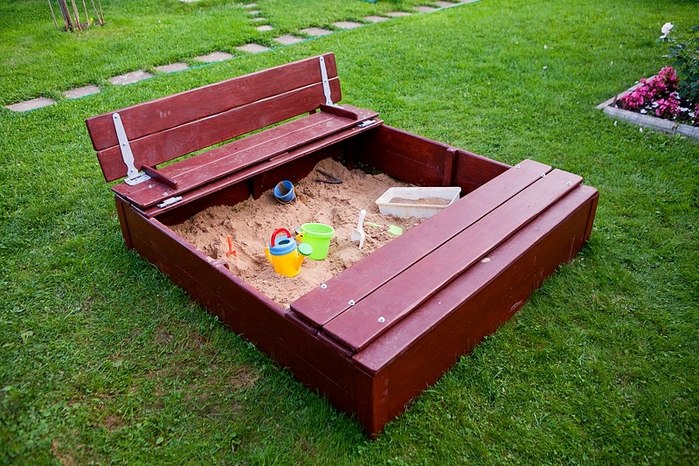
Convenient to make sandboxes with a cover
Or smaller ones
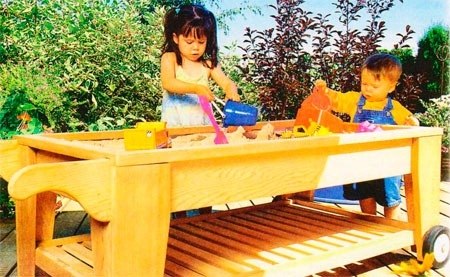
You can make a sandbox on the table or complete with a covered area
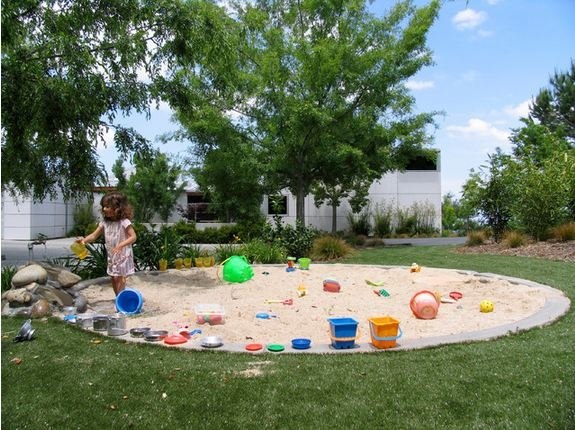
If you want expanse, the sandbox can be made very large
Or a very small, so to speak individual option
So choose, and if you want to learn how to make a children's sandbox with your own hands with instructions and step-by-step photos, you can see here.
In a child’s life, play, and everything connected with it, plays a big role. In the game, the child comprehends the outside world. One of the most beloved, for children of all generations, was and remains a game in a children's sandbox.
Types of children's sandboxes
Children's sandboxes are a huge variety:
- Open;
- Closed;
- With a roof;
- No roof;
- Wooden;
- From improvised materials.
All options are difficult to list.
Building Rules
Observing the rules for building this simple structure, you can place a real miracle in your yard that gives joy to you and your children.
Where to build sandstone
Having decided to build a sandbox in your yard on your own, you need to determine the location of the future entertainment venue.
Where better post a sandbox
For a children's sandbox, it is advisable to choose a place where: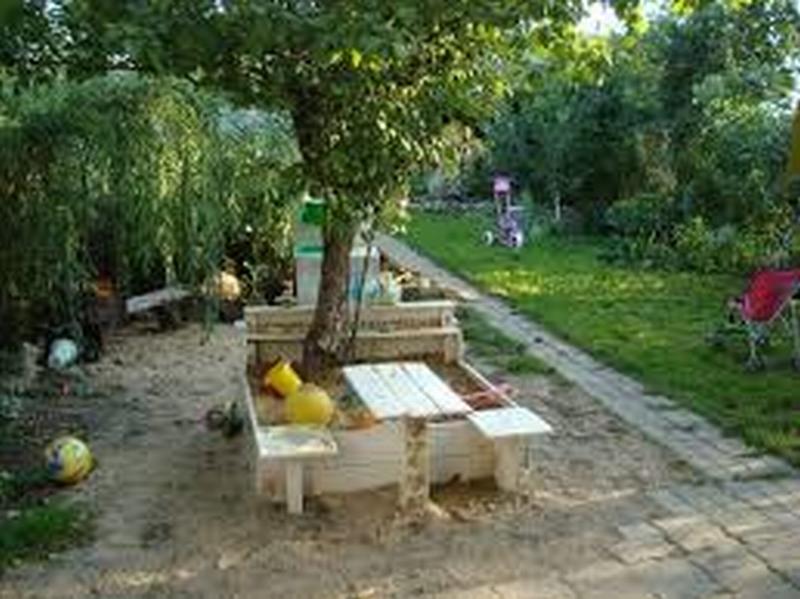
- Your children will be comfortable playing in the morning, afternoon and evening;
- Should no drafts;
- It is good if there is a lawn around the sandbox, sown with resistance to trampling, grass;
- You can place the sandbox under the trees. Especially good under the trees will be a sandbox without a roof. A shadow will protect playing children from scorching rays;
- The advantage is given to the location of the children's sandbox on the south side. Sand will warm up faster, and dry faster after rain.


https://i.expert-h.com/en/pesochnitsy/detskaya-pesochnitsa-na-dachu#sigFreeIda55eb5f1c1
WhereIt is impossible sandbox
- It is impossible to arrange a sandbox in the dead corners, behind outbuildings and behind bushes. Children playing cannot be hidden from parental eyes.. The building should be visible from the windows of the house. At least viewed in the yard;
- Choosing a location for the sandbox, pay attention to the moist, long-retaining moisture, places in your yard. If you place the building in such places in spring and early autumn, as well as in rainy summers, the sand will retain high humidity for a long time. And this is not very good for the children sitting in it. When choosing a place, avoid the lowlands, damp areas.
- Cannot be placed under old trees. After all, a sick or old one can break and injure the playing children. Before placing the sandbox under the tree, you need to carefully examine the tree itself. Having arranged a sandbox under the trees, it is imperative to revise the trunk and cut branches every spring;
- Do not place the sandbox under the scorching rays. Especially if your children's sandbox is planned without a roof;
- You can’t arrange a children's sandbox in too shady places, otherwise the sand will not warm up and will dry out after the rain.
When deciding on a place for a children's sandbox, you must choose a place where children will be comfortable and comfortable playing at any time of the day. Remember that children should not be under the scorching sun or supercool.
Children's sandbox size
 The size of the sandbox depends on the number of children playing sand at the same time, as well as the age of the children playing.
For two children aged two to five years, 160x160x25 cm is enough size. The main thing is that there is enough space and the children are freely located in the sandbox itself.
Standard sandbox sizes
Standard sizes:
- 1.2 x 1.2 x 0.22 m.
- 1.5 x 1.5 x 0.3 m.
- 1.2 x 1.5 x 0.25 m.
The standard height of the fungus is 180 cm.
Sandbox sizes do it yourself
When building a sandbox in your yard, you can choose the size yourself, based on the number of children playing in the sandbox at the same time, the size of your yard and its location, the shape of the sandbox you decided to build.
Choosing sizes, it is necessary to consider:
- Age of playing kids. The height of the side should be accessible for independent stepping by the child. The height for 2 - 3 - 3 year old babies should not exceed 20 centimeters, as children at this age can freely step over the height from 20 to 25 centimeters.
- The number of children playing. For one child, 1.2 x 1.2 x 0.2 m is enough. Sandboxes of this size will be enough for two small children up to three years of age. For two, three children from three to five years old, a sandbox with dimensions of 1.7 x 1.7 x 0.22 - 0.30 m is suitable.
- The depth of the structure. The fullness of the sandbox should be such that the kids playing in it could not get to the ground.
- The height of the structure. If your sandbox is planned with a canopy, umbrella or roof, their height should be such that a standing child cannot reach the edge of the roof or canopy with his head and bump.


https://i.expert-h.com/en/pesochnitsy/detskaya-pesochnitsa-na-dachu#sigFreeId2f7d2e9601
Leveling the site and preparing the soil for the installation of a children's sandbox for giving
For the installation of a children's sandbox for a summer house, you need to prepare the soil.
- Before starting work, determine the location of the building, size and shape;
- Create a drawing, layout, diagram;
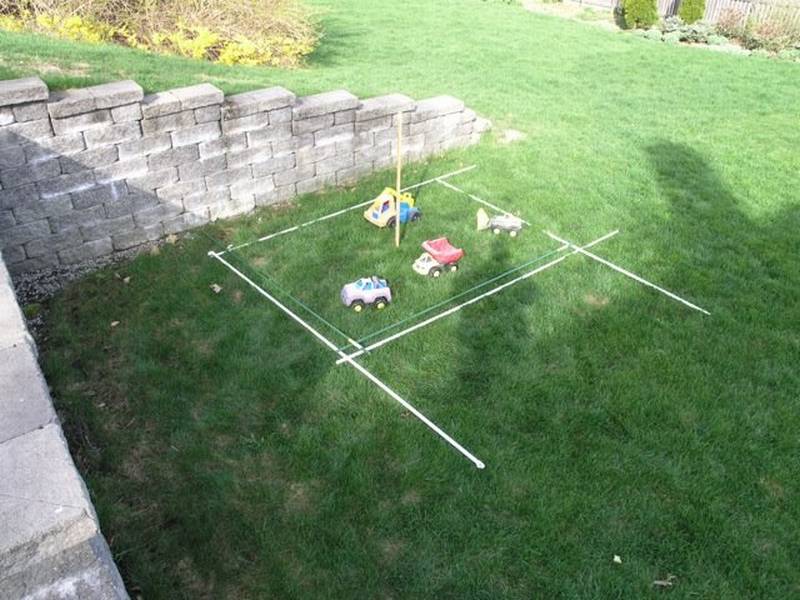
- Perform alignment of the site. The hillocks are cut off, the recesses are covered with soil. Stack turf or sow grass;
- Mark according to the drawing. When marking, it is necessary to achieve the accuracy of angles and dimensions. From compliance with the accuracy of the markup, the harmony and geometry of the children's sandbox depends;
- At the location of the future sandbox for children, the soil is removed, 20 centimeters and leveled.


https://i.expert-h.com/en/pesochnitsy/detskaya-pesochnitsa-na-dachu#sigFreeIdac64620738
Do-it-yourself woodworking in the manufacture of a wooden children's sandbox
In order for a children's sandbox made of wood, made by hand, to serve for a long time, it is necessary to treat the wood with special anti-corrosion agents. They are offered for sale in a wide range.Such impregnation will protect your sandbox from insects that destroy wood, as well as protect your wooden sandbox from rotting and destruction. When choosing wood processing products, pay attention to the safety of the product.When processing boards, wait until they dry completely, and only after that proceed with the construction.
How to make the bottom of a children's sandbox with your own hands
 Why make the bottomin the sandbox?In order to protect the children's sandbox:
- From the germination of grass;
- From the penetration of insects from the soil;
- From high humidity;
- Prevention of sand contamination due to mixing with the soil.
This photo shows what a children's sandbox will turn into without proper bottoming.


https://i.expert-h.com/en/pesochnitsy/detskaya-pesochnitsa-na-dachu#sigFreeId3e2fa1e06d
Drainage in a children's sandbox with their own hands for giving
So that moisture does not linger in the children's sandbox, it is better to make a drainage. In rainy summers, sand in such a children's sandbox dries faster.
Drainage in the sandbox is arranged like this:
- In the center of the filmed soil they dig a recess of fifty centimeters in depth and also in width;
- The soil is cut with a bias towards the recess;
- Fall asleep with rubble;
- Expanded clay layer;
- Layer of sand;
- Agrofibre or other selected material.
Agro-fiber do-it-yourself children's sandbox bottom for summer house
For a wooden sandbox recommend arrange the bottom of the agro fiber. It is a practical material, appropriate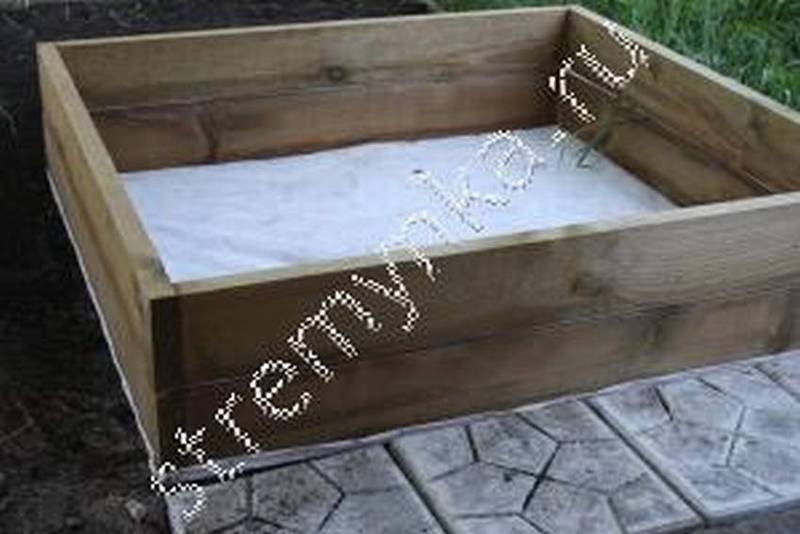 requirements. Is he:
- Durable
- Protects from germination of grass;
- Protects sand from blooming due to venting properties;
- Do not miss insects;
- It passes moisture in one direction and delays on the other.
It is important to place the agro-fiber on the bottom of the wooden sandbox with the right side. Otherwise, it will not protect the sand in the sandbox from moisture, but, on the contrary, will delay it.
The bottom of the children's sandbox made of film and tarpaulin
 If you decide to arrange the bottom of the children's sandbox from film, it is necessary to make holes in it through which excess moisture will be removed. Not recommend make the bottom of a solid plastic film without holes. After rain, moisture will not be able to seep from the sand to the ground and the sand will remain moist for a long time, allowing molds to multiply and supercooling children playing in the children's sandbox.
- Arrange the bottom of the children's sandbox in the same way from tarpaulin. In the case of the device of such a bottom for a wooden sandbox, it is also necessary to make holes. This material does not leak water, as does the film.
It is good to arrange the bottom of the film if there is a canopy over the sandbox. In rainy weather, sand in such a children's sandbox will not get wet.
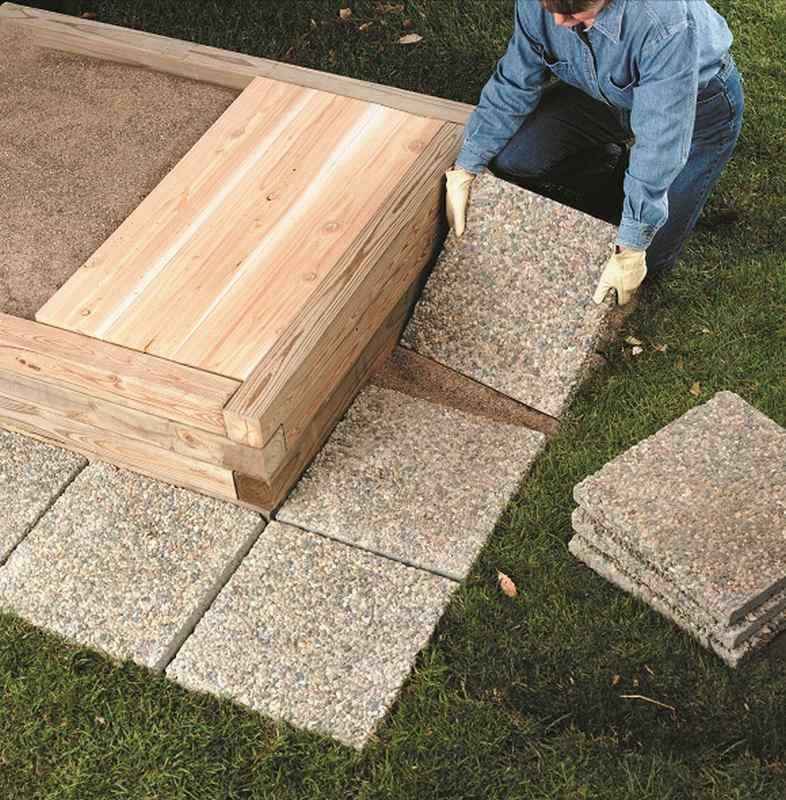
Do-it-yourself sandbox bottom made of paving slabs
You can also arrange the bottom of a wooden sandbox from paving slabs. With such a bottom device, excellent protection against
- Insects;
- Sprouting grass;
- The penetration of rodents;
- Removing excess moisture.
The device bottom of the sandbox of such material is more costly and time-consuming, but more practical and durable.
The bottom of the children's sandbox made of plastic bottles
An interesting version of the bottom for a wooden children's sandbox made of plastic bottles. Bottles with closed corks are fastened together with one cloth and laid on the bottom. You can fasten them with ordinary tape. Such a bottom device for a children's sandbox with their own hands is a very good option:
- Moisture will pass between the bottle joints;
- Air in closed bottles will serve as a heater between the ground and sand;
- Such a bottom will protect against weed germination;
- Small insects will not crawl into a children's monastery;
- Protects playing children from hypothermia, even in cool weather.
When arranging the bottom of a children's sandbox out of plastic bottles, it is necessary to deepen the soil an additional one to the height of the pillow from the bottles. It is advisable to take bottles of the same volume. This will facilitate the work with them and provide an even bottom in the sandbox.
Arrange the bottom of plastic bottles using cropped bottoms. They are laid with the cut side in the ground, in tight rows.
The photo clearly shows the ways of laying and fixing the bottom of the children's sandbox with their own hands.
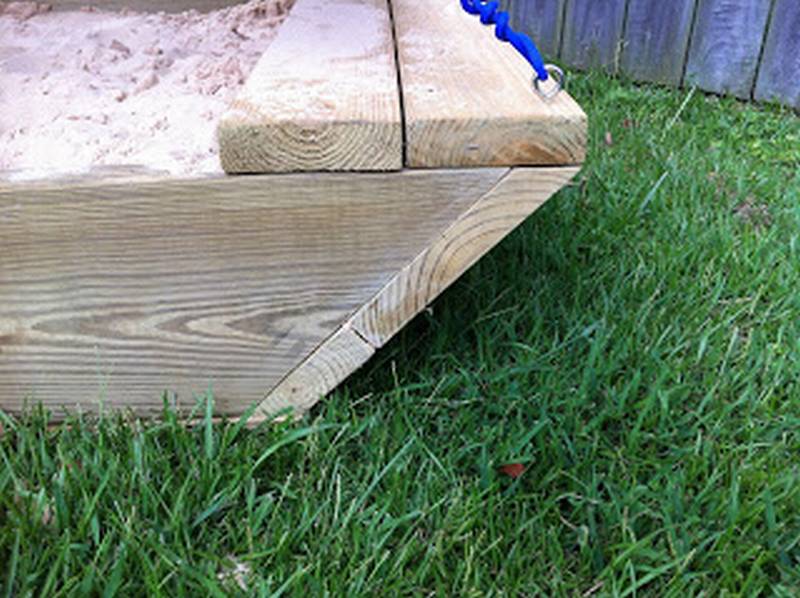
Do-it-yourself board joint seal in a wooden sandbox
Many people wonder how to seal the gaps between the boards in a wooden sandbox so that the sand does not wake up between them. After all, it is not always possible to achieve the ideal surface of the ends of the boards when building a children's sandbox with their own hands. An excellent solution was suggested by the blogger. In these photos it’s goodYou can see the solution to this problem using a conventional seal. You can glue the seams with ordinary rubber by gluing the ends of the boards. With this decision, you must choose non toxic glue.


https://i.expert-h.com/en/pesochnitsy/detskaya-pesochnitsa-na-dachu#sigFreeIdb94415bc7f
Making sandboxes with step by step photos
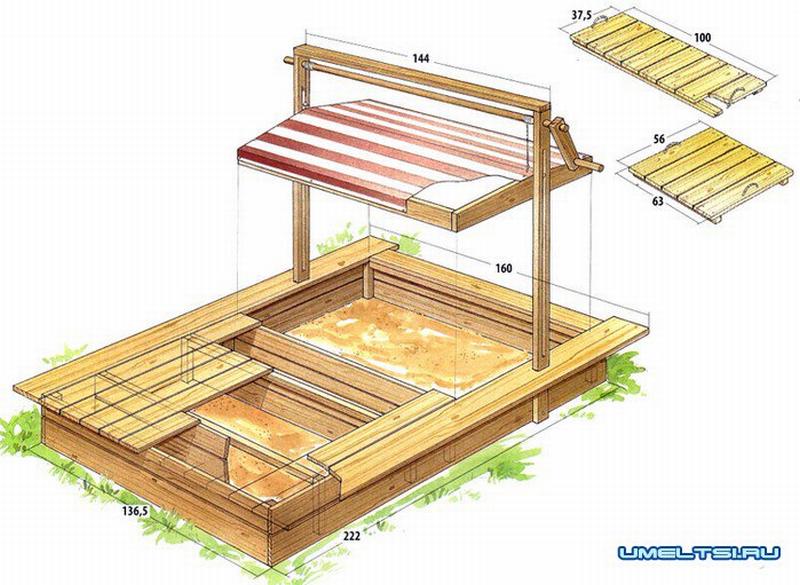
 These photos show the step-by-step production of a sandbox with a lid with step-by-step drawings and diagrams, which with a light movement turns the lid into a convenient bench. This version of the sandbox with a bench cover is perfect for kindergarten.
This wooden sandbox project was developed on a computer by a blog author.ana-white.com. To make a sandbox, you need boards (note that the wood must have been dried. Otherwise, when dried, the raw boards are deformed and spoil the appearance of your building, its geometry), loops, pens, screws, wood glue.
- Before screwing in, drill holes with a drill. For added strength, use wood glue. (Excess glue must be cleaned immediately, otherwise the paint will not work well).
- We fill the holes with wooden filler. Let it dry completely.
- We grind all boards and filling places. Coat with a primer and leave to dry completely. We paint.


https://i.expert-h.com/en/pesochnitsy/detskaya-pesochnitsa-na-dachu#sigFreeId32fa4f6e60
Children's sandbox do-it-yourself little table for a summer house with step-by-step photo
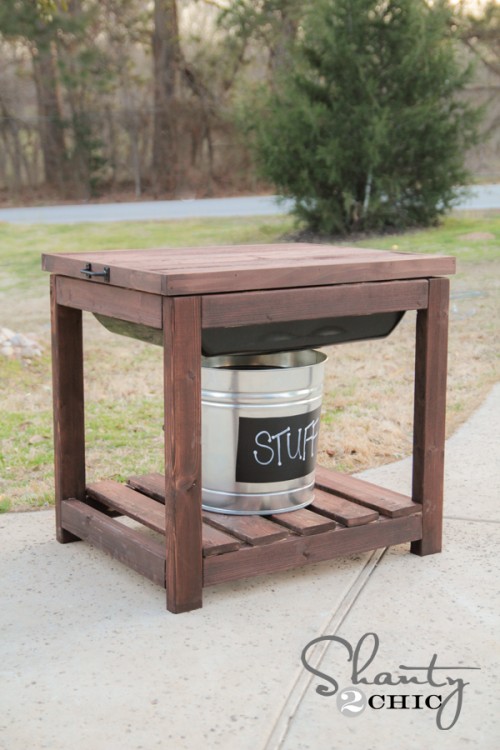
A very interesting version of the children's sandbox for giving with their own hands with the stages of construction was developed and created by the blogger shanty-2-chic.com.
A beautiful wooden sandbox will allow your children to play without danger of catching a cold, sitting on the cool sand.
The sandbox easily transforms into a children's table for board games, you just have to close the lid. A wooden cover can be designed for any children's board game, and turn the place of fun into a place of development.


https://i.expert-h.com/en/pesochnitsy/detskaya-pesochnitsa-na-dachu#sigFreeId664803c07b
Sandbox with a table
- Compact
- Convenient;
- Hygienic
- Multifunctional;
- Mobile
It is not difficult to move the sandbox with a table. On rainy days, your favorite fun will be available, you just have to pour out the sand, move the children's sandbox - a table under a canopy, and refill it.
Sandbox table for kindergarten
 Such a sandbox table is suitable for kindergarten. Skillful parental hands will not be difficult to create several sand tables together. On wooden covers, you can draw fields for educational games, allowing you to combine the time you walk on the street with learning moments.
Tables - sandboxes are easily transported under the roof of the pavilion in inclement weather.
So that children do not get tired, playing in the sandbox and board games, you can do do-it-yourself sandbox with a bench and for more children.


https://i.expert-h.com/en/pesochnitsy/detskaya-pesochnitsa-na-dachu#sigFreeId3cc77dddef
When building this sandbox should take into account the growth of the child. If the height of the sandbox table is incorrect, the child will feel discomfort and fatigue.
DIY sandbox with step-by-step photos and a drawing fromrounded logs
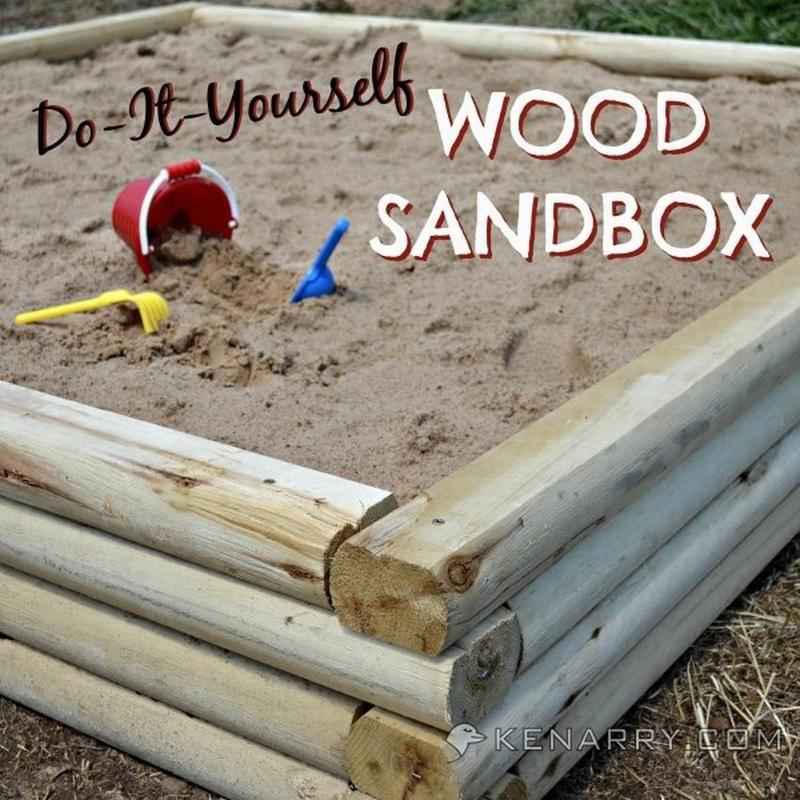
A variant of a wooden children's sandbox from timber DIY with a step-by-step photo and drawing designed and built by the blogger blackanddecker.com.
Such material is durable and looks great.This is a very interesting sandbox idea. In this model, agro-fiber is used to arrange the bottom of a wooden children's sandbox. This sandbox is easy to build and original. The rounded beam gives it a charm.


https://i.expert-h.com/en/pesochnitsy/detskaya-pesochnitsa-na-dachu#sigFreeId9311722969
Sandbox made of logs on pins for kindergarten
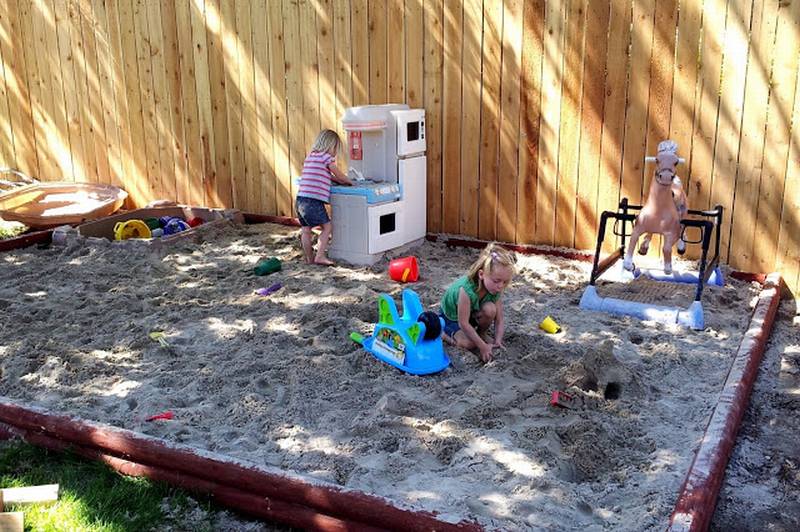 Do-it-yourself sandbox for logs for kindergarten made by the blogger finditmakeitloveit.com.
The advantage of such a sandbox is its size, which allows a large number of children to play simultaneously.
The ease in manufacturing this sandbox will not cause difficulties in construction. Even one parent can do such a job in a fairly short time.


https://i.expert-h.com/en/pesochnitsy/detskaya-pesochnitsa-na-dachu#sigFreeId847952e1da
Do-it-yourself sandbox made of natural hemp
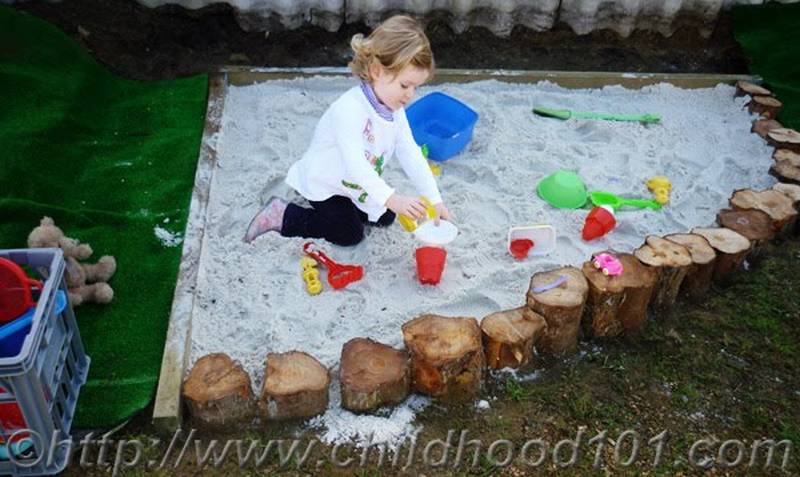 On these photos are suggested varieties of children's sandboxes with their own hands from natural hemp.
The construction principle shown in the first embodiment is suitable for the construction of a children's sandbox of any variations using ordinary wooden stumps.
You can build a small sandbox, or you can build an entire children's town out of logs - a sandbox.


https://i.expert-h.com/en/pesochnitsy/detskaya-pesochnitsa-na-dachu#sigFreeId8a091de355
Sandbox - do-it-yourself hemp town for kindergarten
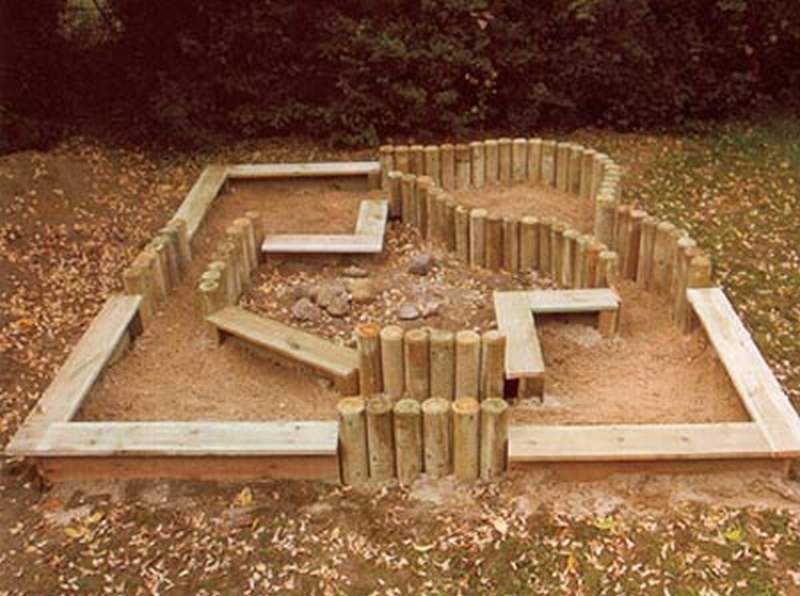 The blogger could not stop at a simple sandbox and built a whole town from natural hemp.
For children from kindergarten, such a sandbox city will give a lot of vivid impressions. In such a self-made sandbox town, it’s fun to play for children of all ages.
Also, such a sandbox can be built in your own country house for your beloved children or grandchildren. Phased photos show the subtleties of this building. Drawings with the sizes of the children's sandbox of the town are given.


https://i.expert-h.com/en/pesochnitsy/detskaya-pesochnitsa-na-dachu#sigFreeId5bf7e60145
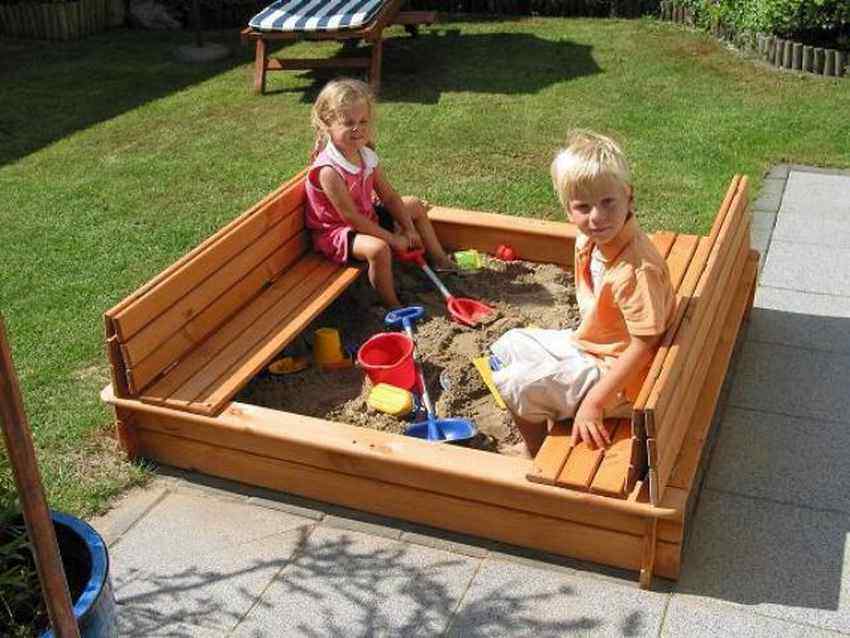
Simple sandbox with corner seats with step-by-step photographs, drawings and dimensions
This sandbox with seats on the corners was developed and built by a blogger
Building such a sandbox for a summer residence will not require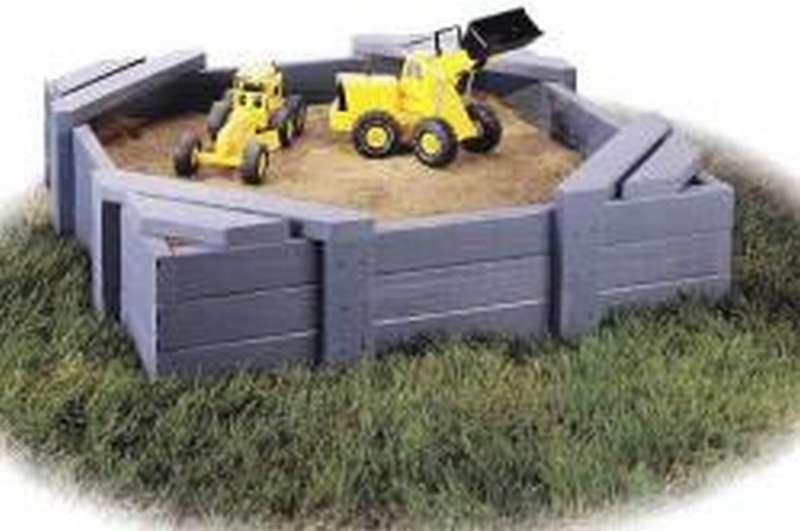 special skills. Having carefully studied the drawings and familiarized themselves with the order of construction, any dad, and even grandfather, can cope without problems.
Such a sandbox is suitable even for small garden plot since it does not take up much space. The benches placed on the corners will add space to the small children's sandbox.


https://i.expert-h.com/en/pesochnitsy/detskaya-pesochnitsa-na-dachu#sigFreeIdafdd3447c8
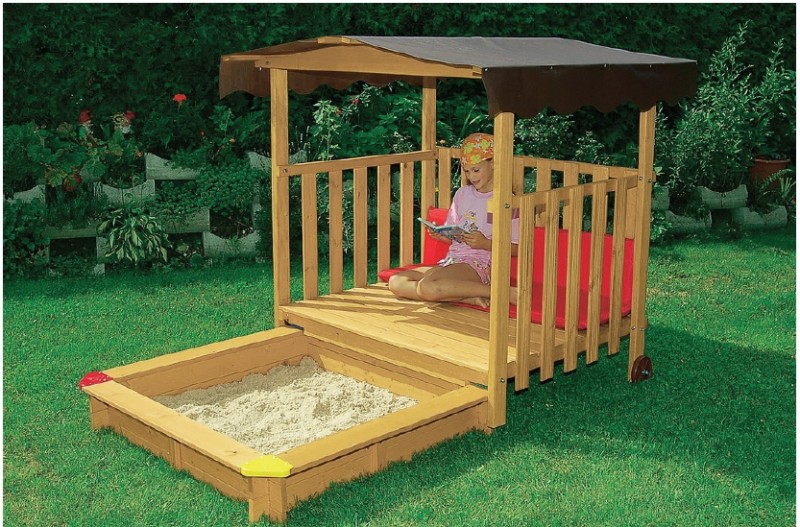
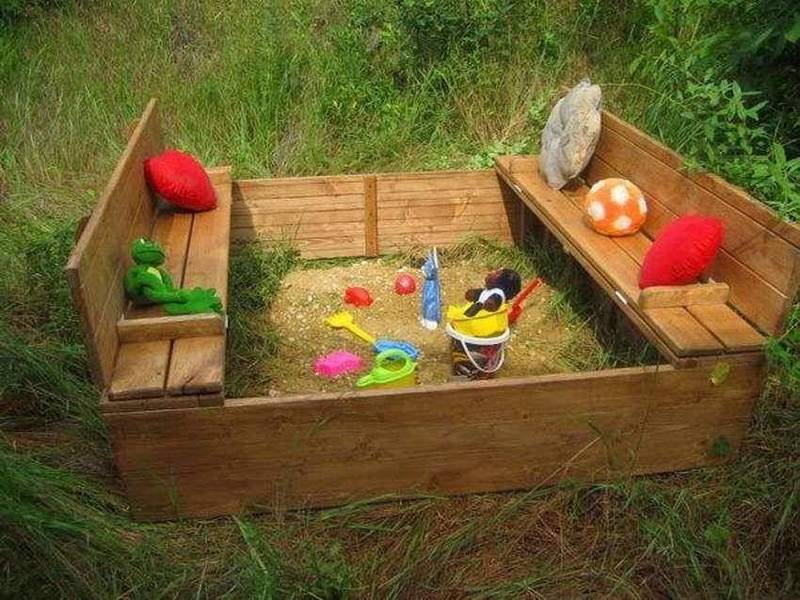
Sandbox - a bench with a box for toys and a folding canopy with drawings, sizes and stages of construction
 A curious option was developed by a blogger. blackanddecker.com with phased photos and drawings.
On one side of the sandbox - benches for summer cottages is a seat. Under the seat is a box with a lid for children's toys. It is very comfortable. There is no need to wash toys from sand after each children's play in the sandbox.
The child will learn order by folding game items after use.


https://i.expert-h.com/en/pesochnitsy/detskaya-pesochnitsa-na-dachu#sigFreeIdec1dee63c0
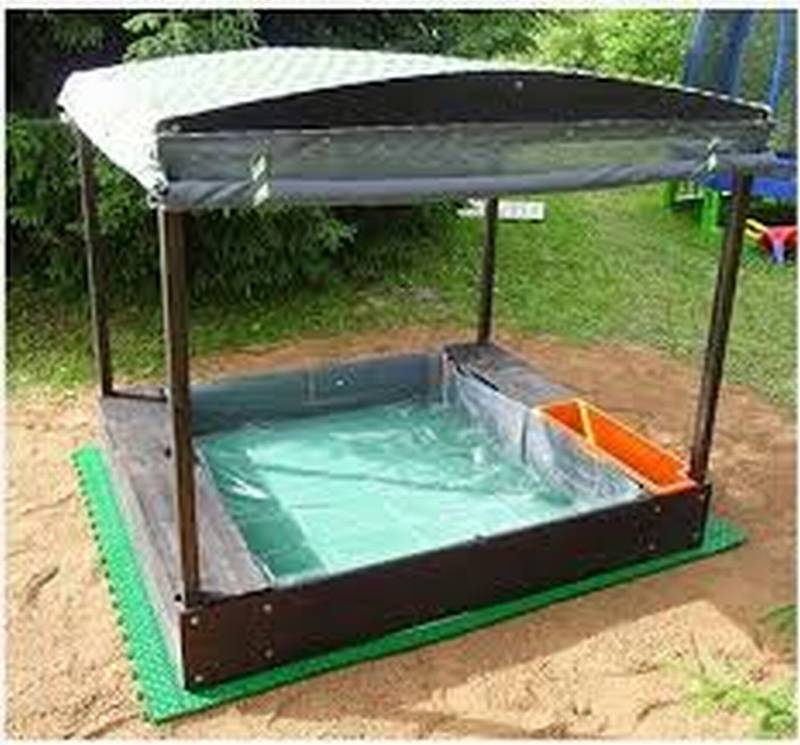
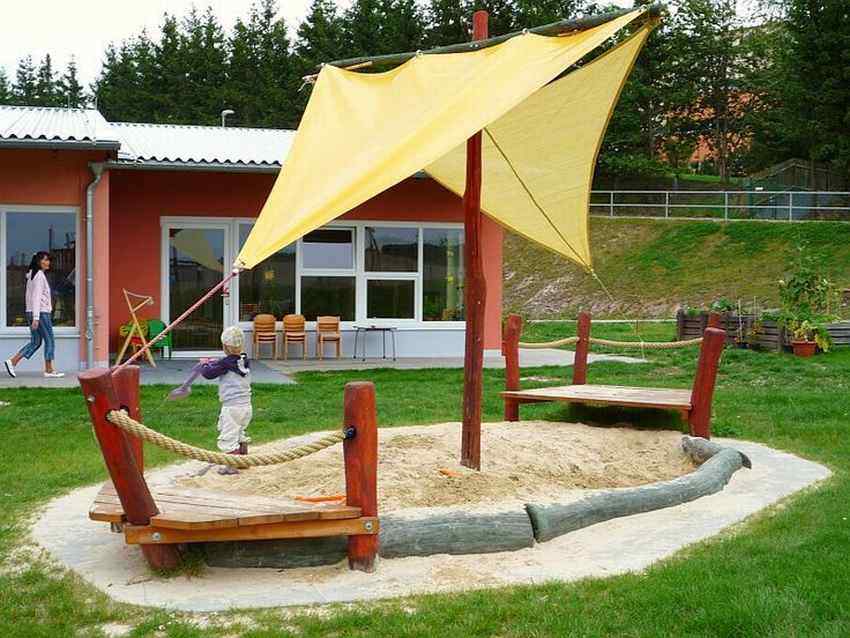
DIY sandbox with a small pond for a children's boat
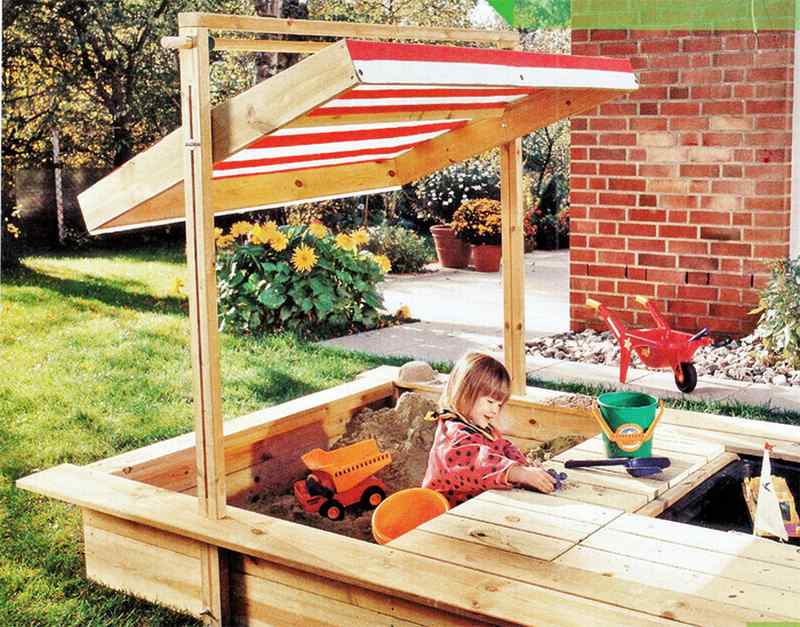
A very original sandbox was developed by a blogger.
Every boy will be happy with such a miracle. After all, next to the sandy abundance, a real sea for ships!
A canopy will protect children from the summer heat. After the game, the canopy lowers easily, turning into a lid.
The photo shows phased photos for the construction of this model.


https://i.expert-h.com/en/pesochnitsy/detskaya-pesochnitsa-na-dachu#sigFreeId8250f3c139
Children's wooden sandbox - a machine with drawings, sizes and phased photos
The construction of this sandbox model will delight not only the boys, but also
girls. Which of the kids does not dream to steer on 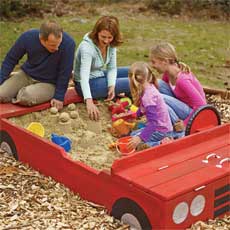 own car!
And if you build with the whole family, a simple children's sandbox turns into a matter of pride. After all, it was built not only by dad, but also by mom and children! So did the blogger’s family thisoldhouse.com.
The construction of a children's sandbox made of wood for this family has become a real unforgettable event.
Even as adults, these children are unlikely to forget the first construction in their lives.


https://i.expert-h.com/en/pesochnitsy/detskaya-pesochnitsa-na-dachu#sigFreeIdcf4aeecfe8
Do-it-yourself sandbox
You can create a children's sandbox with your own hands not only from wood, but also from stones.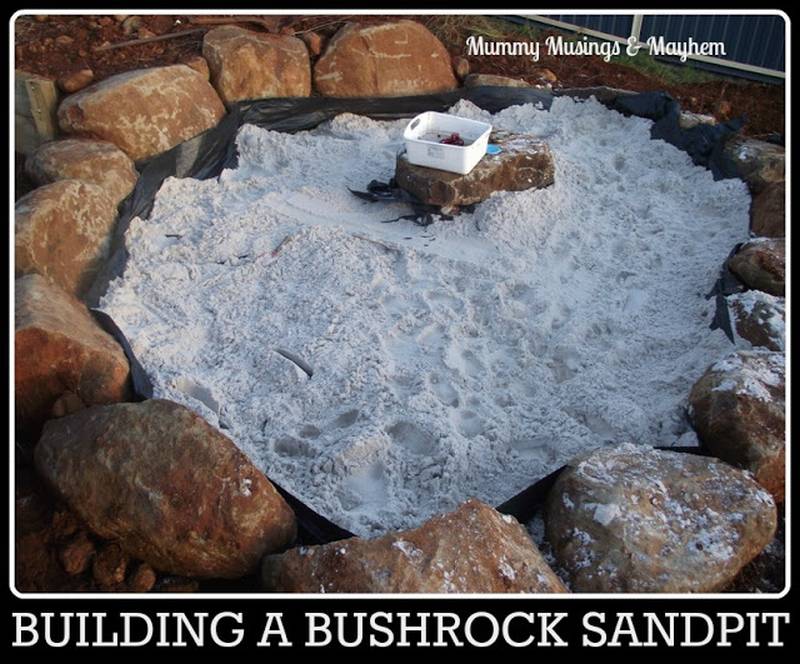
This is what mummymusingsandmayhem.com blogger did.
However, when building such
Sandboxes should be aware that on cool days the stone remains cold. Adults should take into account that the stone warms up for a long time even in sunny weather.
Having built a sandbox from stones with your own hands, it is necessary to warn children that You can’t sit on a cold stone!


https://i.expert-h.com/en/pesochnitsy/detskaya-pesochnitsa-na-dachu#sigFreeId15bce393e0
Wooden sandbox - do-it-yourself boat with photo
Boys and girls can go sailing on a real ship - a sandbox!
This version of the children's sandbox was built by the blogger ana-white.com. Using the method of building a children's sandbox - a boat, you can create a whole frigate.
There are many options for children's boats - sandboxes. Awaken the boy in yourself and embark on a journey with your children on a real ship - a children's sandbox.


https://i.expert-h.com/en/pesochnitsy/detskaya-pesochnitsa-na-dachu#sigFreeIdbd3862a4c3
Amazing sandbox - a boat by the hands of dad for kindergarten
Amazing sandbox - a blogger created a blogger with his own hands
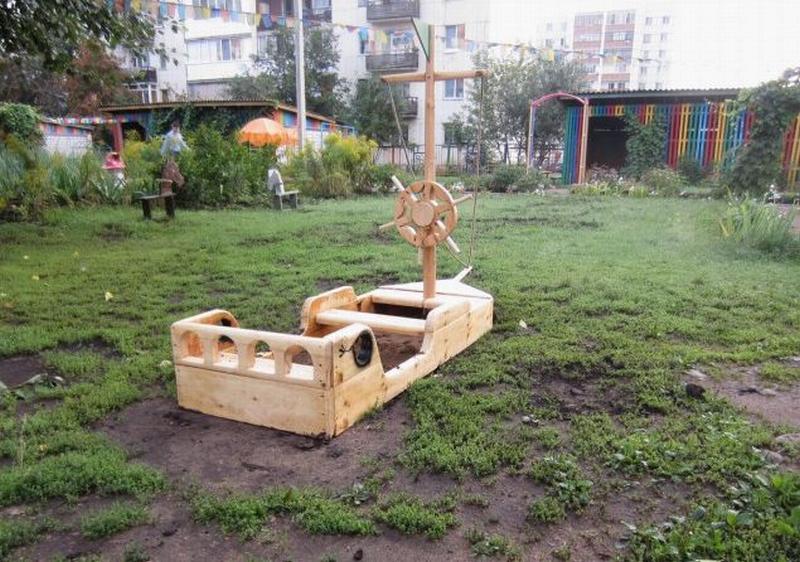
He built this children's sandbox from old window frames and window sills.
Dad made a real miracle for the children of kindergarten from recycled materials. The steering wheel is mounted onbearing, rotates freely, which allows kids to lay real turns!
The teacher asked to build a kind of boat for the children of a kindergarten, and was so carried away that the result enthralled the screeching children.
These step-by-step photos show all stages of construction.


https://i.expert-h.com/en/pesochnitsy/detskaya-pesochnitsa-na-dachu#sigFreeId8074868f15
Sandbox - a frigate for kindergarten or cottage with step by step photos
A real sandbox - a frigate designed and built by a blogger
This sandbox cannot be called a simple building. But if you look, there’s nothing super complicated. Step-by-step photos will help you become a real shipbuilder.
Such a sandbox will be relevant for your children of any age. And when grandchildren are born, there will be no limit to their pride. After all, their grandfather built a real fairytale frigate!
To save the building for many years, tools for processing wood will help.


https://i.expert-h.com/en/pesochnitsy/detskaya-pesochnitsa-na-dachu#sigFreeId1e7e11d29a
Sandbox for girls with a decorative mini flowerbed for giving
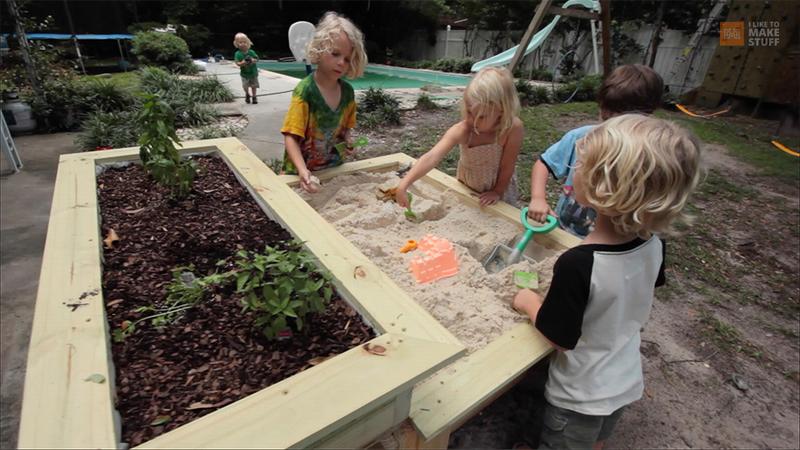 For babies who are in love with fresh flowers, you can build a sandbox with a mini flowerbed of fresh flowers. So did the blogger iliketomakestuff.com
Living scenery fits perfectly into the children's sandbox for girls.
The issue of watering plants is solved by the drip method.
Such a sandbox will educate girls in love of plants, teach them how to care for living decorations.


https://i.expert-h.com/en/pesochnitsy/detskaya-pesochnitsa-na-dachu#sigFreeIdbd3bc29996
Do-it-yourself sand for filling a children's sandbox with a lid
 Children will spend in the sandbox for a long time. It is necessary to choose such sand so that it does not harm the playing kids. Choosing sand to fill the children's sandboxrecommend stick to some rules:
- Sand for a children's sandbox needs to be taken from an environmentally friendly place. After all, you do not want your children to be poisoned with harmful substances during the game;
- It is necessary to calcine sand for a children's sandbox. When calcined in the sand, small insects and heals are destroyed;
- It is necessary to fill the sandbox with dried sand. Sand is usually brought wet or wet. Filling a children's sandbox with wet sand, you will increase its drying period and playing children can catch a cold;
- Sand must be sieved before filling. Sifting through sand, you will remove small pebbles, unnecessary vegetation and its roots, clay compounds and other unnecessary garbage from it.


https://i.expert-h.com/en/pesochnitsy/detskaya-pesochnitsa-na-dachu#sigFreeIdbe24cf45f2
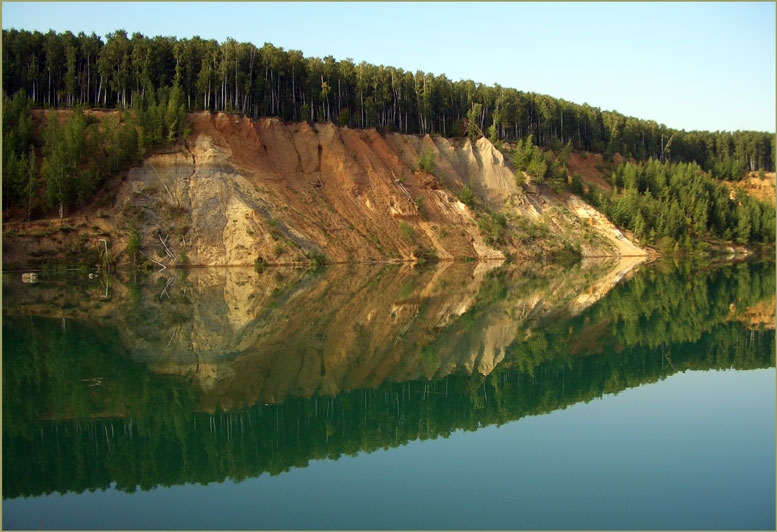
These photos depict sand in nature. Sand layers of different colors are very well visible. You must select a layer that will meet the requirements for the children's sandbox.
It is impossible take sand for a children's sandbox:
- In marshy ponds;
- On the banks of polluted rivers;
- Near factories;
- In the immediate vicinity of the accumulation of garbage and landfills, especially if the landfill is higher than the place of sand collection;
- In places located below sown agricultural fields. The fields are treated with pesticides, and in rainy weather the water carries away toxic substances in the lowlands, infecting the sand.
Can to purchase special disinfected sand supplied by organizations for children's institutions. Such sand does not contain any additional impurities. Anneal it in a special oven at a certain temperature. It is also checked for harmful substances.Such sand for a children's sandbox will give you a guarantee of the safety of your children.
What is sand and whatis good for children's sandbox
You will be surprised, but the sand is divided into several types, and not all of them are good for a children's sandbox. Let's look at the sand.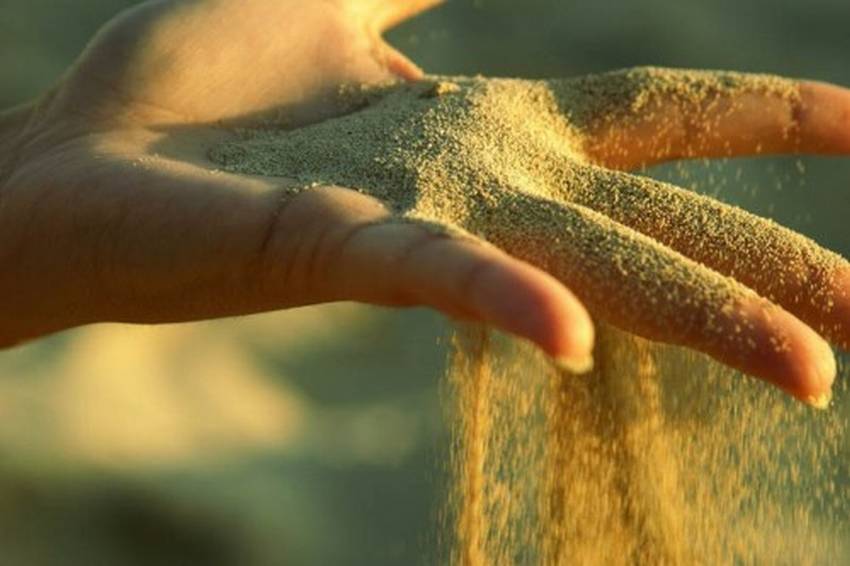
- Red sand is not suitable for a children's sandbox. It contains a lot of clay compounds. They will smear children's hands and clothes;
- Grey sand would be suitable for a children's sandbox, but it is too dusty. Especially if there is a breeze;
- Yellow fine sand is suitable for a children's sandbox. It molds well and is not very dusty. But coarse-grained - no. It is poorly molded and poorly kept in shape;
- White sand, like yellow;
Determine if sand is suitable for a children's sandbox Hold it in your hands, see how dusty it is, how wet sand is molded, holds its shape.


https://i.expert-h.com/en/pesochnitsy/detskaya-pesochnitsa-na-dachu#sigFreeId10994e65ff
These photos show varieties of sand by color. At first glance, it is difficult to determine whether a given sand is good for a children's sandbox or not. In addition to color divisions, sand is divided by structure. To determine the suitability of sand for a children's sandbox, carry out the simple tests described above. Blind a little cake, let it dry. You will see how the sand holds its shape. Blow on sand, checking dustiness. Pay attention to its pollution. Choosing the right sand for a children's sandbox will save your children from many disappointments when playing in a children's sandbox.
Sand for a children's sandbox should:
- It is good to sculpt and keep in shape;
- Do not gather dust;
- Do not contaminate clothes dry;
- Be fine-grained;
- Do not contain a lot of impurities of small pebbles and shells. Small fragments cannot be eliminated, but they can prick a finger.
Registration of surrounding soil around a children's sandbox for giving
 Having built a sandbox, you need aboutshape the space around the children's favorite placeof games.
A little imagination, and a sandbox for giving
will become a real decoration of the yard.
These photos show the design options for a children's sandbox for a summer residence.
A properly designed environment will give charm to a sandbox built by your own hands in your country house.


https://i.expert-h.com/en/pesochnitsy/detskaya-pesochnitsa-na-dachu#sigFreeId6a6c8defb0
Making a sandbox is not at all difficult. With a little effort and imagination, your children clap their hands in delight when they see what a miracle their father created.
150+ photos of sandboxes with your own hands


https://i.expert-h.com/en/pesochnitsy/detskaya-pesochnitsa-na-dachu#sigFreeId6465e7d0e7
Hello, I am the author of this article, so I look forward to asking questions for this article in the comments below, I will answer all !!!
If you have questions on another topic, ask them on our forum, we will answer you
- Two baskets of paper in 5 minutes (Master class)
- How to make a simple and compact table for a milling cutter from plywood
- How to make a soft headboard tile (Instructions + step by step photos)
- Cinder block benches: a convenient bench in 55 minutes
- How to make a bed with a niche: saving space (Master class)