Wooden sandbox do it yourself for children in the country: 490 photos, drawings.
 Do-it-yourself sandbox
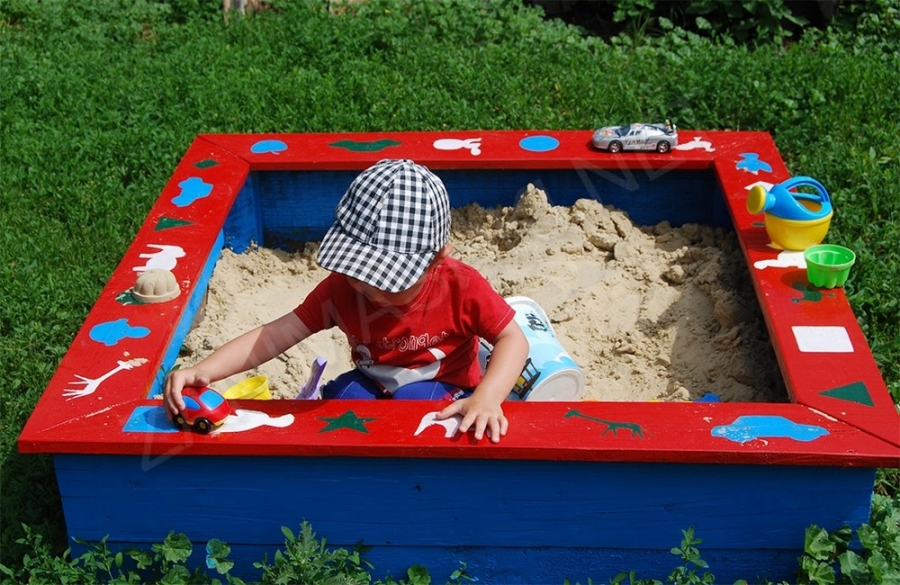
Any child is happy with a good, big sandbox! But to build it with your own hands is not difficult, you only need the necessary material, dexterity, imagination and skillful hands.
Check out the menu for this article below. All links are clickable.
Article Menu
Do-it-yourself sandboxstep-by-step instruction
Sandbox materials and sizes
Before starting work, it is necessary to find boards of suitable sizes and sand them so that the child does not accidentally pick up a splinter. The width of the boards should be at least 3 centimeters.
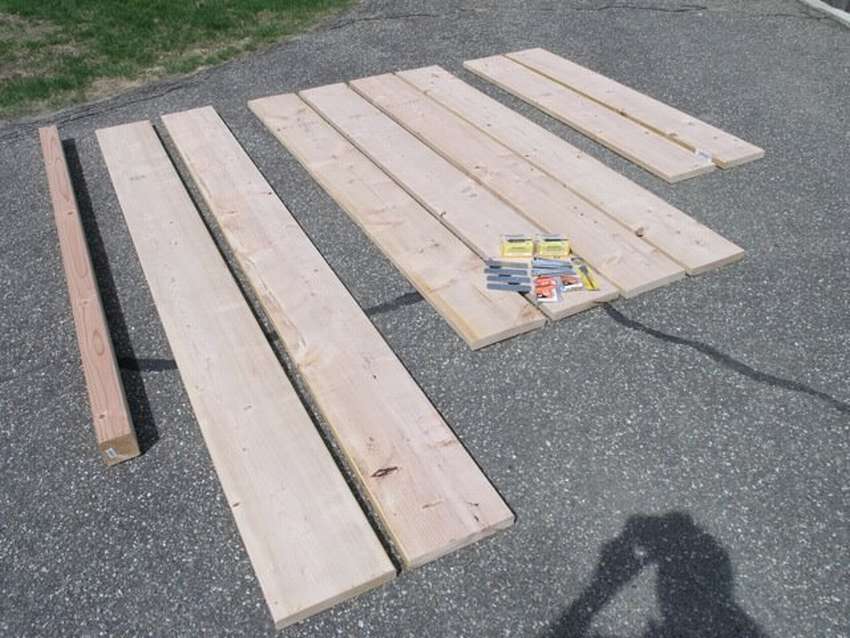
Having decided on the location of the playground for games and the size of the sandbox, we draw up a drawing. The standard shape of sandboxes is a square with sides of 1.5-2 meters and a depth of 20-30 centimeters.
Step-by-step instruction
Having finished preparing the materials, we start the main work - the construction of the sandbox. You will not encounter difficulties in working if you follow each point of the instruction correctly:
- Determined by location. It should be thought that when playing in the sandbox, children do not "roast" in the sun, and also be in the field of view of their parents. In case the shade is not enough you can build a canopy. It will not only create the necessary shadow, but also protect it from rain in case of bad weather, and also sufficiently extend the life of the sandbox.
- We process boards with antisepticsdue to which the material will become resistant to rot and parasite invasion.
- We prepare the surface and make the base of the sandbox. Make the bottom necessary so as to prevent the mixing of sand by the ground, as well as the penetration of rodents and insects. To accomplish this task, agrofibre, attached to the boards with the help of an ordinary stapler for furniture, is perfect.
- We set the sidesconnecting boards with self-tapping screws. Self-tapping screws are the most comfortable and affordable method of fastening, which gives the entire structure sufficient strength, since even with constant pressure of sand mass they will not be deformed.
- We fix wide horizontal boards around the perimeter of the site so that children can sit down and relax if necessary.


https://i.expert-h.com/en/pesochnitsy/948#sigFreeId1b28feb707
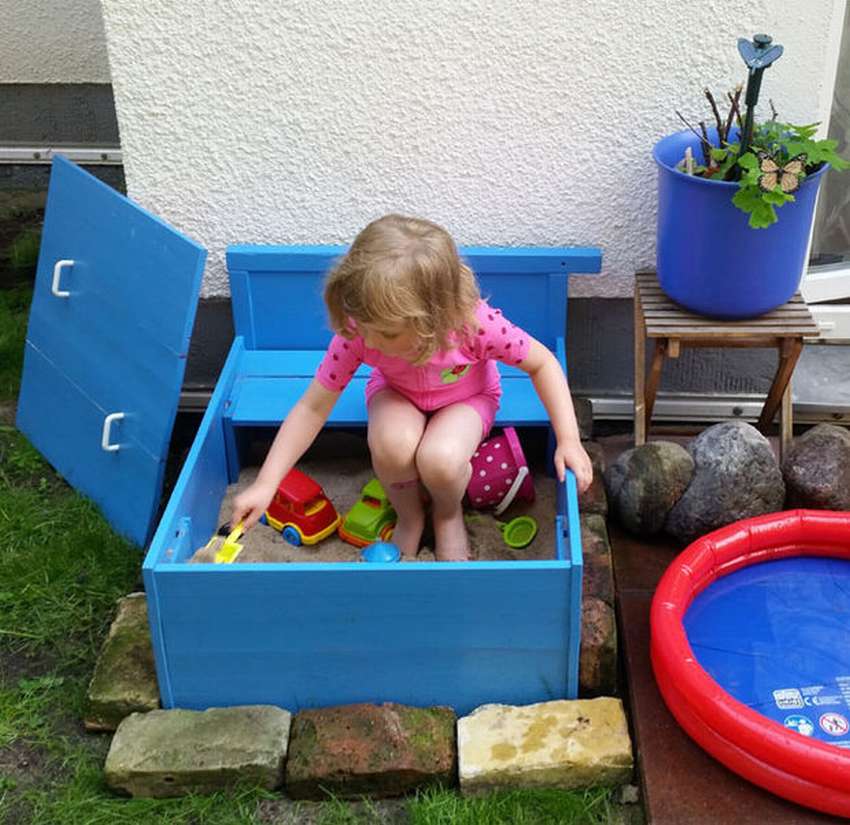
Do-it-yourself sandbox with a lid, photos and drawings
 You can build a sandbox with a cover in 3 stages, which are described below:
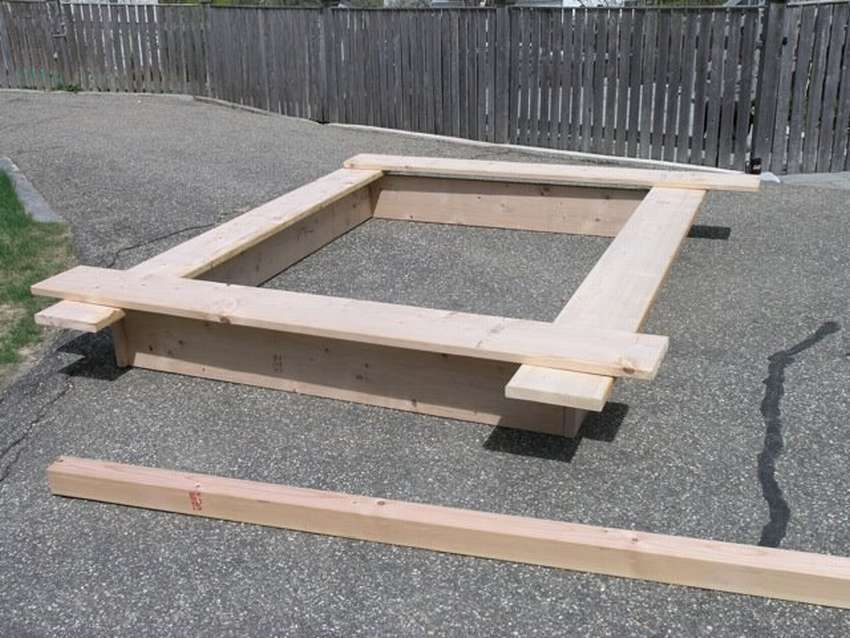
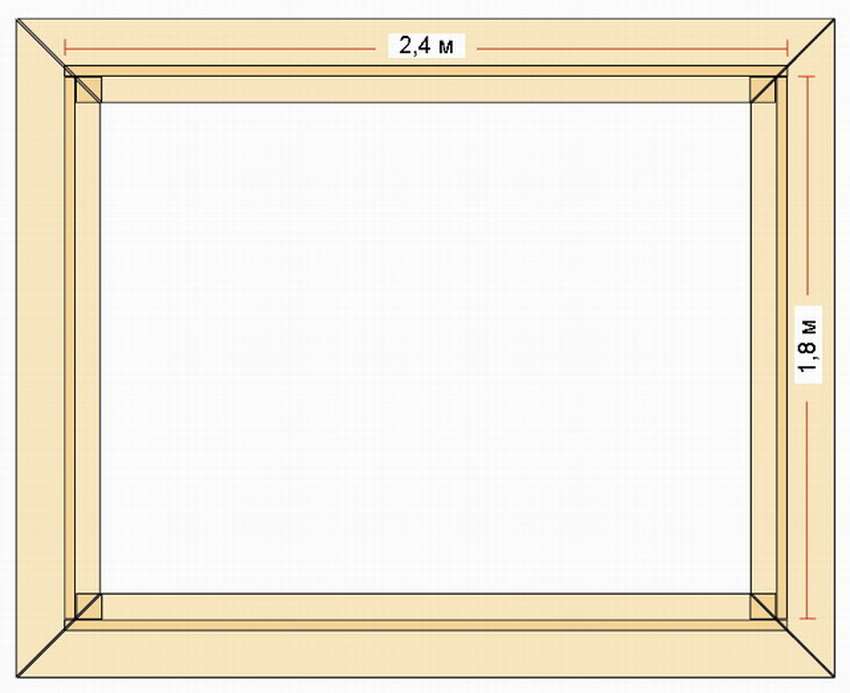
Stage 1. Body assembly.
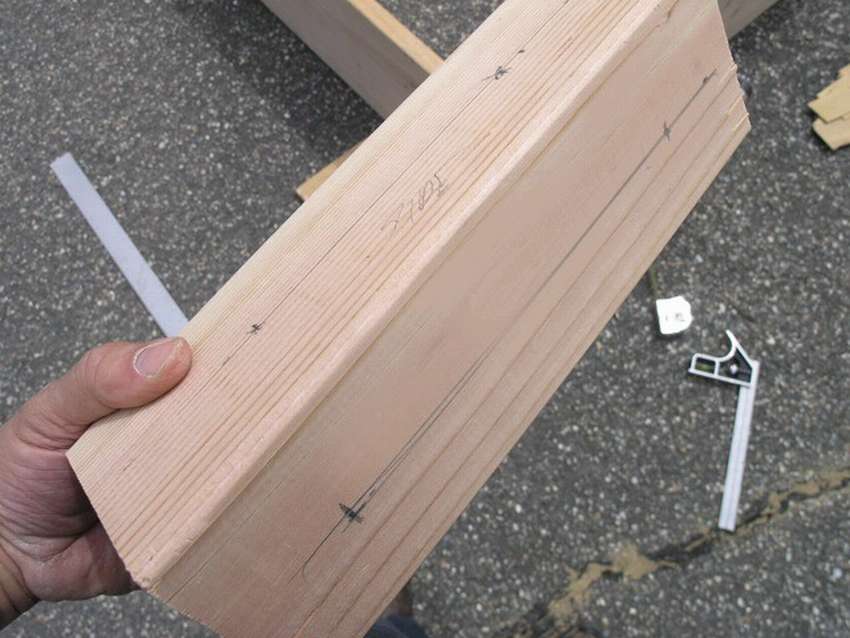
Boards, which must be sanded in advance and treated with an antiseptic, are fastened together with the help of long bars, forming a square. Also do not forget to mark and drill holes for screws.
Important! Having glued ordinary insulation between the tiers, the boards will be tightly connected, so that the sand does not spill out of the sandbox.
For greater reliability, corners must be fixed using additional bars.The 15-centimeter ends of the corner beams will be underground, and therefore they will need to be covered with waste machine oil, drying oil or bitumen. The resulting frame is transferred to the installation site.
2 stage. Assembly of the base and installation of the frame.
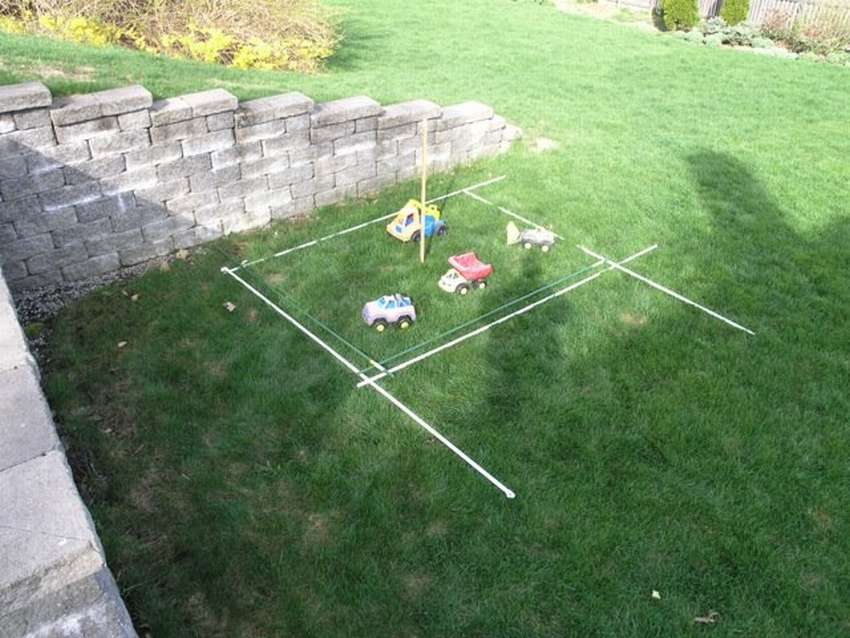
- The area for the future sandbox should be leveled in advance and cleaned of debris. For the accuracy of the markup, you need to add to the sandbox parameters 15-20 centimeters from all sides. Marking is carried out using pegs with a rope stretched over them.
- We remove the upper 20-25 centimeters of the earth, making a bias towards the center (in order to avoid accumulation of water). In the center of the sandbox we dig a hole with a diameter of about 50 centimeters, where material for drainage will be filled up. We pour 5 centimeters of sand on top of the drainage, we compact it well.
- We lay the foundation, making small holes in it (also to avoid the accumulation of water).
- We install the frame on the base.
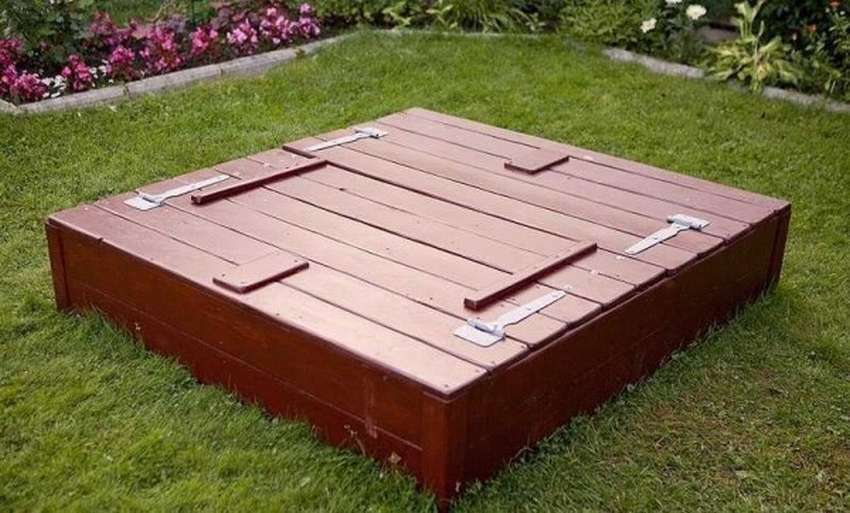
3 stage. Mounting a cover that converts to seats.
- Carefully fasten to the sides 2 boards from 2 sides. Next, proceed to the installation of the movable elements of the cover.
- We connect the remaining boards in pairs using bars (to connect the first 2 pairs, you will need bars of 25 centimeters, the second 2 pairs of 45 centimeters). Short bars will become seats, long bars will become backs. The protruding parts of the beam will serve as a support for the backs.
- We fix the future seat to the boards with the help of 3 loops, which are located equidistant. In this case, the loops are located on the top, and the bars that connect the seats - from the bottom.
- We connect the back and seat using loops, remembering the following: the bars are outside, and the loops are inside.
Done! You can start painting and decorating the sandbox.


https://i.expert-h.com/en/pesochnitsy/948#sigFreeId5d5c9e610e
Pros and cons of various types of sandboxes
Design features
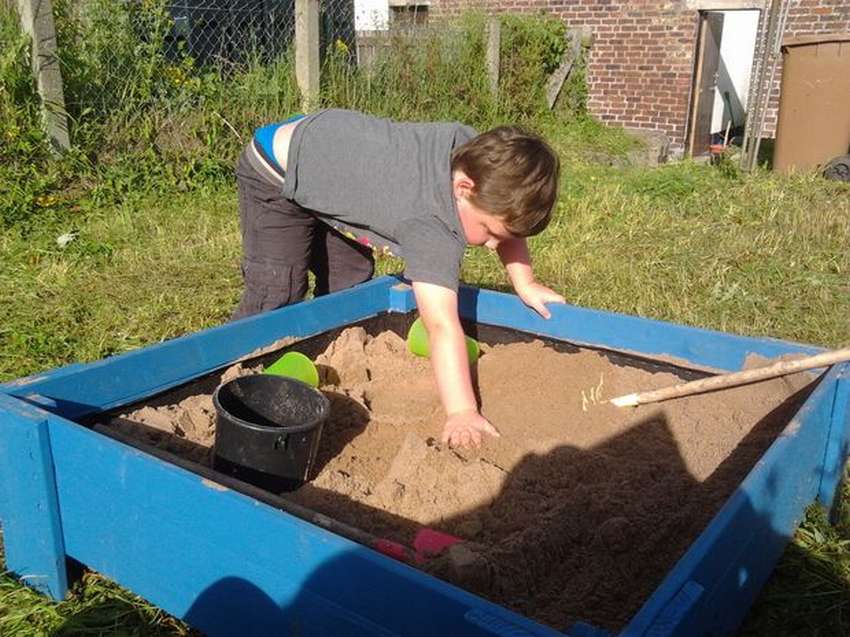
Open. The design is the simplest, acts as a platform for games.
Closed. Thanks to the lid, the sandbox will be protected from debris, rain, from animals used by the sandbox as a toilet. Also under the lid you can store children's shovels, buckets and other toys. Among other things, the cover transforming into seats is very convenient.
Material used
Tree - A fairly simple material, to cope with which is not difficult for an inexperienced master. It is imperative to grind parts, round corners to avoid injuries. The only drawback of wood is its short service life, as over time, the wood undergoes rotting, drying out, the appearance of bugs. However, this can be avoided by treating the sandbox with an antiseptic.
Plastic - reliable, beautiful material that lasts a long time. Plastic sandboxes are easy to clean or transport if necessary. The only negative is the cost.
Other materials. Materials such as stone, brick, metal can also be used to build sandboxes, but they are unsafe for children. Due to the hardness of the surface and the sharpness of the corners, there is a high risk of injury to children.
Placement method
In-depth. An effective way to strengthen the base will be to deepen the sandbox into the ground. Due to this, vegetation will not germinate through the base, insects will not start, and sand will not mix with the soil.
Elated. A sandbox of this type is installed on concrete or grass. Care should be taken to ensure that any child can climb into it on their own.
The form
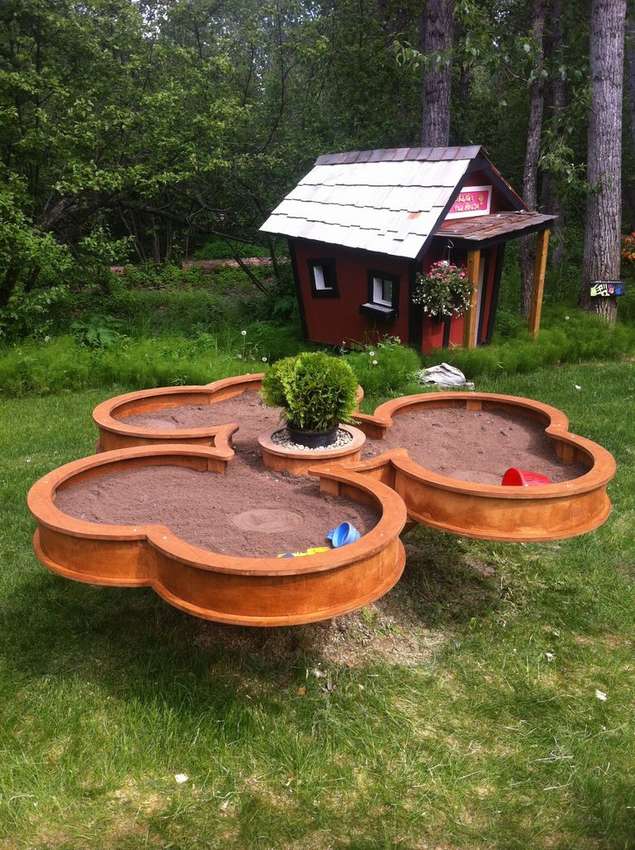
Curly. Sandboxes in the form of flowers, cars, ships, animals will especially please children.
Game centers. For example, a sandbox made of car tires. In it you can not only play with the sand, but also jump on the wheels.
Do-it-yourself sandbox in the form of a car,step by step photo
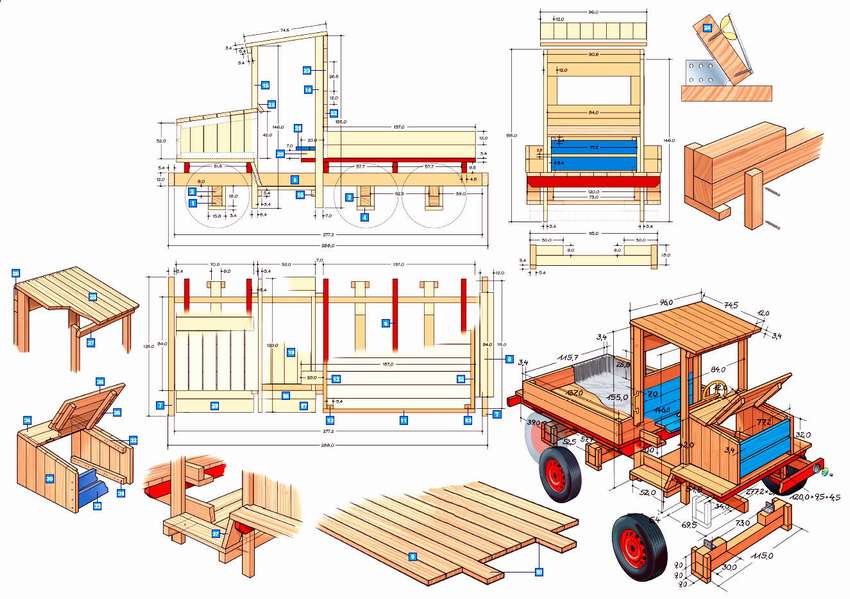
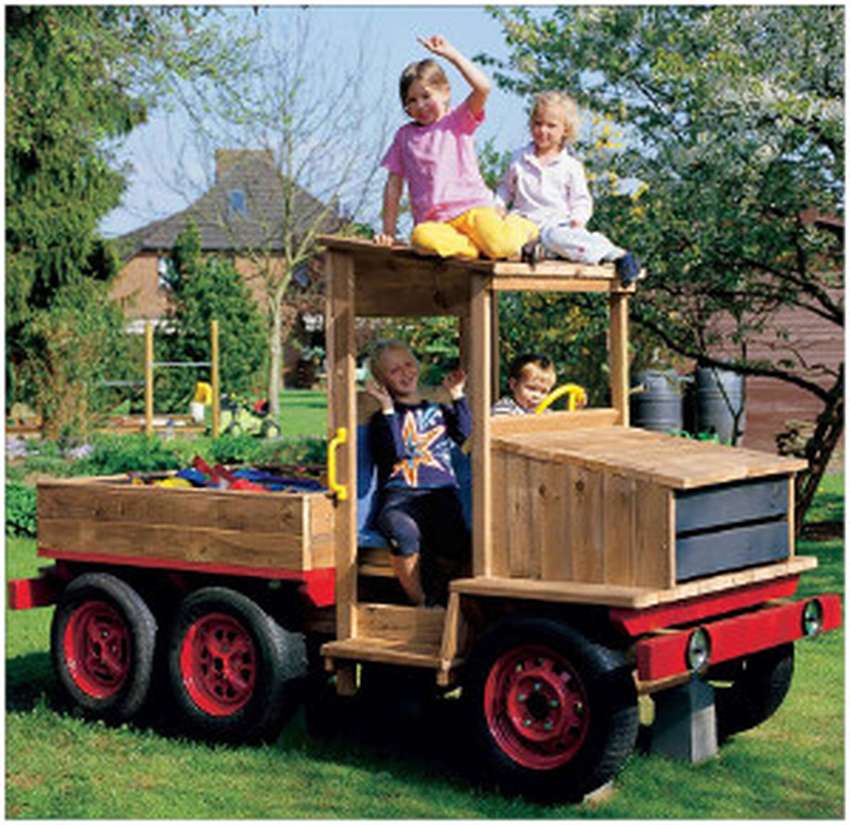 In order to build a sandbox in the form of a machine, the following photographs provide detailed step-by-step instructions. I will only report on important points.
The following conditions must be observed:
1. Install the sandbox so that there is some free space around it for maintenance if necessary.
2. It must be safe, stand firmly on the ground.
3. Care should be taken to eliminate sharp corners and chips.
Sandbox machine, which you can build according to the instructions, is made of pine boards and mounted on concrete posts. The columns and bars of wood are fastened with steel corners. To prevent splitting of boards, as well as their tight adjacencyganii to each other, it is recommended to drill holes for screws in advance. During the entire period of operation of the sandbox should monitor the condition of the connecting wooden nodes.


https://i.expert-h.com/en/pesochnitsy/948#sigFreeId5ebaa27997
How to choose the right material?
- All trees have different properties. The long service life of the product can be affected not only by the quality of processing, but also by the species of wood: materials from pine, linden, larch practically do not rot.
- The design should be strong enough, so use boards with a thickness of less than 3 centimeters Not recommended.
- Sanding, sanding and processing the details of an already completed sandbox is very uncomfortable and of poor quality, so you need to do this in advance. The same applies to painting iron loops.
- Sandbox filling i.e. sand should be clean and well sculpted. River or quartz sand sifted in advance with a fine sieve is perfect for this.
Do-it-yourself sandbox in the shape of a boat, workshop
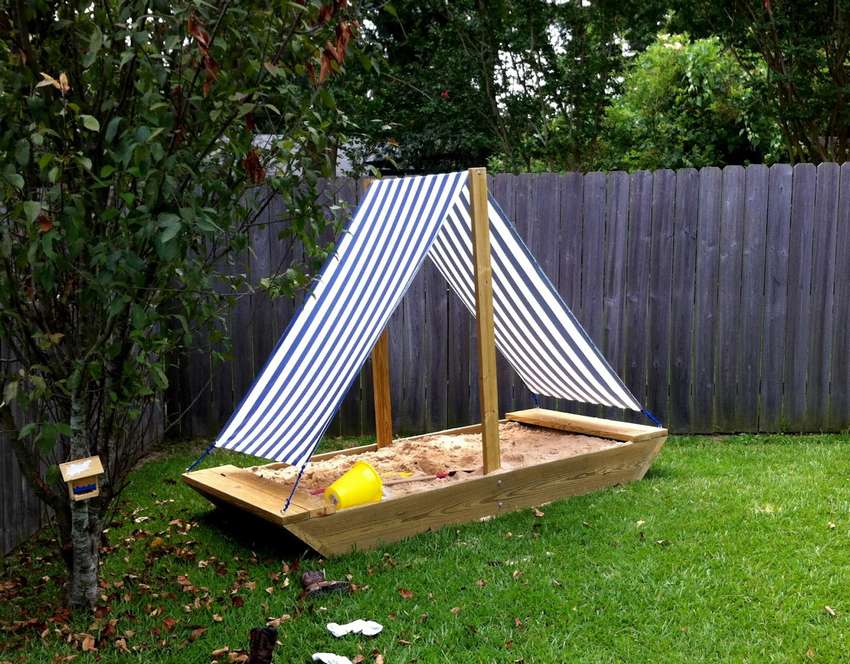 To build a sandbox in the shape of a koblik, you will need boards of the following length (each thickness is 5 centimeters):
- for boards - 30x245 centimeters, 2 pieces,
- for seats - 15x125 centimeters, 2 pieces,
- for the mast - 10x180 centimeters, 2 pieces,
- wide body parts - 15x115 centimeters, 4 pieces,
- narrow body parts - 10x115 centimeters, 2 pieces.
Procedure:
- We take the boards intended for boards, and cut off the corners at 45`.
- We connect the parts of the side with the boards designed for seats, using special glue and screws.
- Turn over the design. We glue to the sides, and then fasten with screws 2 wide parts of the body and 1 narrow.
- On the sides we find the center and mark it, we press the mast perpendicular to the side, drilling and fixing with glue and bolts.
- In the tops of the masts we drill holes and insert a round rail (125 centimeters), having previously applied glue to the connecting places.
- We carefully grind the details.
- Screw the screws with the eye-loop at the ends of the seats.
- Take the pre-hemmed fabric and sew to the corners of the rope.
- Throw the resulting sail onto the rail, thread the ropes into loops, pull and tie.
Done! For greater realism and to the delight of children, you can build and install a steering wheel, an anchor and similar details.


https://i.expert-h.com/en/pesochnitsy/948#sigFreeIdbb0065d3f0
Do-it-yourself sandbox made of logs
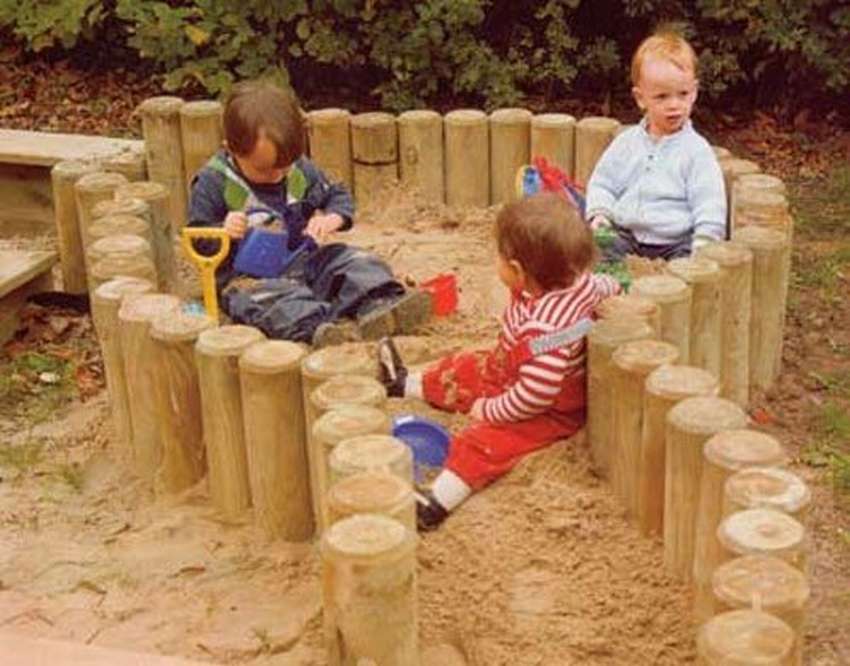 Before you start the construction of a sandbox from logs, you need to make a drawing.
Step 1. Based on the drawing on the ground, we pull the marking cord between the pegs installed along the contour of the future sandbox, adding 25 centimeters.
Step 2 Digging soil along the marking cord to the required depth.
Step 3 Rectangle-shaped side parts are made using 2 boards (3x20 centimeters) and 2 support posts (9x9 centimeters), which are twisted using steel screws.
Step 4 We mount corner parts in advance. We install them and attach the sidewalls.
Step 5 At the place of installation of the columns we distribute the prepared concrete solution, thereby forming the foundation.
Step 6 Columns (in our case 90 pieces with a diameter of 12 centimeters and a length of 75 centimeters are needed) are inserted into concrete and driven in, so that in the end they are of equal height (10 centimeters above the side boards).
Step 7 Outside the sandbox, using a trowel, we erect a border from the solution, which will fix the columns (to solidify the solution, you must wait at least 12 hours).
Step 8 Cut the canvas film for dams into tapes with a width corresponding to the level of filling with sand. These tapes are fixed with studs for attaching the roofing cardboard on the inside of the stockade. The ends of the tapes should go on solid side boards.
Step 9 We fill in the sinuses between the edges of the pit and the details of the sandbox fence, then we ram them well.
Step 10 We fasten the boards around the entire perimeter of the sandbox (future benches). We fasten these boards at each joint point with the help of dowels made of wood, glue with joiner's glue.
Done! And now we give free rein to fantasy and colorize the sandbox.


https://i.expert-h.com/en/pesochnitsy/948#sigFreeId54d6142e95
Where to build a sandbox?
Choosing a place for the sandbox, the main factor should not be the beauty of the surrounding nature and buildings, but practicality of the territory and the presence of shade. Long exposure to the sun, children can get a sunstroke.
Great place to set up a sandboxwill become park or garden. Such places will serve not only for games, but also for walks in the fresh air, as well as parents and children will be able to admire the beauty of nature, watch birds and other animals.
A large number of different plantings is not an option for installing a sandbox, since it will be quite difficult to get to the sandbox through the forest or through many planted plants. If there is such an opportunity, then to the sandbox best track.
Simple car tire sandbox
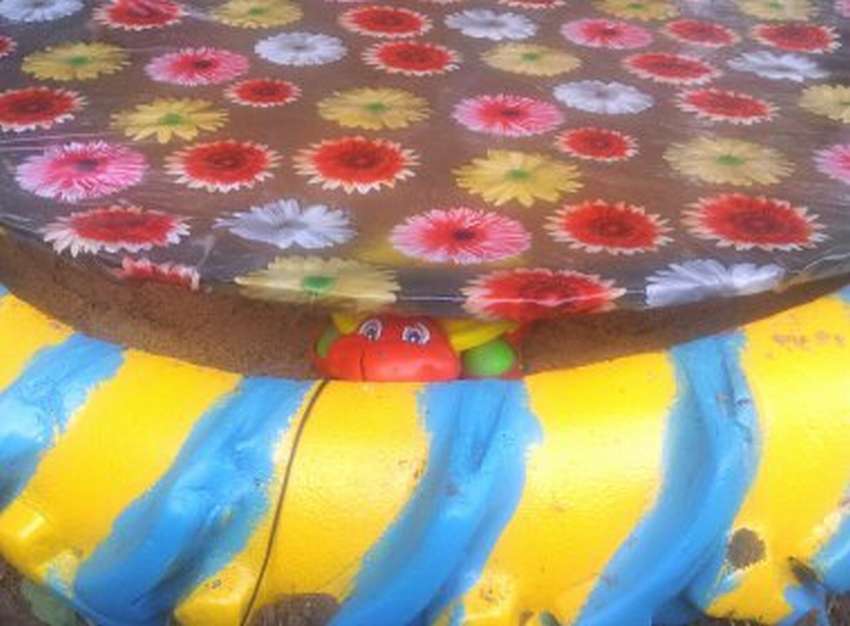 This version of the sandbox is pretty simple. To get started, you can use either a bus from a car or a bus from a truck (in this case, the sandbox will be more spacious).
So, the order of work:
- We clear the tire of dirt. Using a rag or brush, clean the outside of the wheel. When finished, degrease the surface with white spirit or acetone.
- On one side of the tire we trim the inner rim. You should get a ring, which will be needed later to build the cover. The width of the strip should be approximately 10 centimeters. No need to cut off a very wide strip, otherwise the children will not be able to sit on the edge of the sandbox.
- Getting to the painting. Here you can give free rein to imagination and draw patterns, animals, or simply paint with multi-colored paints. It is necessary to apply 2 layers so that the color is brighter and the paint is even. The 1st layer will dry for about a day, the 2nd - a little longer.
- We select a non-sunny place not far from the house and install a sandbox. We fall asleep in the sand. Due to the mass of sand, the tire will be stationary. However, it can be further strengthened by nailing the tire to the ground with slate nails or metal pegs.
- Build a cover for the sandbox. To do this, take an old oilcloth or a piece of dense polyethylene. Cut a circle 15 cm in diameter larger than the diameter of the rubber ring.
- Using a furniture stapler, pull the oilcloth over the ring. If there is no stapler, you can use a bag needle and synthetic thread.


https://i.expert-h.com/en/pesochnitsy/948#sigFreeIda899a920f1
The original sandbox on the stump with your own hands
 If there is a stump near your home, it can be turned into an original sandbox.
Procedure:
- We make a template. We find and prepare the place where we will draw the template. The form can be any, at your discretion.
- Materialfrom which the sandbox will be built, must be solid and durable. We transfer the template to the material (in our case, plywood). Next, cut the plywood across and get 2 parts.
- Using another sheet of plywood, cut out the boots according to the pattern.
- We take the prepared blanks and fasten them to the base of the sandbox.
- We prepare a stump. To do this, cut it off on each side, and make the top even. The height of the hemp should be about 30 centimeters, if more - cut off the excess.
- On the stump we build a support box where the sandbox will be installed.
- Set the base of the sandbox on a stump and varnish.
- In the center of the sandbox you need to make a small hole, thanks to which the sandbox will stand upright and not break in case of bad weather.
- We make a cover for the sandbox, thanks to which the sand will be protected from rain and animals who decide that it is a toilet.


https://i.expert-h.com/en/pesochnitsy/948#sigFreeIda702f3107d
Useful Tips
Having started the construction of the sandbox with your own hands, you should familiarize yourself with the following recommendations:
- If you decide to build a large sandbox for four or more children, be sure to install cover - so you do not have to constantly pour sand.
- Acceptable sandbox size - 1.5x1.5 meters. It is convenient to install such a small sandbox in cottages with a large area, since it becomes possible to transfer the sandbox as necessary, so that playing children are always in sight.
- Very young children after some time of the game get tired of squatting and sit right on the sand. Most parents are against it, as the sand can be cold and things can get dirty quickly. To do this follows to think about comfortable sides where any kid can sit.
- It is advisable to make a sandbox with a height of at least 25 centimeters so that children, digging holes, can not get to the bottom of the ground.
- Do not save on sand - its layer should be at least 15 centimeters.
- In order for the sandbox structure to be durable, for construction it is necessary to use boards 3.2 centimeters.
Home sandbox. How to make?
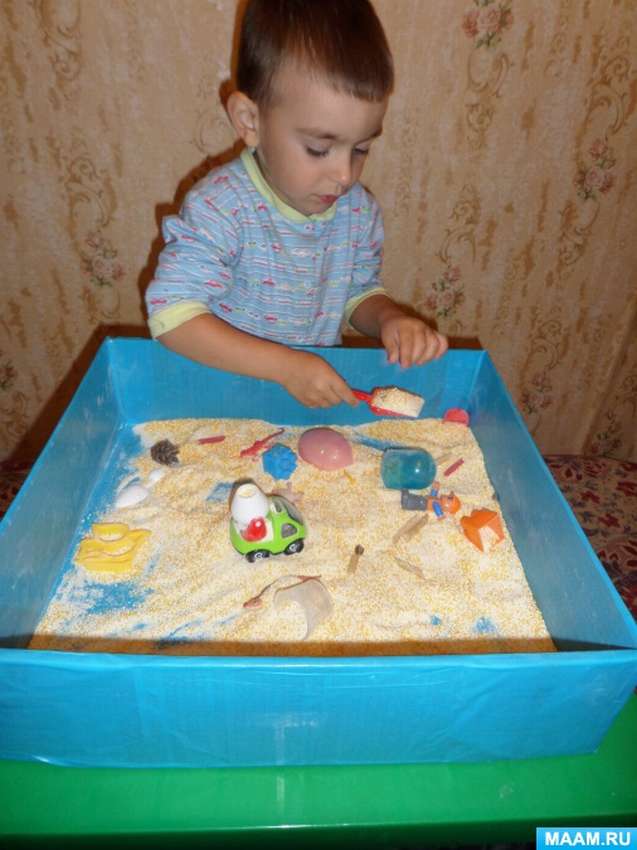 With the onset of winter, children are not able to play on the playground with sand. However, this is not a problem, because the sandbox can be made by yourself, at home! For this we need a cardboard box. Next, proceed to the manufacture of the sandbox:
- We take a dense cardboard box, cut off one sidewall, and strengthen the edges with adhesive tape. We glue all sides of the box with a self-adhesive film.
- Pour semolina and corn grits into the box (you can use any otherat your discretion).
And it's all! For a small sandbox you will need small scoops, shovels, buckets. The game can include various figures of animals, cars and other toys.


https://i.expert-h.com/en/pesochnitsy/948#sigFreeId2ffc427032
Do-it-yourself sandbox with a canopy, step-by-step photo and instructions
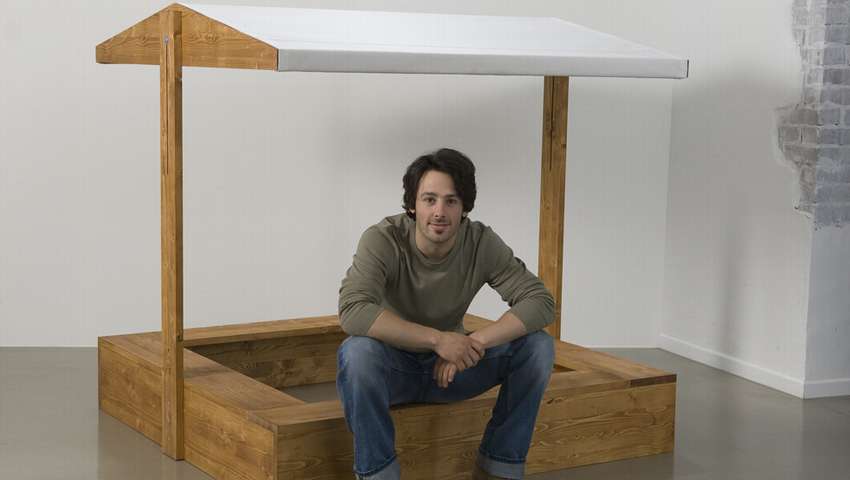 This design is made of two parts - containers for sand and a canopy on two supports. More on progress:
Stage 1. We connect the sidewalls with the help of bars. We recommend marking parts to know which part relates to what.
Stage 2. Using a screwdriver we connect short and long sidewalls, for vertical threaded connections we use bars. We install horizontal threaded bars and drill holes in them.
Stage 3. We install the finished frame on the stands. We fix the boards for future seats on the sidewalls and horizontal beams, fix.
Stage 4. So that the sandbox is stable, and the seats are securely fastened to each other, the boards are screwed down from below using connecting strips. We drill holes in each bar. Turn the sandbox over and turn the trims according to the photo.
To prevent grass from sprouting through the sand, it is necessary to pull a canvas or a durable synthetic film onto the base of the sandbox. We fix using a furniture stapler.
Stage 5. We connect the sides of the pediments and cross-pieces.
Stage 6. We fasten the roof supports with a screwdriver.
Stage 7. We stretch the tent along the sides of the gables on the roof, fix it using a stapler.
Stage 8. Grind the surface of the sandbox.
Stage 9. We paint (or cover with varnish, azure - at your discretion).


https://i.expert-h.com/en/pesochnitsy/948#sigFreeIda12602285a
Do-it-yourself big sandbox ship
 Each child will be happy to feel like a captain of a wonderful ship. And every loving parent will be able to help him with this. Any dad who has at least basic skills in working with wood and tools can build a sandbox in the form of a ship. And to make the ship even more realistic, you can create from the simplest materials, such as plywood and wood, various accessories: guns, a helm, swords and shields. In this case, there is no limit to fantasy!


https://i.expert-h.com/en/pesochnitsy/948#sigFreeId3719bc5769
Sandbox little table with a box for a bed
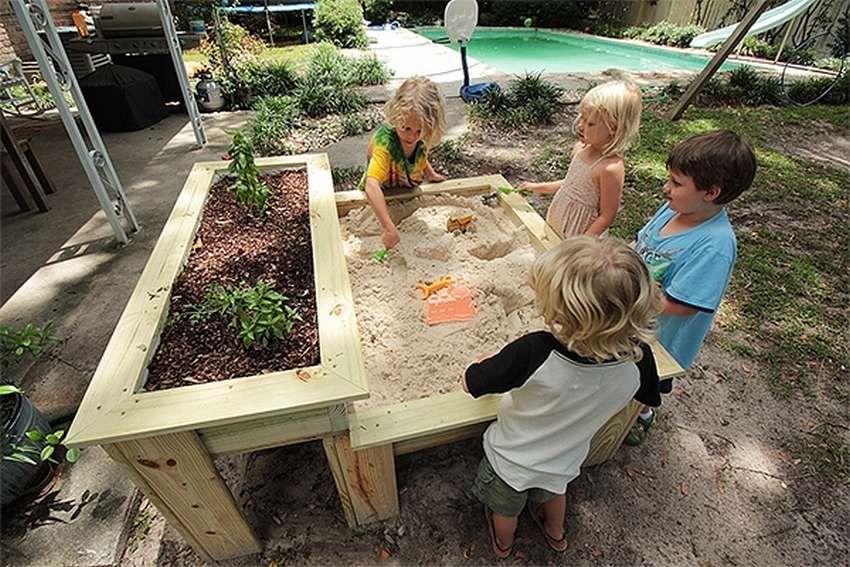 For construction, 2.5 meters long boards are used. The perimeter of the sandbox is 120x85 centimeters. This is the sequence of our actions:
- To the assembled frame, it is necessary to attach a plywood sheet with a perimeter of 90x120 centimeters, on all sides to secure with several screws.
- For the legs you need 8 boards with a length of 60 centimeters. Height may vary depending on the height of the children; they should be comfortable playing in the sandbox. For each leg, 2 boards are used, attached at the corners with screws. Turn the workpiece over.
- For drainage, drill small holes.
- We make the box for the garden in the same way, the perimeter is 120x45 centimeters.
- Set the front edge of the box for the beds on the trailing edge of the sandbox. Equalizing, inside the sandbox we screw several screws.
- Since we do not plan to plant edible plants, we put plastic film inside the box and fix it using a furniture stapler.
- To process the top of the boxes, you need boards with sawn off at 45 degrees angles.
- We fill the sandbox and the bed with sand and earth, respectively.
- For watering plants, as well as for children to wash their hands or draw water in a bucket, we install a hose tap.


https://i.expert-h.com/en/pesochnitsy/948#sigFreeId115f8da8cf
How to choose sand for the sandbox?
1. Fine white sand One does not fit. Firstly, it molds very badly. Secondly, there is a lot of dust from it, it gets into the eyes, mouth and ears, microscopically injuring the skin surface. Professionals working with such sand wear overalls, oki and respirators.
2. White or grayish quartz sand also not good. There is no dust from such sand, but it does not stick at all and, like the first item, injures the skin. Quartz is a solid mineral in itself, so its particles are almost never rounded to a smooth surface.
3. Red sand, called "ravine", is perfectly molded, but is also not suitable for use in sandboxes, as it contains a large amount of clay and is very dirty. Among other things, this clay has many microscopic pores that are filled with nutrients, which is an excellent medium for the multiplication of various microorganisms.
4. Moderately yellowish sand with medium-sized grains of sand (referred to as river) is a great option for a children's sandbox. There is a sufficient amount of clay in it for a good sand molding, however, it encloses grains of sand with a thin dense layer, so that sand does not harm the skin. In addition, such sand is not a breeding ground for various microorganisms.
River sand follows in winter Store in a cool dry place, the best option is to store in bags or outdoors under a film. In the spring, when the weather is warm, sand is filled with sand. In cases where the sand remains to "winter" in the sandbox, in spring it is necessary dry and sift.
Compact sandbox from materials at hand
 What can be done froman old cabinet that is gathering dust in the attic, but is it a pity to throw it away? Of course, turn it into a compact sandbox for your child! What is sequence of our actionclearly presented in the photo below. The finished sandbox can be painted with your favorite colors. Bring your kids to the sandbox - let their fantasies come true. It doesn’t matter whether it is any one color, a lot of multi-colored blots, hand and foot prints. Only through joint efforts will your sandbox become unique!


https://i.expert-h.com/en/pesochnitsy/948#sigFreeId20ad2af45f
A simple sandbox made of do-it-yourself boards
 In order to build such a sandbox, it will not take a lot of materials, effort and time. The design is extremely simple - you need about 16 pieces of pine boards, fixing materials. tools and oilcloth. In the photo below, detailed step-by-step instructions that will help you in the construction of the sandbox. A bit of personal time, a huge desire - and the sandbox is ready!


https://i.expert-h.com/en/pesochnitsy/948#sigFreeId7120bba70c
Sandbox with a lid and a canopy
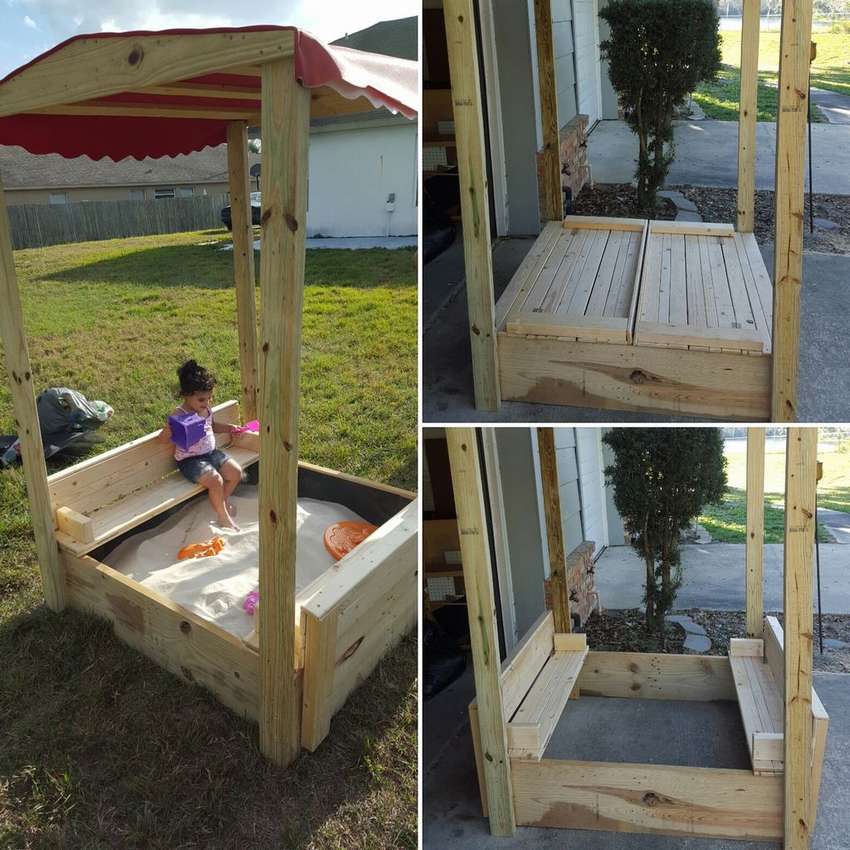 Its useful to note convenience sandboxes with a cover and a canopy. In such a place for playing with sand, the child will always be reliably protected from hot sunlight and from rain in case of bad weather. And thanks to the lid, sand, when they don’t play, will not fly apart throughout the site. Also under the sand cover well protected from dogs and cats. Among other things, under the lid can store children's toys: blades, buckets, molds and others.
- Step 1. Build the base of the sandbox - the pallet.
- Step 2. We prepare the construction details: we measure and saw the boards for the box and canopy.
- Step 3. Putting the box together.
- Step 4. Assemble the cover.
- Step 5. We collect the canopy.
- Step 6. We fall asleep sand.
The step-by-step photos clearly show all the steps, guided by which you quickly and simply build a sandbox with a lid and a canopy with your own hands!


https://i.expert-h.com/en/pesochnitsy/948#sigFreeId08bd5f1c53
Beautiful do-it-yourself sandbox
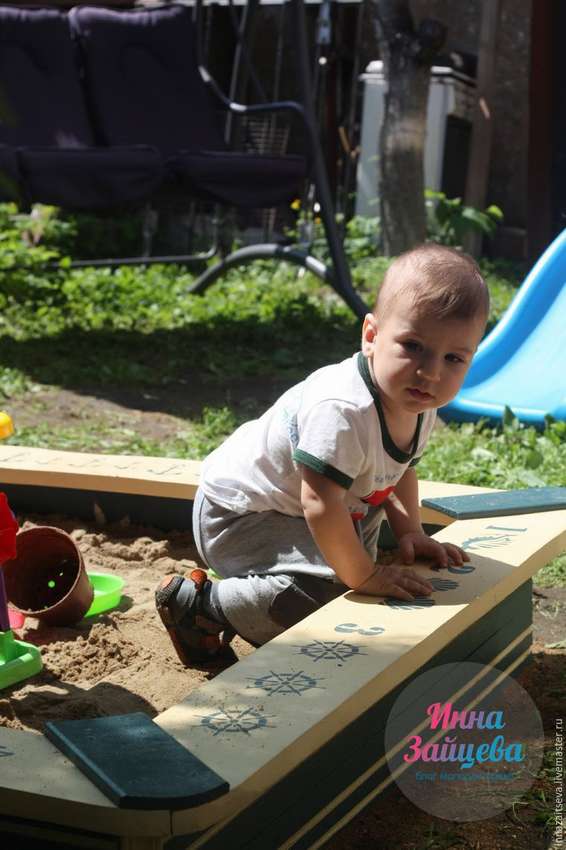 You can decorate the children's sandbox with various patterns: flowers, animals, geometric shapes, prints of small arms and legs, animal tracks and so on. In our case, the sandbox is decorated in marine style. How to build such a sandbox with your own hands is shown in the photo. We will only briefly comment on the sequence of actions:
- We cut the floorboard into 4 parts of 120 centimeters.
- We paint by impregnation, and then with acrylic paint in two layers.
- As an additional decoration, we draw strips.
- Putting the box together.
- We cut the board into 4 parts, if necessary, grind, file the corners.
- We fasten the boards to the sides of the sandbox.
- We round the corners.
- Decorate with stencils.
- We varnish.
- We fall asleep sand.


https://i.expert-h.com/en/pesochnitsy/948#sigFreeIdf840b4fe95
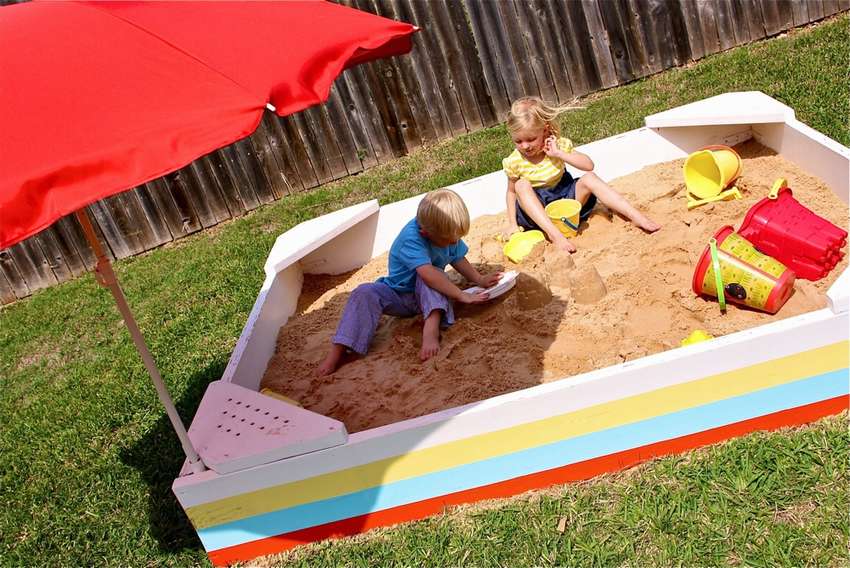
Sandbox with comfortable seats and a parasol, workshop
 How to build?
- We select a place for our future sandbox.
- Cut the sides, build a box.
- We make the base (bottom).
- We build benches in the corners of the sandbox. The corners of the seats must be cut so that it is possible to install an umbrella in any of them.
- In order for moisture to drain, we make several holes in the base.
- In each corner we install a piece of PVC pipe.
- Paint the sandbox (turn on the fantasy!).
- We fall asleep sand.
- Set the umbrella.
Done! The result is a large, comfortable and beautiful sandbox for your children!


https://i.expert-h.com/en/pesochnitsy/948#sigFreeId02f92bf145
50+ schemes, drawings and layouts of sandboxes


https://i.expert-h.com/en/pesochnitsy/948#sigFreeId921af5c285
50+ unusual and original sandboxes


https://i.expert-h.com/en/pesochnitsy/948#sigFreeIdf46287fa05
100 photos. Ideas for inspiration


https://i.expert-h.com/en/pesochnitsy/948#sigFreeId88990e418f
150+ photos of sandboxes with your own hands


https://i.expert-h.com/en/pesochnitsy/948#sigFreeId6465e7d0e7