New Year's toys from cones. Do it yourself + 700 photos
 christmas toy from cones
The most interesting and fun activity is getting ready for the New Year and Christmas. Here are examples of how to do DIY Christmas toys from cones with minimal training, effortless and costly and with great pleasure for adults and children. In this case, you can’t do without little helpers.
Manufacture crafts from conesA pleasant and simple family activity. The most attractive thing is that there is nothing that can be done wrong! You will also find out how to paint cones, make not only multi-colored and shiny, but also fragrant. The master classes presented below with step-by-step photos are simple and understandable even for the youngest masters.
Content:
- Christmas cones on the Christmas tree
- Snowflakes from cones
- Toys from cones for the New Year
- Toy Christmas tree made of cones
- How to paint cones for crafts
Christmas toy from a cone on a Christmas tree
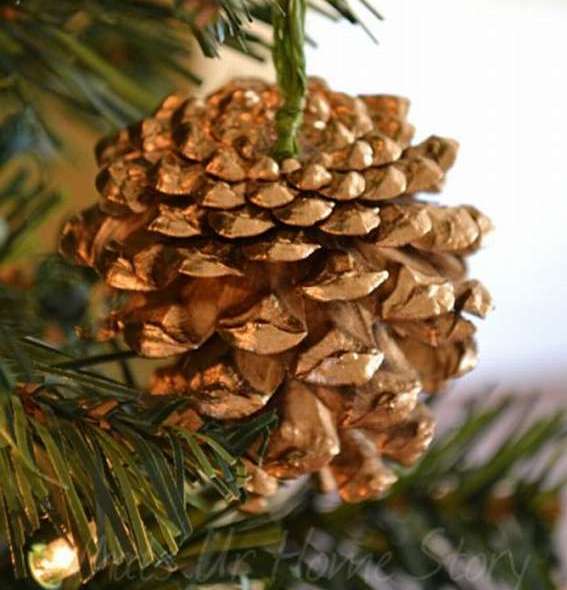 To make this beautiful christmas toy, just find a beautiful bump and paint it golden.
It is enough to apply two layers of spray paint, the author recommends using Krylon Metallic Gold, we have it costs about 400 rubles, in a spray 230 grams.
To make a beautiful hanger, you can use a gold ribbon, cord or any type of twine. Make a loop, tie a knot and cut off the rest. Glue the knot to the base of the bump with hot glue.
That's all, now you have your brilliant beauty, Christmas tree toy made of cones!


https://i.expert-h.com/en/iz-shishek/novogodnie-igrushki#sigFreeIdf15291b728
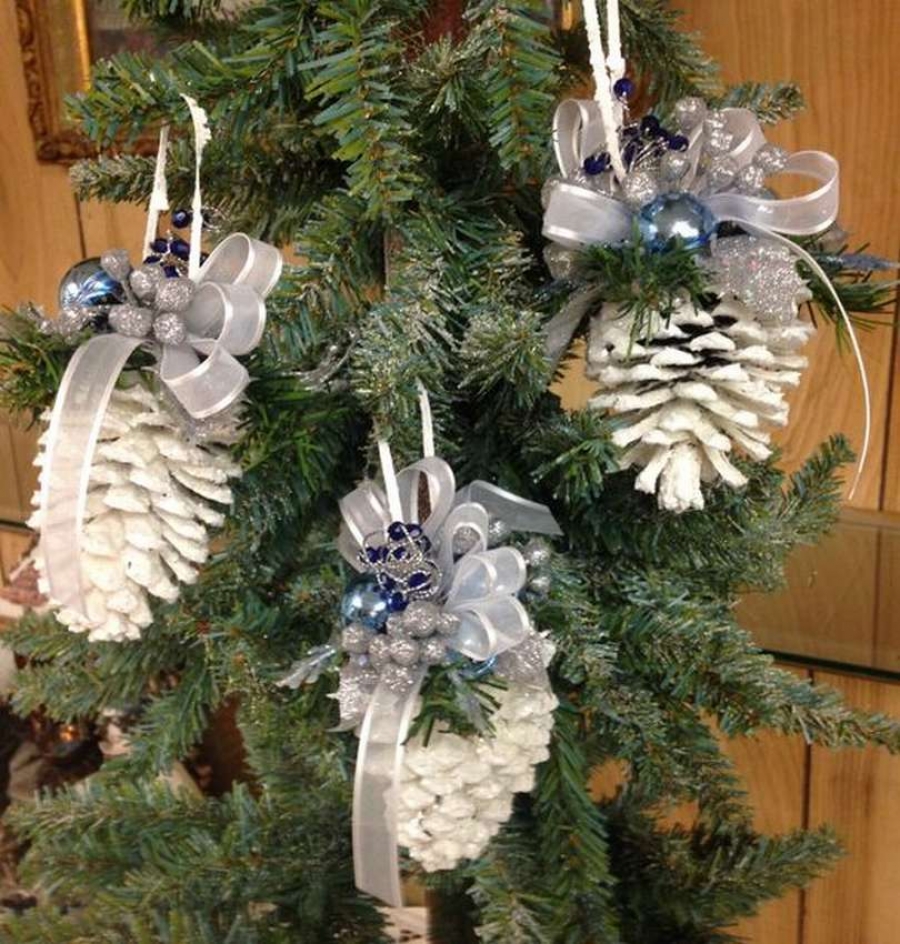
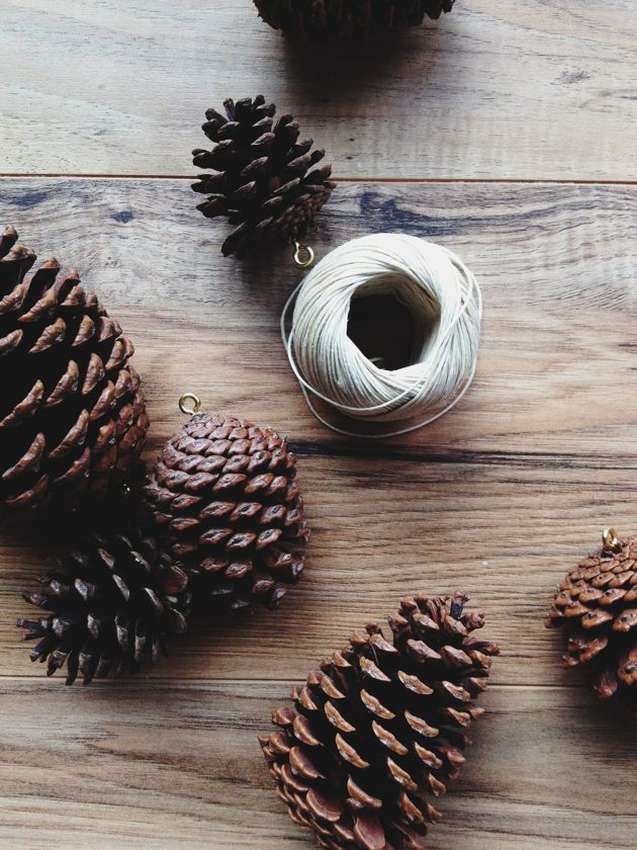
Christmas ball with cones
 See how to make beautiful Christmas tree decoration made of cones and New Year's ball. It looks natural and elegant. You will need pine cones and small metal hooks. Also choose beautiful for composition christmas ball, prepare twine and white paint.
How to make a Christmas toy from cones with your own hands.
- First paint the bumps with white paint. Just apply a little brush on the edges of the cone, as if it is easily dusted with snow.
- When the paint has dried, twist the small hooks into the base of the bump.
- Pass a long rope through the first bump and tie a knot.
- Add a second bump about 3 cm from the first.
- Secure with a traditional knot.
- Then through the loop pass the Christmas ball.
- Add the last, third bump. Finish with a knot.
- Tie a bow and add a hanger for decoration. Everything is ready.
Fix them in a garland or on a champagne bottle. See below for step-by-step photos..


https://i.expert-h.com/en/iz-shishek/novogodnie-igrushki#sigFreeId1da53fa25a
Christmas tree toy made of cones
That's how easy and fast you can make beautiful DIY Christmas tree toy. So she looks on the Christmas tree.
 You will need beads, glue, thread for hanging and just a few minutes of time. See the master class on step by step photos.


https://i.expert-h.com/en/iz-shishek/novogodnie-igrushki#sigFreeId2460e73b58
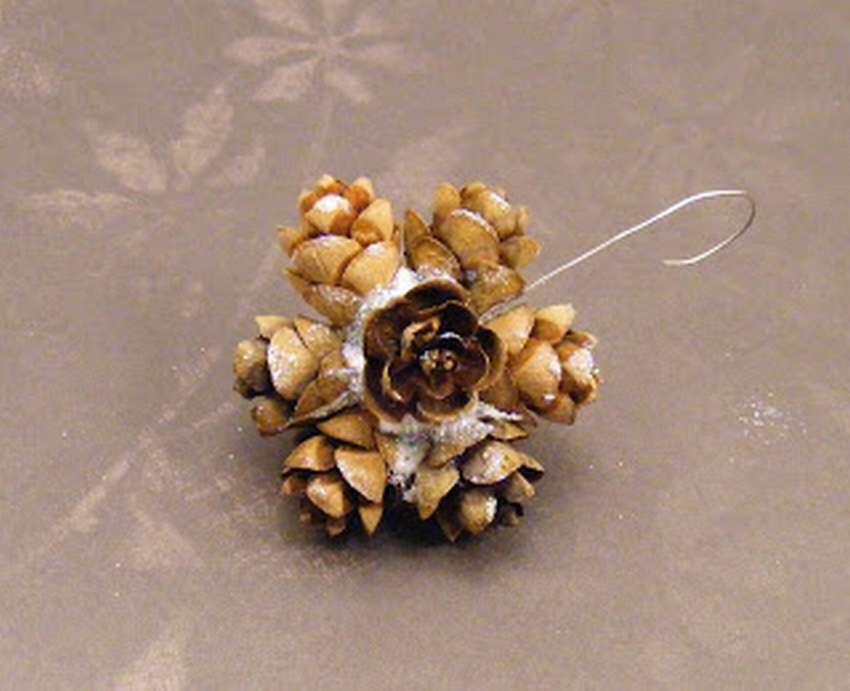
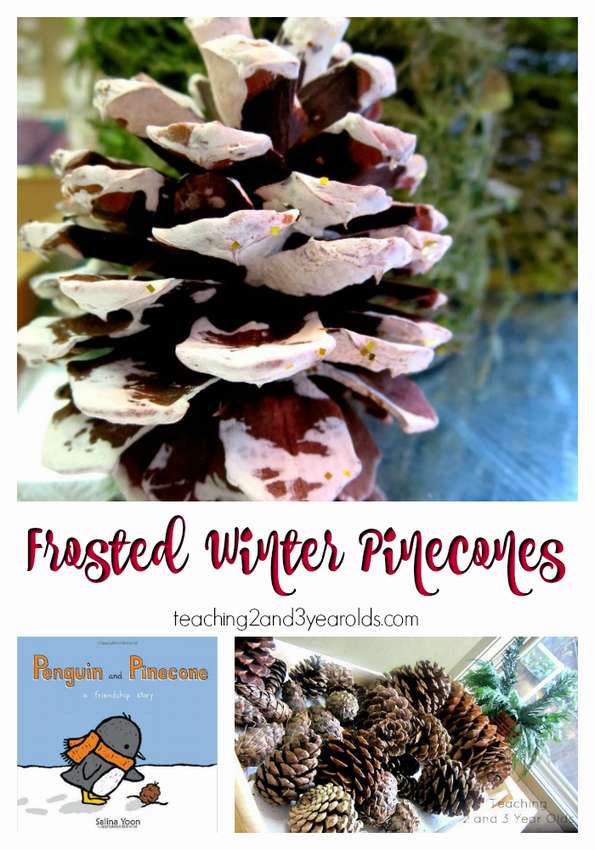
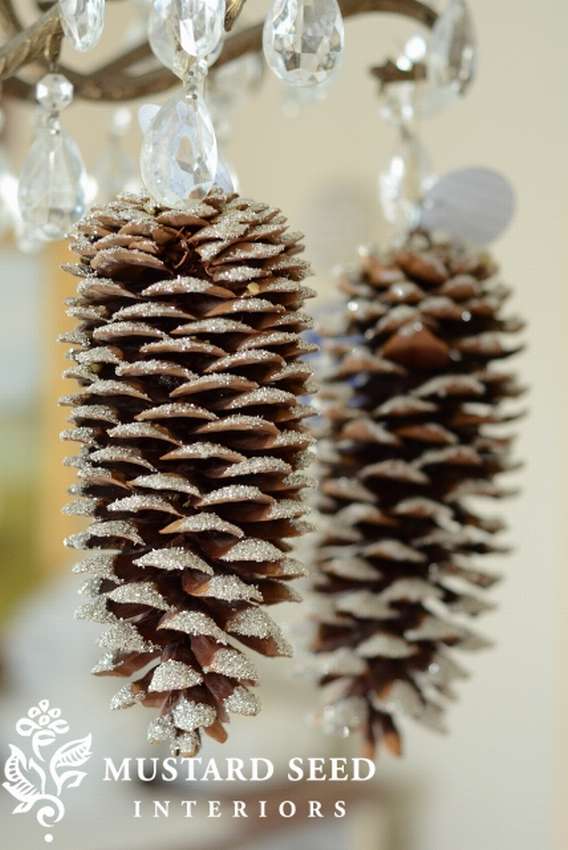
Snow cone
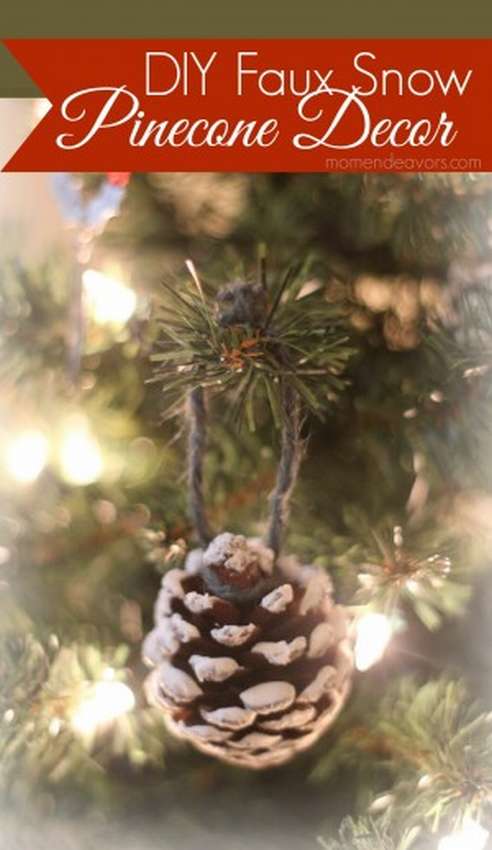 Do Christmas toy in the form of a conecovered with snow, which is ideal for New Year's decor. The craft is so versatile that it can be used for decoration of any interior. For example, put in a large bowl; add to the garland, make a Christmas composition with candles - the options are endless!
To make christmas toy from cones you only need a few supplies and a few minutes (plus time to dry)! These are pine cones, artificial snow, sold in spray cans and bags, by the way, can do it yourself and brush.
Then simply apply a small amount of glitter artificial snow to the tips of the flakes. Leave to dry at least for the night, but 24 hours recommended. It is very simple. In 10 minutes you will make a whole bunch of snow cones! If you do not want to buy artificial snow, you can use white paint and sparkles. But whatever you say artificial snow is more beautiful, because it has the shape and texture, like real snow! In any case, when decorate the cones, set them aside, where they can dry safely! When the bumps are ready, you can use them as you like. For example, tie in a bunch, add fir branches and make a very simple ornament. Ways of use can be found here in the article “Cones Compositions". Or just hang it on your Christmas tree.


https://i.expert-h.com/en/iz-shishek/novogodnie-igrushki#sigFreeIdf2c5267ecd
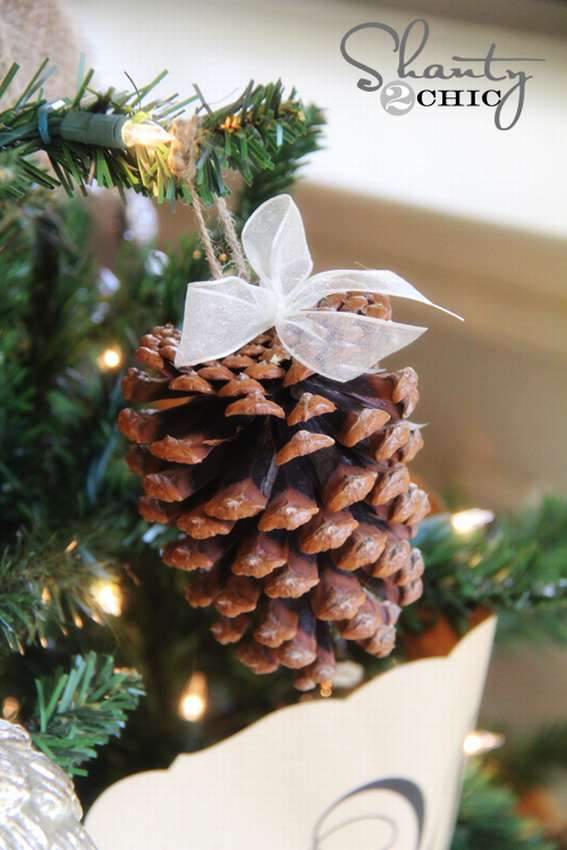
How to make a Christmas toy from a bump
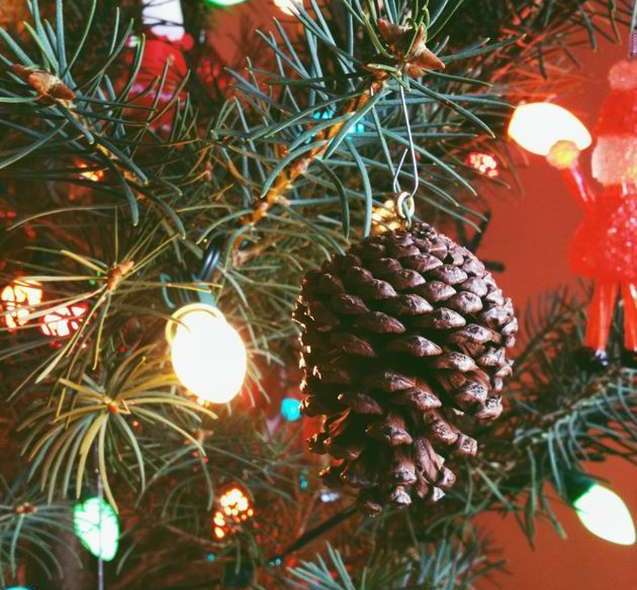 The bumps are beautiful in themselves, without any additional decorations. So if you don’t have the opportunity to paint and shine, you can just screw the screw with a ring and christmas toy from cones ready.
This is just one of those projects where the author, instead of painting, gilding and gluing, simply kept it as it is. It is unlikely that it will be possible to do something more beautiful than nature has created.

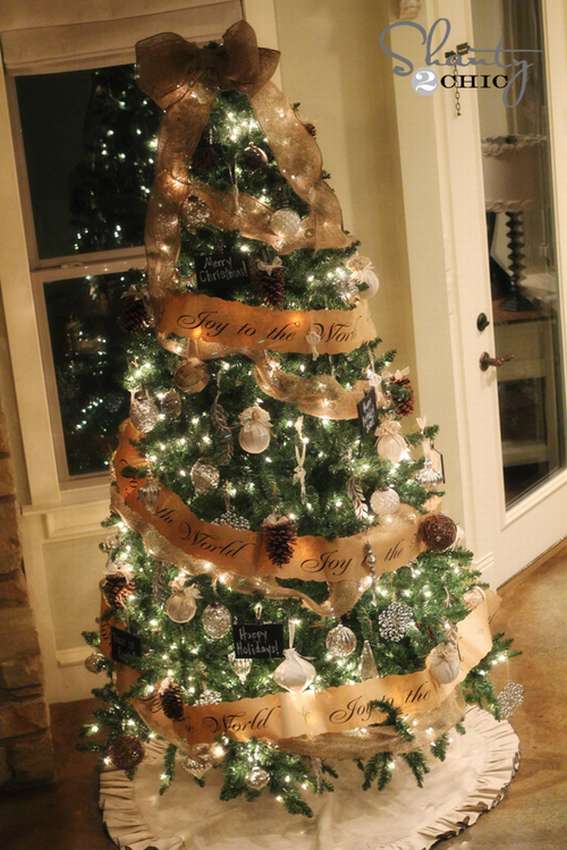
Christmas tree with golden cones
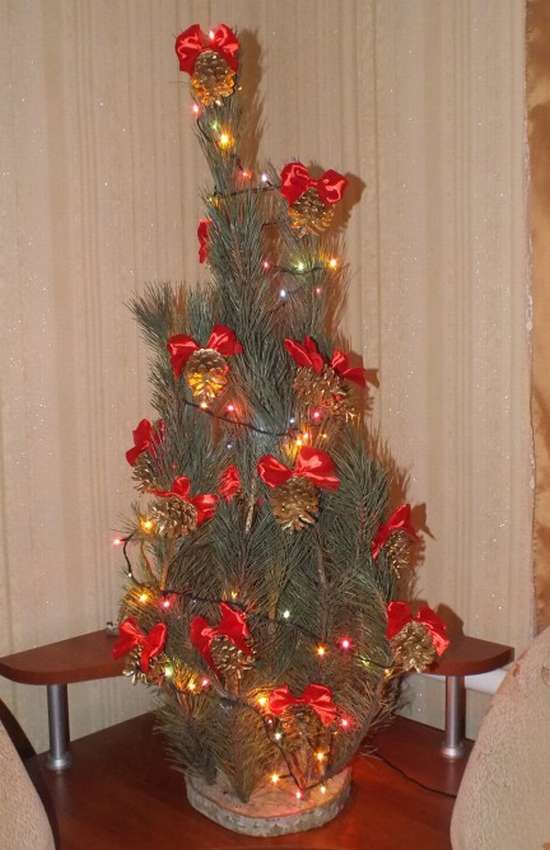 Here is another interesting way to decorate christmas tree with golden cones.
The idea is that the cones do not hang, but rather “grow” on the branch. You can use the usual hairpins.
Everything is very simple, here how to make a toy from a bump with your own hands:
- Glue the hairpin to the base of the bump.
- Then paint along with the hairpin with golden spray paint.
- You can any other, silver, green, as you like.
- Make beautiful ribbon bows.
- Glue the bow to the shisha so that it covers the hairpin.
That's all, the Christmas toy from the cone is ready. Make a whole bunch of such crafts and decorate the Christmas tree.
You can see the master class on step-by-step photos below in the photo gallery.


https://i.expert-h.com/en/iz-shishek/novogodnie-igrushki#sigFreeId30eebfe6ce
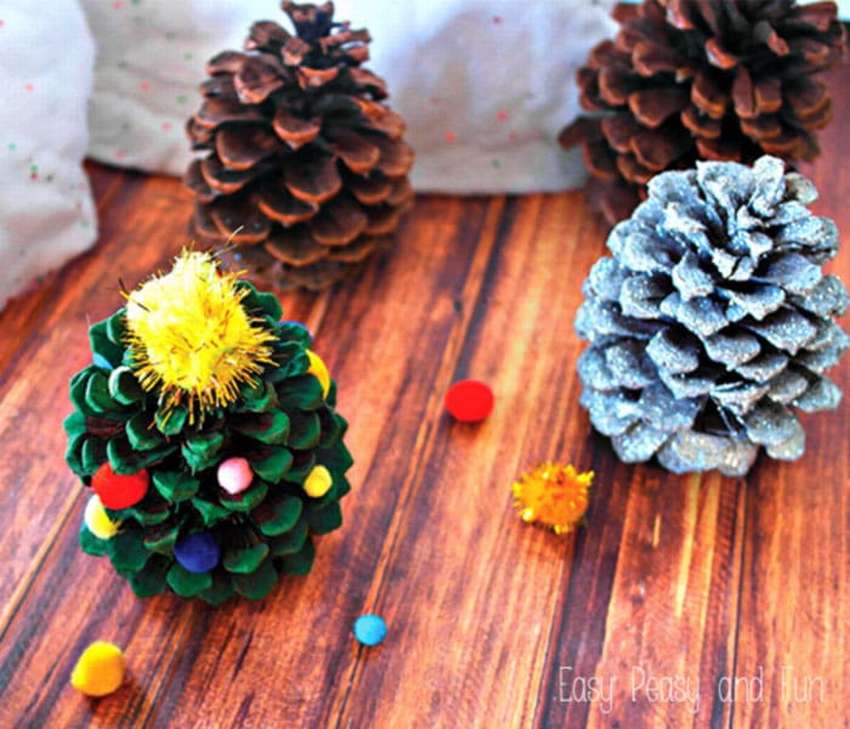
Christmas toy made of cones with pompons
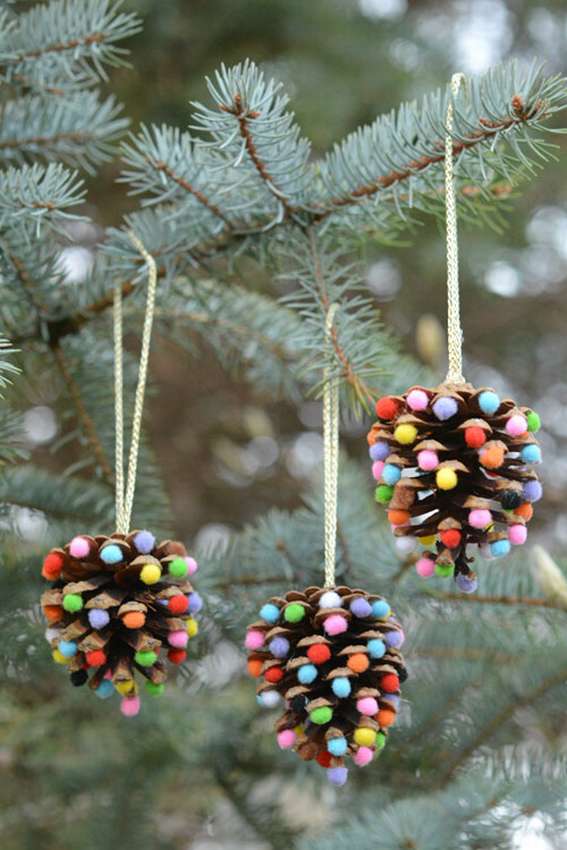 Yes, you're right, this is a very simple craft. But you know what? This is one thing in the photo, and when you do this DIY Christmas toy from a cone, then be surprised how beautiful they are and how amazing they look on the Christmas tree. And most importantly, even a three-year-old child can do such a craft.
You will need quite a bit to work: tiny pompons, rope or ribbon and hot glue.
To glue the pompoms, apply a little glue, literally one smear, to the flakes and carefully insert the balls. It goes pretty fast!
Then take about 30 cm of the cord or tape, apply hot glue to the top of the bump and stick it on. Can be used gilded chain, as in the photo, it will be very beautiful.
Such Christmas toys from cones look natural and bizarre at the same time! You can make them colorful, or try using pompons of the same color to give a more uniform look. See below the master class on step by step photos..


https://i.expert-h.com/en/iz-shishek/novogodnie-igrushki#sigFreeIdcffaf644b3
 And here is a similar option, only with a bow. Such christmas toy from cones can be done in just ten minutes.
If you entrust the production of crafts to children, make sure that they used glue gun correctly.
The process is shown in step by step photosif you have questions, use the link under the gallery, the author’s site has detailed instructions.


https://i.expert-h.com/en/iz-shishek/novogodnie-igrushki#sigFreeId6e6fe74d92
Craft Catherine Nesmirnoy
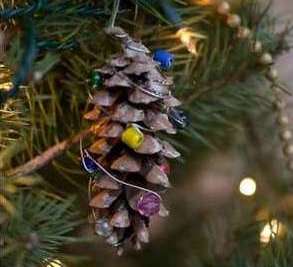 Another example. This time, besides the cones, you will need beads. It can be beads from torn beads or bracelets, such are often found at home. They should be strung on a thin wire, and entwine a cone with this wire.
Twist each bead strung with pliers a couple of times to fix it. The upper free end of the wire bends to form a hanger.
How to make wire with beads for New Year's toys from cones Look at the step by step photos.


https://i.expert-h.com/en/iz-shishek/novogodnie-igrushki#sigFreeId90b3d908e1
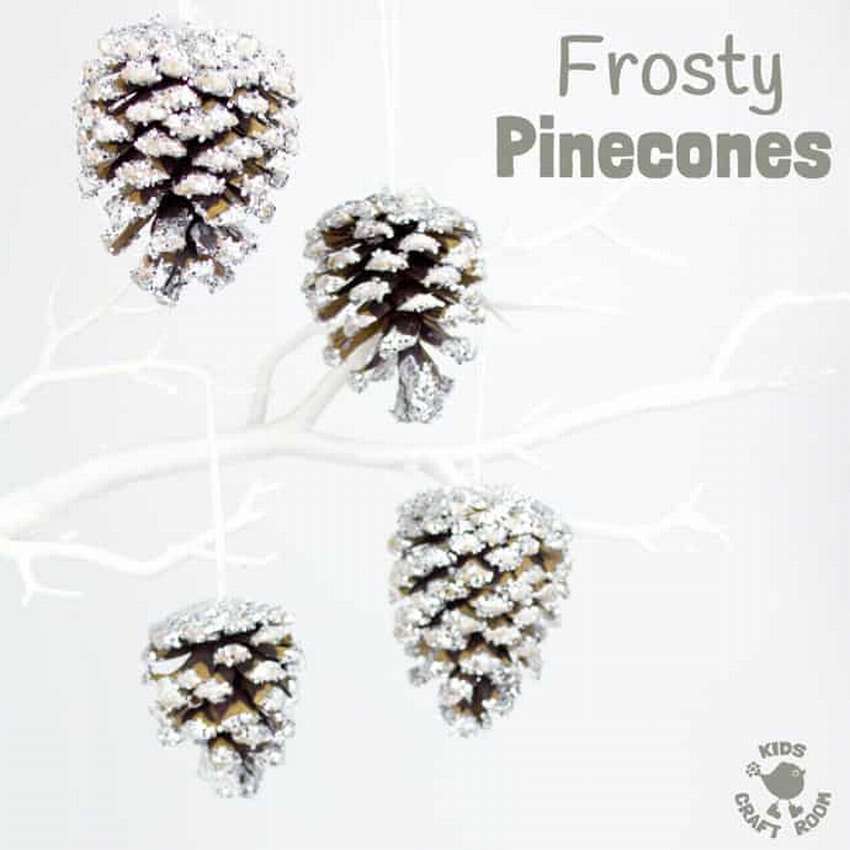
Pine cone for christmas tree
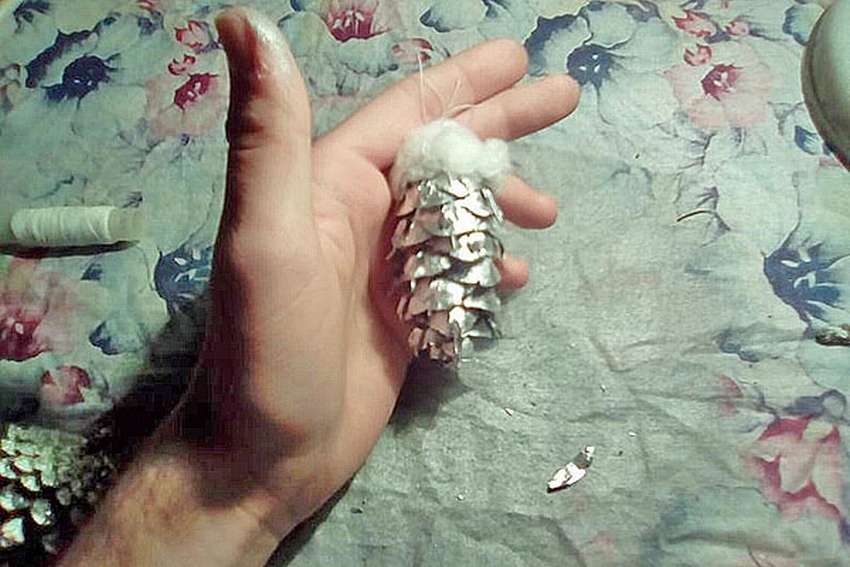 If you are looking for a way to do the simplest Christmas toy from conesthen you found it. Just take a bump, paint it with silver paint from a spray can, or powder with sparkles, you can acrylic, gouache, in general, anything you like or have at hand. Fasten the rope from above (ribbon, wire, lace from the boat). There are many ways to do this.: stick; stick a thin clove and use as a hook; take a regular needle with an eye, stick and thread; fasten instead of thread gumso that the bump does not hang, but does not lie on a twig. Glue a piece of cotton wool on top of the bump (snow fell).


https://i.expert-h.com/en/iz-shishek/novogodnie-igrushki#sigFreeId5d9bbc99b5
Children's Christmas tree cones
 See an example of how to make cute christmas cone decorations for the Christmas tree. For children it will be a fun and useful activity that will help develop motor skills of the child’s fingers. Painting and sticking pompons is a complex process that requires concentration and good coordination.
The lesson is great to encourage children to think about how the Christmas trees look and what to add to make them beautiful. Use figurative language. Bright, brilliant, green, brilliant, etc. Let the children tell what the New Year tree means to them. And how to make these bright christmas toys from cones, see below in the master class for step-by-step photos.


https://i.expert-h.com/en/iz-shishek/novogodnie-igrushki#sigFreeId7ce0c69f30
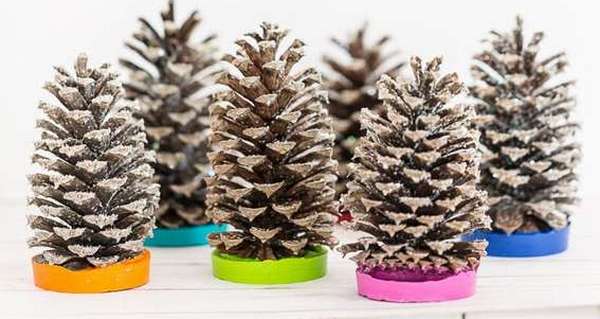
Christmas cones for the Christmas tree
Make a set of colored cones for your Christmas tree.
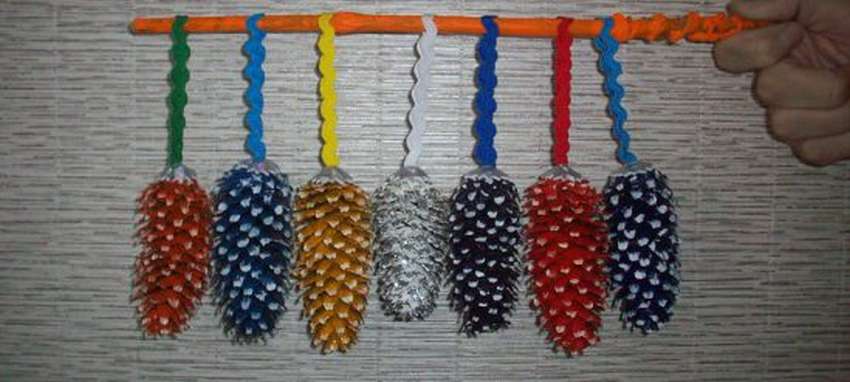 Detailed instructions and a list of all the necessary materials for the manufacture of crafts you will find on the site, the link is under the gallery. A master class on how to make Christmas toys from cones; see step-by-step photos.


https://i.expert-h.com/en/iz-shishek/novogodnie-igrushki#sigFreeIdd30860cb73
Snowflakes from cones
It's never too early to get ready for the winter holidays. Snowflakes, with their imagination and geometric design, are an excellent source of inspiration for holiday decorations. There are many ways to use snowflake made of cones to create a Christmas decor. You can dress the living room with flickering garlands of snowflakes, glue them to the mantelpiece or fasten to the wall. Therefore, if you want to give frosty freshness to the interior, include snowflake decorations. Below are some examples of beautiful cone snowflakes for your inspiration.
Snowflakes from cones
 Here is one example how to make snowflakes from cones with your own hands! You can hang them in different places of the room to create a New Year's mood or on the Christmas tree like toys.
Pick up tiny pine cones, hot glue gun, wire, PVA glue, sparkles and paper snowflake.
Glue two cones with a wire between them with hot glue, and then 6 more pine cones in a circle. Apply PVA to cover the hot glue, then with a toothpick, smear the glue on the tips of the cone flakes. Sprinkle spangles until glue is dry. That's all, Christmas snowflake from cones is ready. Below see the master class on step by step photos.


https://i.expert-h.com/en/iz-shishek/novogodnie-igrushki#sigFreeIdd96e8e63d7
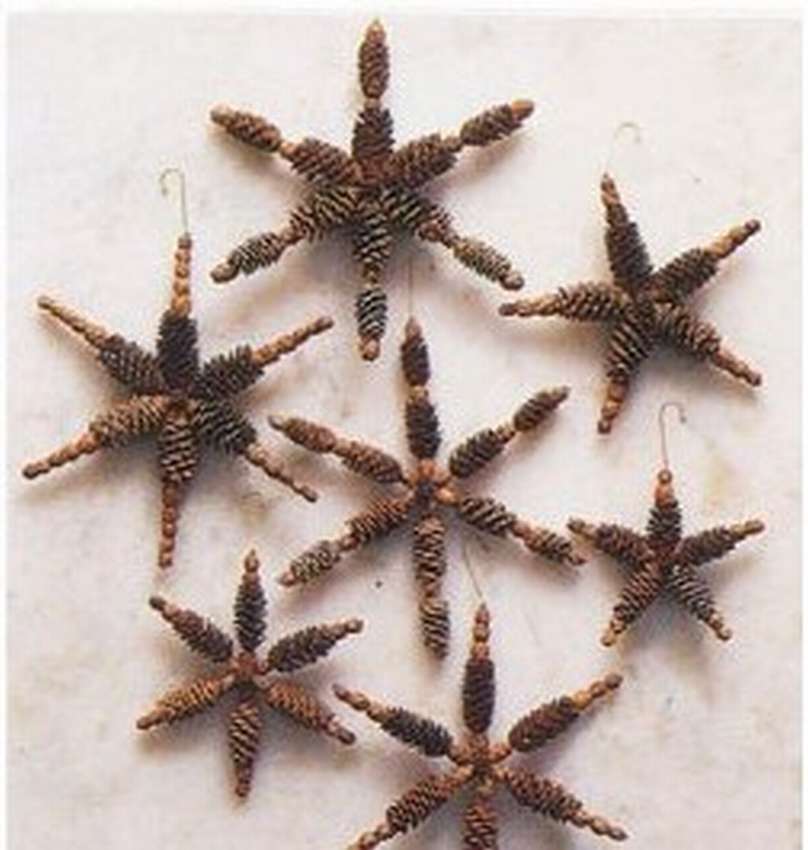 Snowflake from cones step by step
Craftsmanship snowflake made of cones DIY is a good way to spend time with your family on the eve of the New Year holidays.
Snowflakes have a unique appeal not only because cheap and easy to makebut also because we create fond memories.
This photo was taken from Pinterest, and unfortunately there is no instruction, but according to the step-by-step photos below, I think it will not be difficult for you to do this do-it-yourself snowflake from cones.


https://i.expert-h.com/en/iz-shishek/novogodnie-igrushki#sigFreeIdf7f09427c2
Here is another example of a New Year's crafts from cones. You can call it a snowflake or a star, it doesn’t matter, the main thing is that it’s beautiful.
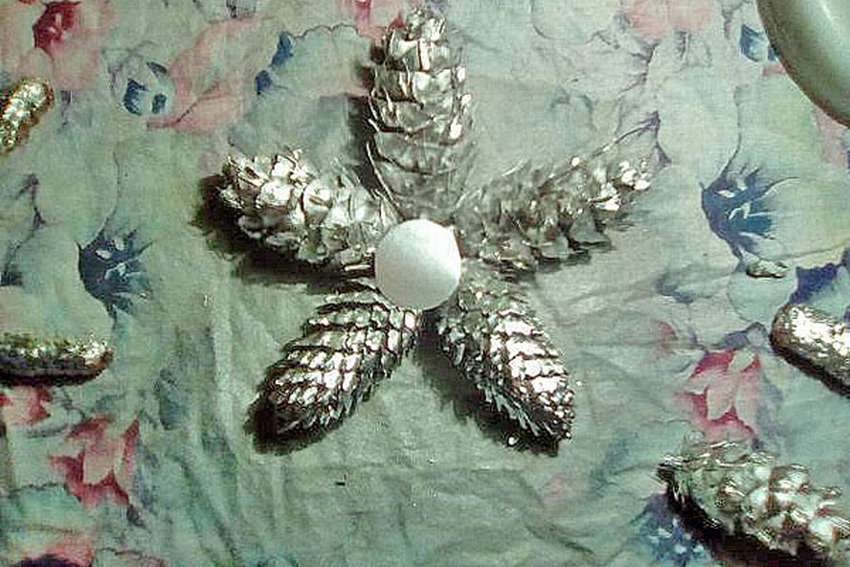 The idea is this, first you need to make a wire frame, that is, just twist the rigid wire to get five free ends, like an asterisk. In the lower part of the cone you need to drill a hole, you can take a drill with a very thin drill or just pierce it with an awl and widen the hole a little. Then glue the wire and put on the cones painted with silver paint. The middle can be closed with a circle of foil. Here is ours christmas toy from cones and ready. Tie a thread and decorate the Christmas tree.
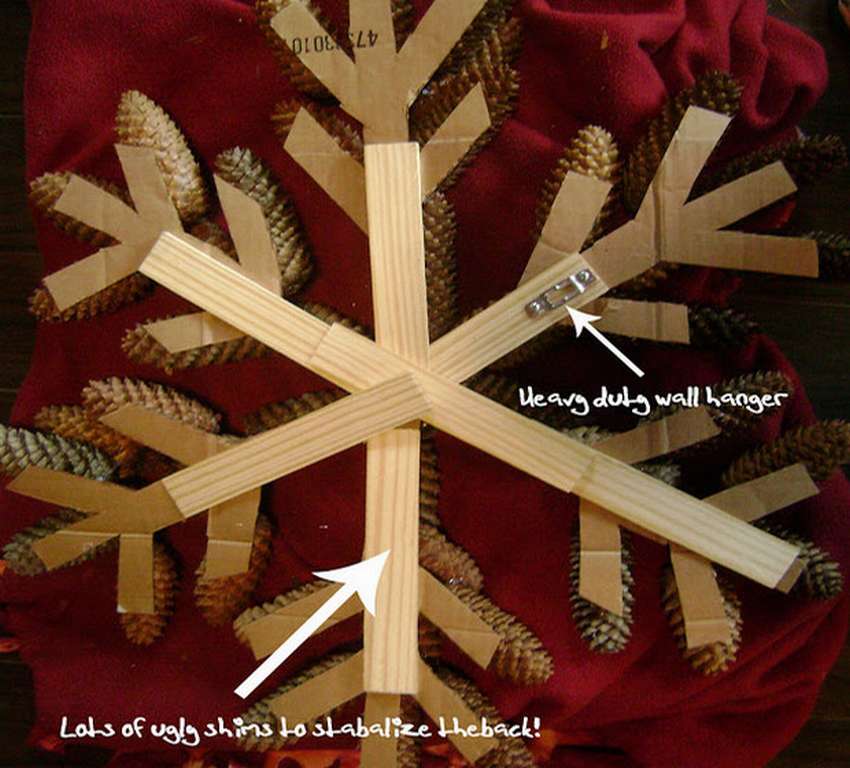
Large decorative snowflake on the wall
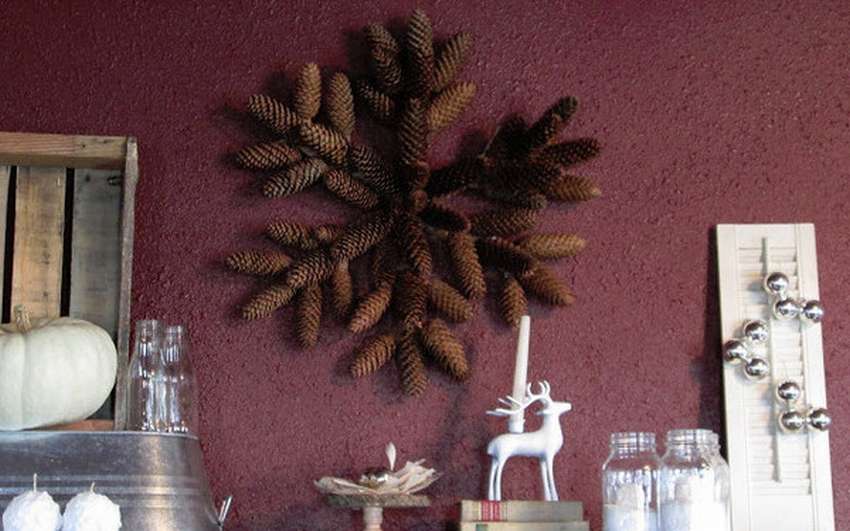 Snowflakes are different, not only miniature for the Christmas tree, but also of decent size. You can do this wall decoration, in combination with a rustic composition will look very beautiful. There are no step-by-step photos, one photo shows the reverse side of the craft, you will understand. It is not necessary to use wooden planks if you have strong cardboard, then this will be quite enough. The frame does not have to be perfect, pine cones cover all the flaws - and each snowflake is different in its own way.

Snowflakes from cones 50 photos


https://i.expert-h.com/en/iz-shishek/novogodnie-igrushki#sigFreeId29c9966738
Christmas toy Winter Fairy
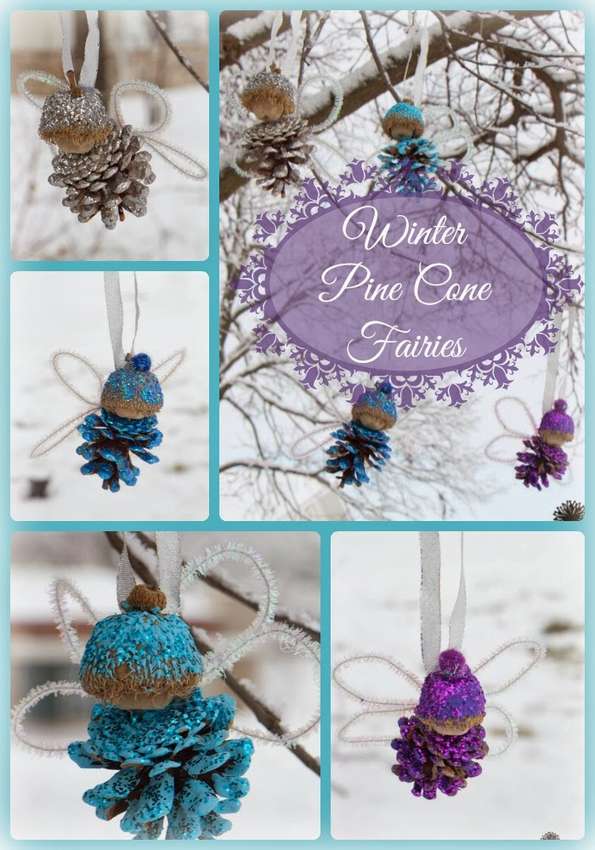 To make these beautiful together with children christmas toys from cones Winter Fairy, pine cones and acorns will be needed. Of supporting materials make multi-colored pieces of chenille wire, acrylic paints, shiny pompoms and hanging tape.
- Paint the pine cones and the acorn hat until the paint has dried, sprinkle them with sparkles.
- While the blanks are dry, make wings. Older children can do this on their own. Take two pieces chenille wire and give them the shape of a butterfly’s wings.
- Then attach to the bump, as shown in the photo.
- Using hot glue, fix the head from the acorn, and glue the pompon on top of the hat.
- Glue the tape at the end.
If you want the toy to hang vertically, tape fasten not to the bump, but to the acorn.


https://i.expert-h.com/en/iz-shishek/novogodnie-igrushki#sigFreeIdb299ad72f8
You can also do this christmas toy - elves from cones and poppy boxes
 Look at the step by step photos, how to do it yourself.


https://i.expert-h.com/en/iz-shishek/novogodnie-igrushki#sigFreeIdb53183bf72
New Year's toys from cones. Master Class
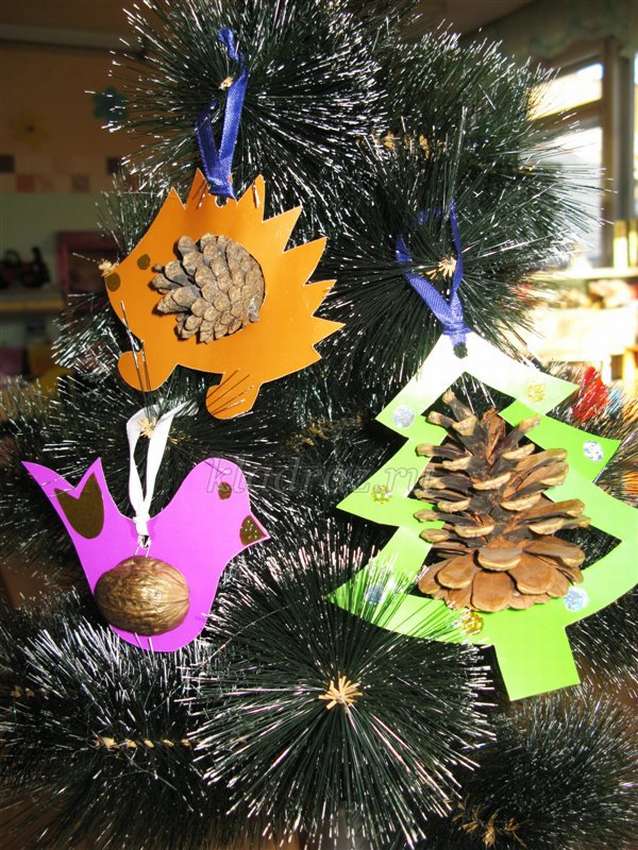 Christmas crafts from cones and colored paper for the smallest craftsmen - children from 4 years old. Craft design already understandable from the photograph.
- Let the children cut out figures of animals, birds, Christmas trees, or other contours from colored cardboard.
- Then, from the collected natural materials, we select suitable cones, nut or acorn in size.
- Mark with a pencil so that they fit in the center of the cut figure.
- Then carefully, with thin scissors, we cut out a place for installing a cone or a nut.
- The size of the hole is desirable to make a millimeter smaller, so it will be easier to fix. With a bump it is easier, it can be hooked at the expense of scales, and for a nut you can use a strip of adhesive tape.
All this is shown below on step by step photos, but if you need detailed instructions, follow the link to the site of the author of the craft.


https://i.expert-h.com/en/iz-shishek/novogodnie-igrushki#sigFreeId7ed9ce6f6f
Toy made of cones funny birds
Make fun for the New Year with children christmas toys from cones – funny colorful birds.
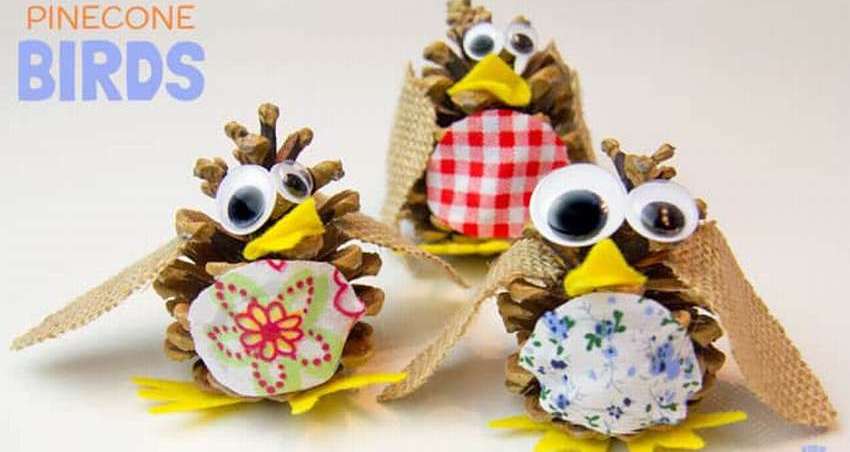 You can read the instructions on the website, and below see the photo that you will need to make the craft.


https://i.expert-h.com/en/iz-shishek/novogodnie-igrushki#sigFreeId79fe0ea5d8
How to make Christmas crafts from cones
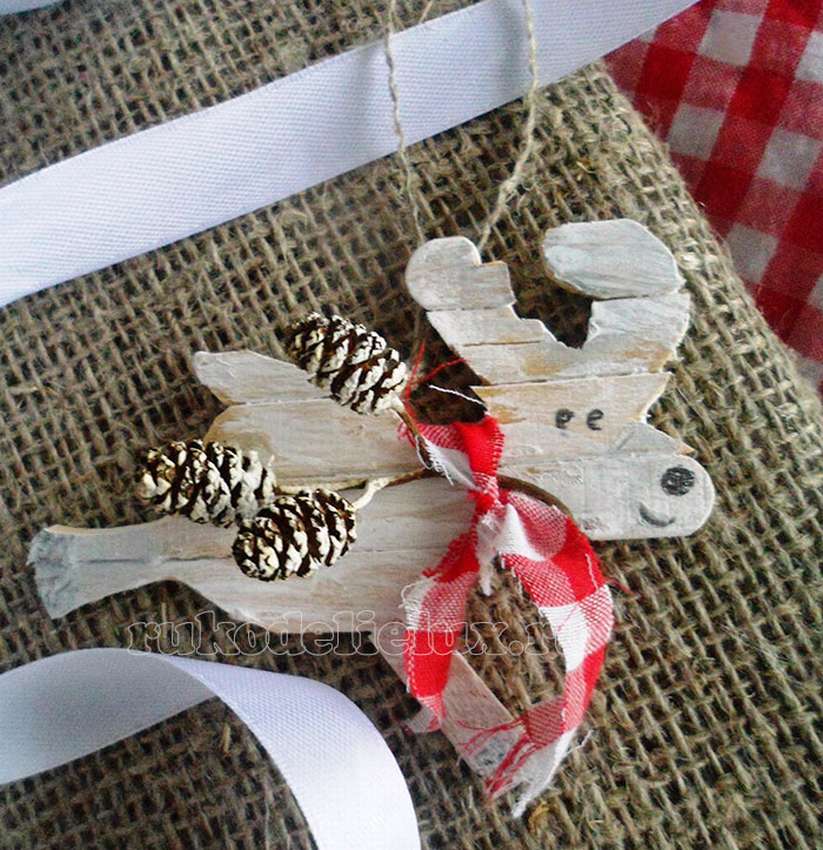 For this craft, you will need a few cones, ice cream sticks and a beautiful ribbon.
Do cone toy and sticks like that.
First draw a deer to make a stencil from the drawing. Then put the plate out of the sticks, put stencil, circle and with a clerical knife cut the sticks, glue. Or glue it first, then cut it off. Of course, it is much easier to make a figure from plywood or cardboard, but we are not looking for easy ways, just from ice cream sticks more interesting. Then we color the craft, tie the ribbons, cones and the toy is ready. See all this in a master class on step by step photos.


https://i.expert-h.com/en/iz-shishek/novogodnie-igrushki#sigFreeId04f0b7f86a
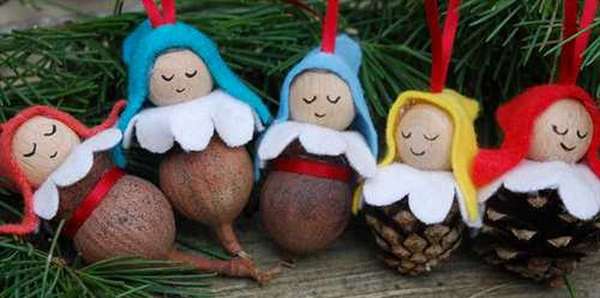
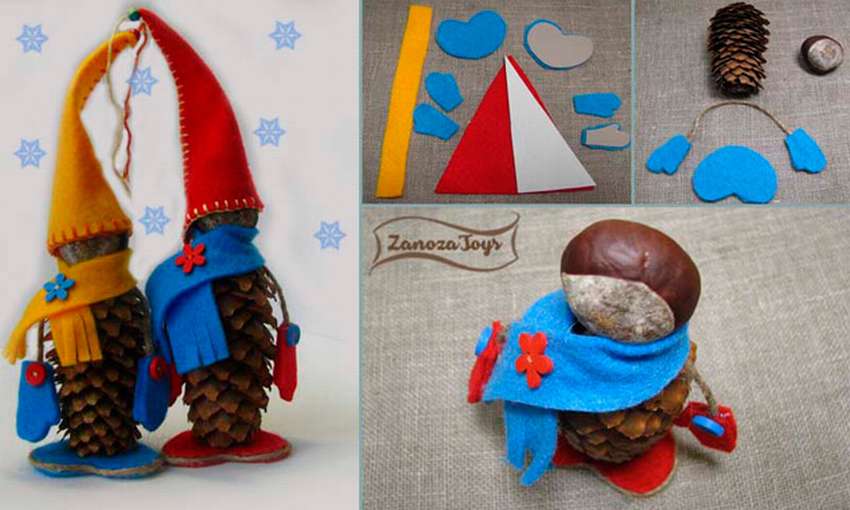
Christmas tree toys gnomes from cones and chestnuts
A small bump, a chestnut and a couple of patches of multi-colored felt - that's all you need to do pretty gnome.
Christmas toy Christmas tree made of cone scales
Here are some examples how to make a toy from pine cones.
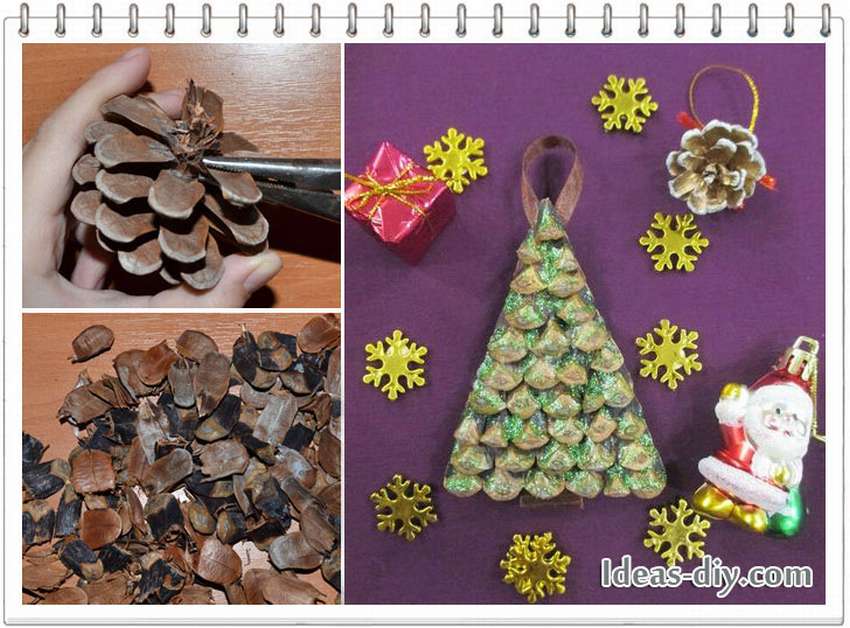 To make this do-it-yourself New Year's toys from a bump You will need cardboard, pliers and a glue gun.
- Remove the scales, one big pine cone will be enough to make a toy.
- Trim the rough edges of each flake.
- Stick the flakes on the cardboard blank as shown in the photo.
- Add some sparkles.
- Glue the eyelet.
On the reverse side, write in which year you made this craft. Just like that, as a keepsake. The last photo in the gallery shows more options for how to make Christmas trees. How to make a Christmas toy from a cone, see the master class in step-by-step photos.


https://i.expert-h.com/en/iz-shishek/novogodnie-igrushki#sigFreeId6f999a5f5b
Pine cone herringbone
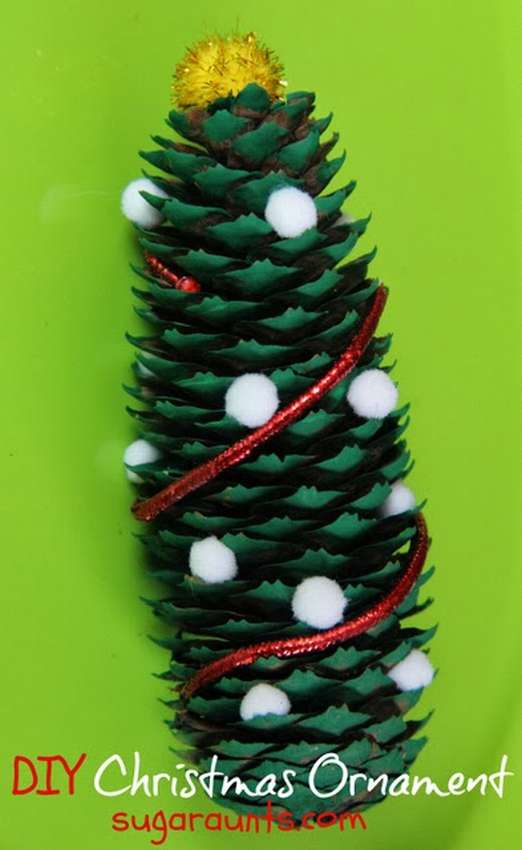 This little pine cone herringbone Great craft for the development of motor skills of the child.Put it among the branches of a large Christmas tree, here is another Christmas toy for the holiday.
To get started, just paint the bump green. When dry, start decorating. For this craft, use a small red cord and white pompons or cotton balls of different sizes. Glue a large yellow bead to the top of the tree from the cone. Instruct the children pushing small pompons between the cone flakes is a good and useful job for their little fingers. No glue needed in this case, the balls will therefore hold perfectly. Lay down as many white pompoms as you see fit.
To finish the craft, tie a bump red braid, lace, or even wire. No need to stick. Just wind around the bumps to keep everything in place. This is another great challenge. for the development of baby dexterity. I hope your child will be very pleased with this craft.


https://i.expert-h.com/en/iz-shishek/novogodnie-igrushki#sigFreeId14c025e6fa
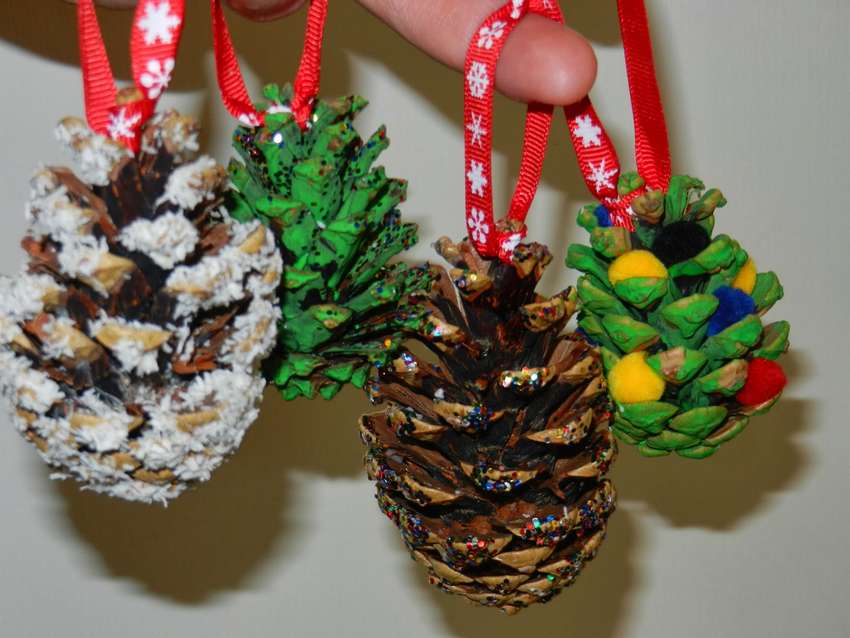
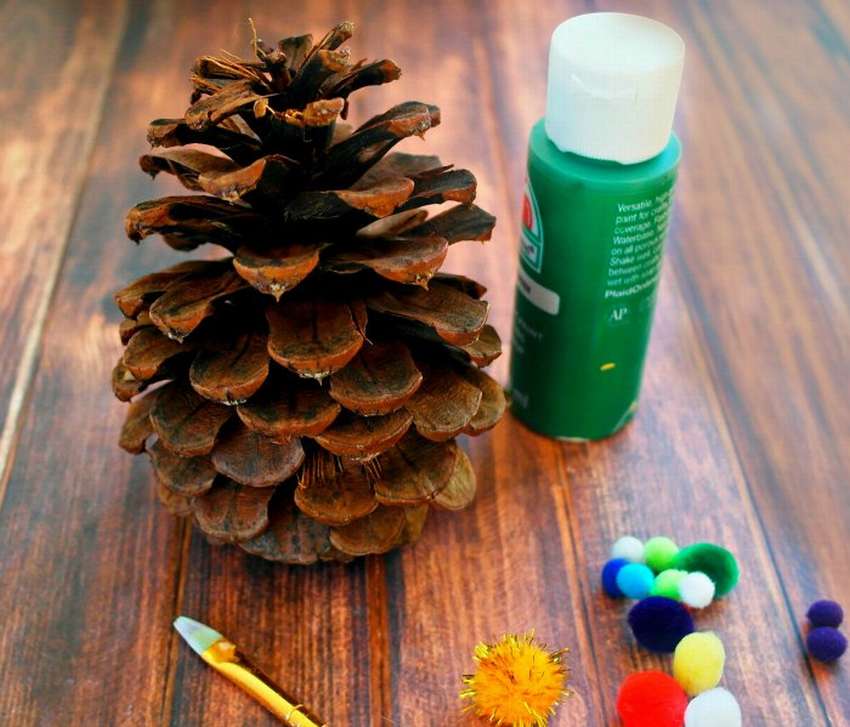
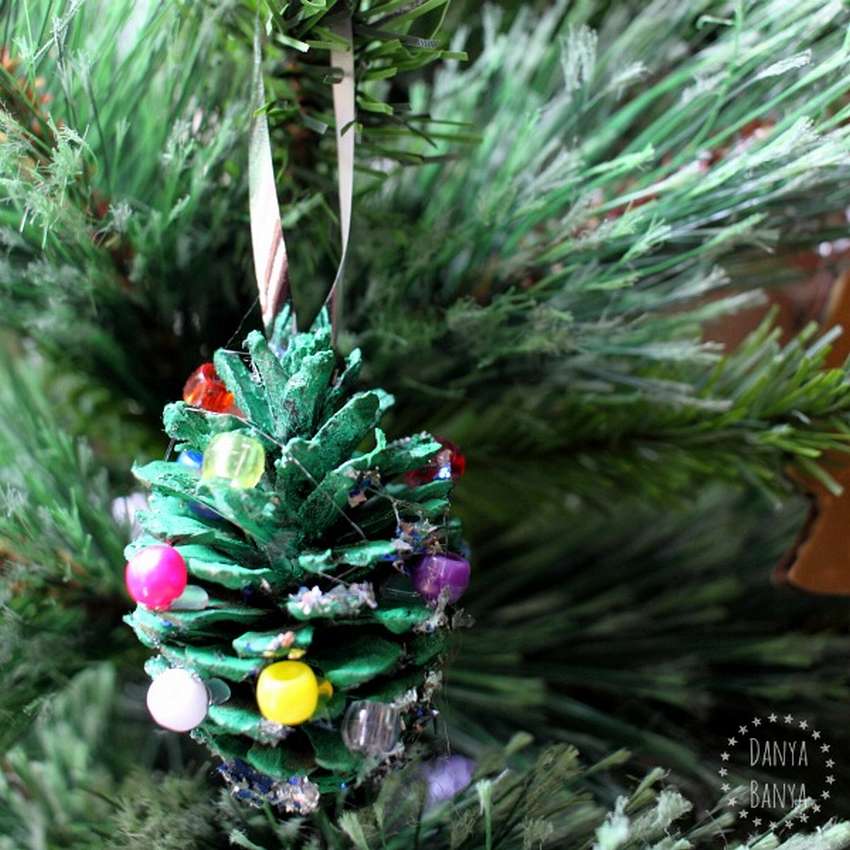
Christmas toy Christmas tree from cones
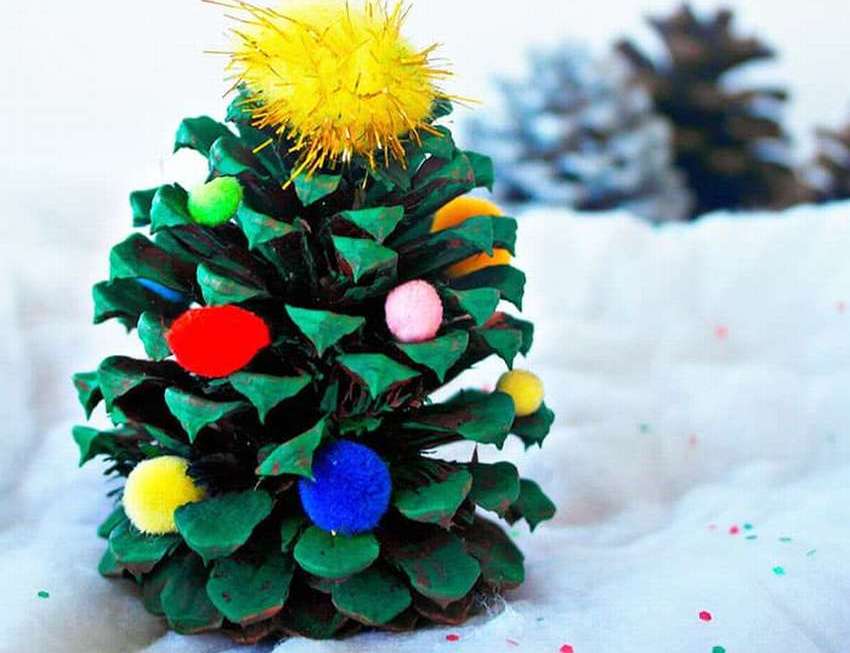 If you managed to get a few cones, then look how pretty christmas toy from cones you can do it.
If using cones collected outdoors, rinse well and wipe to remove dirt. Dry in the oven for 15 minutes at a temperature of 200 degrees. Paint the bump green. With a thin brush or better with a toothpick, apply a drop of glue to each flake. Glue pompons, beads or other jewelry that you have.
Ideas. Make a bunch, tie some chain (or use a hook) on top of the bumps.
 Paint the ribbon, and fix on it several ready-made Christmas trees from cones, it will turn out beautiful garland.
 Or here's another similar example. Several different types of paints were used here, including plain green, metallic green, and powder (mixed with water). To paint bumpsUse small containers, such as plastic containers. When the cones are painted, lay the foil and lay out to dry.
Next day you can start decoratingusing transparent glue, short silver and blue shiny pieces, silver glitter glue and pompons. When the crafts dry, attach a loop of silver tape using a low-temperature glue gun. And so christmas toy from cones ready.
See below for step-by-step photos..


https://i.expert-h.com/en/iz-shishek/novogodnie-igrushki#sigFreeId782bece359
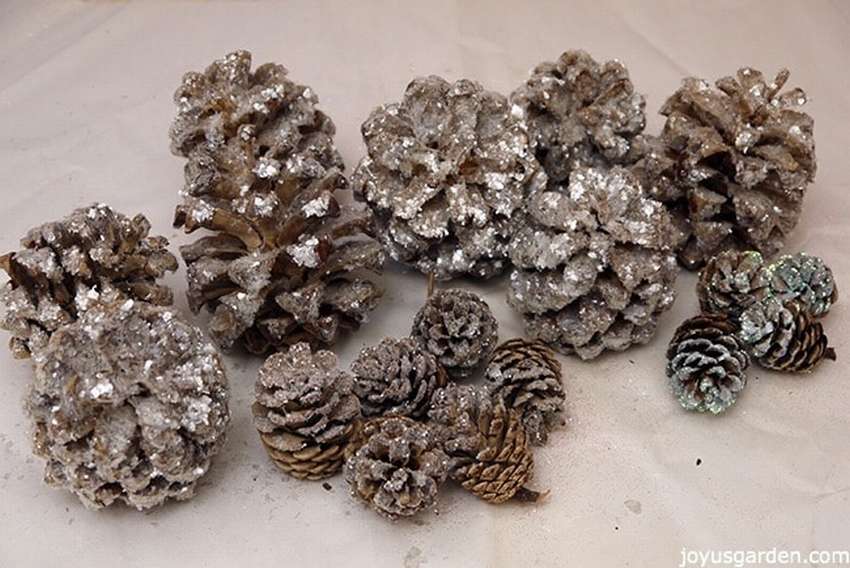
Shiny cones
Shiny cones for crafts
 Although many people like natural beauty, the colorful and shiny cones that are used for Christmas crafts, garlands and toys look much more beautiful. Here are some examples of how to bring beauty to your natural materials. If just paint a bump, then this is a ready-made Christmas toy. Look very nice on the Christmas tree Snow cones. It is very easy to do.
You will need: white tempera paint and silver sequins
How to make shiny bumps
- Make small containers of white paint
- Put the bump in the tray and brush on the scales,
- Sprinkle glitter onto wet paint and shake.
- For this part, you can first place the bump in some kind of tray to collect the sparkles that are not stuck.
- If you hang a bump on a Christmas tree, tie a rope or wire.
Tip: Spangles can be poured into a salt shaker with large holes, so it will be more convenient to sprinkle cones.


https://i.expert-h.com/en/iz-shishek/novogodnie-igrushki#sigFreeIda0d6194449
Here is the second way how to make shiny bumps.
 In a bowl large enough to fit a bump, mix white acrylic and PVA glue in the ratio 60/40 (about).
Roll the bumps in the paint and glue mixture to evenly cover the entire surface. Pour a thin layer into another container. sequin. Glitter storage in the tray saves a lot of material. While the mixture of paint and glue has not dried, also roll the cones in sparkles.
Usually, to make a shiny bump, it is simply coated with glue and sprinkled with sparkles. The proposed method is aesthetically more attractive.
The paint gives the pine petals a special kind of snow cover, and the luster creates an amazing frosty effect.


https://i.expert-h.com/en/iz-shishek/novogodnie-igrushki#sigFreeId4e929cf68f
 The third way to make the bumps shiny
Make the bumps shiny possible for an hour. It is simple, cute and cheap.
Screw a screw with a ring into the thick base of the bump. You can simply twist it with your hands, but if you want it to hold firmly, use a drill or small nail to create a guide hole.
Apply glue and sprinkle with sequins so that the bump is likeit is dusted with snow.
Use some capacity or newspaperto collect glitter residues that are not fixed on the bump. This is not only for reasons of economy, but also for safety. When you cover the whole bump, shake it slightly over the newspaper.
In this case, used glass sequinsthat have their advantage.
They do not cling like spangles made of foil, look prettier and shine brighter. And most importantly, working with them is a little easier. How to work with a glitter brush, look at step by step photos.


https://i.expert-h.com/en/iz-shishek/novogodnie-igrushki#sigFreeId0e789c22e7
 And here is another way. The idea is to plunge the bumps into bleach solution, cover with something heavy and wait three days. In the liquid, the cones will close, so when you get them, you will need to dry in the oven. After that, spread the glue with water, add sparkles there and gently apply with a brush on the bumps.
You can use them for many years. Shine stays and holds well. Shiny cones beautiful in the center of the dining table, lit by candles - simple, festive and sparkling!


https://i.expert-h.com/en/iz-shishek/novogodnie-igrushki#sigFreeId64e6b1c762
How to make aromatic pine cones
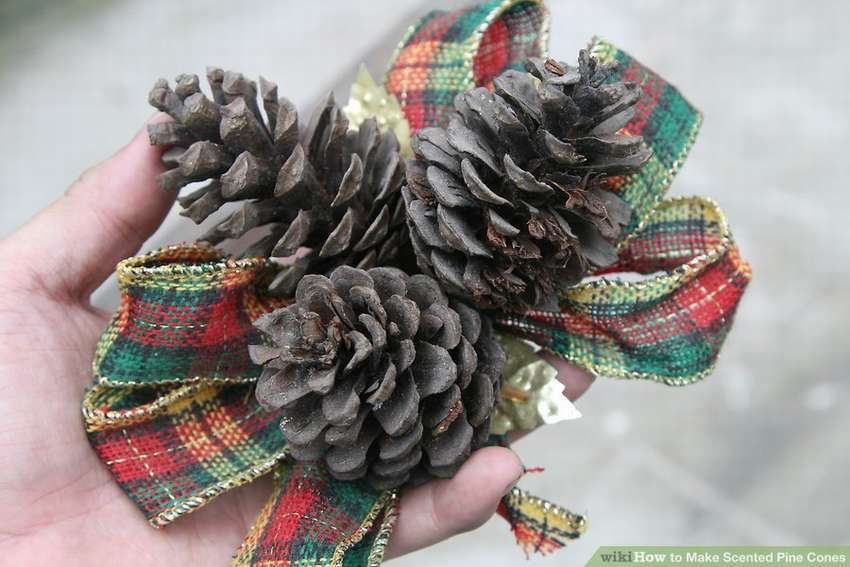 Do aromatic pine conesso that your jewelry is not only beautiful, but also fragrant. Shown here three methods: bonding with adhesive, with glue and without glue.
Method 1. Put cloves, cinnamon and other elements of pickling spices into the dish and mix thoroughly. Add patchouli, orange, sandalwood, cinnamon or balm essential oils if you want a more tangy flavor. Put the cones in a bowl, sprinkle with the mixture, mix. Then fold in a bag, close and shake. Do this a few times. Then shift the cones into the net and shake again to remove the extra spices. Put in a basket, decorate with ribbons and you're done.
Method 2. Mix equal parts nutmeg, ginger and cinnamon in a plastic bag. Lay out pine cones on a newspaper. Apply glue on the bump with a brush. Fold in a plastic bag and shake. Put it on a newspaper and leave to dry overnight.
Method 3. Do a mixture of essential oil in a bottle of water with a spray. Sprinkle pine cones with scented water and close in a plastic bag. After 24 hours, the fragrant cones are ready. Alternatively, put the cones in a plastic bag with a few drops of cinnamon or clove oil. Let them lie closed for 2-7 days, after which the cones are ready.


https://i.expert-h.com/en/iz-shishek/novogodnie-igrushki#sigFreeId608f1288e4
Here is another way how to make fragrant cones using wax and essential oil.
 The instruction is long, so I won’t rewrite it, if it’s interesting, there is a link to the author’s website under the gallery, everything is described in detail there. See below for step-by-step photos..


https://i.expert-h.com/en/iz-shishek/novogodnie-igrushki#sigFreeId3e1a5d304d
New Year's toys from cones 300 photos


https://i.expert-h.com/en/iz-shishek/novogodnie-igrushki#sigFreeIdd37d90c836
Hello, I am the author of this article, so I look forward to asking questions for this article in the comments below, I will answer all !!!
If you have questions on another topic, ask them on our forum, we will answer you
- Two baskets of paper in 5 minutes (Master class)
- How to make a simple and compact table for a milling cutter from plywood
- How to make a soft headboard tile (Instructions + step by step photos)
- Cinder block benches: a convenient bench in 55 minutes
- How to make a bed with a niche: saving space (Master class)