Plastic Bottle Butterflies

Several options for creating butterflies from plastic bottles
- 8 Tips "What's the best ..."
- 11 places to use such butterflies
- Do-it-yourself bobbles (12 master classes)
-
- From beads
- Of beads with antennae and natural wings
- We attach the wings of butterflies to dolls)
- Shiny with a belly of clay
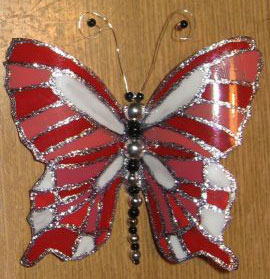
- Butterfly with rhinestones and microbeads and painted with nail polish
- With shiny contours and rhinestones
- Multicolored with straight wings.
- Bead body barrel
- DOUBLE BUTTERFLY with four wings!
- Templates, sketches, stencils of butterflies (120 pcs.)
Important Tips "What's the best?"
- it is better to take light bottles, as on colored paints they are not clear and may give the wrong color;
- always draw the butterfly’s abdomen rectangular (not oval and not round) so that you can bend the wings in straight lines;
- do not draw the butterfly where the label was; later debris may stick to this place;
- the contours of butterflies can be photocopied from books or clothes;
- to keep the paint better, we recommend sanding the surface of the plastic with sandpaper 220mkm .;
- so that the paint on butterflies dries faster, use a hairdryer in cold air mode;
- try to apply lighter tones, because then it will be easier to apply a dark color on them;
- if you have old colored varnishes that have already thickened, gone out of fashion and dried, then, diluting them with acetone or nail polish remover, you can safely use it again for coloring our butterflies.
How and where to use such crafts
Attach to:
- gift wrapping gifts;
- to the refrigerator, if you glue the magnet to the abdomen;
- to the curtains with a pin;
- to the pictures, you get a 3D effect;
- to the picture frames on a drop of glue;
- to the wallpaper with a pin or a drop of glue;
- to flowers and pots to them;
- if you attach a butterfly to a skewer, you can insert it into the soil of a flower;
- on trees in the country with carnations or a pin;
- hang on thin strings under the chandelier, under the breath of a breeze, the butterfly will constantly “dance”;
- map in the form of flags on pins.
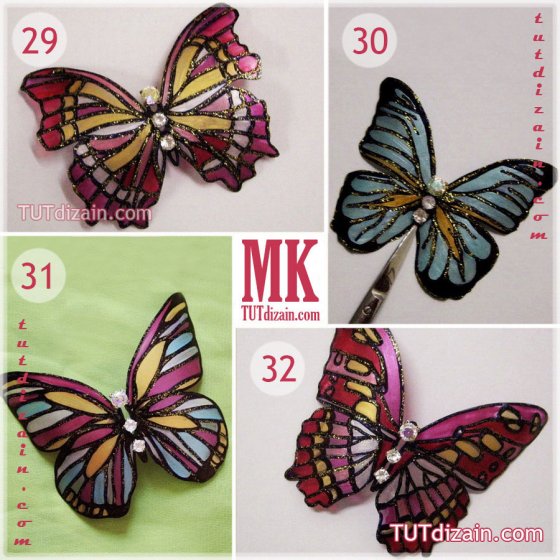
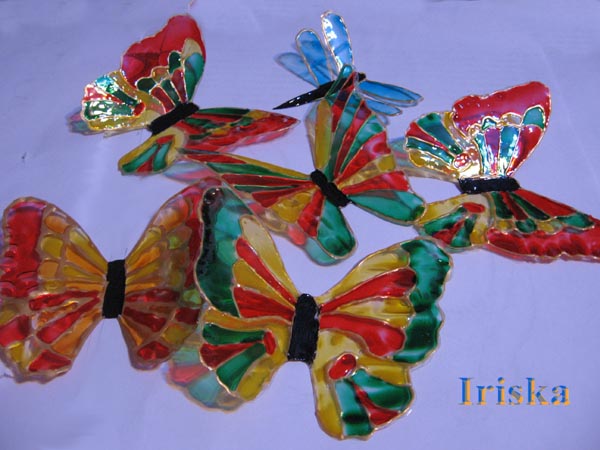
Bobochki (master classes)
Step by step photos
From beads
Here we need: Beads, wire, stained glass paints
We insert the sketch of the butterfly into the cut part of the bottle inside, and, securing the sketch with paper clips, draw a contour with vintage paints. Until the paint has dried, paint the butterfly. Then we string the beads on the wire, and fasten this wire with beads into the previously made holes in the body of the butterfly. Do not forget to bend plastic along the contours of the body to give the shape of a butterfly


https://i.expert-h.com/en/iz-plastikovykh-butylok/igrushki/838#sigFreeId9dd523314a
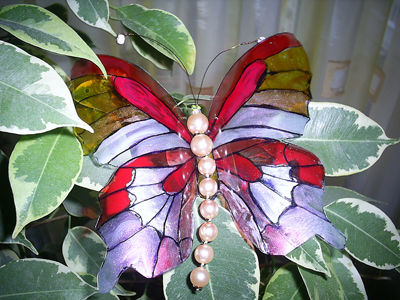
Of beads with antennae and natural wings
To create this butterfly we need: as always, a plastic bottle, acrylic or stained glass paints, multi-colored nail polish, glitter glue, waterproof marker, beads, sparkles and thin wire.
In this version of the butterfly, we will not spread our wings, but will use the curl of a plastic bottle for our own benefit. After you have drawn the outline and cut out the butterfly, it turns out so that the wings look down. And we’ll act more cunningly by bending the wings up along the fold lines along the butterfly’s body (see the photo marked with yellow dashed lines), we will make the butterfly the natural position of the wings).
As usual, we color the butterfly with varnishes and paints to your taste.
The most interesting thing is the antennae, which we will make of two wires, on which we attach one or two beads from one end, and attach the other end to the plastic holes made in the butterfly body in advance.
And the body itself will be decorated with beads strung on wire. If you take more beads, you can get a dragonfly, only the wings will have to be cut a little differently


https://i.expert-h.com/en/iz-plastikovykh-butylok/igrushki/838#sigFreeId1f16826192


https://i.expert-h.com/en/iz-plastikovykh-butylok/igrushki/838#sigFreeId0adc08ecea
We attach the wings of butterflies to dolls)
 The author of the website miryarche.ru (and photo below) Julia found an interesting application of wings from our butterflies from plastic bottles, she suggests attaching wings to dolls. She actualizes this by the fact that Winx dolls are now popular among girls, but such dolls with wings are an order of magnitude more expensive than usual. But with our wings gets a pretty decent and budget option)


https://i.expert-h.com/en/iz-plastikovykh-butylok/igrushki/838#sigFreeId2a45e470db
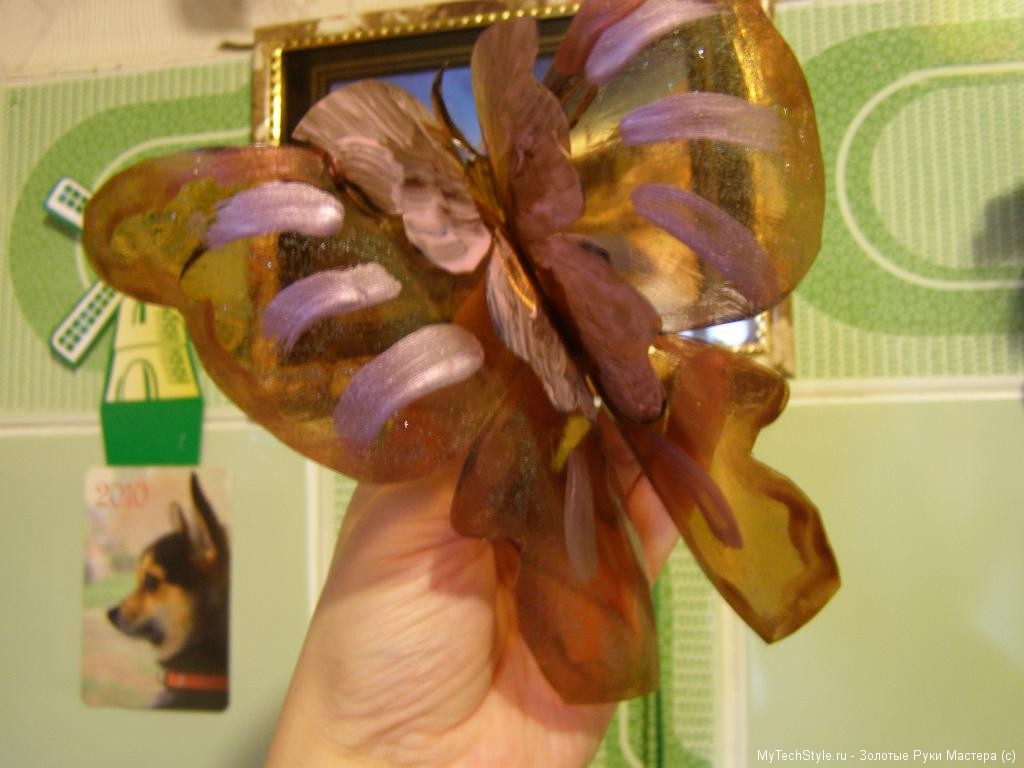
Brilliant with abdomenm from clay
What we need:
In this version, butterflies. We do everything exactly the same as in the previous ones.
The differences are:
- Sanding with a sandpaper 200mkm the surface of the cut bottle, so that the paint holds better, the surface should become matte
-
the abdomen is made of clay, we stick a tendril into it from the wire, and the eyes are made of beads pressed into small lumps of clay. On the abdomen, as in the previous ones, we apply rhinestones, microbeads with a toothpick. Bake the finished belly for half an hour in the oven. Then with the help of reliable glue we fasten it to the base of the wings.
- so that it would be more convenient to apply paint in this version, we attach the strip of cut plastic with the butterfly contours already drawn on it to the wooden base to straighten the leaf.
- the veins on the wings we draw no longer with a marker, but with a thin brush and the same color of paint, but a little lighter
- shine and shimmering and brilliant sparkling effect will give wings applied over all patterns of mica-based powder. You can also use oil enamel varnish and matte spray


https://i.expert-h.com/en/iz-plastikovykh-butylok/igrushki/838#sigFreeIda155774870
Butterfly with rhinestones and microbeads and painted with nail polish
Necessary: Permanent marker, rhinestones, microbeads, colored varnishes and transparent varnish with sparkles.
 For this option butterflies must be selected symmetrical sketch butterflies. It’s important that the center of the butterfly passes through the BOTTOM of the bottle, so that the wings do not turn out to be twisted, look at the photo highlighted. With a permanent marker, we outline the outline of the butterfly. After the butterfly was cut out, we bend the wings and proceed to decorating. We use unnecessary colored nail polishes, while we try to paint over each element of the picture in one motion. Apply two coats of varnish!. After drying, apply a transparent varnish with sparkles. Then, with a marker, circle all the lines of the picture and color the antennae. And then all these circled lines are again covered with transparent varnish with sparkles with a thin brush. Then we glue rhinestones or microbeads with transparent varnish using tweezers or a toothpick. And the inner part of the butterfly is painted over with a completely permanent marker.
How to attach our butterfly? To do this, glue a piece of double-sided tape or a piece of magnet on the inside of the abdomen.


https://i.expert-h.com/en/iz-plastikovykh-butylok/igrushki/838#sigFreeId7e54ea405b
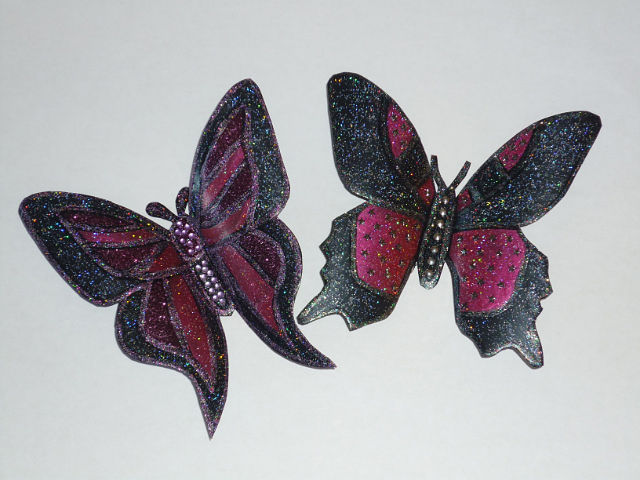
With shiny contours and rhinestones
What do we need: a pair of rhinestones, glue, a permanent marker, varnishes of several colors.
Here we draw a marker with a marker with a picture embedded under the plastic. Then we cover with three or two layers the sections between the contour. Draw the contours with a marker again, and then this contour is varnished with sparkles with a thin brush. We fix several crystals on the body.
A butterfly sketch was created here by translating the main lines from a real photo of a butterfly. Here you need training)


https://i.expert-h.com/en/iz-plastikovykh-butylok/igrushki/838#sigFreeIda1bad4ab6b
Multicolored with straight wings.
We need: glass contour, iron, felt-tip pen, vintage paints
 Again, cut the cylinder out of the bottle. We attach a butterfly pattern to the adhesive tape on the inside of the cylinder. We circle the butterfly with a felt-tip pen. After drying the marker, cut out the butterfly. One butterfly can make two butterflies. To make butterflies flat. We put them between two sheets of paper, then hold them with an iron and quickly, until it cools down, smooth them with something hard. Then, with a contour, draw the main lines of the butterfly. Then we start painting with stained-glass paints. First, apply one color, then wait for it to dry, apply another. And the last to paint the belly of a butterfly


https://i.expert-h.com/en/iz-plastikovykh-butylok/igrushki/838#sigFreeId90e5d3bffb
Bead body barrel
 A simple butterfly is made as described above. The body here is made of large beads, and the antennae is made of wire


https://i.expert-h.com/en/iz-plastikovykh-butylok/igrushki/838#sigFreeIde5e7984df7
DOUBLE BUTTERFLY with four wings!
So, what is the interestingness of this model ???
- - we draw the contours from the outside, but paint from the inside, in this case the contours do not blur, BUT the paints will not look as bright as if they were drawn from the outside
- - you can do everything WITHOUT WIRE:
-
- - we bend and fasten the body with a stapler (is it not original).
-
- - the antennae are also made of plastic, we fasten them with a stapler, we hang them on the ends with a bead, which gives the antennae a curvature under its own weight
- - and we fasten the beads for the head with a thread.
- - double butterfly, that’s what you haven’t seen yet. If you make two butterflies of different sizes and insert one into the other and fasten the abdomen with a stapler, then you get SUPER-BUTTERFLY, uscurrent beauty !!! It will be something to surprise those who have already seen enough of the simple ordinary homemade butterflies with two wings)


https://i.expert-h.com/en/iz-plastikovykh-butylok/igrushki/838#sigFreeIdd12cb83db5


https://i.expert-h.com/en/iz-plastikovykh-butylok/igrushki/838#sigFreeIdccbe2fc911


https://i.expert-h.com/en/iz-plastikovykh-butylok/igrushki/838#sigFreeIdd87101e7bf
Templates, sketches, stencils of butterflies (120 pcs.)


https://i.expert-h.com/en/iz-plastikovykh-butylok/igrushki/838#sigFreeId016380f047
- Brick grill: 44 drawings, 18 projects + photos
- Collapsible barbecue: 50 drawings, 20 master classes +300 DIY photos
- ✿ Flowerbeds:> 34 turn-based master classes + photos (248 ideas) - do-it-yourself
- DIY sauna in the apartment: bathroom, balcony, storage room. Projects and photos
- Shelves in the bath with your own hands: +200 photo. Drawings of bench benches in the steam room