A tree made of cones. Do it yourself + 100 photos
 tree of cones
Autumn always pleases craftsmen with an abundance of natural materials - acorns, chestnuts, leaves, cones. This article will show you how to make a tree of cones to decorate the interior and create a festive decor. Here are some simple examples with step-by-step photos and instructions.
Cones, as a natural material, are ideal for crafts; working with them is always a pleasure. Although it’s hard to call this work, decorating your home is more of a pleasure. Make your own cone tree the master classes presented in the article plus your imagination will help.
How to make a tree from cones
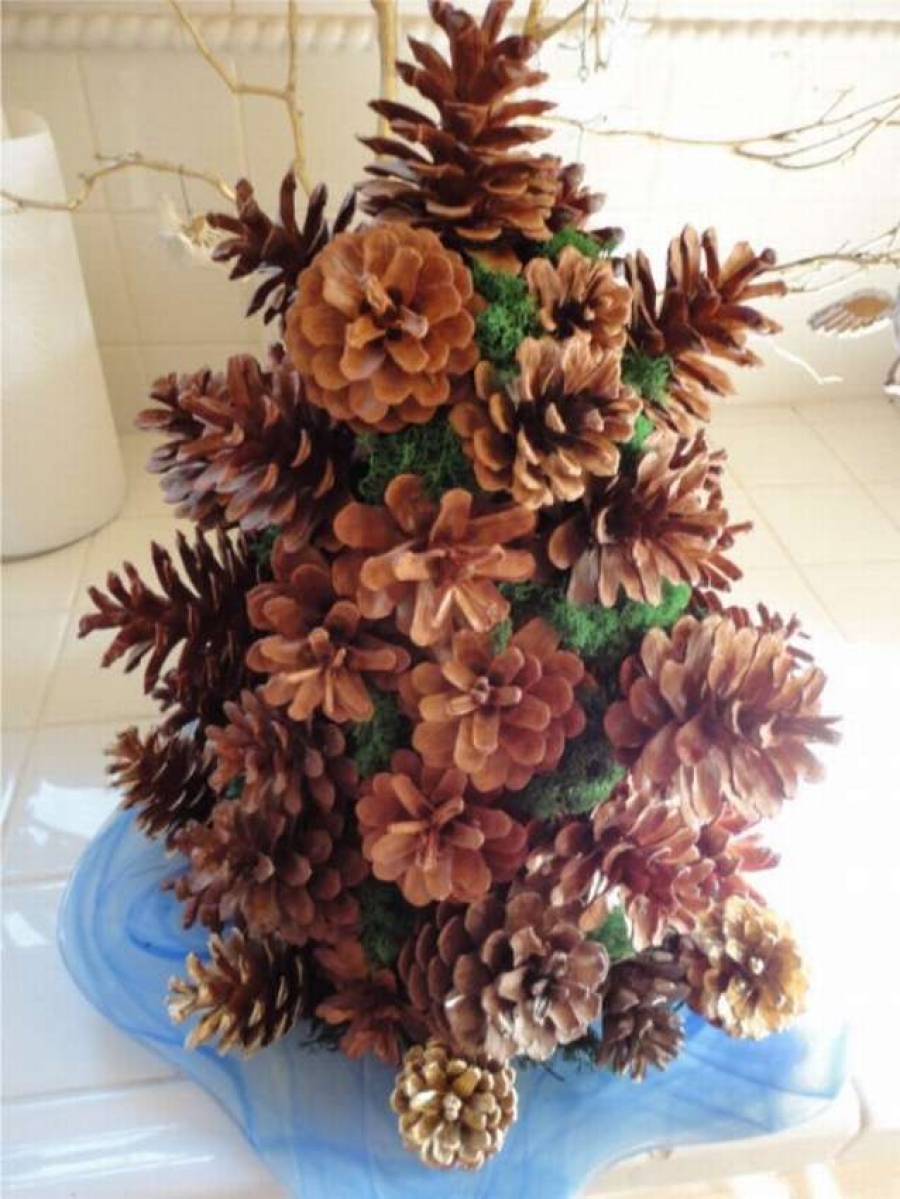
 Here is a great example of how to do do-it-yourself tree of cones, which will serve as a wonderful decoration for the home and will especially please on winter holidays. The sizes depend on your desire, well, and on the number of cones available. Here is one of the simplest manufacturing options.
If you want to do big tree of cones, you will need a lot of materials. First of all, prepare a lot of different cones, large ones will go to the outer contour, and small ones will fill in the gaps. Still need a lot of glue and cardboard sheet.
A frame for this tree of cones is not needed, just cut a circle out of cardboard and paste cones on it, row by row, gradually narrowing the diameter to the top. Fill the middle with the remaining cones. Do this until the cone closes. Then decorate the tree with cones at your discretion. Decor Options Can look at step by step photos, and read the instructions on the site, a link under the gallery.


https://i.expert-h.com/en/iz-shishek/delaem-derevo#sigFreeId99f39fb971
Cones tree
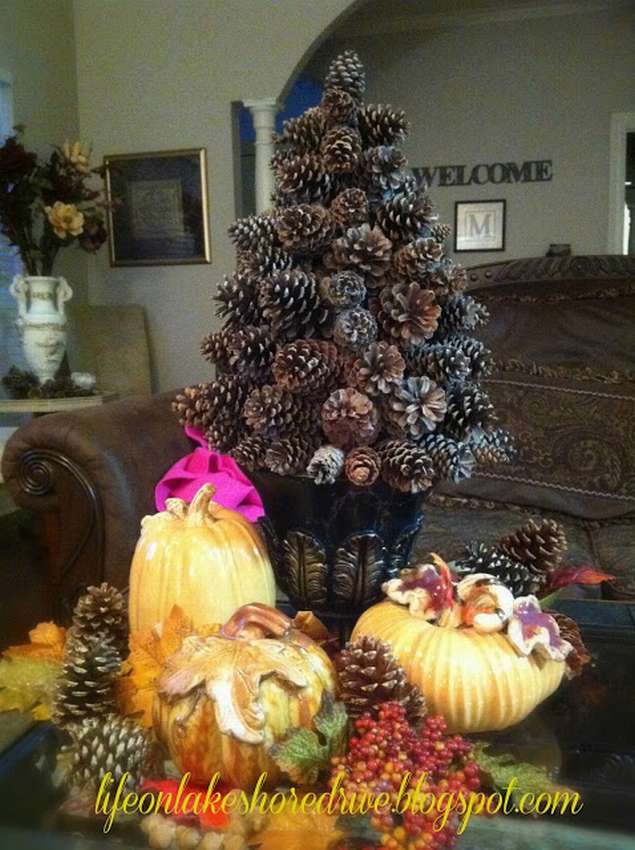
 Another easy way make a tree of cones. Only in this case will we need plastic frame. You’ll have to work with wire, so get the wire cutters. The procedure for making crafts from cones is:
- Large cones wrap wire at the bottom, as in the photo.
- Twist the loose ends of the wire as tight as possible to secure the pin.
- Insert the bumps with sharp ends into the foam cone, starting from the base, leaving no gap between the bumps.
- If the free space still remains, fill them with the remaining cones - first use larger ones, then smaller ones.
- Proceed until the entire cone is full.
To make this simple craft out of cones, follow the guidelines below. step by step photos.


https://i.expert-h.com/en/iz-shishek/delaem-derevo#sigFreeId28e2311a4d
Cones tree master class
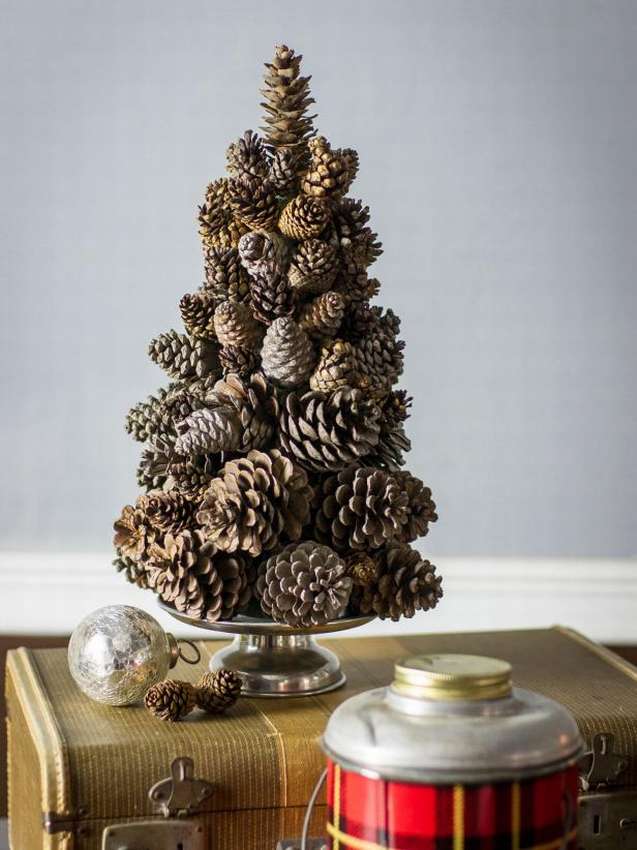
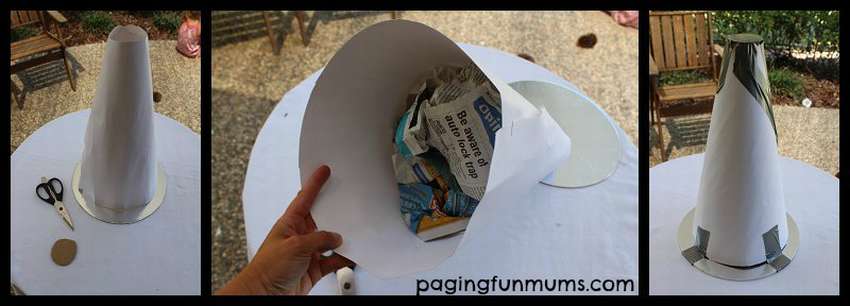
 This option is even simpler. In this case, to make a tree of cones, not plastic, but cardboard cone. It is very easy to make a craft, because the main material is cones and cardboard, but it looks great.
What do you need:
- Cones (preferably large);
- Flexible cardboard (brown is better);
- Old newspaper;
- Round base for cakes (wooden or cardboard);
- Packing tape (adhesive tape);
- Glue gun with a sufficient supply of rods;
- Battery powered garland.
How to make a tree of cones step by step
Step 1. Make a base by folding the cardboard with a cone and aligning the bottom. Fill with crumpled newspaper and attach with tape to the base. The top closes in the same way. The photo shows what should be the result.
 Step 2. Glue the bumps to the base, starting from the bottom, so that there are no gaps between them. To do this, alternate the directions of the cones.
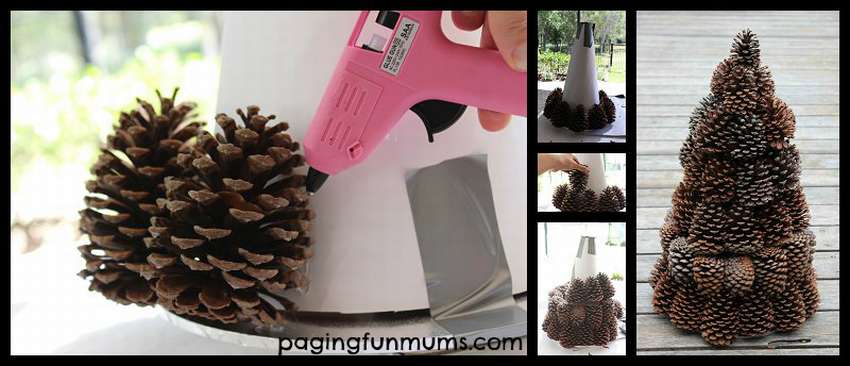 Step 3. If you make a Christmas tree, decorate the tree with a garland.
Cones decorative tree
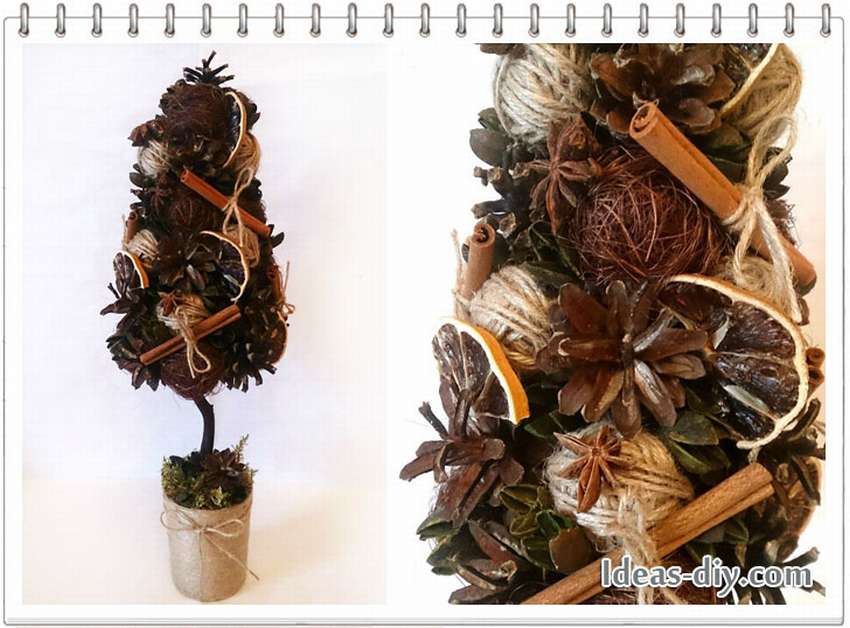
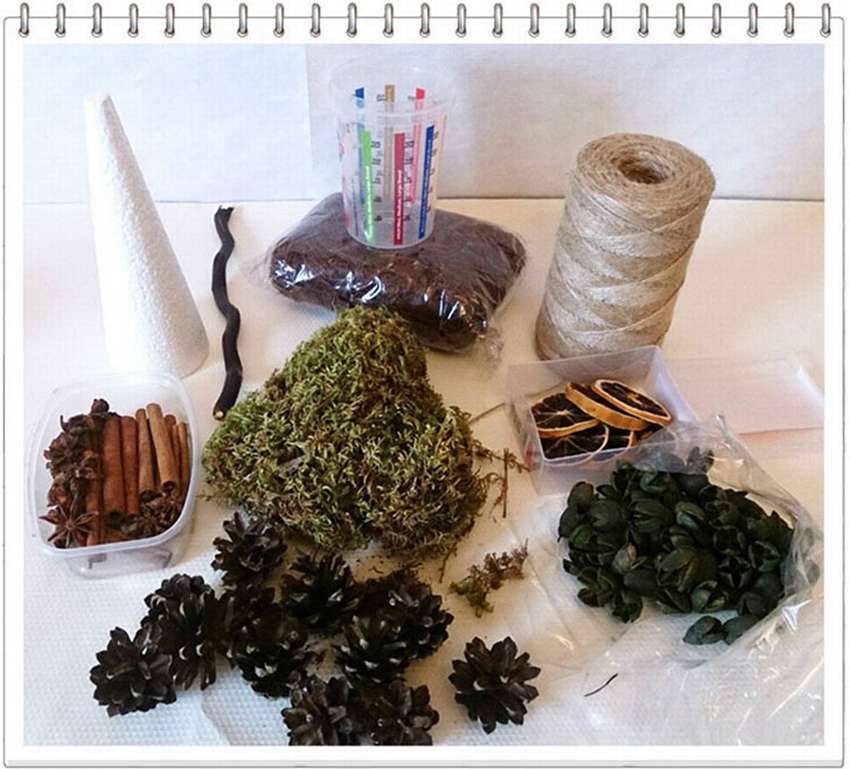 Example how to do decorative cone tree and natural materials. It looks a bit unusual, since they went along with bumps, dried fruits, acorns, cinnamon sticks, etc.. Step-by-step photos on how to make an original tree of conessee below.


https://i.expert-h.com/en/iz-shishek/delaem-derevo#sigFreeId8bc6c903cb
Small cone tree
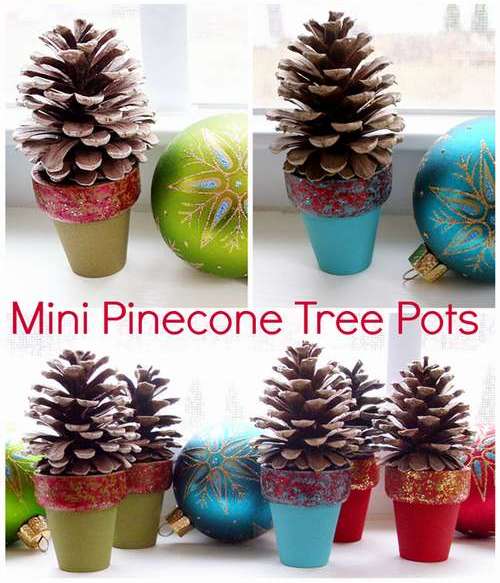 Such a mini-garden in pots form cone trees. It can be planted very quickly and simply. The result is a wonderful decoration suitable for any celebration.In appearance, it is not noticeable that it took so little time to produce such beauty. And very few funds, although some items will have to be bought. To make these little trees out of cones, You will need miniature pots about 5 cm in diameter and acrylic paints.
Acrylic paints paint the pots and let them dry. Apply another coat of paint.
Apply a finish to each pot by picking up a paint with a small brush and leave to dry. Then place the bump vertically, like a small tree. You can enjoy your potted mini-forest!


https://i.expert-h.com/en/iz-shishek/delaem-derevo#sigFreeId8be9c1f8b7
Christmas tree made of cones
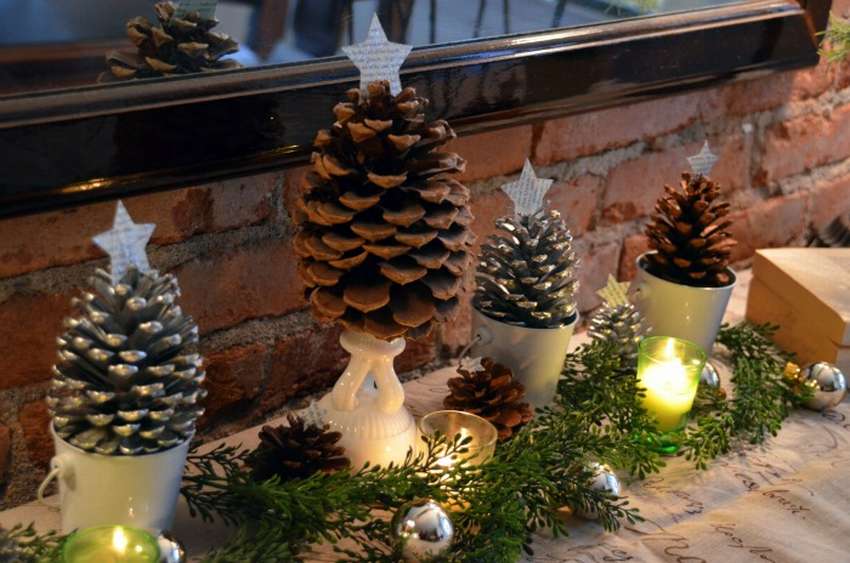 The decoration is very simple, but it small christmas tree of cones creates a truly unrivaled festive atmosphere. More precisely, the decoration consists of several cone trees resting in small children's pails. All the salt in decorating them paper stars. These stars are patterned from cardboard and pasted on both sides by pages of an old book. Having fixed the star at the top of the cone, sprinkle this structure lightly with glitter. So the brilliant decoration is ready - Christmas tree made of cones


https://i.expert-h.com/en/iz-shishek/delaem-derevo#sigFreeIde30971a1e4
Children's crafts tree of cones
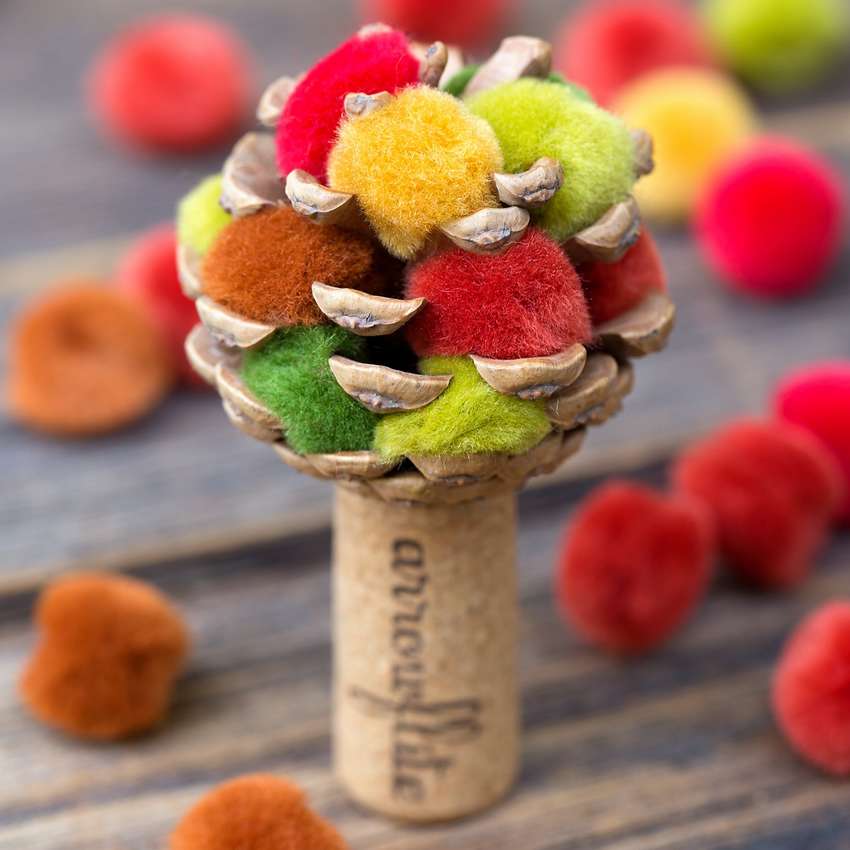 Not only adults, children of all ages will work on this craft with pleasure. The result is very beautiful, but everything is done easily, a lot of materials are not needed. The only time adults should obviously work is sticking cones to the cork. To do this, you need a glue gun, hot glue. The rest is all within the power and children.
To make a craft out of cones, you will need only three things: the main cones, dry and open, corks from wine bottles and small decorative pompons. Attract the children, invite the children to insert multi-colored pompons between the opened scales of the cones. You can them do not stick, then to change colors depending on the season.


https://i.expert-h.com/en/iz-shishek/delaem-derevo#sigFreeId1178485efe
Cones and Bark Tree
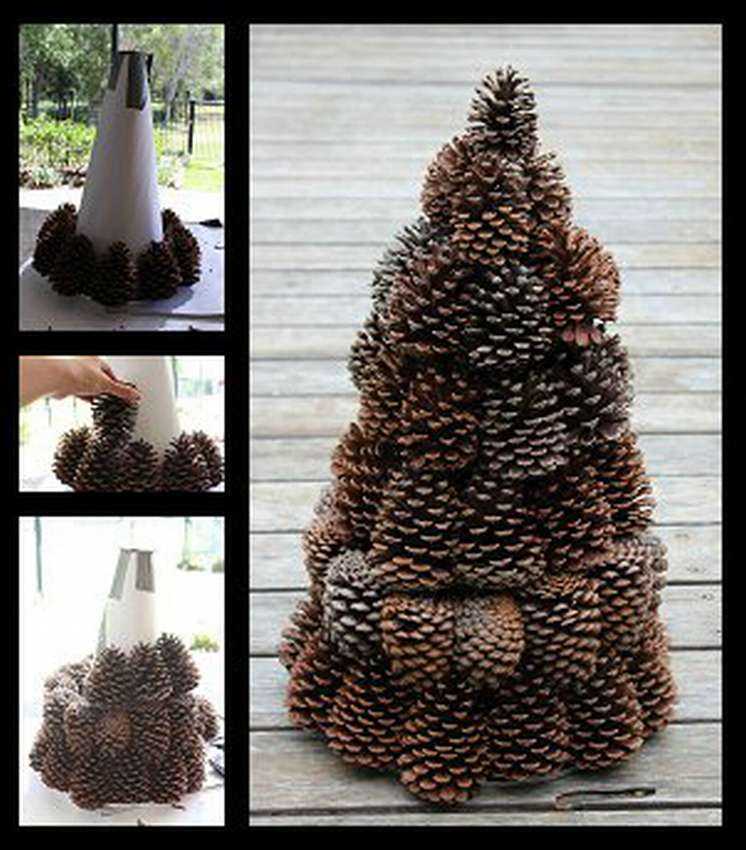
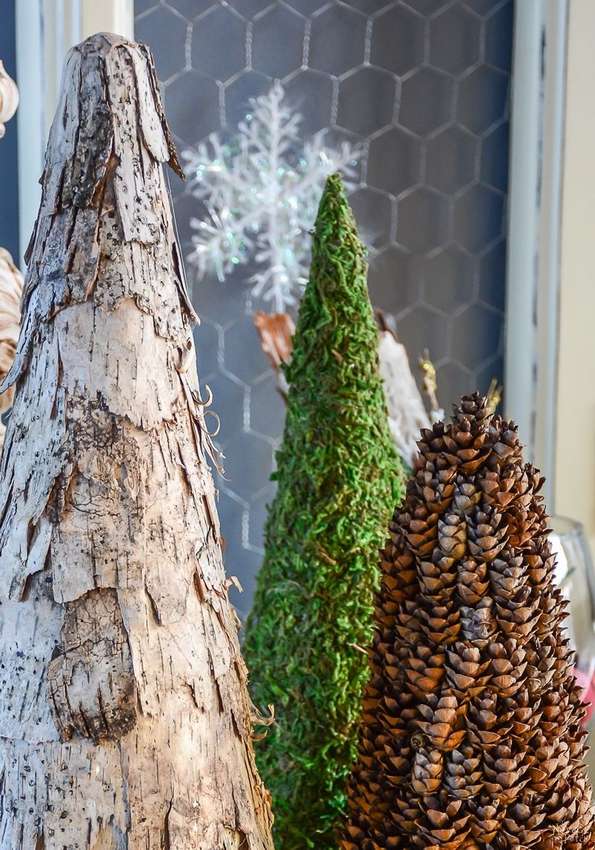 An attractive decoration for all lovers of home crafts. A suitable composition to create a small corner of nature at home. Also, cone and bark treesThis is a chic winter decor, and is done quite simply. From natural materials, collect cones and birch bark, and for the base, prepare several foam cones and more hot glue. The work process, in principle, is not complicated, although it will take some time.
- First, cones are glued onto one cone.
- Before this, the cone, if white, should be painted brown and wait until it dries completely.
- But even with a painted blank, the cones are glued so that there are no gaps.
- Birch bark will have to be broken into small pieces.
- Another cone is glued with these pieces, and you don’t need to paint it anymore, so this is an even easier option. White gaps among the pieces of birch bark look natural.


https://i.expert-h.com/en/iz-shishek/delaem-derevo#sigFreeId23eceb60af
Cones tree 50 photos


https://i.expert-h.com/en/iz-shishek/delaem-derevo#sigFreeId6f3837255f
Hello, I am the author of this article, so I look forward to asking questions for this article in the comments below, I will answer all !!!
If you have questions on another topic, ask them on our forum, we will answer you
- Two baskets of paper in 5 minutes (Master class)
- How to make a simple and compact table for a milling cutter from plywood
- How to make a soft headboard tile (Instructions + step by step photos)
- Cinder block benches: a convenient bench in 55 minutes
- How to make a bed with a niche: saving space (Master class)