Candlestick made of cones. Do it yourself + 300 photos
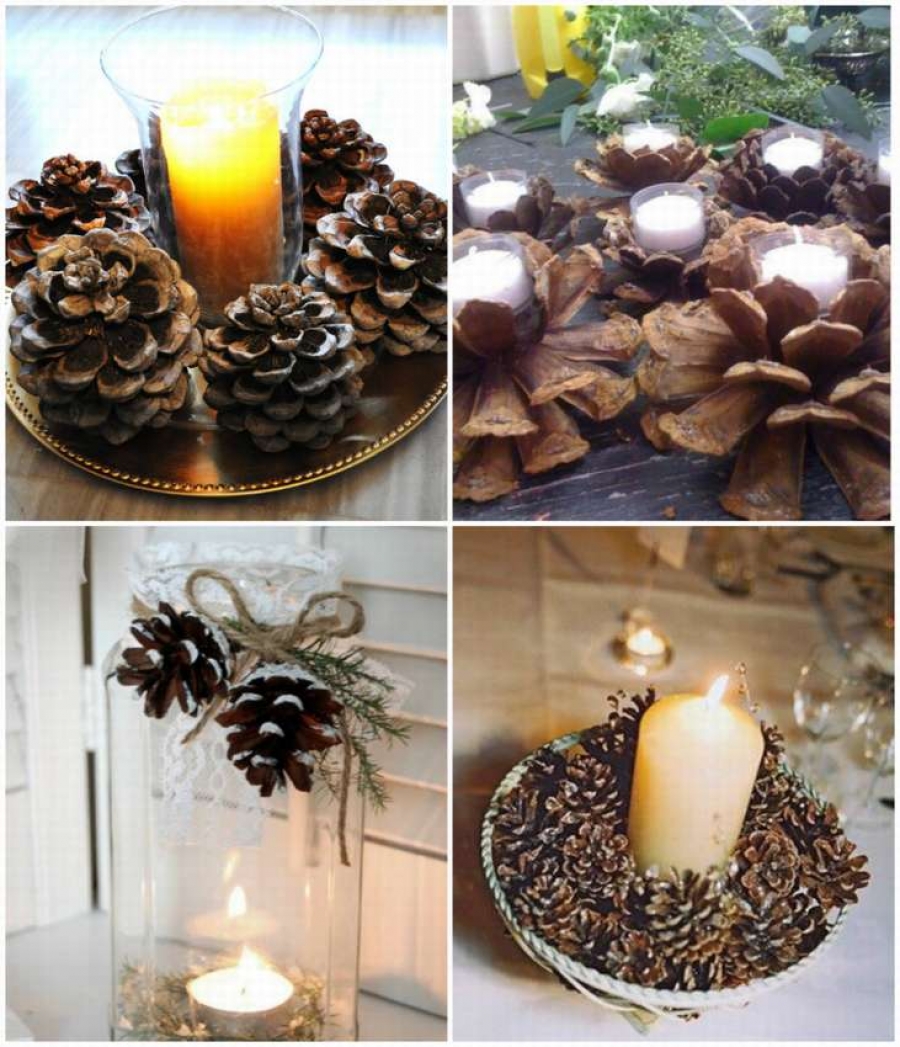 cone candlestick master class
If you want to know how to do do-it-yourself candlestick, here are 12 good examples with step by step photos. We all like the holidays and frost outside, when we want to curl up on the sofa with a cup of hot cocoa and look at the soft flame of candles. And bumps are a great material for decoration, which create a special atmosphere of coziness and comfort in the room.
You can decorate anything with cones, any thing decorated with them automatically becomes New Year's. Use the master classes presented here to make a candlestick out of cones for festive decor.
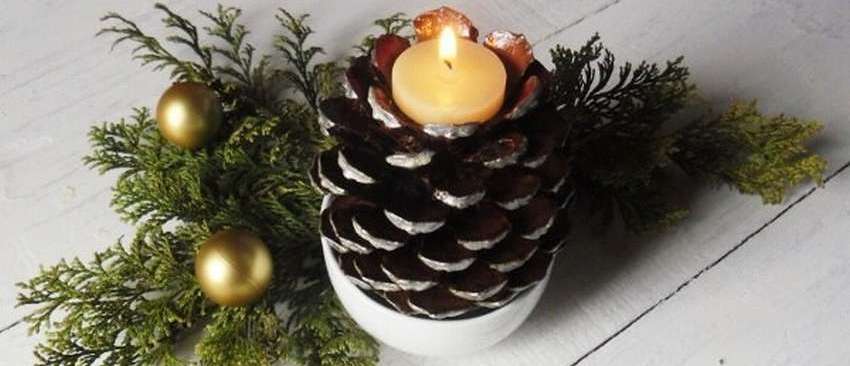
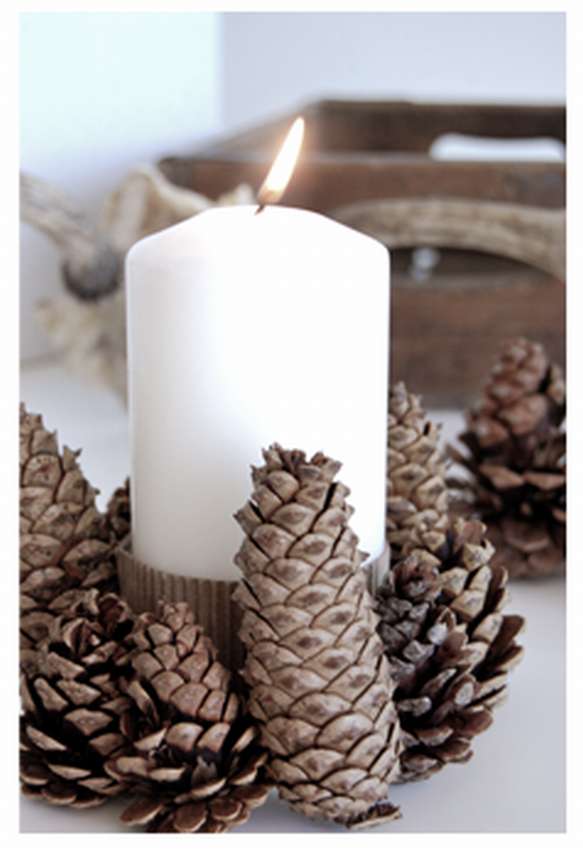
Pine cone candle holder
 Elegant candlesticks made of cones Perfect for home decoration. It will not take much time, but you will get a lot of pleasure, both from the process and the result of your work. In anticipation of the upcoming holidays, you will surely like this festive cone candlestick, which is very easy to do with your own hands. From materials, in addition to pine cones and candles, cook needle-nose pliers, it’s more convenient to “take apart” the cones with them.Just two simple steps to make a candlestick out of cones:
- Use a pair of pliers to remove the scales and align the top of the bump to create a flat surface for the candle.
- After that, apply hot glue to the even surface of the cone and fix the candle.
This is the easiest option, if you want to do it more reliably, you can use metal pin, (wire or sewing needle) that is inserted into the bump and a candle is put on it. It is also desirable to make a foil gasket - for safety reasons.


https://i.expert-h.com/en/iz-shishek/podsvechnik#sigFreeIdf4c1e94ba2
Do-it-yourself candlestick made of cones
 Bumps, this is a universal material for crafts. Only on this site you will find hundreds of ways to use them. Now we’ll look at an example, how to make a candlestick out of cones. The idea is simple, trim the top of the cones and use as a candlestick. But we need not just a candlestick, but beautiful and festive candlestick.
How to turn cones into fabulous flowers, you can read here, it shows how to make zinnias from cones. It is on their basis that you can make these beautiful candlesticks. However, detailed instructions can be found on the site, under the gallery there is a link. The craft is not complicated, you can easily figure out step-by-step photos.
There are just some nuances. For example, to fix a candle on glue does not work, hot glue does not stick on wax, and messing around with epoxy, hardly anyone would want. But you can use ordinary sewing needles. With the pointed end, slowly push the needle halfway into the center of the bump. And cut a small piece of foilTo make a gasket between the bump and the candle, an additional barrier will not interfere. Then slowly put the candle on the needle.
 After securing the candles, cut a small circle out of cardboard and glue it to the bottom of the cone, this is for stability so that the candlestick does not accidentally tip over. Or you can glue the cones on a long and narrow plank, which is also a good alternative.
And most importantly, you should never forget about it. Just remember that these are pine cones and they burn beautifully. Be responsible and never leave these candles unattended. Use cone candle holders responsibly and wisely.


https://i.expert-h.com/en/iz-shishek/podsvechnik#sigFreeId8e9828315a
Here is another example how to make a wonderful Christmas candlestick from cones with your own hands.
 The sequence of production, see the step by step photos.


https://i.expert-h.com/en/iz-shishek/podsvechnik#sigFreeIdb6f8d17a59
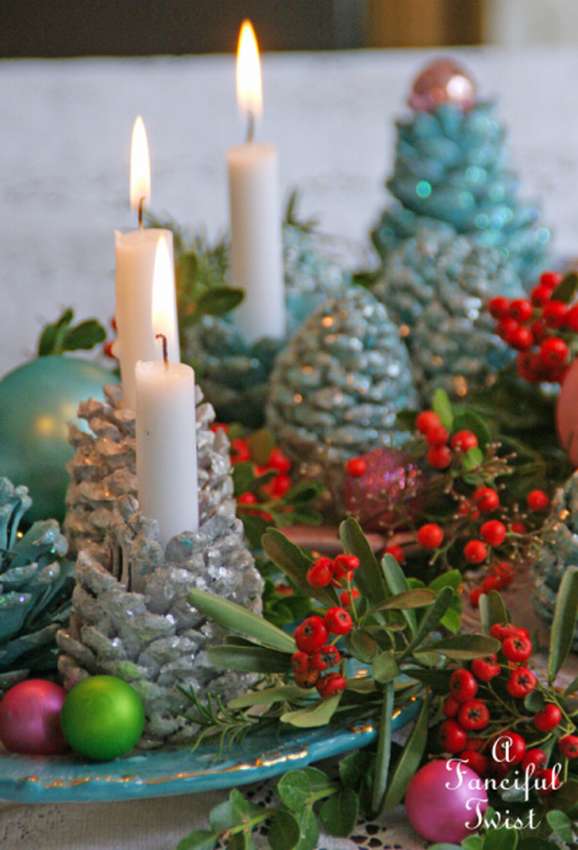
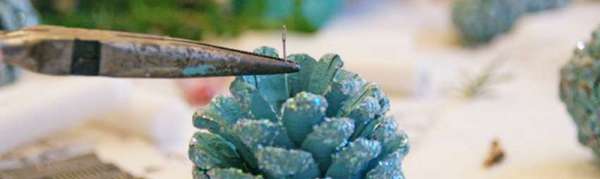
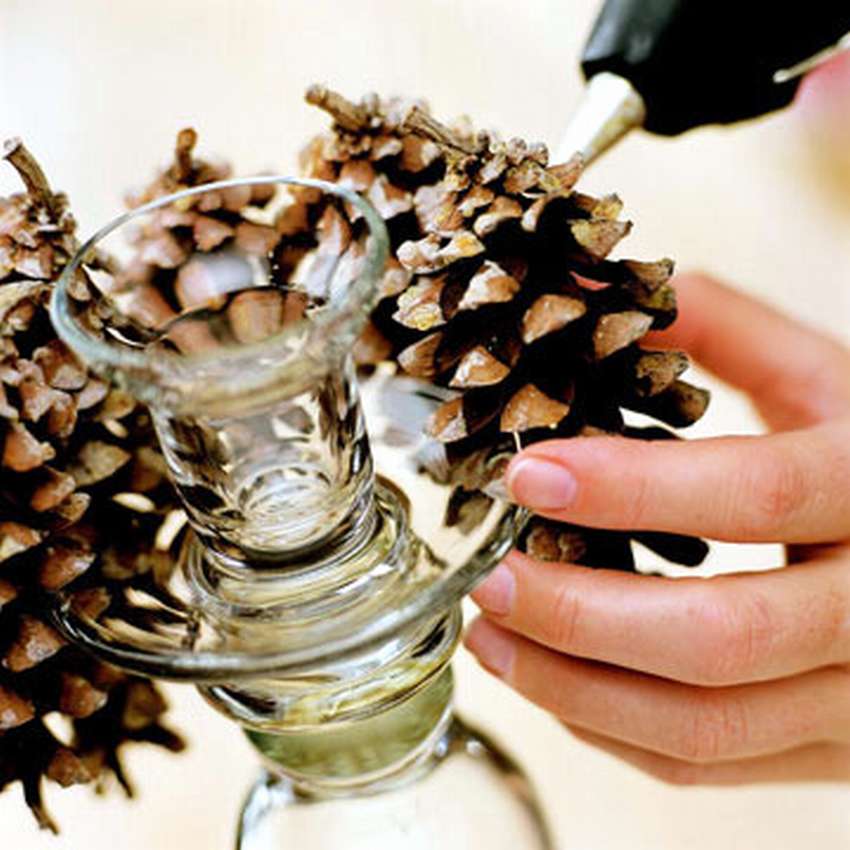
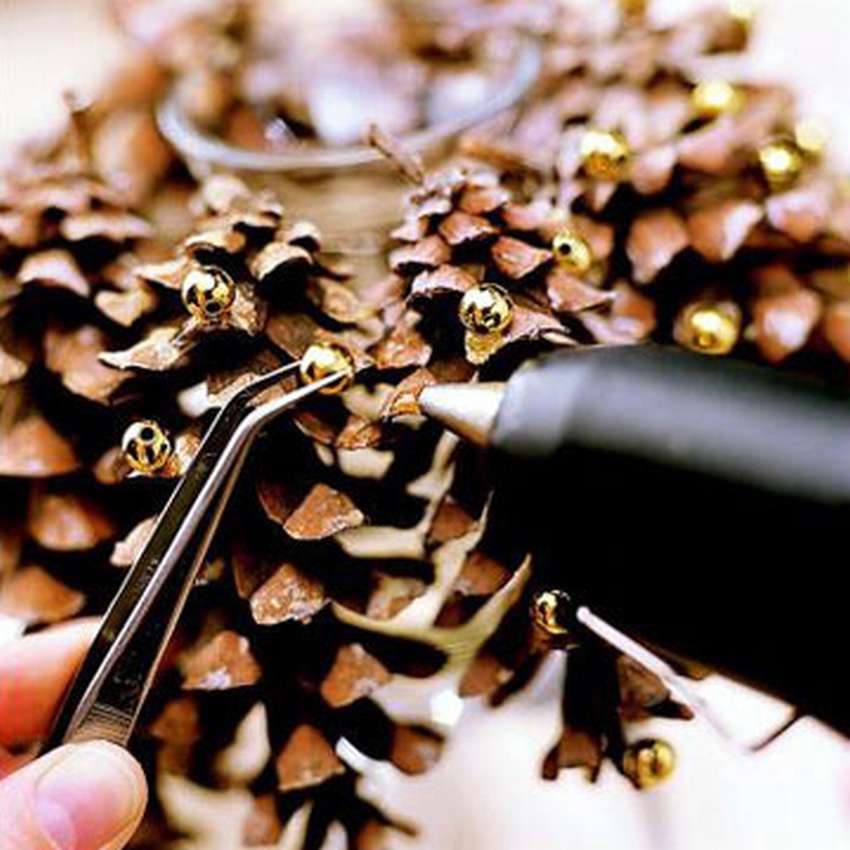
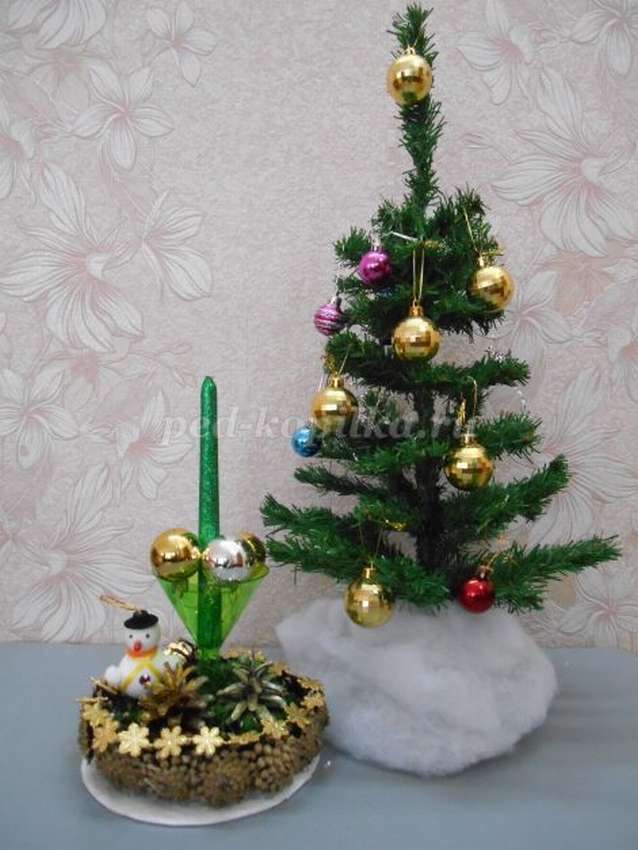
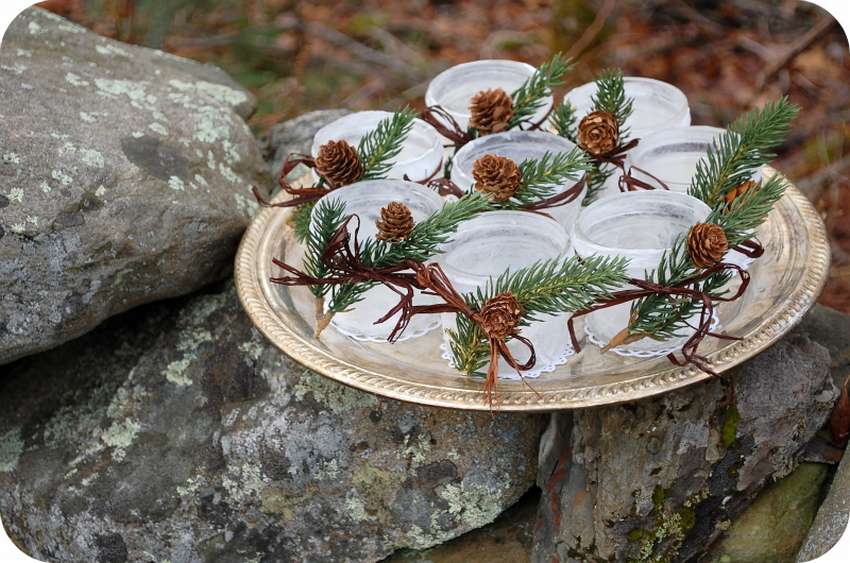
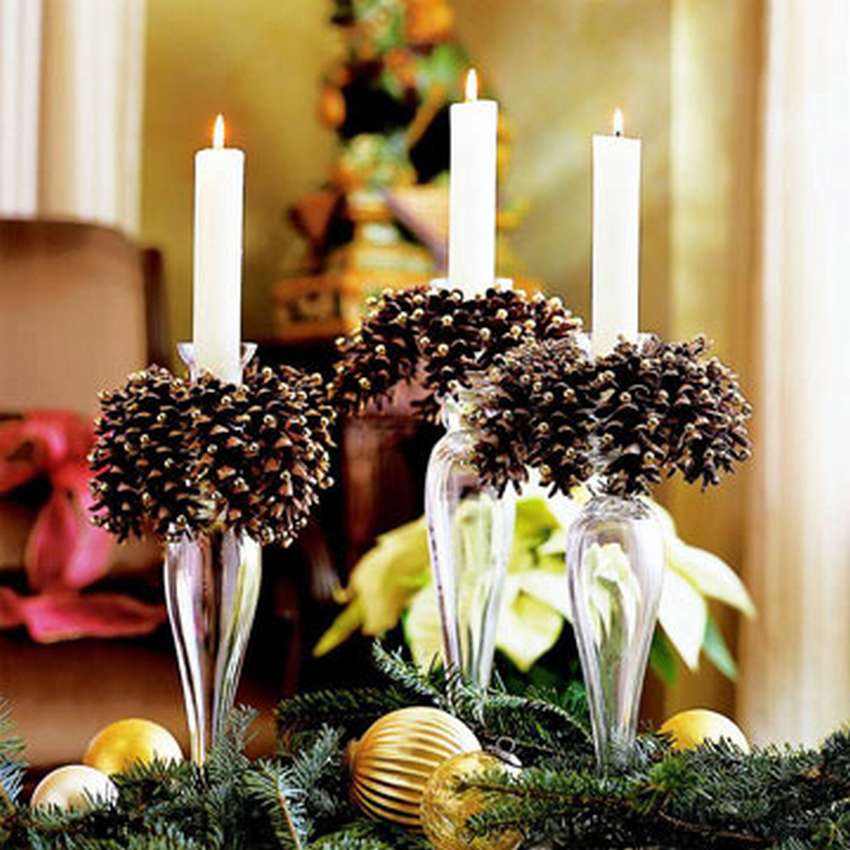 Decoration of cones for candles
Decorate your home, beautifully decorating candle holders with sparkling pine cones.
You can fix the cones by tying along the bottom edge fine wire and fixing with glue. Using tweezers, fasten the small shiny beads between the flakes by simply adding a drop of glue.
These amazing candle holders look very elegant on a coffee table surrounded by evergreens and shimmering golden balls.
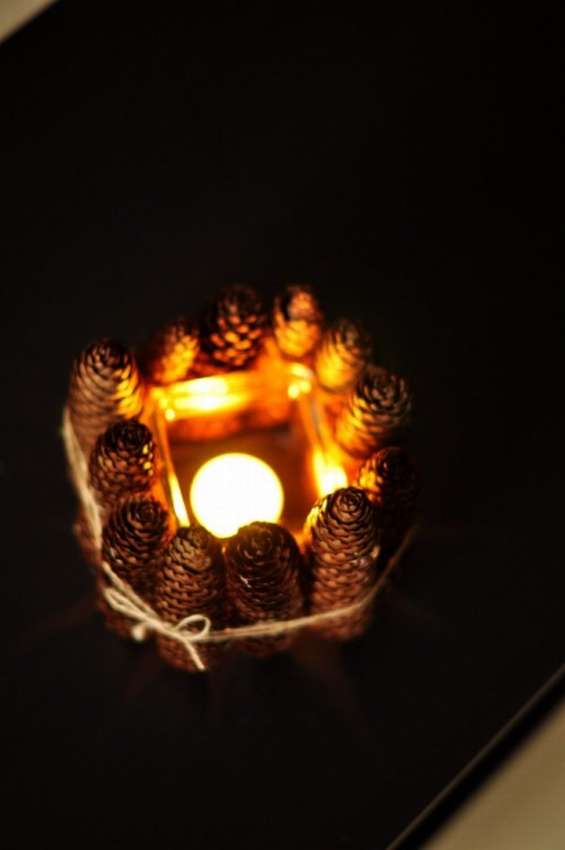
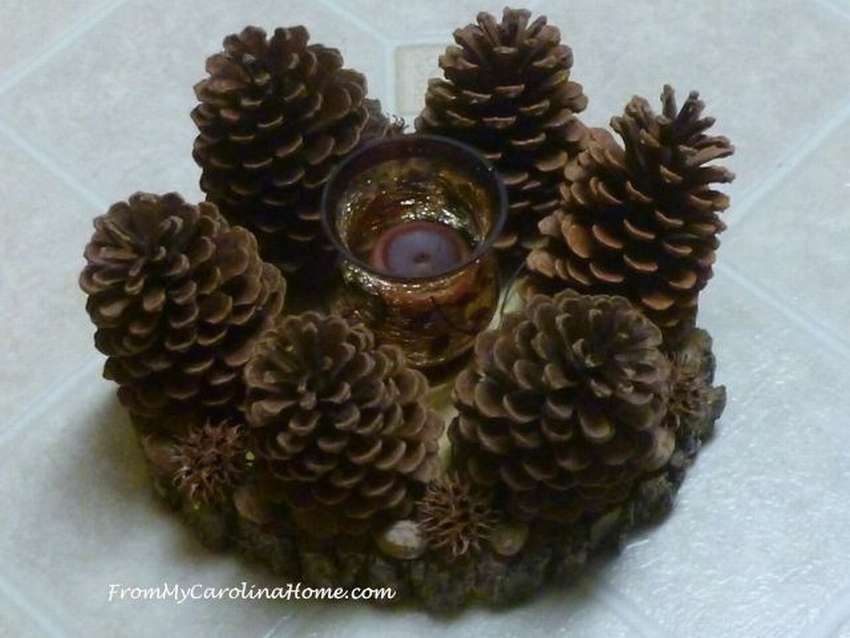
Candlestick from cones master class
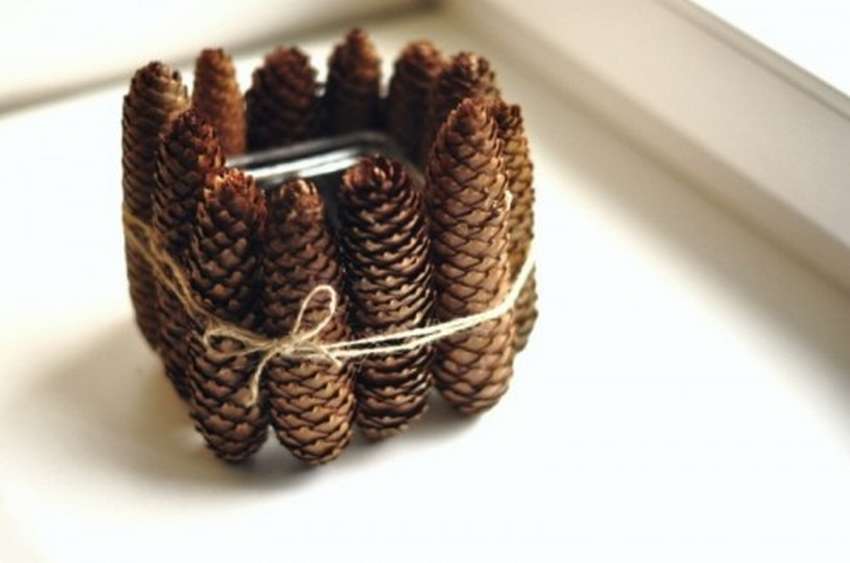 This is very simple cone candlestick, but it brings an atmosphere of simplicity and comfort to any room.
It is not difficult to do, the materials, as they say, are always at hand.
Just do not forget: such candlestick must not be left unattended. Dry withThe main cones of which it is made are excellent combustible material.
However, the decoration looks really beautiful, see for yourself.
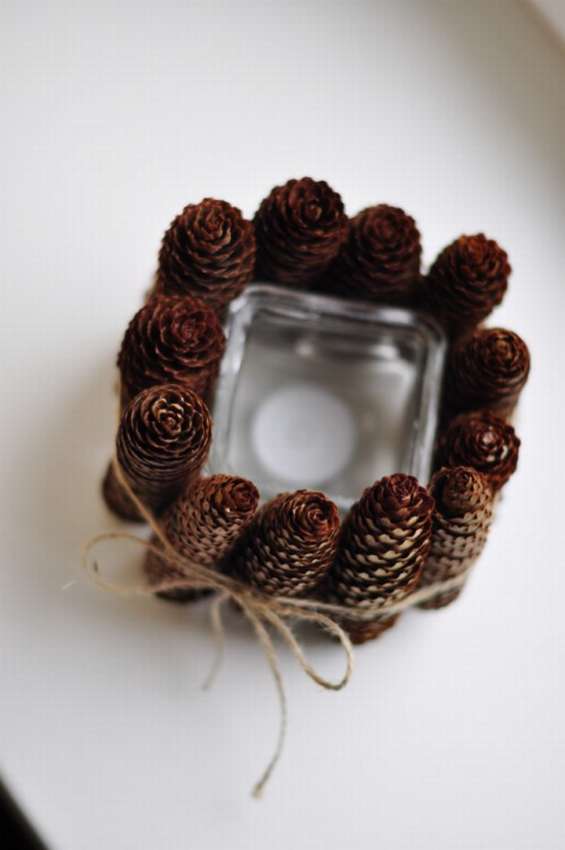
 Necessary materials:
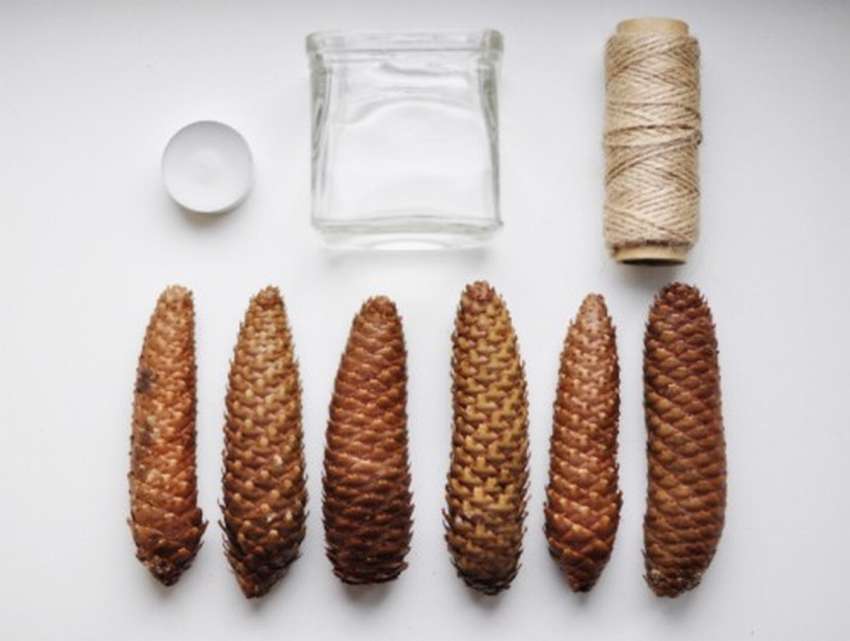 A small glass bowl;
- Double-sided tape or hot glue;
- Thin twine or any twine.
How to make a candlestick out of cones:
- Wrap the jar with double-sided duct tape, overlay with cones. Alternatively, cones can be glued to the jar with hot glue. Cones are better to pre-select approximately the same size.
- Tie with light twine from above, to give an underlined simple-looking appearance.
- Place the candle inside and you can light it to enjoy the result.


https://i.expert-h.com/en/iz-shishek/podsvechnik#sigFreeId75da6a22f9
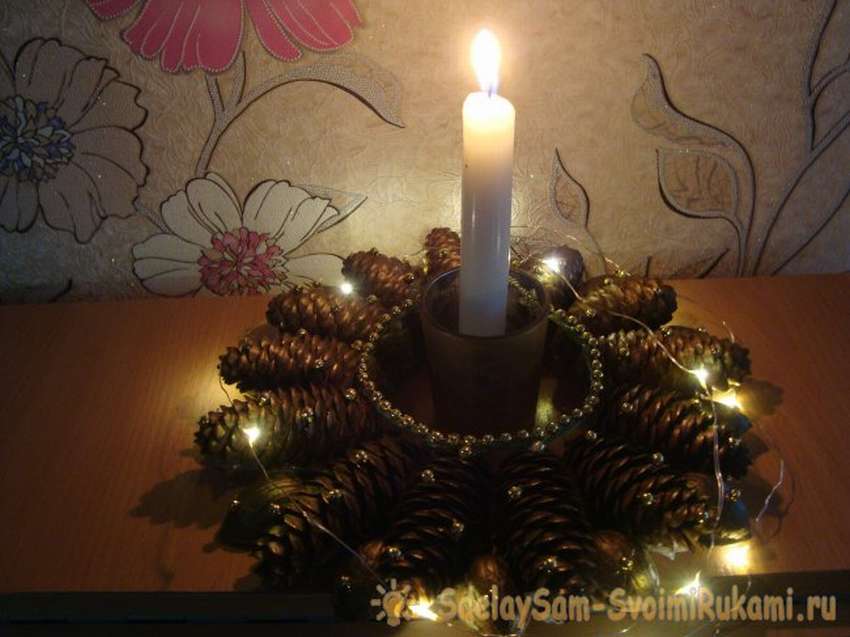
 Christmas cone candlestick
To use a glass as a basis for a candlestick is, of course, an original idea. In addition, the craft conquers with its simplicity. The main component is wreath of conesglued to a circle of cardboard. A glass is installed in the center and is also fixed with glue.
Next comes purely creative work. The center can be filled with fir branches, festive tinsel, set a couple more cones covered with varnish. Use any jewelry so that no one doubts that it Christmas crafts.
If something is not clear, under the gallery is a link to the site with detailed instructions. See below for step-by-step photos.


https://i.expert-h.com/en/iz-shishek/podsvechnik#sigFreeId7bca4edd79
 See another option christmas candle. In fact, this is not a candlestick, the candle itself is simply installed in a glass, but the idea is to make a beautiful wreath of cones, which will serve as a decor for the candlestick. In this article, we have already considered various examples of decor, this one is not more complicated than others. Glue cones on the cardboard ring, which can be pre-painted, or varnished and sparkled. Fill the gaps with walnut shells (an interesting solution!). Decorate the cones with beads.
That's all. However, the author of this craft wrote detailed instructions, if interested, you can read on the site. How to do christmas cone candlesee below for step by step photos.


https://i.expert-h.com/en/iz-shishek/podsvechnik#sigFreeIda8059fd928
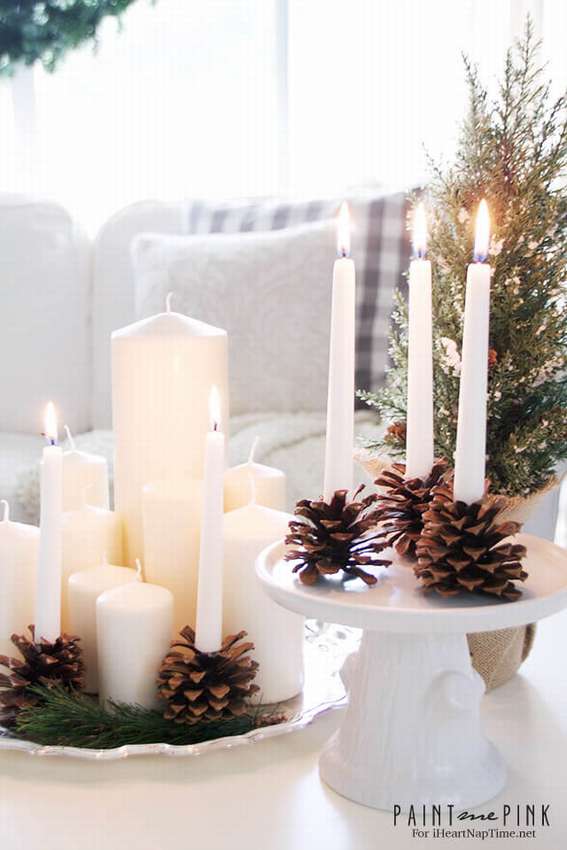
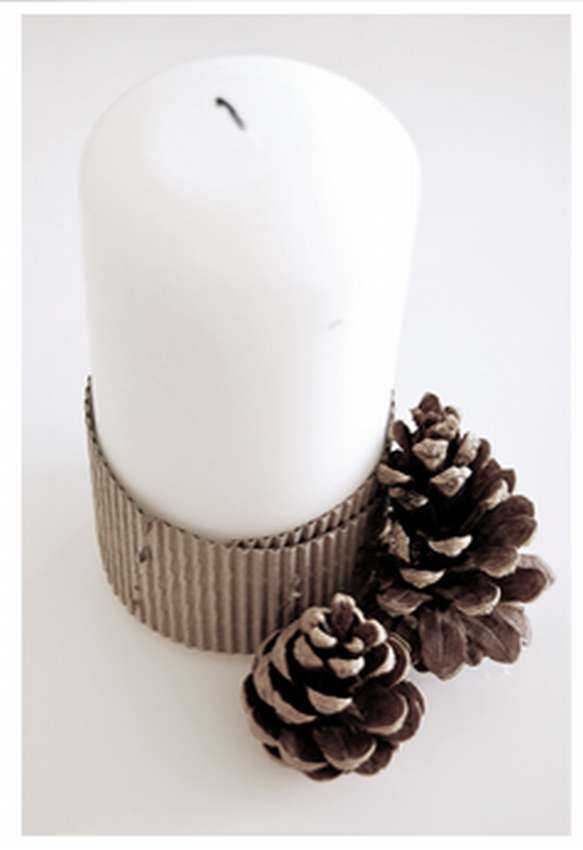
Simple cone candlestick
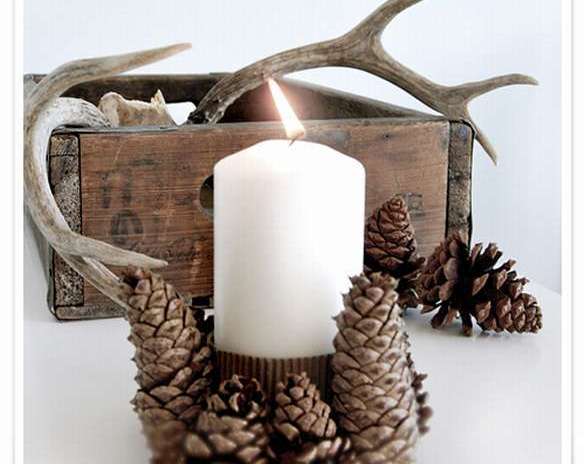 Start the week with something creative. How do you get the idea decorative cone candlestick, Just the theme of the upcoming New Year holidays.
Just glue the pine cones on a strip of cardboard, come up with some kind of stand and in a few minutes you will have a new candlestick for New Year and Christmas. Do not be afraid to use imagination, you can use any materials. Just remember, such decorative candle holders require constant attention.
DIY decorative candlestick
 This is not just a candlestick, but a whole composition of cones. If you like, you can try. Six pine cones form a beautiful ring around the edge of sawn logs. The space between the cones can be filled with some kind of decorative or natural material. Fallen leaves, moss, dry acorns are well suited for the autumn theme. Closer to the New Year holidays, decorate the candlestick with tinsel and artificial snow. Instruction how to make a candlestick out of cones with your own hands can be calculated on the site, see below a few step-by-step photos of the master class.


https://i.expert-h.com/en/iz-shishek/podsvechnik#sigFreeId0063f31beb
Candles with flowers from cones
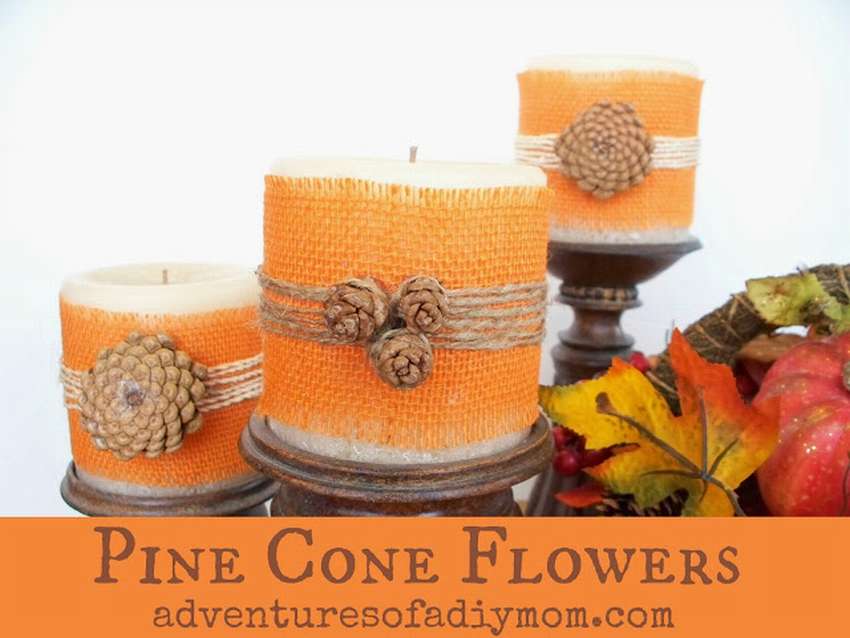 See how beautiful you can decorate candles with autumn decor. For work, prepare small cones, hot glue, twine and burlap.
This is what was needed just for this decoration, but you can use the elements that you already have. You may not have twine, but you have a leather cord. Use what is! Nothing is so pleasing than creating something new and creative without spending money on it.
Then do it like this:
 First cut the burlap and wrap it around the candle. Fix with hot glue.
- Then wrap the twine around the candle.
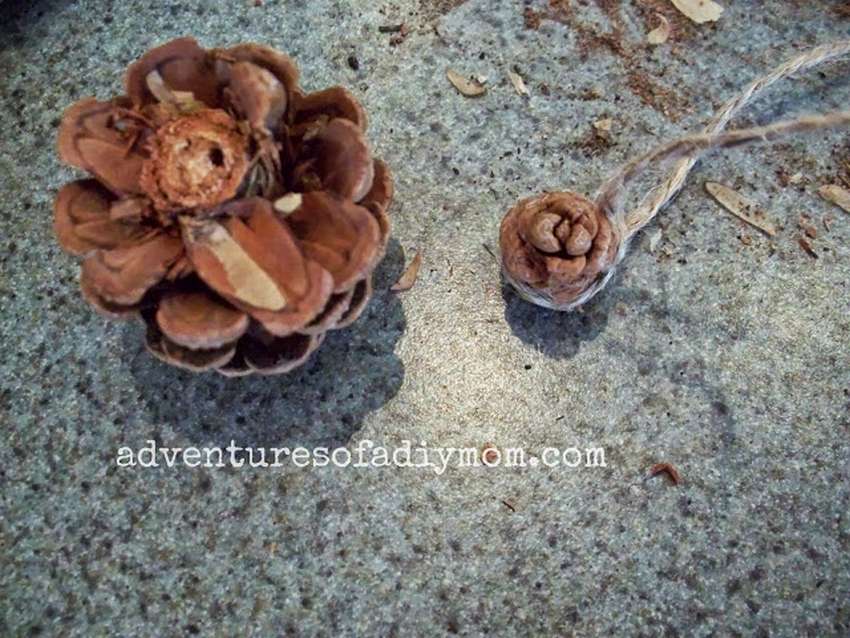
- Now make flowers out of cones. You will definitely need a small hand saw because you have to cut the bumps.
- The upper part of the cone resembles a flower, you just need to fix them on a candle. To do this, remove a few scales so that a small rod remains. Tie it with twine as shown in the photo.
- Then cut the twine and apply hot glue to the candle to fix the flower of the cones.
The decoration for the candles is ready.


https://i.expert-h.com/en/iz-shishek/podsvechnik#sigFreeIde8adb0d8a5
DIY luminaires
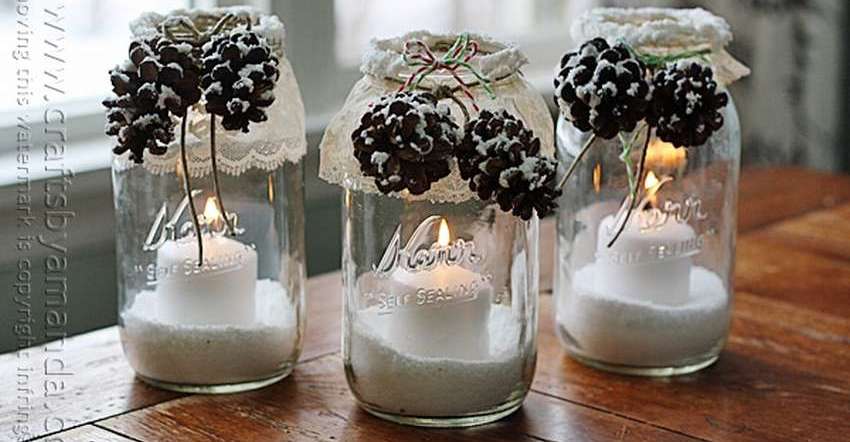 Make beautiful winter cone lightsas if covered with freshly fallen snow. They look great, perfect for the holidays, very easy to manufacture.
Such lamps will look great on the festive table, mantelpiece or window sill.
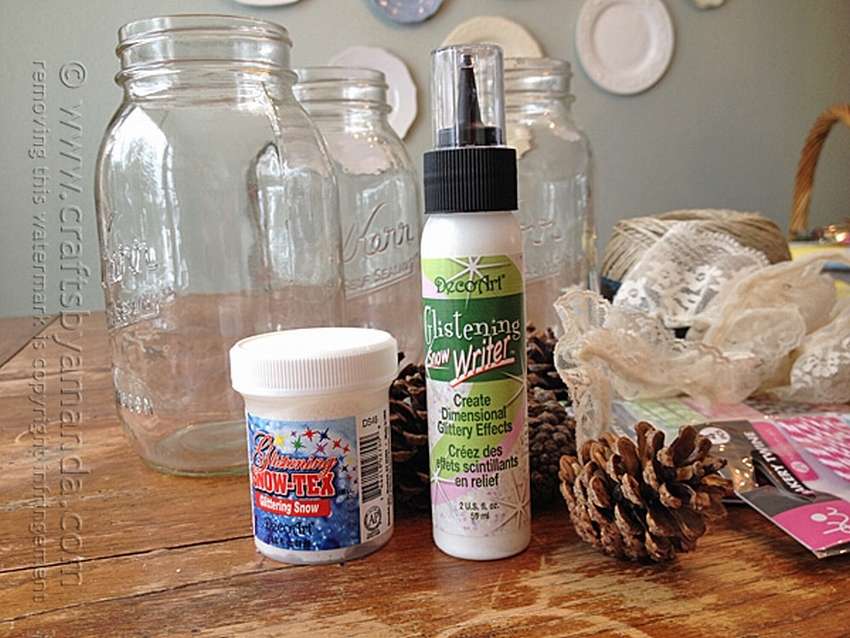
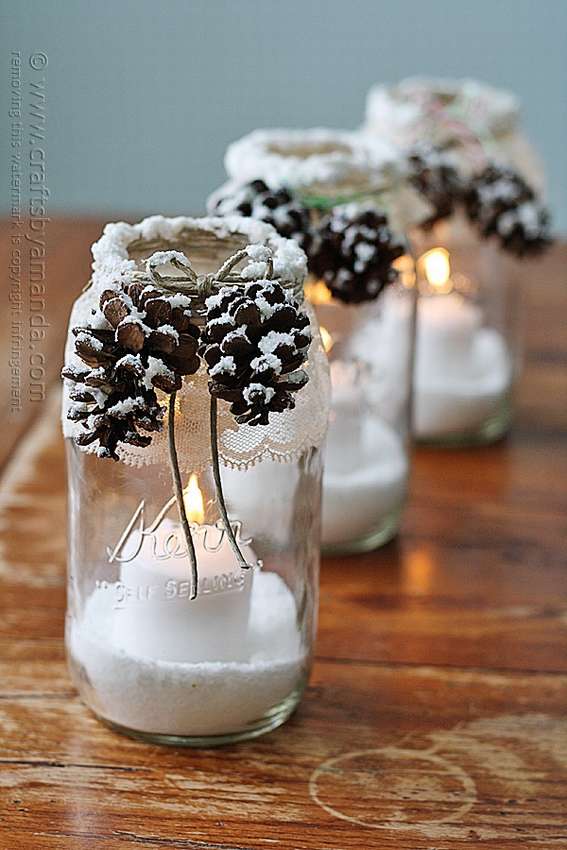 To make one lamp from cones you will need:
- Glass jar;
- Two bumps;
- Lacy napkin;
- Thin sturdy twine;
- Artificial snow;
- Epsom Epsom Salt;
- Candle.
There are two ways to make a similar lamp from conesand.
Option 1
- Start by covering the jar with lace and tightly tying the edges with twine.
- Tie the two bumps with the ends of the twine. Although you can just stick to the edge of the lace.
- Cones and edges of the can cover with artificial snow.
- Through lace, push a small amount of Epsom salt into the jar to cover the bottom about 2 cm.
- In the same way, fix a candle in salt.
 Option 2
The second option is fundamentally no different.
- Just first fill in the bottom with Epsom salt and fix the candle.
- Then the jar is covered, tied, decorated with cones and snow.
In both cases, the lamp is very nice.


https://i.expert-h.com/en/iz-shishek/podsvechnik#sigFreeIdb4453cedbc
DIY candle holder
 A candle reminds us of the warmth of a house, and a white lace paper napkin is the beauty of morning frost! Making a candlestick out of a can of cones is very easy.
Cut the napkin, cover the entire jar with glue and wrap the cooked napkins. Cut out the center of one of the large paper napkins and glue on the front of the can so that the inside light of the candle emphasizes lace design. Fasten the cones and twigs with ribbons.
This, of course, is a short version, you can read in more detail on the site, a link under the gallery. See below for step-by-step photos..


https://i.expert-h.com/en/iz-shishek/podsvechnik#sigFreeIdf460d02288
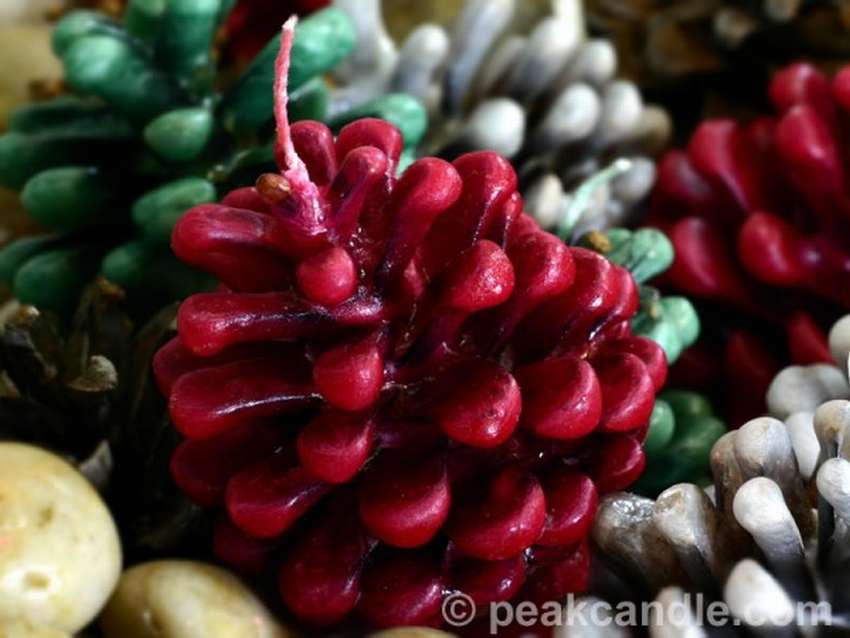
Fire cones
 Outwardly, they resemble candles from cones, but are intended for completely different purposes. This is a great tool for igniting fireplaces and stoves. Not only do they burn beautifully, but still burning, exude a pleasant aroma. Make cone burners quite simply and the process of making fire in the fireplace turns into an easy and enjoyable procedure. For celebrations, you must agree, given the attractive appearance of the product. Which one then lovely christmas decorwhen you put the basket with colorful cones near the fireplace.
To make you need: flakes of soy wax (paraffin); candle dyes; aromatic oils and cotton twine.
- Tie each cone with a cotton twine several times in a spiral, this will be a wick. Tie the end so that the tip remains about 10 cm.
- Melt wax or paraffin in a water bath, mix it with flavor and color.
- Holding the tip of the wick, dip cones into it in turn, putting them afterwards on a baking sheet to cool.
- Repeat the procedure 3-4 times until the paraffin layer is thick enough. The last immersion is best done in a more liquid wax, then the surface will gain luster.
- After cooling, cut the wicks, leaving about 1 cm for ignition.
If you want, you can attach it to ready-made firebolts cute shortcuts. Perhaps they will have short inscriptions with wishes if it is planned to use products for decoration. By the way, if your friends have a fireplace, then this is not a bad New Year gift.


https://i.expert-h.com/en/iz-shishek/podsvechnik#sigFreeId5d5e7f6093
 Or here's another way how to make fragrant pine fire cones. For use as decorative air fresheners, simply put in a basket on a shelf, table or by the fireplace. To use as a fire igniter, light the wick and place on the prepared place among the firewood in the fireplace. Do not try to light the wick like a candle, the whole bump will light up. Burn only in well-ventilated fireplaces or equipped fires.
Detailed instructions can be found on the website, link under the gallery. See below the master class on step by step photos..


https://i.expert-h.com/en/iz-shishek/podsvechnik#sigFreeIda4add0bcda
Candlesticks from cones 150 photos


https://i.expert-h.com/en/iz-shishek/podsvechnik#sigFreeIdb28db0a8b7
Hello, I am the author of this article, so I look forward to asking questions for this article in the comments below, I will answer all !!!
If you have questions on another topic, ask them on our forum, we will answer you
- Two baskets of paper in 5 minutes (Master class)
- How to make a simple and compact table for a milling cutter from plywood
- How to make a soft headboard tile (Instructions + step by step photos)
- Cinder block benches: a convenient bench in 55 minutes
- How to make a bed with a niche: saving space (Master class)