Do-it-yourself paper crane. Step-by-step instructions + 800 photos
 origami paper crane
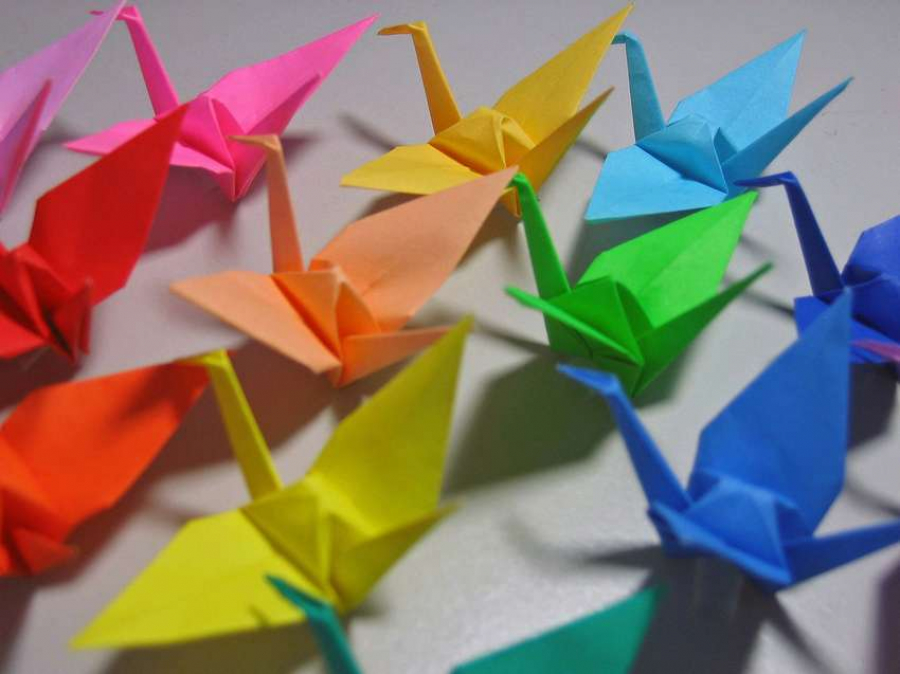
If you ask any person what he knows about origami, then usually the first thing that comes to mind is paper cranes. On the Internet you will find hundreds of instructions, how to make an origami paper crane. To facilitate your task, the article contains 25 best examples with step-by-step photos and links to the source.
In fact, almost all paper cranes are folded according to one scheme, based on the basic form of the origami Bird. But each model presented here has its own differences and features. There are original options, for example, paper crane with flapping wings or a paper crane with legs. Browse all the models and choose which one you like best.
How to make a paper crane step by step
 Paper cranes - This is an origami classic, popular all over the world thanks to the Japanese legend that whoever makes a thousand origami cranes will fulfill any desire. But before you make a wish, you must learn to do do-it-yourself paper cranes. For this project you will need 1 square sheet (preferably origami paper) and nimble fingers. If you have any problems with the below step by step photos, please watch the video and re-read the instructions on the site. Good luck I hope you will enjoy!


https://i.expert-h.com/en/iz-bumagi/1156#sigFreeId42210378e2
How to make an origami paper crane
 For some paper cranes may be the first origami model to learn how to fold. This is not surprising, for some reason, this nominal paper craft for many people is associated with origami. So that your first paper crane may be a prerequisite for more advanced models. You can use any type of paper, but it will be a little easier if the front and back sides are slightly different, whether it is texture or color. How to fold do-it-yourself paper crane See below for step-by-step photos.


https://i.expert-h.com/en/iz-bumagi/1156#sigFreeIdc4e32a6c23
Origami Crane Step by Step for Beginners
 This step-by-step guide can serve as a good guide for those who want to master the origami technique. You can learn by example how to make an origami crane out of paper. There is no need for previous experience to follow this guide (although it will certainly help). All you need is a few square sheets of paper and flat surface for work. Or a few rectangular sheets of paper and scissors. Note. Small paper sizes mean more complex folds, so the ideal size is 22 x 22 cm. You may also need a ruler or straight edge to help with creases, but this is not necessary. In step by step photos there are no schemes and designations accepted in origami, this is just a visual aid. If you have any questions, read the detailed instructions on the site. Try to practice with paper of different sizes and colors.


https://i.expert-h.com/en/iz-bumagi/1156#sigFreeIdc633c41b58
Origami crane made of paper diagram.
It's classic origami crane model, a feature here is the unique shape of the wings.
 For this model you will need a sheet of square paper. The sheet used here size 20 cm x 20 cm. If you are familiar with this model, you can try smaller paper.


https://i.expert-h.com/en/iz-bumagi/1156#sigFreeId98c0fc6b63
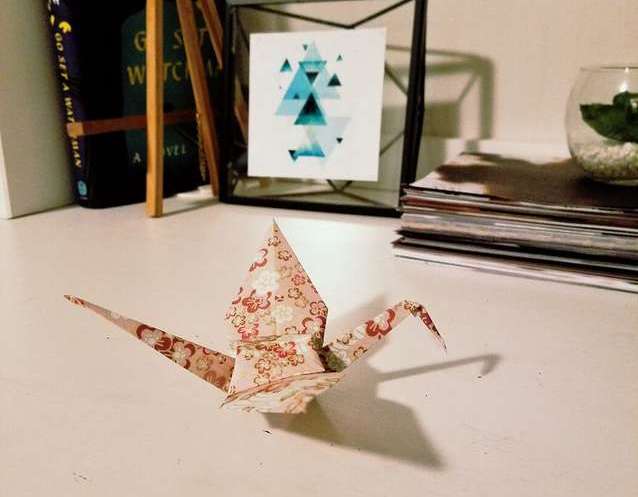
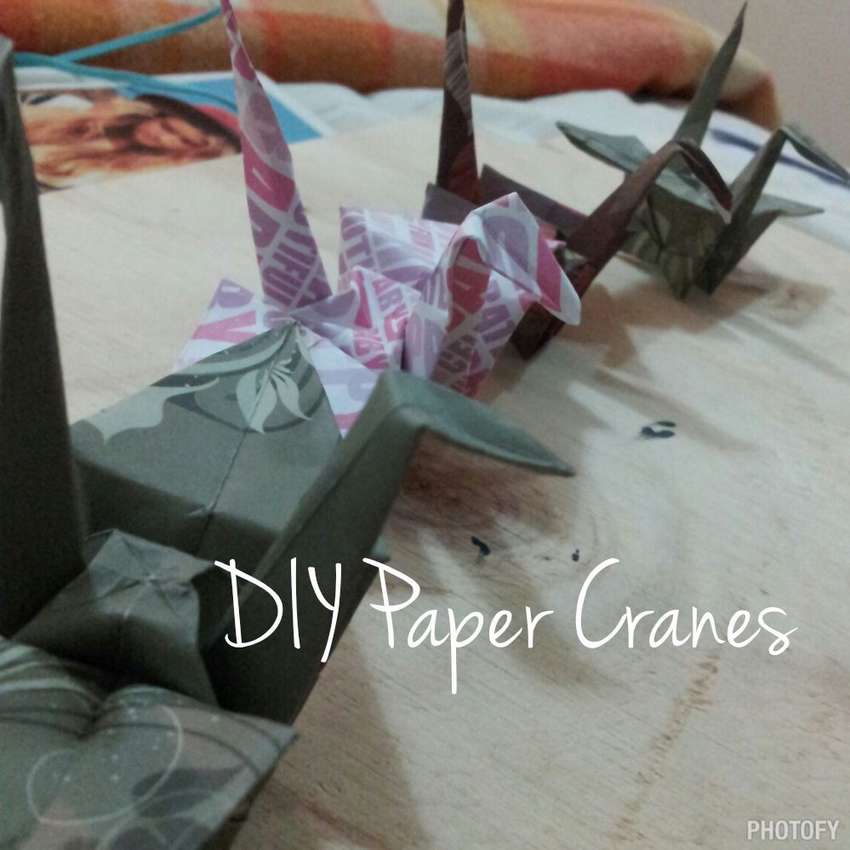
How to make a paper crane
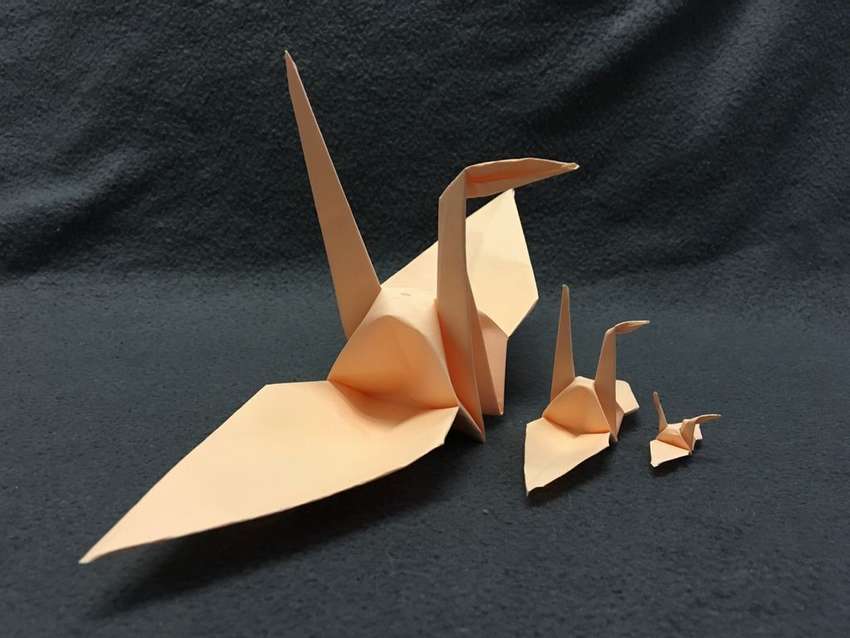 These cute little paper cranes are the perfect project when you have nothing to do. They are easy and quick to fold, you can decorate with different colors and add decor from improvised materials. The craft is great for all ages. Do some paper origami cranes to decorate a room or present at a party to your friends. Cranes look especially wonderful if you make a collection of different colors, models and sizes. The only material you need is this is a square sheet of paper. You can make different sizes, just remember that the smaller the crane, the more difficult it is to fold.


https://i.expert-h.com/en/iz-bumagi/1156#sigFreeId3d954256e9
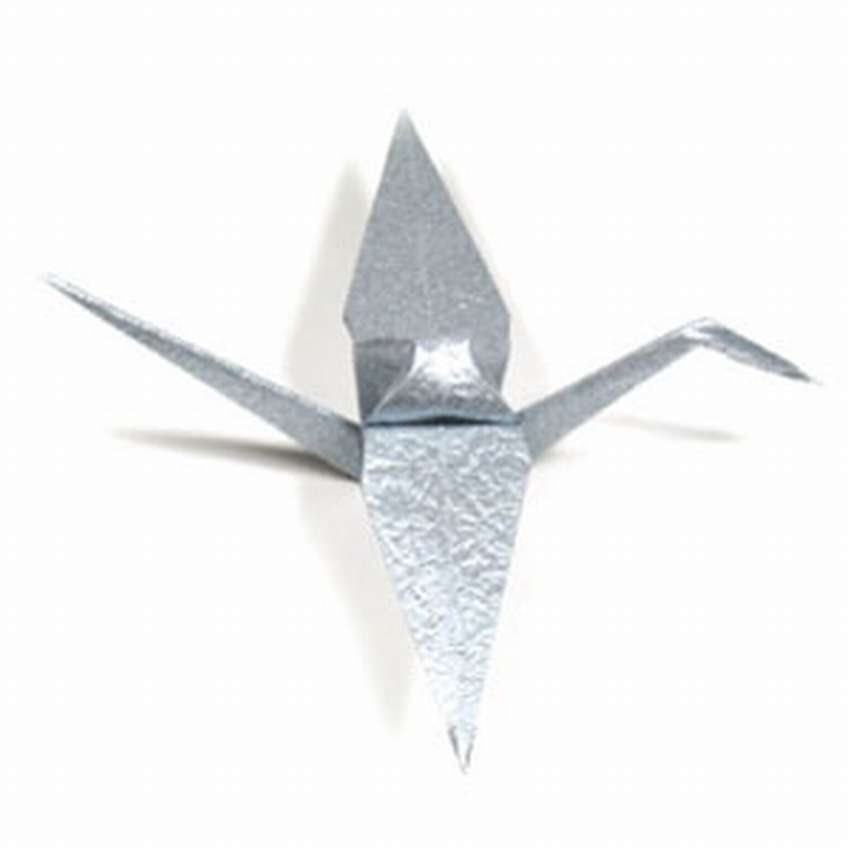
Lightweight paper crane
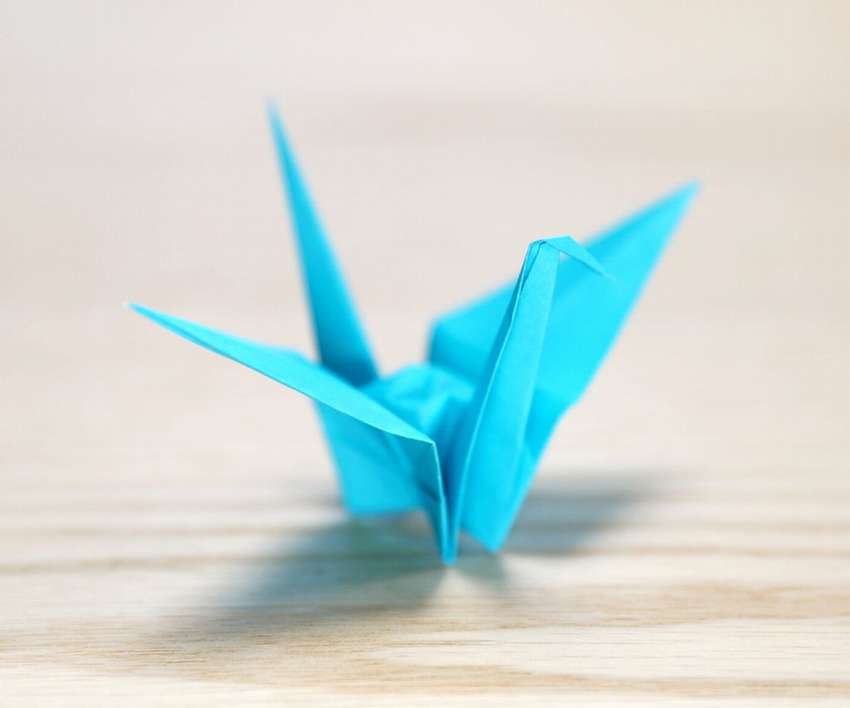
 Here you can find out how to make a classic origami crane. Although a few examples have already been shown, in this case the technique is a little different. The author of this craft personally studied this origami technique in Japan and wants to share his experience. It takes 3 to 10 minutes, depending on the experience and skills of working with origami. The materials are ordinary, it's a square sheet of paper. If you have problems, you can watch a 5-minute video on the site. Pay attention to the final stage. The bottom of your crane should be holethrough which you will make the body voluminous.


https://i.expert-h.com/en/iz-bumagi/1156#sigFreeId11ff5bd3d6
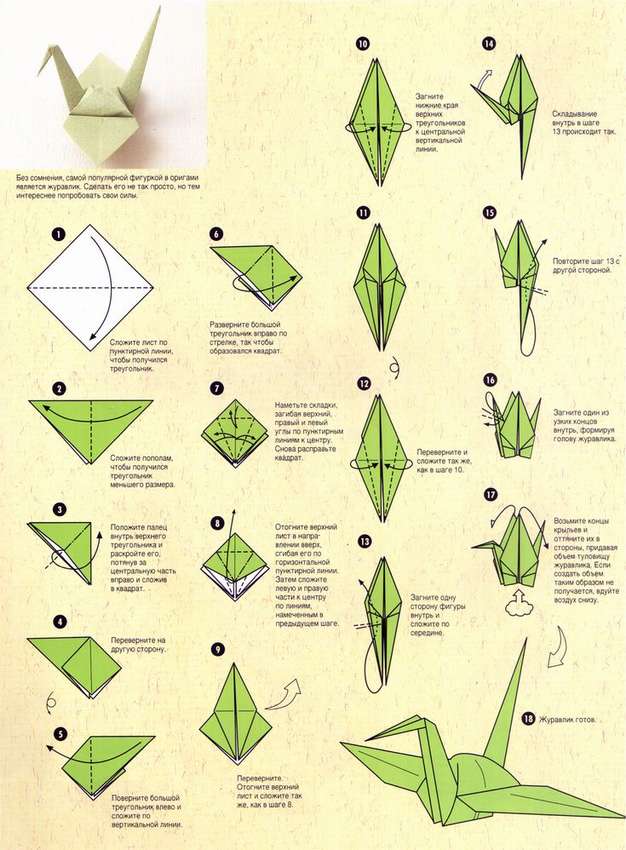
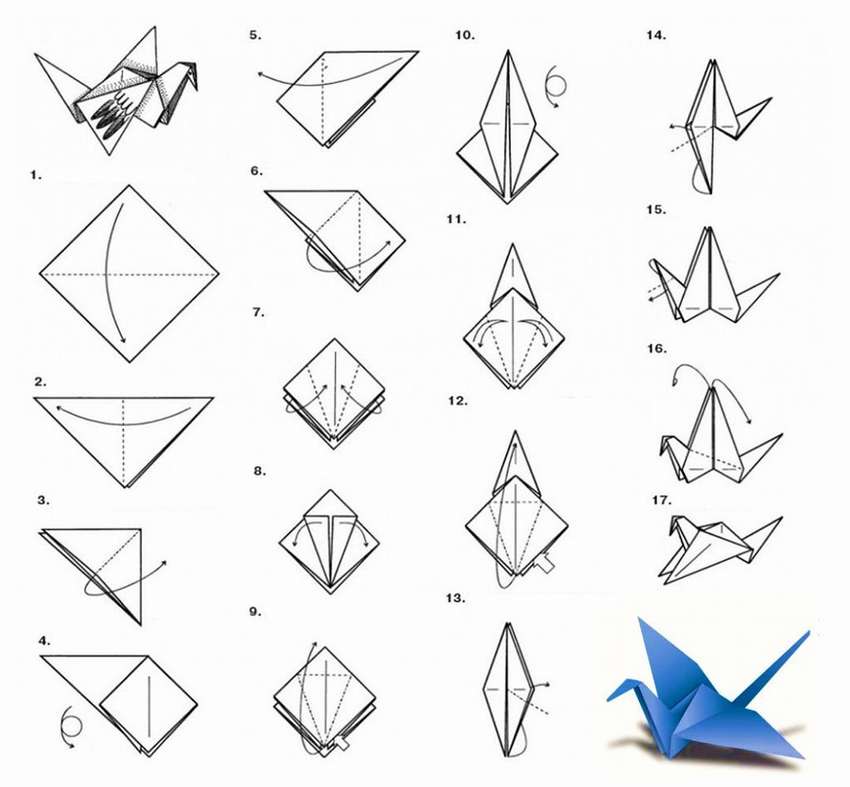
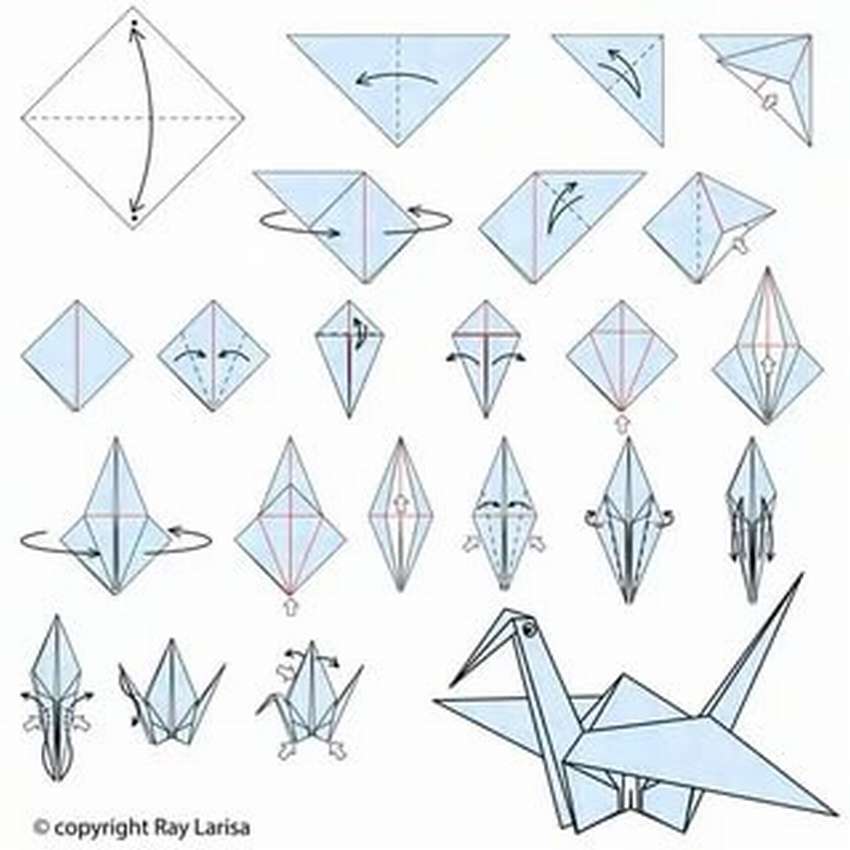
Origami paper crane step by step diagram.
 Like most other models, it is used here basic form "Bird". A special folding technique thatYou must know that fold the origami crane, this is an asymmetric squash fold. Of course, not the easiest craft, as you will see in the diagrams below, there are a lot of direct and reverse folds. Therefore, to find out about all the nuances, read the instructions on the site.
At the expense of the inscriptions on the diagrams. Fold mountain - fold mountain fold valley - the fold of the valley, these are the basic folds of origami, which are best known in more detail.


https://i.expert-h.com/en/iz-bumagi/1156#sigFreeIdbcb4353137
Origami paper crane


https://i.expert-h.com/en/iz-bumagi/1156#sigFreeIda95aec02e6
Origami paper crane
If you have a sheet of any paper, square or rectangular, scissors and two hands, then you can easily fold paper crane.
 Remember, each model will be different, and if it does not work out for the first time, it's okay. Origami is an art and requires little practice.


https://i.expert-h.com/en/iz-bumagi/1156#sigFreeId598d1fa191
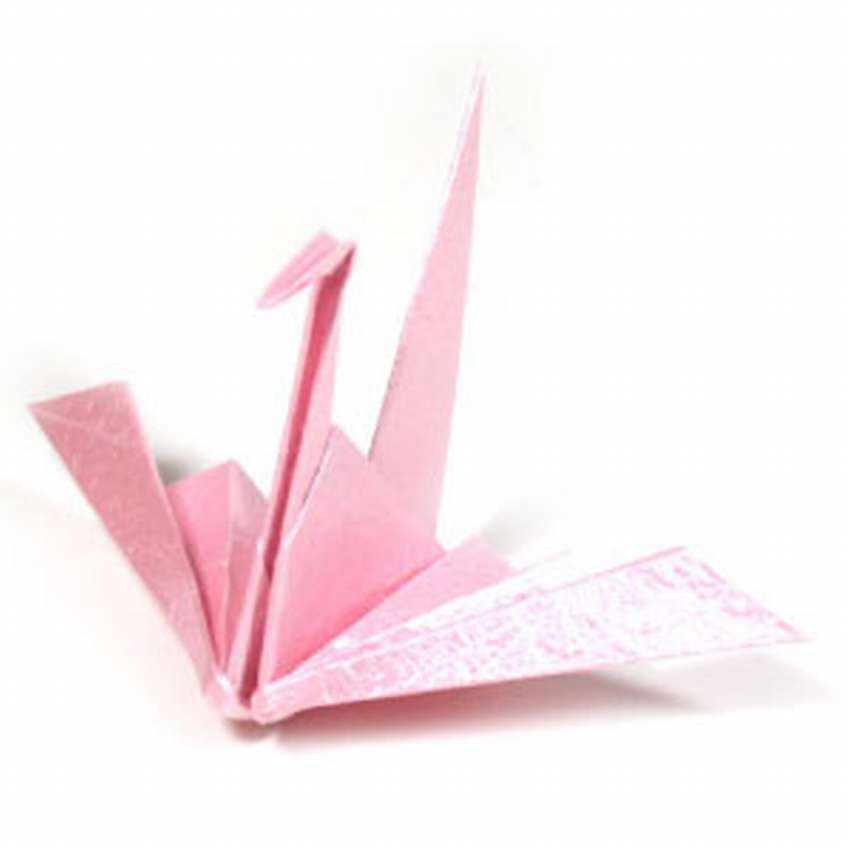
Paper crane in stages
 This origami crane is different from traditional patterns. The main difference, the usual basic bird form is not used here, cup-shaped model. As you can see, a paper crane turns out to be a little slimmer than a traditional one. Although this model is a little more complicated, but if you have at least a little experience in origami, then there should be no problems. It uses a square piece of paper 20 cm x 20 cm, which is a good size for beginners. If you are confident in your experience, you can take a smaller size.


https://i.expert-h.com/en/iz-bumagi/1156#sigFreeId47e7a654a8
How to fold a paper crane
 Walkthrough showing how to fold a standard paper crane. Although the step-by-step photos are very detailed, but if you are collecting the origami crane for the first time, be sure to read the instructions on the site. It's just that the model is made of thick paper, so there are some nuances that you need to consider when you are folding origami crane. Although fundamentally from the above models is no different.


https://i.expert-h.com/en/iz-bumagi/1156#sigFreeIdffd16b9084
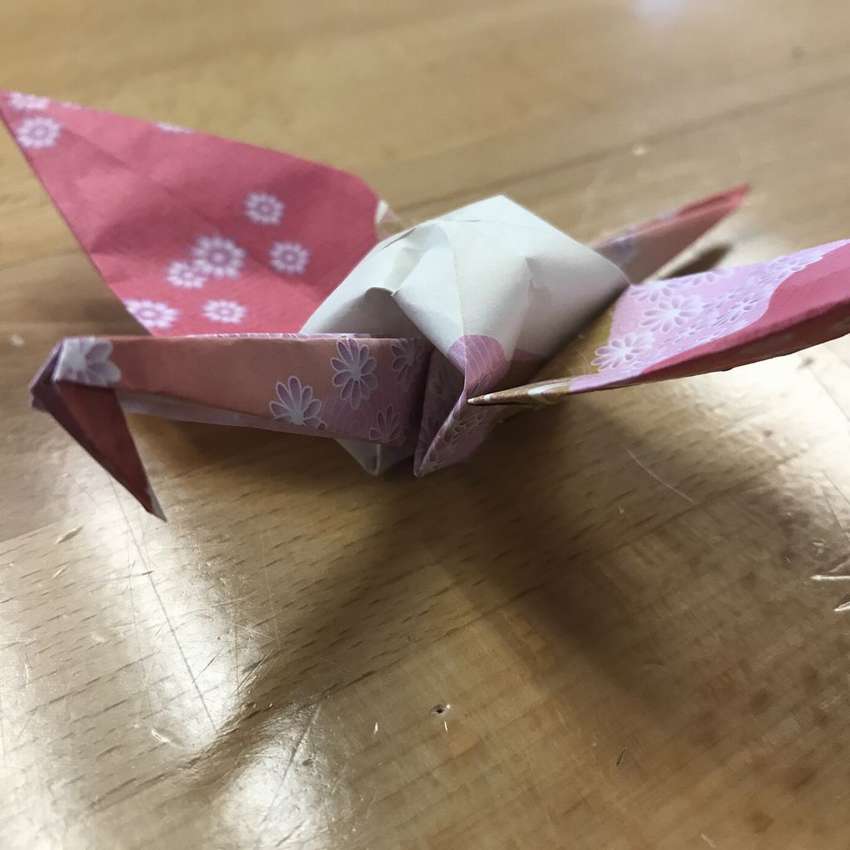
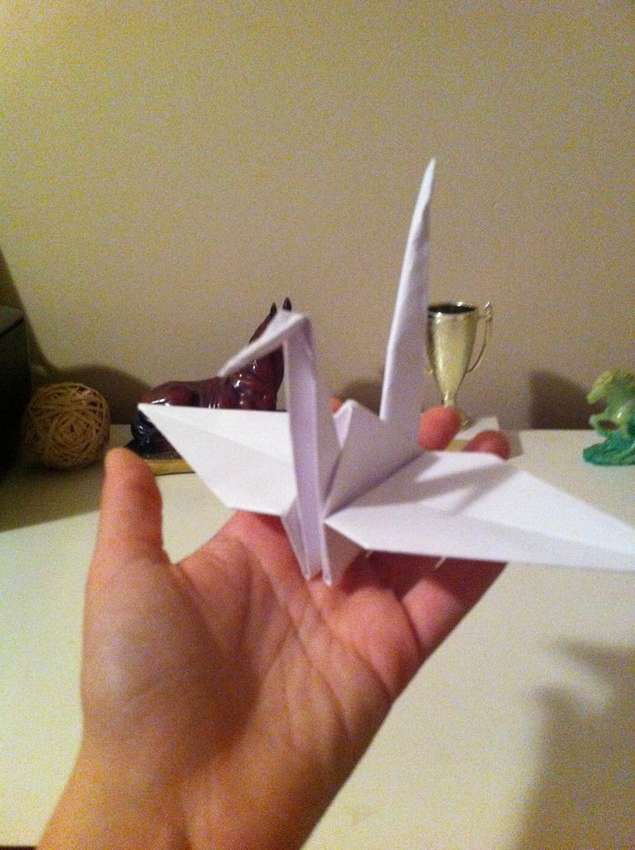
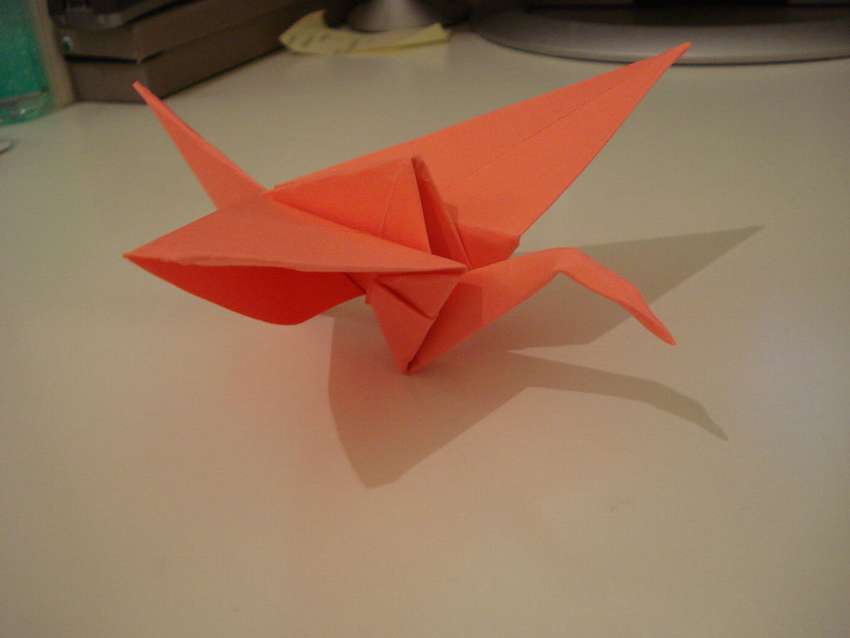
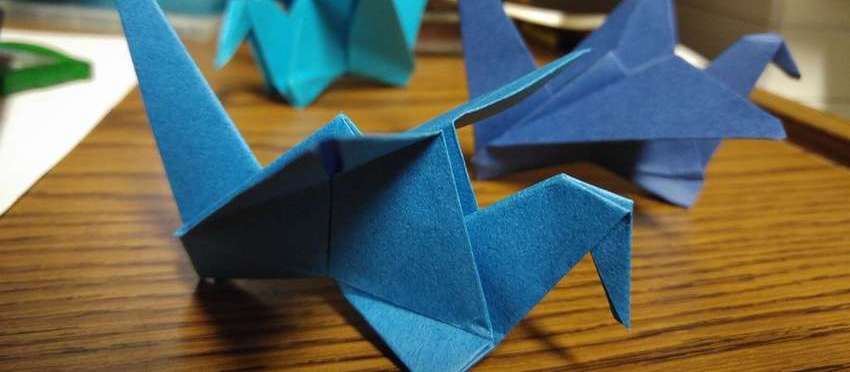
Paper Crane with Flapping Wings
 Three examples are shown here.. In the first version, the paper crane resembles a standard model, however, the design is significantly different. If you hold correctly and pull the tail slightly, then you will see that the crane comes to life. You might think that such a craft is hard to put together, but in fact it’s easier than doing an ordinary one. paper crane. The most difficult part where you need to pay attention is the location of the wings. In addition, we must learn to hold the model correctly and stretch the tail so that it does not recline. Do not worry, everything can be learned. Just do what you see in the picture.


https://i.expert-h.com/en/iz-bumagi/1156#sigFreeId7b0423763e
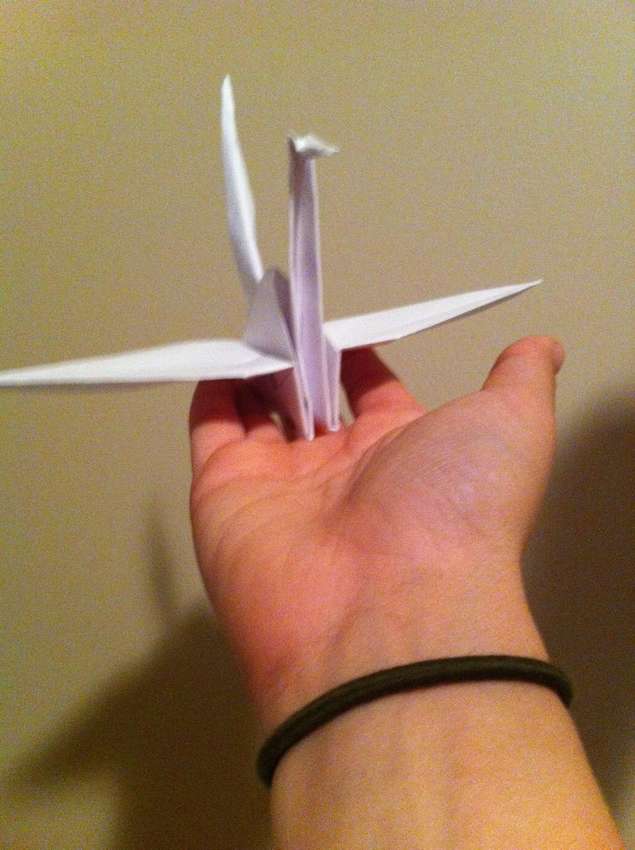
 This is another option how to make a paper cranethat can flap its wings. It looks like the model presented above, but the “waving” mechanism is still slightly different. All you need is a sheet of paper and scissors if your paper is not square. Please note that thick paper for cards was used for this project, so if you use plain paper, crane movements will be smoother. To make your bird fly better, open the back lower layer of the wings. Hold the crane as shown in the photo. Caution pull the tail out and the wings will drop.


https://i.expert-h.com/en/iz-bumagi/1156#sigFreeId35ce70a035
A third example of a flapping winged crane.


https://i.expert-h.com/en/iz-bumagi/1156#sigFreeId3f9b2e5a5d
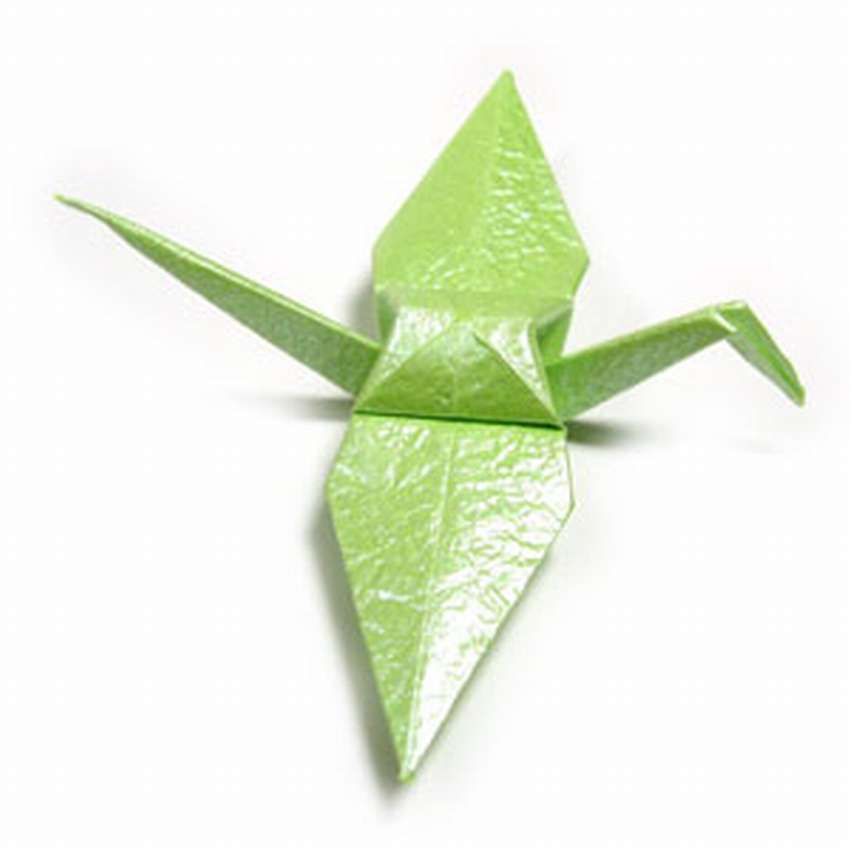
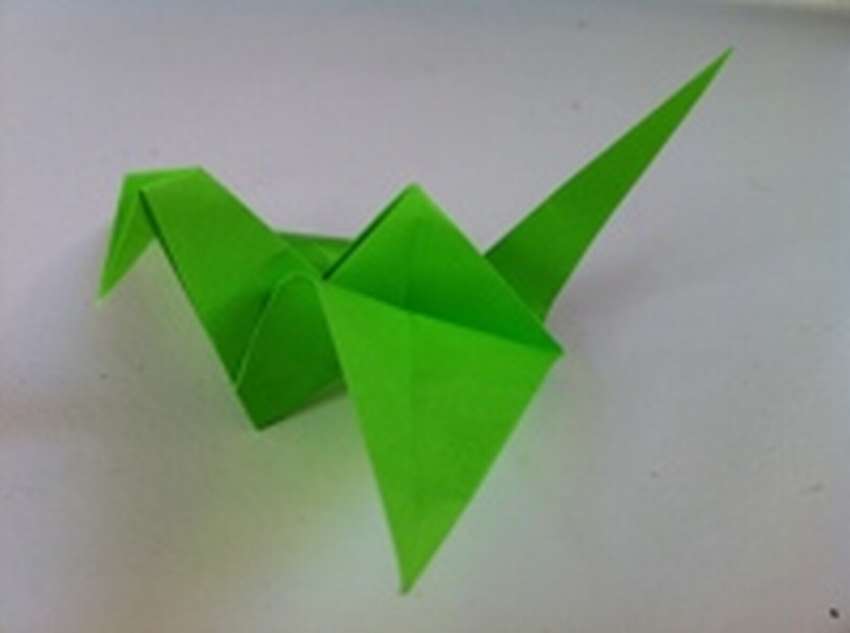
Origami Flying Crane
Want to fold origami flying crane? Check out these diagrams and step-by-step photos.
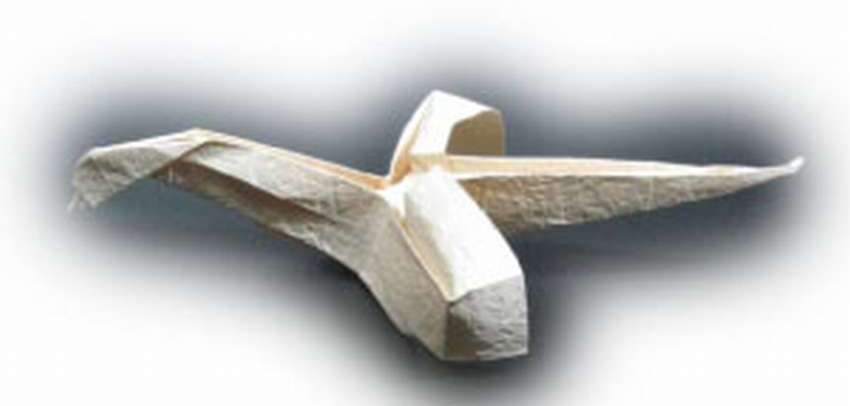 Used here two origami techniques - reverse folds and winding folding.


https://i.expert-h.com/en/iz-bumagi/1156#sigFreeId8055097c06
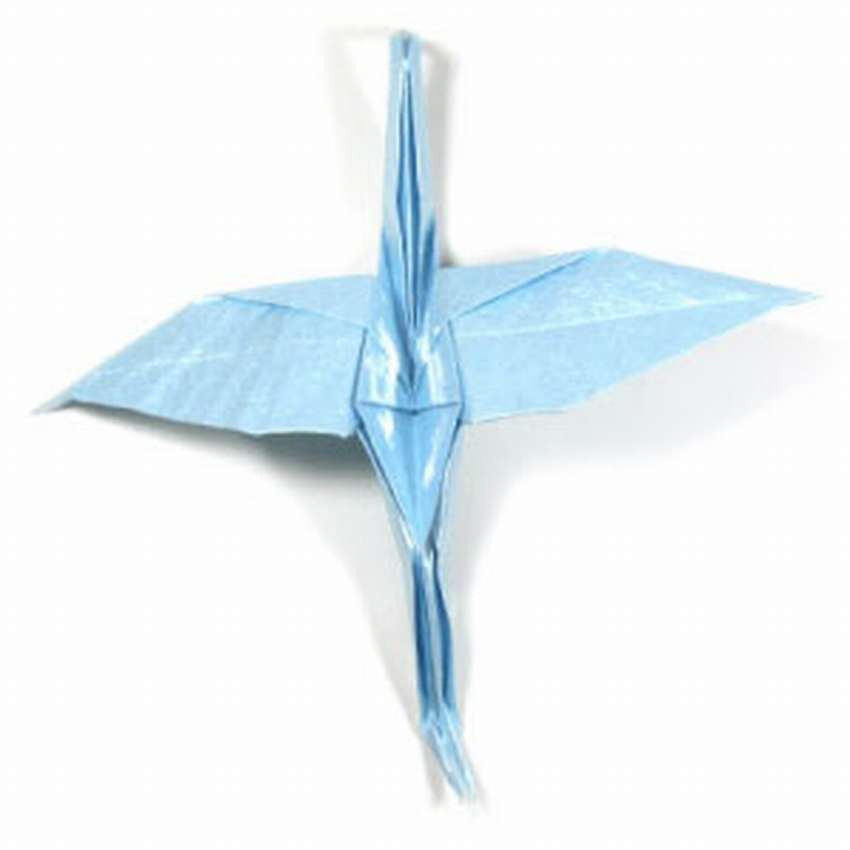
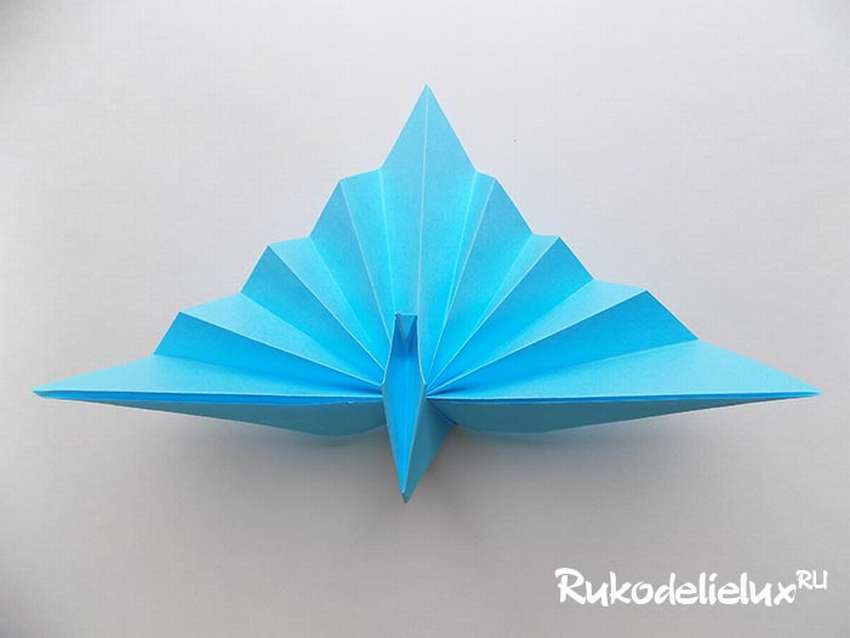
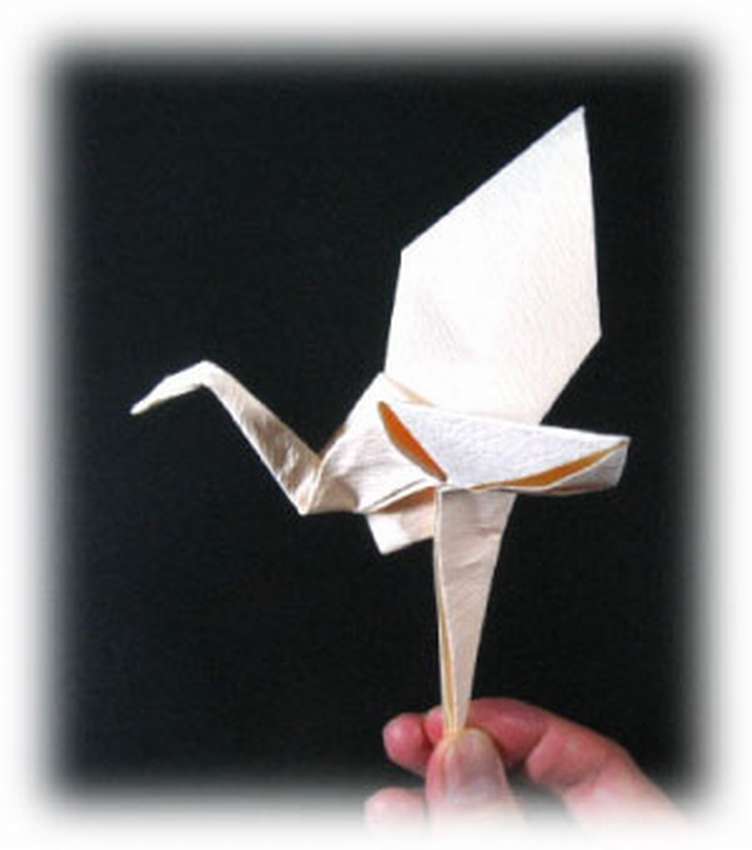
Original paper crane
 See another interesting model origami crane. Although the manufacturing procedure is not fundamentally different, it is also used here. basic form "Bird". This origami technique is used in conjunction with other instructions to create a variety of winged creatures. The crane is perhaps the most famous that can be made using the base of the "bird". In this case, this model is an origami crane different wing shape, we can say that this is a simplified version. If you liked it, just follow step by step photo.


https://i.expert-h.com/en/iz-bumagi/1156#sigFreeId43403d1e66
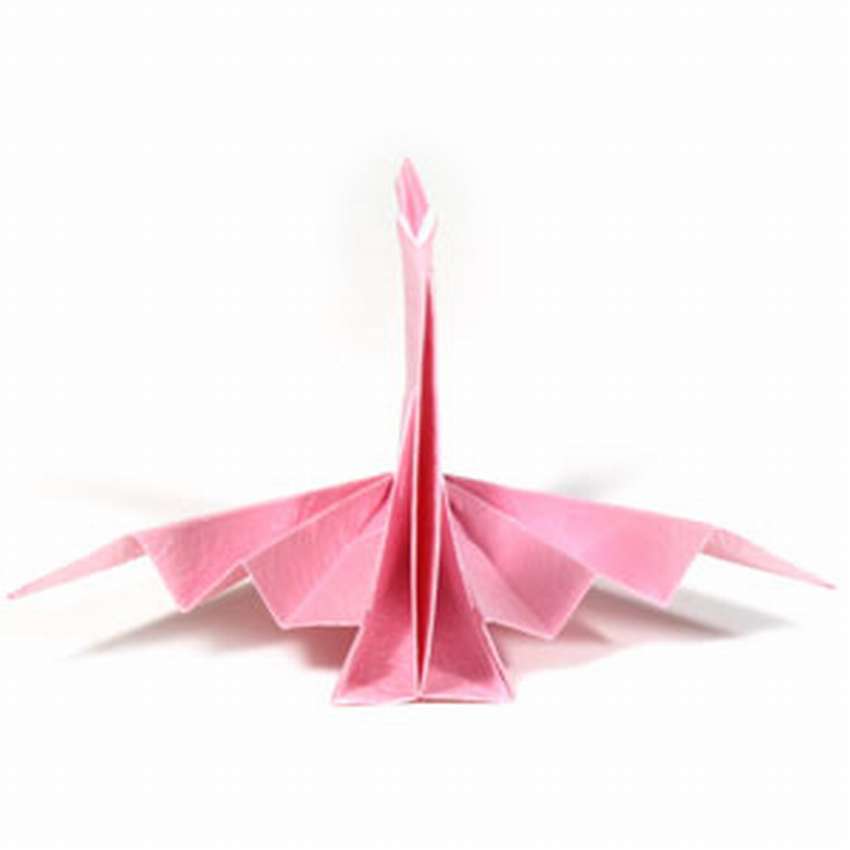
Crane made of paper with spread wings
See an example of how to make a custom model winged paper crane. It looks very beautiful.
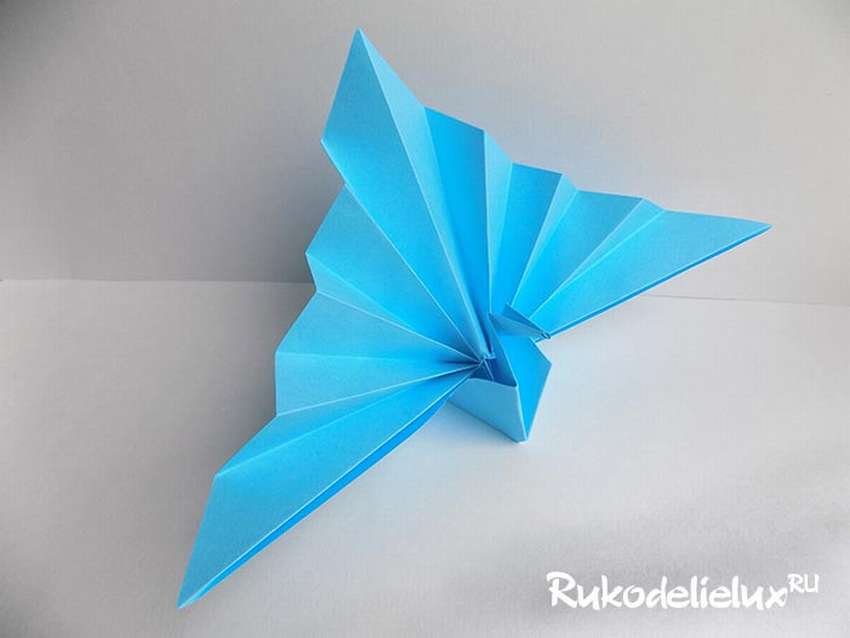 In addition to step-by-step photos, the site has a very detailed step by step instructions.


https://i.expert-h.com/en/iz-bumagi/1156#sigFreeIdb41e143513
Making a crane out of paper is an easy way.
Here is an example how to do simple paper crane do it yourself in 9 steps.
 How to do it, shown in step by step photos. The most difficult part is to fold and unscrew the pocket, then fold the ends at an angle of 45 degrees.


https://i.expert-h.com/en/iz-bumagi/1156#sigFreeIdff42d226c2
How to make a paper crane
 Following are the steps to paper crane manufacturing.
- Take one end of the paper and a layerlive across to create a triangle
- Take one end of the triangle and shift to create a smaller triangle.
- Open the valve and press evenly to make it square. Repeat on the back.
- Squeeze the middle of the triangle and pull from top to bottom, then press down and fold. Repeat on the back.
- Fold the right corner to meet in the center of the line. Repeat this step to the left and back.
- Lift the right side up and press the other side, then press the middle fold.
- Turn the paper over and repeat on the back.
Bend one side to create a head. Spread your wings gently.


https://i.expert-h.com/en/iz-bumagi/1156#sigFreeIde0a4818a5a
Origami crane
 Like all major models origami paper cranes, the basic “bird” form is also used here. This base is used in many models, including classic paper crane and other variations on the theme of birds. Those who have been engaged in origami for a long time know that this base is used in all types of models, and not just in the creation of birds. Also, almost all origami shapes start with one of the basic origami patterns: a folded shape that starts the shape - base shape double square. But it’s better to read about it separately.
How to fold this model of an origami crane in stages, see below for step-by-step photos.


https://i.expert-h.com/en/iz-bumagi/1156#sigFreeId6fabb11124
How to make paper cranes
You see everywhere origami paper cranes and you think: "Oh ... how beautiful ... but it's probably too hard to do." By looking at the step-by-step photos of this guide, you will be sure to actually add do-it-yourself paper crane not hard at all.
 Fold sheet SQUARE paper in half so that it takes the shape of a triangle. Expand and do the same on the other corner.
- Expand again, fold the paper in half to make a rectangle, unfold and do the same for the other side.
- While paper is folded in a rectangle, hold it at the corners with the open side facing up.
- Connect the two corners together to get a cruciform shape. Fold to make a square.
- Fold in the corner pieces to fit the midline. It should make a small triangle at the top. Fold this triangle back and forth to create a crease.
- Open the two wings for both sides.
- There should be a pair of “legs” at one end. On this side, fold to the sides on both sides.
- Open the side and push from bottom to top.
Do it for both sides. fold your wings and head, you're done!


https://i.expert-h.com/en/iz-bumagi/1156#sigFreeId8da04f3038
Kirigami Crane
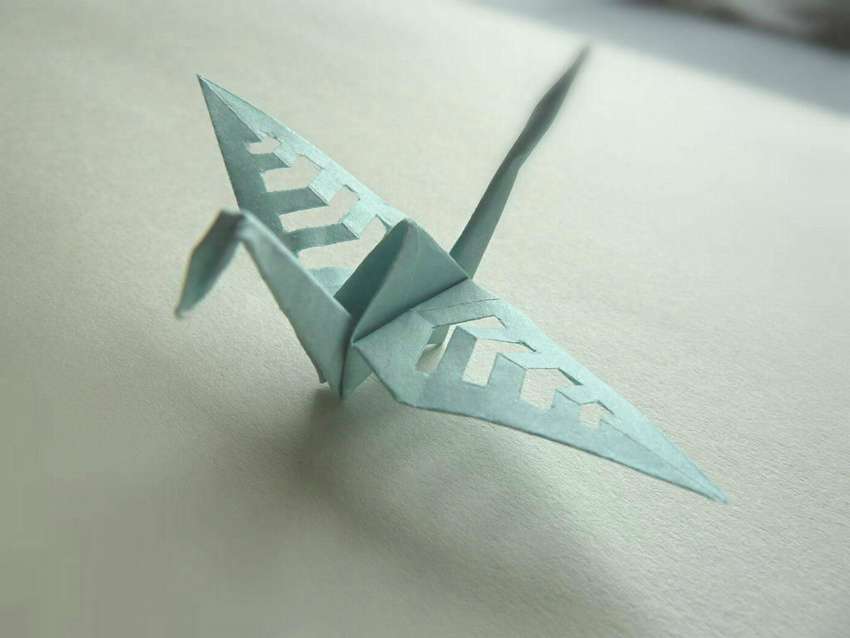 Kirigami literally translates as "cut paper." This is an origami variation where paper is usually folded first and then cut. This may sound a little strange, but there is one Kirigami model that many of you must have done: paper snowflakes. You fold square or round paper, cut out the design and open it, you get a snowflake with an even pattern. That's just this New Year's craft and served as the inspiration for the author to create origami crane. If you liked it, read the instructions on the website. Step-by-step photos below in the gallery.


https://i.expert-h.com/en/iz-bumagi/1156#sigFreeId8be89d4c31
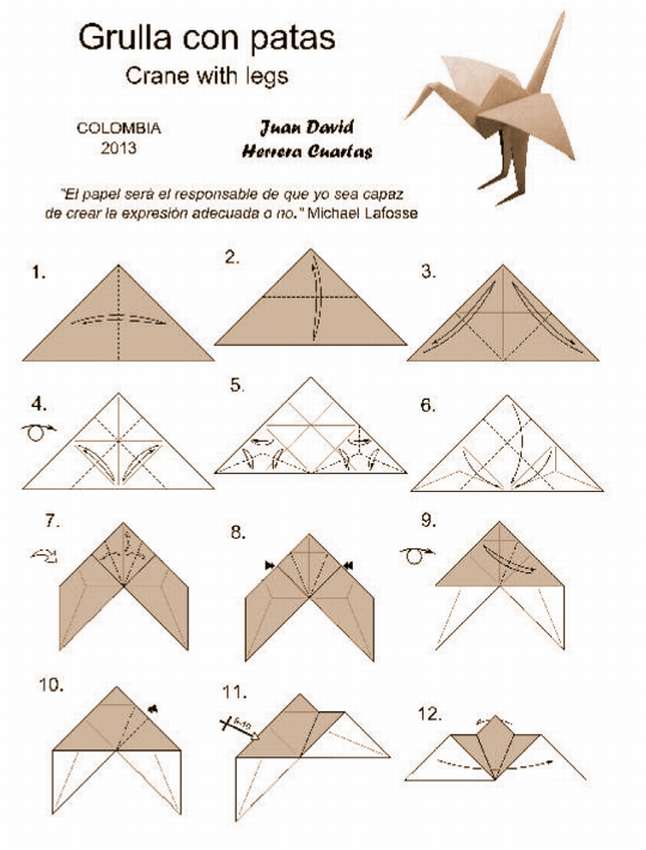
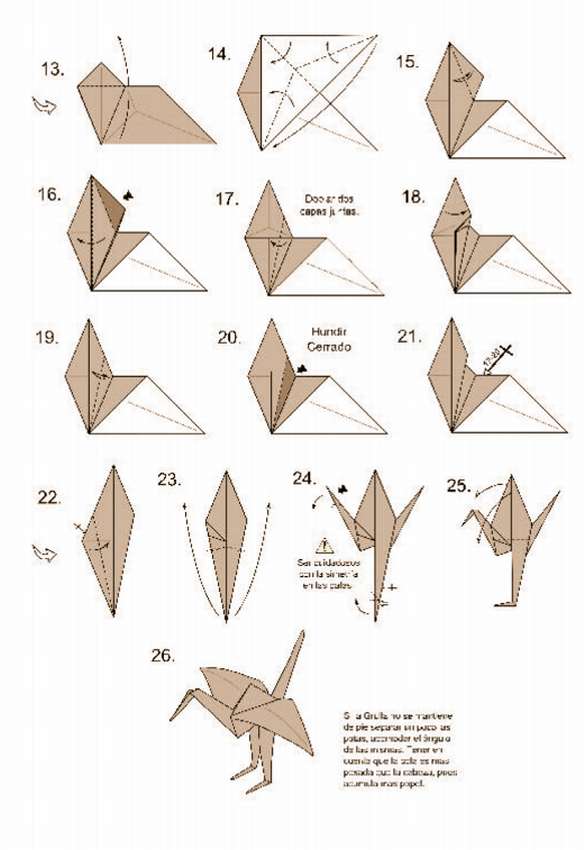
Origami Crane with legs
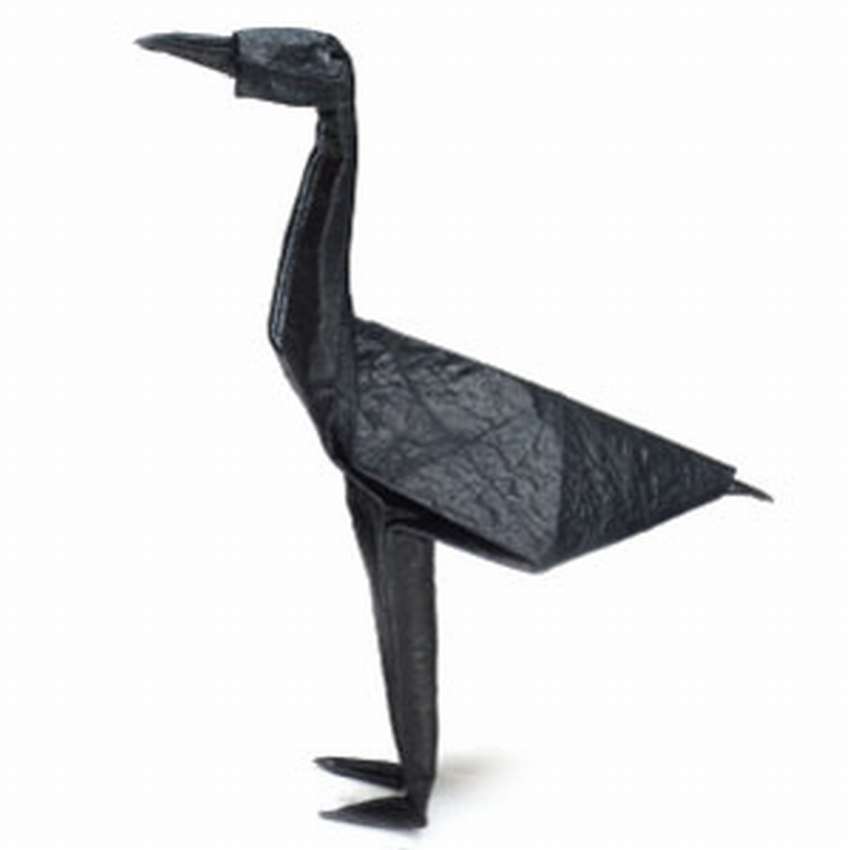 This rare model for origami cranes. By the way, on the Internet it is almost impossible to find instructions with step-by-step photos of a standing crane, there are only a few videos. So if you have been dreaming of doing your whole life crane of paper standing on legs, then these schemes and step-by-step pictures will be useful to you. Admittedly, this is not the simplest origami model, it uses complex folds - rabbit ear, squash, petal and others. In general, if you are taking on this model, carefully read instructions on the site.


https://i.expert-h.com/en/iz-bumagi/1156#sigFreeId47b9759d70
Crane from the newspaper
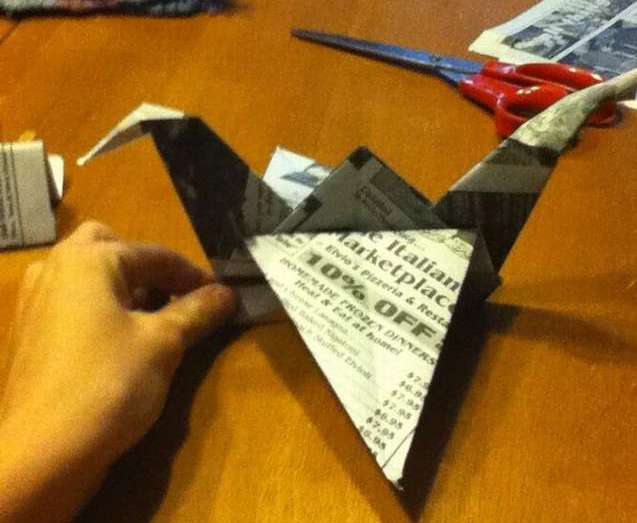 Everybody loves origami cranes. Has anyone tried to compose this model from a newspaper? The folding procedure is basically similar, just necessary take into account some nuanceswhen dealing with the same material as a newspaper. You can read about all this in the detailed instructions on the website of the author of this project.
Master class on step by step photos, see below in the gallery.


https://i.expert-h.com/en/iz-bumagi/1156#sigFreeIda9cb084afe
Crane made of paper 100 photos


https://i.expert-h.com/en/iz-bumagi/1156#sigFreeIdb6d499ce91
Hello, I am the author of this article, so I look forward to asking questions for this article in the comments below, I will answer all !!!
If you have questions on another topic, ask them on our forum, we will answer you
- Two baskets of paper in 5 minutes (Master class)
- How to make a simple and compact table for a milling cutter from plywood
- How to make a soft headboard tile (Instructions + step by step photos)
- Cinder block benches: a convenient bench in 55 minutes
- How to make a bed with a niche: saving space (Master class)