Wooden podium in the garden 28 photos Favorite
 wooden podium
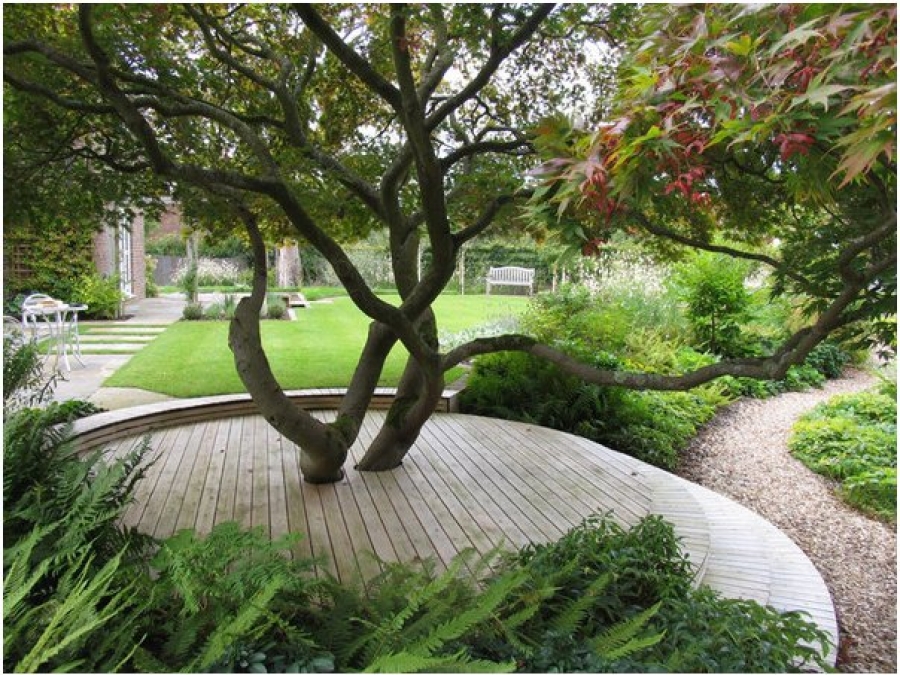
The podium will allow you to visually expand the space of the garden and highlight the thematic zone in it.
For a small site, this is of course an expensive pleasure, in the sense of a place it is a pity, but if there is such an opportunity, to have an open podium, of course, is wonderful.
- The podium can be an option for the design of the near-trunk zone, as in the photo.
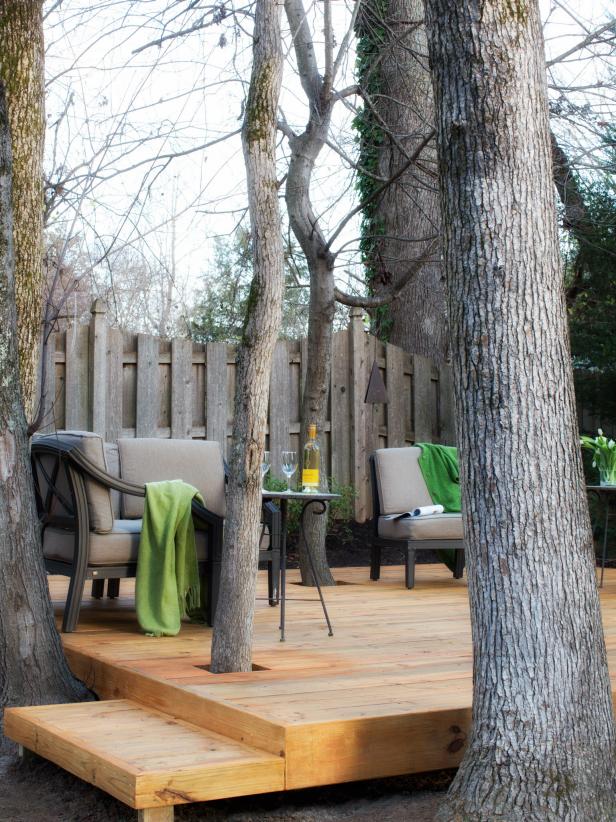
- Slightly raised wooden flooring can also be used as a patio, putting garden furniture in the shade of a tree and equipping a recreation area.
- A summer dining area is also an option for a small wooden podium.
- The podium itself can also play the role of a bench or sunbed.
- A wooden podium, in the center of which a tree grows, will serve as a home stage if necessary. So speakers, especially children, will be able to feel like real theater artists.
How to make a wooden platform
 If your site has enough space, making a wooden platform in the recreation area is a good idea. Even if everything is planted with trees, this is not a hindrance at all, on the contrary, so the site will look much more attractive.
What do we need:
- wooden pegs;
- boards of the appropriate size;
- pressed plates;
- beams for attaching terrace boards;
- cement and everything for mortar;
- varnish or paint.
This is, of course, of course. Tools, sizes of boards and other details for the terrace, than you will cover it, this is already looking at the situation.
Getting to work
- Select the area where the trees give a lot of shade, determine the contour of the future site (you can draw a diagram) and mark the territory with pegs.
- Pull the rope between the pegs and determine the highest point by level.
- Dig holes for support columns half a meter deep and at a distance of approximately 2 or 2.5 meters.
- Determine the height of the support columns, mark with a pencil on the bar and file the required amount.
- Drill holes in the boards at future attachment points.
- Fasten the frame with screws and fill the supporting posts with the prepared solution.
- Then, with a hand saw, we trim the ends of the supporting posts according to the level of the future site.


https://i.expert-h.com/en/zona-otdykha/724#sigFreeId0fdc12b45f
- Starting from corner posts, every 30 centimeters we make marks for fixing the floor beams.
- We cut small pieces along the width of the support beam and fasten them to the longitudinal support (see photo). Because of the trees, it is not possible to place all the fasteners at the same distance, but in general, it is desirable that it does not exceed 35 centimeters.
- We assemble the frame, near the trees we make a tolerance of 10 - 15 centimeters.
- We lay the top layer. For a terrace that requires cutting boards in size, install them in a checkerboard pattern to reduce waste and create a consistent look.
- It is better to bolt the boards for reliability, having previously drilled holes with a drill.
- At the final stage, clean the finished podium, process the surface. The use of varnishes for such purposes is impractical, "paths" are quickly formed, it is better to use special terrace oils. You can also use a combination of varnish and high-quality impregnation - stains, good protection and natural beauty is preserved. In general, this is a separate issue, choose what is best suited to your climatic conditions.


https://i.expert-h.com/en/zona-otdykha/724#sigFreeId4ccda88be6
That's all, as everything dries up, you can put furniture, or leave it open. A good thing for parties, hang garlands of lanterns on the trees, organize a small bar, dance floor ready, you can have fun.
Hello, I am the author of this article, so I look forward to asking questions for this article in the comments below, I will answer all !!!
If you have questions on another topic, ask them on our forum, we will answer you
- Two baskets of paper in 5 minutes (Master class)
- How to make a simple and compact table for a milling cutter from plywood
- How to make a soft headboard tile (Instructions + step by step photos)
- Cinder block benches: a convenient bench in 55 minutes
- How to make a bed with a niche: saving space (Master class)