Gates from corrugated board. Drawings and schemes. DIY step-by-step photos
 Gates from corrugated board
When building a house, cottage or cottage, the question always arises with fencing.
Decking is the most widely available and quite budget option. Whether the fence is temporary or permanent, you can always make a very reliable and quite nice design out of corrugated board.
This article will focus on making gates from corrugated board with your own hands, the nuances of construction will be considered, we will analyze the types of corrugated board and determine the options for making a gate with your own hands.
Swing gates from corrugated board with ZERO !!!
(photos, instructions, video master class)
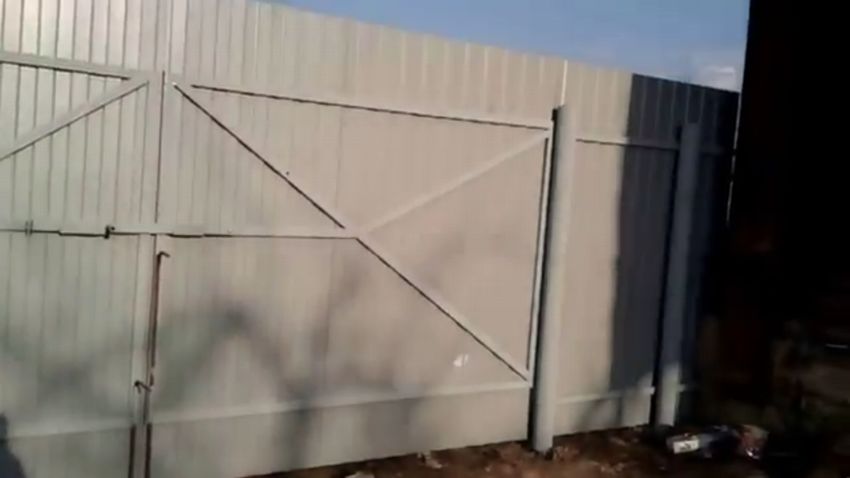
Undoubtedly, the most common type of gates are swing gates. So how do you make swing gates from corrugated board with your own hands? If you are interested in the answer to this question, then you have come to the address.
Consider the process of creating swing gates with your own hands from corrugated board and profile pipe using a specific example.
 In this case, the author of the video of the master class begins to create a fence along with the gate completely with scratch, but for now, we will assume that we have created a fence, and that the poles are already standing, ready to install the gate. About the creation of the fence itself, I will tell you later in this article, be patient.
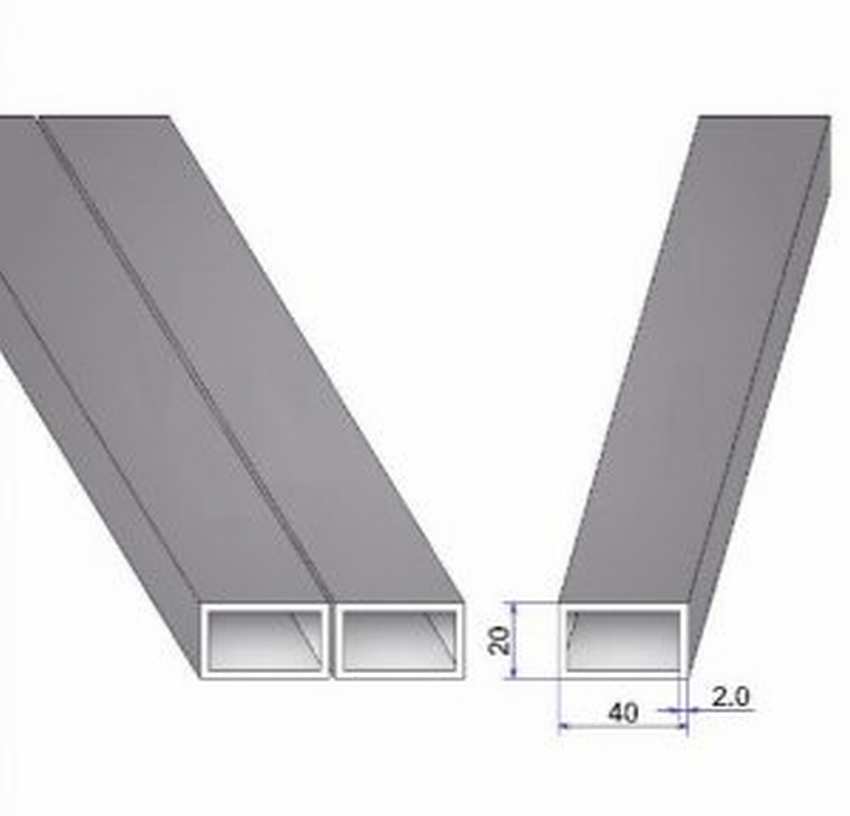
 Most popular question: “Where to start?”. Of course, with the choice of material. In our case, a suitable material is already known: standard corrugated board and profile pipe with a cross-sectional area of 20x40 millimeters.
After the material is determined, it is necessary to take measurements (length and width) from the doorway. Then, for clarity, I advise you to depict a simple scheme of future gates with the dimensions outlined on it.
According to this scheme it will be much easier to create a gate with your own hands.
Decking and profile pipe are cut to the desired size. After that, a metal frame of the gate is created from the professional pipe, which is sheathed on the front side with prepared corrugated board.
You can see the stages of creating such a gate in the following step-by-step photographs:


https://i.expert-h.com/en/vorota/1013#sigFreeId3096ed7838
Source of ideas and photos, video master class: https://youtu.be/itZiYOuXhds
Original name: Do-it-yourself fence, gate and wicket from corrugated board
Do-it-yourself door frame from professional pipe.
(photos, instructions, video master class)
How to make a frame from a professional pipe for swing gates with your own hands?
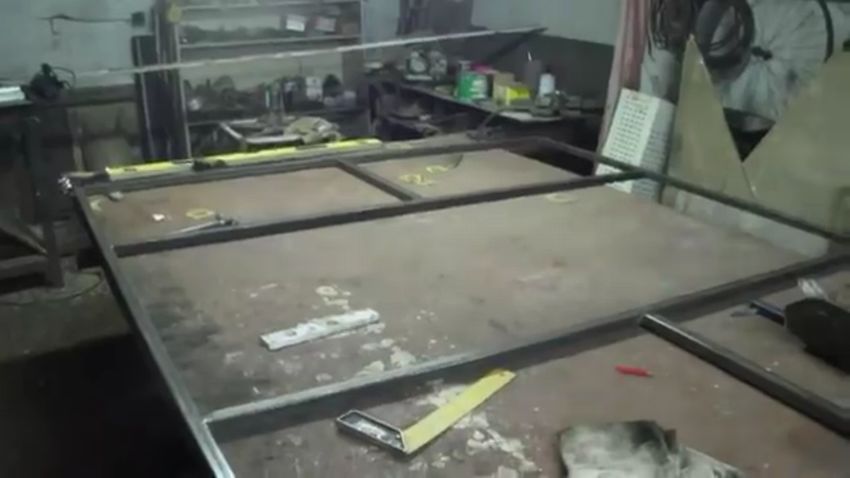 A little higher in this article, I have already shown you how to create a swing gate from a corrugated board with my own hands. But I did not go into the details of each stage of creation. So now you will learn how to make a metal frame for swing gates from corrugated board with your own hands.
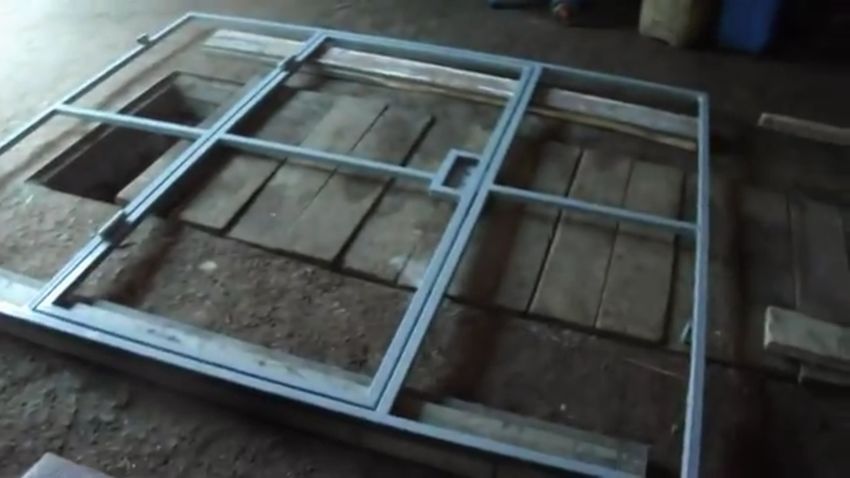
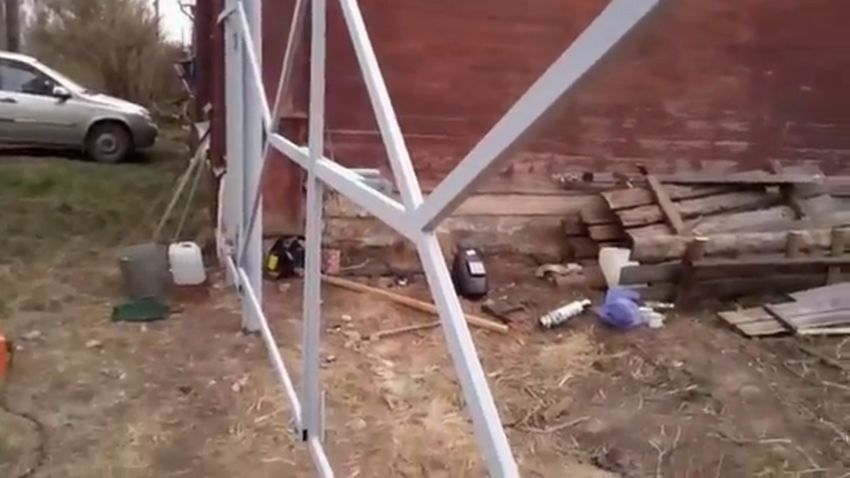
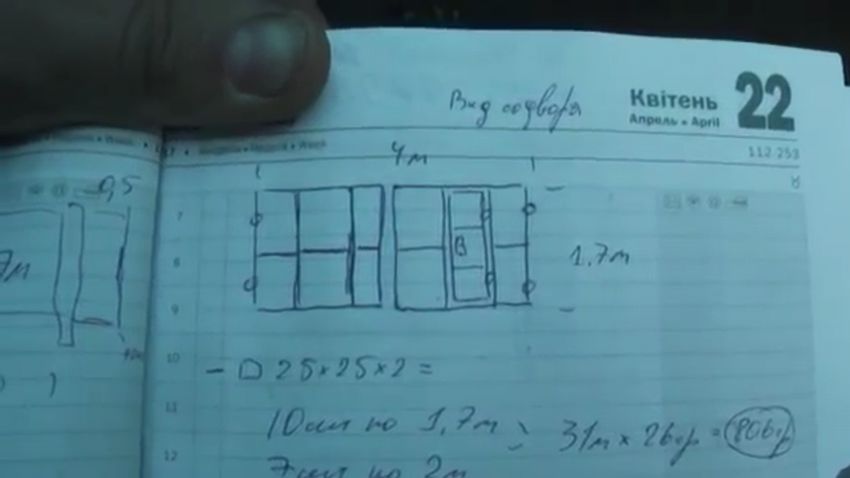 If you read this text completely from the very beginning, you should have noticed my advice about the schematic representation of the gate before starting to create it. Now you can also see a demonstration of the use of such an image. According to the dimensions outlined in the diagram, the master prepared pipes to create the frame. Then, from the received parts, he folded a rectangular frame - the basis of the frame.
NOTE: The frame should be folded on a flat surface.
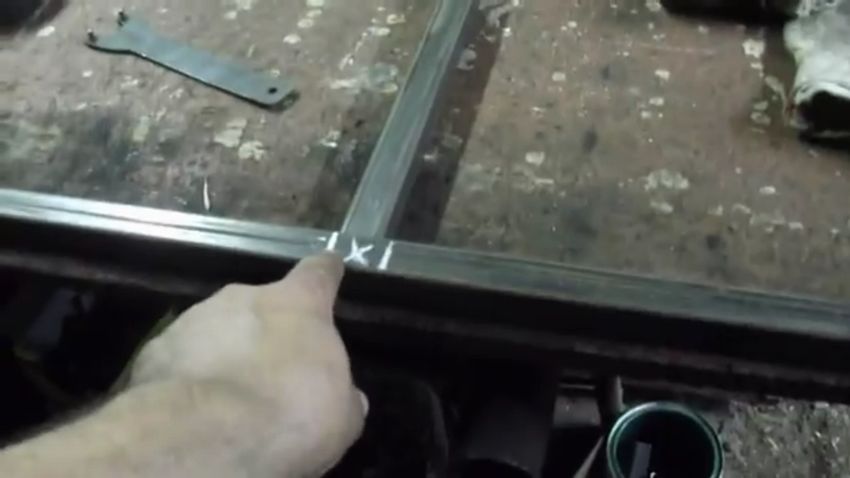 Once again checking the conformity of sizes, the author of the video of the master class grabbed the corners by welding. After which he “broke” the frame with jumpers into several rectangular windows, although they are usually limited to a pair of diagonal or horizontal jumpers. Next is another rechecking of sizes, after which jumpers can also be grabbed.
Having attached the level to the frame, the master made sure that the structure was even. After this action, the frame parts can be finally welded together.


https://i.expert-h.com/en/vorota/1013#sigFreeId2123c78e26
Source of ideas and photos, video master class: https://youtu.be/Gap1nMWHfjY
Original title: The easiest version of the door with corrugated board
how slice do-it-yourself professional sheet for gates.
(photos, instructions, video master class)
 How to cut corrugated board for metal gates do it yourself? When creating gates from corrugated board, remember that an important step, in addition to assembling the frame, is the preparation of corrugated board, because the fence should be safe and convenient, right? And with improper cutting of corrugated board at the edges, serifs can form, which, firstly, can grow, worsening the condition of the entire coating of the fence, and secondly, harm anyone. So how to prevent this? Follow our tips, of course!
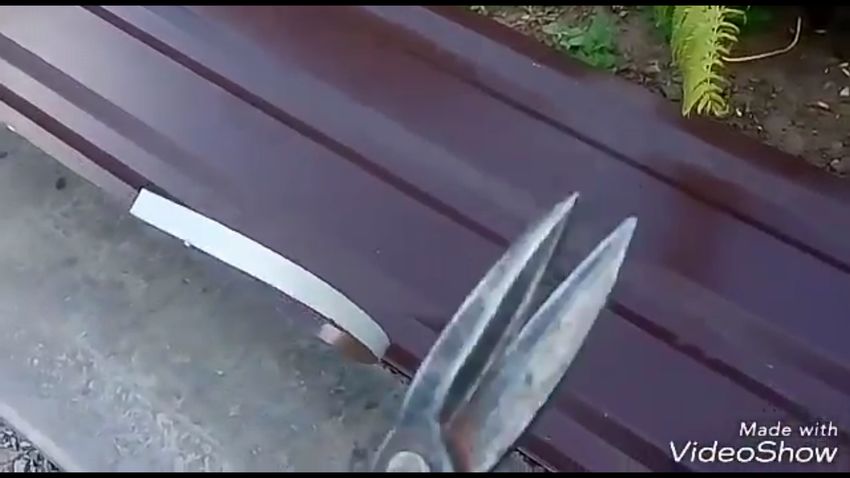
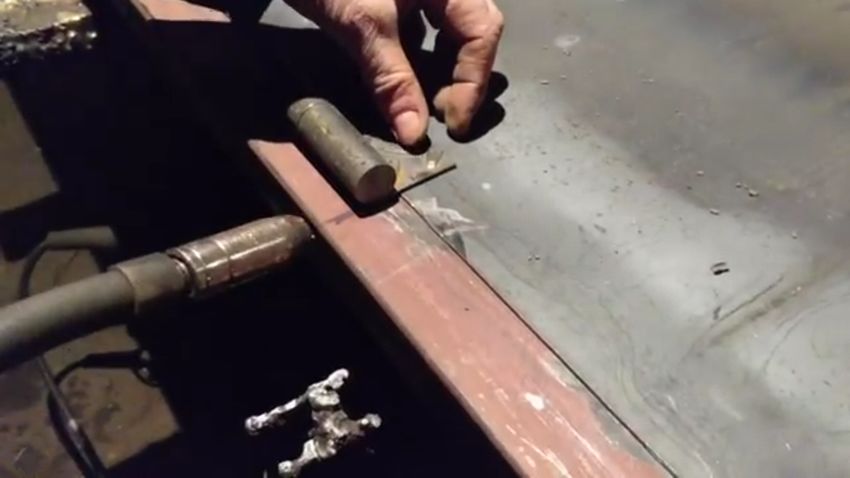
Rules for cutting corrugated board for gates:
- First, outline the cut location. To do this, put serifs on both sides of the profiled sheet, and then, using a construction ruler or just any straight long metal bar, draw a straight line through these serifs;
- For the straight line obtained, bend and straighten several times the unnecessary part of the profiled sheet that you are going to cut. Thus, the profiled sheet in the place of the cut will become more plastic;
- Well, the last stage, carefully cut the profiled sheet with scissors for metal;
That's all! And for greater reliability, after fixing the profiled sheet on the frame, its edges can be slightly bent from the front side.
All attention to a step-by-step photo-master class:


https://i.expert-h.com/en/vorota/1013#sigFreeId9df286c4ed
Source of ideas and photos, video master class: https://youtu.be/AKPggpTlLHI
Original name: How to trim a professional sheet, a professional flooring along for gate.
Installation do-it-yourself collar
(photos, instructions, video master class)
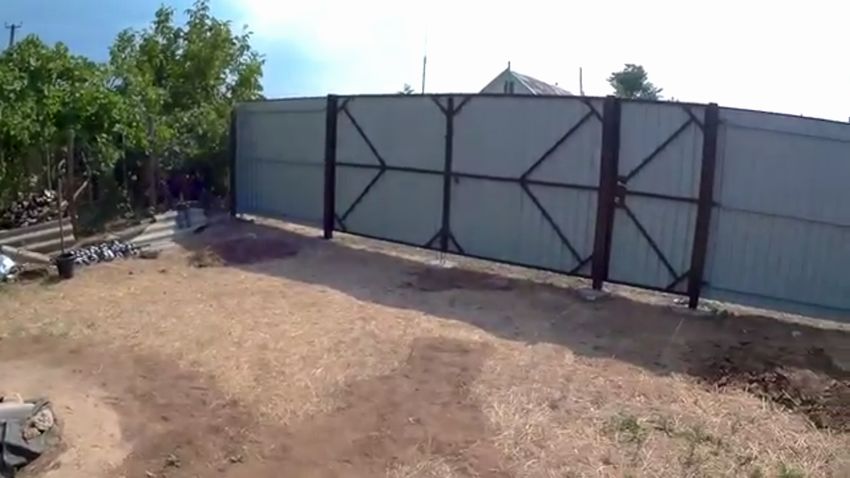
How to install a swing gate from a sheeting with your own hands?
 The final and, at the same time, the most important stage of creating swing gates from corrugated board with your own hands is the installation.
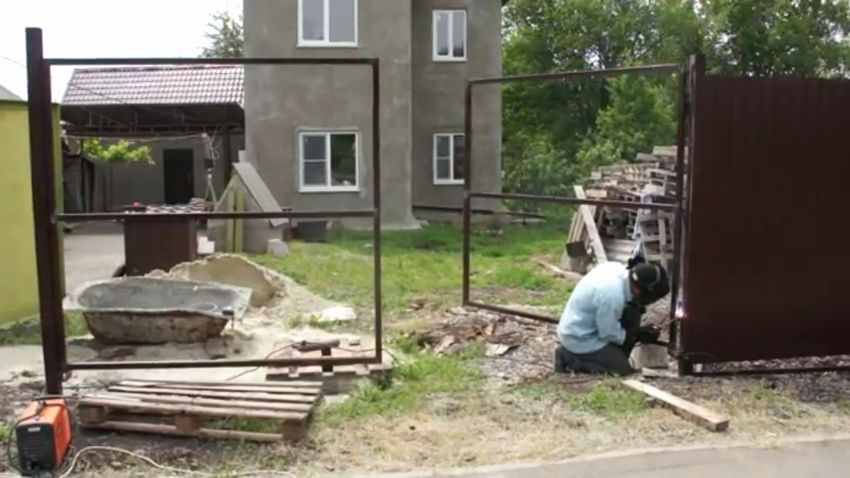
Usually, at this stage there is already a finished door leaf (or at least just a frame) and metal hinges, but when creating the next model, the master went in a slightly different way, and quite interesting:
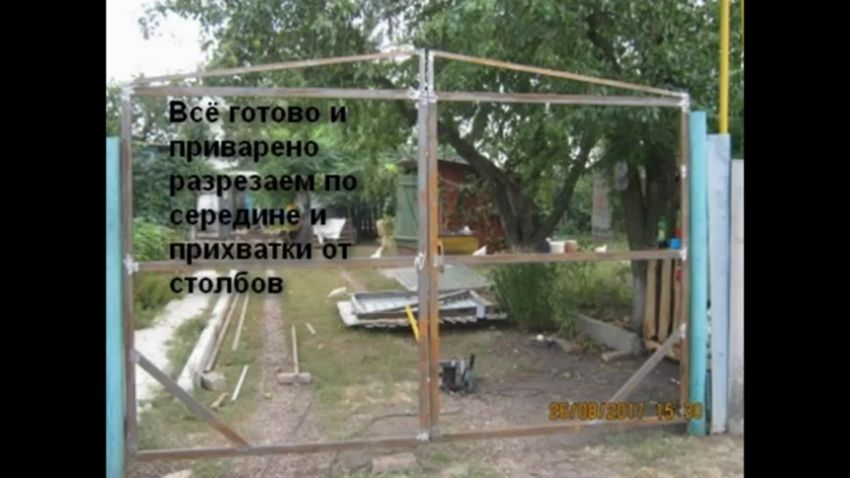 He began to collect the gate immediately in the opening reserved for them. To do this, he put the bottom horizontal edge of the frame frame in this opening on two bricks, and then he began to fasten everything else from this edge.
 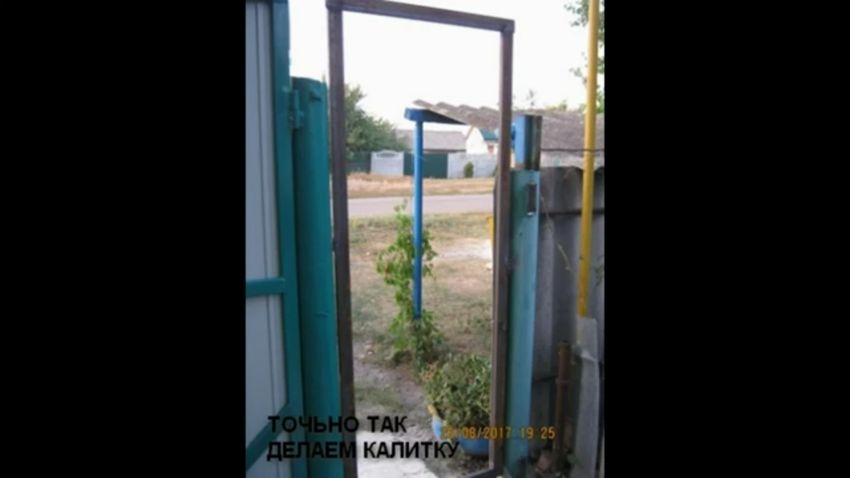 Having secured the vertical racks of the frame on such a base, and then placing the upper horizontal edge on them and connecting the lower and upper edges with two vertical jumpers (which will later be the side edges of the gate leaves), the master created a metal frame for the swing gates, which then immediately secured it to hinges in the opening. That's all, it remains only to divide the frame structure into two parts, fix the professional sheet on them, and the gate will be ready.
Step-by-step photographs demonstrating this method of installing the gate are at your service!


https://i.expert-h.com/en/vorota/1013#sigFreeId5be7688995
Source of ideas and photos, video master class: https://youtu.be/kmMW7ufjcek
Original name: Doors and gates from do-it-yourself decking.
How to weld power hinges to gate
(photos, instructions, video master class)
 How to weld metal power loops to the swing gate frame with your own hands?
An important step in installing metal swing gates is fixing power loops on the gate frame and fence posts. Many believe that this is not so difficult.
Indeed, it is easy to weld the hinges, given some small nuances, so now I will tell you how to weld the power hinges to the gates.
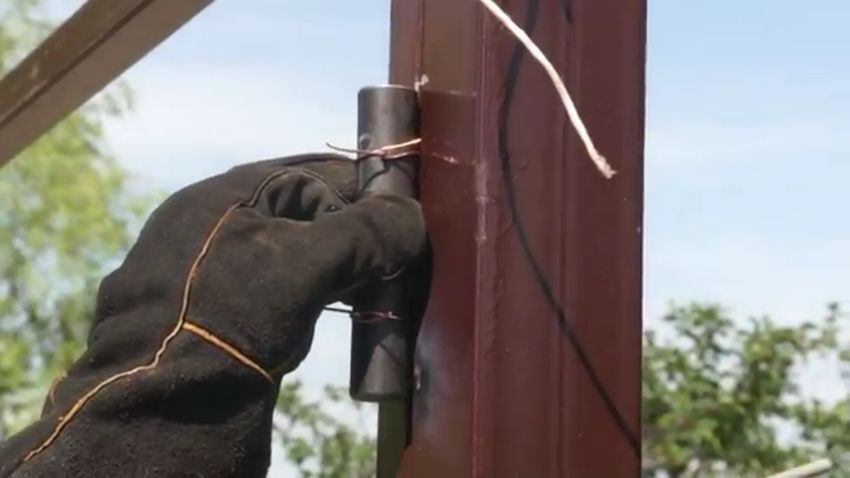
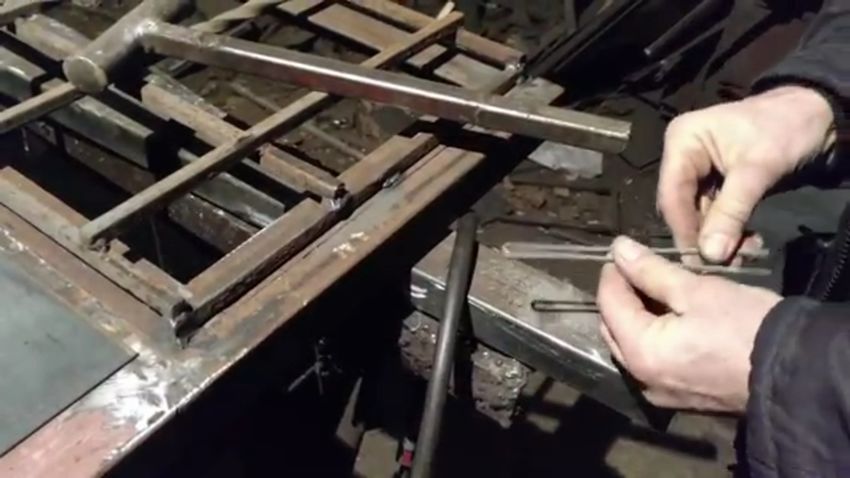 You will need (picture 1):
- Electrode (any thick enough wire);
- The loops themselves;
- Mortgages (in the form of small metal plates);
To begin with, the electrode must be bent as shown in pictures 3-6. Next, attach the bent electrode to the loops to compare their lengths, as shown in Figure 7. If the electrode is much longer than the loops, cut off the excess (eighth photo), its length should be a maximum of 5 millimeters more than the length of the loop. Then bend that 5-millimeter piece of electrode (Figure 9).
Put the bent electrode on the metal frame of the fence and place a loop on it. Mortgages are placed under the loop and tacked by welding. Then, one mortgage is welded to the gate frame, and the second to the metal pole.
The photo instruction is in front of you!


https://i.expert-h.com/en/vorota/1013#sigFreeId969a7daaa2
Source of ideas and photos, video master class: https://youtu.be/tkeBgGQ3Tac
Original name: How to weld a loop., Do it yourself. "Armored car" Dnieper.
Fence with gates from corrugated board.
(photos, instructions, video master class)
Let's look at the process of creating a fence from a professional flooring with your own hands:
 The construction of the fence begins with measurements. In order to determine how much material you will need, you need to measure the perimeter of the territory allotted for the installation of the fence. But before taking measurements, you need to mark this same perimeter, this is done as follows: small pegs are placed at the corners of the installation area, and a rope or thread is stretched between them. So the length of this thread is what you need to measure;
- Once the material is selected, you can start directly fence assembly, for this you need to dig / drill holes (at least 70 centimeters deep) under the main pillars, along the edges, and under the intermediate ones, which will be equidistant from each other (the distance is called the fence step, it’s better not to do this step more than three meters, otherwise, the corrugated board will deform the wind);
- Then first main pillars are installed, you need to do this in terms of level, and after installation they need to be temporarily fixed with something (create any support from the bars of boards and the like);
- While the main pillars are temporarily fixed, you can make concrete mortar and pour them holes with the columns installed, after the mortar has strengthened, the temporary support can already be removed (before filling the columns, check once again their vertical level);
- The same steps are repeated for intermediate posts;
- Between the posts are two horizontal jumpers (bottom and top);
- Now you can jumpers fasten professional sheets. In order to fix profiled sheets, you must either use a permanent support, moving it under each sheet during installation, or enlist the help of someone else;
- After the corrugated board is fixed, the fence is ready, and it is already possible set the gate;


https://i.expert-h.com/en/vorota/1013#sigFreeIde6dc55550d
Source of ideas and photos, video master class: https://youtu.be/d6lGZa8Nghg
Original name: Gate for a fence from a professional flooring
Forged gates and a wicket gate.
(photos, instructions, video master class)
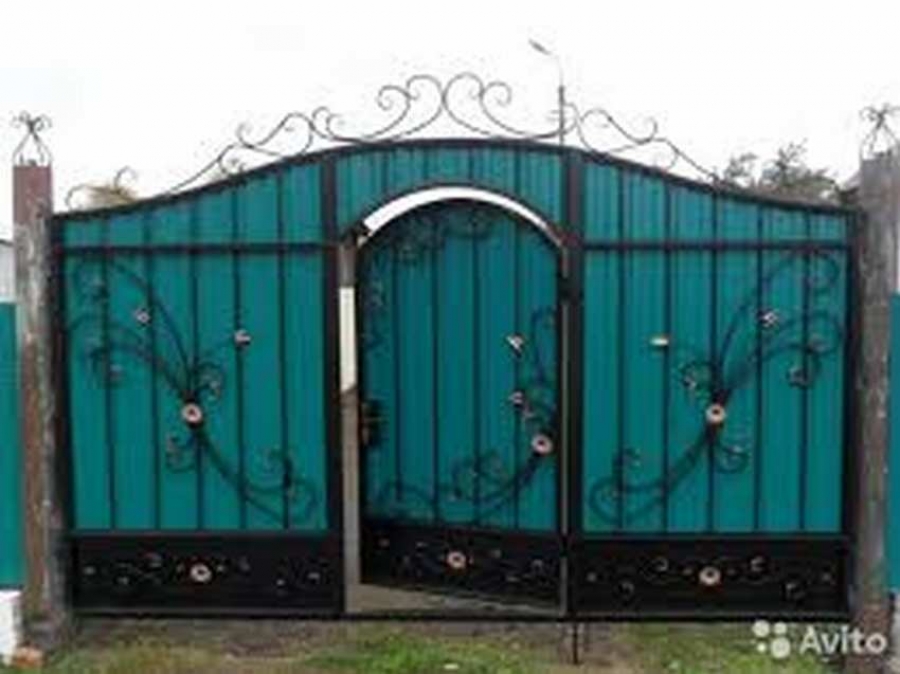
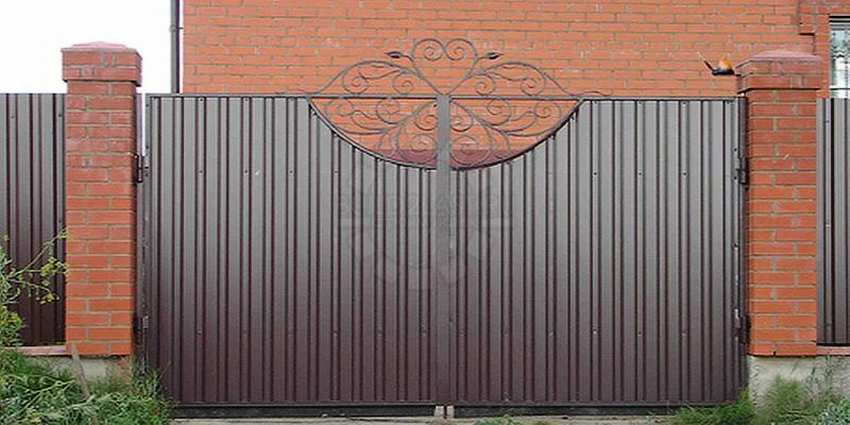
Let's look at an example of how to make a beautiful gate from a corrugated board with your own hands?
 If you think that all the gates from the corrugated board are uniform, then you should look at the next model. She, just the same, is an example of the converse. Although this model looks complicated in terms of creation, it is based on all the same principles that I told you about earlier in this article.
 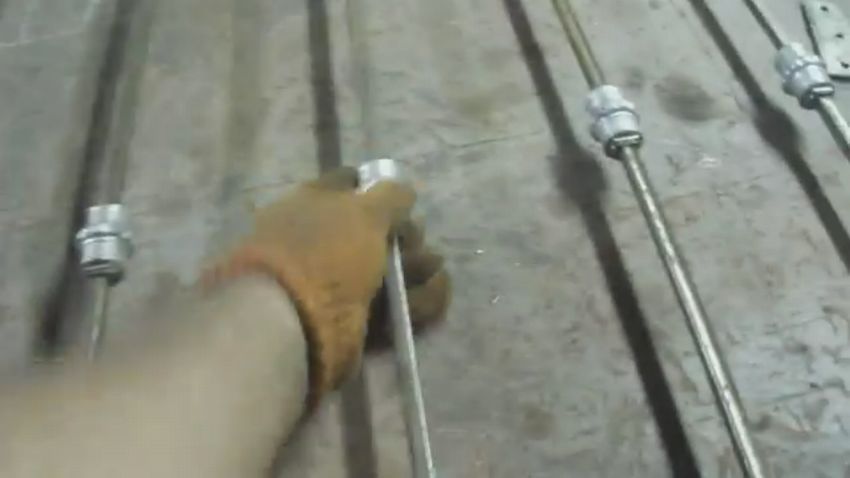 Everything also starts with creating a frame from a profile pipe, only instead of internal jumpers, the master fixed a forged metal pattern made by him in it. Then the master simply covered the frame of the gate and the gate with black paint, installed it and sheathed with corrugated board, there is nothing complicated about it, but what an impressive effect produce these swing metal gates. So if you have certain skills, desire and a little time, you can easily create something like this with your own hands.
Detailed photo instruction to help you!


https://i.expert-h.com/en/vorota/1013#sigFreeIdc5271578a0
Source of ideas and photos, video workshop
First part: https://youtu.be/Z2pnmjgVxTw
Second part: https://youtu.be/qQelqyrYjSQ
The third part: https://youtu.be/G_PDTc17PK0
Fourth part: https://youtu.be/mfNOatHH7Jg
Original name: Forged gates new technology
How to install a fence on inclined surface.
(photos, video master class)
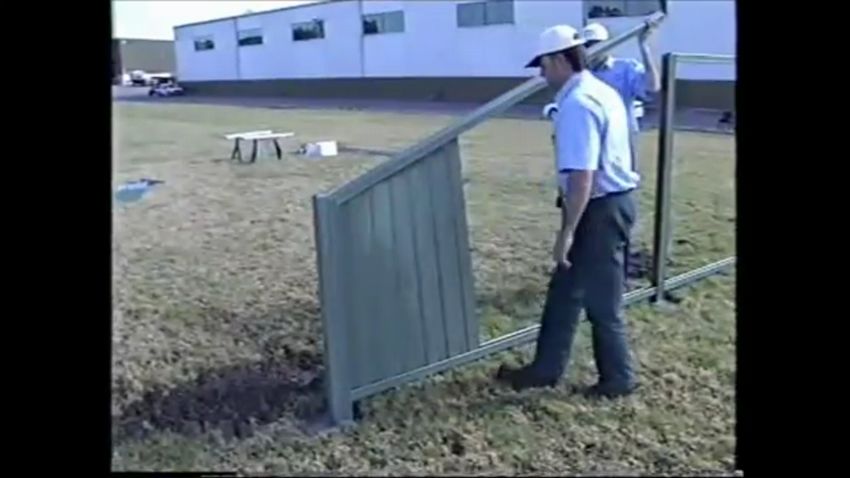
 With the installation of the fence on a flat flat surface, everything is clear. But how to install a fence from corrugated board on an inclined surface with your own hands?
This is already a little more complicated, but for us there is no problem! Let's reflect on what can be done in such a situation.
Exists three options do-it-yourself fence installation on an inclined, uneven plane:
- The most commonplace way is fill the surface with earththereby creating a surface of one level;
- A little harder - concrete plane;
These two methods of dealing with surface irregularities when installing a fence with one's own hands have one common minus: a great waste of time, money and material, which means they are not suitable for us, because our main goals are practicality and economy. So what to do?
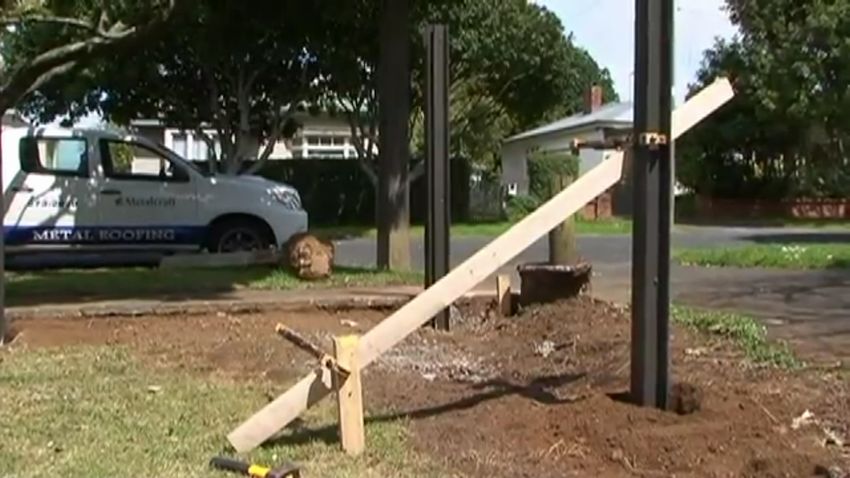
There is one more way! - Installation of pillars at different levels;
If the surface inclination does not change throughout its entire length or changes slightly, you can use this method. Posts from corrugated board are installed lowering the level from maximum to minimumAt the same time, their height relative to the surface of the earth should remain unchanged. Well, the crossbars between the posts, respectively, are attached according to the same principle. Then, at the very end, corrugated board is simply attached to such a design.
You can see an example of using such a system in the following photos.


https://i.expert-h.com/en/vorota/1013#sigFreeId1319d382b0
Source of ideas and photos, video master class: https://youtu.be/WBNS3tdf8fc
Original title: Fencing Mildura - Panel Fence Video 2 002.mov
Doors and gates made from corrugated board with their own hands.
(photos, instructions, video master class)
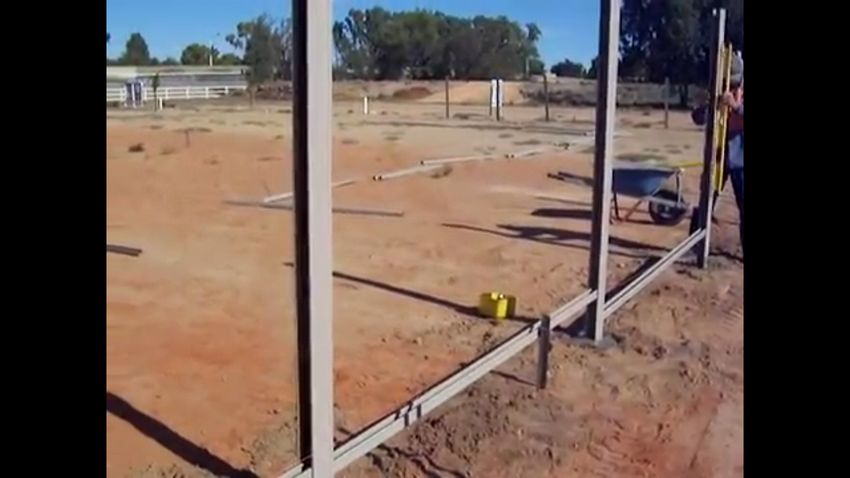
 How to make a swing gate with a do-it-yourself wicket gate? The simplest case for installing swing gates is this is the installation between the house and the fence. And in this case, gates with a gate are also installed between brick pillars, which simplifies the task, especially in terms of measurements.
 First, the author of the video of the master class installed three vertical metal posts from a professional pipe with a wider cross-sectional areathan the pipe used to create the gate frame. The first pillar is attached to the house, the second is located at a distance equal to the width of the gate, well, and the third pillar is installed to the brick support of the fence. The distance between the second and third pillars will be exactly equal to the width of the swing gates.
 To install these poles, the master first drilled three holes in the right places, then installed the poles at the same level, checked the verticals and, finally, poured the hole with concrete (unfortunately, this whole process is not shown in the pictures, but it's okay, you should already know how all this is done, because a little higher in the article I showed you some detailed instructions).
Then, gate frames and gates were installed on the posts, which were eventually covered with corrugated board.
That's all.


https://i.expert-h.com/en/vorota/1013#sigFreeId8982c91587
Source of ideas and photos, video master class: https://youtu.be/IcPECp4cTDU
Original name: WELD THE GATE AND THE GATE AT YOURSELF OWN HANDS! WELD THE GATE AND THE GATE HOUSE WITH HIS OWN
Simple gate with integrated do-it-yourself wicket door from the corrugated board, 2 in 1.
(How to make a gate in a gate from a professional flooring?)
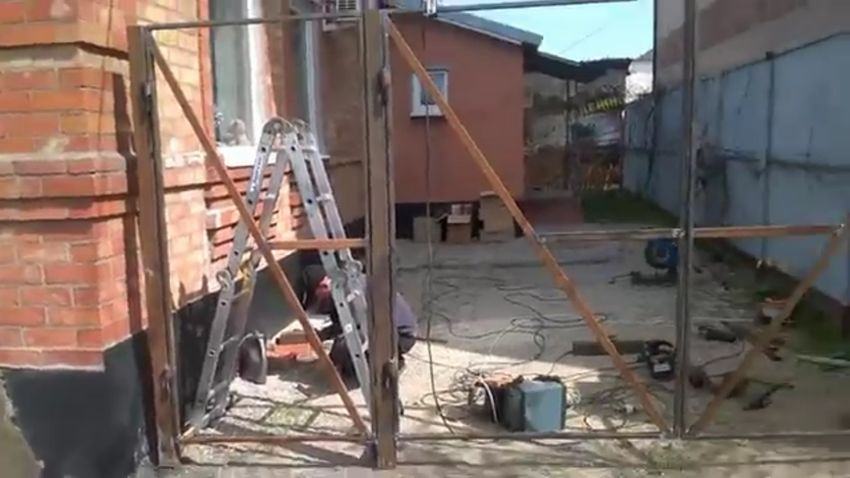
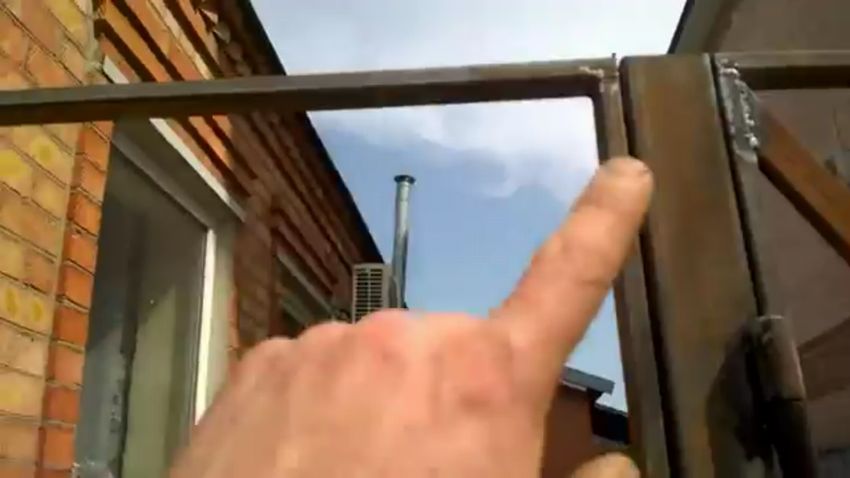
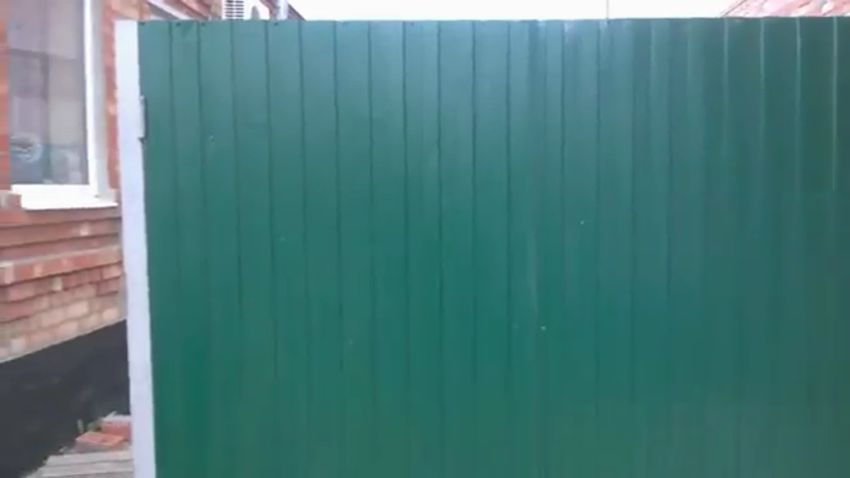
 I do not know about you, but me, first of all, interested in here is this model. Now I will explain what exactly:
 The thing is that inside the metal frame for the gate there is a gate with a dedicated place for a mortise lock. That is, after installing this design, it can be used both as a gate and as a gate, this is, firstly, very convenient, and secondly, it saves space, so this model is suitable for those people who do not have the opportunity create a large doorway for a gate with a gate.
According to the dimensions of this entire structure, a corrugated board is cut, in which holes for loops are cut.


https://i.expert-h.com/en/vorota/1013#sigFreeId963a27f4c1
Source of ideas and photos, video master class: https://youtu.be/x-AzsYobd18
Original name: Strengthening of corrugated board and full finish
Do-it-yourself fence installation from corrugated board.
(How to safely secure corrugated board on a metal fence? Let us analyze this using an example of a specific model.)
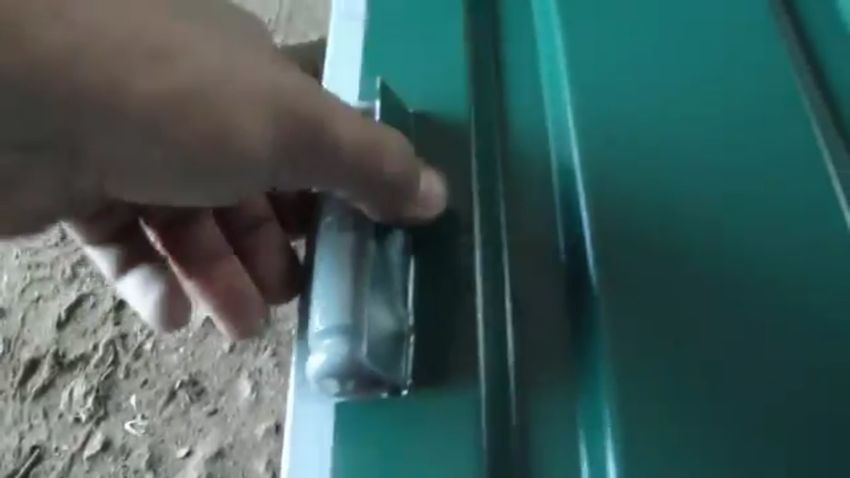
 Under “Safe” By fixing, in this case, I mean that the borders of the corrugated board do not stick out on this option of the fence. This is achieved in the following way:
The fence frame does not consist of square shaped sectional pipes, but of special shaped metal pipes (with a groove cut out). Poles have two grooves on both sides.
Let's look at the process of creating such a fence in more detail:
 First, the poles are installed as usual, using the technologies already described above.
- Then a narrow pipe with one groove cut out is inserted between them, this will be the lower edge of the fence frame.
- Then, between the posts, profiled sheets (and more dense than usual) are inserted into the grooves.
- Well, in the end, from above, the profiled sheet is covered with another horizontal narrow pipe.
Thus, the profiled sheet is in a metal frame, as a result of which no sharp edges come out of it, and there is no need to use screws to assemble the fence.
By the same principle, not only a fence can be made, but the gates themselves.
Step-by-step photo of manufacture:


https://i.expert-h.com/en/vorota/1013#sigFreeId080bd09d60
(to view, just click on any photo)
Source of ideas and photos, video master class: https://youtu.be/wu537rNVH98
Original name: 120326 METAL FENCE QT LAN forWeb
A simple fence made of corrugated board with your own hands.
(photos, instructions, video master class)
 Using the creation system safe a metal fence made of corrugated board, similar to the above, can be considered with the example of the following model.
By the way, to create such a fence, you can also use a profile pipe, for this you only need to pre-cut a groove in it, and the posts, in this case, will be two profile pipes, fastened together so that the cut groove in it goes out. 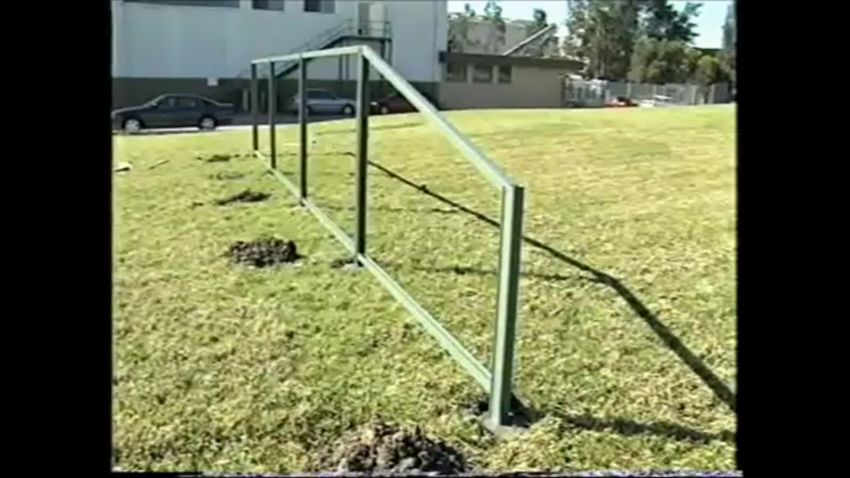 Further, according to the same scheme already described, the professional sheet is simply inserted into the grooves. Thus, using a trade union pipe, it will be possible to save money (after all, you will not have to purchase special materials) and, at the same time, make the fence design safe.


https://i.expert-h.com/en/vorota/1013#sigFreeId9b07d9c47c
Source of ideas and photos, video master class: https://youtu.be/FwRHZa3LQ8Q
Original title: FenceInstallation
Assembly and installation of gates from corrugated board with their own hands.
(photos, instructions, video master class)
 How to assemble and install swing gates from corrugated board do it yourself? You can answer this question only by looking at the next step-by-step photo master class, which clearly shows each stage of creating a gate from corrugated board.
Stages of creating swing gates from corrugated board:
- Everything begins, as always, with the creation of the frame of the frame from a profile pipe;
 Then the professional sheet is cut. It is best to attach a professional sheet to the frame of the gate frame itself and cut it directly in its shape;
- After these actions, the master installs a horizontal jumper on the metal frame;
- Then, metal power loops are prepared, on which the gate frame is subsequently installed;
- A professional sheet is attached to the frame, locks for gates are installed;


https://i.expert-h.com/en/vorota/1013#sigFreeId0db42895c7
Source of ideas and photos, video master class: https://youtu.be/W67OoXSvEQg
Original name: Gate from a professional sheet. The most detailed instruction.
Creature retractablex do-it-yourself collar
(visual diagram, instructions, video master class)
 With the installation of the swing gates, everything is clear, but what about sliding gates? What needs to be done to create them?
I suggest you consider the following visual illustration on the creation of sliding gates from corrugated board with your own hands.
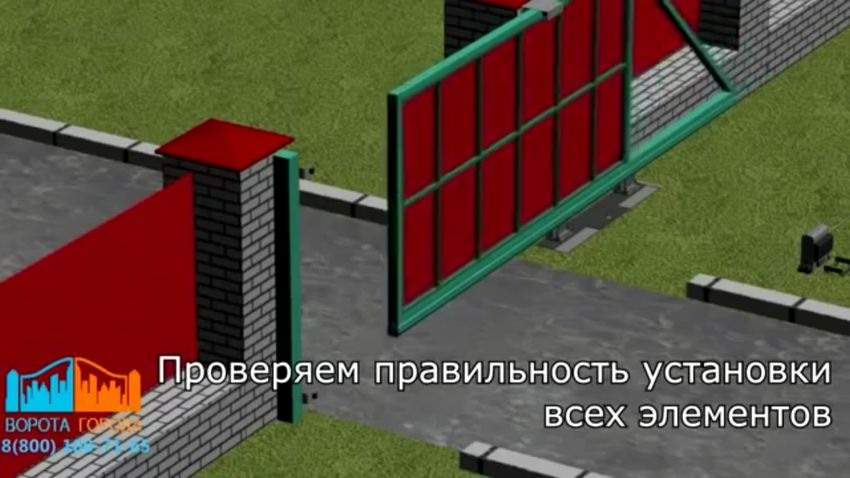
Instructions for creating sliding gates:
- First, a place is prepared for installing the gate: foundation 1.5 meter deep;
- The foundation is set mortgage;
- I am installing guides;
- Is being created karks for gates from a profile pipe with a cross-section diameter of 60 by 40 millimeters (you can see the shape of the frame in the diagram);
- Next, they are inserted into the frame jumpers from pipes 20 to 20 millimeters;
- The finished frame is inserted into the guide;
- The frame is sheathed corrugated board;

See the step-by-step master class in the photo gallery below for more details.


https://i.expert-h.com/en/vorota/1013#sigFreeIdcffc9c4238
Source of ideas and photos, video master class: https://youtu.be/gzr468uDwuc
Original name: Sliding gates from corrugated board
Create a gate from a sheeting with your own hands.
(photos, instructions, video master class)
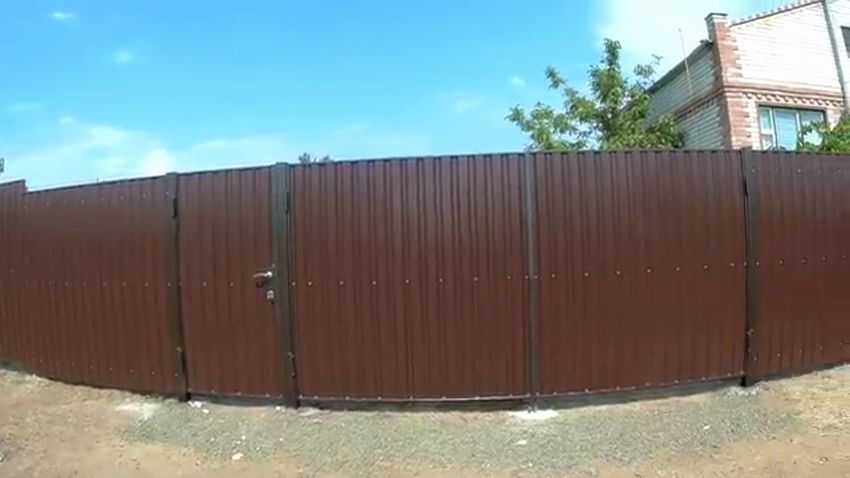
 And finally, I want to demonstrate to you another version of the finished swing gates from corrugated board. The interest of this model lies in the fact that its metal frame, created from a profile pipe, is covered with paint of the same color as the reverse side of the corrugated board. Because of this, porota look solid and assembled efficiently.
 Pluses of model:
- Ease of creation;
- Pleasant appearance;
- Ease of use
- The minimum cost of materials;


https://i.expert-h.com/en/vorota/1013#sigFreeId1dd228550b
Source of ideas and photos, video master class: https://youtu.be/KOxg2p2Fiwg
Original name: Swing gates, economy option, do-it-yourself,
Swing gates made of corrugated board
 The design of swing gates is the simplest design for do-it-yourself implementation. Nevertheless, with good fasteners and locks, this design is very reliable.
You can make swing gates from corrugated board both automatic and mechanical, these options will differ only in the presence or absence of an electric motor on the gate leaves.
Look gates from corrugated board, whether they are temporary or permanent, will be quite aesthetically and functionally.
Below is a detailed photo report for the manufacture and installation of swing gates from corrugated board with your own hands.


https://i.expert-h.com/en/vorota/1013#sigFreeId8aacaee767
Sliding gates from corrugated board
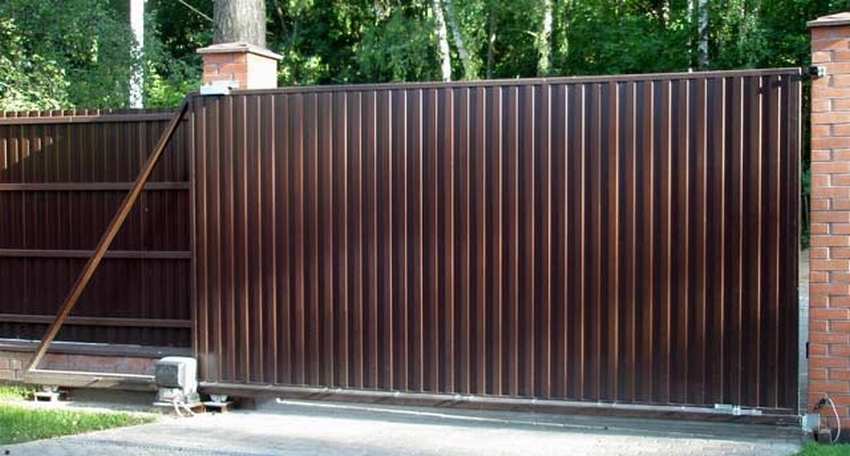 Sliding gates solve the problem with space, namely, they do not occupy revenge upon opening, since they open parallel to the fence.
The sliding gates look very aesthetically and modernly. This design allows not only to free up space when opening, but also to get a beautiful design of the entire fence.
The following are photographs that describe the manufacture and installation of sliding gates from corrugated board.


https://i.expert-h.com/en/vorota/1013#sigFreeId56127d1558
Material for gates made of corrugated board
Doors made of corrugated board mainly consist of two parts: frame and paneling, consisting of sheet corrugated board.
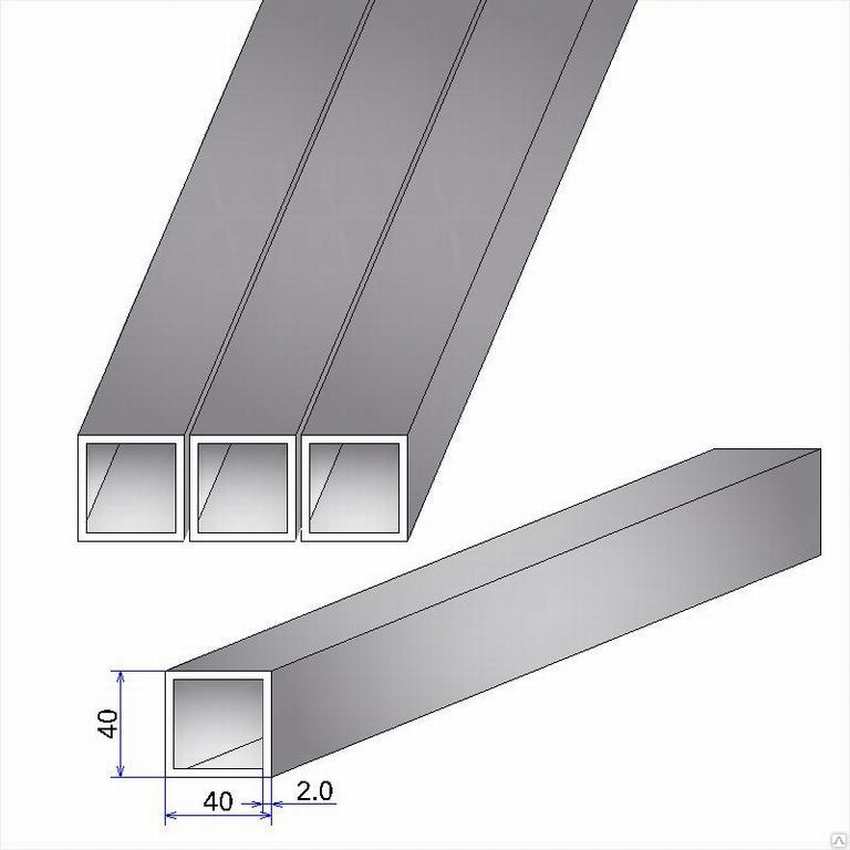
The frame of corrugated board is mainly made of steel profile 20x40 for temporary or not very wide permanent gates, and 40x40 for gates that will often be used and have a decent weight.
Sheathing from sheet corrugated board may differ in the brand of corrugated board:
1. C8 professional flooring - This is the lowest profiled sheeting used in construction. It can be either galvanized or polymer painted.
Below is the characteristic of C8 corrugated board in the table.
2. C10 professional flooring it also has not very good strength, it can be either galvanized or painted.
Below is the characteristic of C10 corrugated board in the table.
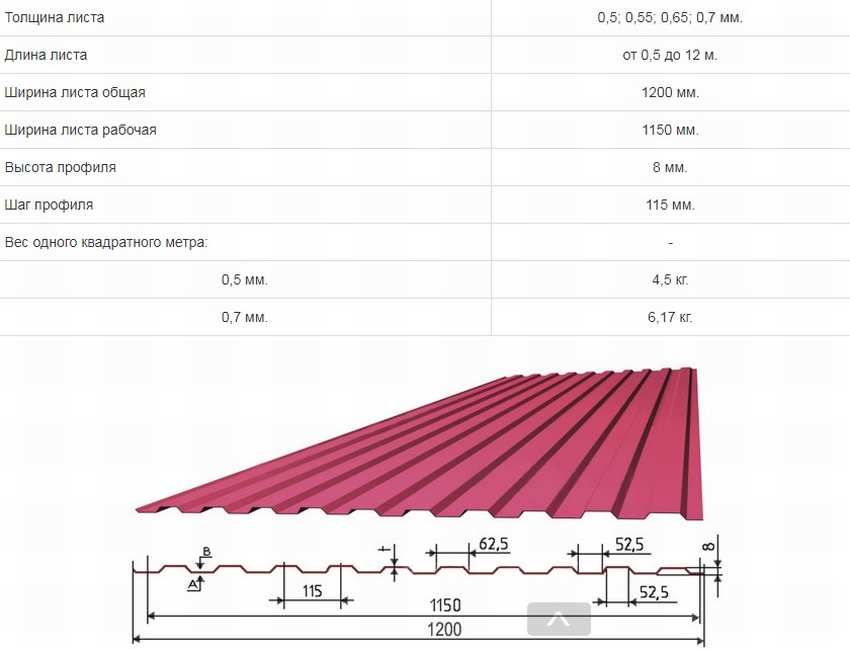
3. C18 professional flooring already has medium strength, it can be either wavy or ribbed, the colors are similar to the above profiles.
Most often, for the arrangement of fences and gates, this particular flooring is used.
Below is the characteristic of C18 corrugated board in the table.

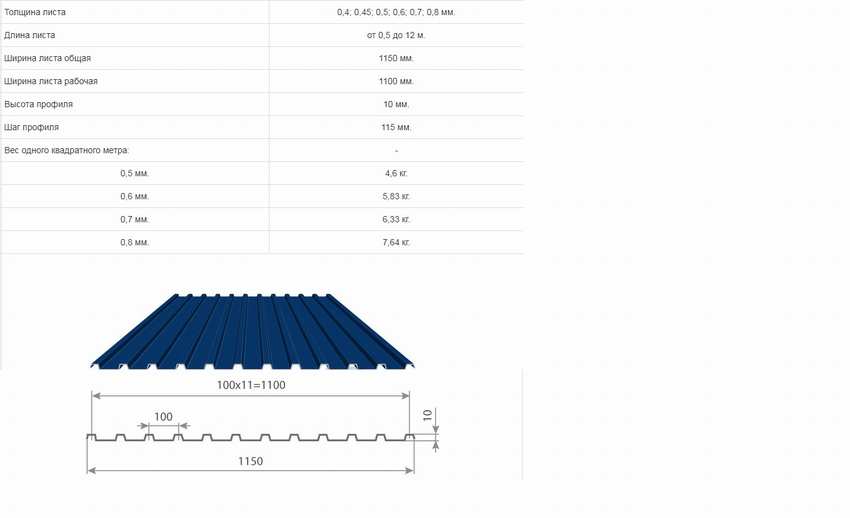
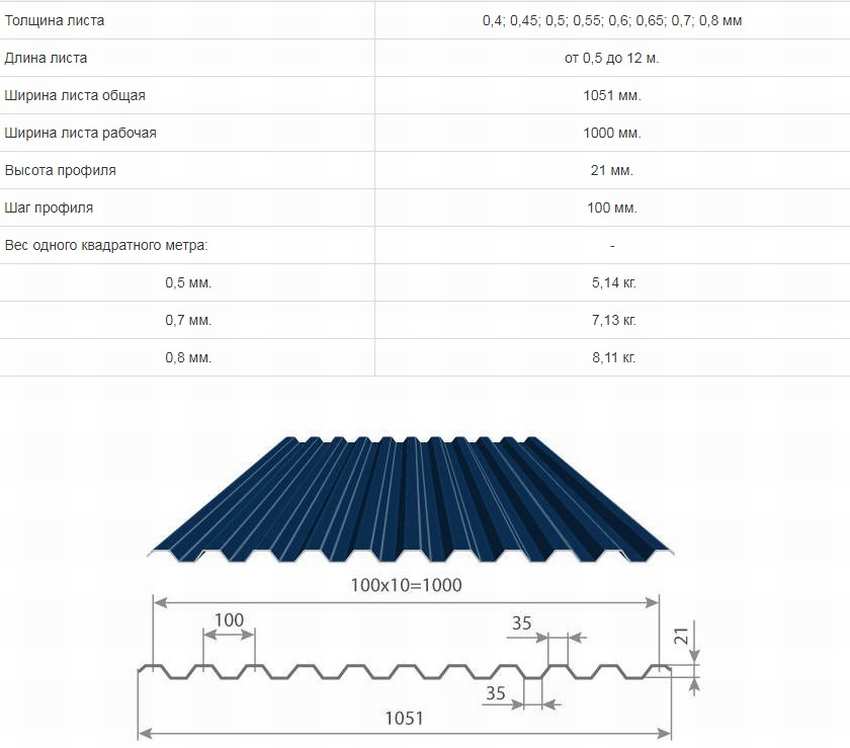
4. C21 professional flooring possesses greater strength and versatility, it is also very often used for the construction of fences, gates and fences.
Below is the characteristic of C21 corrugated board in the table.
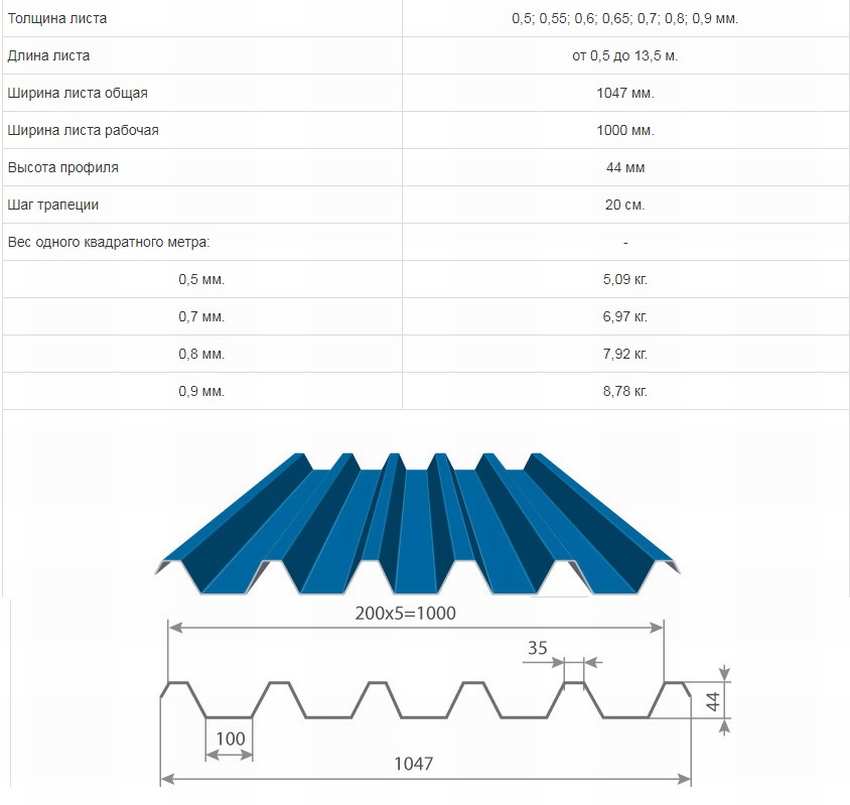
5. C44 professional flooring - a very tough and durable brand of corrugated board, it is used most often in the manufacture of load-bearing elements: massive fences, hangars, cabins.
Due to its ability to withstand heavy loads, it has been widely used in construction.
Below is a characteristic of C44 corrugated board in the table.
There are also other brands of corrugated board, but they are already more durable and mainly suitable for the construction of serious structures, such as roofing or floors, the maximum step of the crate is 3 meters.
Such brands are not used for the construction of gates and fences. So, C8 and C10 professional flooring are best suited for the construction of temporary gates and fences.
For the construction of permanent structures, it is better to use corrugated board of grade not lower than C18.
Gates from corrugated board: drawings, diagrams and designs. (49 photo)


https://i.expert-h.com/en/vorota/1013#sigFreeId88e16a0b30
Beautiful ideas of gates and fences from corrugated board (354 photos)
(for home, garage and garden)
Gates from corrugated board with a gate: the best photo ideas
In this gallery the best versions of metal gates are collected, containing a gate (with forging, swinging, sliding and folding elements) in their design, which can be made independently.


https://i.expert-h.com/en/vorota/1013#sigFreeIdcd538a70c9
Gates from corrugated board with forging elements (95 photos)
In this photo collection, the most beautiful examples of gates from profiled sheet with forging elements are collected.


https://i.expert-h.com/en/vorota/1013#sigFreeId67c7534c6f
Swing gates from corrugated board. Collection of 47 photos
Take a look at our selection of the most beautiful and unusual metal swing gates from profiled sheet. Many models can be used both for a garage, a summer residence, and for your own home. Moreover, most of the options presented below you can do it yourself.


https://i.expert-h.com/en/vorota/1013#sigFreeIdb022d41415
Sliding gates from corrugated photo
So, below are 47 photos of fences and sliding gates from corrugated board, which can also be done with your own hands.


https://i.expert-h.com/en/vorota/1013#sigFreeIdd4965ad0dc
Lifting gates from profiled sheet
This collection of 45 photos contains the most interesting options for lifting gates from corrugated board for the garage and for the fence in the country. As you can see, in the photo below there are home-made models that are completely made by the hands of home craftsmen, which deserves respect, since the lifting gate is the most complex design, in which the accuracy of calculations and the accuracy of the manufacture of guide parts are very important.


https://i.expert-h.com/en/vorota/1013#sigFreeId97aa66e9d7