DIY laptop table 500 photos, master classes
 laptop table
A laptop is a compact thing, but working with it is not always convenient. Do not believe the ads where cute happy girls famously knock on the keys while sitting in Turkish or lying on the couch. Turn it off, happiness passes after ten minutes, when the legs and neck become numb, and the knees become uncomfortable from the overheated body.
In general, you will very quickly come to the conclusion that you need a table, and a desk for the desk. Making a laptop table with your own hands is easier than a shelf in the kitchen, there’s nothing to talk about. With a dozen options presented in this article - choose.
 Folding laptop table
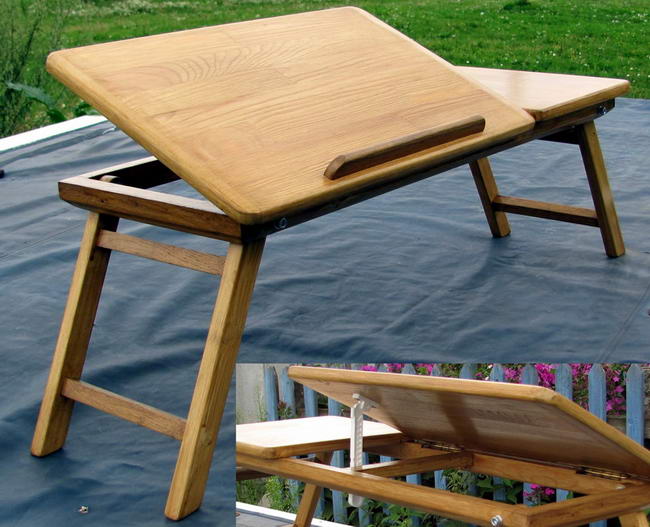
Here is a great option - folding laptop table and not only. The thing is multifunctional and portable, you can use it as a tray, a coffee table or just as a place for a tea party. By the way, suitable to serve coffee in bed, this is a note for romantics. All you need is a sheet of plywood, wooden planks, if any, an old picture frame, glue, nails and four leg bolts will do.


https://i.expert-h.com/en/stol/928#sigFreeId5fe34c1ced
 Trolley for laptop on wheels
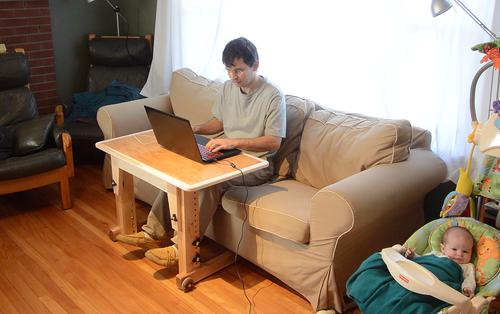
To make such do-it-yourself laptop table appropriate equipment will be needed. Of course, the thing is comfortable, on wheels, the tabletop can be adjusted in heightso that you can work sitting in a chair or on the couch. The option proposed by the author requires accurate calculations, so the adjustable part slides along the grooves, so the grooves in the parts of the legs should ideally match.


https://i.expert-h.com/en/stol/928#sigFreeId05df9a05c0
Presented here exact parts diagrams in inches (1 inch - 2.54cm).


https://i.expert-h.com/en/stol/928#sigFreeId22db8b646f
 Do-it-yourself standard laptop table
If you don’t have your own design idea yet, here diagram of a standard laptop table, you can take it as a basis, individual details can then be finalized as you wish. With the worktop, everything is clear here, but to fix the legs, attach the hinge to one end of each leg. Place your foot on each corner with a wider surface facing the outside. Attach the hinges to the countertop so that when the leg folds, the hinge is sandwiched between the leg and the top, and the leg is flush with the sidewall.


https://i.expert-h.com/en/stol/928#sigFreeIdc070bbfe15
 DIY folding table for a laptop
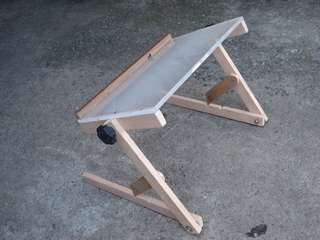
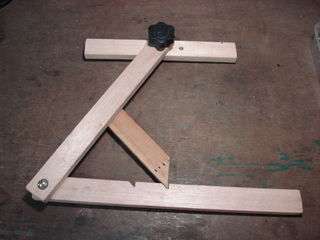
Such it is not difficult to do a folding table for a laptop with your own hands and you will not need much materials. Below are shown drawings of countertops and legs, as well as a unit for fixing and adjusting the countertops. The angle of inclination is adjustable plastic window latch, which is fixed inside the frame - the main feature of this design.


https://i.expert-h.com/en/stol/928#sigFreeIda7877bef7f
 Notebook table with cooling
A little table for a laptop is a good thing only if it is correctly made. The laptop has the property heat, many do not think about it somehow and over time it becomes an unpleasant surprise for them. But this is not such a problem. Look at the step by step photos as you can provide cooling to your laptop by slightly refitting the countertop.


https://i.expert-h.com/en/stol/928#sigFreeId8b3f322def
 Simple work table
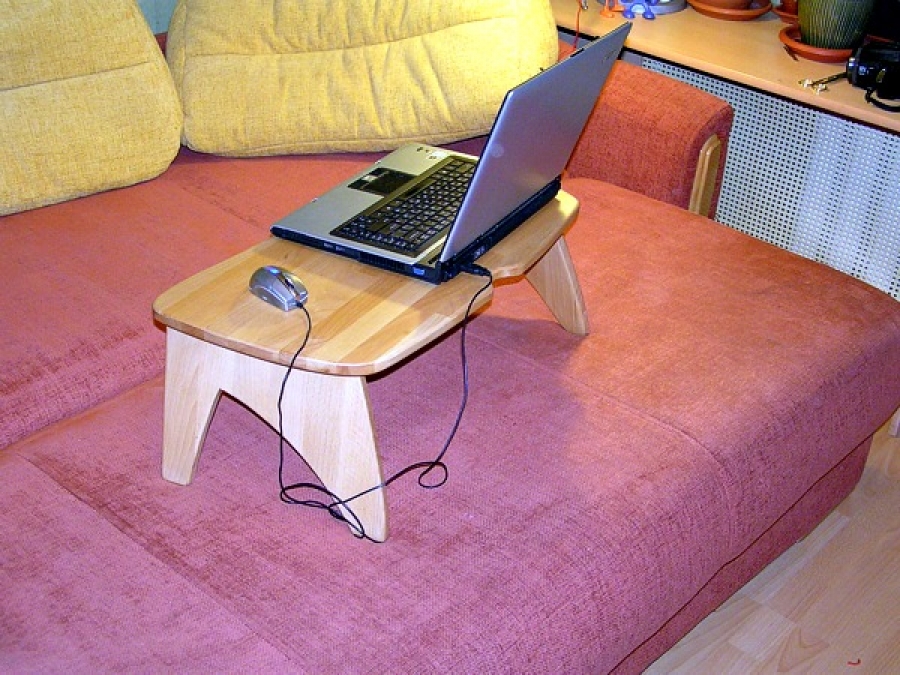
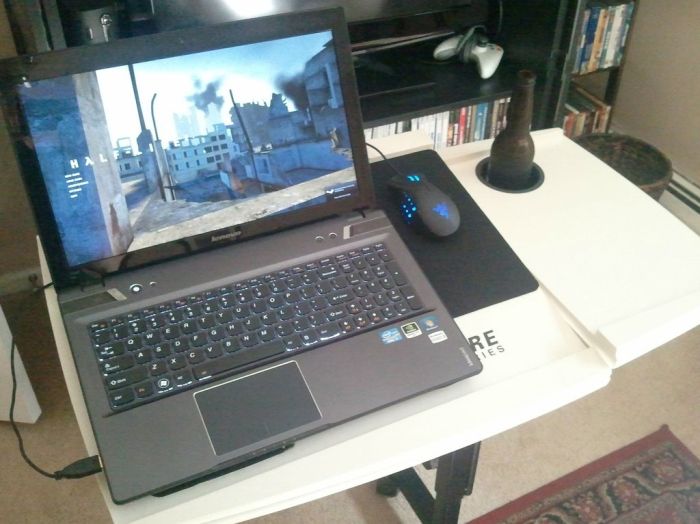
This table can be for a laptop, or for anything else. It's just that the laptop is on the cover on the photo, so I decided to attach it to this collection. The design is very simple, adjust the height during manufacture to make it convenient to work with the keyboard, so you get a simple table for working with a laptop.


https://i.expert-h.com/en/stol/928#sigFreeId8ed1291ca0
 DIY little laptop table
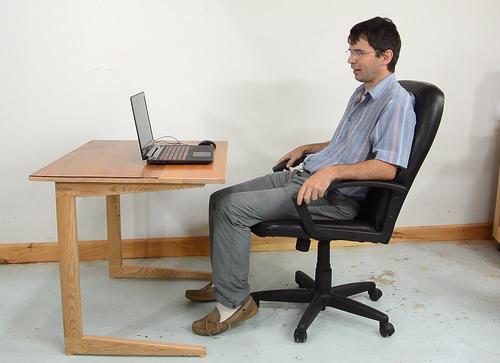
Materials to make this stylish little DIY laptop table went quite a bit and mostly only on legs. The countertop is redone from the old desk. The design only looks so fragile, in fact easily supports the weight of a person.
Step-by-step photos of the master class are quite detailed, but as you can see, you need your own workshop.


https://i.expert-h.com/en/stol/928#sigFreeIddd84891c2a
 Adjustable laptop table
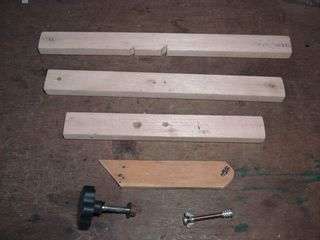
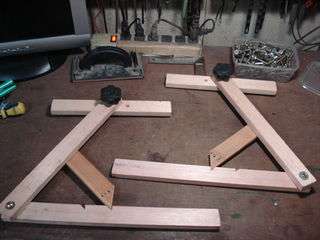
Making such a table is not easy, as the whole the mechanism is made by hand. The coupling part is designed to adjust the height, with a horizontal emphasis on the upper part, which is fastened with mortise spikes to the countertop and the lower part fixed in the grooves on the glue. The adjustment bolts will need to be sized. However, it’s not so difficult, but it’s necessary to tinker, you can’t do without milling machine, circular saw and drill. Each step is detailed in step-by-step photographs.


https://i.expert-h.com/en/stol/928#sigFreeIdb096a6d632
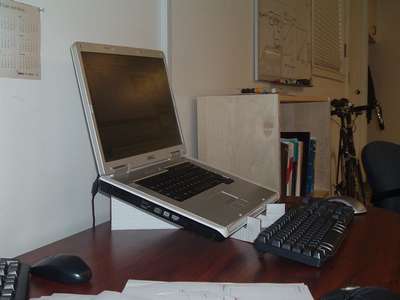
 Notebook table for standing work
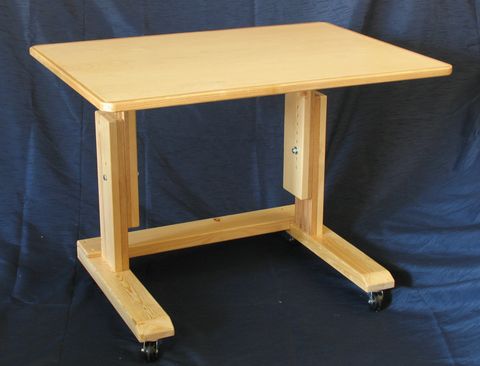
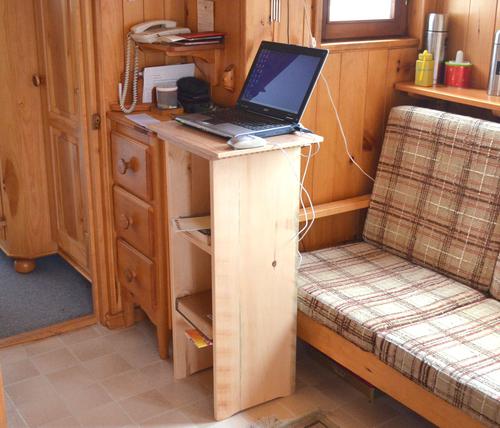
Most of the tables for standing work are made on the basis of a metal frame, have an adjustment for standing and in the normal position. At home, few people use such tables, but sometimes a similar need arises. As you know, such models are very expensive. This laptop table for standing work is made by hand only of wood.
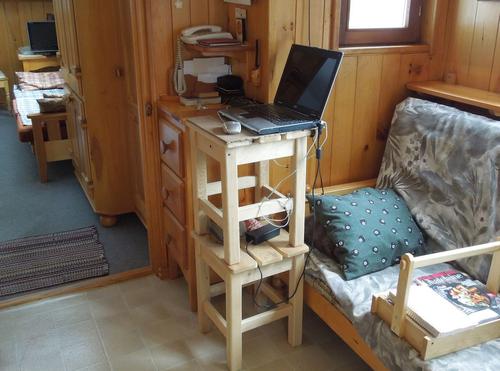 Of course, this is not the top of comfort, the usual high bedside table, but quite comfortable and pretty. In the right photo you see which design was used before. Not very convenient, right? The step-by-step photos show the work process, although the master is clearly not looking for easy ways, on glued grooves the construction is certainly more reliable, but you can do it easier on ordinary end connections.


https://i.expert-h.com/en/stol/928#sigFreeIdc4e6116ed9
 How to make a laptop table quickly and inexpensively
Everyone can make such a laptop table. You will need a small countertop, this is not a problem, you can find any stove from an old table or cabinet, six wooden slats, screws and screws. These holes, what you see, are more for beauty, well, and so that the design is not so heavy. Lock bolt made of nails, springs for handles and bicycle spokes. The table is compact, if it is not necessary, it can be folded and put under a sofa or on a cabinet.


https://i.expert-h.com/en/stol/928#sigFreeId4867525e43
 Notebook table in bed
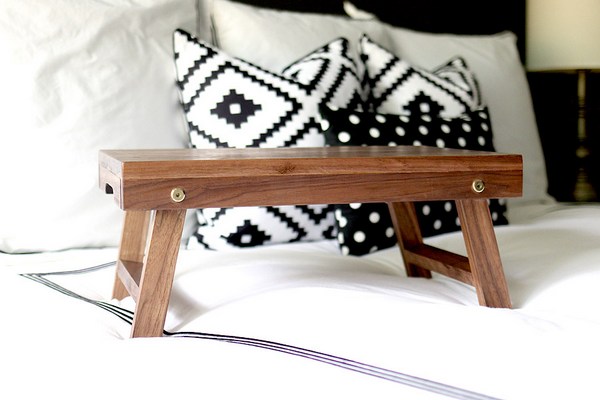
Cute laptop table in bed made of just two boardsconnected by glue. Still need six bars on the legs and bolts for connection. The holes for the bolts must be made large enough so that the legs can be conveniently laid in the middle, so there is not much space for storing the table.


https://i.expert-h.com/en/stol/928#sigFreeIdb909722b92
 Notebook table with lifting lid
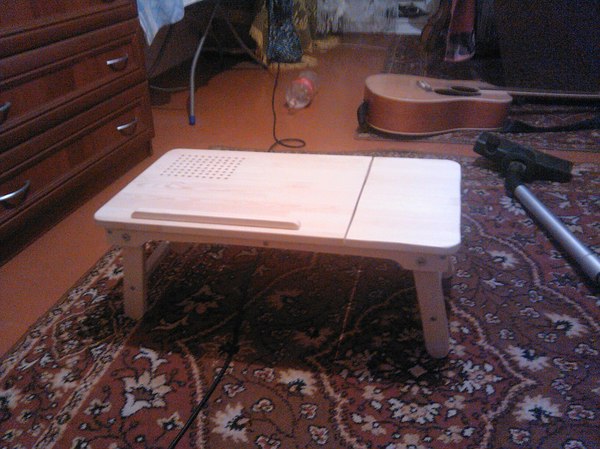
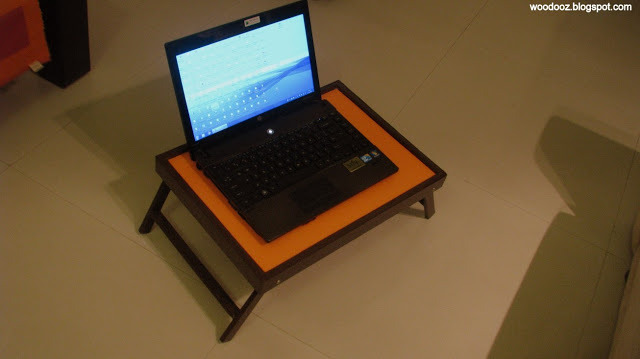
Perhaps not an ideal design in terms of design, but all the technological features are provided for - a grill for ventilation, strap so that the laptop does not fall, folding legs. So in terms of functionality, it complies with all standards. A rail is fixed under the tabletop, a groove is drilled in it, and a groove is also made in the tabletop from the back side, where it is inserted metal bolt to hold the cover. A good option for a beginner joiner.


https://i.expert-h.com/en/stol/928#sigFreeId62f7b0829c
 DIY laptop stand
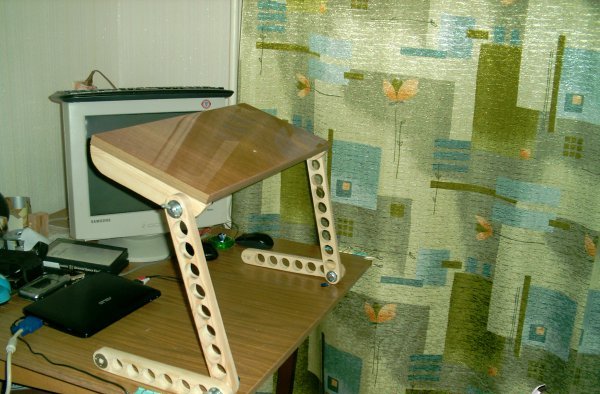
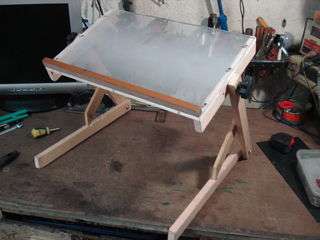
Like this a music stand for a laptop can be done with your own hands in a couple of hours. To do this, you need an electric drill, a hacksaw, and a little sandpaper. In this case, the thrust surface is made of plexiglass, although a regular sheet of plywood is also suitable. On supports simple clamps to change heightat the top tilt adjustment screws.
The stand can take any position, a convenient thing, and the design can be modified.
 Bedside table for laptop
For lovers of comfort I suggest bedside table for laptop with wheels, which allows it to be used in the bedroom, living room or even outdoors. When you need to work late at night, which often happens to many of us, having such a bedside table, you can comfortably work in bed.For the manufacture you will need plywood, glue and ordinary tools, as you can see in the step-by-step photos, it will not be difficult to assemble the structure with your own hands.


https://i.expert-h.com/en/stol/928#sigFreeIdd2752a0a47
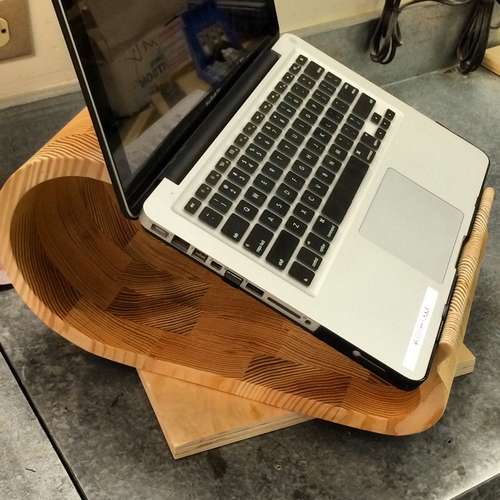
 Notebook table for the lazy
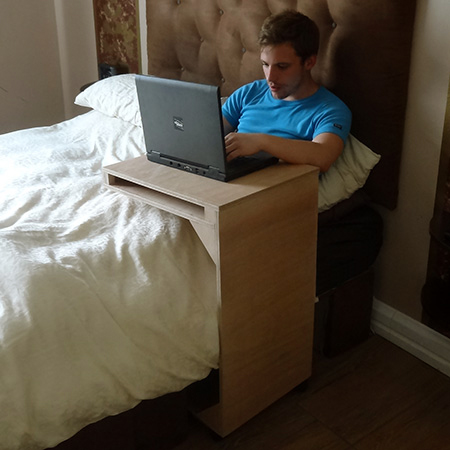
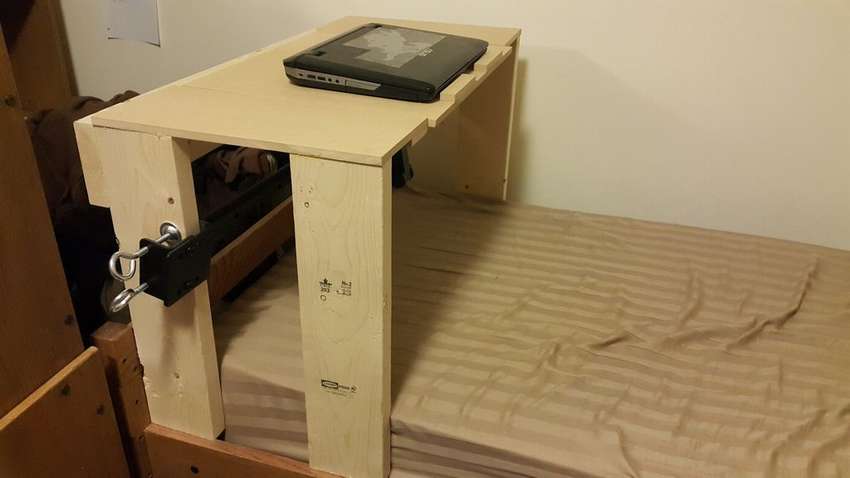
The author of this project loves to work in bed, if you are also a supporter of this method, then this design is for you. Keep in mind that the table is made according to the size of the author’s bed and his height, so you need to calculate your sizesif you want to do something like that.
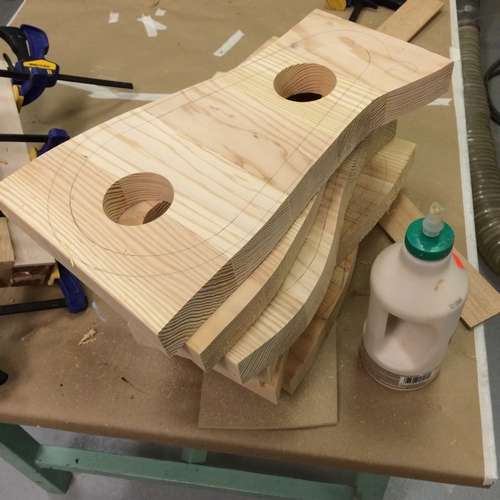
- Measure the top of the table, cut out two pieces of the same size for the top.
- Then saw out 4 legs and a support block that will be attached to the back of the table.
- Then you need to glue and nail the back to help the table maintain its shape and give it additional support.
- Now, using 4 small rectangular pieces of rectangular wood and nails, fasten them close to the middle of the table to work as a support. Make sure that the 4 fixed legs are located at the back and in the middle of the table.
- For the front, drill two holes for the long screws. Then you need to drill a hole that corresponds to the length of the screw fully towards the front of the table. Next, adjust the screw tightening to allow part of the front support to be manipulated, allowing the table to change shape.
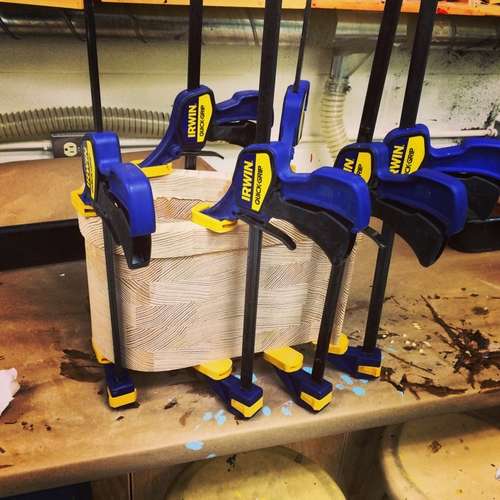
- Depending on the type of movable bracket, you can use screw slots, and then proceed to drill holes that are the exact size of the screws. After the holes have been drilled, attach the bracket to the table and screw the screws into the wooden board. Take two more small pieces of wood and attach to the edge of the middle of the table, this helps support laptops and a book.
- Manually adjust the hand so that the movable part of the table is aligned with two other slices on both sides.
Basically, the table is finished. A few things to remember - if the movable bracket is weak, use a lightweight top, and if strong enough, you can use any kind of durable wood, the table will last longer.


https://i.expert-h.com/en/stol/928#sigFreeIdcaade2fda8
Retro laptop table
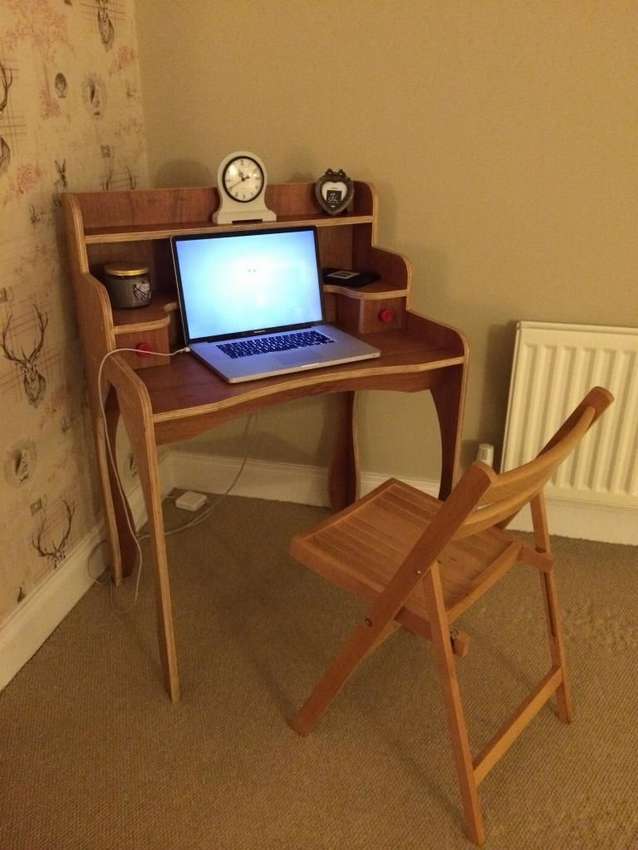
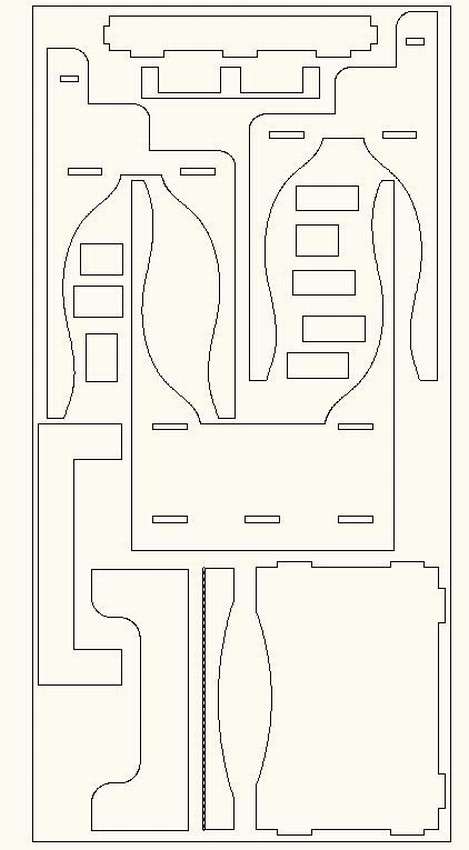 This laptop table is made by a student for a dorm room, that is, as you know, no free money, no free space. Nevertheless, the table turned out wonderfully, and only one sheet of plywood took its production. Truth, I needed a CNC machineif you know how to produce a 2D DXF file for him to enter into the NC program. For this table in the photo. Perhaps it can be done in another way, but it’s difficult to make identical curves manually, so this can be added to the expense item. In general, stock up with glue and try, it is not so difficult.


https://i.expert-h.com/en/stol/928#sigFreeId5ba5d4057d
 DIY folding table for laptop
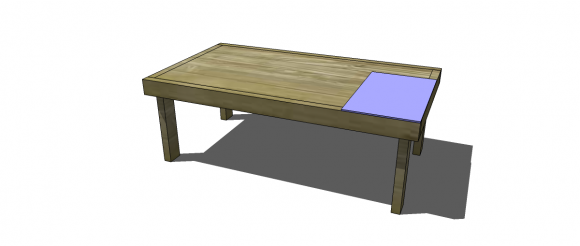
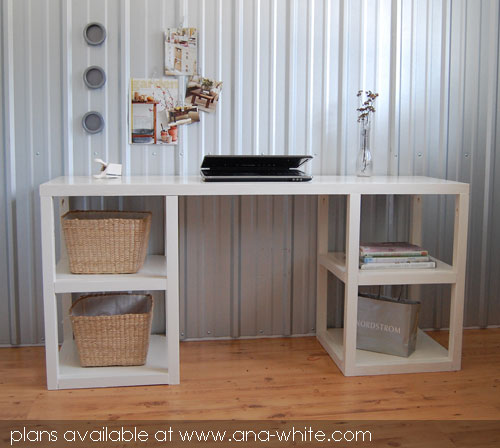
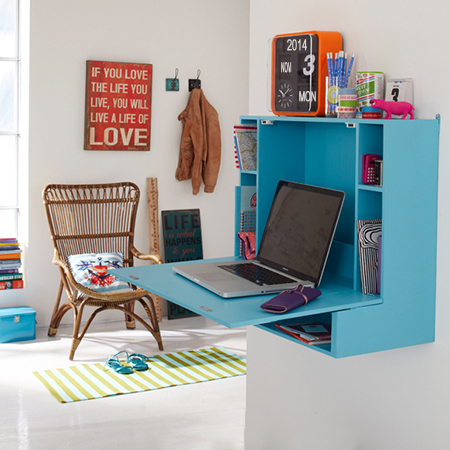
A compact wall-mounted desktop with a hinged lid that serves as a work surface for a laptop. You can make such a folding table for a laptop with your own handsIt takes up very little space, can be installed in a small home office or a child’s bedroom. When not in use, the lid is easy to close and can be used as a wall cabinet.


https://i.expert-h.com/en/stol/928#sigFreeIde0a76cff31
100 photos of tables and tables for laptop


https://i.expert-h.com/en/stol/928#sigFreeId2d8fbdfd9b
DIY Laptop Stands
Simple and cheap laptop stand
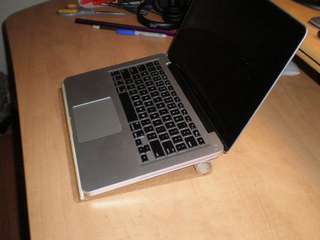
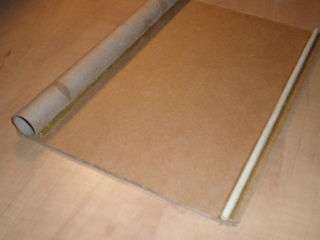
This is a simple and very cheap laptop stand made from improvised materials that are in every home. 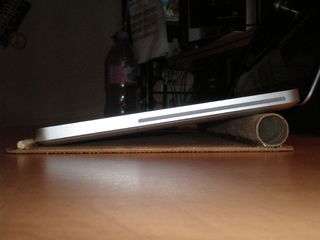
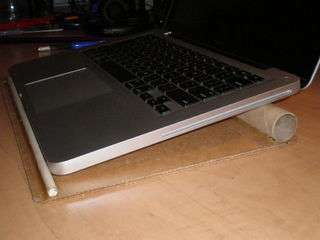
All that is needed is a piece of cardboard or plywood the size of a laptop, as well as a regular cylinder made of cardboard. Then you just glue the whole thing - the stand is ready.
 PVC pipe laptop stand
To make this original stand you will need a PVC pipe 2 cm thick and 1.2 meters long and six 90 ° elbows for the same diameter. You can use other pipe diameters, but this option is tested and holds the structure perfectly. You will also need PVC glue, a hacksaw and a spray paint can. We cut the pipe into three parts: 27 cm, 19 cm, 9 cm. Then sand the edges and paint all the parts separately. Assemble the structure, adjust it so that it is convenient for you to use, and finally glue all the joints. The stand is ready.


https://i.expert-h.com/en/stol/928#sigFreeId5291011593
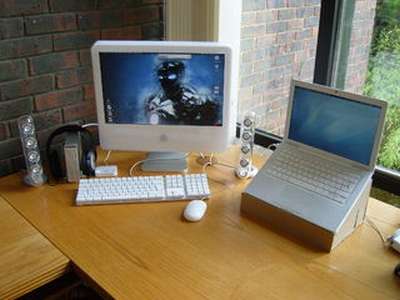
 Laptop stand with brackets
If you are a happy owner of a laptop, then you probably already made sure that the stand is needed. Thus, you solve two problems. Intear, provide comfortable corner of the keyboard and move the display closer to your eyes for easy viewing. Secondly, provide enough space for air circulation, that is, ensure normal circulation so that the laptop does not overheat. This version of the stand is a little more complicated than the first one, you just need to buy or make such metal brackets as in the photo, and then to assemble such a design is not at all difficult.


https://i.expert-h.com/en/stol/928#sigFreeIdd2c2d68f25
 Plastic laptop stand
If you have a laser cutter, then making such a laptop stand out of plastic is not a problem for you. Of course, holes can be made in another way, but then it is unlikely to be so neat. In general, if you want a sleek, stylish and inexpensive laptop stand, then this is a great option. Prepare a ruler, mittens, two table clamps, a laser cutter and a job.


https://i.expert-h.com/en/stol/928#sigFreeId56fd8d5550
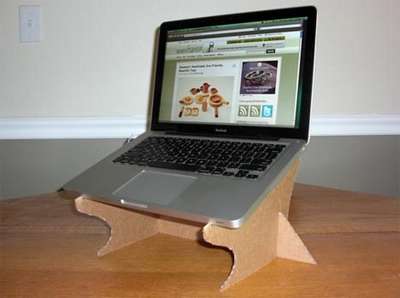
 Decorative stand for laptop
This option is for those who are not looking for easy solutions. Like decorative stand for laptopOf course, it’s not as easy as the previous ones, you will have to work, but it’s worth it. It is necessary to make a drawing, according to which with the help of a jigsaw and a drilling machine you make the first workpiece. It may not be exactly as accurate as in the diagram, but it’s not so important use the first part as a sample, the rest should match the original as much as possible.

Then glue the workpieces and fix with clamps. Then we bring the finished design to mind - we grind, varnish.
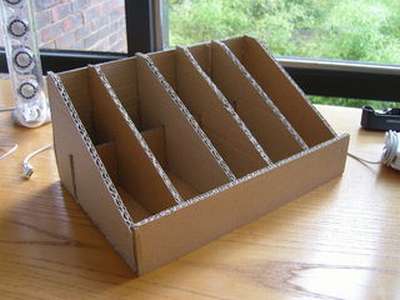
 Cardboard laptop stand
The fastest and easiest way to make a laptop stand is to cut it out of cardboardGreat material for home use. If you are fundamentally spending money, there is no better option. Of course, cardboard is needed very strong, preferably from packaging boxes, somewhere 8 mm, thinner to take just does not make sense. Unless glued and pressed, but this is an unreliable matter. 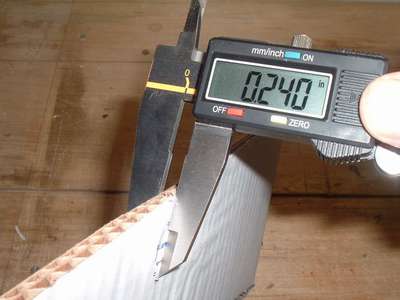
You can try another option. If you are skeptical about cardboard, then according to the author, this stand passed the endurance test conducted by him personally. The laptop is not removed from the design exactly two weeks, as a result, the stand is like new, it has not slipped a centimeter, the corners are not dented or bent, so you can try.
 One more cardboard stand option. It looks pretty aesthetically pleasing, there is no additional information about the reliability, but it’s probably worth a try. Make a stand according to the same sketch as in the photo, just use very durable cardboard. By the way, if in doubt, you can replace cardboard with plywood and work with a jigsaw, the forms are not at all complicated.


https://i.expert-h.com/en/stol/928#sigFreeId4940ff66c6
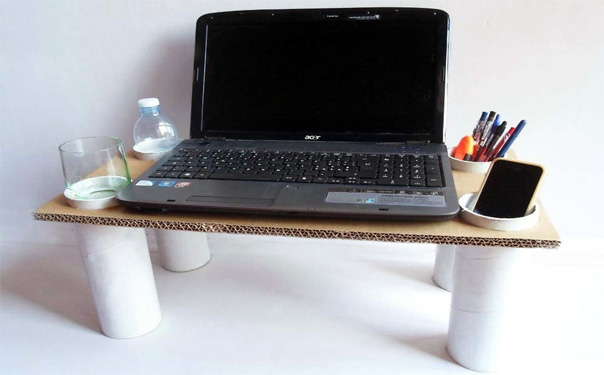 Can still do a cardboard stand for a laptop in the form of a tablebut it does find cardboard pipes. Here you can be sure of durability if you saw such cardboard pipes, they are very strong, and the TV will withstand. The countertop can be made in two or three layers, plus add ventilation holes.


https://i.expert-h.com/en/stol/928#sigFreeIdd89024f08a
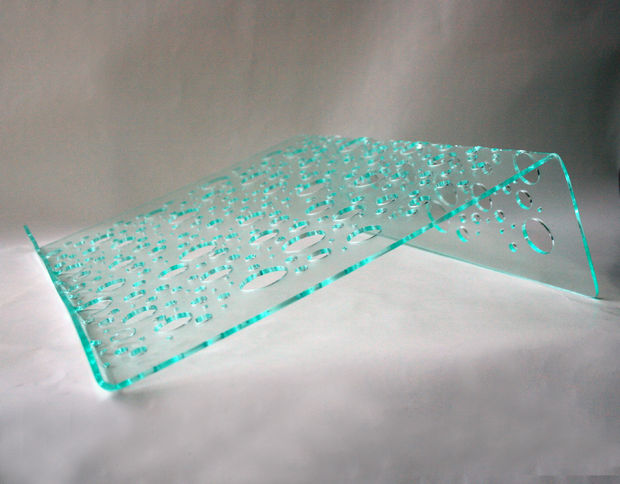
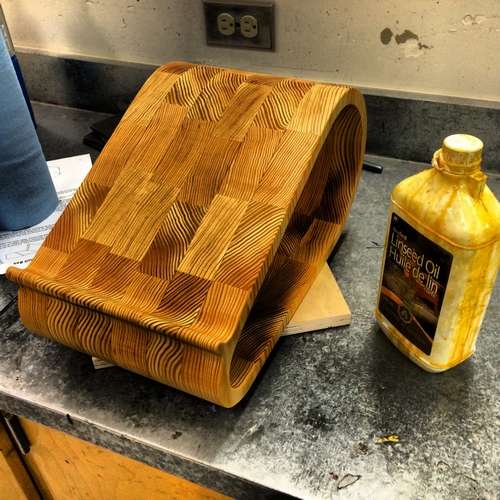
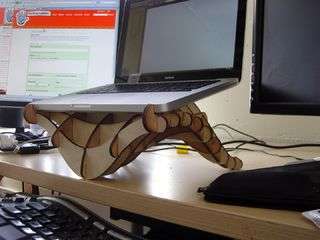 Original stand for laptop
The design depicts the intersection of two waves traveling perpendicularly. If not for the laptop, I would never have guessed why this thing is needed. The author claims that working on such a stand is a pleasure. From a technological point of view, everything is fine, ventilation is provided, the screen is at eye level, on account 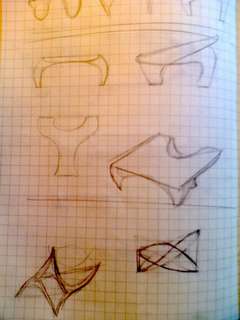 I don’t know the keyboard. The design, of course, is impressive, if you like it, the photo below is something like a drawing. If you cut such parts, to assemble and put on glue I think is not a problem.
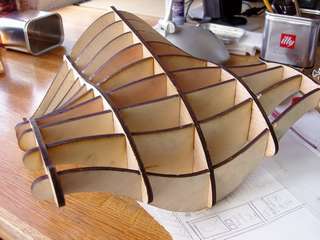
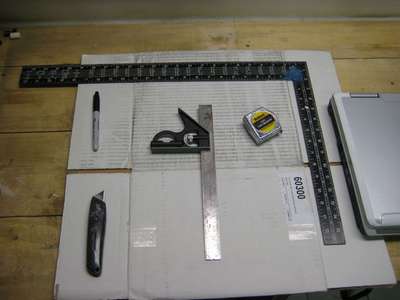
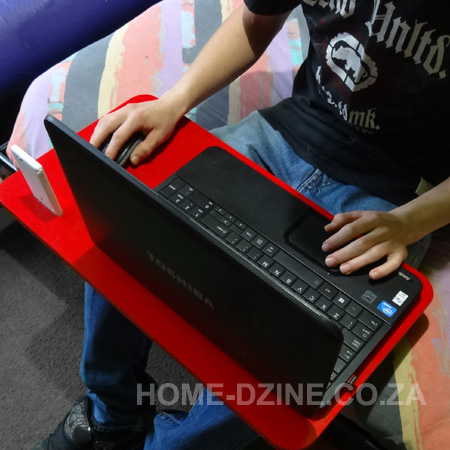 Laptop tray stand
This laptop stand is ideal for those who have to work in situations where a desk is not available. The tray stand has openings for air circulation, and even a slot for your phone or smartphone. It is convenient to work with him on the couch or in bed, you can watch TV at the same time, that is, combine the useful with the pleasant. All you need is a large enough sheet of plywood or a thin board, and how to make a tray for a laptop out of it, see the master class.


https://i.expert-h.com/en/stol/928#sigFreeIdf75fd3b177
100 photos of laptop stands


https://i.expert-h.com/en/stol/928#sigFreeId5b10c083db
Schemes and drawings of tables and stands for laptops


https://i.expert-h.com/en/stol/928#sigFreeId0c819a5e26
Hello, I am the author of this article, so I look forward to asking questions for this article in the comments below, I will answer all !!!
If you have questions about another topicask them on our forum, we will answer you
- Two baskets of paper in 5 minutes (Master class)
- How to make a simple and compact table for a milling cutter from plywood
- How to make a soft headboard tile (Instructions + step by step photos)
- Cinder block benches: a convenient bench in 55 minutes
- How to make a bed with a niche: saving space (Master class)