Do-it-yourself built-in wardrobe. 400 photos and drawings
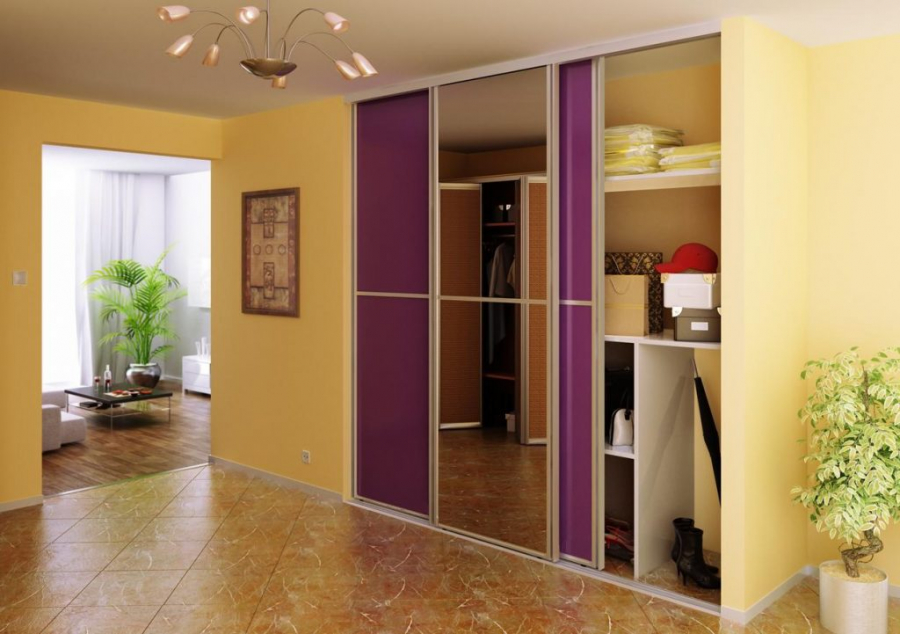
Do-it-yourself wardrobe in the entrance hall
A built-in wardrobe is a great alternative to traditional wardrobes, and this is not only an attractive appearance, but mainly practicality. If you take make a built-in wardrobe with your own hands, you can arrange the layout and choose the finish as you wish, in accordance with the style that you like best. The built-in closet function is installed in the wall niche and completely occupies the allocated space.
Benefits:
the cabinet has no bottom, roof and side walls depending on the design, which significantly reduces the cost of the product;
can be installed in the opening of almost any size;
metal rods, trays, baskets and other equipment also save on additional options.
disadvantages:
the size of the cabinet will depend on the opening;
there is no mobility, the cabinet cannot be moved to another place without dismantling the structure.
Built-in closet step by step instructions
Here are photos taken in the workshop. Marko studiowhere the process is shown how to make a built-in wardrobe. The body of the structure is made of plywood, the relief elements are made of oak. The side walls are boxes of 100 mm. The main feature of the finishing work is polyurethane finishallowing to achieve both elasticity and high hardness. The wardrobe is designed in a classic style, installed in a niche - very comfortable and roomy. Instructions describing the assembly process can be found on the website.
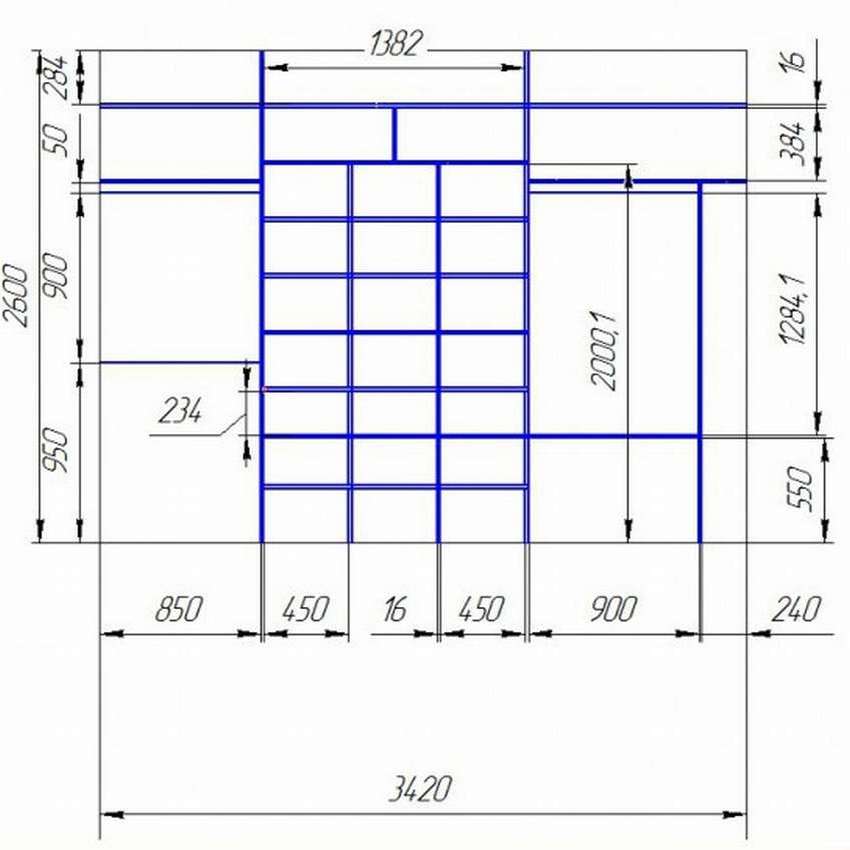
Here is a concrete example do-it-yourself wardrobe installation. Dimensions of the structure 2020x625x2320 mm. The diagram below shows part numbers. Vertical - 1,2,3,4,5, top - 6, bottom - 7 and shelves - 8, 9 10. In the right photo drawing of a sliding wardrobe with dimensions. This is an example of a classic design that can be used in principle for any room - an entrance hall, a living room or a nursery, the design is essentially the same, only the functional load, and therefore, the internal content, will be different. Assembly of a sliding wardrobe, of course, an important stage, but still the most important thing is to correctly calculate the dimensions of the component parts.
You can read about all this, including a list of tools, assembly, installation of equipment and sliding doors in the instructions on the website. See below the master class on step by step photos..
Video: Do-it-yourself closet (Built-in). Very detailed !!!
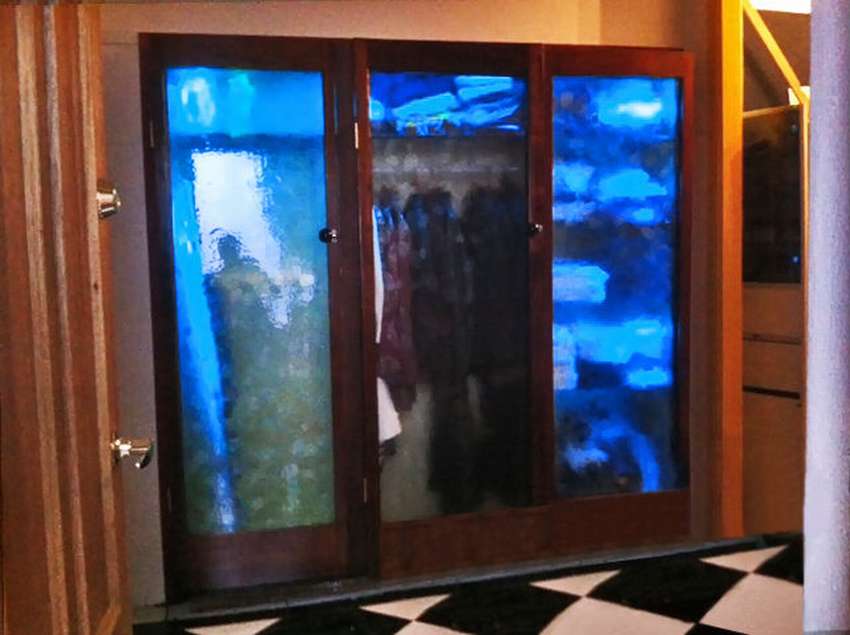
Built-in wardrobe with lighting
In the topic of the upcoming New Year holidays, a good idea to do built-in wardrobe with lighting. Install LEDs with multi-colored lights and why do you need a Christmas tree? The first thing to do is find or make sliding doors. Then measure the height, length and depth of your space, in this case it’s approximately 2.1 x 2.1 x 0.5 meters. Cut the outer frame to size and screw it into the wooden frame for sliding doors. Divide the cabinet into three areas to fit the door. Then cut the doors to size, hang and see how comfortable they fit. Attach the LED strip to the inner front edge around the perimeter. That's all, in short. Detailed instructions how to make a built-in wardrobe, you can read on the site, below in the gallery see step-by-step photo builds.
Built-in closet today is a very popular model of furniture for home interiors. New technologies are being developed, new design options appear. Presented here sliding wardrobe photoOf course, a very small part of the existing models.
 Do-it-yourself wardrobe in the entrance hall
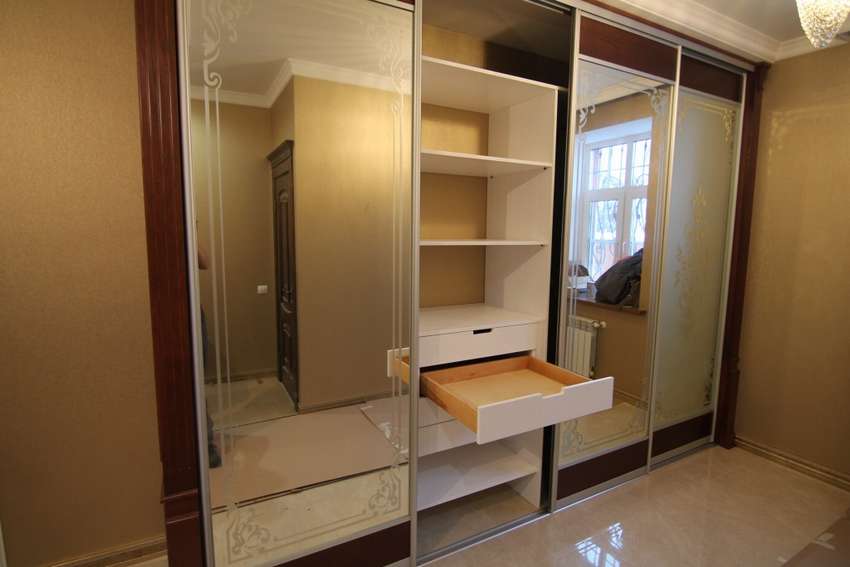 Here are photos taken in the workshop. Marko studiowhere the process is shown how to make a built-in wardrobe. The body of the structure is made of plywood, the relief elements are made of oak. The side walls are boxes of 100 mm. The main feature of the finishing work is polyurethane finishallowing to achieve both elasticity and high hardness. The wardrobe is designed in a classic style, installed in a niche - very comfortable and roomy. Instructions describing the assembly process can be found on the website.


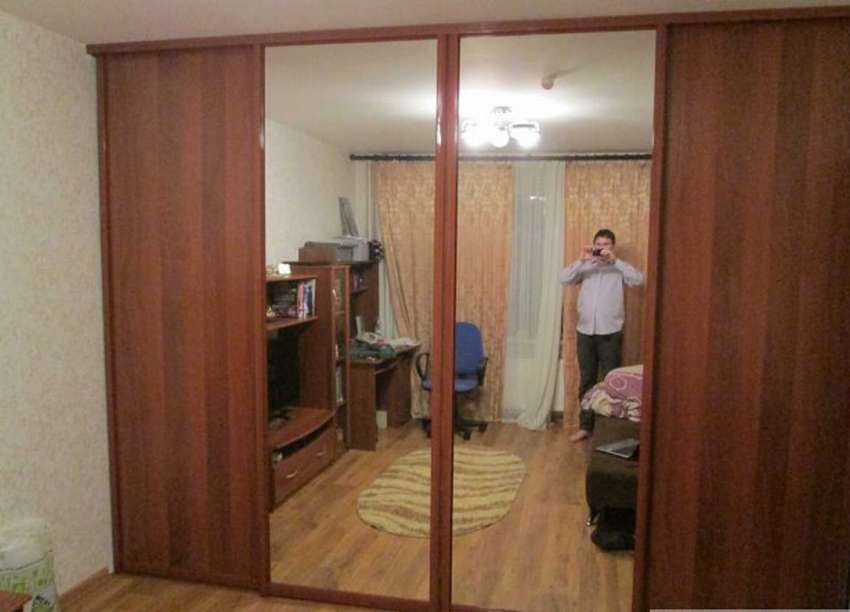 Here is a concrete example do-it-yourself wardrobe installation. Dimensions of the structure 2020x625x2320 mm. The diagram below shows part numbers. Vertical - 1,2,3,4,5, top - 6, bottom - 7 and shelves - 8, 9 10. In the right photo drawing of a sliding wardrobe with dimensions. This is an example of a classic design that can be used in principle for any room - an entrance hall, a living room or a nursery, the design is essentially the same, only the functional load, and therefore, the internal content, will be different. Assembly of a sliding wardrobe, of course, an important stage, but still the most important thing is to correctly calculate the dimensions of the component parts.
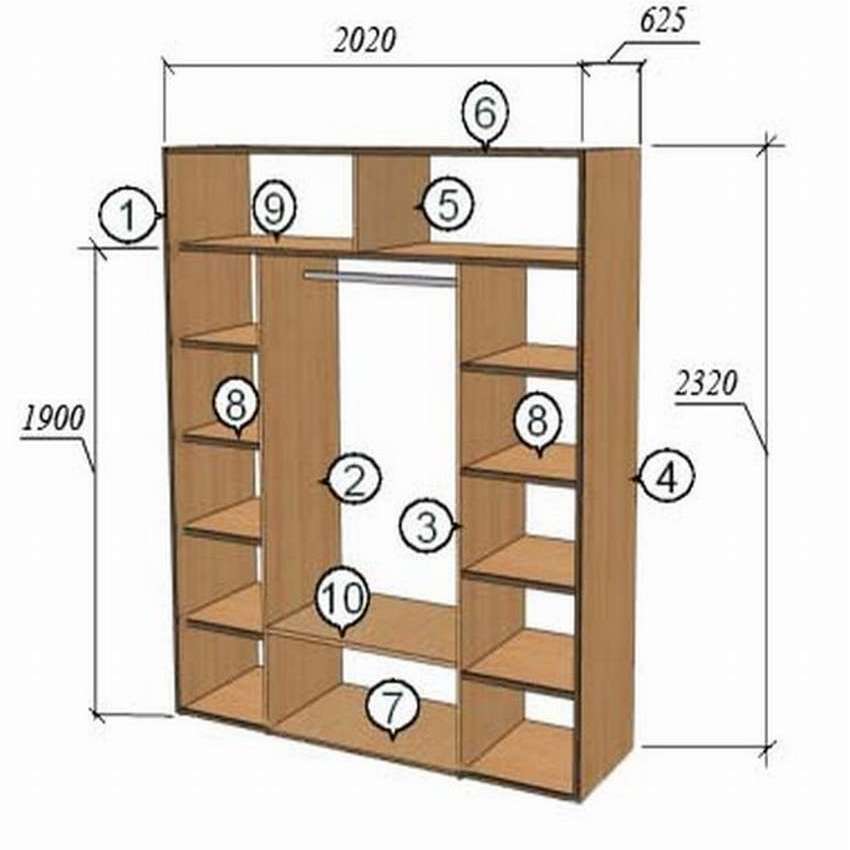
 You can read about all this, including a list of tools, assembly, installation of equipment and sliding doors in the instructions on the website. See below the master class on step by step photos..


 In the topic of the upcoming New Year holidays, a good idea to do built-in wardrobe with lighting. Install LEDs with multi-colored lights and why do you need a Christmas tree? The first thing to do is find or make sliding doors. Then measure the height, length and depth of your space, in this case it’s approximately 2.1 x 2.1 x 0.5 meters. Cut the outer frame to size and screw it into the wooden frame for sliding doors. Divide the cabinet into three areas to fit the door. Then cut the doors to size, hang and see how comfortable they fit. Attach the LED strip to the inner front edge around the perimeter. That's all, in short. Detailed instructions how to make a built-in wardrobe, you can read on the site, below in the gallery see step-by-step photo builds.


