Wall cabinet for the kitchen. Do it yourself + 700 photos, drawings, step-by-step instructions
 do-it-yourself kitchen cabinet
Have you decided to do your own kitchen? Here are 25 ideas how to make a wall cabinet for the kitchen with drawings and step by step photos. These are not the most difficult projects, but you definitely need help not to spend a lot of time searching for information.
Manufacture DIY kitchen cabinets It will save money and create a kitchen with an individual design. This way you get exactly what you want. Here are simple models that even a beginner can handle. But after the kitchen cabinets are installed, it may seem that you have been making cabinets all your life. In addition, in the article you will find step-by-step photos on how to make photodiode illumination of the kitchen cabinetinstall microwave in the cupboardmake towel holder and a lot of other useful information.
How to make a wall cabinet for the kitchen
 If you are looking for an inexpensive way to do do-it-yourself kitchen cabinetuse here step by step instructions. The reason why it will be relatively cheap is because the cabinet is made from plywood, and this is usually an inexpensive building material. Therefore, if you have a limited budget, you can consider this option. Such hinged kitchen cabinets can be made using conventional tools. Due to its simplicity, a wall-mounted cabinet is ideal for demonstrating the benefits of a frameless design. All that is needed for assembly, whether in the store or at the workplace, is a cregg jig for connecting parts, from four to six clamps, screws and glue. Detailed instructions can be found on the website, see below the assembly procedure of the kitchen cabinet step by step photos.


https://i.expert-h.com/en/shkaf/navesnoi#sigFreeIde0a23e5463
Wall cabinet with shelves
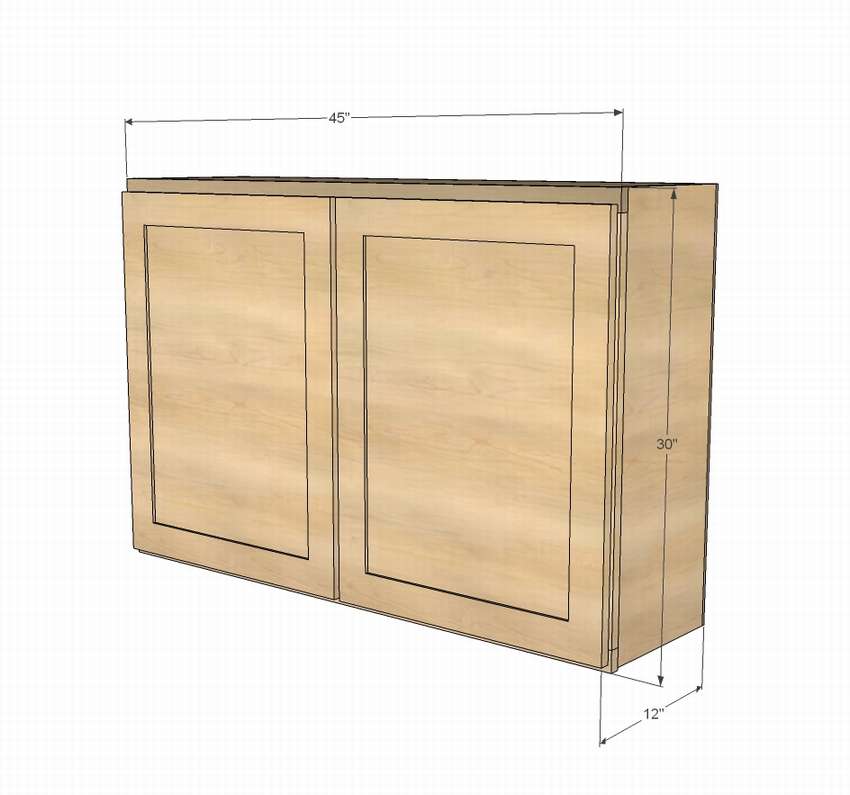
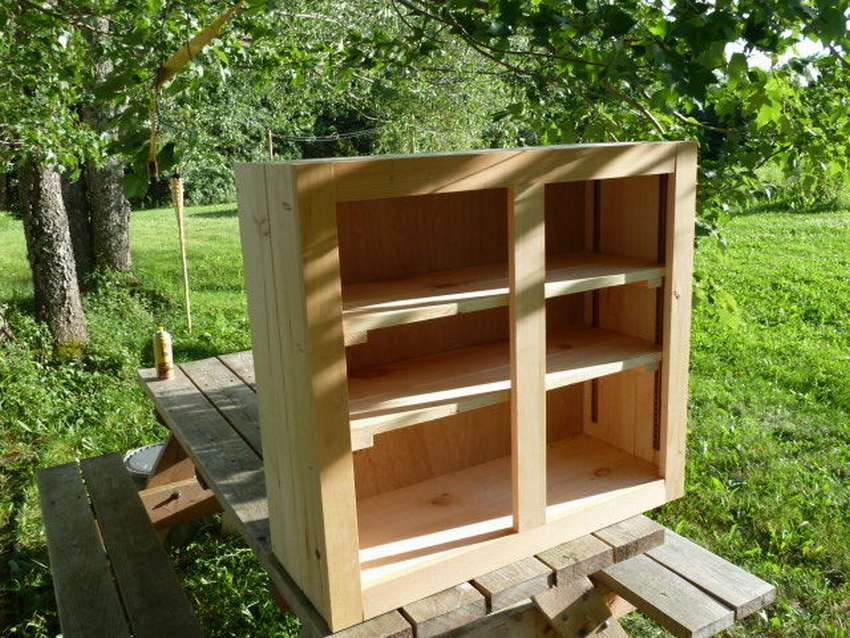
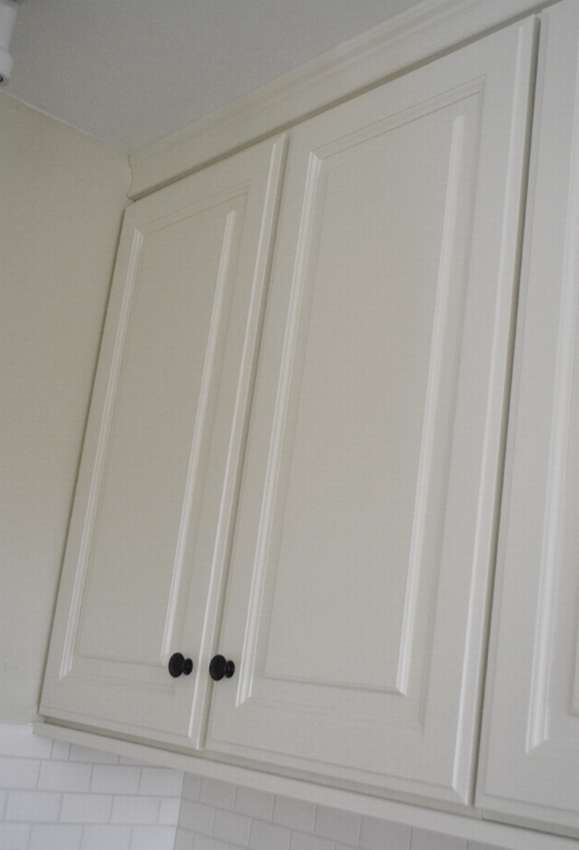 One more example, how to make a wall mounted kitchen cabinet do it yourself. Unlike other designs presented, this cabinet has double doors. The general rule is that the door should always be above the width. Also need to add central vertical barto close the gap between the double doors. For work you need boards, plywood, and two sets of doors.
First of all, fix the side walls with pin holes on the inside for adjustable shelves - it's a lot easier to do at the beginning. Drill holes for the front bezels.
For higher shelves, just trim the sides above. For deep shelves it is necessary to adjust the width of the plywood.
Attach the back support insert at the top of the cabinet. When you hang the cabinet, screw this board into the studs on the wall. For additional support can add a second support at the bottom of the cabinet.
The back is not constructive, but covers the inside, so it cannot be used for hanging. Use glue and nails for fastening.
The front bezel is flush mounted at the top and bottom, but increases the sides of the cabinet, so leave some room for maneuver when installing the cabinets.
At the end, install the shelves and secure the doors.


https://i.expert-h.com/en/shkaf/navesnoi#sigFreeId721236610d
Wall cabinet for kitchen with doors
 It's ordinary wall cabinetbut the idea is to make doors that open from the side of the stove, despite the fact that this is one design. This option is really makes the kitchen more functional.
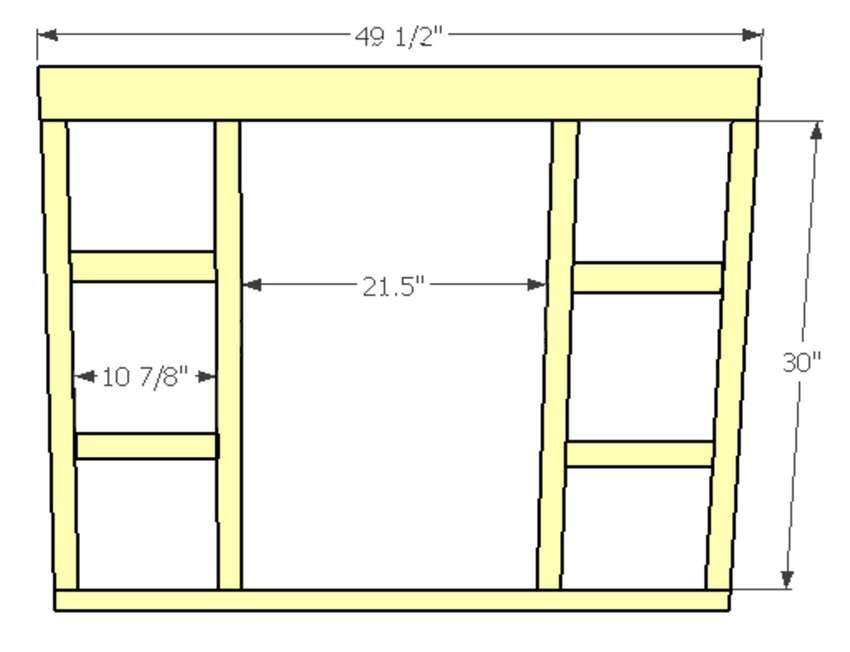
Note. Here, the cabinet depth of 30 cm is selected as a whole, including doors, the front frame and the back wall, so the plywood is cut into 25 cm. You can choose a different depth, just make sure that it matches the cabinets in your kitchen.
For the manufacture of the frame do-it-yourself kitchen cabinet you will need:
- 2 sheets of plywood 10-1 / 4 "x 30" (13 x 76 cm) sides
 2 sheets of plywood 10-1 / 4 "x 43" (13 x 110 cm) top and bottom
- 1 sheet 6 mm thick plywood 44-1 / 2 "x 30" (113 x 76 cm) back
- 1 x 1 ", 43" (110 cm) long slat inner stand
Front part
- 2 bars 1x2 27 "long (68 cm)
- 1 board 1x3 27 "long (68 cm)
- 2 bars 1x2 45 "(114 cm) long
Shelves of such sizes as the top and bottom of the cabinet, but with cut ends at 5 mm.
The procedure for making a hinged kitchen cabinet with your own hands, see the step by step photos.


https://i.expert-h.com/en/shkaf/navesnoi#sigFreeIdcb85dcf9db
DIY do-it-yourself kitchen cabinet door handles
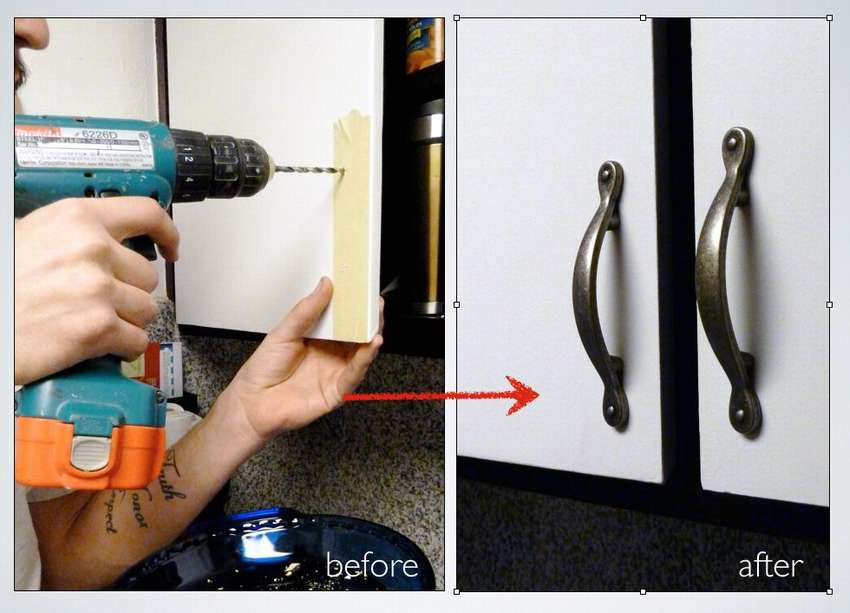 Here's a simple and inexpensive way.how exactly set handles for the kitchen cabinetwithout complicated tools and without removing the doors. Saving time and money means more time to relax! Of the tools you need drill and bits, screwdriver, masking tape, pencil with a ruler. Look at the design of your kitchen and determine where you want to install the handles. Then determine the locations for the holes. Take a piece of masking tape, mark the holes with a pencil and a drill! Remove the tape and attach to the next door. Be sure to use on the doors, opening in one direction! Also do on doors that open the other way.


https://i.expert-h.com/en/shkaf/navesnoi#sigFreeId3085010886
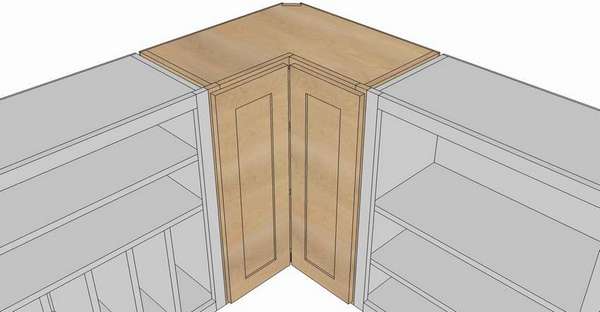
Corner kitchen cabinet drawing
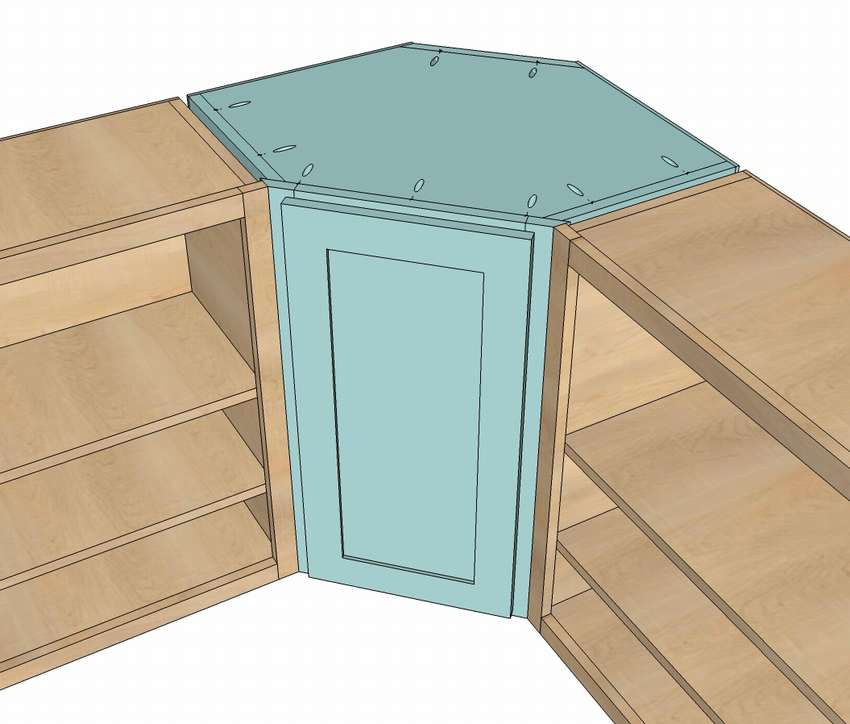 Here are the assembly steps and drawings of a corner kitchen cabinet on step by step photos. It is important to note that this plan, in particular, for a wall cabinet from 28 cm plywood sheet 18 mm thick, to make front frames that should perfectly match each other. It is also recommended to buy (ask, borrow, rent) a good table saw for the manufacture of this cabinet. Have design 45 conical sectionsIf you can’t get a table saw, you will have to install a cabinet with hidden corner walls, then you won’t need to make any bevels.
When you carefully look at the drawings, you will understand what to actually do do-it-yourself kitchen cabinet quite simple! However, the instructions can be read on the website.


https://i.expert-h.com/en/shkaf/navesnoi#sigFreeIdde2778612d
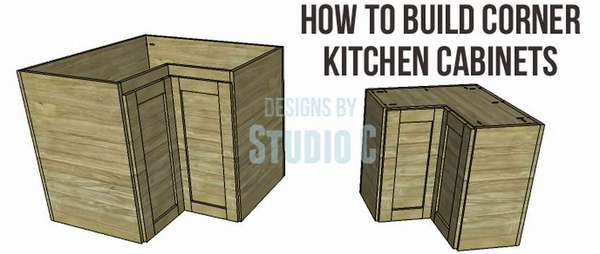
This is another example. According to a similar scheme, you can also assemble the lower corner cabinet.
 Master class with manufacturing drawings corner hanging cabinet with double folding doors. This style simplifies access to the countertop and is easier to build than a corner door cupboard. The step-by-step photos show the assembly order.


https://i.expert-h.com/en/shkaf/navesnoi#sigFreeId76969240c4
How to make corner kitchen cabinets
 Here is a simple kitchen conversion project. Look at the drawings, how to make a hinged and lower corner kitchen cabinets with your own hands. The design includes a door in the shape of the letter "L". Doors should not be built in the same way as shown in the photo - make them according to your needs! The lower cabinet is supported by adjustable legs. The list of necessary materials is on the author's website.


https://i.expert-h.com/en/shkaf/navesnoi#sigFreeIdafd3d2b0d9
Kitchen open cupboard with shelves
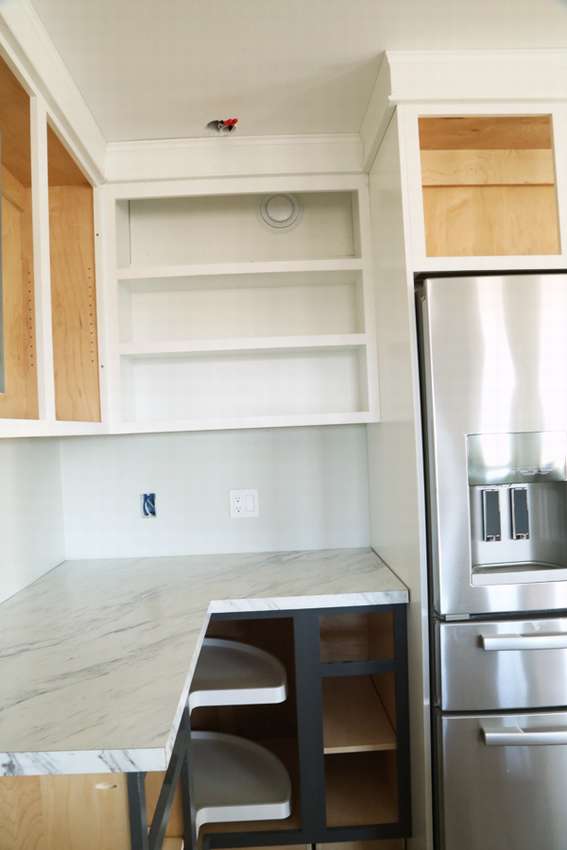 To assemble such a design, you need to carefully plan everything. In this case, the difficulty was that in the corner of this kitchen was air intake, just in the place where the upper part of the kitchen cabinet was planned. Therefore, it was decided to make the cabinet frame as high as the ceiling height, so that the duct is located inside, but at the same time make the front frame of the same height as the neighboring cabinets. Since the cabinet is in the corner, 1x3 boards were used on the left edge here to tie the adjacent cabinet at a 90 degree angle. To do this, cut a hole in the back of the cabinet for the duct and hang the structure in place.
Then they closed the top with a bar and added the same for all other cabinets. If you have a similar situation, then you can use this example to make a kitchen open cupboard with shelves in your kitchen. Some more tips. Drill pocket holes facing forward along all the upper, lower, and side edges to secure the front frame in subsequent steps. Fixed shelves fasten with nailsDo not make pocket holes; they will be visible from below. Hang the cabinet through the top stud for the walls.
Detailed instructions with a list of materials can be found on the website, and see below step by step photos, with drawings and diagrams.


https://i.expert-h.com/en/shkaf/navesnoi#sigFreeId9ff42166a0
Open shelf shelf
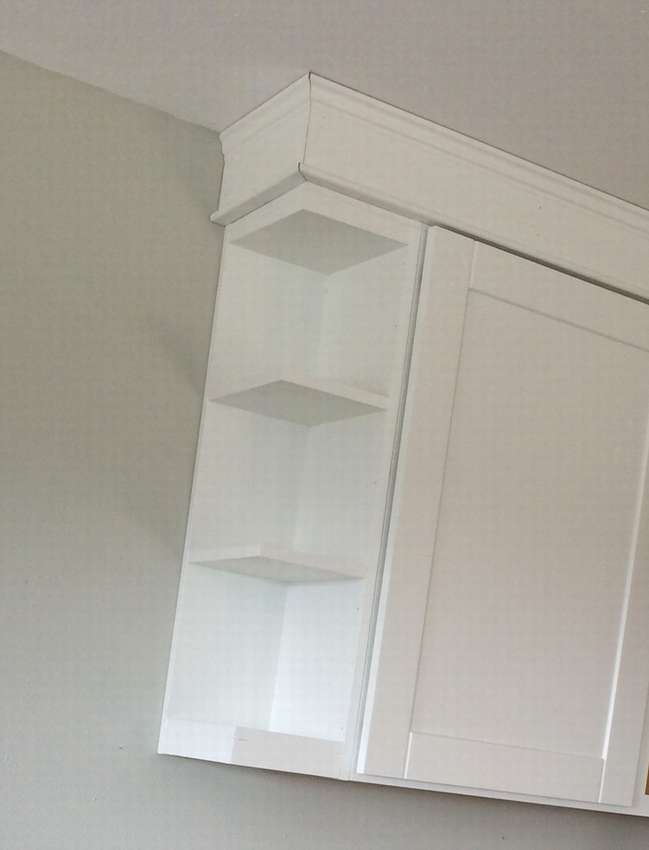 This simple design can fulfill not only a practical, but a decorative function. Open shelf on a hanging kitchen cabinet gives the kitchen a more harmonious appearance and at the same time, you will be amazed at how easy it is to make open cabinets for walls in the kitchen!
To do this, you will need one 1x8 board 2.5 m long, a 1x2 plank 120 cm long and plywood. For mounting, prepare glue and staples.
- The side panel must match other cabinets, including the front and rear panels.
- Just make sure that assembled the cabinet in the correct configuration. In this case, it is open on the left.
- Fix the upper and lower shelves first with brackets or nails, then with glue.
- Then install the remaining two shelves.
- Hang the cabinet by attaching it to an adjacent cabinet and studs in the wall. If there are no studs, use a drywall fastener system.
A master class on how to make a shelf for a hanging cabinet in the kitchen, see below for step-by-step photosabout


https://i.expert-h.com/en/shkaf/navesnoi#sigFreeIdbf498d3c81
Wall-mounted kitchen cabinet
 These step by step photos with drawings will help you make do-it-yourself wall-mounted kitchen cabinet effortlessly. You can read the detailed instructions on the website, it includes a description of all stages of the assembly and a list of materials. Therefore, if you need wall cabinets, then use the link under the gallery.
Material List:
- 20 mm plywood of hardwood, cut into strips of 30 cm.
- 6 mm plywood for the rear wall
- Bars for the front frame and supports
- Edging for shelves
- Clamping screws with holes (thin thread for hardwood)
- Molding for the crown
Measure the required cabinet width and calculate the dimensions of the parts according to your dimensions. Here the cabinets are shown with a standard height of 75 cm, but you can make it taller or wider, just adjust the side cuts.
First draw a drawing of the kitchen cabinet and write a list of parts with dimensions.
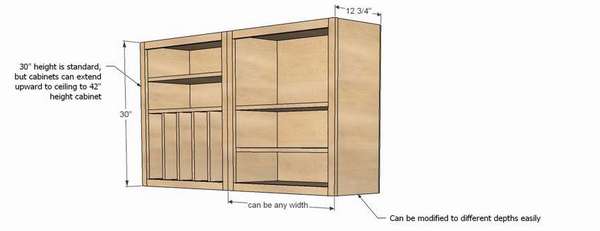 notethat the front frame is the full size of the cabinet, but the frame is actually smaller in width (5 mm on each side). This is done so that during installation you have a small space for maneuver if the wall has any defects.


https://i.expert-h.com/en/shkaf/navesnoi#sigFreeId1cf4f6953b
DIY hanging kitchen cabinet
 One of the simplest builds to build is hanging cabinet and make it even easier when there is no front frame. This style is called frameless or European. The absence of a front frame allows you to use the rack during installation, that is, more make efficient use of cabinet space. To make the hanging cabinet more adjustable, drill holes for the pins to adjust the height of the shelf.
The frame is made of finished maple plywood 2 mm. The leading edge of the shelf is combined with pre-finished wood to match the plywood.
If you want the frame to be narrower, just reduce the width top, bottom, or rear shelf.
Necessary tools:
- Pocket hole clip
- Drill
- Table and circular saw
- Roulette
Also, the method can be collected and lower kitchen cabinet. See step-by-step photos on how easy it is to make do-it-yourself hanging kitchen cabinet.


https://i.expert-h.com/en/shkaf/navesnoi#sigFreeIda19315ad8b
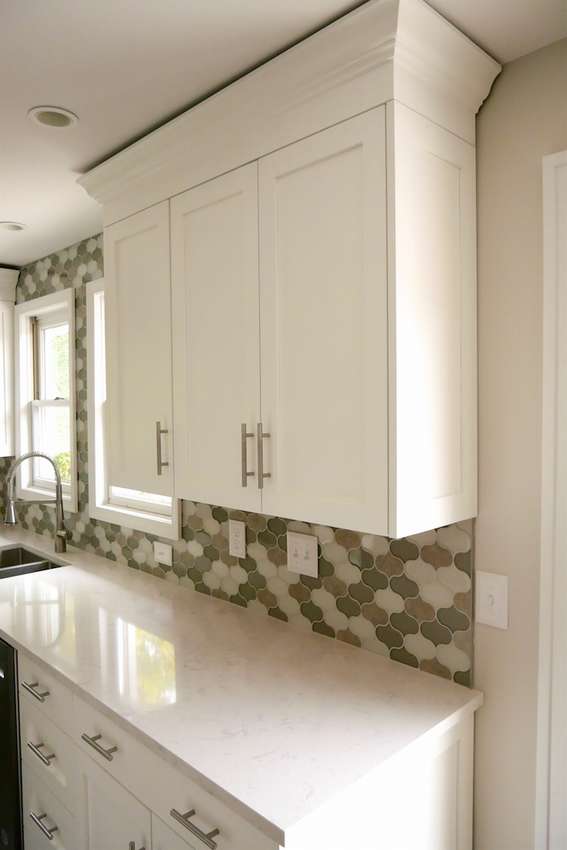
How to make a crown for a kitchen cabinet
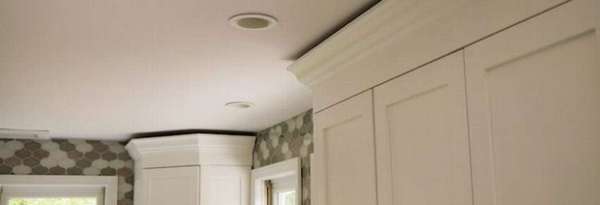 Making a crown on a cabinet is actually easier than you think. For more information on the cutting process and installing the crown on the kitchen cabinet, read the basic guide on the author’s website, a link under the gallery with step-by-step photos.


https://i.expert-h.com/en/shkaf/navesnoi#sigFreeId91e4b4bef5
Illumination under kitchen cabinets
 Here are some examples how to make your own lighting for a kitchen cabinet. Of course, there may be a million options, but you still need to choose one. It is assumed that you have basic knowledge of electricitysome skills and experience. If none of this exists, then better don't touch, leave this work to a specialist. And if there is experience, then the task of making the backlight is not so difficult. This project will take about 2 hours. What will be needed tools and materialsYou can read on the website as detailed instructions. The author even developed software, it is shown in the photo in the gallery so that the diodes smoothly gain brightness. Look, it might come in handy.


https://i.expert-h.com/en/shkaf/navesnoi#sigFreeId980d73c43b
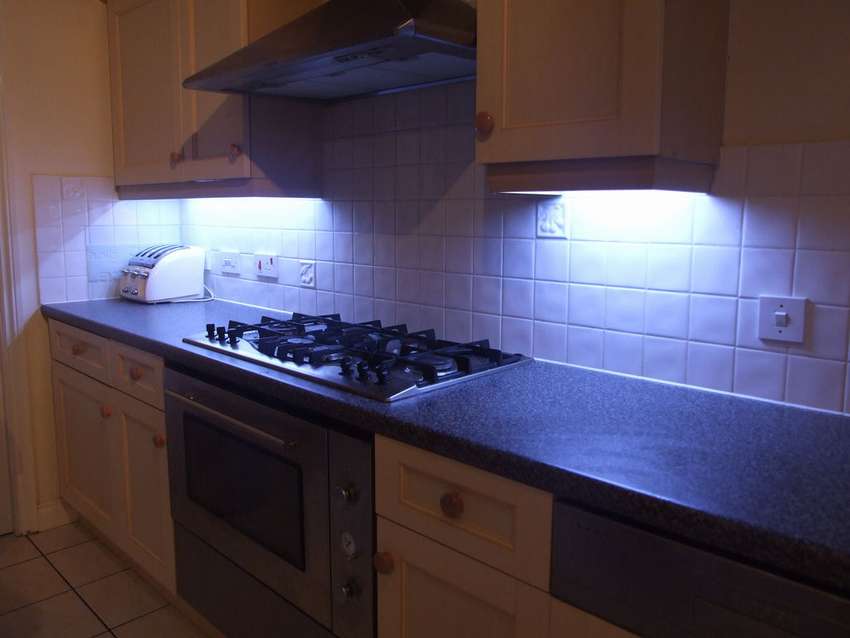
LED lighting for kitchen cabinets
This is the second option, how to make photodiode illumination for a cabinet in the kitchen.
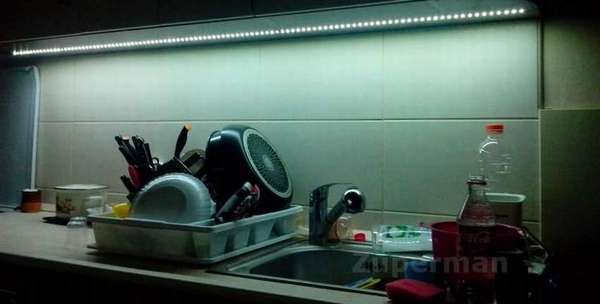 Power consumption is 21 W for 4 meters of LEDs. The strips have a self-adhesive background, so for their installation no tools required. The lights are very powerful, you can perfectly read, cook and do the dishes. Interestingly, under it, the food looks fresh and colorful. On the surface, almost no shadowbecause there are many tiny light sources. Please your spouse, a happy wife - a happy life.


https://i.expert-h.com/en/shkaf/navesnoi#sigFreeId1df370f516
Kitchen lighting for wall cabinets
See another example how to make a kitchen cabinet light with an LED strip.
 One of the nice things is that it’s only 12 V DC, and you can use the backlight without any risk if you use it fully isolated power supply. In addition, no tools are needed, if the tape leaves, you can use hot glueto snap back into place.


https://i.expert-h.com/en/shkaf/navesnoi#sigFreeIdb1a30e8798
Illumination of kitchen cabinets 50 photos
As already mentioned, there may be a million options, each lighting for the kitchen cabinetMade with your own hands is unique, it’s like a Christmas tree, there are no two alike. Just look at a few more examples, for inspiration, only if you get to work, be sure to observe safety measures.


https://i.expert-h.com/en/shkaf/navesnoi#sigFreeId5ba09251b3
Kitchen cabinet
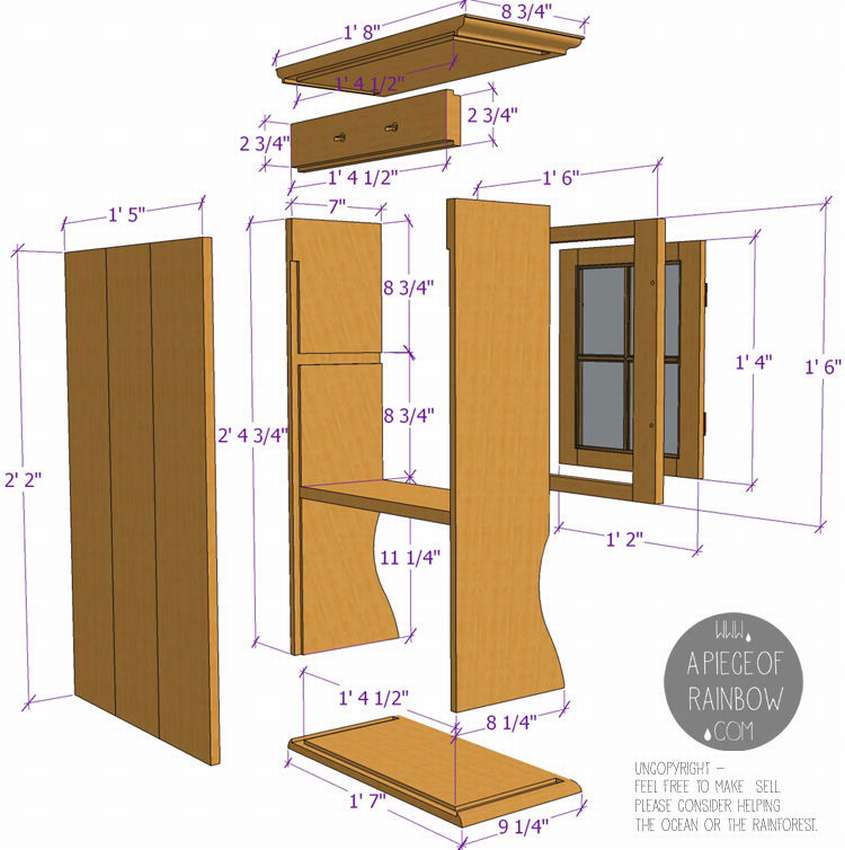
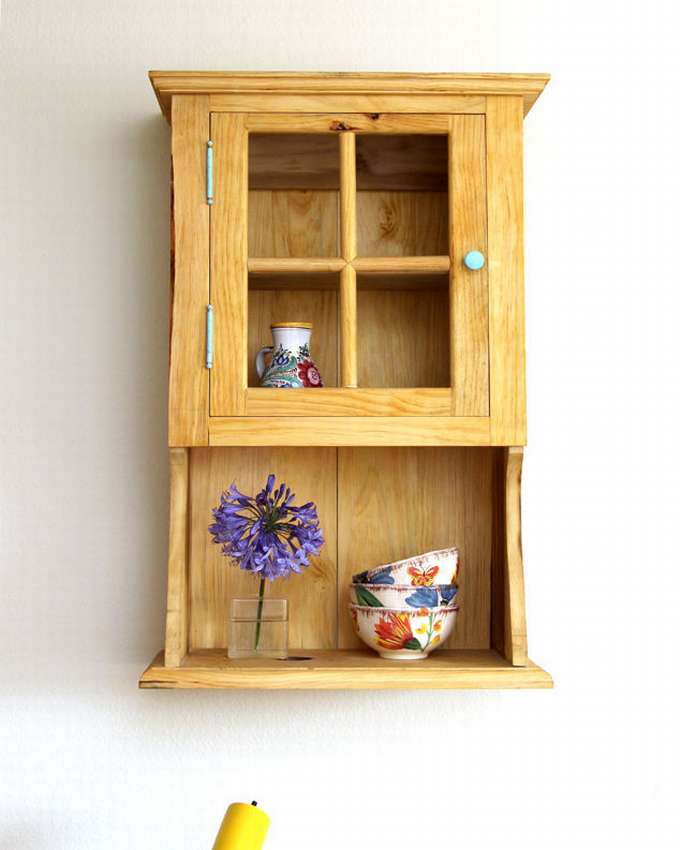 Do you like unique and beautiful antique furniture? You can make it so cute do-it-yourself kitchen cabinet on the wall. The design displays the popular furniture models of the last century. This wall cupboard completely assembled from glue and carpentry. Only screws on the rear panel are used to secure the door hinges.
From materials you will need 15 boards, wood glue and clamps, you can’t do without them when gluing parts. And also door hinges, handles, a small magnet and screws. Choose the finishing material yourself, in this case it was used tung oil.
If you use ready-made lumber, you will not need sophisticated tools. You can make a cabinet in the kitchen with a table saw and a jigsaw.
Since almost the entire structure is assembled with glue, some tips for gluing wood:
 make sure the surfaces are clean and smooth, use clamps;
- as soon as you tighten the clamps, be sure to clean the excess glue with a scraper;
- let the glue dry for at least an hour before removing the clamps;
- when gluing at the final stage, use dowels to strengthen the connection.
The back panel is the only place where small screws are used. Mark the hinges on the front door and front frame, then cut the thickness of the planks with a chisel. Fasten the hinges to the door frame and front with screws.
Detailed instructions how to make a kitchen wall cabinet, you can read on the author’s website using the link under the gallery. Below see step by step photos and drawings with dimensions. Follow the instructions and you will succeed.


https://i.expert-h.com/en/shkaf/navesnoi#sigFreeId1b59b4782a
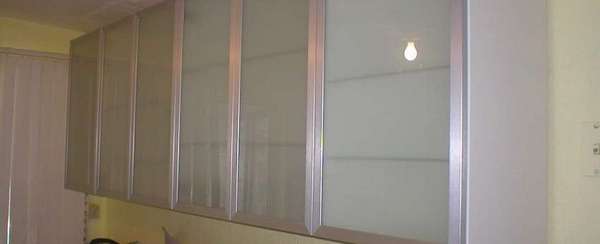
How to replace wooden doors with glass in a cabinet
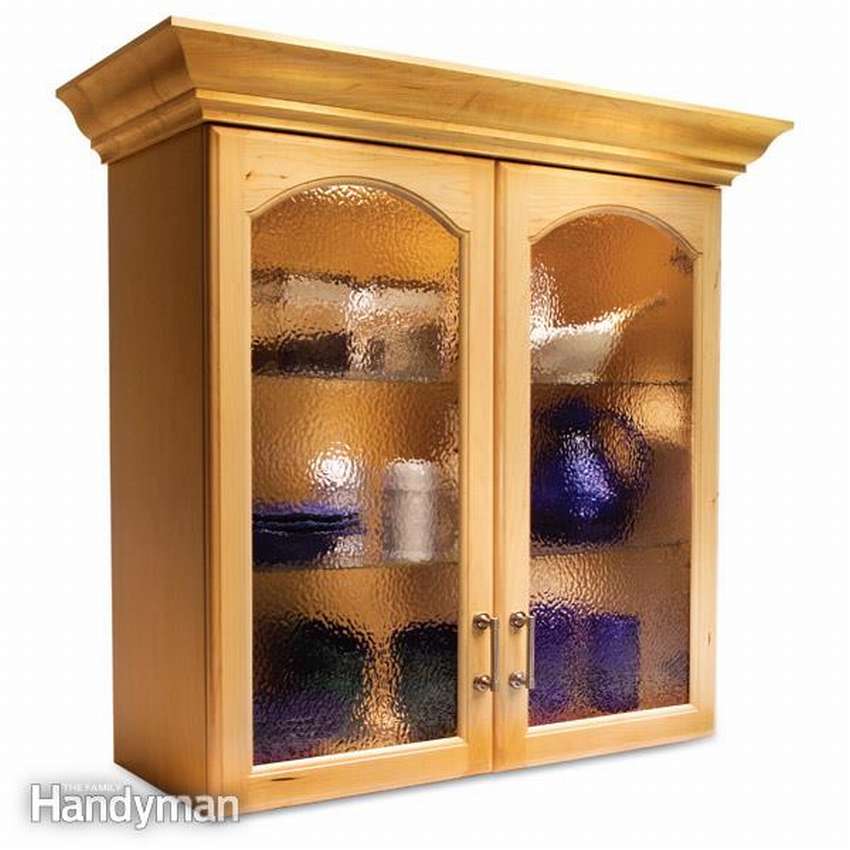 Change the design of the kitchen cabinet in 2 hours by changing the wooden doors to glass. This simple solution can change the look of any kitchen and turn an ordinary cupboard into a decorative display case. Such a change is recommended. for door cabinets only with a frame and a panel where you can exchange wood panels for glass to make kitchen cabinets with glass doors. Replacing the shown door photos took approximately two hours.
In the cabinets, most of the doors are made so that the flat panel is inserted into the grooves of the frame. To remove the panel, simply cut the tab on the back of the door. Then just insert the glass into this place. That’s short, more details can be read on the website, and maybe there will be enough step-by-step photos below.


https://i.expert-h.com/en/shkaf/navesnoi#sigFreeId8d9b2250e9
Do-it-yourself simple kitchen cabinet
 This is not a complete construction, but gives a general idea. To make a kitchen cabinet with your own hands, you need to determine what you need from the equipment. In this case, you will need a table and a hand saw, this will be your main tool. You just need to very accurately calculate the dimensions of the parts. A circular saw, an electric drill, a tape measure, etc. are still needed.
When you cut the boards, set locking block very convenient when all boards need the same length. Be sure to observe the safety precautions when using power tools.
See below how to make a kitchen cabinet in step-by-step photos..


https://i.expert-h.com/en/shkaf/navesnoi#sigFreeIdb9165dd496
Kitchen cabinet with sliding door
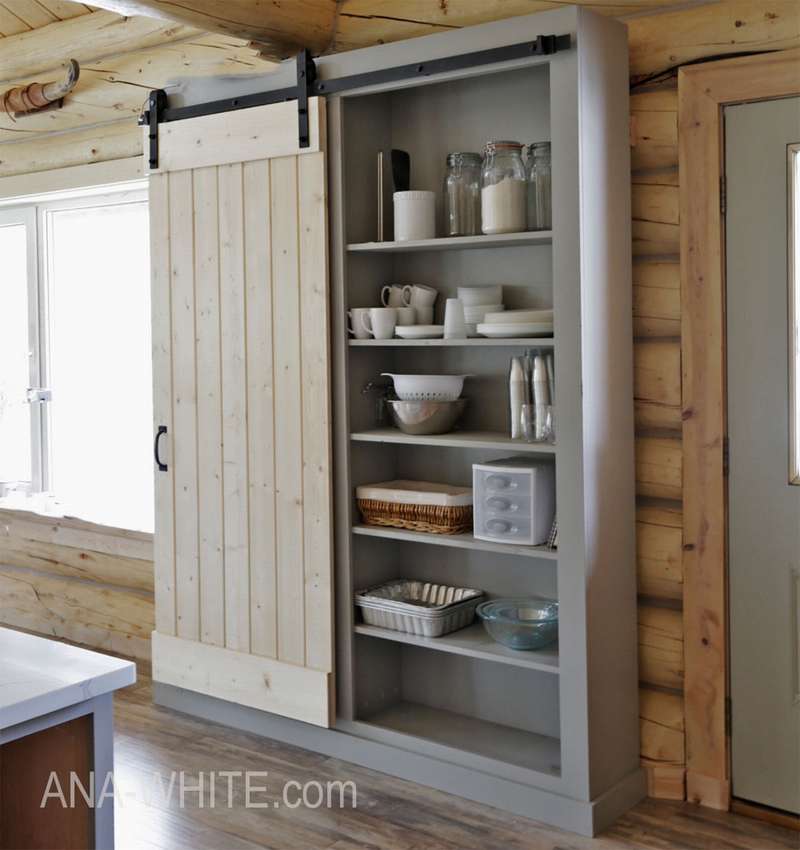 Convenient kitchen cabinet with sliding door. It is attractive because dishes and attractive items can be placed on one side, and things such as food boxes, canned goods and vegetables can be folded on the other side. The door slides on casters, therefore, it easily slides, does not bother anyone, and both sides of the cabinet are equally accessible. The design for this project was surprisingly simple. Basically, it's just a large shelf with a simple door on casters attached to the front.
The dimensions of the kitchen cabinet represented in this project are 230 cm in height, 185 cm in width and 34 cm in depth. This, of course, is a solid design, so before you do, make sure that the cabinet will enter your doorways.
How to make such a cabinet in the kitchen, or closet, look at step by step photos.


https://i.expert-h.com/en/shkaf/navesnoi#sigFreeIda063291669
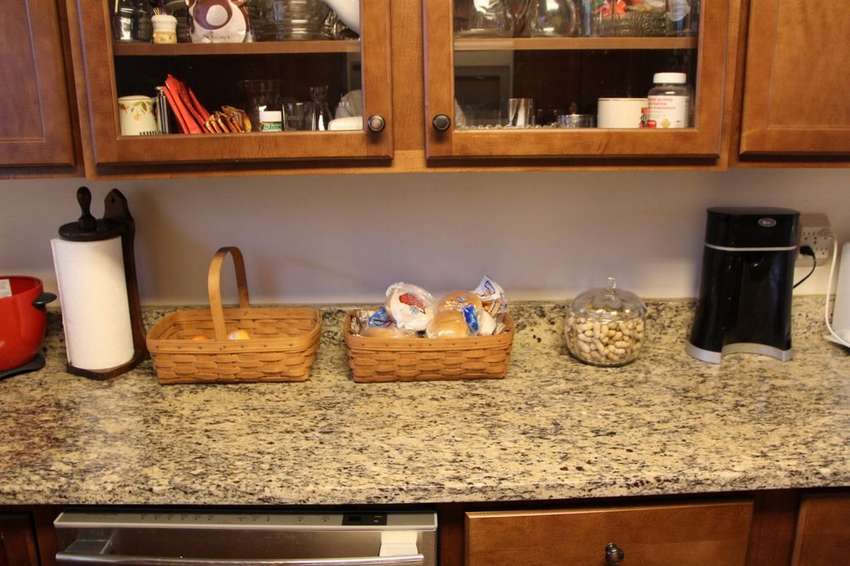
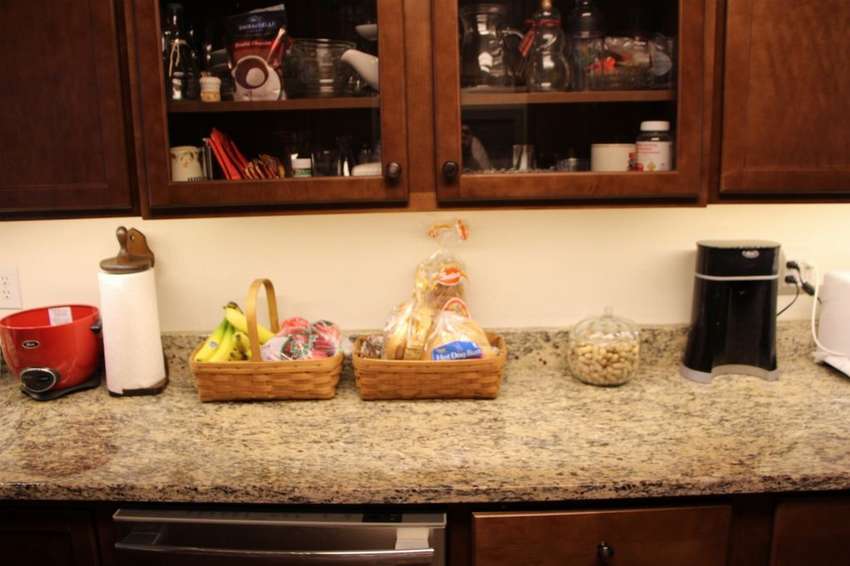
Wall cabinet
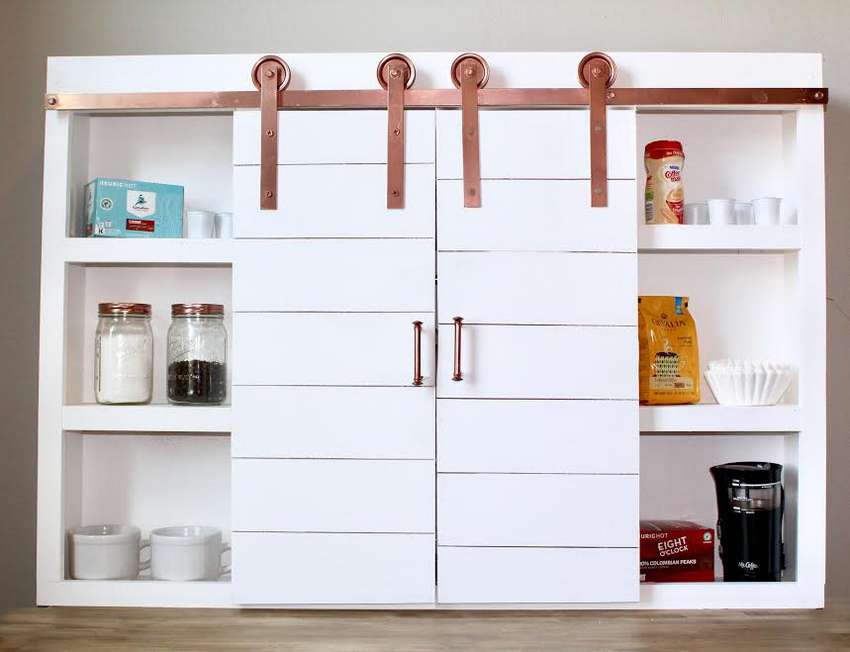
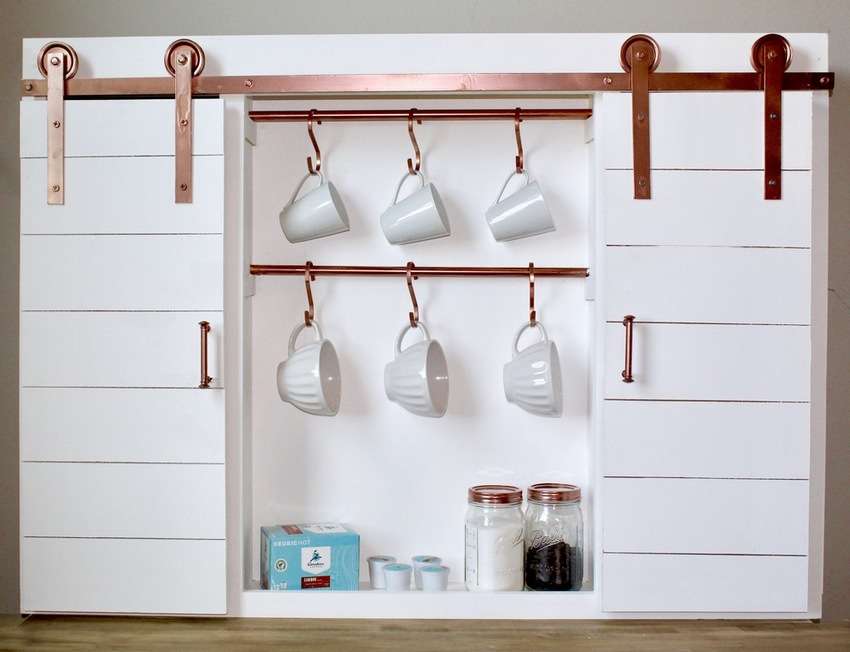
 It's no secret that the world is full of coffee lovers, so many people will like this project! If you need an interesting way to store all your coffee supplies, this coffee bar is the perfect complement to your kitchen.
How to do this kitchen cupboard, can be read on the website of the author of the project, there you will find a list of all the necessary tools and step-by-step instructions. See below for step-by-step photos.


https://i.expert-h.com/en/shkaf/navesnoi#sigFreeId0a68fc6ca8
Installation of kitchen cabinets
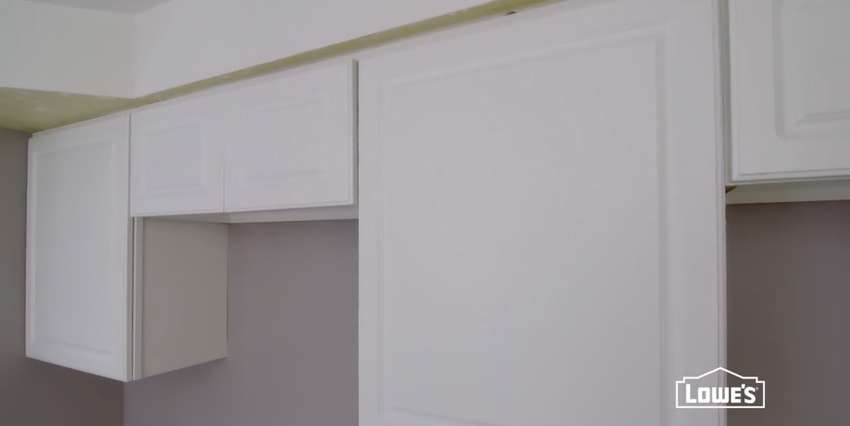 Take a look master class how to install wall cabinets in the kitchen. The operation procedure is shown in step-by-step photos.


https://i.expert-h.com/en/shkaf/navesnoi#sigFreeId47b00a07b2
Now that you have prepared the place and installed the upper cabinets, it’s easy to install lower kitchen cabinets. Do not add drawers and doors yet. You still have to mount the countertop. The instructions on how to install the upper and lower kitchen cabinets can be read on the website, links under the gallery.


https://i.expert-h.com/en/shkaf/navesnoi # sigFreeId8c241ac118
How to install hanging cabinets in the IKEA kitchen
This is not a simple but reliable method, how to install wall mounted kitchen cabinets from Ikea.
 Although there are a lot of step-by-step photos, they only display part of the process, you can learn more from the instructions on the author’s website, a link under the gallery.


https://i.expert-h.com/en/shkaf/navesnoi#sigFreeIdb20f12873c
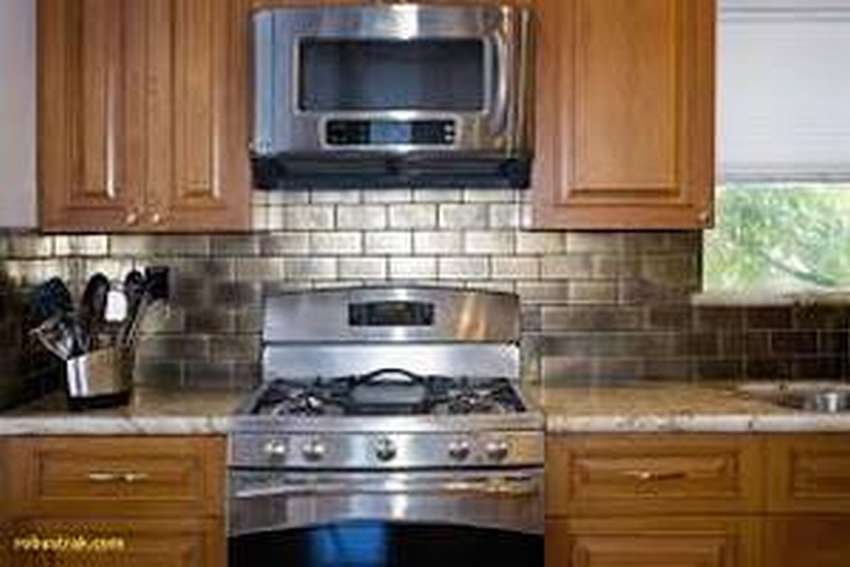
Microwave in the kitchen cabinet
How to install a microwave in the kitchen
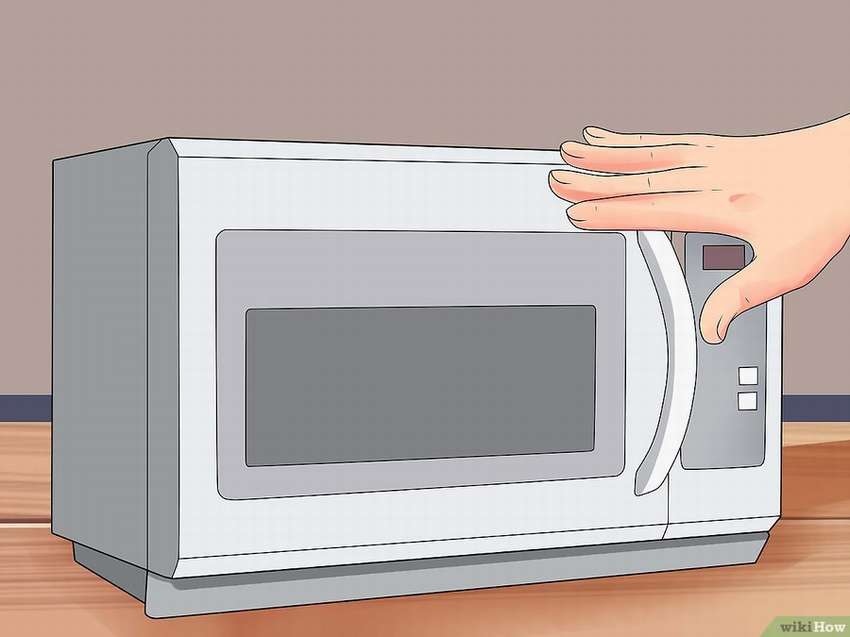 This wikihow tutorial describes two methods, how to install a microwave in the kitchen. The first way is under the hinged kitchen cabinetThis is a difficult option, it requires special hood equipment and materials for fastening. The second way is easier, you need to do box suitable size or install a microwave on the shelf taking into account ventilation openings. The process depicted in the pictures is beautiful, but perhaps not entirely clear. Therefore, it is better to use the link under the gallery and read the instructions on the website, everything is painted there clear and detailed.


https://i.expert-h.com/en/shkaf/navesnoi#sigFreeId5278d0a2b4
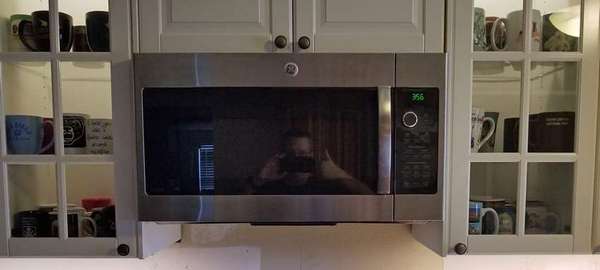
How to install a microwave in a kitchen cupboard
 To install the microwave in the kitchen cabinet, do not rush to call a specialist, you can easily do it yourself with the help of ordinary tools and one assistant. In addition to the stove, you will need air vent. Ventilation is built into the wall and is easy to install when you build or remodel a kitchen. But if you can handle drywall, you can install a microwave in the finished kitchen. You also need a cabinet where the microwave will be mounted. The cabinet not only provides support, but also hides wiring and may be part of ventilation.
You will need about two hours to install the microwave in the cabinet, or a little more if there are difficulties with ventilation. Detailed instructions can be found on the website. Or just look at step by step phabout.


https://i.expert-h.com/en/shkaf/navesnoi#sigFreeId56576e4dc2
How to install the microwave on the bracket
Example, how to install a microwave in a hinged kitchen cabinet using a bracket.
 Therefore, you need to buy a bracket, that is, a bracket, a piece of painted black steel, designed to install and fasten a 10 cm microwave oven. Everything is simple with installation, see step-by-step photos, the instructions can be read on the website.


https://i.expert-h.com/en/shkaf/navesnoi#sigFreeId074da175f3
Here is a similar option, only without the upper cabinet, microwave attached to the back wall and a specially made shelf that is fixed between two hanging cabinets.


https://i.expert-h.com/en/shkaf/navesnoi#sigFreeId405f0492c0
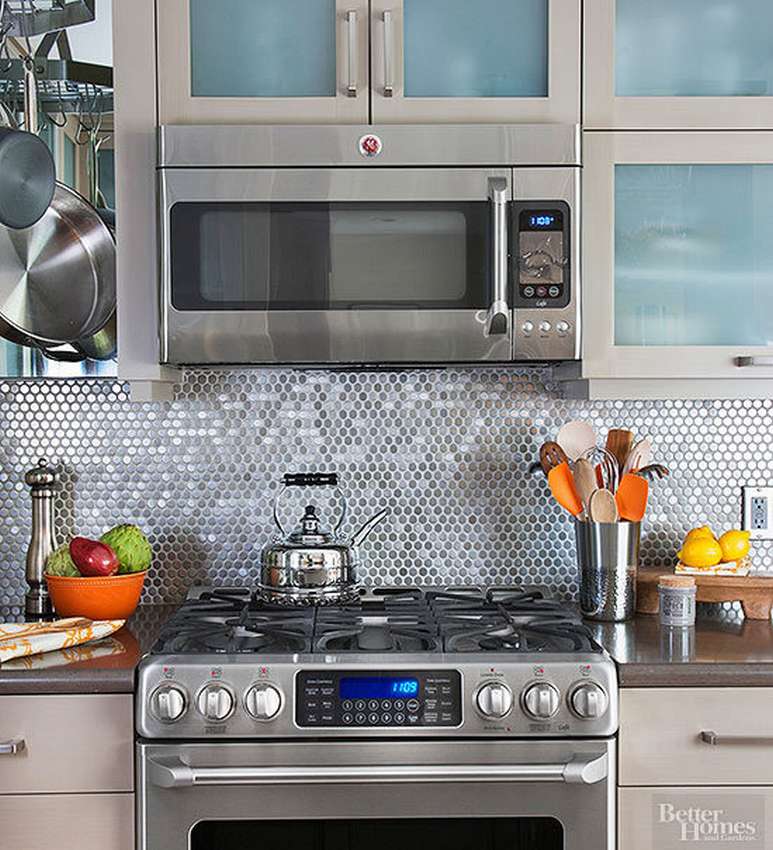
Built-in microwave with hood
 Another way how to install a microwave in a kitchen hanging cabinetf. A special metal mounting plate is attached to the pin, and a microwave is attached to the plate. You need to install a microwave on the pinand not on the wall. The metal mounting plate is a very convenient thing to install, since it practically holds the entire weight of the structure. After securing the stove to the plate, pass the power cord up through the hole that needs to be drilled in the upper cabinets.
It is necessary do togetherWhen your assistant stabilizes the microwave, you first tighten the self-adjusting screws with your fingers. Then tighten the screws all the way with a wrench. If the microwave oven has a ventilation pipe, connect to the duct using duct tape.


https://i.expert-h.com/en/shkaf/navesnoi#sigFreeId5c6edf4e67
Microwave Installation Diagram


https://i.expert-h.com/en/shkaf/navesnoi#sigFreeIdcfad7ebdd3
Microwave in the kitchen cabinet 100 photos


https://i.expert-h.com/en/shkaf/navesnoi#sigFreeIdc35955acce
Paper towel rail under the wall cabinet
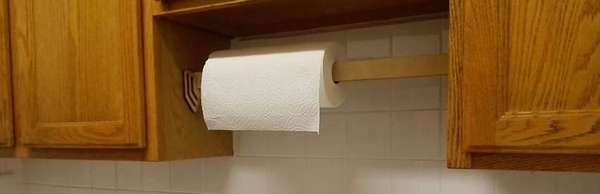 By looking at this step-by-step photo guide, you’ll find out how to make a paper towel rail under a kitchen cabinet. The problem is that paper rolls can easily get dirty, so putting them on a table or shelf where they might get wet is not a good idea. Instead of buying a coil holder, you can make a simple horizontal bar above the sink, which is more economical, inexpensive and convenientabout!


https://i.expert-h.com/en/shkaf/navesnoi#sigFreeIdc35e01c680
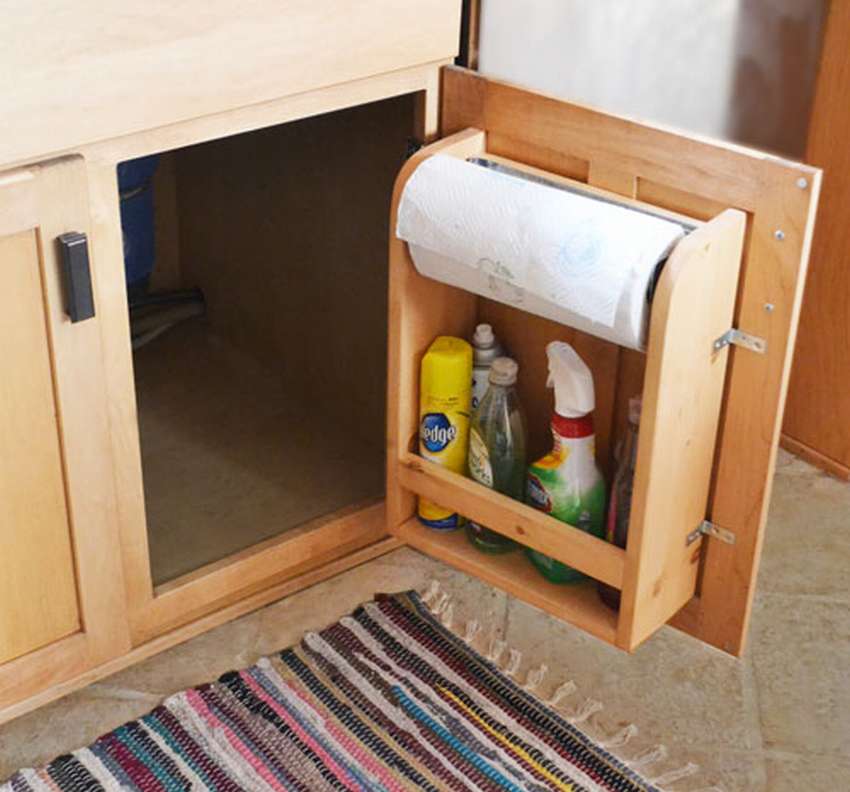 And for the lower cabinet fasten the paper towel bar possible in this way. Just prepare a 1x6 board 180 cm long, saw off two sides of 45 cm and the bottom 30 cm. Then take a 1x2 rail 60 cm long and make two 30 cm crossbars from it. You will also need small brackets with screws (for attaching to the cabinet door). When everything is ready, attach the bottom to the side boards. Then set the bars to the tops and bottoms for extra support. If you do not want to do roll holder, you can add a shelf at the top. To fasten to the door, use L-shaped brackets, it is very easy. Now just fill with your favorite accessories and you're done! Below in the gallery you can see the drawings of the additional rack.


https://i.expert-h.com/en/shkaf/navesnoi#sigFreeId39009f9cb5
Drawings for kitchen cabinets


https://i.expert-h.com/en/shkaf/navesnoi#sigFreeId257d983ad1
Kitchen wall cabinets photo 200 photo


https://i.expert-h.com/en/shkaf/navesnoi#sigFreeIdc5abfe91e6
Hello, I am the author of this article, so I look forward to asking questions for this article in the comments below, I will answer all !!!
If you have questions on another topic, ask them on our forum, we will answer you
- Two baskets of paper in 5 minutes (Master class)
- How to make a simple and compact table for a milling cutter from plywood
- How to make a soft headboard tile (Instructions + step by step photos)
- Cinder block benches: a convenient bench in 55 minutes
- How to make a bed with a niche: saving space (Master class)