Cabinets for the home. Do it yourself. 700 photos, step by step instructions
 home cabinet ideas
Here are examples of furniture for non-standard rooms made of non-standard materials. For example, how to make a cabinet on the balcony with your own hands, and if you live in a private house, then information will be useful to you, how to make a closet for the attic. And of course, you cannot ignore the theme of pallets; look at several options for stylish and functional furniture from this durable and affordable material. In addition, the article presents several interesting home cabinet ideas.
Content:
- DIY wardrobe on the balcony
- Attic cabinet
- Cabinet for jewelry
- Home Cabinet Ideas
- Cabinets from pallets
DIY wardrobe on the balcony
 If we consider a balcony or a loggia as an extra room, which is very important for small-sized apartments, then you can not do without furniture. In order not to let things go by their own accord, and you will not notice how your balcony overgrown with any shelves, hooks, shelves in a very short time, you need to approach the matter conceptually. The best solution, make a cabinet on the balcony with your own hands, so that the design is attractive, and create the interior of the room. Well, then the choice is yours. The best option is built-in wardrobe on the balcony. You can do it from floor to ceiling, that is, completely fill all the free space, it will turn out spacious and comfortable.
 Of course there are other options - cabinet cabinetso that it can be rearranged to another place if necessary; suspendedth - if you need additional space on the floor; modular, in the form of a set of bedside tables, this is if you are seriously engaged in flower cultivation or, say, decided to equip home workshop on the balcony.
In general, decide, the following is a couple of examples of how to make a cabinet on the balcony with your own hands. Of course, this is not much, but enough for inspiration.
Do-it-yourself wardrobe on the balcony
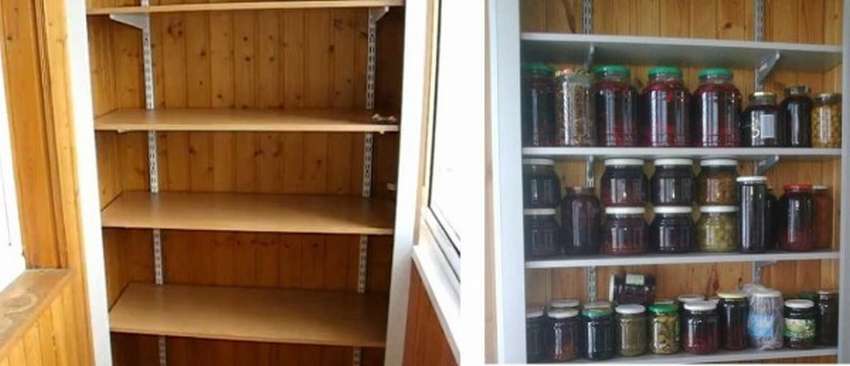
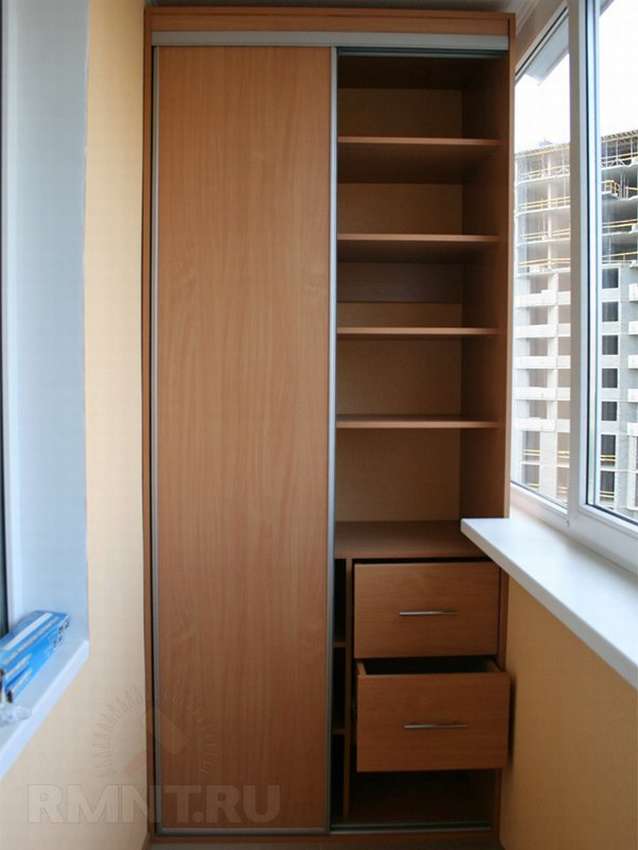 Here is an example of how to install do-it-yourself wardrobe on the balcony. Just don’t forget that on glazed balconyotherwise there’s no point in trying. The second point is wardrobe with sliding doors, the best option for a small space. And another nuance is the choice of material. Even your balcony is glazed, it’s still a room with high humiditythings to consider. In this case, the structure is assembled from waterproof chipboard. A good option for such conditions, tolerates temperature extremes and high humidity. But, this is ideal. Of course, if you have any materials - boards, plywood, chipboard, then why splurge. By the way, if you do not have a home workshop, it is better to order a cut of parts, it is not very expensive, but it is reliable, you are unlikely to cope with a hand saw. Step by step photo there is not much here, so use the link and read the detailed instructions on the site, everything is painted very intelligibly there.


https://i.expert-h.com/en/shkaf/dla-doma#sigFreeIdd67e00d655
How to make a wardrobe on a balcony or a loggia
Here you can get even more information, how to make a cabinet on the balcony with your own hands.
 it review articlewhere different models, drawings, tips and tricks are presented.


https://i.expert-h.com/en/shkaf/dla-doma#sigFreeIda927d46e9f
Wardrobe on a balcony with a folding table
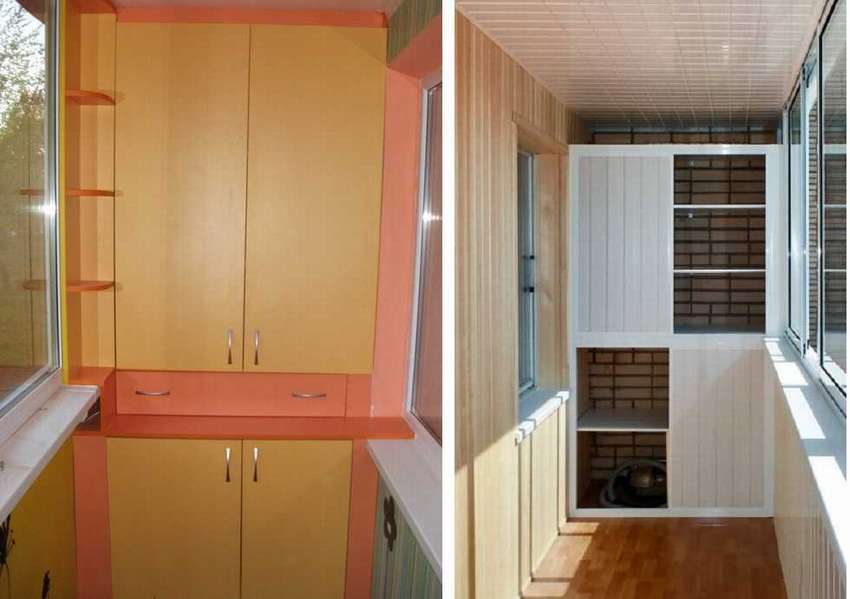
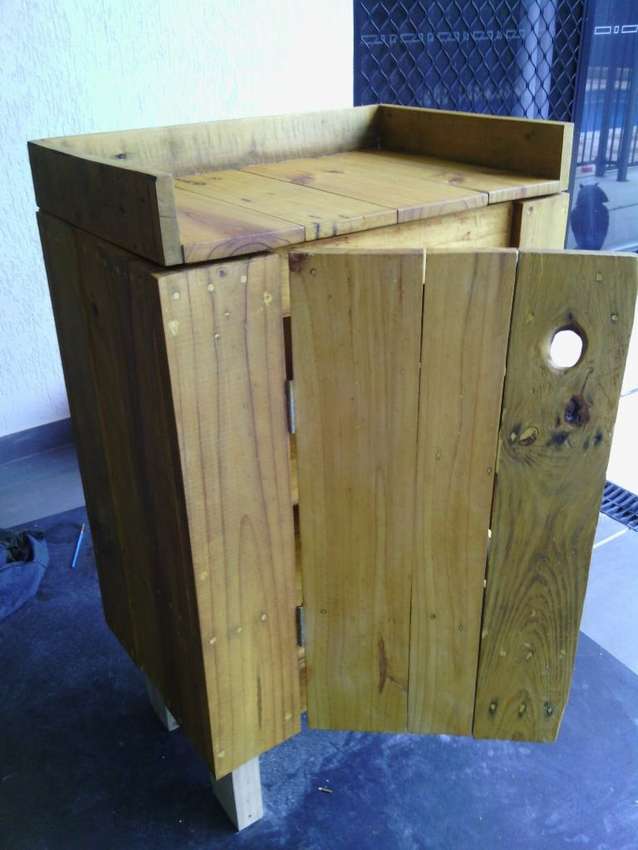
Option for those with balcony, this is a recreation area. It shows how easy make a cabinet with a hinged door and a folding table for the balcony.
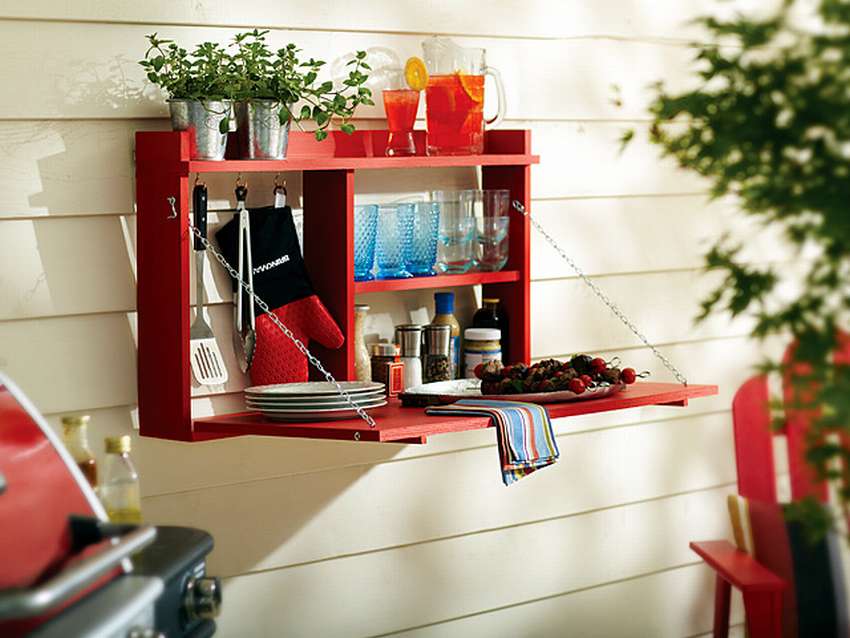
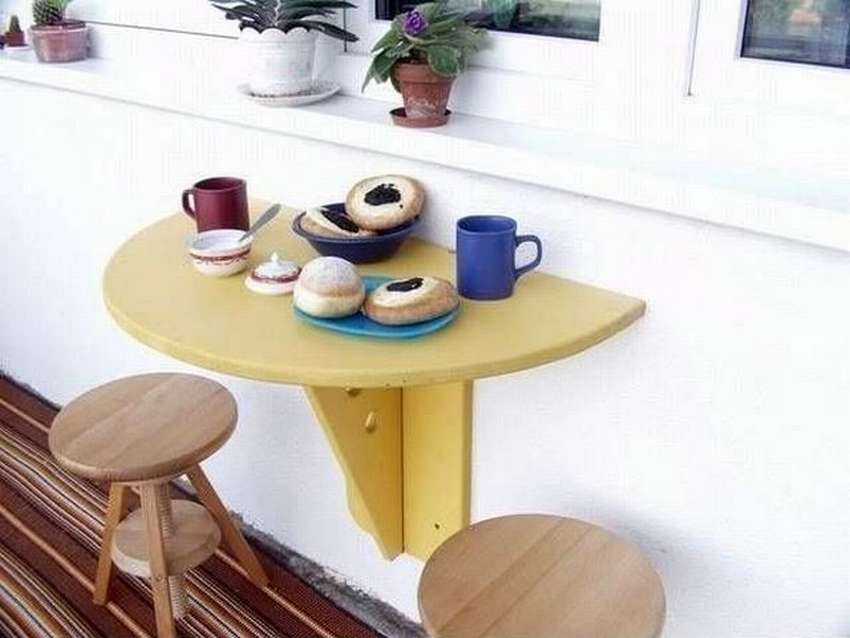 The cabinet can be easily mounted on the wall and you have a great place for barbecue utensils, if you plan to have a picnic on the balcony, spices and two small flower pots. Everything is in perfect order, and the case wall does not take up much space. A plus folding tableGreat for a balcony.
 You will need plywood, a drill, screws, wood glue, an eyelet, S-hooks, two chains and a red wood lacquer. How to make and assemble all this furniture, look at step by step photos.


https://i.expert-h.com/en/shkaf/dla-doma#sigFreeId18a7168861
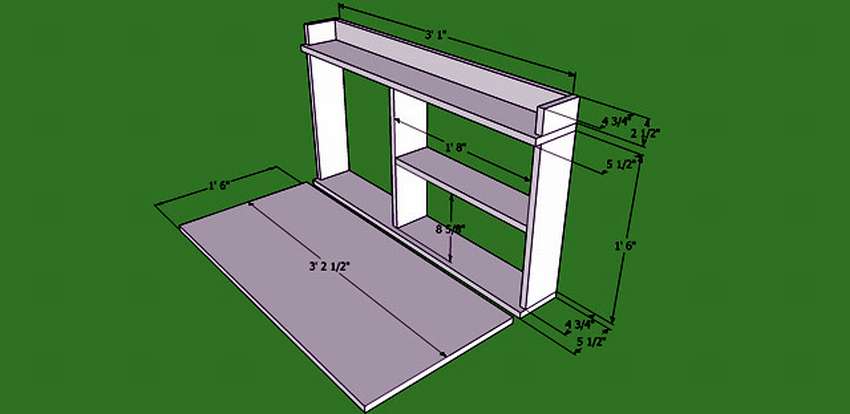
Cabinet drawing on the balcony


https://i.expert-h.com/en/shkaf/dla-doma#sigFreeId8c5617e110
Do-it-yourself wardrobe to the balcony 200 photos


https://i.expert-h.com/en/shkaf/dla-doma#sigFreeIdc9f499d90f
DIY attic cabinet
 Idea make a closet in the attic - a great way to get more storage space for various things. Attic configurations vary, but the vast majority have a pitched roof, which tapers off on both sides, which is the main feature that determines the location and shape of the cabinet structure.
Usually the best place to install is along one side of the pitched roofthen the cabinet door will be at the point where the rafters are at a height of 200 to 250 cm seven above the floor. You can make the back wall of the cabinet to any depth, but for the sake of practicality there is no particular reason to go beyond the point where the rafters are at a height of less than 90 cm above the floor. Although the depth of the cabinet is determined by the angle of the roof, width is not limited.
The easiest approach is to use a size that matches distance between floor beamsas they form the structural support for the cabinet.
 In addition, there are several friendstheir important points to consider:
- Ventilation - Plan an attic cabinet in a place that does not overlap the existing ventilation system.
- Insulation - If your attic is not yet isolated, you can insulate the space in the closet. You can also make a ventilation hole in the cabinet floor so that warm air can flow in if necessary.
- Access to the floor - If there is no floor in the attic, you will need to install it over the beams, at least to cover the space between the access point in the attic and the cabinet.
- Lighting - A necessary thing, but it is better to invite an official electrician and install a junction box for the light source in the cabinet.
How to make a closet in the attic
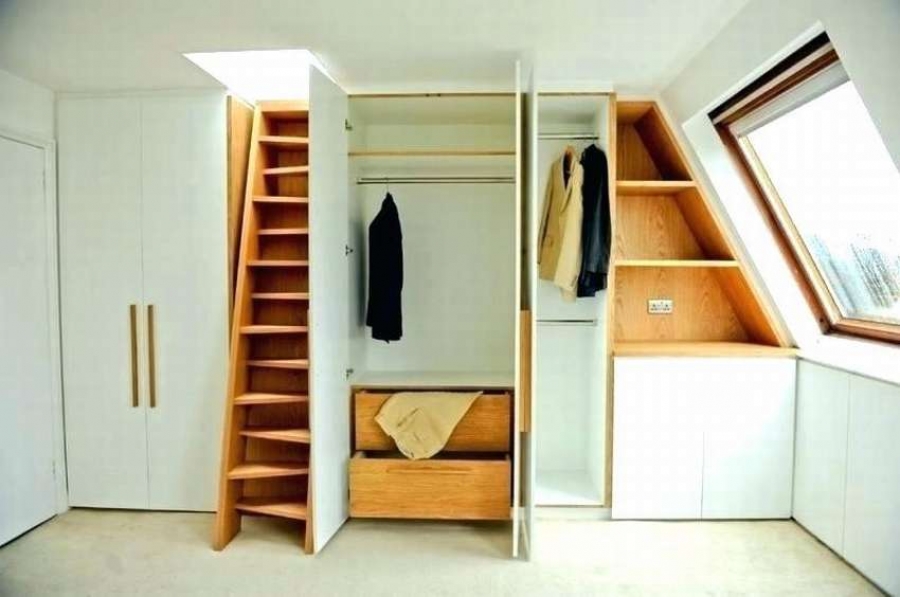
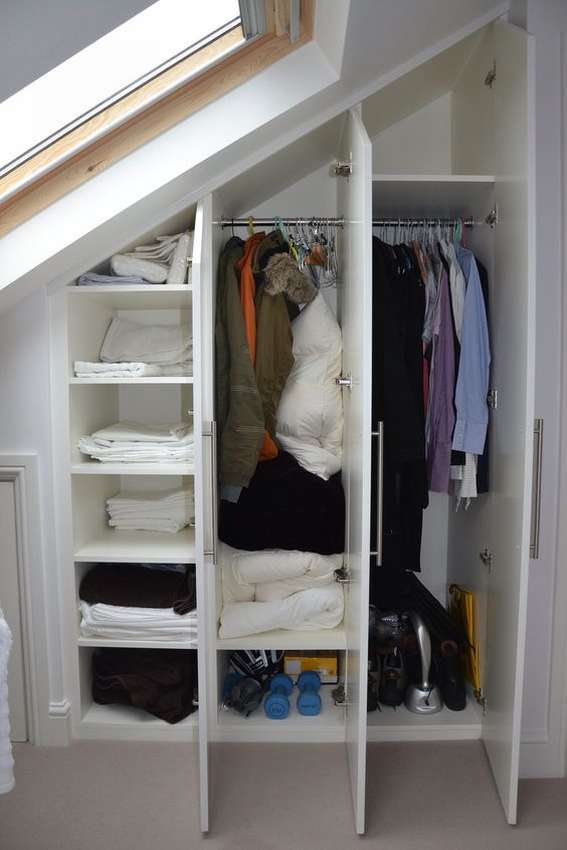
 See how to make it very simple. sloping roof loft cabinet. With this design, you can use the space that used to be wasted. Such a cabinet is very easy to make with just a few simple tools and relatively cheap materials. For example, the author assembled this construction only with drills and jigsaw. And yet, if necessary, the dimensions of the cabinet are easy to adjust, so that it matches any corner of the roof, you just need to change some indicators. A complete list of materials and tools, as well as detailed instructions are on the site, a link under the gallery. See below master class, how to make a cabinet in the attic with your own hands in step-by-step photos.


https://i.expert-h.com/en/shkaf/dla-doma#sigFreeIdf12c1f2377
Built-in closet in the attic
Or another example, how to install an attic sliding door wardrobe.
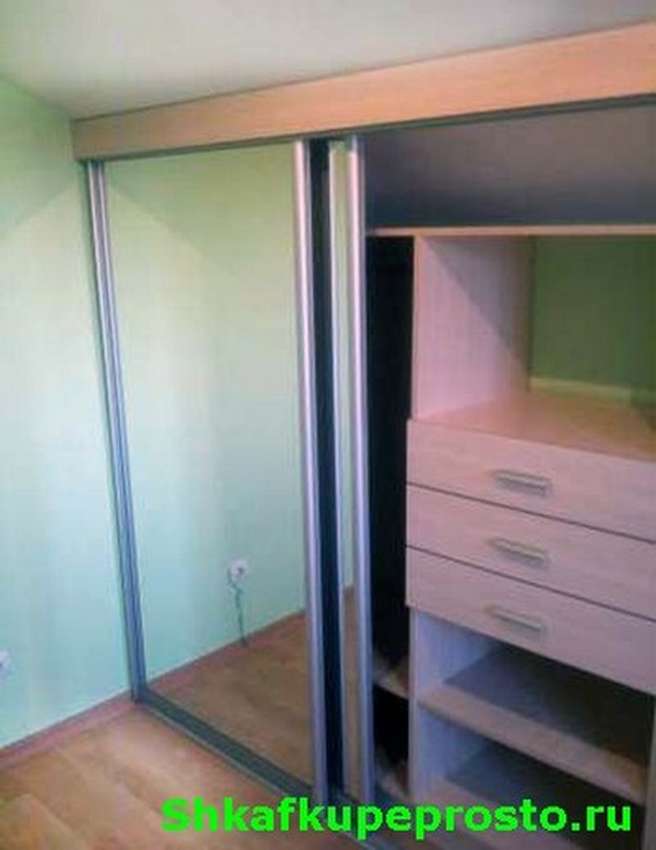
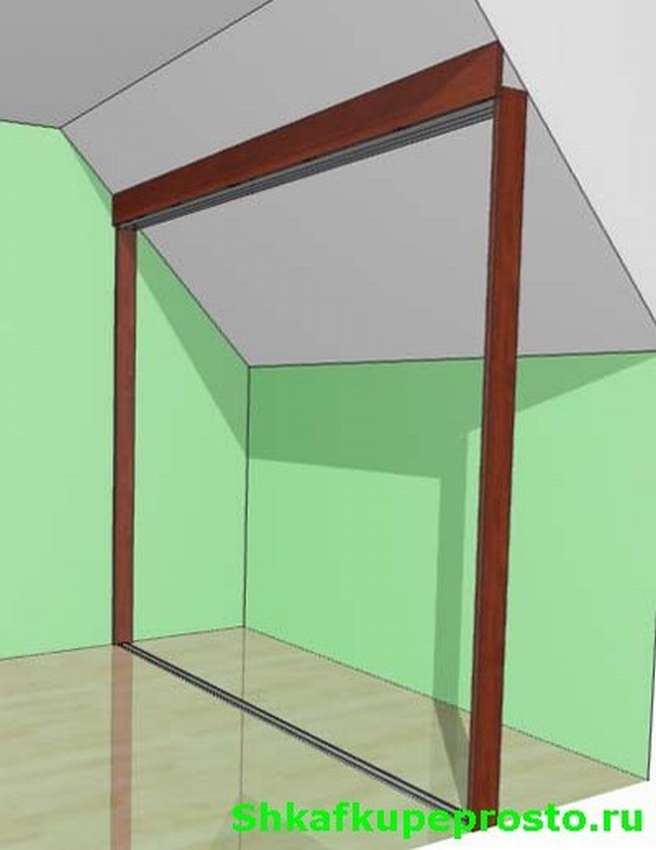 This design is more for beauty, false panels on the sides and can not be installed. The upper rail is fastened with mounting anglesto which triangles cut from chipboard are attached, it is necessary to do as shown in the diagram. Important right calculate proportions. Lastly, the lower guide and the compartment door are attached.


https://i.expert-h.com/en/shkaf/dla-doma#sigFreeId05a6b91366
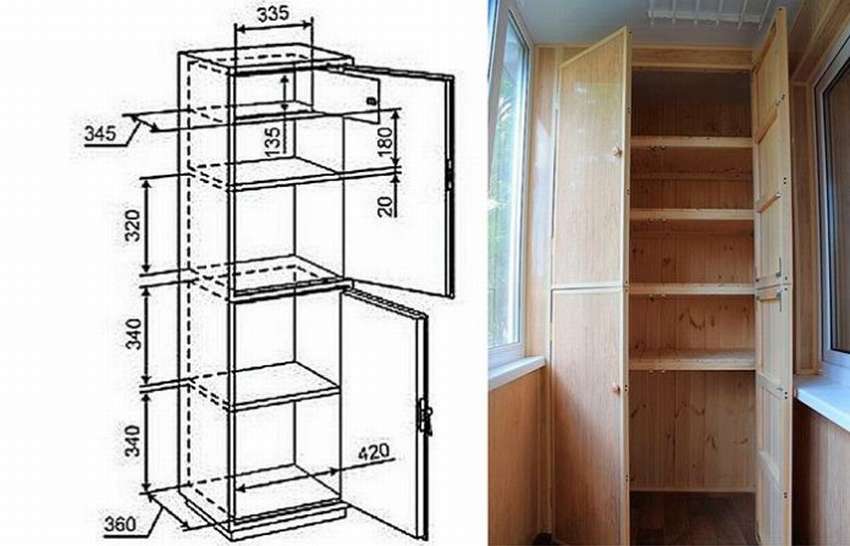
Attic cabinet under the roof
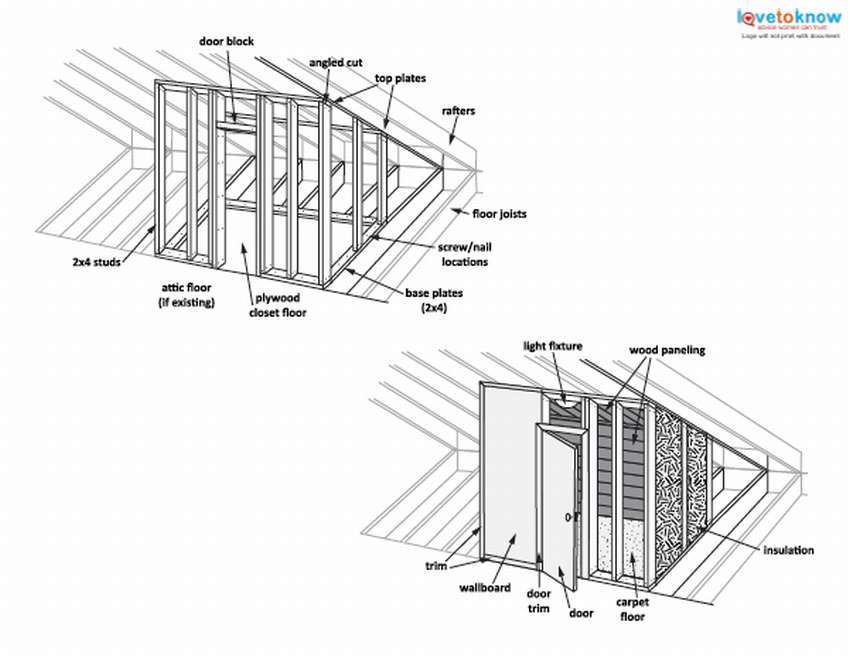
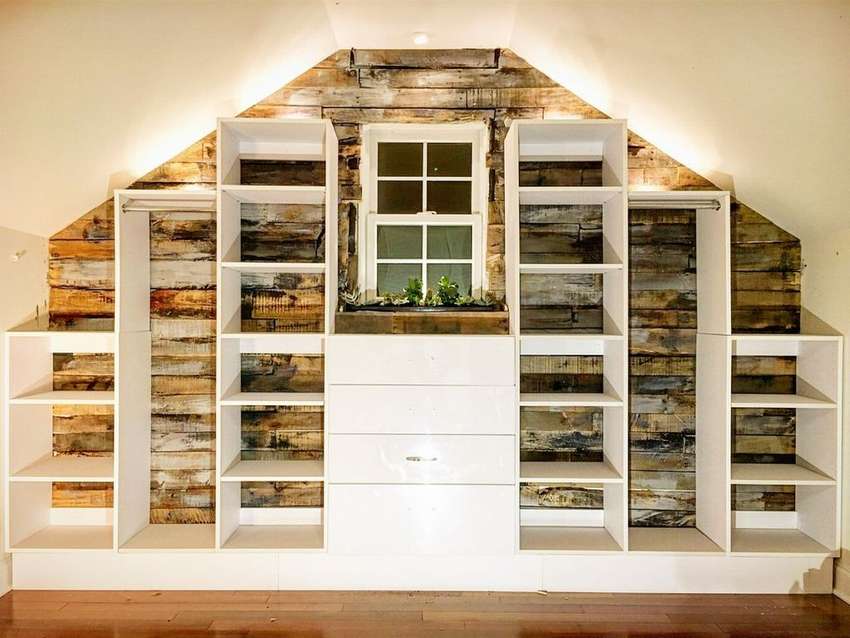 Like this attic cupboard to the end wall of pallets, you can do it yourself. Dismantle the pallets. Board the wall around the window, leaving an open space behind the drawer. Mark the corner of the ceiling by aligning the board under angle of 90 degrees to your corner of the roof. Track the tilt using a second board held along the corner, as shown in the photo. Trim the mark. Fill all spaces of the wall with boards from pallets, do not forget to cover the cracks. The components of the cabinet on a 15 cm base are mounted on top. Measure 35 cm in depth and 5 - 8 extra centimeters for a wall from a pallet. Start there base. Then make blocks of shelves, which are staggered down the slope of the ceiling for a symmetrical effect.


https://i.expert-h.com/en/shkaf/dla-doma#sigFreeIdff4b355be3
Attic cabinet drawing


https://i.expert-h.com/en/shkaf/dla-doma#sigFreeId23cf92d9c1
Attic cabinet 200 photos


https://i.expert-h.com/en/shkaf/dla-doma#sigFreeId140c38c18b
DIY jewelry cabinet
 Although jewelry boxes are a must in most homes, small boxes rarely contain enough space to hang a normal-sized necklace. The only option - separate cabinet with hooks and racksto hold pendant accessories.
This cabinet is mounted on the wall. Small enough to fit in any room, but also roomy enough to hang a few necklaces and includes many drawers for small items.
Making boxes is a good activity for a beginner. Since space stands tall, the material must be thin, but still strong. In order to put everything together, you will need several through swallows, dado, circles and other cuts.
You will need at least a router, a band saw and a few hand tools. You can use a grinder and planer to clean all cut parts, although a hand plane or grinder can help instead.
Detailed instructions can be found on the website, how to make a locker do it yourselfLook at the step by step photos.


https://i.expert-h.com/en/shkaf/dla-doma#sigFreeId24777ef6fd
Case for jewelry
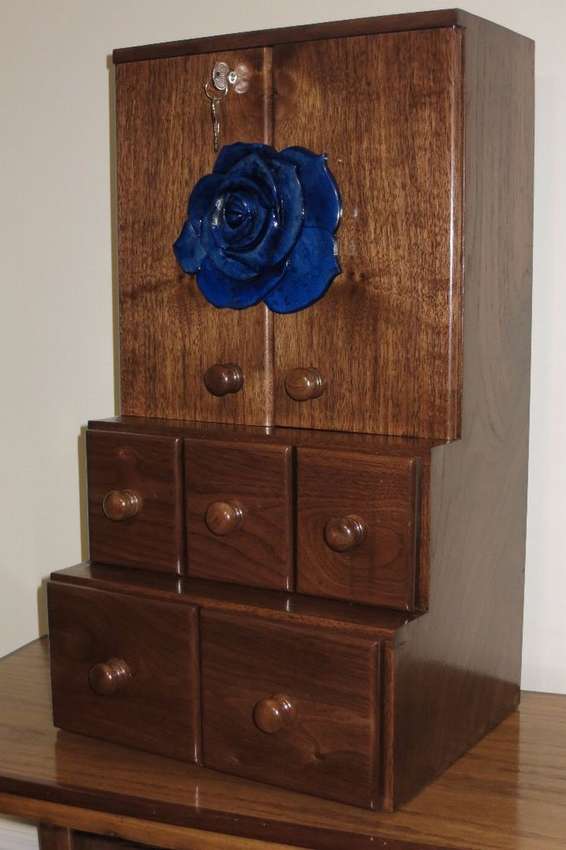
Here is another example how to make a cabinet for jewelry do it yourself.
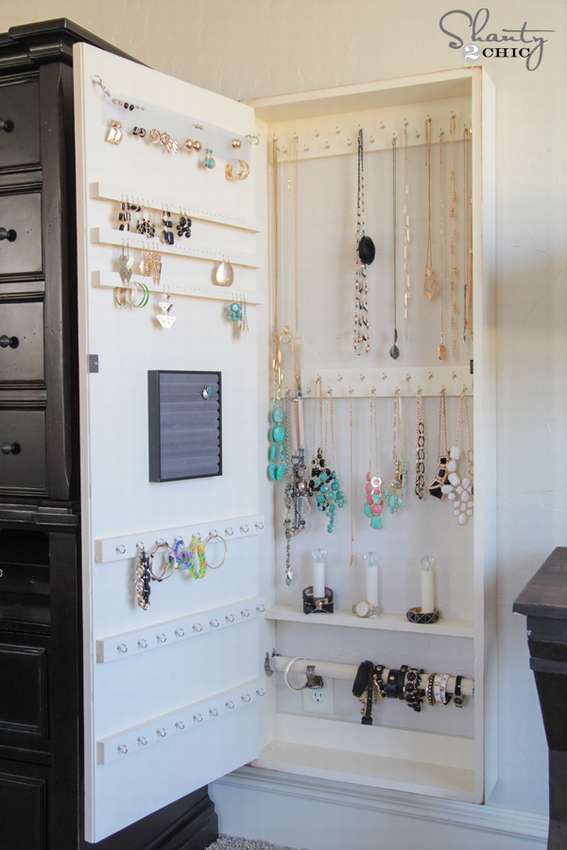 As you can see, this cabinet has a lot of functions, hooks and holders for necklaces, bracelets, earrings and other jewelry are provided. If you liked it and want to make such a cabinet with your own hands, a link to the site with instructions under the gallery, see step by step photos below.


https://i.expert-h.com/en/shkaf/dla-doma#sigFreeId3ffcc08423
Check out some more examples jewelry lockers and jewelry.


https://i.expert-h.com/en/shkaf/dla-doma#sigFreeIdb8d21735a9
Home Cabinet Ideas
Cabinets, they are so different. Here are a few cabinet ideas for homethat you will surely like, and if you want to do something similar with your own hands, master classes and step-by-step instructions are at your disposal.
Universal cabinet for home
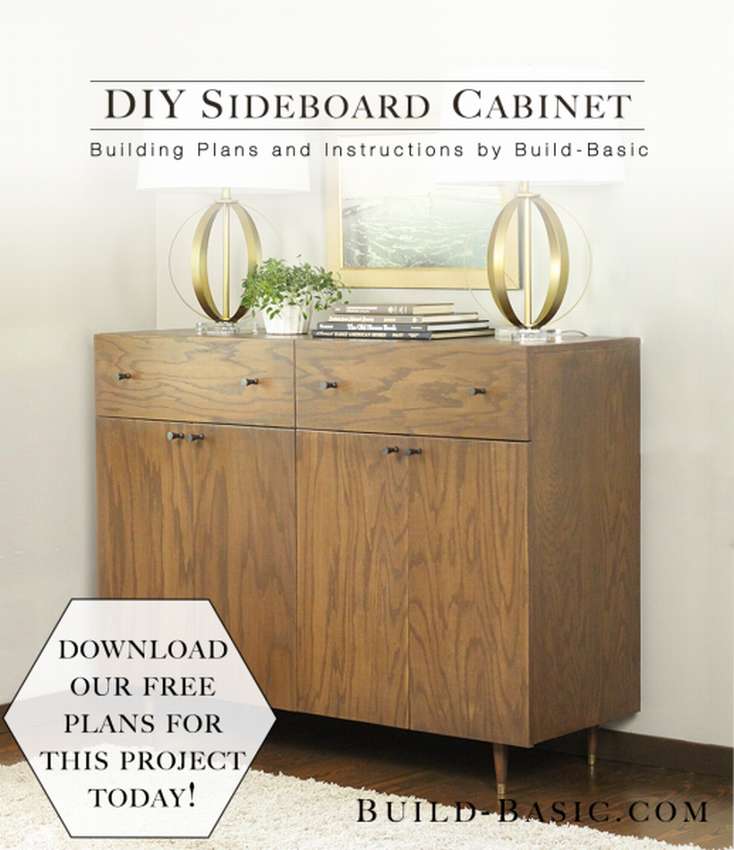 Universal cabinet for all occasions. It can be a buffet in the dining room, a chest of drawers in the bedroom or an excellent nightstand in the hallway. Regardless of use, you will be pleased with the stylish look and functional equipment. And although this project is complex, and require a higher level of skill than for the manufacture of a conventional cabinet, but the namesbut this accuracy is key. Do not worry when it comes to installing doors and drawers, the instructions on the author’s website have some useful tips, so you can do everything in a professional manner.
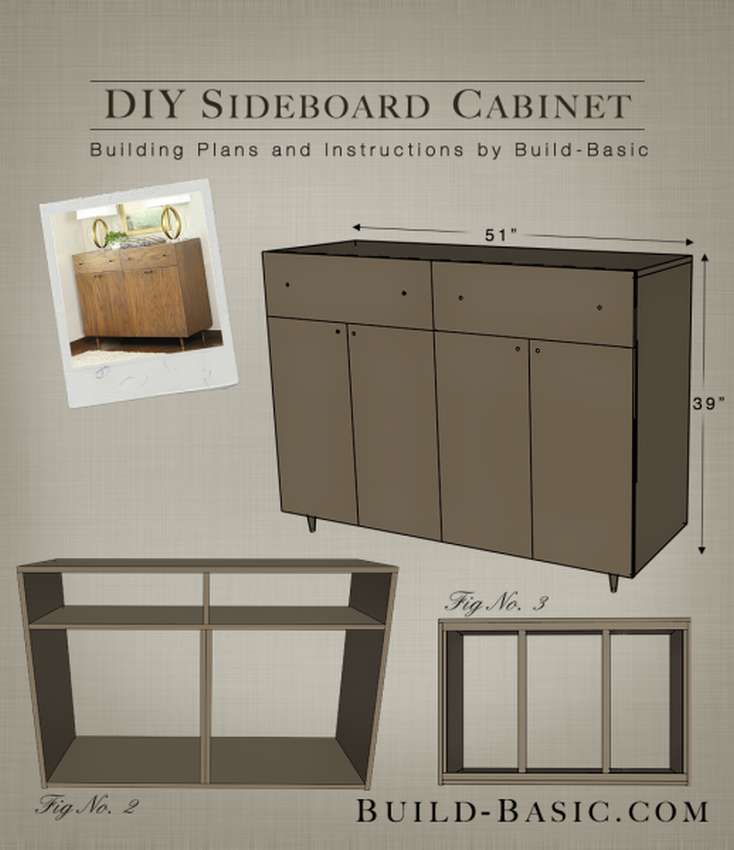 To make a cabinet yourself, you will need such materials.
- 2 sheets ¾ ”plywood 120 x 240 cm
- ¼ ”plywood sheet, also measuring 120 x 240 cm
- 8 overhead hinges
- 2 drawer slides (sold in sets of two for each drawer)
- 4 table legs 8 cm high
- Nails
- Wood screws.
Read the instructions for making this universal cabinet on the author’s website, link below the gallery.
See below the master class on step by step photos..


https://i.expert-h.com/en/shkaf/dla-doma#sigFreeId3a95c1984c
Cabinet with drawers for storage
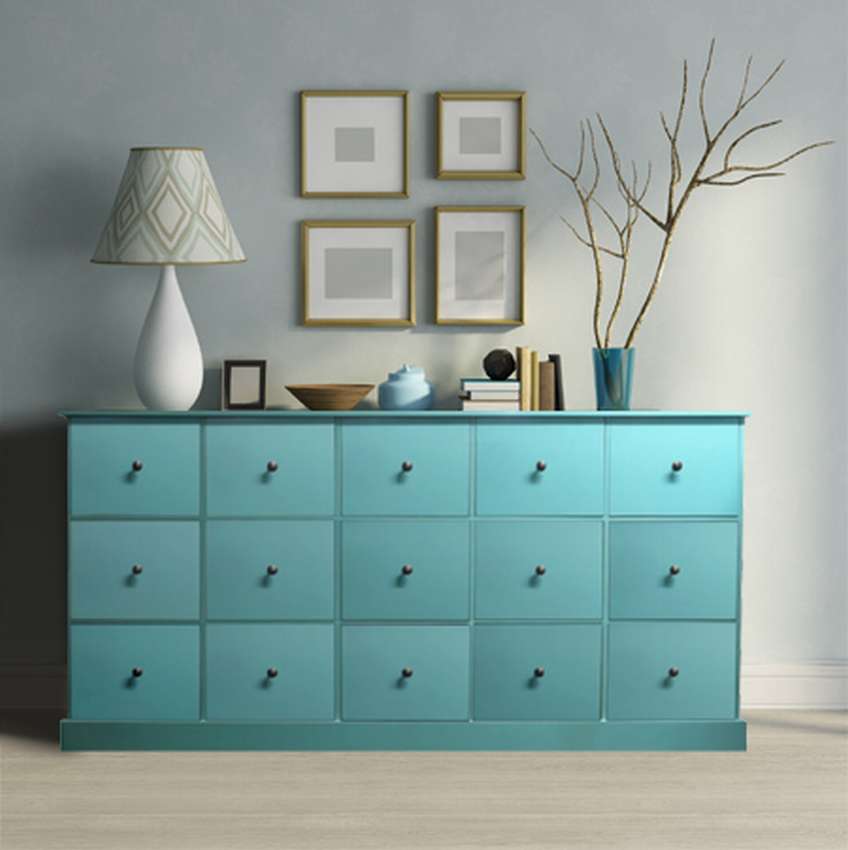 This cabinet with 15 storage drawers, although it looks complicated, but in fact the most difficult part is to make the boxes themselves. The uniqueness of the design is the color. Although the cabinet is larger than normal, which is usually a 3 x 4 layout, you can easily resize to make it smaller. In this design no glue. It is not always necessary to use wood glue, especially when using smooth shanks. The screws used here are designed for tight connection of boards. This is one of those projects where you start in the middle and go to the sides. Thus, it is easy to attach the drawer frame to the sides, top and bottom for a solid location. How to do this, shown in the drawings in the gallery, the process look at step by step photos.


https://i.expert-h.com/en/shkaf/dla-doma#sigFreeIdbc0ac8ddd1
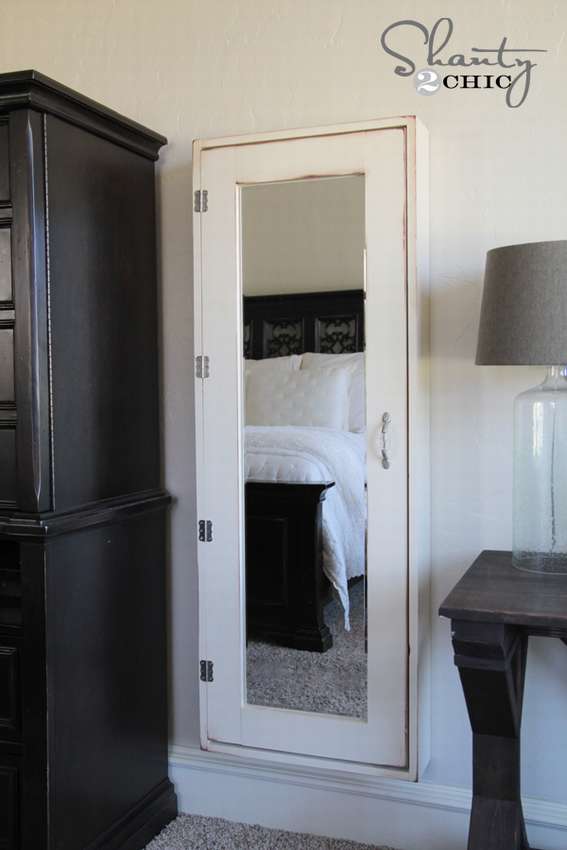
Curved wardrobe in the bedroom
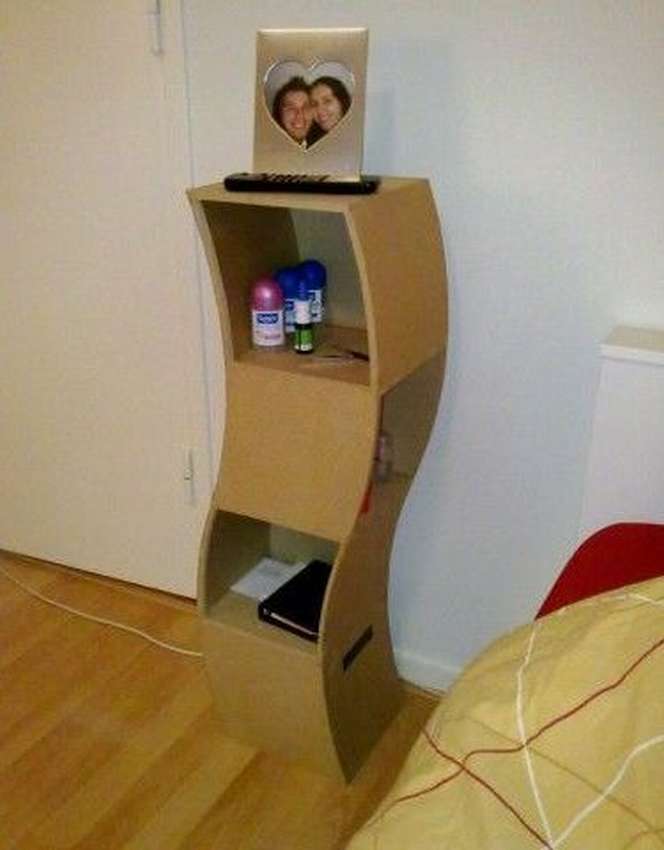
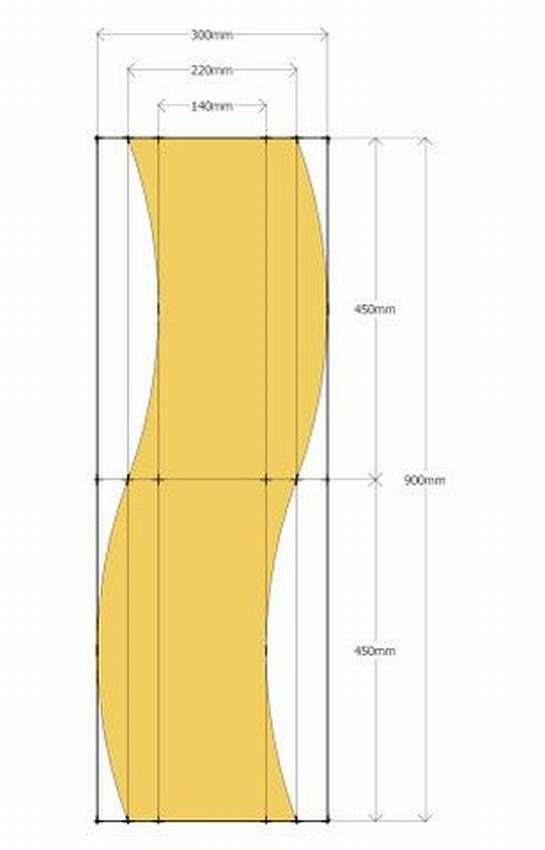
 The idea is to make a curved cabinetdivided into four sections. Two in front and two on the sides. Thus, you can get any thing off the shelf while lying in bed. This cabinet is 900 mm high, because of the standard MDF sizes, you can change all sizes to your liking, they are just used as an example.
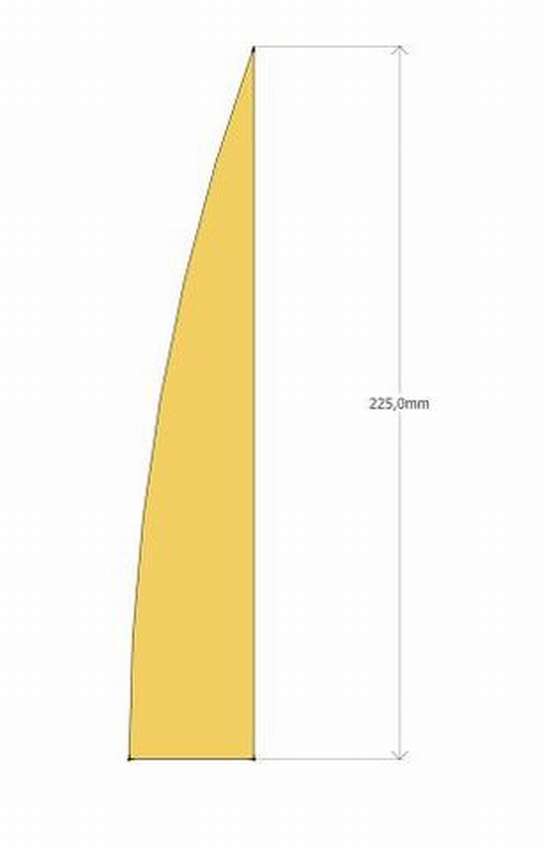
All arcs have the same curve and size.. If you print (or draw) 1 part of the arc to scale, you can display all the curved lines on the tree, rotating and mirroring the piece.
 This cabinet is made of 9 mm thick MDF and a thin 0.4 mm “MDF pocket” (so to speak, figuratively). For the main structure, you can use a thicker MDF or board and perhaps a thin, flexible triplex for a curved shape.
See drawings and step-by-step photos below..


https://i.expert-h.com/en/shkaf/dla-doma#sigFreeIda3cd89705b
DIY pallets cabinet
 Wooden furniture from pallets is usually used in the country, although there are magnificent artwork that can represent a decorative style for the entire home interior. Pallet Cabinets Ideas make complicated things easier. Thanks to the design, you can make a wide variety of furniture at a lower cost. The great advantage of these ideas over others is that they can create your own style.
Here are some examples. furniture from pallets for the kitchen, pantry and even the living room. Of course, there are many more options, you can see another hundred examples in a large gallery.
Cupboard in the kitchen
 A great option for a summer residence. If you do not want to buy furniture for your country house, here is a way to solve the problem with minimal cost.
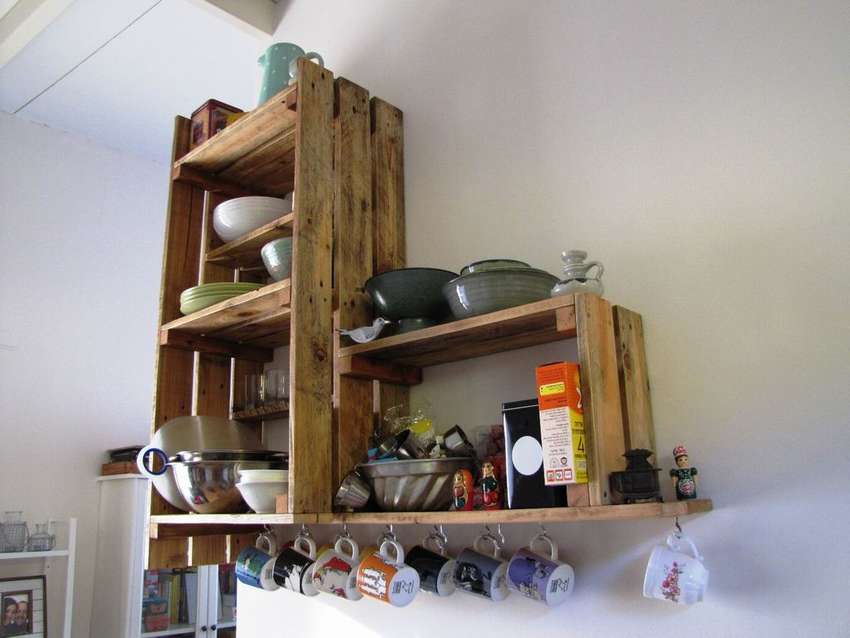
See how to make it very simple. wall cabinet for kitchen from pallets do it yourself.
In the photo you see a drawing designed with the 3D software necessary tools.
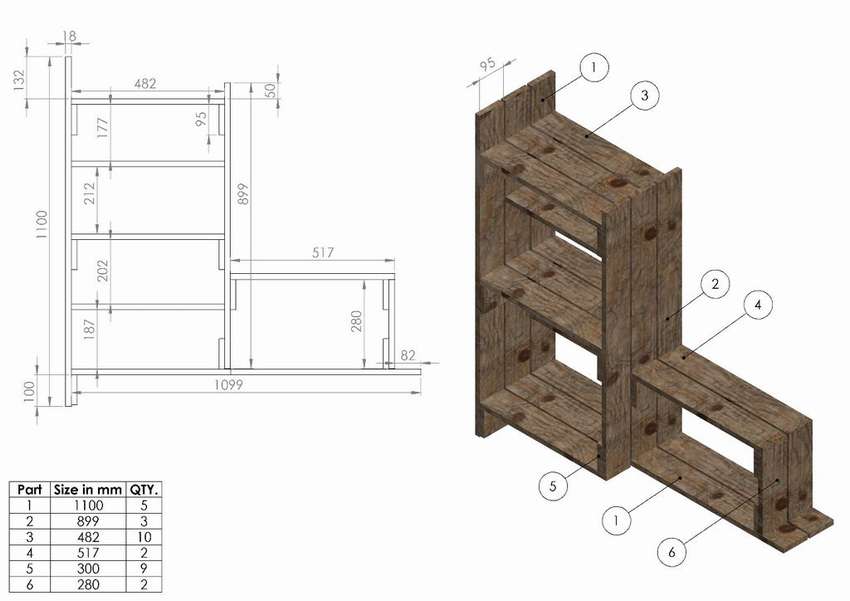 Briefly about the workflow. Dismantle the pallet. Measure and cut the pallet boards into the necessary parts, as shown in the drawing. Sand and coat with matt varnish. Assemble the cupboard and hang it on the wall. Before tightening the screws, drill holes (smaller than the diameter of the screw) to prevent fractures and cracks in the boards. At the bottom of the cabinet, twist the hooks to hang cups, towels, and other kitchen utensils.


https://i.expert-h.com/en/shkaf/dla-doma#sigFreeId15f0aa1eb7
Backlit kitchen cabinet
Pallets are an excellent source of cheap boards, and the reuse of wood is a necessary and useful business. See how you can make cute kitchen cabinet of pallets.
 If you paint, install tiles on the countertop and carry out lighting, you will get unique furniture for the kitchen, moreover, at minimal cost. Below, see the master class on how to make a locker on step-by-step photos..


https://i.expert-h.com/en/shkaf/dla-doma#sigFreeId7b8b84372f
Farm style kitchen cabinet
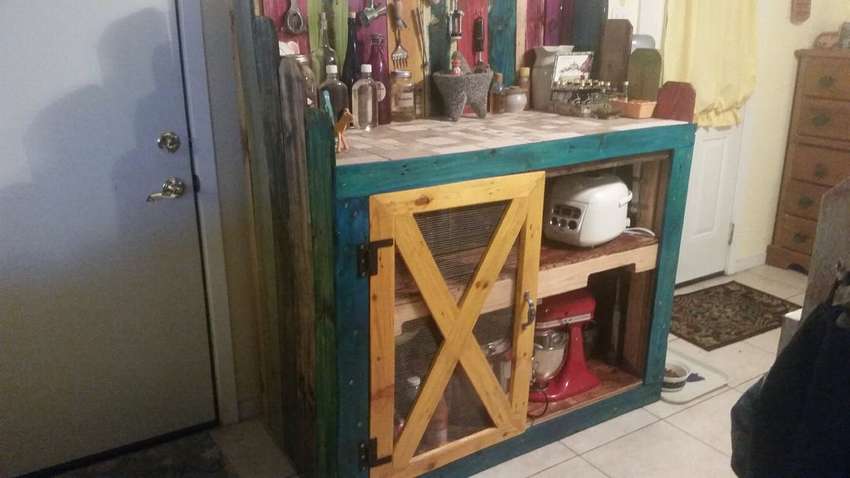
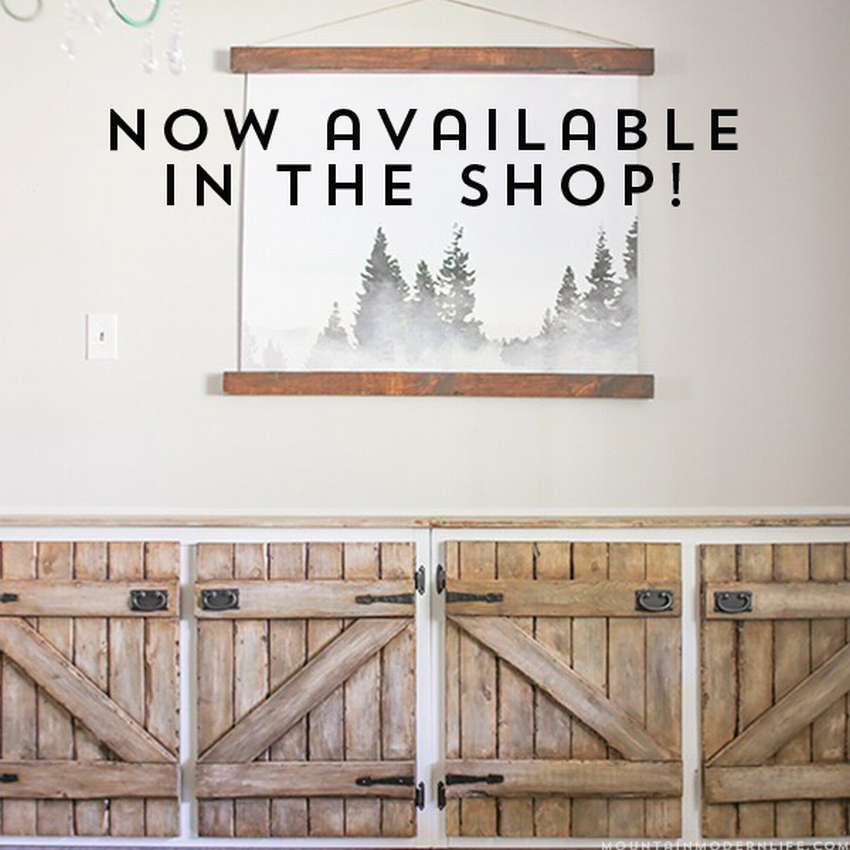 For the manufacture of this environmentally friendly kitchen cabinet used old boards and other waste wood, but look what a beautiful design that lasts for many years. If you like barnwood style (furniture from a barn board, used), then such a kitchen cabinet can be a great addition to your kitchen. You don’t need to be a professional carpenter to do this do-it-yourself cabinet. With junk materials, you can turn old boards and plywood into an amazing piece of art. How to do this is shown in detail in step-by-step photos, even a landfill with waste wood, if you see the same, do not pass by. Of course, there is a lot of fuss with used materials, you will have to work well with a grinder, and then with a brush. The author recommends using epoxy paint in accordance with the interior decor of your kitchen.
I hope you feel inspired to overestimate the discarded furniture and turn it into something that you will love and appreciate for years to come.


https://i.expert-h.com/en/shkaf/dla-doma#sigFreeId3aaa2bbcae
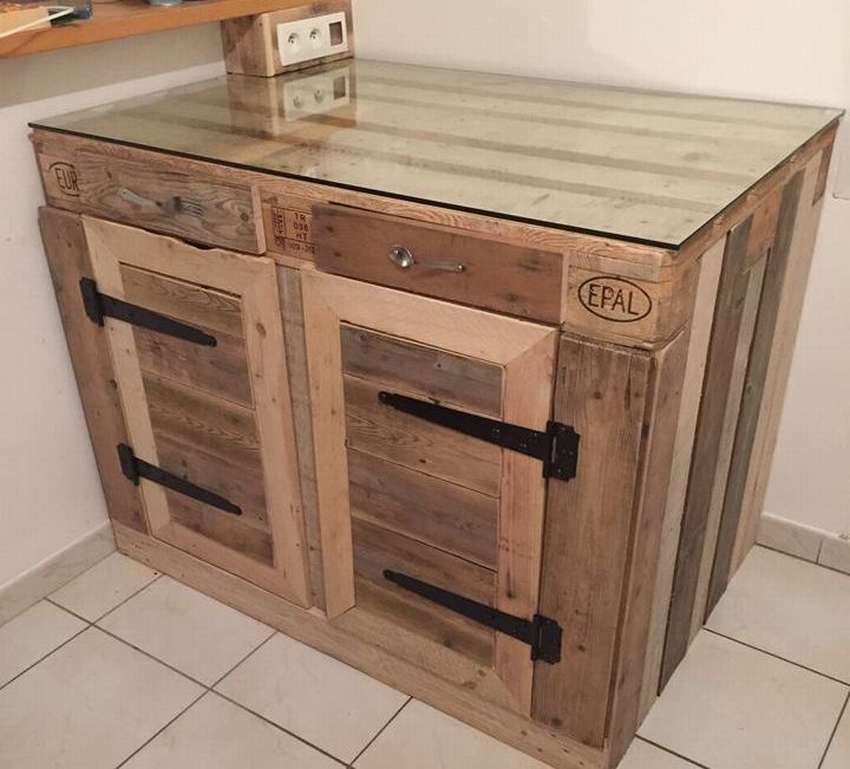
Cabinet from pallets to the kitchen
 Like this a cabinet for the kitchen can be made of palletscheap and reliable. In the middle there is one shelf, on the countertop are two side and a rear side, so that nothing falls. For assembly used screws with a cross-shaped slot, designed so that the wood does not split. But it is not very reliable, better drill holesI'm under the screws. It is also recommended to fill the holes with glue,it will be stronger and the risk of unscrewing the screws itself will be reduced. Use the bottom shelf to attach internal support and glue. For the top shelf, do the same, just add a little support. Before grinding, it is necessary to hide the screws or completely clean the appearance. This is achieved through the use of wooden putty.
About the other nuances of making this cabinet from pallets, can read on the site and see below on step by step photos.


https://i.expert-h.com/en/shkaf/dla-doma#sigFreeId04bbe81b76
Kitchen cabinet for spices
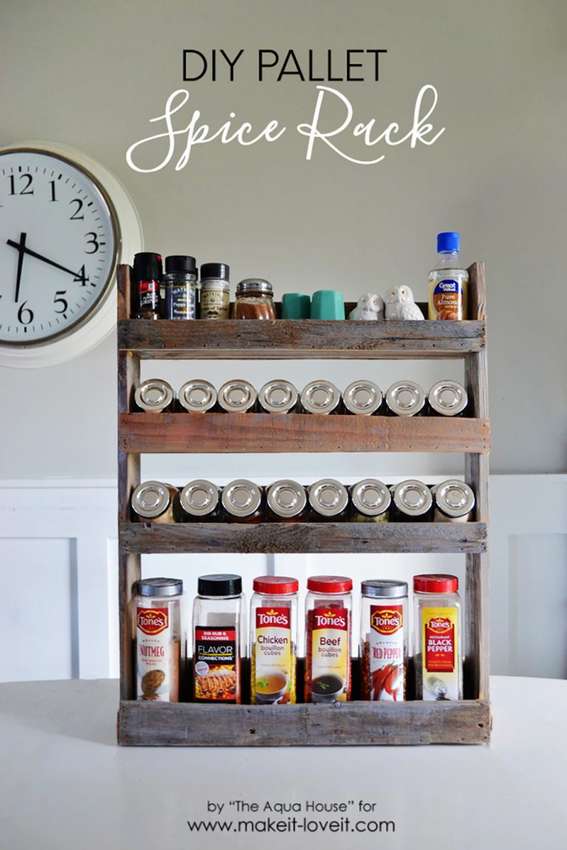 To clear some space, make a spice cabinetIt is convenient, cheap and looks very pretty. Such a small rack is very easy to make, and you can change the design to suit your specific needs. In this case, the lower shelf is larger for large cans, and the upper shelves are smaller for small containers with spices. It all depends on you (and the containers in which you keep the spices). You can hang this spice cabinet anywhereanywhere in the kitchen!
For this project you will need boards from pallets, (just one pallet is enough) and a combined saw.
Pallets come in many shapes and sizes; if your pallet is larger, you may need a table saw to cut boards.
It’s not difficult to assemble the rack, the most time-consuming part is to disassemble the pallets, no special tools will help here. You just need an ordinary hammer, a nail puller to pull out the nails ... and an extra dose of patience ... and maybe strength. And then prepare the details, mainly 50 cm boards. You can read more about the dimensions of the parts on the website.
How to assemble a kitchen cabinet from pallets, shown below in step-by-step photos.


https://i.expert-h.com/en/shkaf/dla-doma#sigFreeId33da8b7265
TV cabinet in the living room
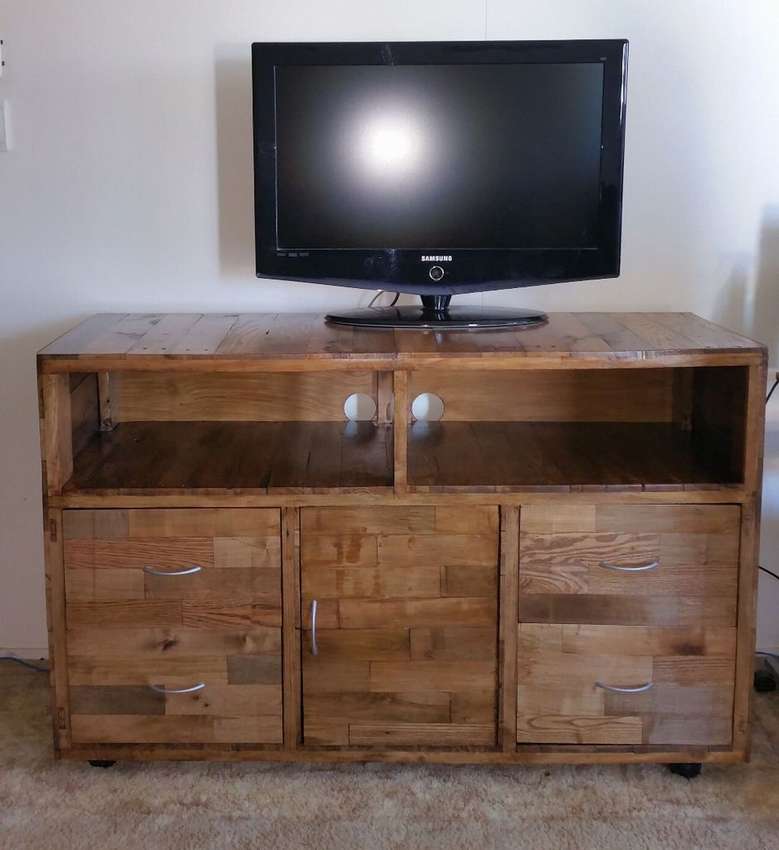 Here is another example that proves that you can make stylish and modern furniture out of pallets. it TV cabinet in the living room with a niche, four drawers and a middle section with a shelf. There are many ways to disassemble a pallet, for example pallets from pine boards can be disassembled with a little splitting, but pallets made of hard wood threaded nailswhich are very difficult to remove and therefore easy to break. This method consists in using a circular saw trim the ends of the boards and remove the side parts. Then select the boards from the center using Multi toolto trim the nails flush with the center. Since the central element is now full of nails, it is safer to throw it away and then risk running through any of the tools. Can be used scrap nail clipper to remove nails from the sides. In general, if you want to find out all the details, a link to the site under the gallery, there the whole process is scheduled and laid out on shelves.


https://i.expert-h.com/en/shkaf/dla-doma#sigFreeIda6d3030724
Cabinets from pallets 100 photos


https://i.expert-h.com/en/shkaf/dla-doma#sigFreeId9908c32e7c
Hello, I am the author of this article, so I look forward to asking questions for this article in the comments below, I will answer all !!!
If you have questions on another topic, ask them on our forum, we will answer you
- Two baskets of paper in 5 minutes (Master class)
- How to make a simple and compact table for a milling cutter from plywood
- How to make a soft headboard tile (Instructions + step by step photos)
- Cinder block benches: a convenient bench in 55 minutes
- How to make a bed with a niche: saving space (Master class)