Do-it-yourself wardrobe. Master classes: 370 photos + Drawings
The sliding wardrobe is convenient, beautiful, practical and functional. How to make a wardrobe with your own hands? Not an easy task, but a real one. See 20 examples of different designs, with drawings, diagrams, and step-by-step photos. Wardrobe with sliding doors - This is an absolute need for modern interiors, allows you to effectively use the free space and create a convenient storage area.
In the article you will find:
- How to assemble a wardrobe with your own hands
- Mounting the body and doors of the closet
- Sliding wardrobe filling inside
- DIY sliding wardrobe
- DIY built-in wardrobe
- Do-it-yourself corner wardrobe
- DIY Radius Sliding Wardrobe
- How to make do-it-yourself wardrobe doors
From this article you will learn:
Step-by-step photo of manufacture 4 types closet
Case
(step by step photos) 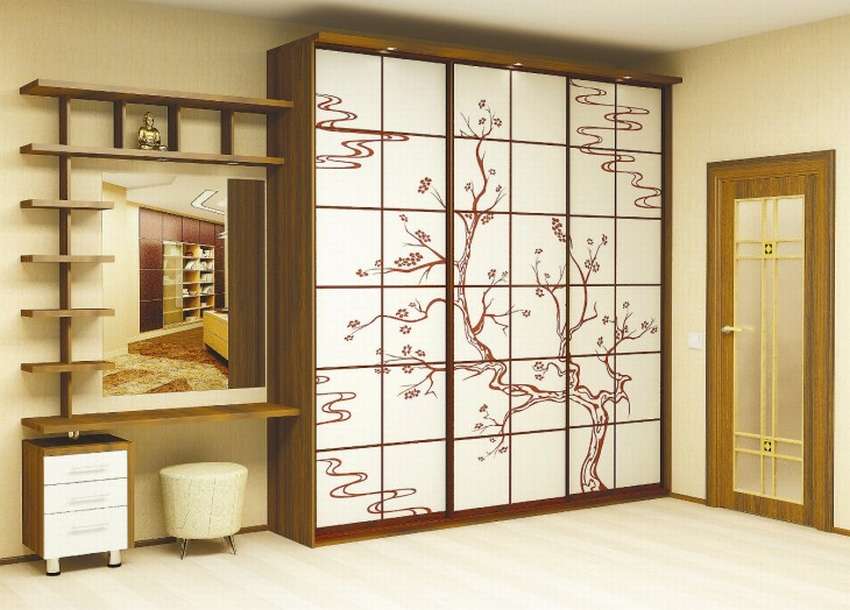
Angular
(with step by step photos)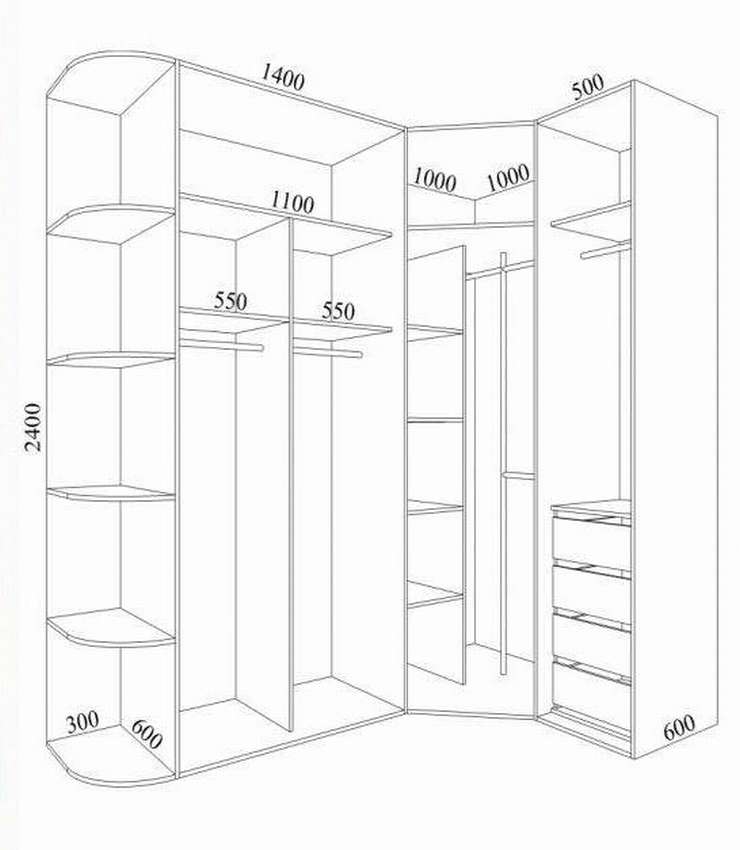
Built in
(with step by step photos)
Radouscloset (radial)
80 circuits posting
(things and shelves in the closet)
Blueprints
53 drawings sketch and layout with dimensions Cabinet closet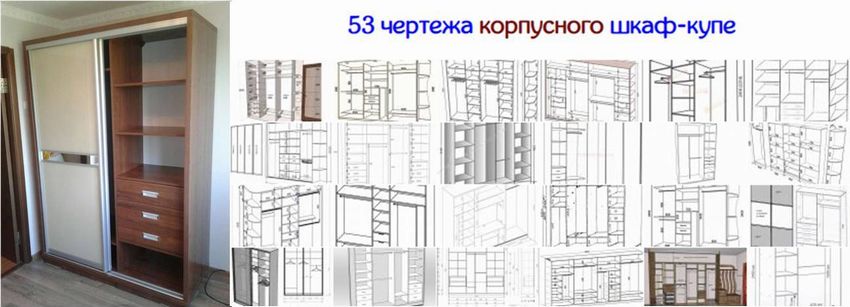
54 drawings sketch and layouts with dimensions Angular closet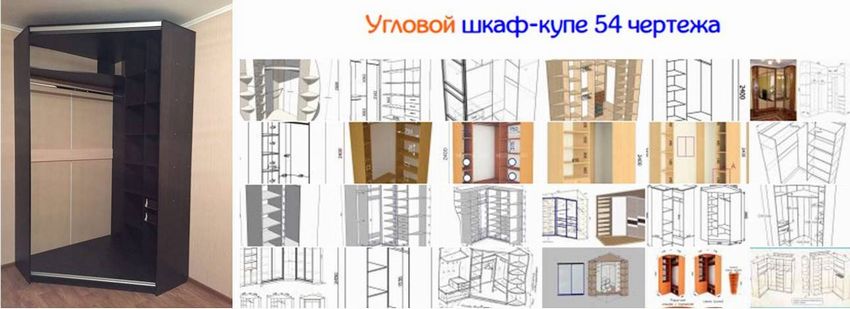
105 drawings sketches with sizes and layouts Radius closet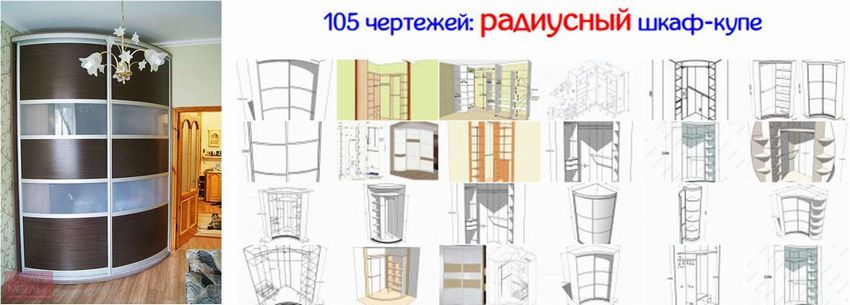
55 drawings sketches and layouts with dimensions Embedded pergolas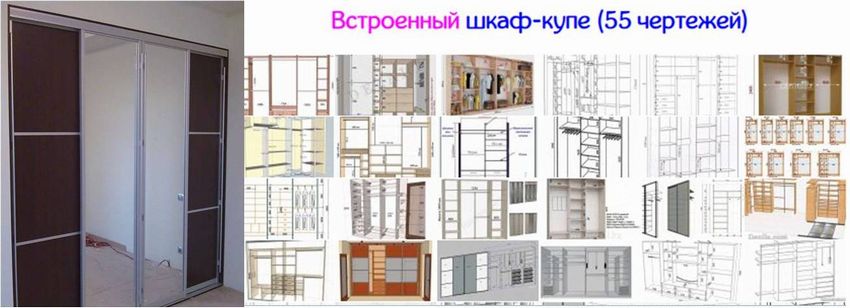
Photo gallery
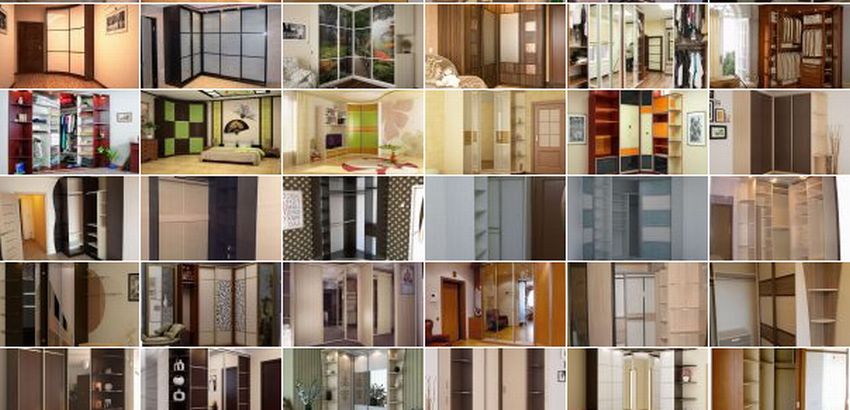
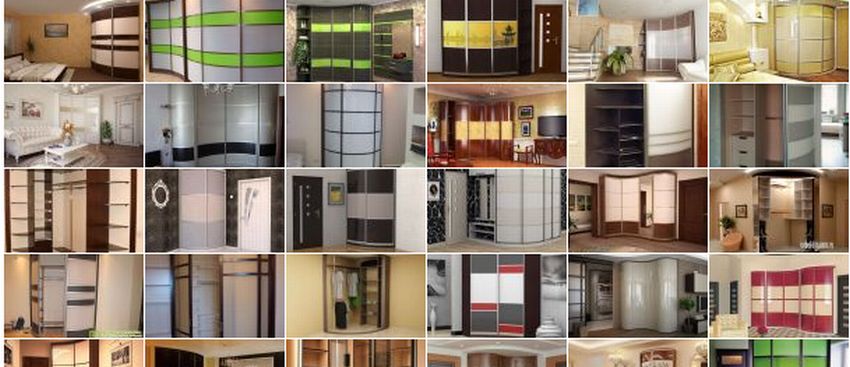
At the end of the article 4 photo collections the best options for different models of wardrobe (more than 150 selected models) 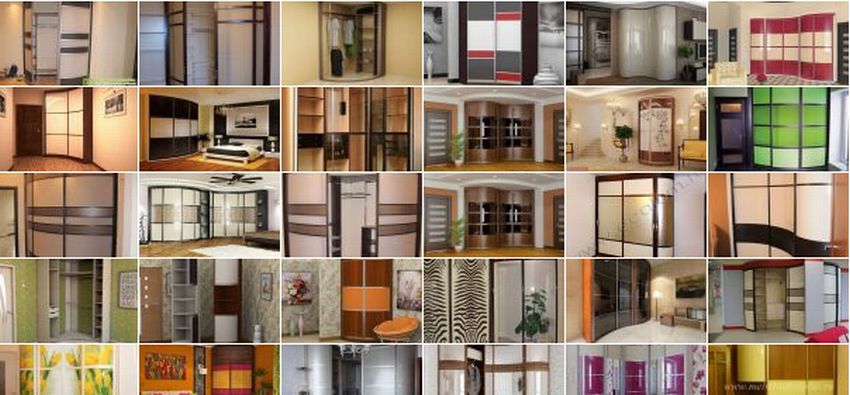
Cabinet closet
Sliding wardrobes are called conventional wardrobes, but with sliding doors. Unlike built-in hulls, there is a back wall, and unlike angular and radial hulls have a rectangular shape.
How to make a wardrobe with your own hands from A to Z
(step by step instructions and master classes)
 Here is an overview of how to learn from how to make a wardrobe with your own hands, what is a wardrobe and what are the types of this design. The full article can be read on the author’s website, links can be found under the galleries with step-by-step photos. The operational functionality of modern furniture should be combined with aesthetically pleasing attractive appearance. These requirements are fully met by modern coupe systems with sliding doors.
 If you decide do-it-yourself wardrobe, the issue of facade design should be addressed. The dissonance of the internal content of the cabinet with its external design must not be allowed. You should choose the most appropriate option. You can issue
- a mirror
- just glass
- Particleboard / MDF. (The advantage of chipboard is the possibility of photo printing, although the choice of colors is already huge)
- Natural wood - In general, an ideal, durable option, but expensive, so it is not used too often.
Photo master class (from 3 parts)
The gallery below provides step-by-step photos, on which do-it-yourself coupe cabinet assembly process is displayed, though not completely. Useful in the manufacture of a sliding wardrobe any!!! configuration. Even a guide to disguise hats confirms is shown.
1st part: how to stick edge tape on the ends of the workpieces


https://i.expert-h.com/en/shkaf/1111#sigFreeId5bed67a1c6
2nd part: assembly frame


https://i.expert-h.com/en/shkaf/1111#sigFreeIdb364845ac9
3rd part: door manufacturing and assembly of the sliding system


https://i.expert-h.com/en/shkaf/1111#sigFreeIdbebc9c7966
40 drawings: corpus closet


https://i.expert-h.com/en/shkaf/1111#sigFreeIda715d15f53
See entire collection of drawings (+ step-by-step photo of manufacture) in this article https://i.expert-h.com/en/shkaf/korpusnye-shkaf-kupe
Be sure to watch the video:
Sliding wardrobe tips (briefly, succinctly, in the case)
A lot of useful and necessary in a compact presentation on the design of sliding wardrobes. You just can’t find it anymore !!!
240 photos: corpus closet
Attention!!! This photo gallery is located on the page about cabinet closets, here we decided not to post it because of the risk of page overload with a huge array of photos, so follow the link under this collage.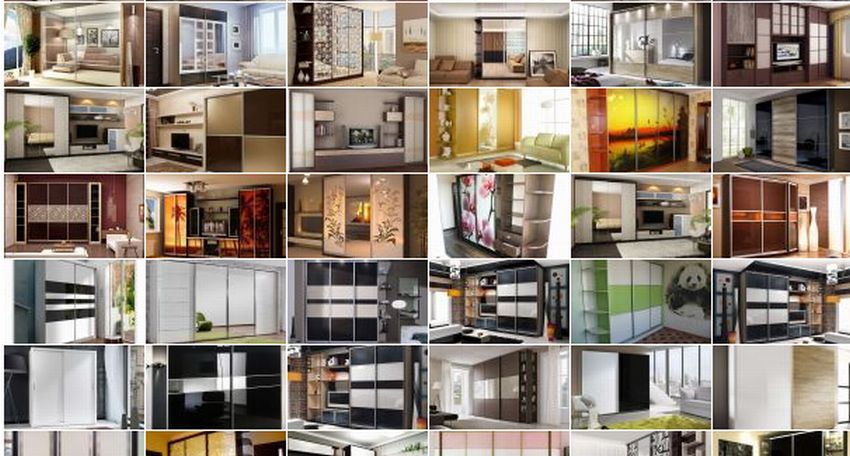
See entire collection of drawings (+ step-by-step photo of manufacture) in this article https://i.expert-h.com/en/shkaf/korpusnye-shkaf-kupe
Built in closet
A built-in closet is called a closet with sliding doors, which has no bottom, roof and rear wall.
Do-it-yourself wardrobe
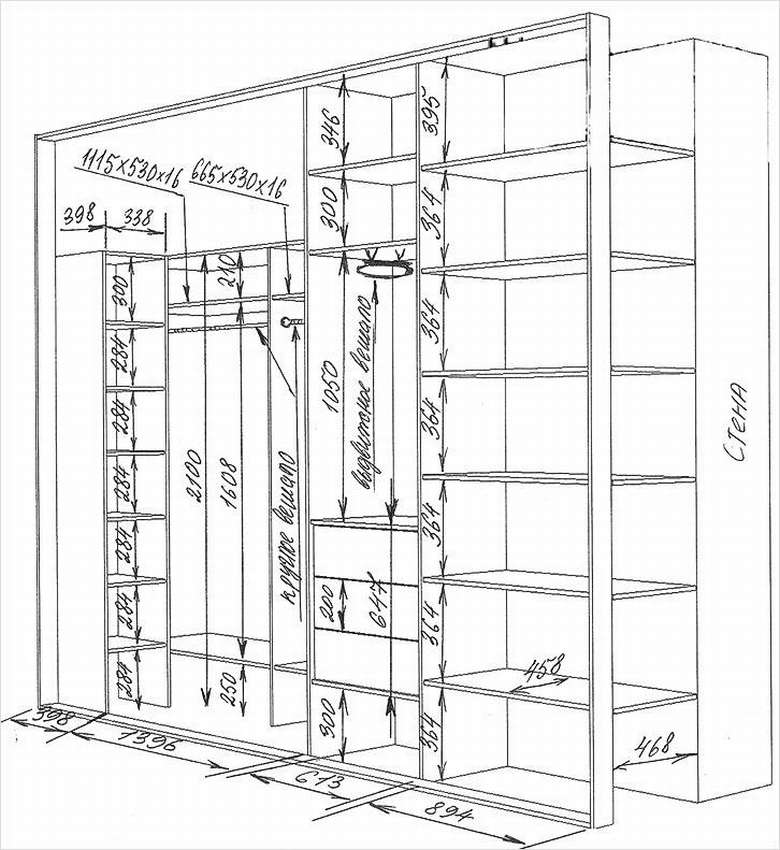
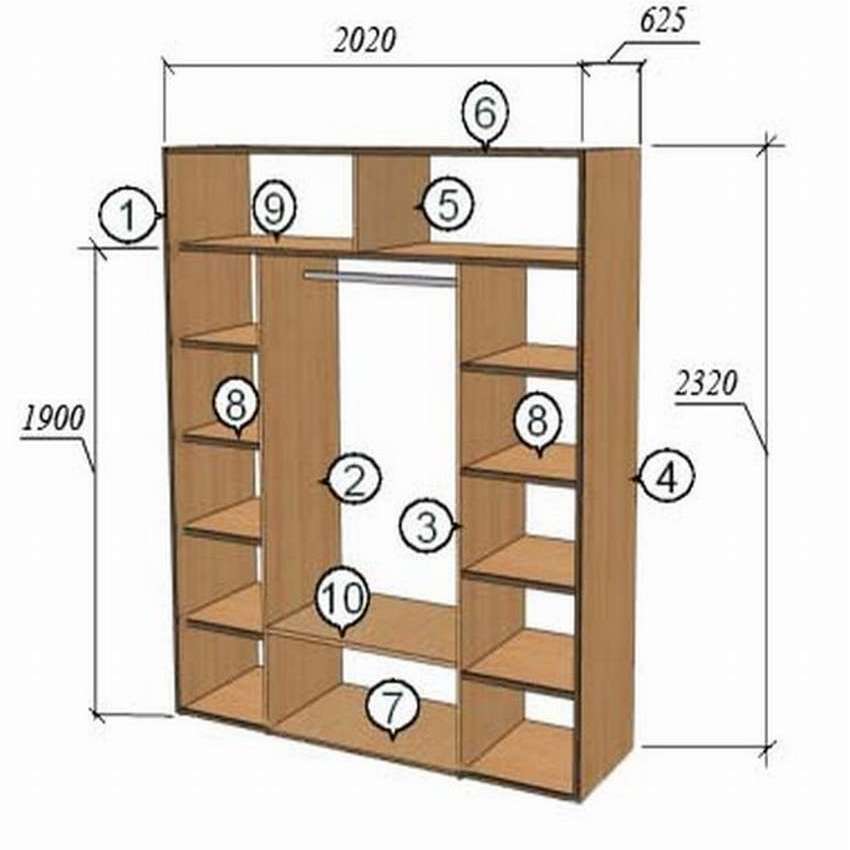
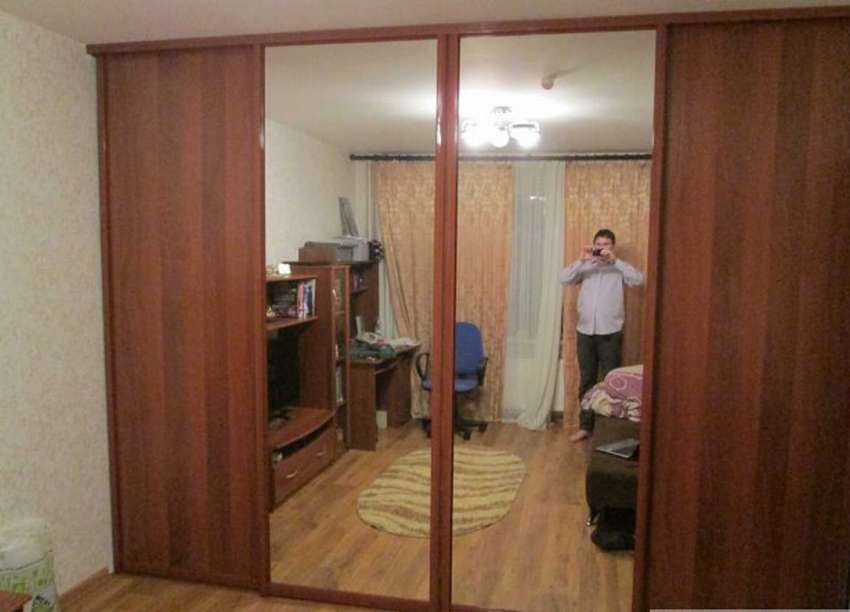 Here is a concrete example do-it-yourself wardrobe installation. Dimensions of the structure 2020x625x2320 mm. The diagram below shows part numbers. Vertical - 1,2,3,4,5, top - 6, bottom - 7 and shelves - 8, 9 10. In the right photo drawing of a sliding wardrobe with dimensions. This is an example of a classic design that can be used in principle for any room.- an entrance hall, a living room or a nursery, the design is essentially the same, only the functional load, which means the internal content, will be different. Assembly of a sliding wardrobe, of course, an important stage, but still the most important thing is to correctly calculate the dimensions of the component parts.
 You can read about all this, including a list of tools, assembly, installation of equipment and sliding doors in the instructions on the website. See below the master class on step by step photos..


https://i.expert-h.com/en/shkaf/1111#sigFreeId5da151515d
Video: Do-it-yourself closet (Built-in). Very detailed !!!
40 drawings: inline closet


https://i.expert-h.com/en/shkaf/1111#sigFreeId5fd7e0bb5e
See entire collection of drawings (+ step-by-step photo of manufacture) in this article https://i.expert-h.com/en/shkaf/vstroennyj-shkaf-kupe
240 photos: inline closet
Attention!!! This photo gallery is located on the page about built-in closets, but here we decided not to post it because of the risk of overloading the page with a huge array of photos, so follow the link under this collage.
See entire collection of drawings (+ step-by-step photo of manufacture) in this article https://i.expert-h.com/en/shkaf/vstroennyj-shkaf-kupe
Angular closet
Below is the simplest model of this kind of cabinet.
How to make a corner wardrobe
 Corner wardrobe, this is a very popular model of furniture, especially for small apartments. There are thousands of options that you have probably already seen by browsing photos on the Internet.
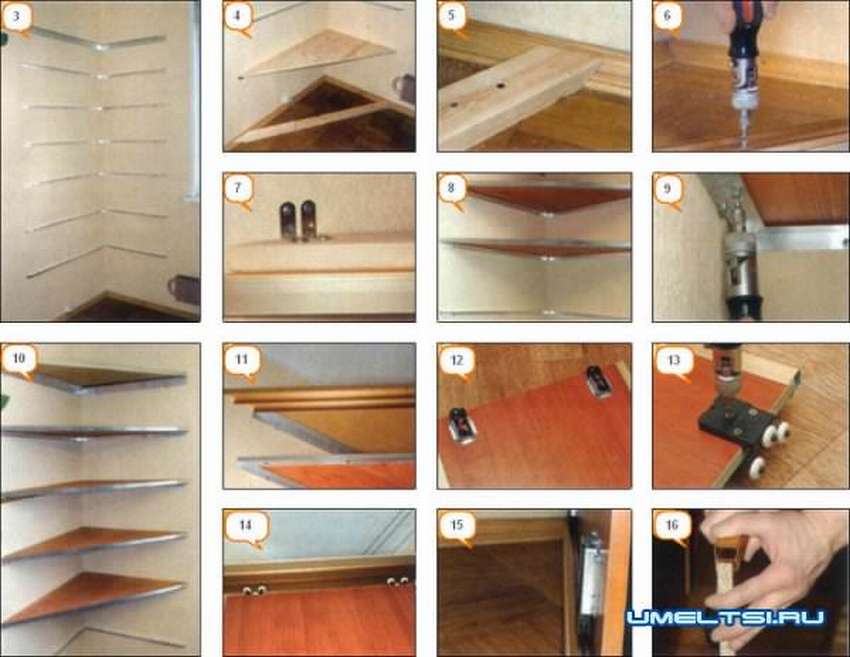
Here is a relatively simple example, how to make a do-it-yourself corner wardrobe.
In fact, these are ordinary triangular-shaped shelves in the corner of the room, closed by sliding doors.
Universal design for any room, can be used as a tool cabinet, both in this case and for other purposes. It all depends on the size and internal equipment. If you make a larger volume, you get great closet for linen, shoes, clothes, but anything.
How to make this locker can be found in the detailed instructions on the author’s website.
 Step by step photos collected in a small collage.
40 drawings: angular closet


https://i.expert-h.com/en/shkaf/1111#sigFreeIdcd34d547bd
See entire collection of drawings (+ step-by-step photo of manufacture) in this article https://i.expert-h.com/en/shkaf/uglovoj-shkaf-kupe
Video: do-it-yourself corner cabinet
240 photos: angular closet
Attention!!! This photo gallery is located on the page about the corner wardrobe, but here we decided not to post it because of the risk of page overload with a huge array of photos, so follow the link under this collage.
See entire collection of drawings (+ step-by-step photo of manufacture) in this article https://i.expert-h.com/en/shkaf/uglovoj-shkaf-kupe
Radius closet
Unfortunately, there are practically no step-by-step master classes on making radial sliding wardrobes at home on the Internet. Basically, all the models presented on the network are factory products. The fact is that it is practically impossible to produce radius doors on their own without special equipment.
Video: Do-it-yourself Radius Wardrobe
40 drawings: radial closet


https://i.expert-h.com/en/shkaf/1111#sigFreeIda95b6d0462
See entire collection of drawings (+ step-by-step photo of manufacture) in this article https://i.expert-h.com/en/shkaf/radialnyi-shkaf-kupe
240 photos: radial closet
Attention!!! This photo gallery is located on the page about the corner wardrobe, but here we decided not to post it because of the risk of page overload with a huge array of photos, so follow the link under this collage.
See entire collection of drawings (+ step-by-step photo of manufacture) in this article https://i.expert-h.com/en/shkaf/radialnyi-shkaf-kupe
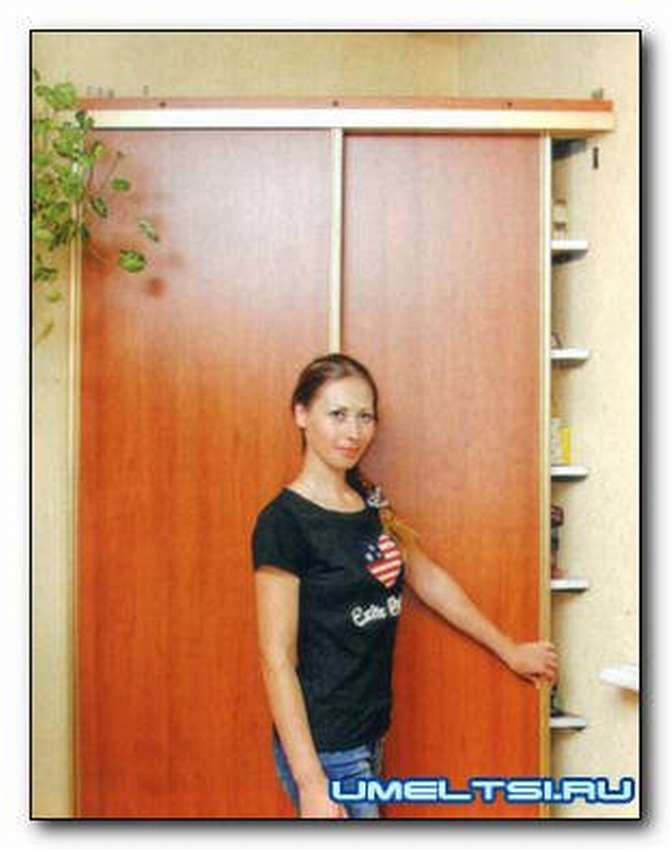
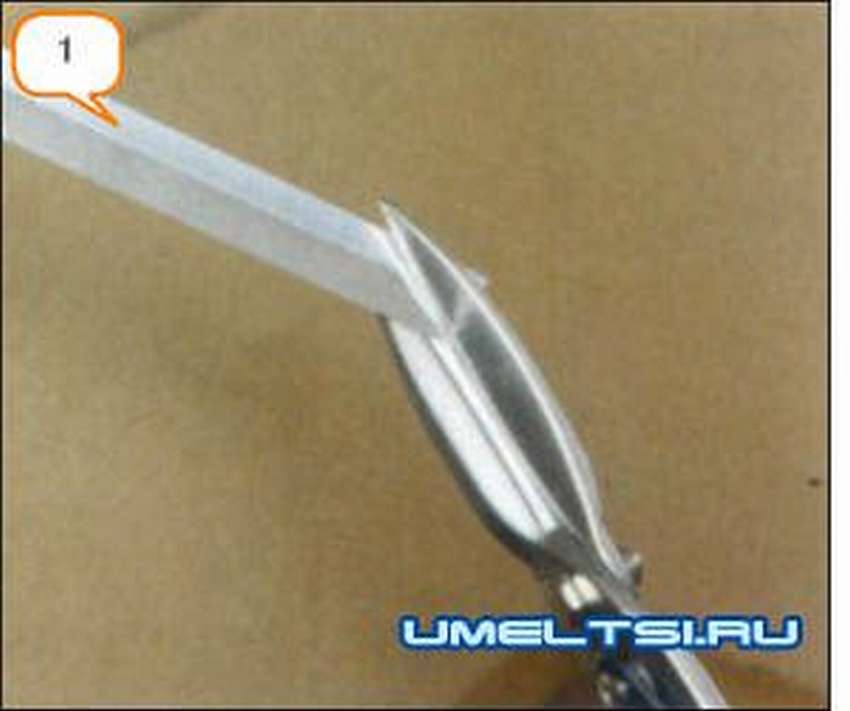
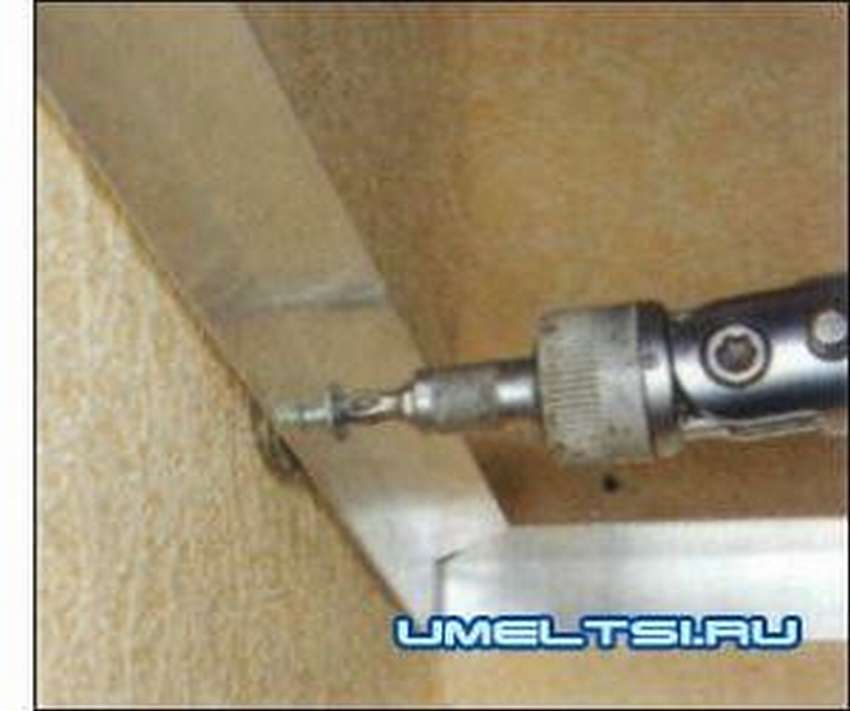
Sliding wardrobe for giving in 5 minutes!
A great option for a summer cottage or temporary rental apartment.
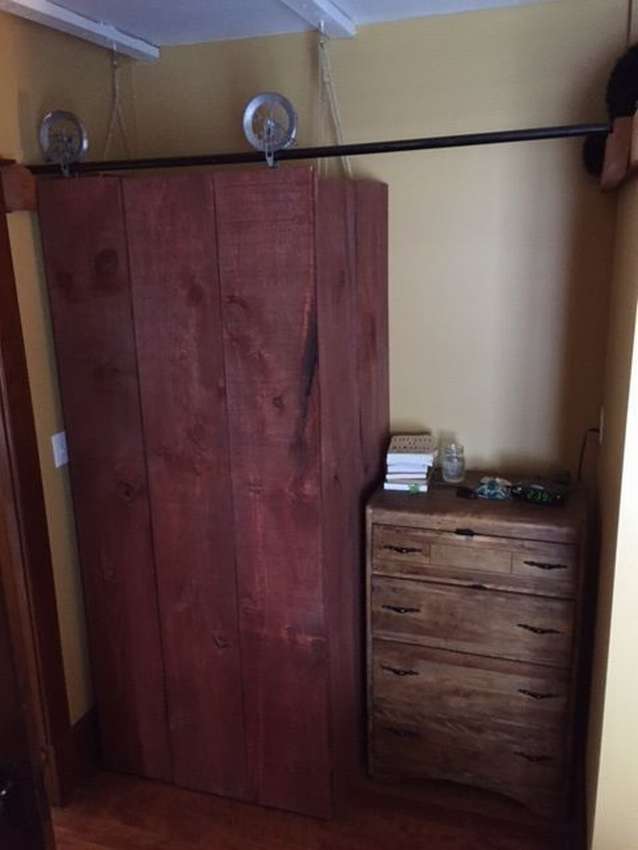
 To make such a cabinet is quite simple and you don’t have to spend much money on doors and shelves, any material will do. Not very stylish, but to provide the minimum amenities, it will fit perfectly. How to assemble such a wardrobe with sliding doors, see below for step-by-step photos.


https://i.expert-h.com/en/shkaf/1111#sigFreeId2c2030bdfa
How to assemble a wardrobe with your own hands step by step instructions
 The following is a step-by-step guide, how to assemble a wardrobe with your own hands. This information is to help you if you have the enthusiasm and desire to save a little and do your own home furniture assembly. Of course, each installation will be different and there may be more or less steps than shown below on step by step photosbut hopefully it’s enough for you to understand the main points. Presented here wardrobe with sliding doors not the most complex design, but fully displays the assembly of standard models.
More complete information with a description of each step can be found on the website, a link under the gallery.


https://i.expert-h.com/en/shkaf/1111#sigFreeIda90d4ef514
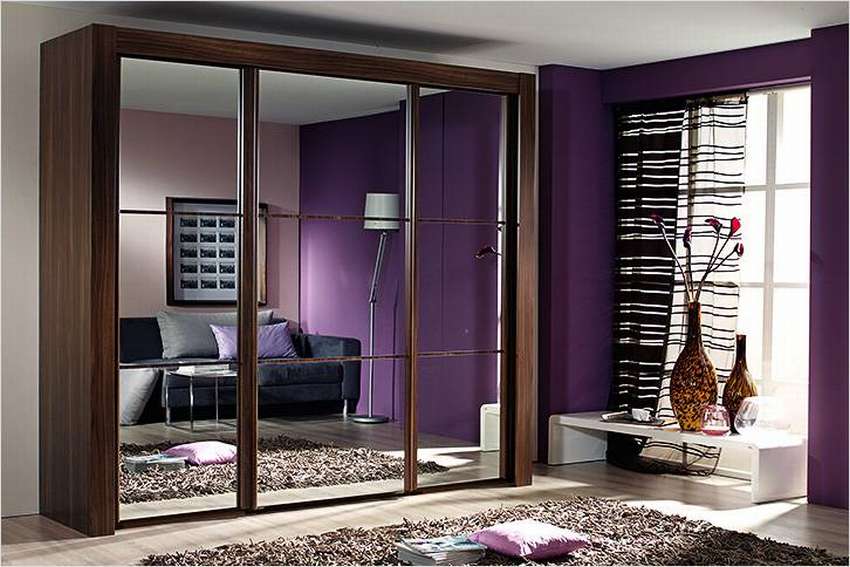
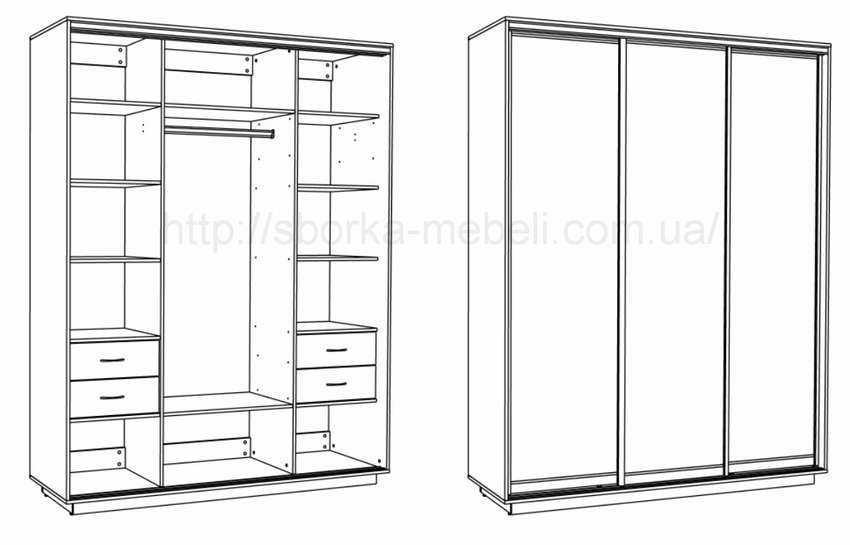
Do-it-yourself wardrobe drawings and schemes
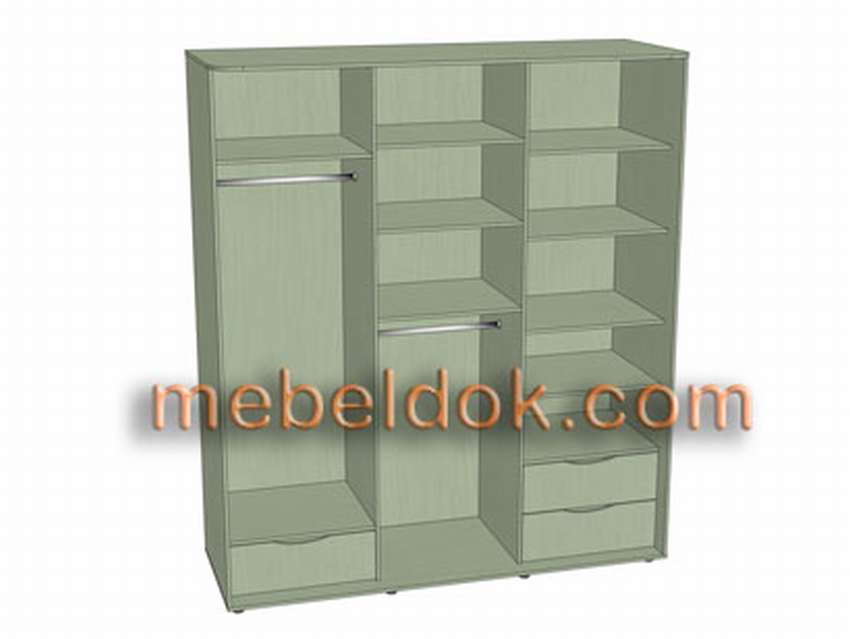 This is not a step-by-step instruction, how to make a wardrobe do-it-yourselfbut rather a general guide. Information from room measurements and structural calculations to step-by-step assembly of a sliding wardrobe. Manufacture Considered Here three-door wardrobe option. The model is wonderful, relatively simple and at the same time quite common. The calculation of the dimensions of the wardrobe is influenced by the features of the materials used in its manufacture. However, many more factors affecting the design of sliding wardrobes will be considered further. Use the link under the gallery, there are many on the site useful and interesting information. Below in the photo gallery shows the drawings, the main components and construction details.


https://i.expert-h.com/en/shkaf/1111#sigFreeId65982733fc
How to assemble a sliding wardrobe
 Here are a few more tips on how to wardrobe installation. It shows how to assemble the structure and install it in place. You can read useful tips on the site, there are a lot of interesting things. For example:
- in which case to assemble the cabinet in a lying position, and in which case in a standing position;
- how to use mortise supports for the walls and connect the bottom and side walls;
- how to fix the fiberboard and install the upper part;
- correctly install the drawers and the bar, as well as the stopper in the lower guide of the sliding wardrobe.
- And most importantly, adjust the doors.
In general, a lot of useful information.


https://i.expert-h.com/en/shkaf/1111#sigFreeIda62a3129dd
Assembly and installation of a built-in closet using false panels


https://i.expert-h.com/en/shkaf/1111#sigFreeId23058b2e80
How to assemble your own wardrobe doors


https://i.expert-h.com/en/shkaf/1111#sigFreeIdc39d683ff4
Filling closet options
And here it’s shown how effective organize storage in your closetso that all things are accessible, and storage is convenient and functional.
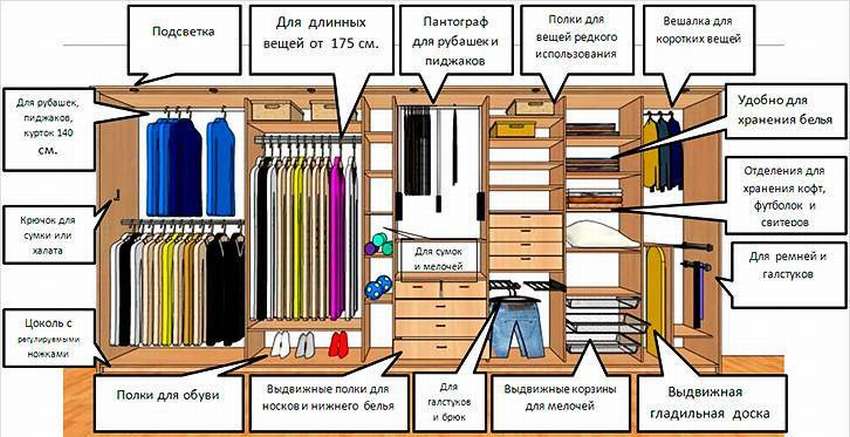 This is the advantage when you do do-it-yourself wardrobe. You can arrange the shelves, hooks and rods so that they are most comfortable for your wardrobe. The gallery below shows the basic elements that you can use for your wardrobe.


https://i.expert-h.com/en/shkaf/1111#sigFreeId03c76e9713
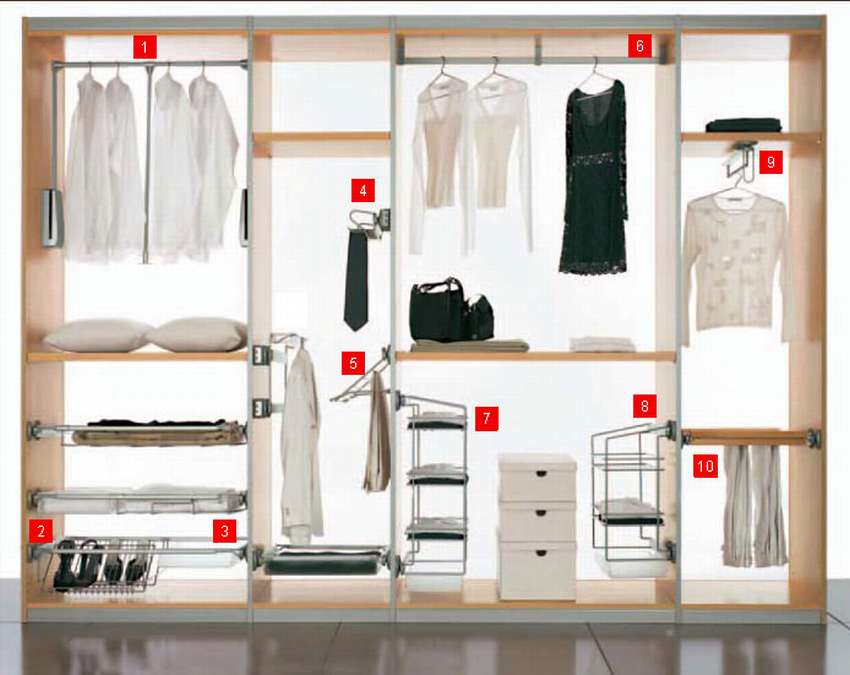 Or another example, how to effectively organize the contents of a wardrobe. What do the numbers in the photo mean.
1 - Pantograph.
2 - While the lattice for shoes.
3 - Plastic shoe tray.
4 - Retractable stand for ties.
5 - Trouser holder retractable with side mounting.
6 - Longitudinal aluminum rod.
7 - Three-tier extendable stand.
8 - Two-tier extendable stand.
9 - Retractable hanger.
10 - Carobnies.
When you do-it-yourself closet, then they themselves should plan the organization of storage of things based on the size of the structure.
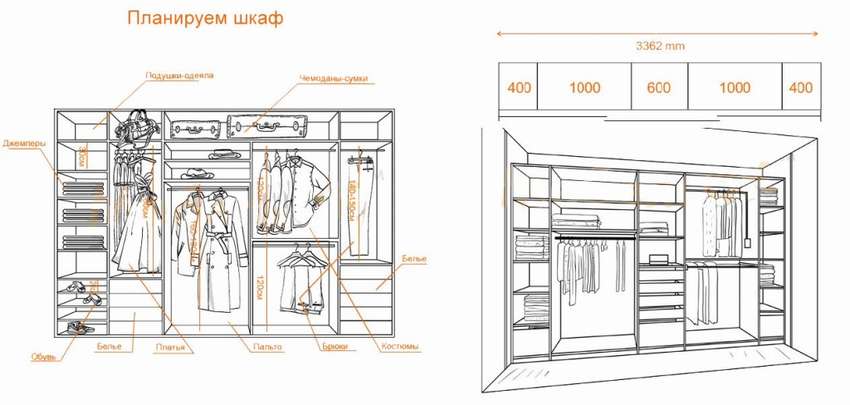 Location shelves, drawers and crossbars for hangers must be foreseen in advance. There can be an infinite number of options.
 Here are some diagrams placing things in a closet


https://i.expert-h.com/en/shkaf/1111#sigFreeId0ef5cad04e
Check out some more examples how to organize the filling of the wardrobe.


https://i.expert-h.com/en/shkaf/1111#sigFreeIdd184428a10
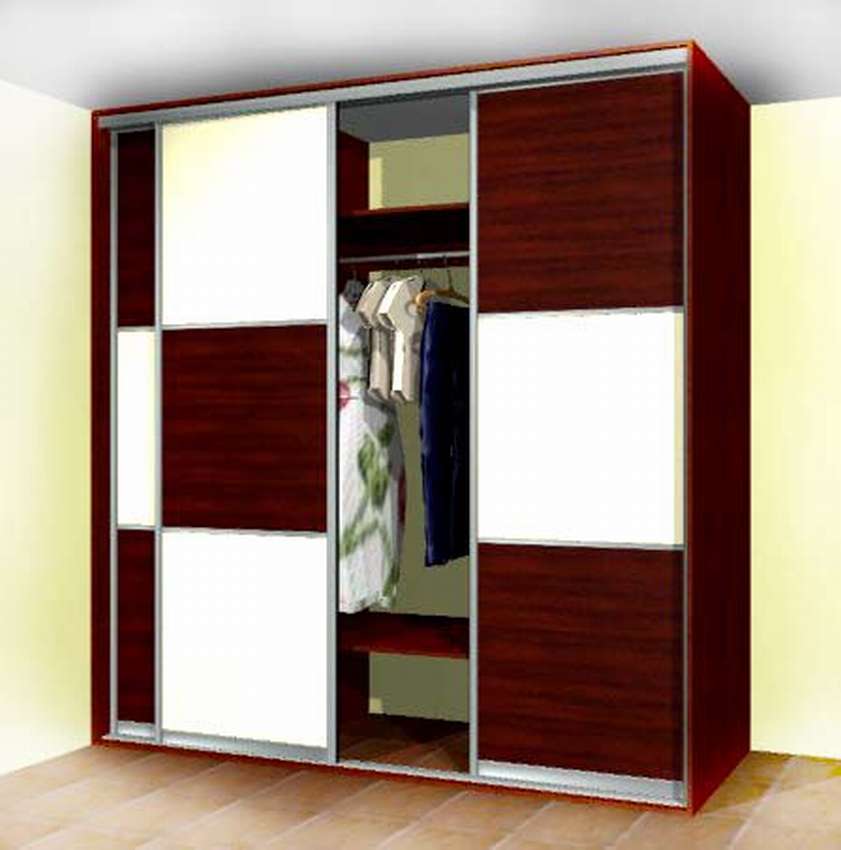
How to assemble a sliding wardrobe drawing
 If you dare do-it-yourself wardrobeA good instruction with drawings and diagrams will not hurt you. Self-assembly is not only a saving of money, but also an invaluable experience that is useful for the installation of other types of furniture. This example is classic coupe cabinet model. You don’t need to use expensive tools: hex wrenches for komfirmatov, a screwdriver and a screwdriver. Prepare a pencil and a tape measure, without them in any way. Instruction how to assemble a wardrobe with your own hands read on the site, link under the gallery.


https://i.expert-h.com/en/shkaf/1111#sigFreeId420e4ba069
How to assemble a wardrobe yourself
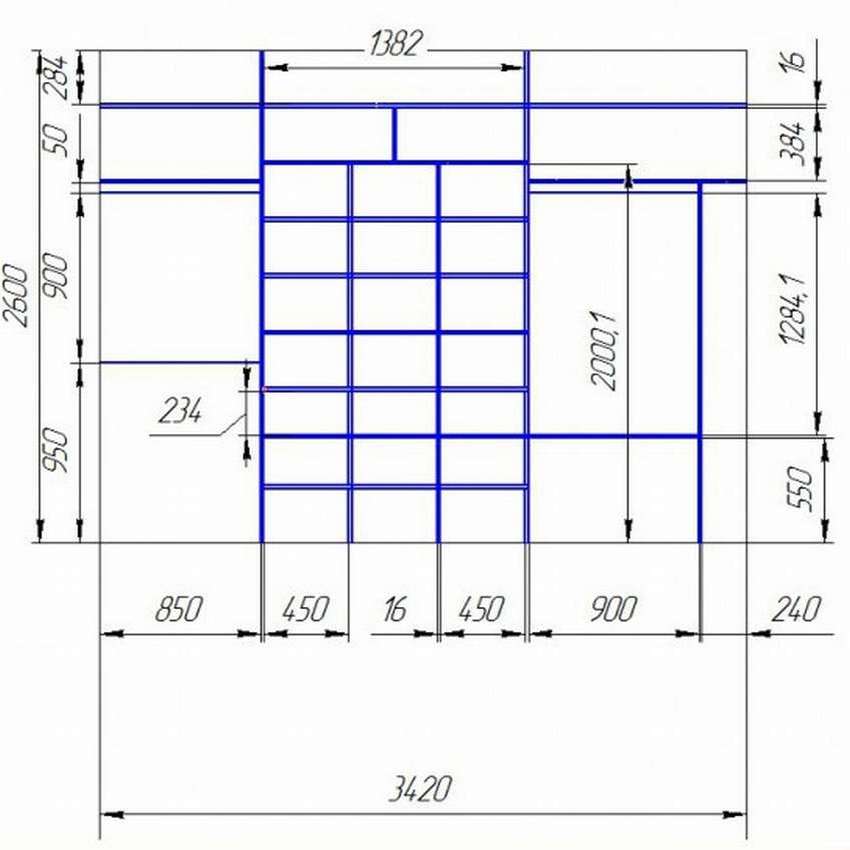
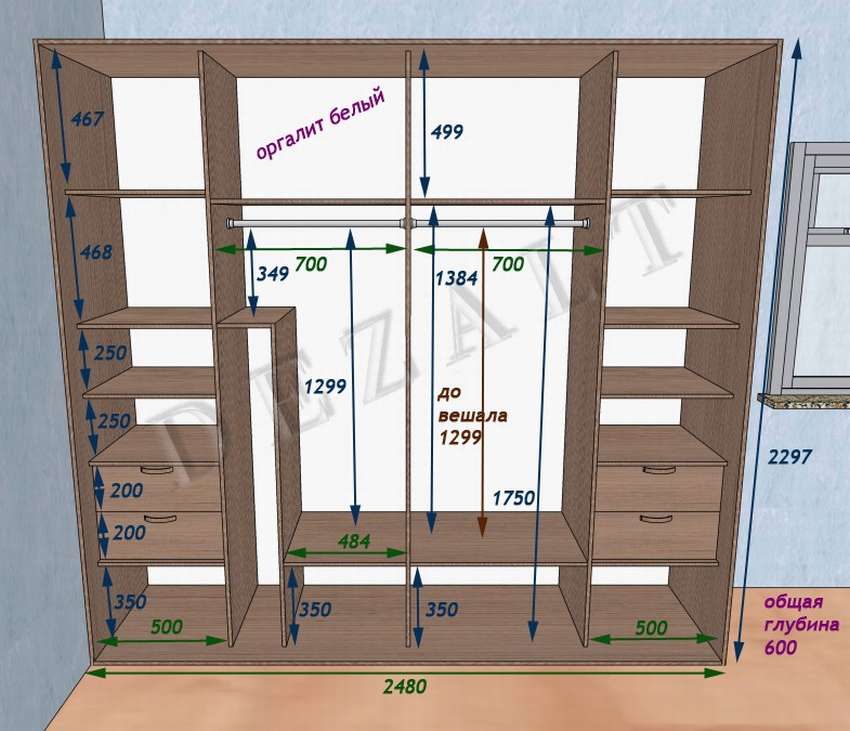 And one more example how to assemble a wardrobe with your own hands. The dimensions of this cabinet are 2480x600x2297, all details with dimensions are well shown in the drawing. Naturally, if you do not have experience in assembling furniture, many questions may arise, but you need to start with something. In fact, it is not very difficult if there is a good drawing of a sliding wardrobe with dimensionsnecessary tools, then you can begin to gain experience. It’s clear that the cabinets are different, if this option suits you, you can read very detailed instructions on the author’s website, each assembly stage is described in detail. You will also find a ton of useful tips. Sequence do-it-yourself wardrobe assemblies are shown in detail in step-by-step photos.


https://i.expert-h.com/en/shkaf/1111#sigFreeId79c3a1f954
How to make doors for a sliding wardrobe
Sliding doors, this is the essence and basis of the wardrobe. It is the manufacture and installation of doors with their own hands that scares many novice masters.
 The task, of course, is not simple, but there is always a solution. You can make the cabinet body, shelves and everything else with your own hands, and order the doors separately and invite the wizard to install them. Save a little, but still, the costs are large. And you can do everything yourself. If you are interested in this issue, read this article, very informative, the link is under the gallery. Given in it tips and tricks sure to come in handy.


https://i.expert-h.com/en/shkaf/1111#sigFreeIddb25b63677
Installation of wardrobe doors drawing
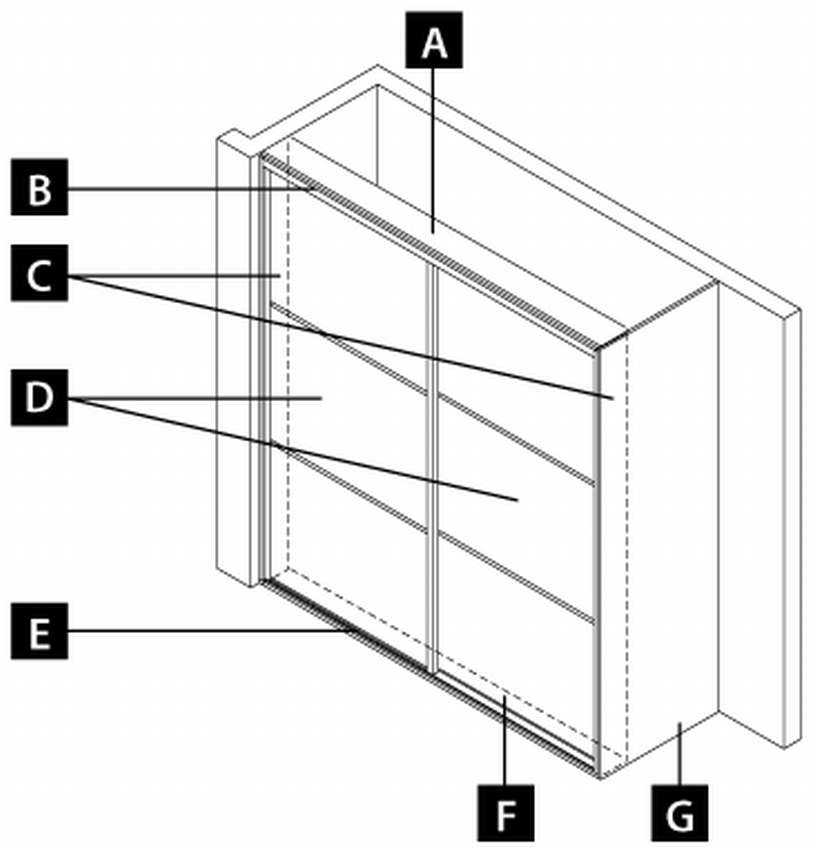 If you are worried that you have few skills andwhether the work is too complicated to do it alone, read this detailed instruction, the link is under the gallery. Install the closet doors You can do it yourself if everything is done correctly.
Here is what is shown in the drawing.
A Frame - Top Liner (optional)
B Top guide
C Frame - thrust plates (optional)
D Sliding doors
E Basic guide
F Frame - Lower liner (optional)
G End panel (optional)
Many people forget to include steps such as measurement of available space, and do not take into account the internal elements, but if you take all this into account, the process will go easily and efficiently.


https://i.expert-h.com/en/shkaf/1111#sigFreeIde44a9cb4ab
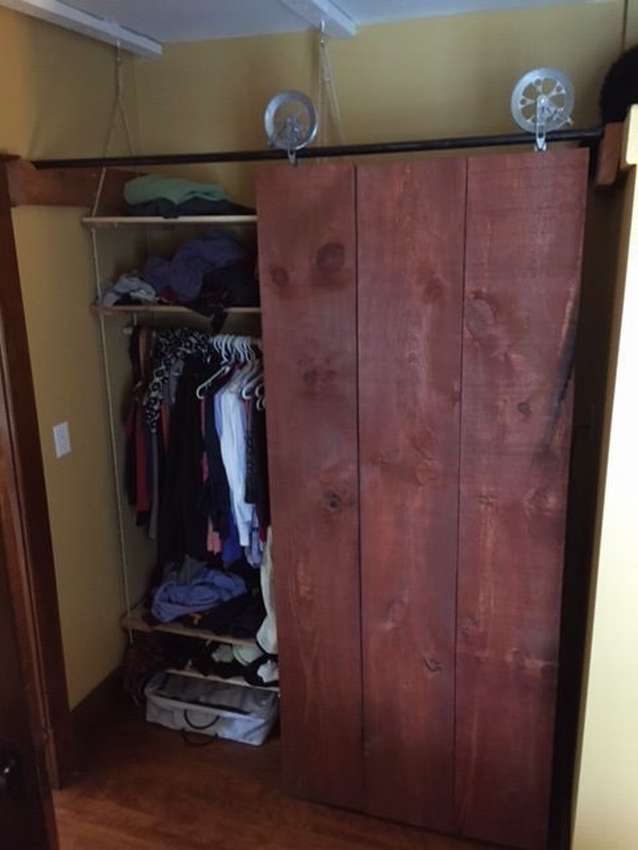
DIY sliding wardrobe doors
 An individual project is shown here, the author has developed a very convenient and simple sliding wardrobe system with three sliding doors. Of course, there are similar systems that you can buy ready-made, but, unfortunately, they are very expensive. In addition, it will be very difficult to pick them up if your DIY cabinet. And in this case, the number of sliding doors, wheels, handles and rails can be easily adapted to the length of your shelf. OSB boards Available at any store where you can cut the size you need for free. 53 cm wide doors are selected here to make them wider than individual shelves. Often the edges of the slab are relatively sharp or worn, so it is recommended to sand them well.
To find out in more detail, read the instructions on the site, there are descriptions of each step, a list of necessary materials and tools. Below in the gallery see step by step photos, they are not very detailed, but all the main points on them are shown in detail.


https://i.expert-h.com/en/shkaf/1111#sigFreeIdb712b47d08
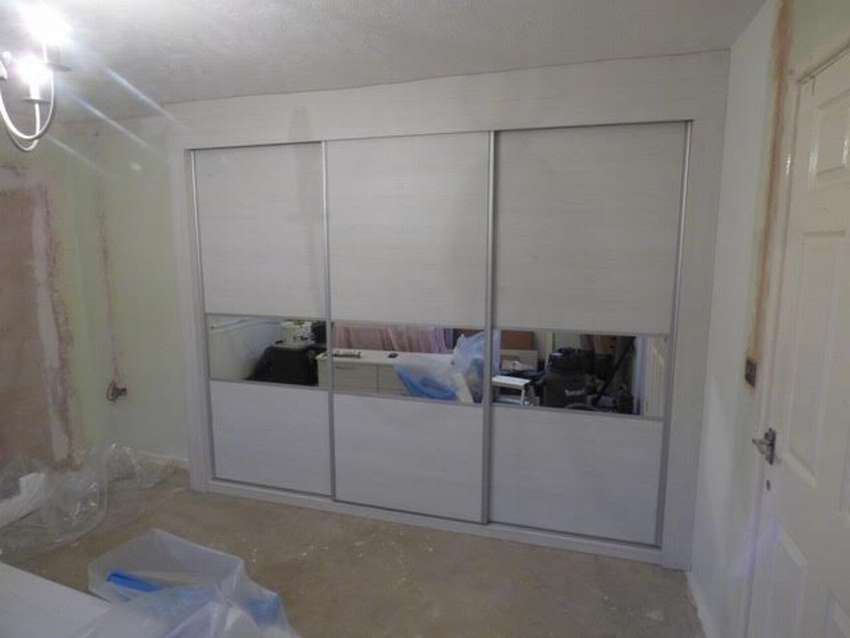
Doors accordion for a sliding wardrobe
If you are not comfortable with sliding or swinging doors for your wardrobe, there is another option. Make an accordion for the sliding door wardrobeThey are light, beautiful and allow you to fully access the entire cabinet in one go.

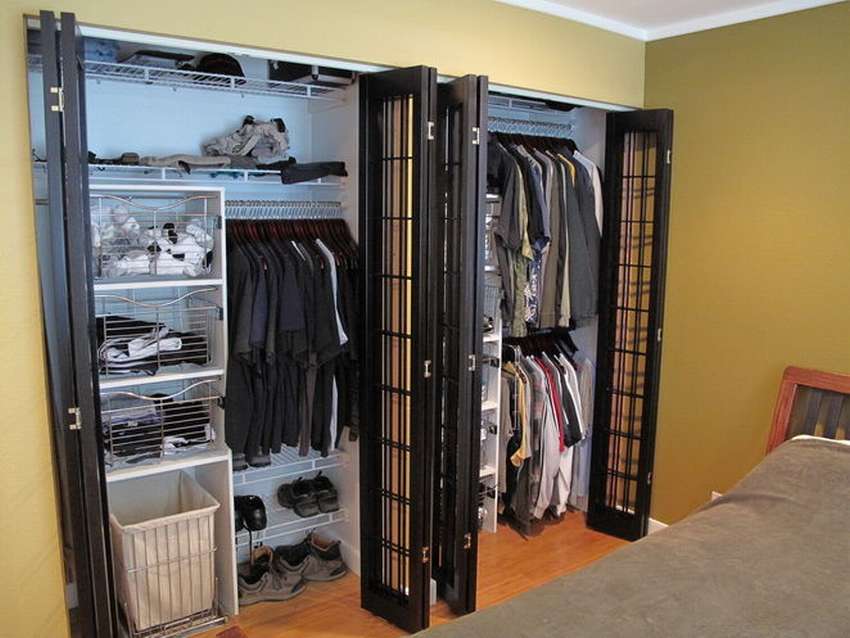 Since each installation is quite unique (your cabinets will not be exactly the same size as presented in this manual), so the dimensions are not listed here. Although this is not a complex construction, certain skills are necessary, since the project requires some accuracy. In the manufacture of doors, the author used some unconventional methods, you can read more about this on the site. See below the master class on step by step photos..


https://i.expert-h.com/en/shkaf/1111#sigFreeId6174caa935
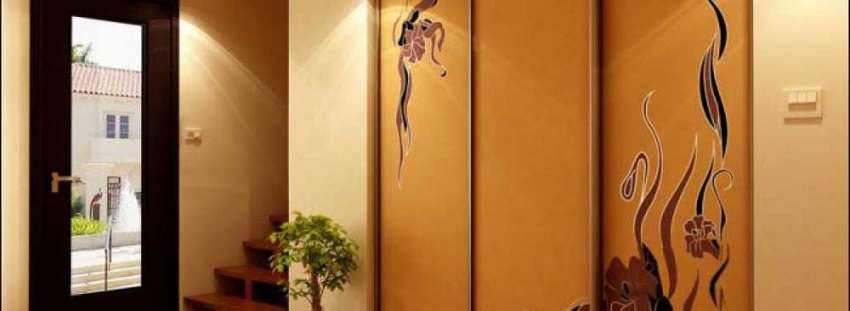
Sliding wardrobe sketches with dimensions
Here are sketches of the most different models of wardrobe: in the living room, in the hallway, in the bedroom, cabinet and built-in models. A simple sketch makes it easier to imagine which particular cabinet model is best for your room.


https://i.expert-h.com/en/shkaf/1111#sigFreeIdbe77bbe5be
Hello, I am the author of this article, so I look forward to asking questions for this article in the comments below, I will answer all !!!
If you have questions on another topic, ask them on our forum, we will answer you
- Two baskets of paper in 5 minutes (Master class)
- How to make a simple and compact table for a milling cutter from plywood
- How to make a soft headboard tile (Instructions + step by step photos)
- Cinder block benches: a convenient bench in 55 minutes
- How to make a bed with a niche: saving space (Master class)