Wreath of cones master class + 700 photos
 do-it-yourself wreath of cones
Can you believe that this is already in the fall, and the holidays are just around the corner? This article will show you how to make beautiful do-it-yourself wreaths of coneswhich are perfect for fall and winter holidays. It is easy and pleasant to work with natural materials; nature does everything so beautifully that there is no need to compete with it. You can use pine cones for anything in the autumn and winter months - wreaths, garlands, Christmas trees, flowers, compositions and much more.
Making a wreath of cones is an exciting activity that is environmentally friendly, cost-effective and an interesting way to spend time with your family. Isn't that what you want for the holidays. In addition, everything that is done by oneself is of particular value. In the article you will find 30 examples, how to make a wreath of cones with master classes and step by step photos.
How to make a wreath of cones
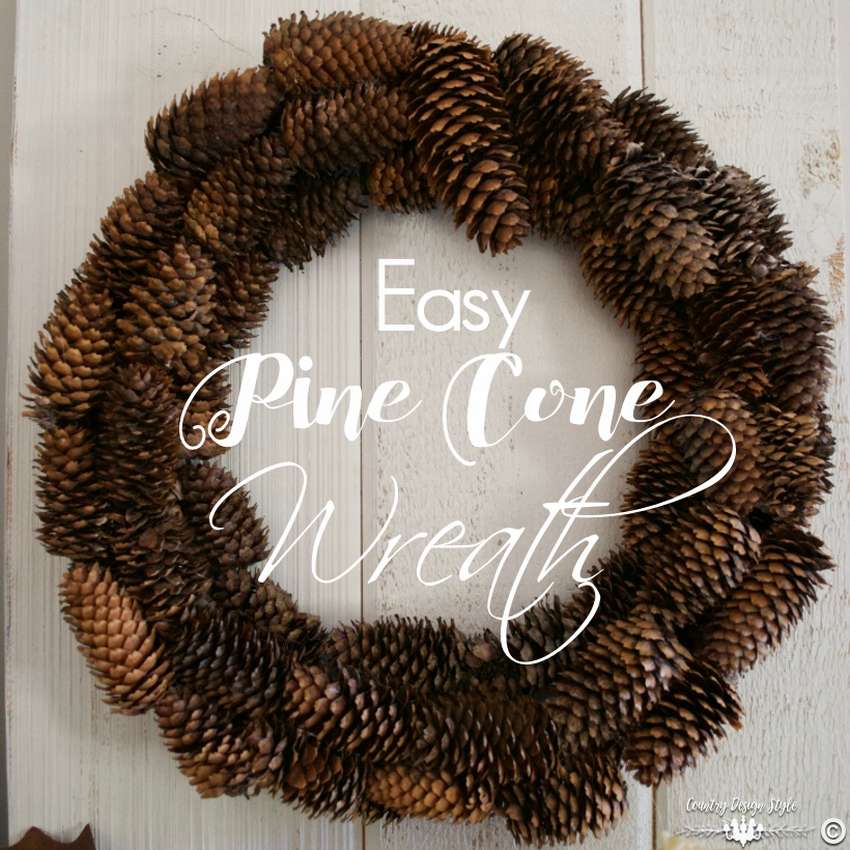
 The beauty of this craft is that you can use free natural materials and turn it into this magnificent autumn wreath of cones.
Moreover, it is not difficult to make a wreath, it will take approximately 2 hours and plus about 4 hours to dry. You can read the instructions on the website, some tips. When painting cones from spray cans, put them in carton boxes. Wear gloves. Fix several colors around one step of the wreath, and the rest around two feet (shown in the photo) for added strength.
Master Class, how to make a wreath of cones do-it-yourself look at step by step photos.


https://i.expert-h.com/en/iz-shishek/venok#sigFreeIdb5259b3bb9
 A wreath of cones and leaves
You will need very few materials to make this cute do-it-yourself wreath of cones and leaves. It is done very simply and in an hour you will have a wonderful decoration on the front door. This perfect autumn wreath easily transformed into winter decor, you just need to replace the ribbons and leaves.
- For the foundation, it is necessary to weave a ring of vines, as shown in the photo.
- Then paint the ring base and cones in one color, this will mix all materials.
- Glue the bumps. To add interest, alternate the direction of each bump so that each subsequent tip is directed toward the inside.
- Tip. Before bonding, align the cones on the base. So they are easier to distribute so that there are no gaps.
- Use more glue. Since the wreath and cones are not flat, it is better not to skimp on glue.
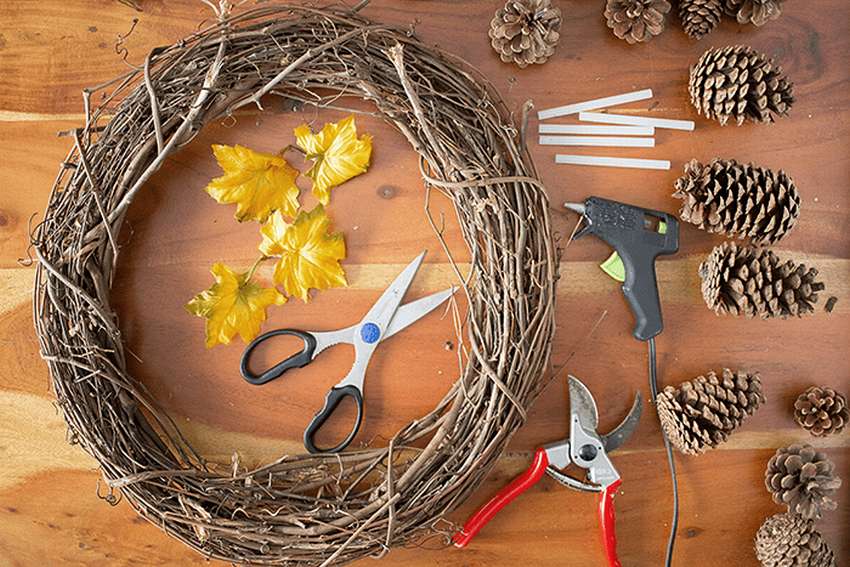 If you will use artificial leaves, as in this case, you can trim them to give the desired shape.
Gluing leaves is not necessary, just insert nicely between the cones.
At the end, add the ribbon and hang your masterpiece!


https://i.expert-h.com/en/iz-shishek/venok#sigFreeId9282d5ddf8
Autumn wreath of cones
 Beautiful and simple wreath of cones in a rustic style. You will be amazed at how easy it is to do. So that make a wreath with your own hands you only need a round hanger made of stiff wire, cones and a floral wire.
Step one: Fold the bottom of the hanger into a round shape. This will be the shape for the wreath. Use pliers and some kind of jig if the wire is too hard.
Second step: Cut a piece of floral wire 20 cm long. Wrap around the bumps, tucking between the scales. Connect the ends of the wire together.
Step three: Press the bump to the rim and wrap the remaining wire around the hanger, securing the bump to the wreath.
Fourth step: Continue adding bumps until the entire wreath is full. Try to place them as tightly as possible.
That's all! You can use the top of the hanger as a hook or remove it with pliers.You can wrap the ribbon around the wreath or add a large bow, although the pine cones are beautiful on their own. Below, see a few step-by-step photos, how to make a wreath of cones with your own hands.


https://i.expert-h.com/en/iz-shishek/venok#sigFreeIda23f36dcd6
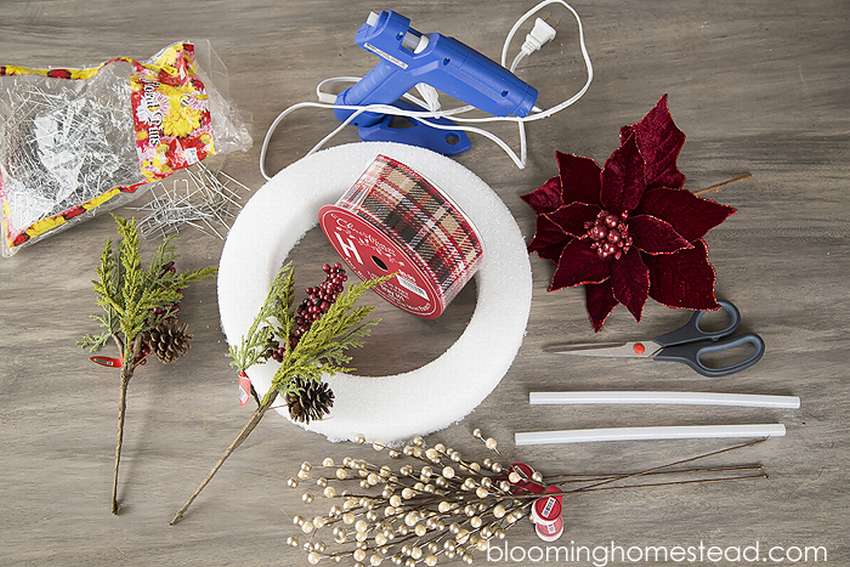
Beautiful autumn wreath
 There are only a couple of cones here, not more, this is for a change. But it looks decorative wreath with cones really beautiful, festive and unusual. It is done simply, it can be used for any occasion requiring decoration of a room. Although he will also be able to add New Year's mood, but is it worth waiting for the holiday to admire something beautiful?
Whoever likes the craft can use the instructions right now.
Necessary materials:
- Styrofoam circle;
- Decorative tape;
- Coniferous branches with cones;
- Decorative twigs (rowan berries are suitable, or take something artificial);
- Large artificial flower;
- Glue gun;
- Flower pins;
- Scissors (or nippers).
Wreath of cones step by step:
 Wrap a circle of foam - the basis of the wreath with decorative ribbon. Fasten the ends of the tape with pins.
- Fill twigs, greens with cones under the circles of the ribbon. You can fasten them with pins or stick them for durability.
- Glue a flower over the ends of the twigs. Beautiful elegant wreath ready.
See below for step-by-step photos..


https://i.expert-h.com/en/iz-shishek/venok#sigFreeId22b12fa9ae
Do-it-yourself wreath of cones
 If you are looking for a great holiday project, wreath of cones Handmade for family or friends, you may like this example. This project is interesting in that for its manufacture you neither wire for fastening nor glue needed. The secret is correctly fix the cones on the frame. The photos show the main points, probably not everything is clear. Of course, if you find the best way to make a wreath of cones with your own hands, great. And if you liked it, use the link under the gallery, on the website of the author of this project there is a very detailed and long instruction. All stages are painted there, from collecting and drying the cones, to decorating and installing, so get a lot of interesting information.


https://i.expert-h.com/en/iz-shishek/venok#sigFreeId11824fb1d8
Craft of cones wreath
 Want to do pine cones wreath in 15 minutes. Here is a great example. First clear the pine cones. Many people prefer to dry the cones in the oven, this is a good way. But you can do it differently, just dip in boiling water for 5-10 seconds. Then remove and let dry. When they are wet, the cones will close, but they will open as they dry.
How to do crafts a wreath of cones, you will understand by looking at step by step photos. That is, just stick them around in a circle on a metal wire frame. A wreath of this size will need approximately 60 pine cones. To make the process go faster, use for drying hair dryer. You can read other tips and secrets on the site, a link under the gallery.


https://i.expert-h.com/en/iz-shishek/venok#sigFreeId0168ecdb87
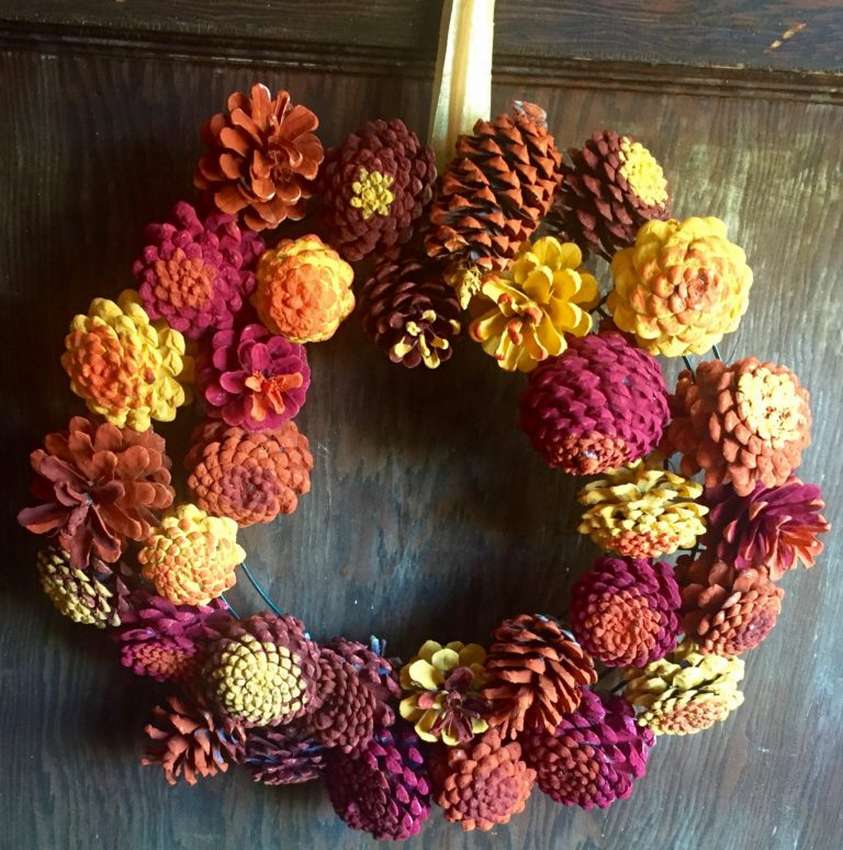
A wreath of flowers and cones
 Wreath in shades of brown and orange - great way to decorate the front door.
Make wreath of cones and flowers pretty simple. Glue the ends of the jute rope to the back of the frame. Wrap the rope tightly around the wreath, leaving no gaps. Wrap the entire wreath with rope and secure with hot glue.
Then, just insert the flowers wherever you like. Add wooden buttons in the center of the flowers; also several buttons in different places to fill in the empty spaces.
Add autumn themed decorations, such as potpourri slices, tiny pumpkins, artificial leaves, and pine cones.


https://i.expert-h.com/en/iz-shishek/venok#sigFreeIdf33e88b518
Beautiful wreath of cones
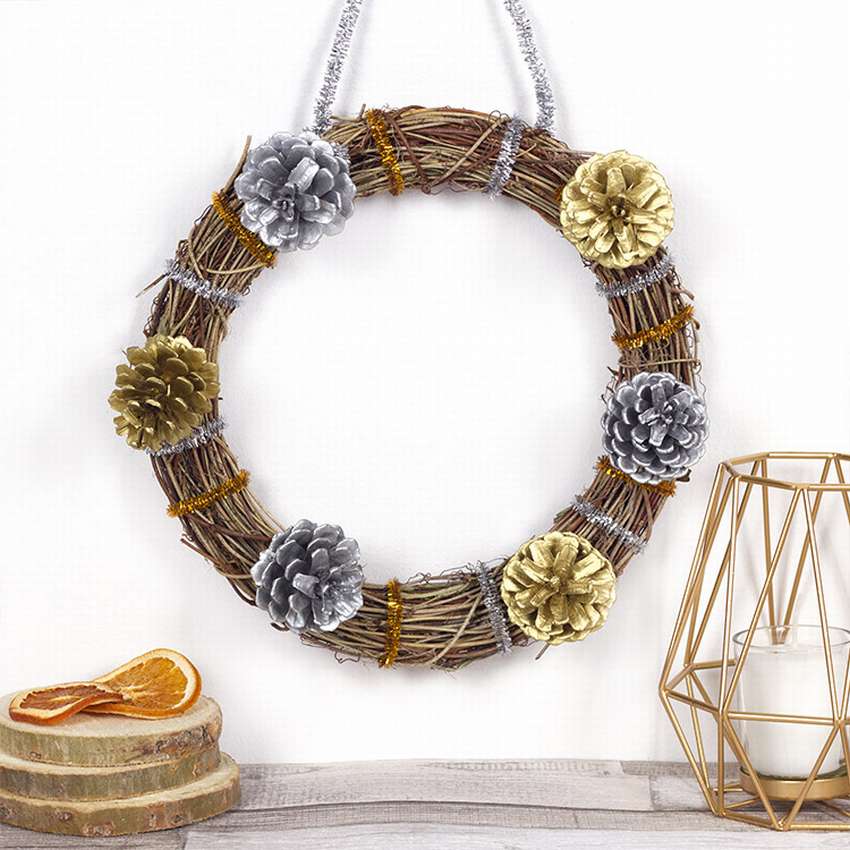 Decorate your home for these holidays wreath of conespainted in gold and silver colors.
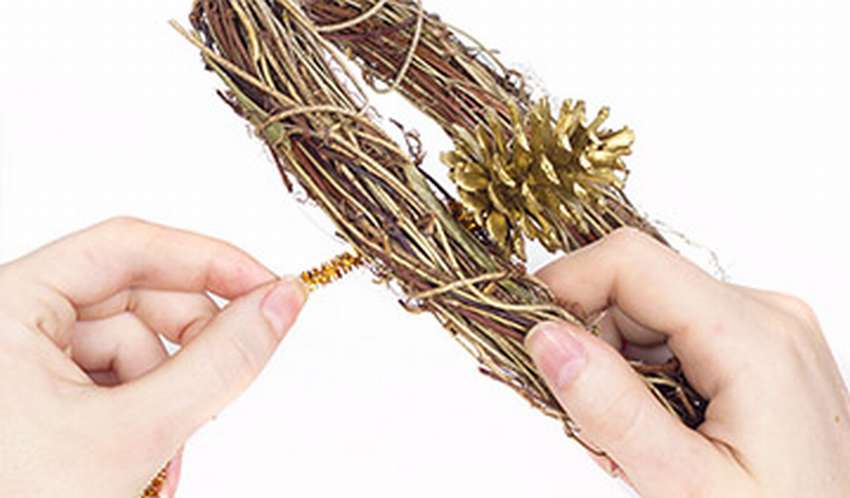
- Take a piece of gold chenille wire andwrap it around the bottom of the bump. Insert it into the middle of the cone shaft to hold it well.
- Wrap around the wreath on the other side.
- Repeat steps 1 and 2 with two more gold cones and three silver cones, alternating colors around the wreath.
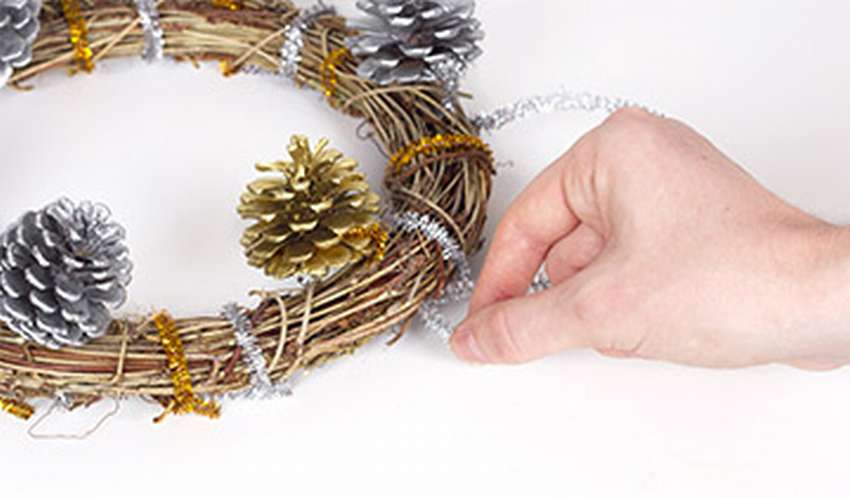
- Wrap a few strips of gold and silver pieces of chenille wire around the wreath between the pine cones.
- Using a silver brush (chenille wire), make a loop at the top of the wreath.
 Tip. If the chenille wire will not attach to the pine cones, try using a glue gun or PVA.
 What do you need: wreath form, gold and silver pine cones, chenille wire of the same color.
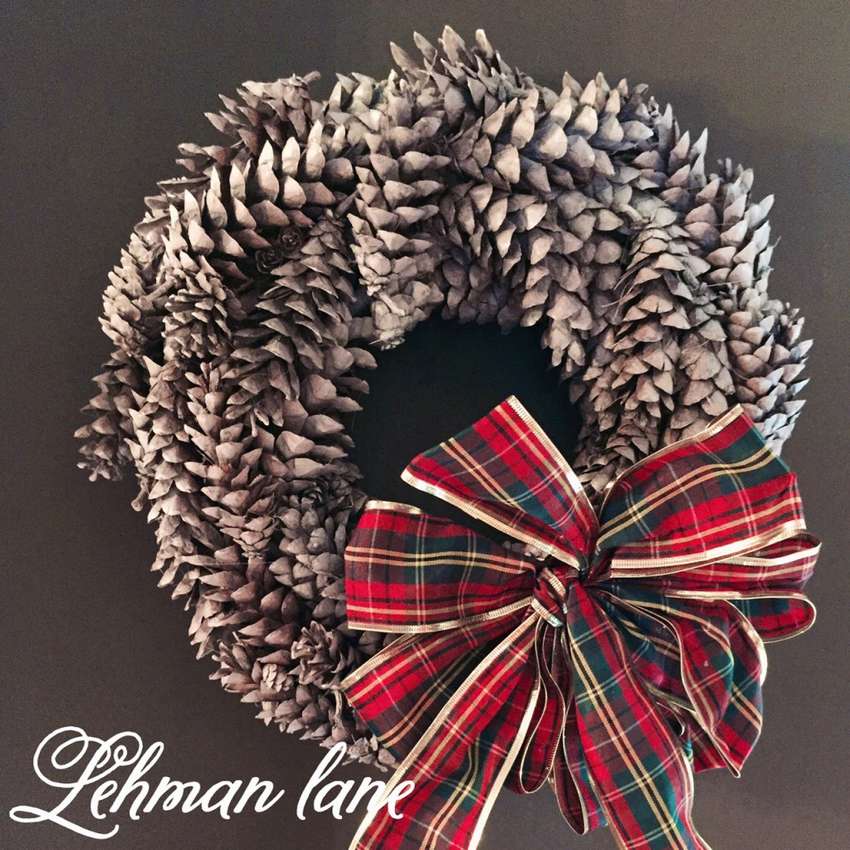
Christmas wreath of cones
 The festive period is on the way, how about making Christmas wreath of cones and have fun celebrating this season. This decoration can hang on the doorput on the table in the living room or hang over the fireplace in the winter months. Small wreaths of cones can even be used as decorative bases for candles. Here you will learn how to make it very easy. Christmas wreath of coneswhich will serve for many years. You can look at the master class below on step by step photos.. Under the gallery is a link, this is if you need detailed instructions, as well as a list of materials and tools.


https://i.expert-h.com/en/iz-shishek/venok#sigFreeIdf135be5572
DIY Christmas wreath made of cones
 Christmas wreath of cones - An ideal craft for a festive decor that can be made from any material. The wreath looks great inside or outside the house!
- Collect and sort the cones.
- Cut eyelets for each bump. Wrap the wire around the base of the bump so that it becomes almost invisible and wraps tightly around the center. Place the wires on opposite sides of each other.
- Place the cones on top of the wreath and wrap the wire around the base. Twist a few times to tighten and cut off excess wire.
- Continue attaching the pine cones to the wreath frame until you finish the circle.
- Set a circle of small cones inside the wreath, as shown in the photo.
- Use hot glue to fix acorns and other materials, filling all gaps. If desired, wrap a wide ribbon around the wreath and secure the ends with hot glue.
- Make a small loop of wire on top of the frame to hang a wreath.
Below see step-by-step photos on how to make a wreath of cones


https://i.expert-h.com/en/iz-shishek/venok#sigFreeId82a0d83fe3
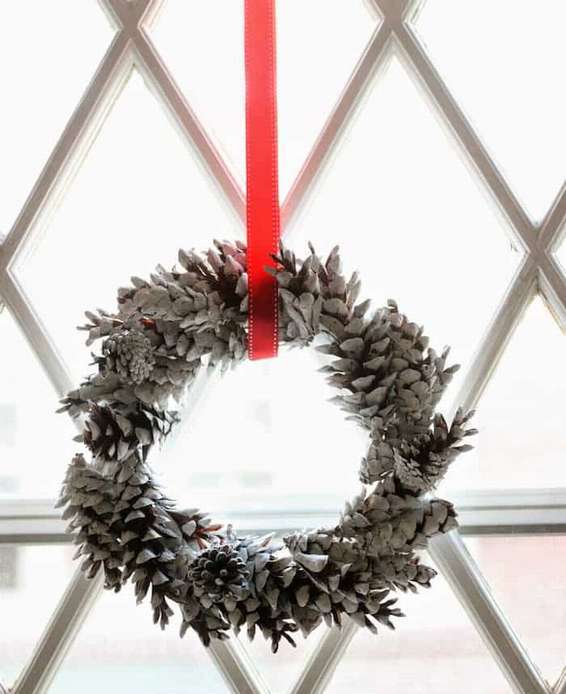
New Year wreath of cones
 You can easily do do-it-yourself Christmas wreath of cones almost free.
For this you will need:
- Wire hanger
- Hot glue
- Glue stick
- Beads
- Christmas ribbon
- White paint spray
- Narrow cones
Apparently, making such a wreath will not be easy, although the idea is good. From the step-by-step photos, you probably already understood what to do. On the base of each cone fasten the beadand then string through these rings onto a wire. It is doubtful how firmly they will hold on to the bump if they are glued with hot glue, as the author of this project did in this case. If he succeeded, then you probably will succeed. When all the cones are worn, apply paint from a spray can, attach a beautiful bow and you're done.
See below the master class on step by step photos..


https://i.expert-h.com/en/iz-shishek/venok#sigFreeIdbc92949e63
DIY Christmas wreath of cones
 This wreath of cones made with charming little pompons that are perfect for the holiday season. Cones provide a healthy dose of natural texture and serve background for bright christmas crafts.
A wreath will require quite a few cones, so collect all sizes, even the smallest, come in handy to fill in the gaps. You will also need a lot of glue. Of other materials prepare the mold, you can take thermal insulation for pipes, brown acrylic paint, brushes and a glue gun. Little pompoms can be bought at the store.
- Make a circle out of the tube and secure with electrical tape.
- Then paint with brown paint so that the color does not stand out in the spaces between the bumps.
- Tape the tape around the mold to make a hanger and glue it. This is easier to do before fixing the bumps.
- Now be patient and start gluing bumps. Start with larger ones and add small ones as needed.
- Add small pompons between the flakes.
Hang a wreath and admire your work.


https://i.expert-h.com/en/iz-shishek/venok#sigFreeIdf5cf250d0d
Wreath of cones step by step
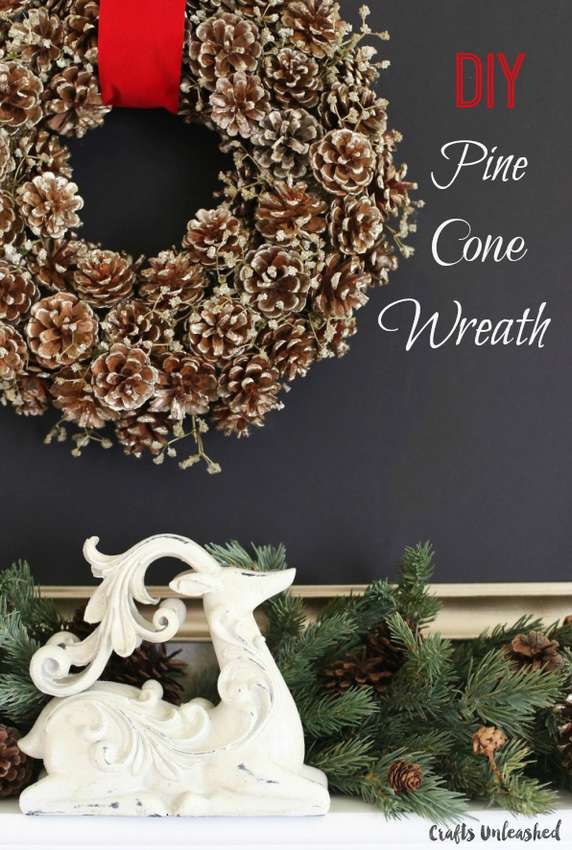 Beautiful wreath of cones Suitable for the holidays and the whole winter season. Shining golden pine cones turn a traditional decoration into a dazzling detail of a winter decor.
- First paint the bumps using a metal paint and brush.
- Then paint the foam mold with metal paint. This will help mask any areas that may occur after attaching the cones.
- When the shape of the wreath and cones are dry, glue the pine cones to the shape of the wreath, covering the front, inner and outer side edges. (Leave the back free so that the wreath can be easily hung.)
- If there are cones of different sizes, first attach large ones, and then fill them with small and medium ones. Note that this will require a large amount of glue.
- Continue fastening the pine cones until you fill out the entire form.
- When you're done with the bumps, measure the length of the ribbon, and add as much to wrap around the wreath.
- Fix the edges with hot glue.
I hope you enjoyed this cone wreath, see below a few step-by-step photos of the master class.


https://i.expert-h.com/en/iz-shishek/venok#sigFreeId2257896e4b
 See another example how to make a simple wreath of cones with your own hands for festive decor. You will need long, thin pine cones of different sizes. First, lay them beautifully on a flat table, as shown in the photo, to visually form the shape of the wreath. Then the longest cones attach with a wire to the frame, they will be the basis on which you will stick the cones of smaller sizes. Glue gradually, fill in the gaps with very small bumps until you form the shape of the wreath as you like. More information is available on the website. See below for a few step by step photos.


https://i.expert-h.com/en/iz-shishek/venok#sigFreeIdfd77b43afd
Wreath of cones and natural materials
 This is a fun winter project for a cold and dreary winter day, which will help to cheer you up and remind you of the upcoming winter holidays.
Detailed instructions how to make a wreath of cones, as well as correctly prepare the material, including washing, drying and other nuances, you can read on the website of the author of this project.
it ecological crafts made from natural materials, even the base is not made of wire and polystyrene, as is usually done, but of homemade straw hoop.
See below for step-by-step photos showing work steps..


https://i.expert-h.com/en/iz-shishek/venok#sigFreeId11e4e603d4
New Year cones wreath
 You can do beautiful wreath of cones in just minutes with just a few accessories - this is the perfect decoration for New Year's home decor! These crafts are very easy to assemble, but they will look great and cost less than a Christmas tree toy from a supermarket. The main costs, the purchase of polystyrene rings, are sold in needlework stores. By the way, pine cones are much easier to glue if the surface of the mold is flat rather than round. To do this, use a knife to cut off part of the mold until it is flat on one side. After that, color the wreath and let dry. Once the pine cones are dry, glue them on the mold!
In fact, some kind of instruction is not needed here, just glue the pine cones until you like how it looks. That's all. Hang a wreath, make coffee and immerse yourself in the atmosphere of the upcoming holidays.


https://i.expert-h.com/en/iz-shishek/venok#sigFreeId7b41ee8d31
Christmas wreath of cones step by step
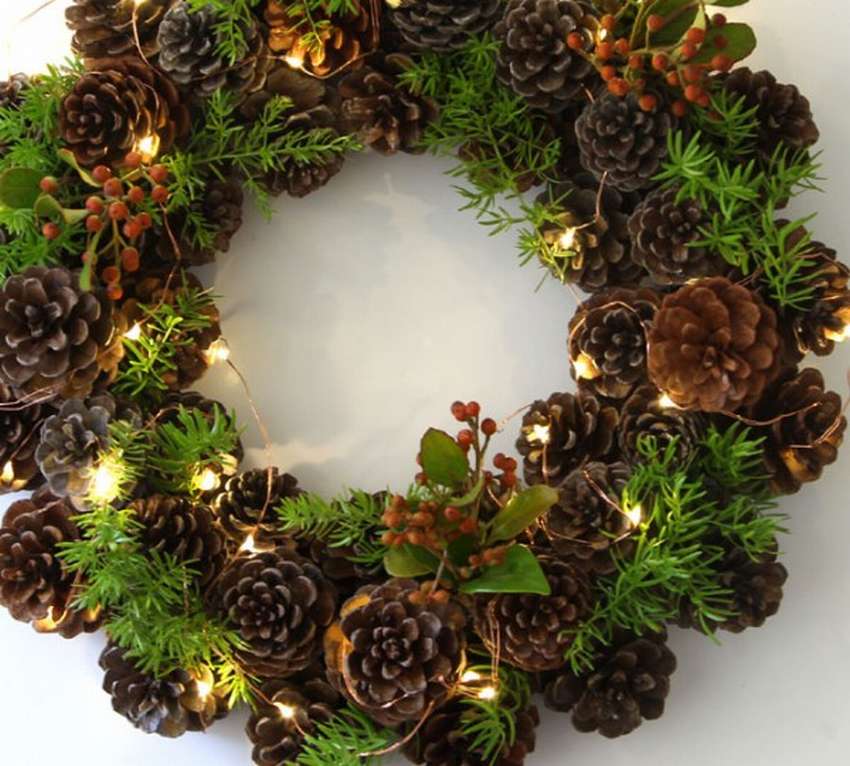 If you have a free watch, you can make this wonderful winter pine cones wreath backlit! What you will need for this project and the manufacturing procedure, I will not rewrite, you can read it on the site, the link is under the gallery.Just note some nuances. You will need 55 to 65 pine cones for this wreath. Tip: Sort them into 3 groups by size! The assembly technology is the same as described in other examples. There are many ways to decorate this wreath, use ribbons, green leaves, colorful berries, small decorations ... just have fun!


https://i.expert-h.com/en/iz-shishek/venok#sigFreeId7e67b7893d
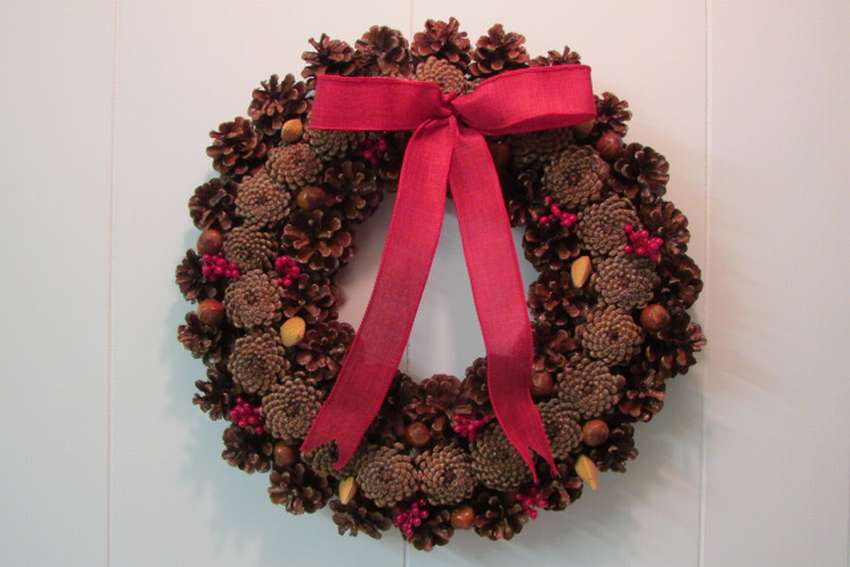
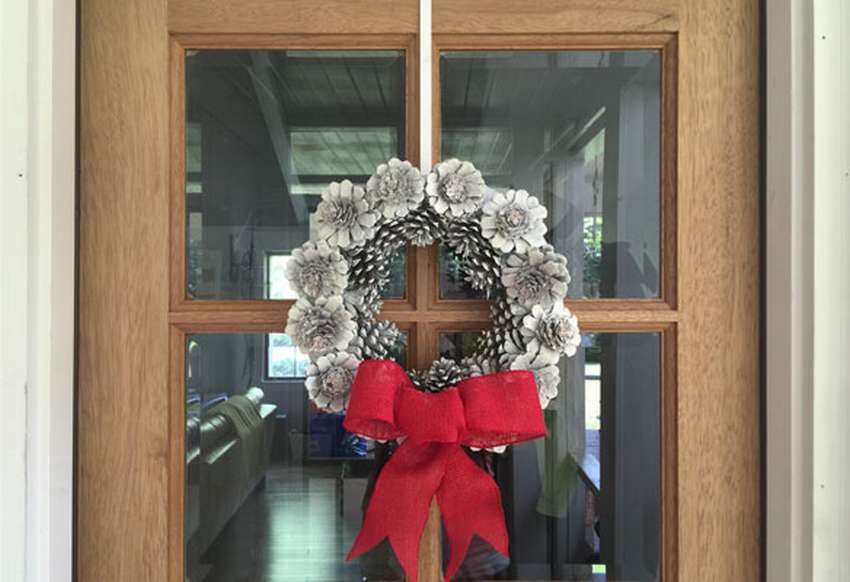
Christmas wreath on the door
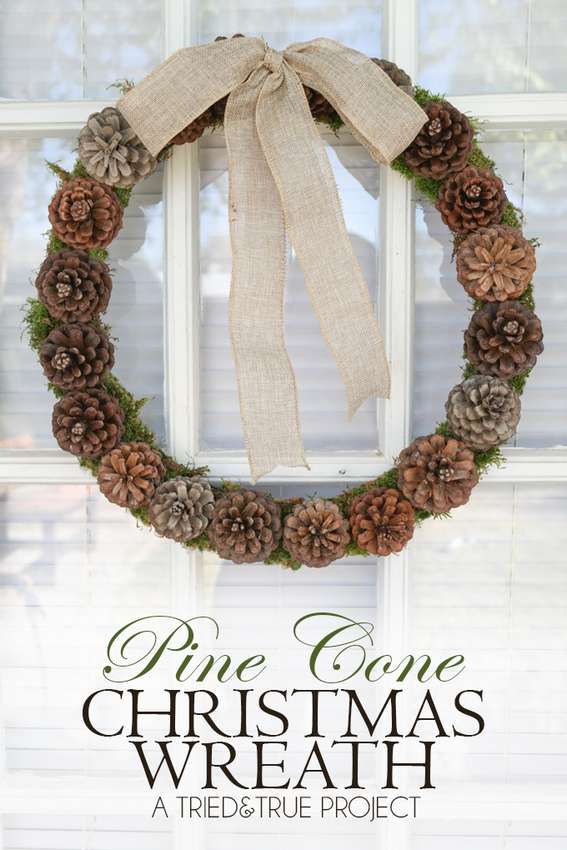 Christmas wreath of cones at the door of your house: a beautiful and easy way to greet a guest during the holidays! Here is a short instruction, how to make such a wreath with your own hands.
Collect the pine cones. Put in the oven, set the temperature to 200 °, leave for about 30 minutes. Make sure you get more cones than you need to select the best.
Tear off long pieces leaf moss and overlay a wire wreath. They must be wide enough to cover the outer edges of the wire. Twist a piece of wire on the bottom of the cone and rotate in the middle. Use excess wire to fasten around the wire wreath. Continue fastening the pine cones until they are full. Turn the wreath over and cut off all the excess ends of the wire. Tie a ribbon bow burlap and attach to the wreath of cones with floral wire.
All that remains to be done is to hang on the front door. Of course, you can decorate the wreath with various ribbons, add decorations or set some decor element in the center.


https://i.expert-h.com/en/iz-shishek/venok#sigFreeIdad732f8a3b
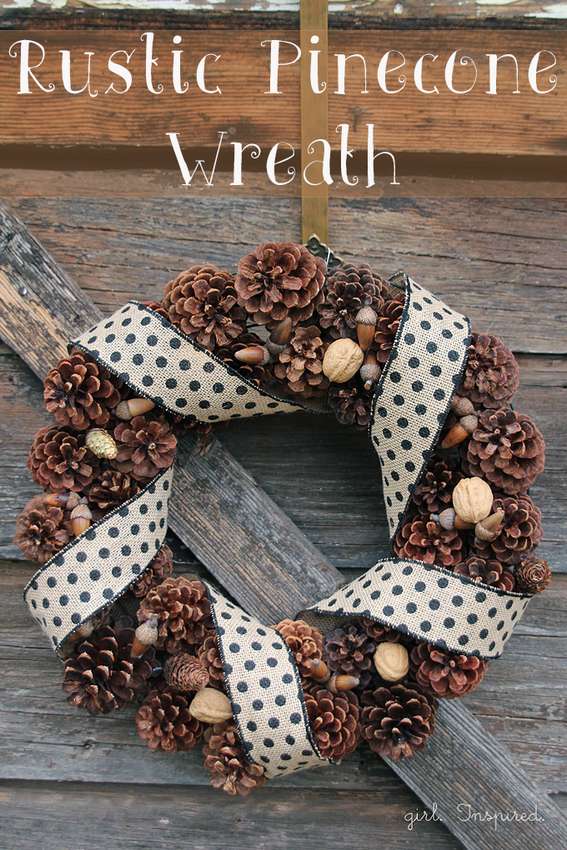
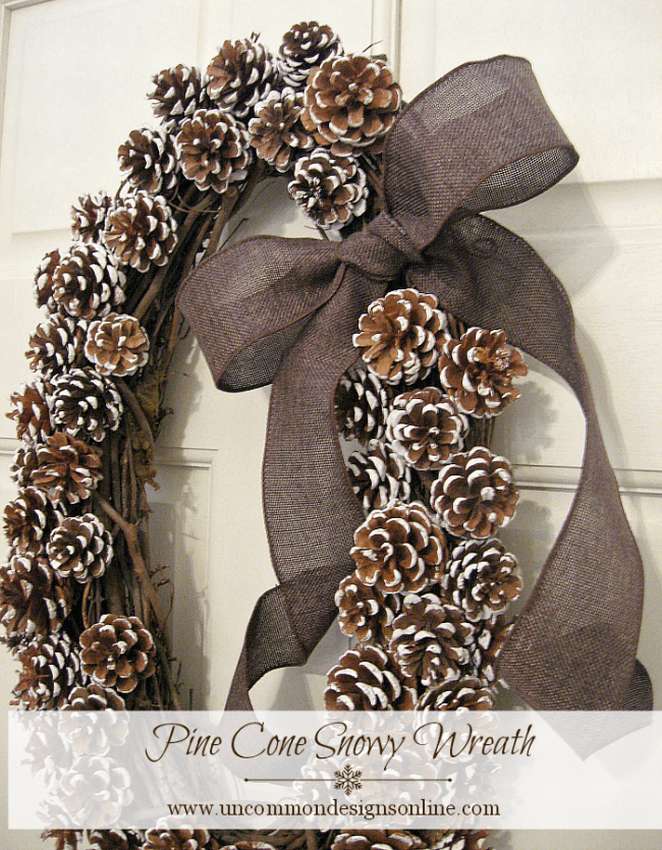
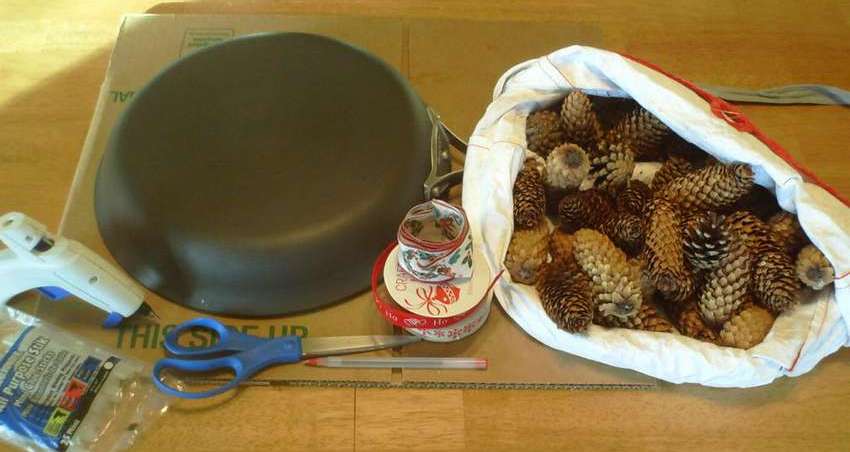
Wreath of cones on the door
 This is a type of wreath that you can use for the New Year holidays, and if necessary it is easy to change, for example, to autumn theme. A wreath can be hung anywhere in the house, whether on the front door, on the window or balcony of your apartment. Gather a bag of cones, then grab a glue gun, scissors and tape. Of course, you can add decorations or other holiday decoration elementsbut here is the easiest way. If in addition to step-by-step photos you need instructions, use the link under the gallery.


https://i.expert-h.com/en/iz-shishek/venok#sigFreeIda2f546a49e
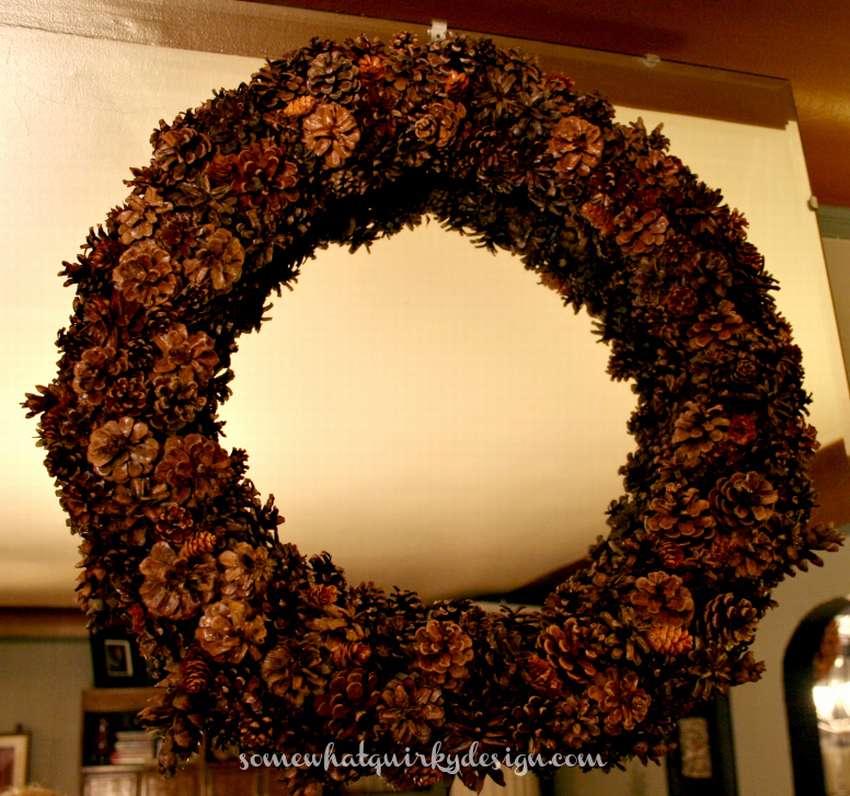
New Year wreath on the door
 Most attracted by the simplicity of this wreath of cones, and the ease of its manufacture.
The necessary materials are an oval grapevine hoop, a brown ribbon and many pine cones.
Just glue the bumps onto the vine hoop. There is no right or wrong way. Just step back from time to time and see where you need to fill and touch up! The wreath is beautiful even when it just lies on the table ... you can place candles in the middle and use it as a New Year's composition!
When fasten all the bumps, attach the brown ribbon. She's a little off to one side.
This a wreath of cones will be a good decoration for the front door and lobby. Although it is so versatile that it can be used for festive decor in any corner of the house.


https://i.expert-h.com/en/iz-shishek/venok#sigFreeId6b440196b8
Small wreath of cones
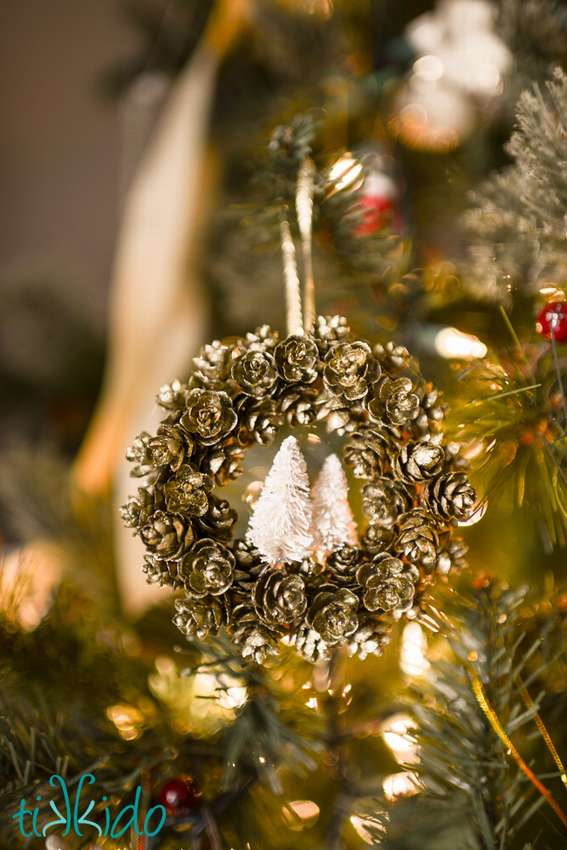 Shiny wrapping paper looks very beautiful - but you need something else to finish wrapping the gift. Why not forget about the bows and instead do miniature wreath of cones, which can be considered as a second gift. It is beautiful, elegant, and very easy to do!
Materials for making miniature jewelry:
- miniature pine cones
- cardboard
- small brushes
- spray paint and gloss (optional)
- Cut the shape of the wreath out of cardboard.
- Glue the ring of cones to the outside of the cardboard ring, the cones of the cones outward.
- Then glue another ring of pine cones to the inner ring, this time with the cones inward.
- Fill the spaces between the two rings with pine cones, this time face up.
- The wreath looks wonderfully natural, but you can make it even more glamorous.
- Apply paint from a spray can, and until it dries, sprinkle with a shine.
- Christmas trees in the middle can be made from brushes.
No matter what style you choose, these cones wreaths are perfect for gifts. See below step by step photos and make your perfect gift.


https://i.expert-h.com/en/iz-shishek/venok#sigFreeIda0106e8c5f
Children's wreath of cones
 This is a simple project for older children. To make such do-it-yourself wreath of cones, a lot of materials will not be required, everything can be found at home, except for cones, of course. The only thing you have to pay for is glue.
- Cut from kartona a large ring and color.
- Place the bumps on the workpiece to make sure that the entire space is closing.
- Using the glue gun, apply a small amount of glue to the bump and press it onto the cardboard.
- Hold for a few seconds to make sure the glue is picked up.
- Continue moving around the template until it is completely closed.
- Turn the wreath over, make sure that all the cones are fixed and stick the tape.
- Hang and admire the beautiful Christmas cone wreath.
 Necessary materials:
- A lot of pine cones
- Cardboard
- Glue gun
- Small piece of tape
The procedure for making a wreath of cones, see step by step photos


https://i.expert-h.com/en/iz-shishek/venok#sigFreeId7380479e42
Decorative wreath of cones
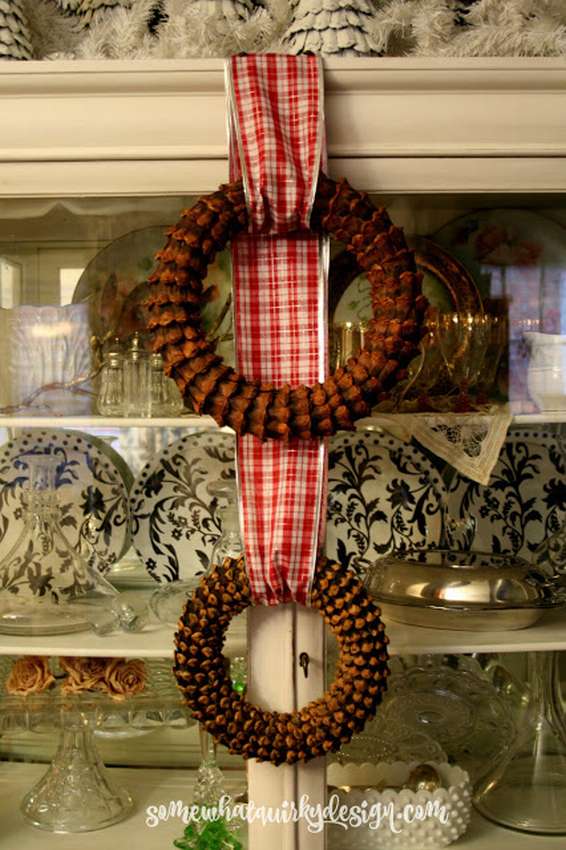 Here you will need two circles made of plastic or other suitable material. Cones will not be needed entirely only need scales. You will also need brown wrapping paper and a fabric strip, long and wide.
How to make a decorative wreath of cones
- Separate the scales from large cones with pliers.
- Cut brown wrapping paper into strips. You can use grocery bags, they are of this color, paper quality will not be noticeable in the finished wreaths.
- Wrap both foam circles with the resulting paper stripes. You can fix the tape with tape or glue.
- Glue the cone flakes to the paper, as in the photo.
- After the whole circle is completely filled, the wreath is ready.
Do the same operations with second round. After all, through the finished wreaths, thread strips of fabric. Can be hung on a door, window or mirror. With this decoration you can celebrate the New Year, the festive mood rises automatically.


https://i.expert-h.com/en/iz-shishek/venok#sigFreeId0bf52b9cbc
How to make a wreath from a frame
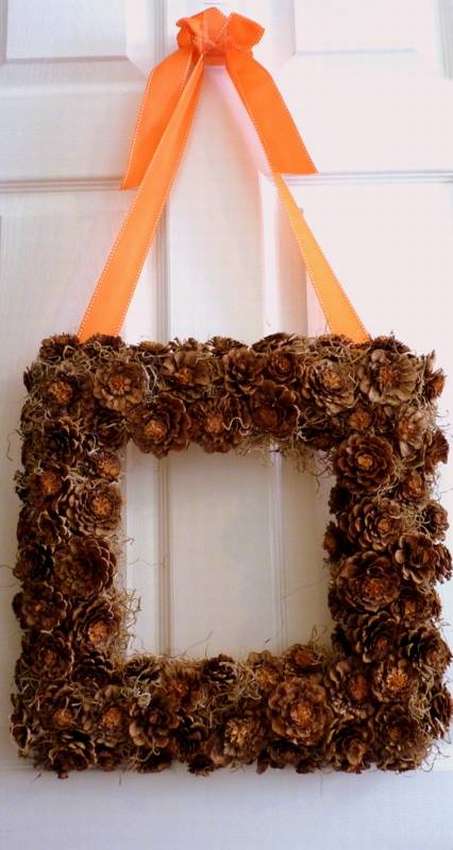 Wreath on the door - This is the simplest element of interior decoration. Anyone can do it. All that is needed, most likely you have it. Simple or complex, elegant or traditional, strict or colorful - this is your craft, and it all depends on the style of the house. Some like the look of a square wreath. This is a bit unusual, so interesting.
Bumps, this is just an option. You can stick sea shells, nuts, buttons or dried pods. Wrap garlands or tie bows and ribbons!
Shown here how to make a wreath of conesusing regular picture frame as a basis. You will also need scissors, a pair of garden gloves to protect your hands, a hot glue gun, and also tape or other decoration for the final touch.
If you want to make pine cones lightersoak them with a solution of one part of water and four parts of bleach. Leave it all night to soak well. In the morning, rinse in fresh water and let it drain.
You can paint the pine cones or leave a natural color. Or do half, for example, leave them natural, but add along the edges of the shine or attach the beads to the middle of the bump.
In general, there are many nuances, if you want to find out all the details, a link to the author’s website under the gallery, or just look at the step-by-step photos, much will become clear.


https://i.expert-h.com/en/iz-shishek/venok#sigFreeIdb001533fdb
Original wreath
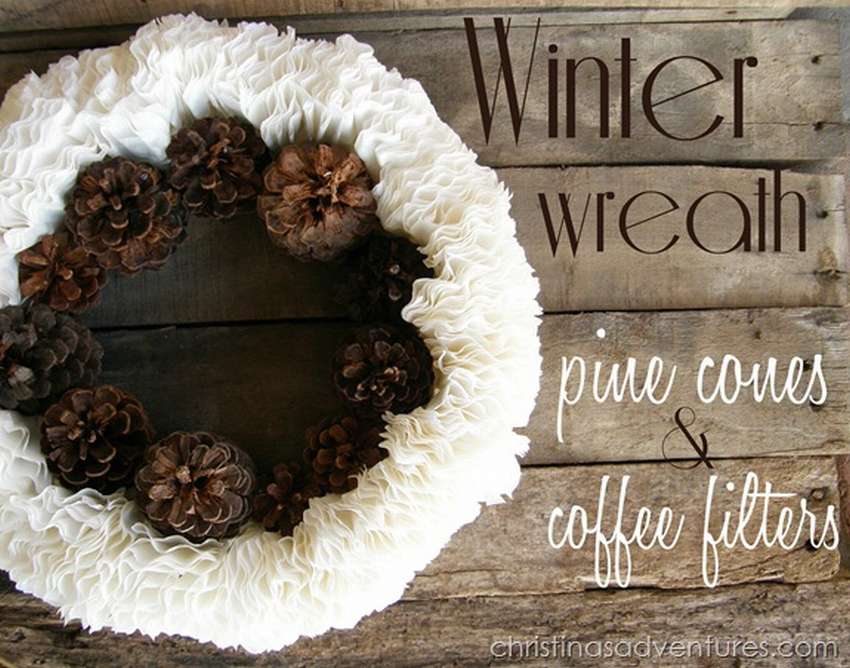 See how to do winter wreath of pine cones and coffee filters.
This is an original way to create a base for a wreath! It is necessary to cut a circle out of cardboard and wrap it in strips of coffee filters. Apply a little glue to the bottom of the cones and glue to the inside of the mold. Then coffee filters fold three times, glue with seams facing inward until you fill the entire circle. Then go through a second time and fill in all the spaces with a second layer of coffee filters, this time with the seams facing out. Making a wreath takes some time, but it turns out very unusual and most importantly, beautiful.


https://i.expert-h.com/en/iz-shishek/venok#sigFreeIdfc7fc7d649
Christmas wreath of cones
 Here you will learn how to make the easiest do-it-yourself Christmas wreath of cones. You can collect this beautiful craft for 5-10 minutes, and for this you do not even need any glue. True, one nuance, for the basis the author took artificial wreathbought at the store and just added pine cones and fresh magnolia leaves. And for this really a lot of time will not be needed. So if there is an artificial wreath, look at the step-by-step photos on how to transform it into a Christmas decoration.


https://i.expert-h.com/en/iz-shishek/venok#sigFreeId3fabafb923
 This is another example where based on a regular wreaththat can be bought at the store.
In addition, you will need pine cones, spray paint, a glue gun and ribbon.
Before painting, cook drying cloth and a newspaper to protect surfaces. Keep the can about 25 cm from the cones and apply the first coat. Let dry for 10 minutes and whenrepeat if necessary. Then glue the silver cones along the inner circle of the wreath, and the gold cones along the outer circle. Using a ribbon, create a bow to hang a wreath. Hang your beautiful holiday wreath in a prominent place.
In general, just follow the simple step by step instructions below.


https://i.expert-h.com/en/iz-shishek/venok#sigFreeId231f24f73b
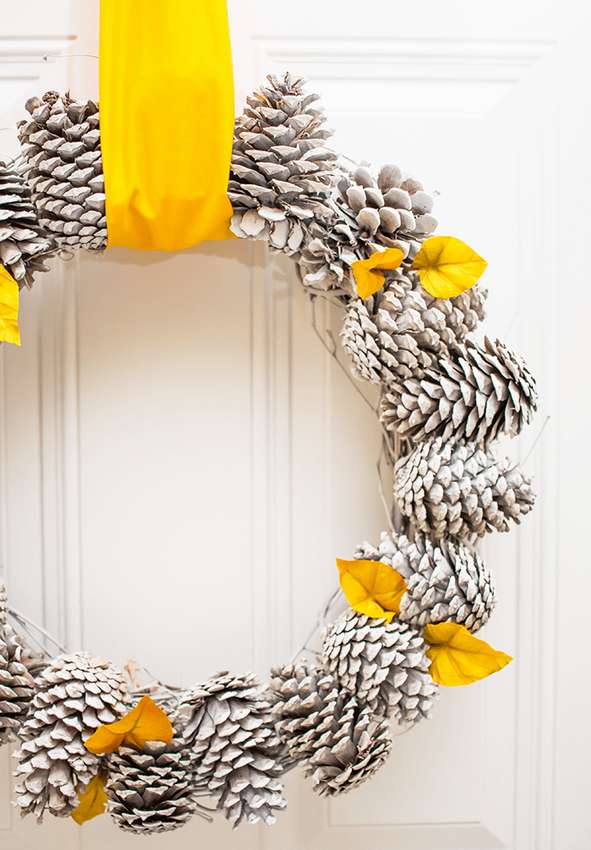
Autumn wreath of bleached cones
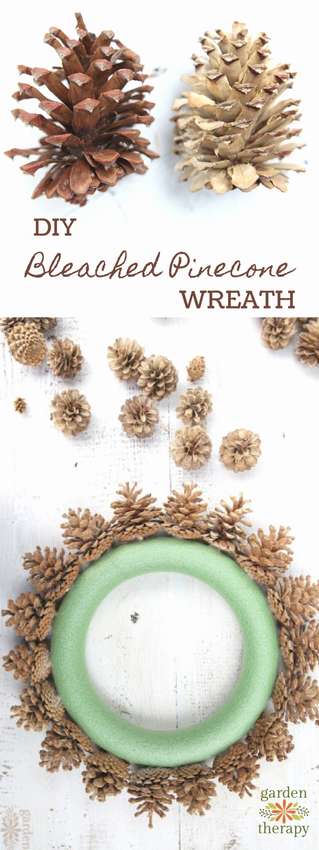
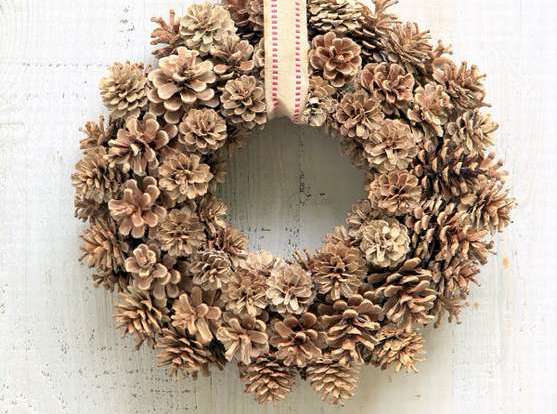 This gorgeous wreath of cones contains rustic charm combined with modern style. With just a few simple steps You can make your own similar wreath to decorate your home.
Bleached cones look very chic, they have always been the main product of the autumn-winter decor, whitening gave them a softer, more modern look than unprocessed cones. Light color creates contrast and makes the shape of the cones really stand out.
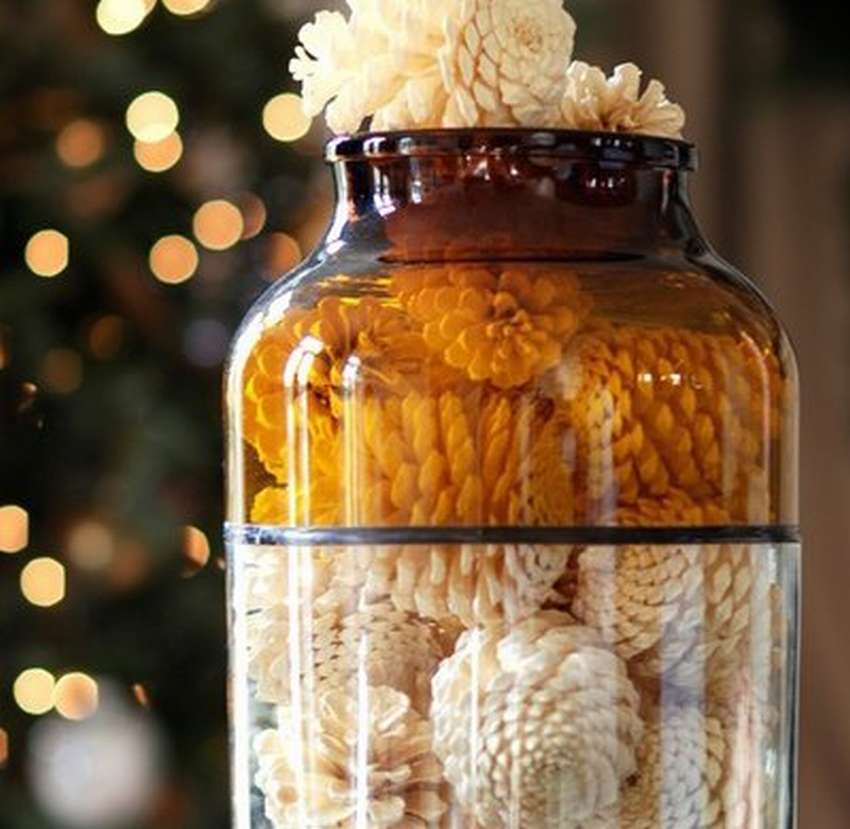
 You may have seen compositions where single bleached bumps put in glass terrariums, grouped into decorative baskets, make garlands and many other crafts.
Start with a walk in the park or hike in the forest and pick up a whole bunch of cones. Follow whitening instructions (read the article below) and then just make a wreath of cones with your own hands.
Materials:
- Foam mold, diameter 25 cm
80 bleached cones in two sizes: 35 medium (5 - 8 cm), 45 small (2.5 - 5 cm) - Hot glue
How to make a wreath of cones
- Divide the bumps into groups of different sizes so that you can choose between medium and small for each layer.
- Lay out the middle bumps around the shape, with the base of the bumps turned towards the wreath.
- Attach the first layer to the base.
- Add glue and paste the second layer of cones into the first when you attach the base to the shape of the wreath.
- Continue to glue the base of the bumps on the outer ring while inserting them tightly to fill in the gaps.
- Lay out the inner ring of the smallest cones. Attach them to the inner ring in the same way as to the outer.
- Add a third layer of middle bumps alternating between the first ring. Attach them as close to the other bumps as possible.
Add the fourth and fifth rings to fill the gaps between the layers and fill all the spaces.
The wreath looks very beautiful on the white door, but it will also look good on the wall of the house or in the garden.


https://i.expert-h.com/en/iz-shishek/venok#sigFreeIde398b233b0
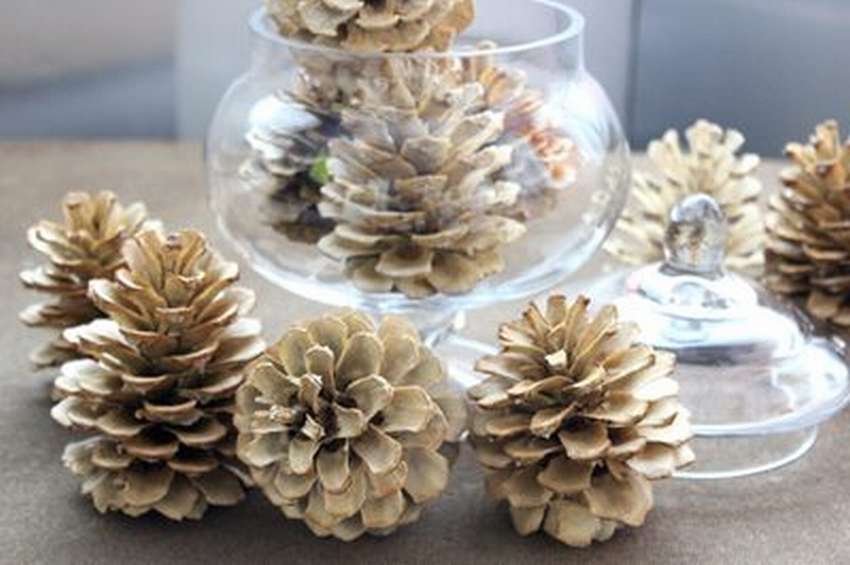
 How to bleach pine cones
Pine cones are a fun accent for wreaths and flower arrangements; they look beautiful on a mantelpiece or coffee table. Although cones are usually associated with autumn or winter, they can decorate your home throughout the year.
Whitening gives pine cones a special charm and style., so they make beautiful compositions, wreaths, panels and other crafts.
Bleach cones, the process is long, but not complicated, you just need to prepare well. For work you will need: pine cones, liquid bleach, approximately 4 liters and a ceramic or glass plate. Also cook rubber gloves, without them in any way, a brick and a newspaper.
 Tnow we are starting the bleaching process.
- Put the pine cones in the bucket, before that, do not forget to clean it of dirt.
- Whiten the cones in small batches, just make sure that the bleach covers all the cones in the bucket. You can reuse the same bleach for multiple batches.
- Pour bleach into the bucket until all the bumps are covered.
- To prevent cones from floating up, cover the bucket with a ceramic or glass plate, press with a brick.
 Be sure to wear rubber gloves at this point, as you will touch the bleach.
- Leave the pine cones in the bleach overnight, for a maximum of 24 hours. You will notice that they are closed.
- Wearing rubber gloves, remove the brick, slab and lay pine cones on paper towels. Bring to air and let dry naturally.
- When the cones dry, they will open again.
Process usually takes one to two weeks, depending on humidity. Drying in the open will eliminate the smell of bleach. If you want to give cones special aroma, store them in a closed container for a month, adding a few drops of essential oil. Cinnamon is a popular fragrance for pine cones.


https://i.expert-h.com/en/iz-shishek/venok#sigFreeId685247ac7c
How to prepare pine cones for wreaths
 Here you will find out how to prepare pine cones for wreaths and other crafts.
Of course, today you can buy everything, even cones, you can see in online stores. But if you live in the middle lane, spending money on pine cones that lie abundantly in the woods underfoot seems crazy. Therefore, if you are going on a picnic or for a walk, take a bag to collect a little of this beautiful and free craft material.
Before using fresh pine cones, you need to spend time preparing them.
How to do this is described in detail on the site, you will find the link under the gallery. Below step by step photoswhere this process is shown.


https://i.expert-h.com/en/iz-shishek/venok#sigFreeId87199f26b3
Wreaths of cones 300 photos


https://i.expert-h.com/en/iz-shishek/venok#sigFreeIda1918500fe
Hello, I am the author of this article, so I look forward to asking questions for this article in the comments below, I will answer all !!!
If you have questions on another topic, ask them on our forum, we will answer you
- Two baskets of paper in 5 minutes (Master class)
- How to make a simple and compact table for a milling cutter from plywood
- How to make a soft headboard tile (Instructions + step by step photos)
- Cinder block benches: a convenient bench in 55 minutes
- How to make a bed with a niche: saving space (Master class)