Decoration of cones. Do it yourself, photos, instructions
 Christmas decor from cones
Autumn has come, winter holidays are approaching. Looking for jewelry ideas? In the fall, nature itself gives a hint to do decor from cones for the house. It is impossible to think of a better material for home decor than bumps. Here you will find 25 simple examples of home decorations made from natural materials made by yourself.
Home decoration cones - This is a simple and affordable way to create a festive atmosphere. They correspond to any style of decoration, are ideal for the holidays and do not require special expenses. Take a look at the master classes presented here and decorate your home with a beautiful decor of cones this winter already.
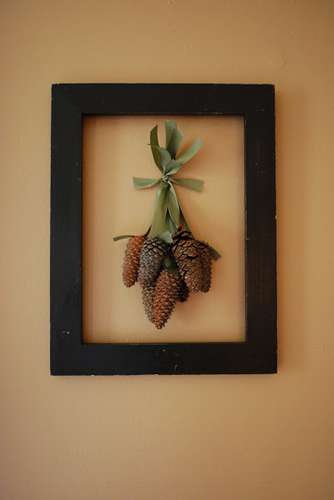
Bow with cones
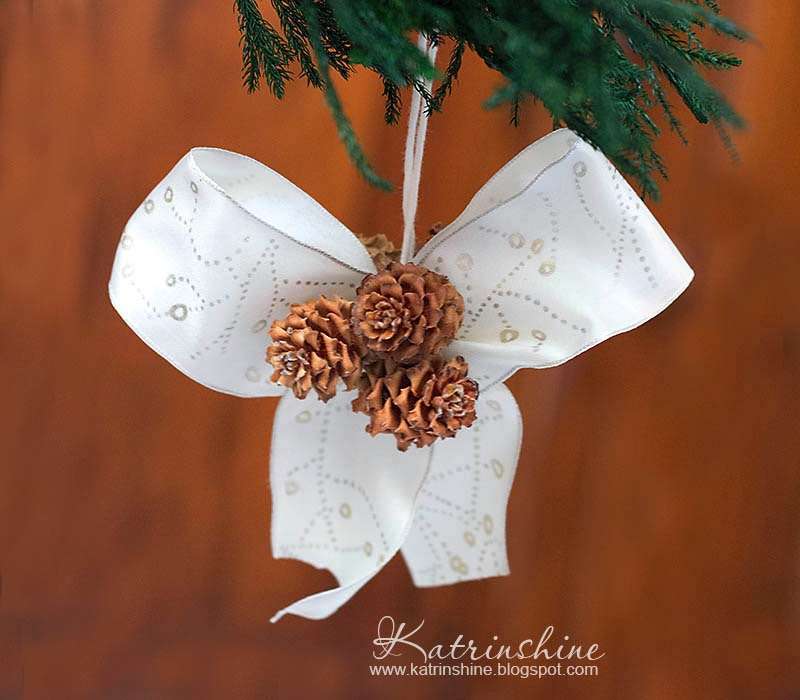 An example for fans of simple and cute crafts. Production takes a minimum of time, but the result is amazing and romantic. you can use cone decorationto dress up a Christmas tree or just hang in the house. For example, in many European countries it is very popular to decorate a tree with gold and red ribbons. Add pine cones to this idea, and it will be generally wonderful!
Make a bow, then glue 3 pine cones in the center. Decorate the space between them with balls. Make a knot and sew on the back of the ribbon bow.
Here is the result. Nice, right?
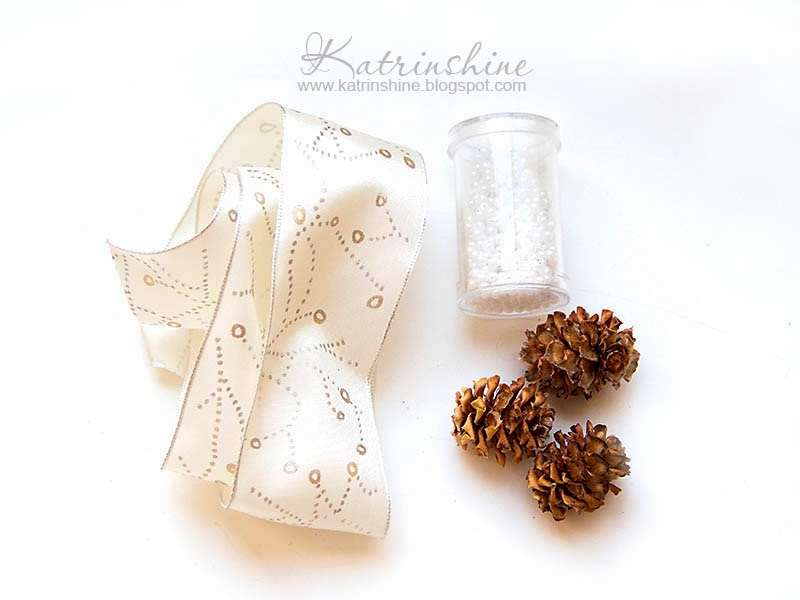 To make such DIY decor from cones, you will need:
- beautiful ribbon
- 6 small pine cones
- glue
- beads (optional)
- piece of yarn 20-30 cm


https://i.expert-h.com/en/iz-shishek/ukrashenie#sigFreeId604e78f5b2
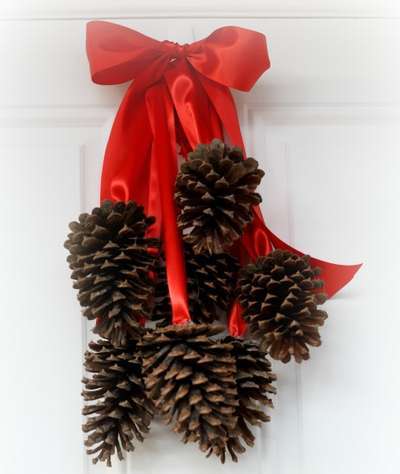 Here is another great example. Christmas decor from conesand all you need is tape, glue and bumps! This is a simple project that you can do with your own hands and even attract children.
- Find a red satin ribbon, 7 cones and hot glue.
- Cut the tape into pieces of different lengths.
- Then glue with glue the end of the tape to the wide part of the bump.
- Keep glue until all bumps are attached.
- Tie the ribbons at one end with a beautiful bow.
- Hang the decoration on the door.
It looks simple, right? This is because it is. Simple and beautiful decor in a budget version.


https://i.expert-h.com/en/iz-shishek/ukrashenie#sigFreeIde70136d5d5
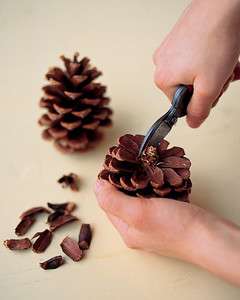
Cone ornament
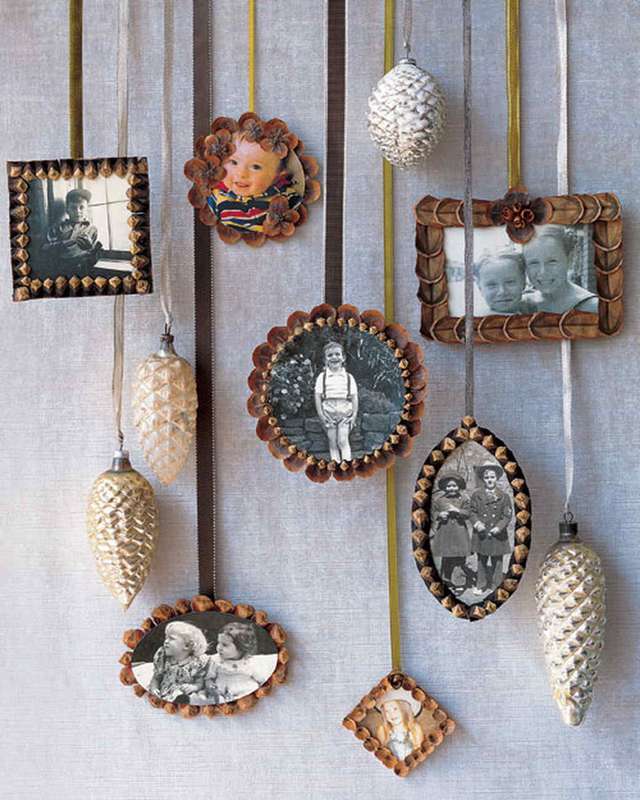 Photos from the cones eye-catching, every ornament, like a page in an album, tells a story.
One cone ornament or set - a wonderful keepsake. In addition, make such decor from cones DIY is quite simple.
- Remove the flakes from the bump. Glue the photo or photocopy of the image onto cardboard.
- Using a template for a circle or other shape (you can do it yourself or buy it in a store), draw a contour in the photo and cut it out.
- Glue hot glue around the perimeter on the back of the cutout so that the scales peek out from the edge.
- Wrap the ornament with decorative paper, glue to the back.
- Then glue the tape between cardboard and photo to make a hanger.
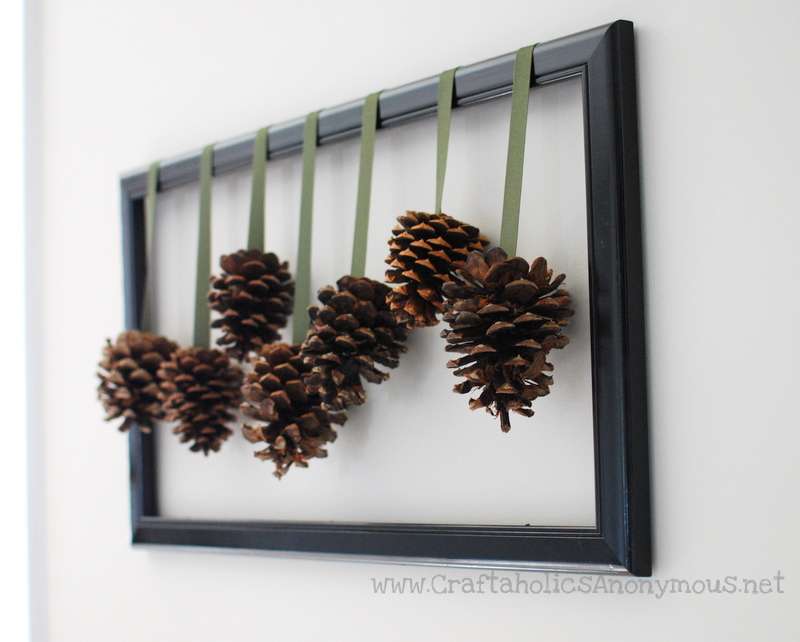
Cones in the frame
 If you like simple and easy crafts, then this is an idea. original decor of cones You'll like it.
You will need:
- 7 peeled pine cones cones (you can do more if you want)
- Tape cut into seven strips of 45 cm and one 15 cm
- Frame 28 x 35 cm
- Scissors
- Hot glue
How to make a decor of cones with your own hands
- Put a drop of glue on the tops of the cones and glue the tape. Leave the tip of the tape about 8 cm. You can trim it later if you don't like the look or want the end of the tape to be shorter.
- Then arrange the pine cones so that they hang at different heights.
- Now take a 15 cm tape and wrap it around and tie a knot. Trim as needed.
- To hang cones, pass a pin or small carnation through the tape
into the wall right under the knot. - Attach the frame.
So simple and so great!


https://i.expert-h.com/en/iz-shishek/ukrashenie#sigFreeIdce19ebbafc
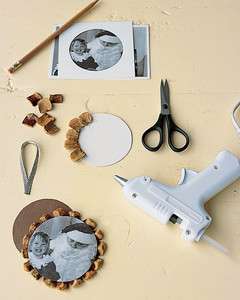
Frame cones decor
 Beautiful picture of conesIdeal for autumn and winter. And let the kids help, this craft is great for little helpers. You will do it in a few minutes!
Cook: pine cones, hot glue, ribbon, frame.
Used here pine cones with cinnamon flavorbut you can take any bumps you like for crafts.
It is unlikely that you will need instructions, see below step by step photos how to make decor from cones with your own hands, everything will become clear.


https://i.expert-h.com/en/iz-shishek/ukrashenie#sigFreeId570f71fd38
Christmas decor from cones
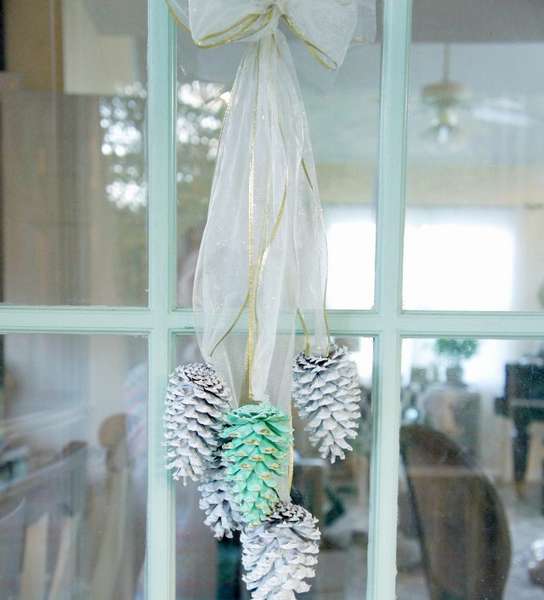 See how to make beautiful christmas decoration from cones.
DIY Supplies:
- paint
- capacities
- Pine cones
- wax paper and artist ribbon
Tip: Wear gloves
Instruction how to make a Christmas decor from cones with your own hands can read on the site. To attach the tape, use a short pin. Assemble the tape, push the pin through the tape into the lower center of the bump somewhere about 30 mm. Gather the ends of the ribbon and tie a bow!
See below the master class on step by step photos.


https://i.expert-h.com/en/iz-shishek/ukrashenie#sigFreeId4a00a0f5b1
DIY cone decorations
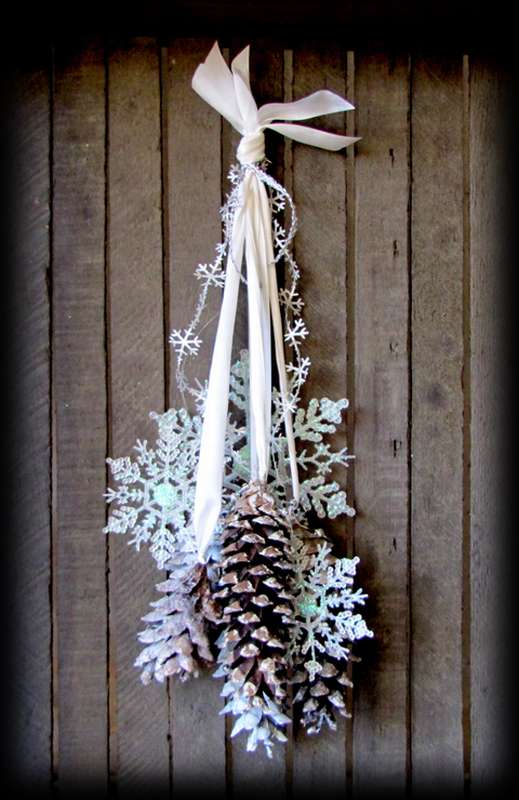 How to turn ordinary into unusual for a small fee? A little fabulous art tape, some household items and a few fallen cones found - from this you can create a bright, elegant decorative crafts. Here is a simple idea for you - cones on a ribbon, Christmas decoration instead of an autumn wreath.
To make a decoration out of cones, collect several objects.
- 3 meters of beautiful tape;
- satin carved snowflakes
- some beads in silver
- silver metal braided cord
- Pine cones
- shine
- spray paint in a spray can (white or silver)
- fishing line
Start by painting the cones. Some are white, while others can be left as is, only apply a little shine. Then tie one silk ribbon and tie to the wide end of the bump. Tie snowflakes to ribbons, make different lengths. Wrap the last knot with a cord. To add extra shine, add beads to the cones. Decorate a few cones with gold trim.


https://i.expert-h.com/en/iz-shishek/ukrashenie#sigFreeIdba1576a399
Autumn decor of cones
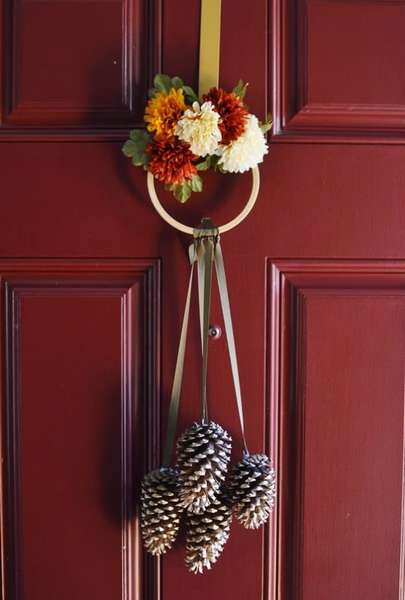
 Autumn is beautiful, but a little sad. Will help you autumn decor of cones. Here's a seemingly simple craft, three bumps on a ribbon, and the mood lifts.
Just collect pine cones and paint! If you want, paint with a different color or just leave it as is - it's up to you! Then make small rings of wire and attach to the top of the cones with hot glue.
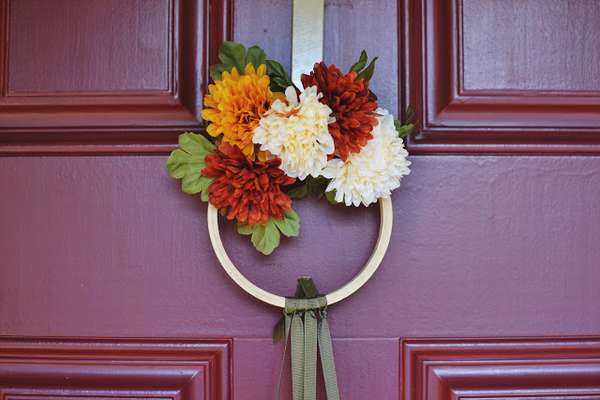
When the glue hardens add ribbon around the ring and tie the ribbons to the hoop. Make a flower crown on the hoop, for which buy a small bouquet of flowers, cut and wrap the stems around the hoop.
And now, the fantastic first day of autumn has come.


https://i.expert-h.com/en/iz-shishek/ukrashenie#sigFreeIda6ea61ae42
Check out some great examples. New Year's decor from cones


https://i.expert-h.com/en/iz-shishek/ukrashenie#sigFreeId1776f83522
Do-it-yourself beautiful Christmas crafts
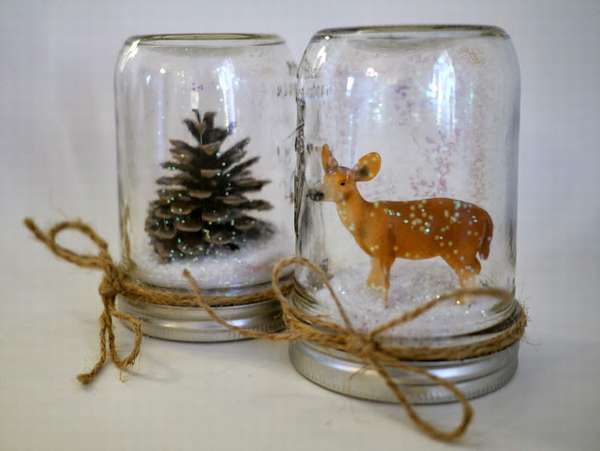 Everyone knows what “Snow globe” is, a favorite toy of children. You can make something like this from an ordinary glass jar. The composition can be any, but a deer and a pine cone are also a good choice. This craft is not difficult to do with the children, they will be delighted.
Detailed manufacturing instructions New Year's crafts and the list of necessary materials can be found on the website of the author of this project, just use the link located under the gallery.
And below, see detailed step-by-step photos, and make sure that nothing complicated. Please children and have a festive mood.


https://i.expert-h.com/en/iz-shishek/ukrashenie#sigFreeIdcbfd518a87
Christmas tree made of cones
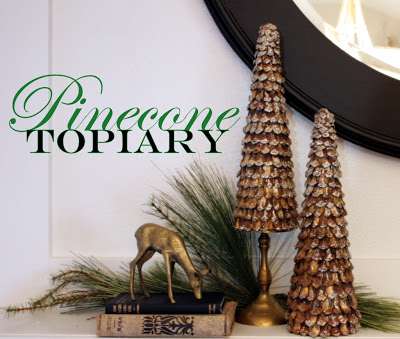 At first glance it seems that this is not ordinary crafts from cones, and an expensive figurine from a gift shop. This effect is achieved due to gold paint. It is necessary to apply a small layer to give the craft a little metallic shine. And if you still find an antique brass candlestick to raise the fir-tree from the cones a little, the view will be generally gorgeous.
Manufacturing instructions You can read this wonderful piece of work on the site, you will find the link under the gallery.
And see below step by step photos how to make a decorative Christmas tree on the table with your own hands


https://i.expert-h.com/en/iz-shishek/ukrashenie#sigFreeId65edc0ec0e
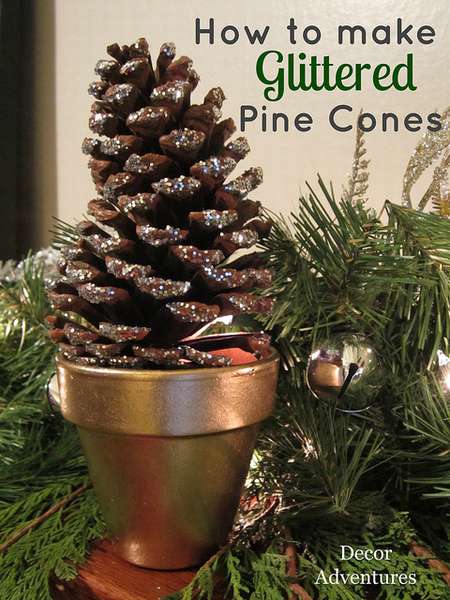 You can do more Christmas tree in a potspangled. Pine cones are great for autumn-winter decoration. And to make them fun and festive - add a little sparkle.
To do this, cook:
- Pine cones
- glue
- shine - any color
- thin brushes
- glitter tray or bowl
You can guess the steps of the instruction, how to make christmas tree from cone
- Apply glue to the ends of the bumps, this will take all the longer.
- Then shake and sprinkle the cones with glitter.
- Only silver and gold were used here, you can try with other fun colors.


https://i.expert-h.com/en/iz-shishek/ukrashenie#sigFreeIdb4f2e06b45
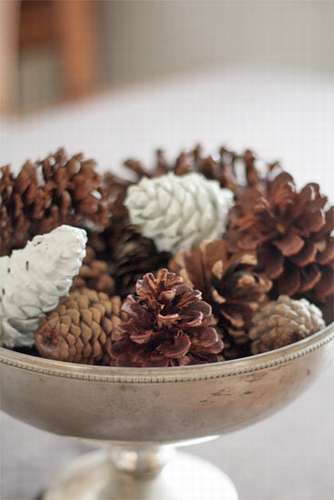
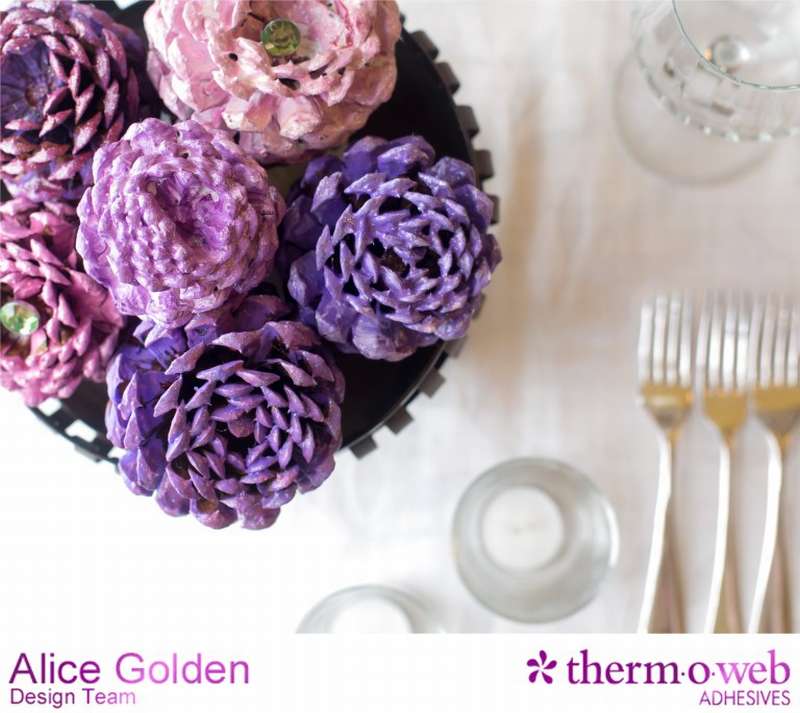
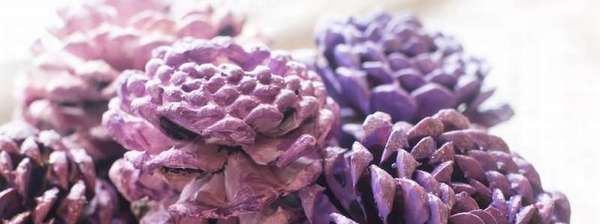
Beautiful pine cones
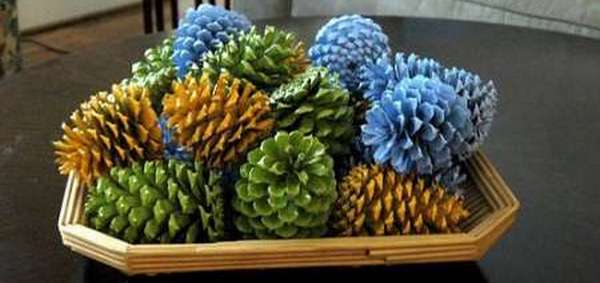 Just find a few pine cones and paint from a spray can in different colors. After they dry, put them in a large bowl or transparent vase and place in the center of the table or on the mantelpiece.


https://i.expert-h.com/en/iz-shishek/ukrashenie#sigFreeIddb1d11486e
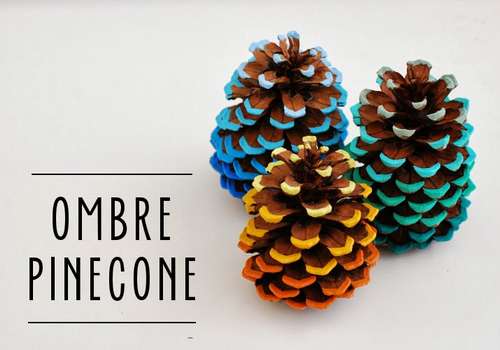 Here is another example you can do cones of different shadesgiving a more refined look, coloring only the tips of the scales.
Materials:
- Pine cones
- Acrylic paint in three or four different shades of the same color
- Corner brush, used for hard to reach places
- Old toothbrush
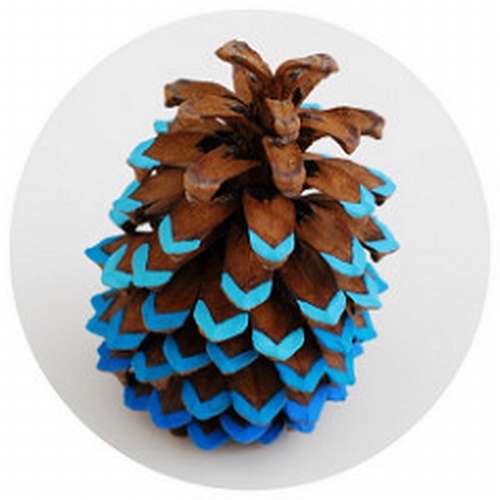 To make such DIY decor from conesjust need a little patience
- Take a toothbrush and clean it from dirt.
- Then, with a brush, apply the first shade at the bottom of the bump.
- Continue to paint the next hue, moving up until you reach the top.
Depending on the size of the cones, you can use three shades for small or medium size, or four different shades for a large sample. This will clearly see the effect. ombre. Adding just a little color to the tip of the flakes can really turn an ordinary bump into something bright and decorative.


https://i.expert-h.com/en/iz-shishek/ukrashenie#sigFreeId926966a2d4
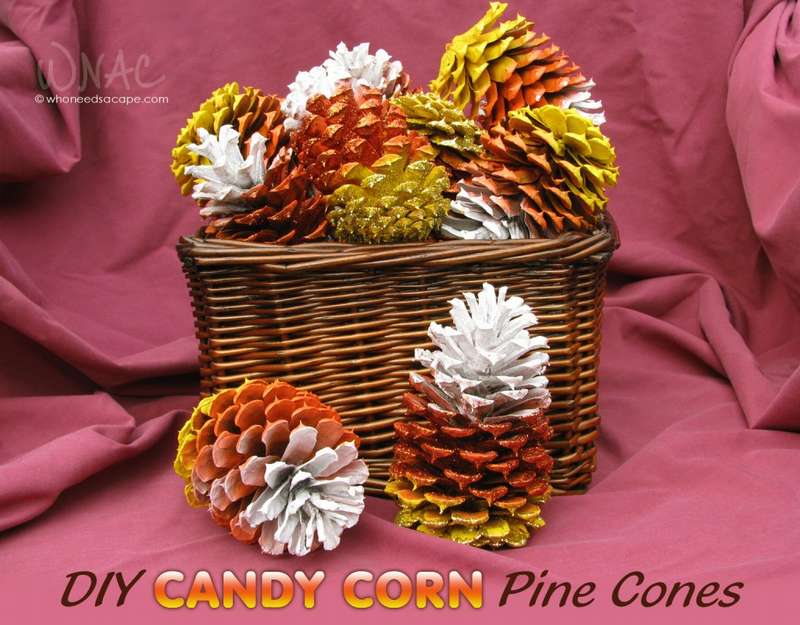 Or another example decorating conesmake them tri-color. You can use a variety of sizes - larger cones are easier to paint.
As for others Supplies, take spray paint in white, orange and yellow; sealant spray; brush and shine in white, orange and gold. Orange is the largest area, so first paint the whole bump orange. Then paint the top with white, and when dry, the bottom with yellow. Leave to dry overnight. And the next day, sprinkle with the appropriate color glitter.


https://i.expert-h.com/en/iz-shishek/ukrashenie#sigFreeId1a3a50206b
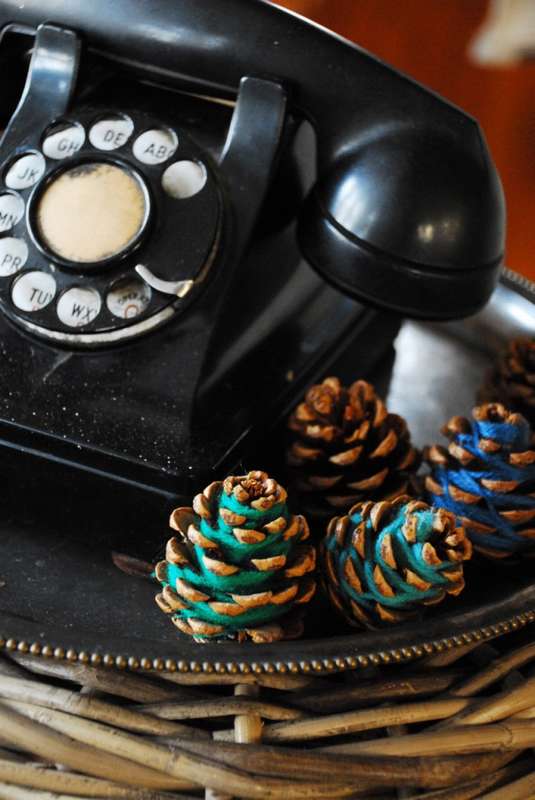
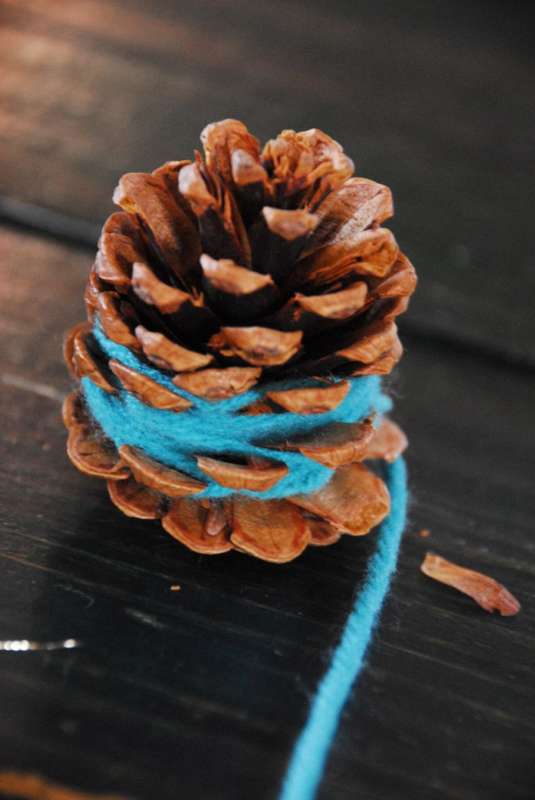
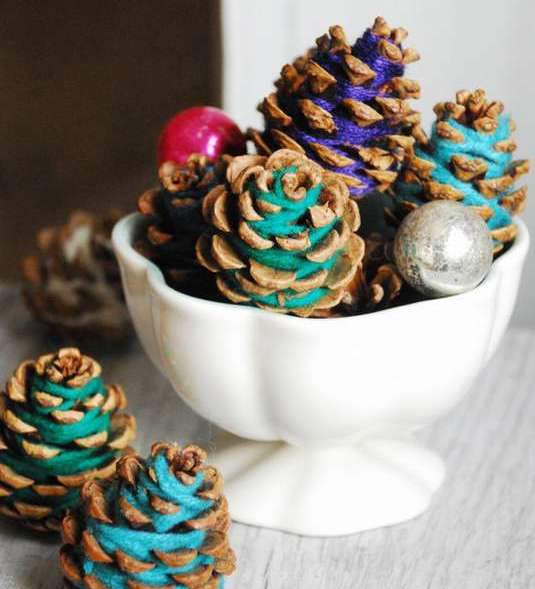 Beautiful bumps in a vase
Pine cones wrapped in yarn create a light and colorful festive decor.
Take the remaining yarn, a few pine cones and wrap with colored thread.
You can make a whole bunch of such decorative crafts from cones and arrange them in different corners of the room.
Start from the bottom and wrap the yarn around the bump - push the threads deep into the crevices. The denser part of the bump will hold the yarn in place, no need to stick anything.
As you can see, this is very simple, and the atmosphere in the room will be completely different.
How to paint cones for decor
 Bring forest winter freshness to your home during the holiday months with these cute crafts. If the bumps you find are not completely open, dry in the oven to a minimumuntil they open completely.
Things you need:
- Bumps
- White paint
- Flower wire
- Newspaper
What should be done:
- Loosely wrap a piece of floral wire around the top bump. You will use this both for dipping and for drying, so you need the wire to be well hidden in the cone or easy to remove.
- Paint the top of the wire so that it is easily wrapped around the hanger.
- Lay out newsprint under a hanging surface.
- Shake the paint well and then open.
- Slowly dip the cones into the paint and hang it up, let it hang for a minute, so that most of the excess paint is glass. After the paint has hardened, skip or remove the wire.


https://i.expert-h.com/en/iz-shishek/ukrashenie#sigFreeId6e9f23f7ac
Shiny cones
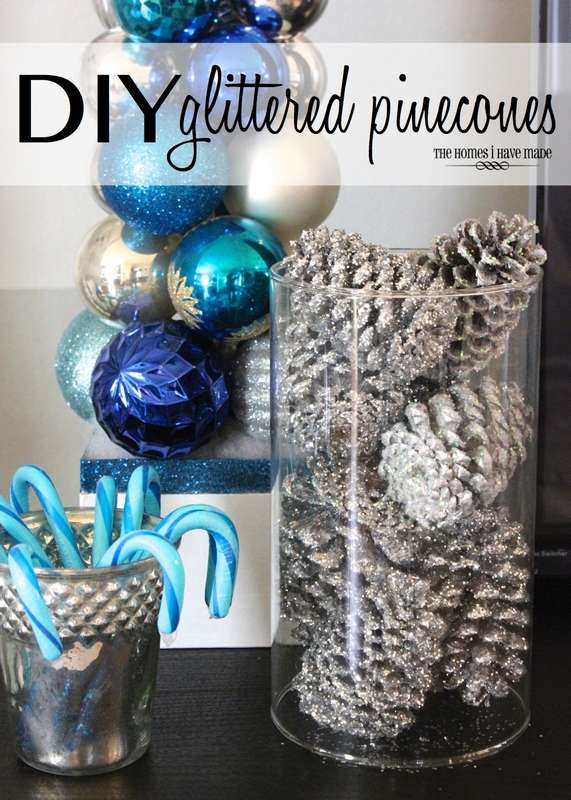 Introducing the Idea of Making Awesome Christmas decoration from sparkling cones! You probably saw shiny cones in shops and holiday bouquets for florists! Shiny cones can be used endlessly, they are so easy to manufacture that you can easily make a few dozen. They can be used in flower arrangements, used as card holders on a festive table, or as decorations on a Christmas tree, all this is fun and festive. The author came up with his own theme, lay in glass vases and arrange throughout the house!
Here is what you need:
- Spray paint (optional).
- Aerosol glue is the fastest and easiest way to achieve excellent results.
- Shine.
- Pine cones.
TOak paint bumpsProbably not necessarily telling. Of course, there are some nuances, if you are interested, you can use the link under the gallery and read the instructions on the author’s website. Below, look at a few more photos of what you need to cook and how it will look.


https://i.expert-h.com/en/iz-shishek/ukrashenie#sigFreeIdb9c58641ee
 And this idea, found on Pinterest, is a fun, easy, and inexpensive way to create ornaments from cones, slightly different from the usual floral design.
Instructions:
Step 1 - Choose pine cones. The bottom will face up, so look for those where the flakes are tightly spaced. If you still use raw pine cones, warm them in the oven on a foil stand for 30 minutes, and then let dry for several days.
Step 2 - Paint the bumps acrylic paint. Try mixing two or more colors for a more natural look.
Step 3 - After the paint has dried, apply a glitter for nails, which allows you to display the basic colors, and the effect is a beautiful flicker, and not that which has a heavy gloss. To add more shine, spray several times until the desired effect is achieved.
 Put the finished flowers in a beautiful dish and voila!


https://i.expert-h.com/en/iz-shishek/ukrashenie#sigFreeId71ec4e2ee1
Cones Fridge Magnets
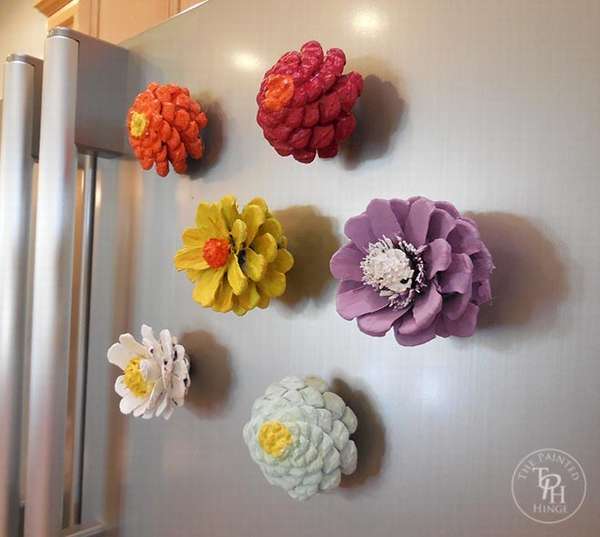 See how to do decorative fridge magnets made of cones.
What do you need:
- Small pine cones
- Magnets.
- Paint.
- Paint brushes
- Glue
- Nippers
- Needle pliers
Pinch several rows of scales at the top of the bump as shown in the photo. Holding the bump so as not to break the lower flakes, cut off the upper ones using nippers. Pull out excess material with needle-nose pliers.
Now that you have the upper half of the pine cone, there are two kinds of flowers that you can make. If you want a daisy, put the bump right side up; if you want zinnia, put the reverse side up. Paint the crafts!
Let the paint dry, then stick magnets. Now the refrigerator will have a completely different look.


https://i.expert-h.com/en/iz-shishek/ukrashenie#sigFreeIdf6233afda0
Home decor
 Example how to do home decoration made of cones and burlap.
Just collect and tie the burlap ribbon with a small piece of jute and fix it with glue. Then glue the pine cones painted in golden color, although it is not necessary to paint as you like.


https://i.expert-h.com/en/iz-shishek/ukrashenie#sigFreeId66c08adafc
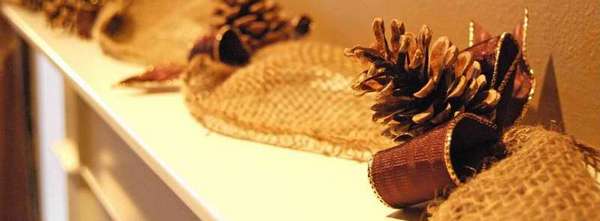
Decoration of cones for napkins
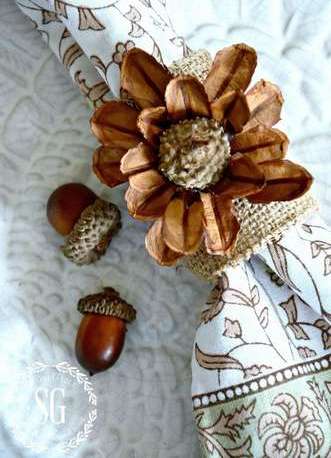 Anyone can make these great ornaments from cones on napkins from a sleeve from a roll of toilet paper, burlap and natural materials! It is so simple and at the same time beautiful and original that you simply have to try to do this do-it-yourself cone decoration.
So, start saving empty bushes from toilet rolls and going for a walk, collect acorns and bumps.
Materials: cones, dry acorns, sleeve from a roll of toilet paper, tape for bags 5 cm, hot glue
- Disassemble the cones into scales.
- Cut the toilet paper sleeve in half
- Wrap bushings with burlap and fix with hot glue.
- Choose 5 large flakes from the cone and glue with hot glue to make the base of the flower.
- Add more petals in the center, completing the flower formation.
Fasten the flower in the center of the sleeve and the napkin ring and you're done.


https://i.expert-h.com/en/iz-shishek/ukrashenie#sigFreeIdbf2855f751
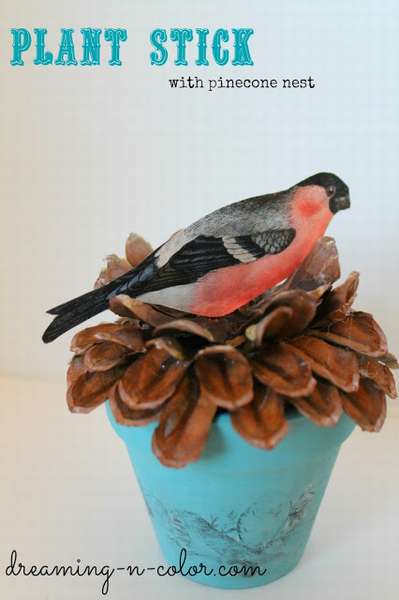 Decorative crafts from cones
A great project for adults and children, suitable as a gift. Such crafts from cones make it easy and inexpensive!
- Start with a cardboard circle. Disassemble the pine cone on the scales.
- Use hot glue to attach two rows of cone flakes to the cardboard face up.
- Then glue two more rows face down.
Finished craft looks like a nest. You can add moss and more to give the product a more natural look.
You can make a bird in different ways, even just buy it in a souvenir shop. Or do it yourself. For example, cut from cardboard, mold from plasticine, even make from the same cones. And at the end, put a decorative crafts made of cones among indoor flowers.
See below for a few step by step photos..


https://i.expert-h.com/en/iz-shishek/ukrashenie#sigFreeId0548869d47
Do-it-yourself decorative lamp made of cones
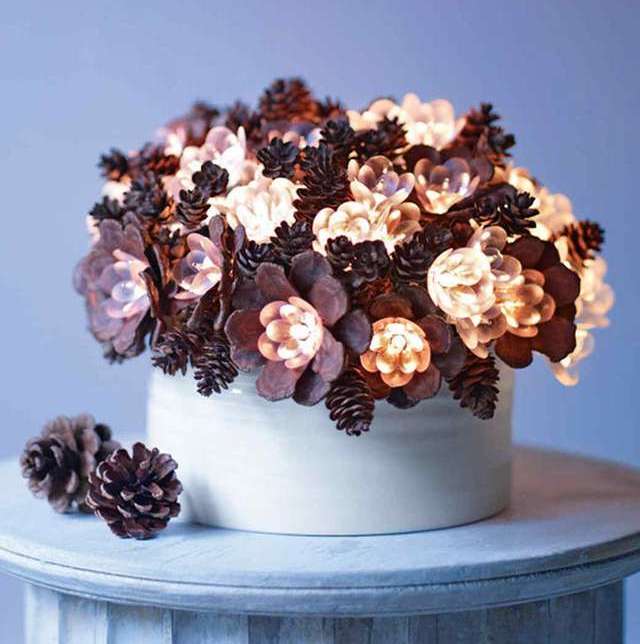 This cone lamp more like a bouquet of luminous flowers. Because the center of each flower is a light bulb from an electric flower garland. Flakes of cones are glued to the plastic flower petals; the result is, as in the photo, beautiful and unusual.
Materials:
- Cones;
- Garland;
- Hot glue;
- Vase;
- Insulating tape;
- Floristic wire.
How to make a decoration of cones:
- To each petal of plastic flowers from our electric garland we glue the scales from the pine cone. 5 petals - 5 scales in two rows.
- We wrap floristic wire wires going from both sides to the flower bulbs. This is how the "stems" of the flowers are obtained.
- The resulting flowers are collected in small bunches that are wrapped with electrical tape. Several cones are tied with floristic wire. The end of this wire forms a stalk of approximately the same length as previously made flower stems.
- We collect bundles of flowers together, supplementing them with cones on the stems. We wrap the bouquet with electrical tape and put it in a vase. We arrange the flowers in the bouquet in the way we like, put the lamp in a suitable place and turn on the garland plug in the socket.
Now it remains to admire the resulting decoration!


https://i.expert-h.com/en/iz-shishek/ukrashenie#sigFreeId4eab149cb9
Cones Wax Jewelry
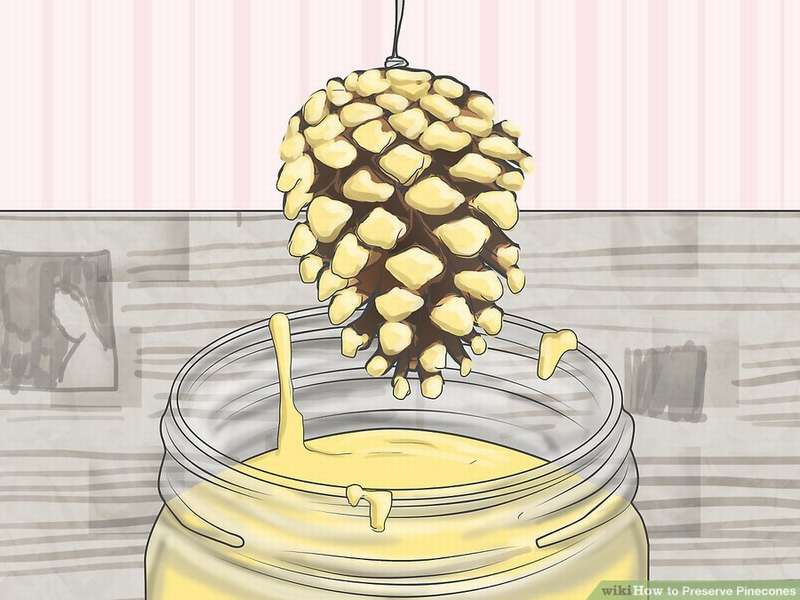
 These pretty ornaments from cones made by dipping them in molten wax. These are beautiful handmade crafts decorated with natural materials that can be found anywhere. you can use beeswax, which gives off a wonderful warm honey aroma, or to act as in this case - use colorful wax.
To make decorations from pine cones, you will need ...
- ring screws
- broken wax pencils
- cups
- Pine cones
- glass jars
How to do.
- First drill a hole in the bump to tighten the screw with the ring.
- Sort the wax pencils and place them in cups.
- Melt in the microwave and pour into the jars by color.
- Take the bump by the screw ring and lower it into the molten wax. Depending on the thickness of the layer, cooling may take up to 30 seconds.
- Then dip it back into the wax to make a thicker layer.
- Place waxed cones on wax paper to cool.
- Prepare a hanging ribbon and your beautiful cone jewelry is ready to be displayed.


https://i.expert-h.com/en/iz-shishek/ukrashenie#sigFreeId6c46a8fec1
How to save bumps for future use
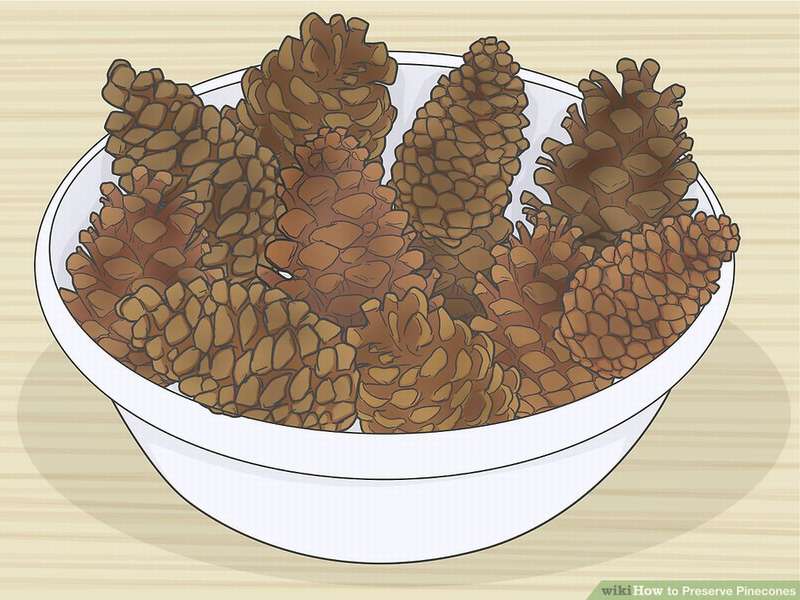 Bump is a ready-made decorative material produced by nature itself. From cones, you can do many different things, beautiful and unusual.
But how to save bumps for the future, for example, for winter crafts? It is no secret that natural materials need to be collected in season.
The season for the fall of cones is mid-autumn; you can also collect them in the spring.Save their charm for several months!
So, first way: soak
- The first action - collect the cones. Whatever you want, closed, open, not quite clean, everything will be corrected later, during processing.
- Cleanse your prey of seeds, moss, pine needles. Use tweezers, a brush, but don’t be too zealous: this is just a preparatory stage.
- Soak the bumps in a bowl with a mixture of water and vinegar. The proportions are different, since vinegar also has a different percentage concentration. You can take dishwashing liquid instead of vinegar. The size of the vessel depends on the number of cones that you are going to place in it.
- After about half an hour, pull the cones out of the water and lay them overnight on a newspaper or cloth to dry.
- Wet cones close and open after drying.
 Second way: drying
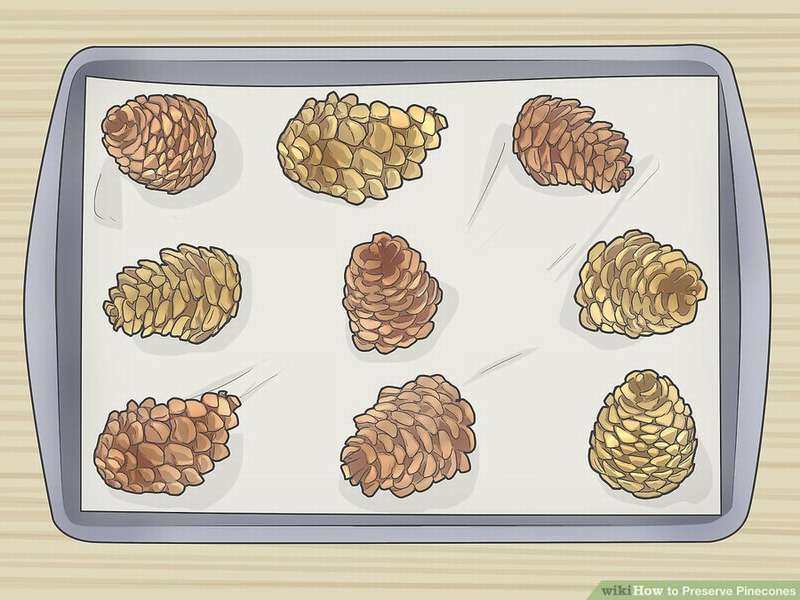
- Preheat the oven to 120 degrees Celsius.
- Place the cones on a baking sheet so that there is some distance between them. In order to protect the pan from the resin released when heated by cones, and from the debris from which they will be cleaned, cover it with parchment paper or cling film.
- When the cones open, pull them out of the oven. This can happen both after 30 minutes, and after 2 hours. All this time, cones cannot be left unattended in the oven. They are flammable, and you need to be prepared at any time to snatch them out of the oven.
- Leave the cones out of the oven to cool for 10 minutes or longer. After cooling, the cones are ready for their further use.
Instead of using the oven, microwaveturned on at full power, leaving cones in it for 1 minute.


https://i.expert-h.com/en/iz-shishek/ukrashenie#sigFreeId3d6ebb2431
 Many cone lovers experience the fragility of their favorite material. Little collected cones lie, and then you look - some rotted, others withered, as they say, "to nothing." Because it is so important cone conservationor rather, their condition. Even soaked and dried cones need fixing their beneficial properties. You can store them for a long time, sealed with varnish or wax.
Paint is less preferable in the sense that it will give color to the bumps. But perhaps color is exactly what you need. let's consider in more detail the necessary actions.
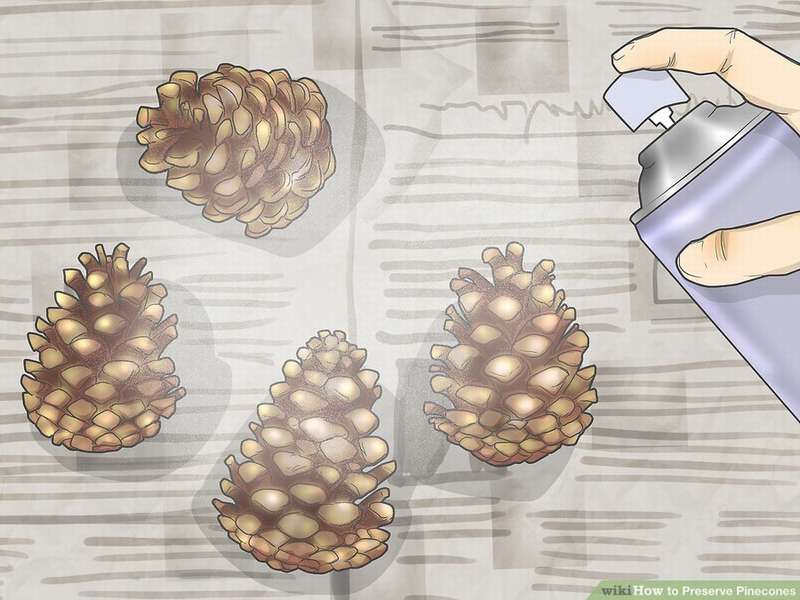
- Decide which cone sealing method is best for you. The preparation of the workplace depends on this. To paint the bumps with a brush or dip them in varnish-wax-paint, it is enough to cover the table with an old newspaper. It is better to work with a spray outdoors.
- The easiest and fastest way to preserve cones is to spray them with a sealant. If there is no special spray, use regular hair spray. The method is so simple that it seems primitive, but it is effective, and the appearance of the cones after such processing is quite natural.
- It is more durable coating with marine varnish, it is better to paint with a hard brush and let the cone dry for 30 minutes. Work should be done with gloves, instead of painting with a brush, the cone can simply be dipped in varnish. So the coating will be thicker, you need to tie the cone onto a rope, holding it, dip it in varnish and let the residues drain, and then hang it to dry.
- A good substitute for paint or varnish is wax. It should be melted and dip cones in it. Repeating the procedure several times, you can achieve a thick, very noticeable layer of varnish on the bump. It is worth remembering only that after dipping in some kind of sealant, the cones can close again, although sometimes this turns out to be a very desirable effect.


https://i.expert-h.com/en/iz-shishek/ukrashenie#sigFreeIde2842ce267
Ornaments from cones 100 photos


https://i.expert-h.com/en/iz-shishek/ukrashenie#sigFreeId703e4b2d42
Hello, I am the author of this article, so I look forward to asking questions for this article in the comments below, I will answer all !!!
If you have questions on another topic, ask them on our forum, we will answer you
- Two baskets of paper in 5 minutes (Master class)
- How to make a simple and compact table for a milling cutter from plywood
- How to make a soft headboard tile (Instructions + step by step photos)
- Cinder block benches: convenientshop in 55 minutes
- How to make a bed with a niche: saving space (Master class)