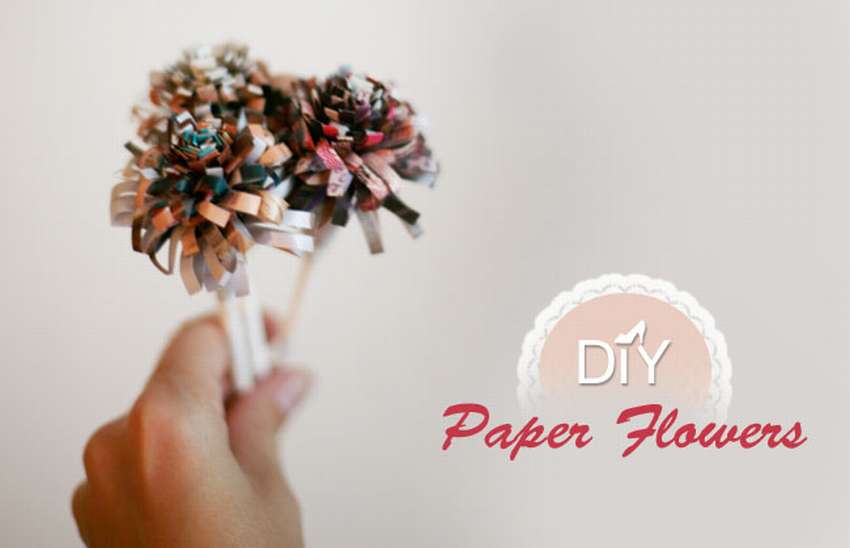
The lightest paper flowers. Do it yourself step by step + 232 photos
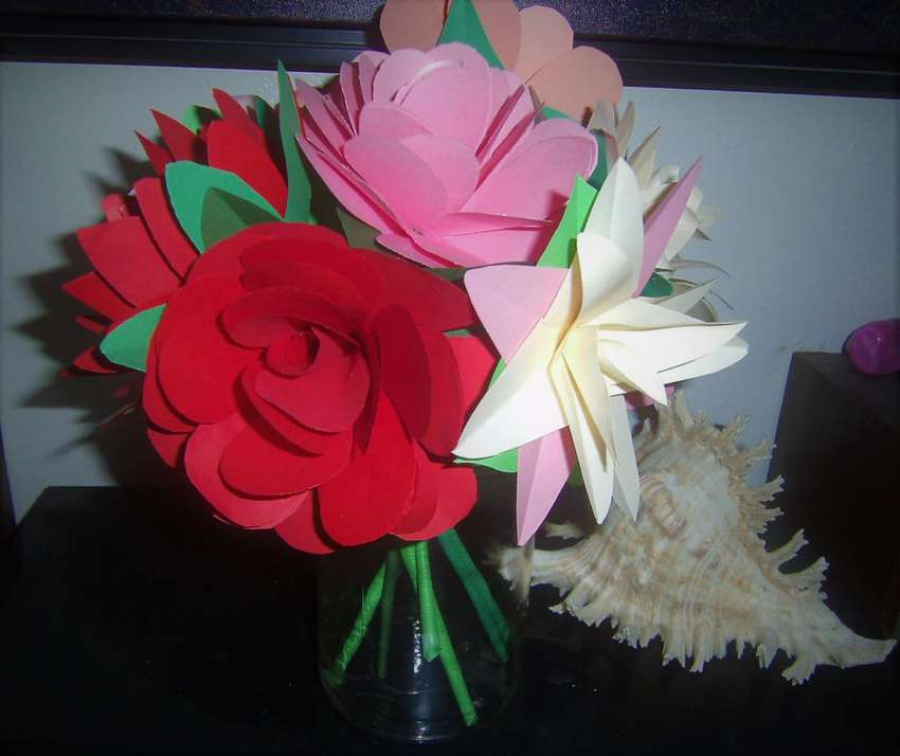 simplest paper flowers
Want to learn do paper flowers with your own hands and looking for easy options for beginners? Then here you will find what you need. Check out the examples how to make light flowers from paper do it yourself - simple, inexpensive and can be used for various events and activities.
In order to make a simple flower, almost any paper is suitable - corrugated, crepe, napkins, even cardboard and coffee filters. If you are familiar with the origami technique, here are three examples. how to make a light origami flower. There are many methods and tools to make simple flowers out of paper, it all depends on how creative you are. Here are 15 projects of simple paper flowers that you can try to do with your own hands and teach your children.
Content:
- How to make a light rose from paper do it yourself
- Light voluminous paper flowers
- Do-it-yourself simple flowers from napkins
- Light colored paper flowers
- How to make the lightest flower out of paper
- Flowers with a napkin candy
- DIY Origami Simple Flower
- Light Origami Tulip
How to make a light rose from paper do it yourself
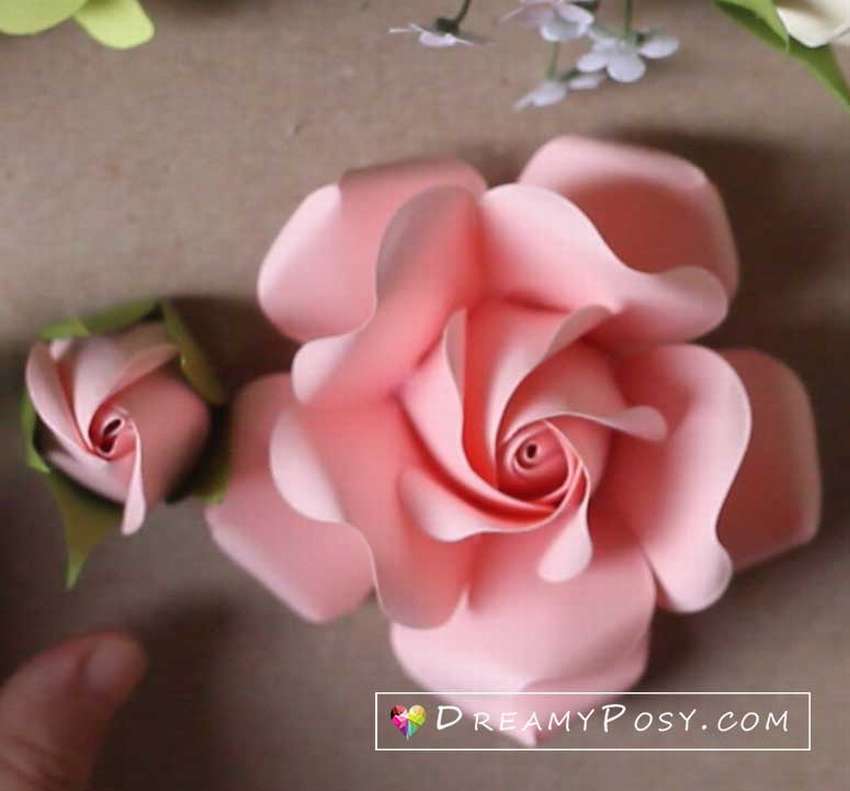 This instruction how to make a light rose from colored paper. The task is not difficult and is intended for beginners, you just need to use the site free patterns. Necessary time: 25 minutes. You can choose any color paper you want. For each flower you will need 4 pink 5-petal layers and 1 green sepals. Free template located in PDF and SVG files. Use the edge of the scissors to bend the petal, try to curl both sides. Then glue the wire to the first layer. A little glue on the tip of the wire will help fix the stem. Curled up pentagon shape at the bottom of each layer, you get the exact shape of the flower. After that, cut the sepal pattern out of green paper and glue it at the bottom of the flower.
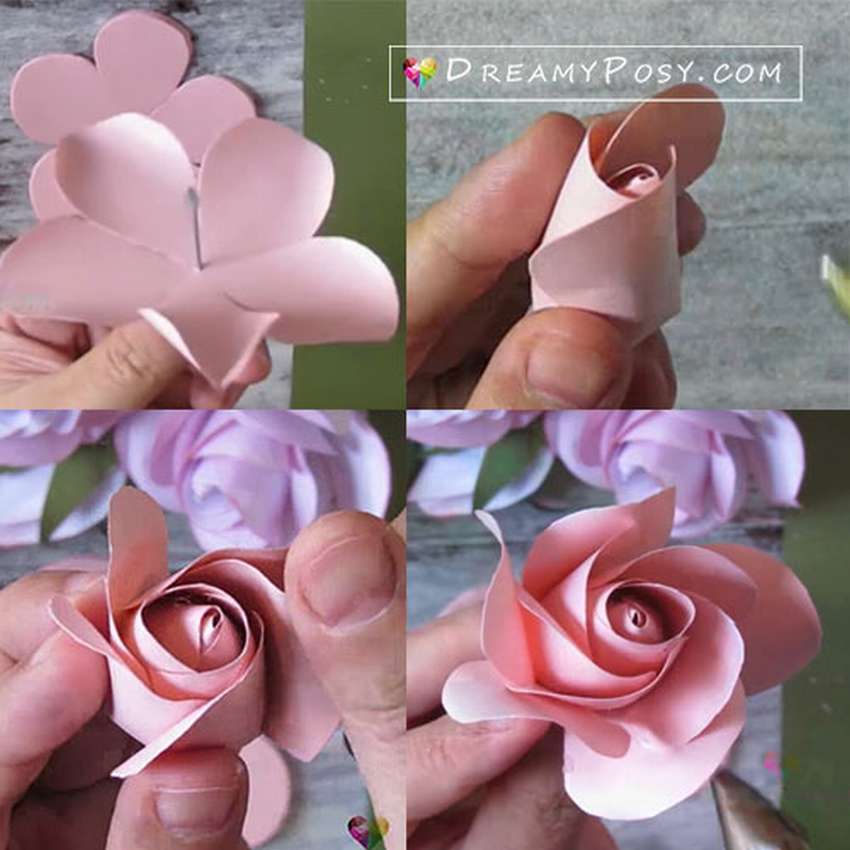 Wrap a small strip of paper to form a container. Now the flower itself. Here you can do 2 types of rose bud. For the first, only 1 layer (5 petals) is required. And the second rosebud will need 2 layers (equal to 10 petals). Cut the sheet according to the pattern. Use technique in the video on the siteto crop the edge of the sheet, which will help make it more realistic.
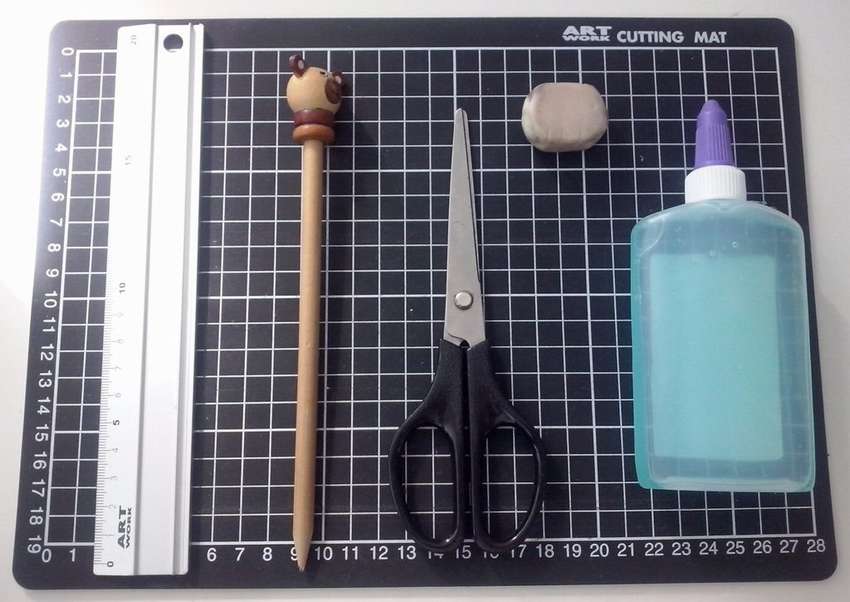
Necessary materials:
- Colored paper
- Scissors or cutting machine
- Glue gun or glue
- Small stylus


https://i.expert-h.com/en/iz-bumagi/samye-legkie-tsvety#sigFreeId15c4f87d83
Simple voluminous flowers made of paper
 Walkthrough how to make simple paper flowers. First cut a circle out of cardboard. The size should be approximately what you want your flower to be (size is not that important, since you can always stick another paper circle if it’s small). Draw a few squares on paper that are slightly longer on one side and cut them out (these should be the inner petals, and therefore they are the smallest). Now cut off one end of the squares. If you prefer, you can draw them or make a pattern on a piece of paper. Use a pencil to round the petals as shown. Then start sticking the petals to the circle.
 When using all the petals, do more, this time a little more. Remember: if you run out of free space on the lower circle, you can simply cut out a larger circle and point it to the bottom of the old circle - still no one will see on the finished flower. Wait for the glue to dry and enjoy the finished flower. If you want the flower to be more durable, cover it with hairspray. The more layers of varnish, the paper gets tougher. Thus, you can use a flower, for example, for a brooch.


https://i.expert-h.com/en/iz-bumagi/samye-legkie-tsvety#sigFreeId3c80206fce
Flower from napkins on a pattern
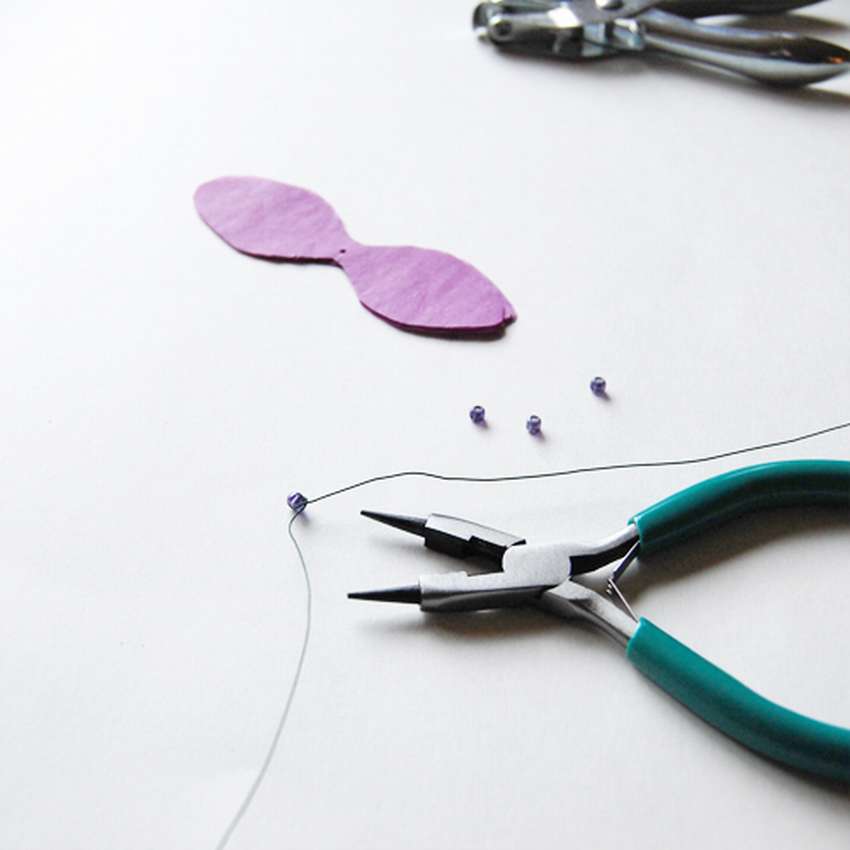
 This option is also not complicated, but a bit troublesome. To make a flower out of do-it-yourself napkins, first print pattern, link to the site vile gallery. You can resize the petals by manipulating the image in your favorite program or by resizing on the printer (if the printer has a zoom function). You can cut the petals all at once or separately. After that, put them together so that the centers coincide. Although they do not have to match exactly. Make a hole and run the wire through all the petals.
 For, to make a stalk, take the flower wire and a large ball (plastic ball or bead), bend the wire in half and fix the ball on one end. Push to the center, and twist the wire, as shown in the photo. Then string the petals on the stem. When using several sizes, make sure that the smallest petals are strung on the first layer, and then the larger ones go. Use some glueto keep each petal in place. You can bend and fold the petals to give a larger volume and shape to the flower.
 After the glue has dried, use floral ribbonsto cover the wire stem. Wind tightly around the entire trunk to cover the entire wire. Your napkin flower ready and you can collect in a bouquet or put in a vase, or you can twist the wire around the wrist, you get a beautiful bracelet! For work you will need: colored napkins, wire, petal patterns, floral ribbon, nippers (for twisting the wire, but this is optional, it can easily be done with your fingers, nippers are needed if make a lot of flowers).


https://i.expert-h.com/en/iz-bumagi/samye-legkie-tsvety#sigFreeId3f3fad2b07
Light colored paper flowers
 These beautiful paper flowers really easy to do. You will need only 2 square pieces of yellow paper, 1 square sheet of green paper, glue for needlework and scissors. Fold the yellow paper twice and cut 4 square pieces. Then fold one of the small squares into a triangle 3 times. Repeat so many times how many petals do you want. Cut the bottom for the center hole. For the first cut, you need only one cut in the center. Glue the cutouts together. Then glue everything together from large to small, with the smallest, centrally located. Let the flower dry and glue a piece of green paper to the stem. With glue connect the flower to the stem. Collect a bouquet using different colors.


https://i.expert-h.com/en/iz-bumagi/samye-legkie-tsvety#sigFreeId6689f164dc
The lightest flower made of paper
 it the simplest flower made of paperwhich can be done in a few minutes. All you need is tissue paper, or napkins (corrugated paper is also suitable), scissors, floral wire. For these little flowers were used 4 sheets of tissue paper. Fold them on top of each other and put together an accordion. Find the middle. Using a piece of floral wire about 15 - 18 cm long (also folded in half), fasten the paper, i.e. just wrap in the center. Then, all you have to do is gently pull on each layer of paper as needed and fluff. That's all, lightest paper flower ready.


https://i.expert-h.com/en/iz-bumagi/samye-legkie-tsvety#sigFreeId883905acd7
Flowers with a napkin candy
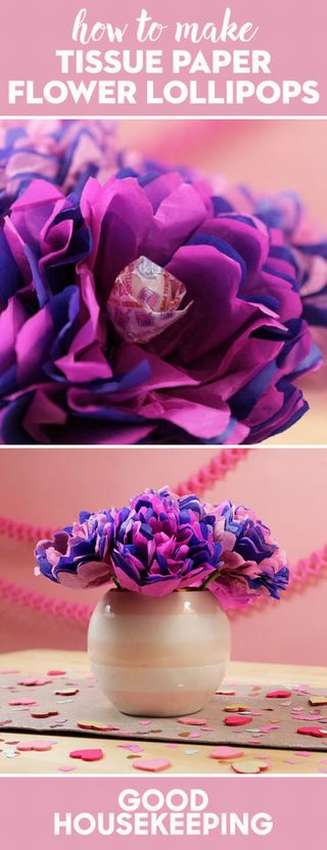 These colorful light napkin flowers in manufacture, beautiful and include sweets - so this perfect for valentines day. To make a flower you will need:
- Colored napkins
- Scissors
- Hole puncher
- Lollipops
- Stapler
- Bamboo skewers
- Green or flower ribbon
How to make a flower from napkins with candy
- Cut nine 20 cm wipes
- Lay the squares on top of each other alternating colors.
- Fold one edge into a 3 cm strip.
- Turn the stack over and flip the edge back to the opposite side. Keep going fold accordion.
- Trim both ends into a curved shape.
- Stretch the accordion and find the fold that is closest to the middle. Re-fold along this fold and punch a hole around the edgeso that you get a hole near the center of the square.
- Insert the lollipop into the perforated hole, then replace the folds with an accordion.
- Stick the candy stick on both sides.
- Carefully separate the layers of napkins on both sides of the lollipop, fluffing as the flower forms.
- If you put lollipops in a vase, use green ribbonto stick the stick on the bamboo skewer and continue wrapping the ribbon to create a flower stalk.


https://i.expert-h.com/en/iz-bumagi/samye-legkie-tsvety#sigFreeIddcc03f0baa
How to make a simple origami flower
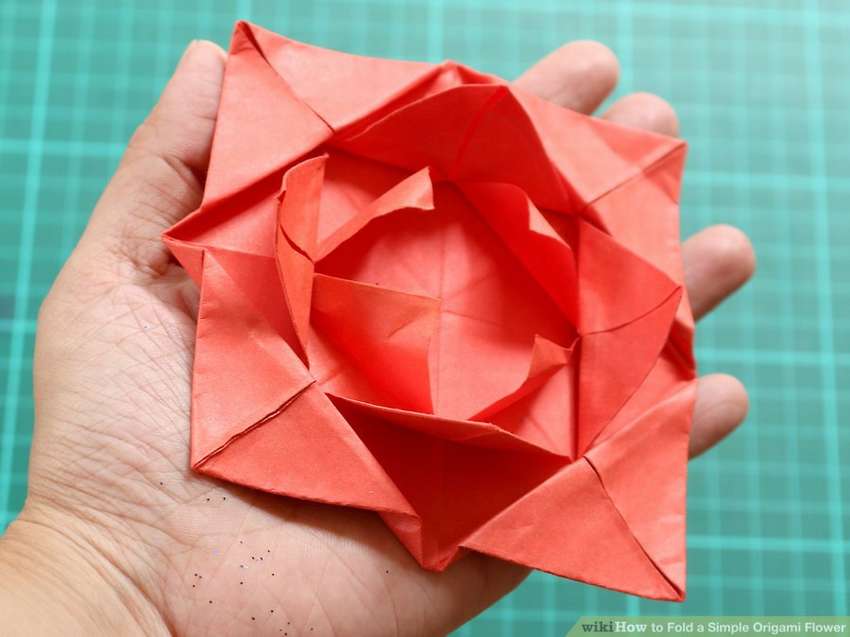 Here you will learn how to fold simple origami flowerthat looks beautiful in bouquets of paper flowers! Fold the paper in half diagonally on both sides. Fold all the corners to the middle. Repeat. Then fold in half on both sidesto shape. We call the side that you just turned, the “top side”, and the side with two sets of angles folded to the middle, “bottom side”. The top side should face up and the bottom side down.
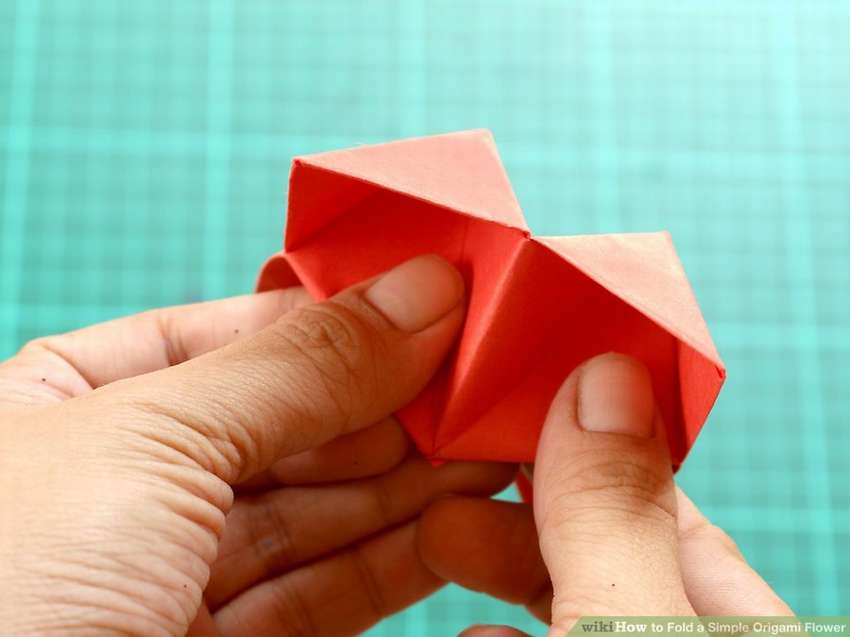 Look at the flaps on the underside. Insert your fingers into them and push everything to the middle. Fold both parts on the underside and bend. Turn and flip the two valves until the four small ones in the center open. Fold back and fill to a white square appeared in the center. Flip and flip the flaps over, this simple origami flower is complete.


https://i.expert-h.com/en/iz-bumagi/samye-legkie-tsvety#sigFreeId89e562fa93
DIY Origami Simple Flower
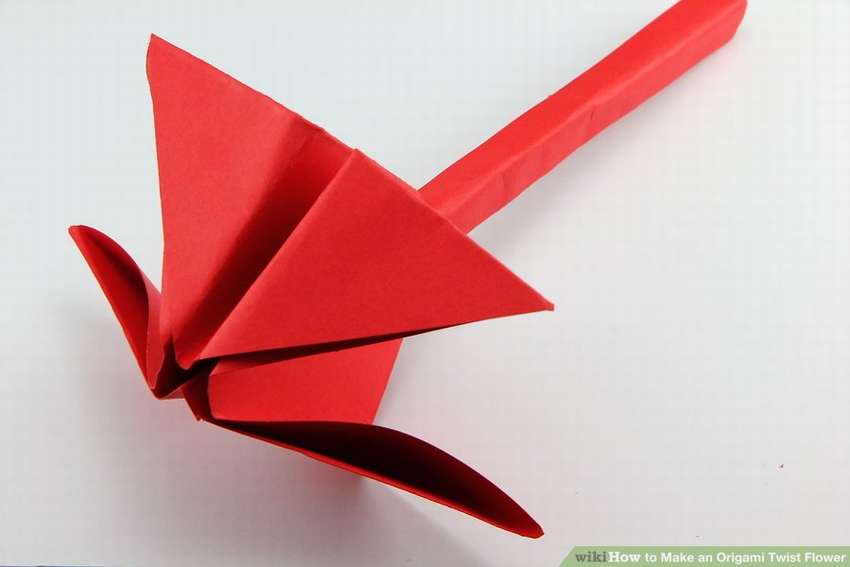 Origami Flower Twist - This is a flower of an unusual shape, which is folded using the origami technique. This is a slightly unusual design, in the photo you see a twisted stalk and a beautiful paper flower. These origami flowers can be used as decoration or for anything else that you like best. The master class presented from the wikihow site you can see below on step by step photos. The instructions can be read on the website, link under the gallery.


https://i.expert-h.com/en/iz-bumagi/samye-legkie-tsvety#sigFreeId3ef4840f17
How to make an easy origami tulip
Instructions for those who want to learn how to fold light origami tulip with two leaves.
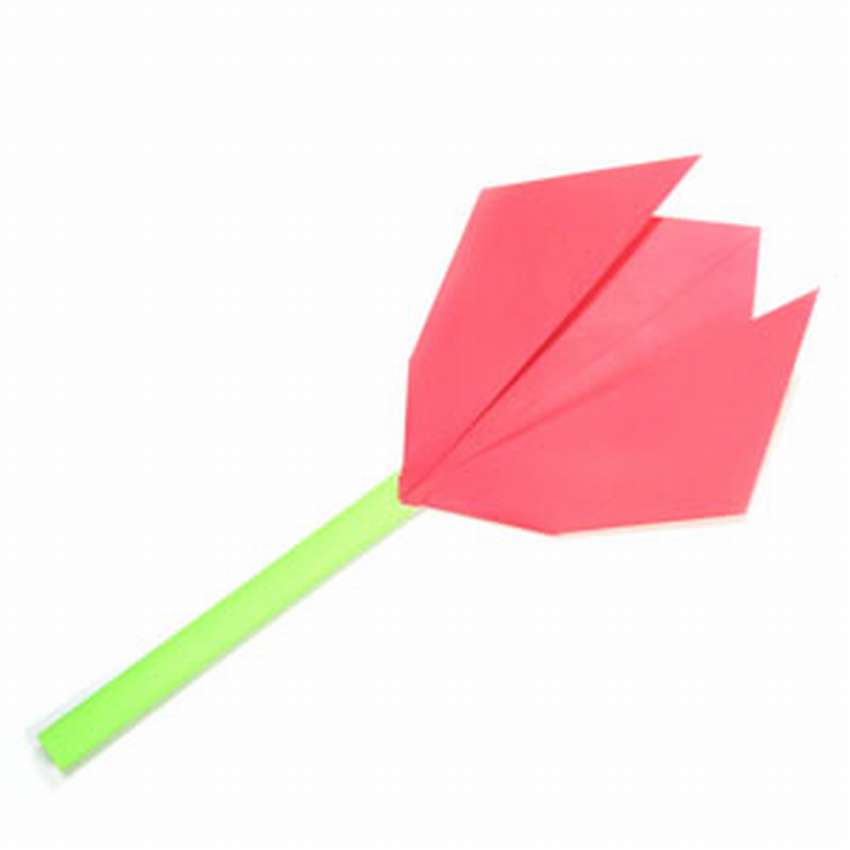
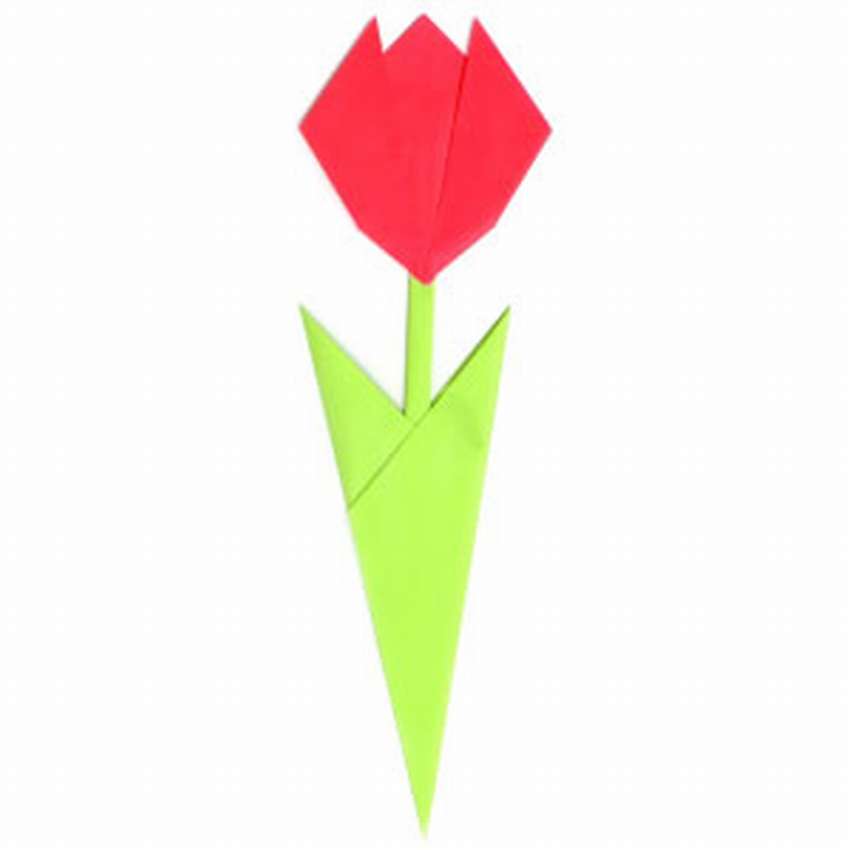 This is a simple craft. for beginners, so a step-by-step photo will be enough to fold this origami flower.


https://i.expert-h.com/en/iz-bumagi/samye-legkie-tsvety#sigFreeIdd70538b474
How to make mini flowers from napkins
 Looking for an idea for a budget party? See how to make a mini do-it-yourself flowers from napkins. Prepare 5 napkins, stack them and cut the center to length. It will be a blank for two flowers. Fold the cloth with an accordion, with folds of about 3 cm. Tie in the middle with thread or twine. Trim the ends to the shape of a petal. Separate the layers of napkins and “fluff in the center”. Walk in a circle until all 5 layers are fluffy. The napkin breaks very easily, so be careful, but even if you break a little, do not worry. No one will ever notice! Repeat with a second stack of napkins to make a second flower! Voila! You have 2 beautiful miniature flower made of napkins!


https://i.expert-h.com/en/iz-bumagi/samye-legkie-tsvety#sigFreeId58d201221f
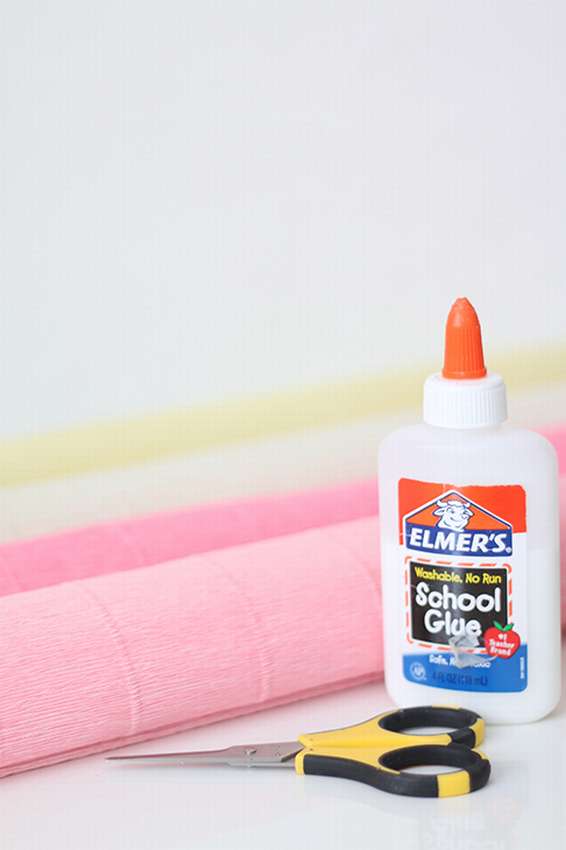
Corrugated Paper Water Lily
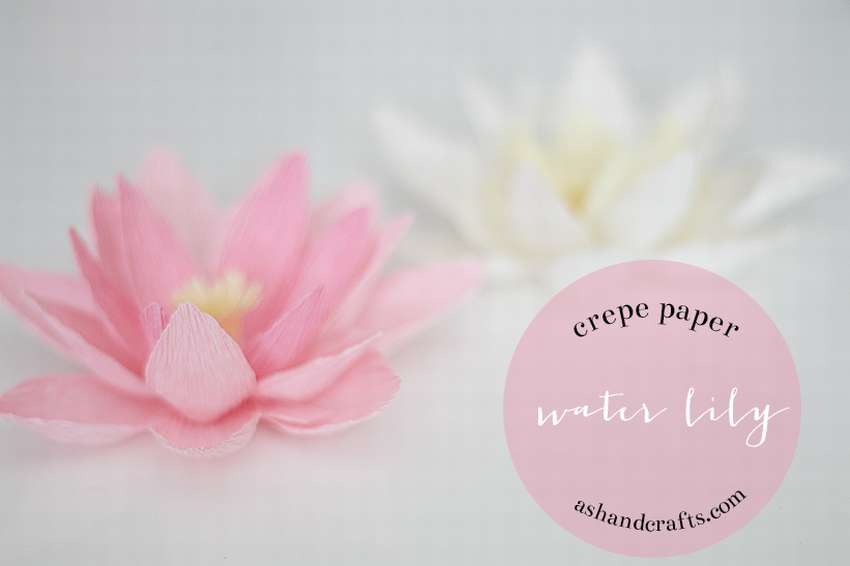 If you are looking for instructions on how to make water corrugated paper liliessee this example. The technique is not complicated: form a petal and glue it on a circular base in layers. This guide will be very simple. Consumables: corrugated paper, scissors, glue. Also, prepare a small piece of cardboard for the base - cut into circle with a diameter of approximately 5 cm.
 First you need to chop corrugated paper into strips. You will need about 20 bands. When you advance in layers, crop the petals so that the widest ones are outside, and the narrowest inside center. Using the thumb pad, pull out the corrugated paper at the base of the petal before it tapers. The petal should be in the shape of a bowlbut do not need to do this for the petals in the first layer. Make a small slot at the base of the petal, where the photo is drawn black dotted line. Glue one valve over the other. The more you overlap the flaps, the straighter the flap will be. Stick the outer layer to the base of the circle. Add a second layer of petals. You can add as many layers as you want. To make the center you need strip of paperapproximately 8 cm wide and 1.5 cm high. Carefully make a 3/4 notch strip.
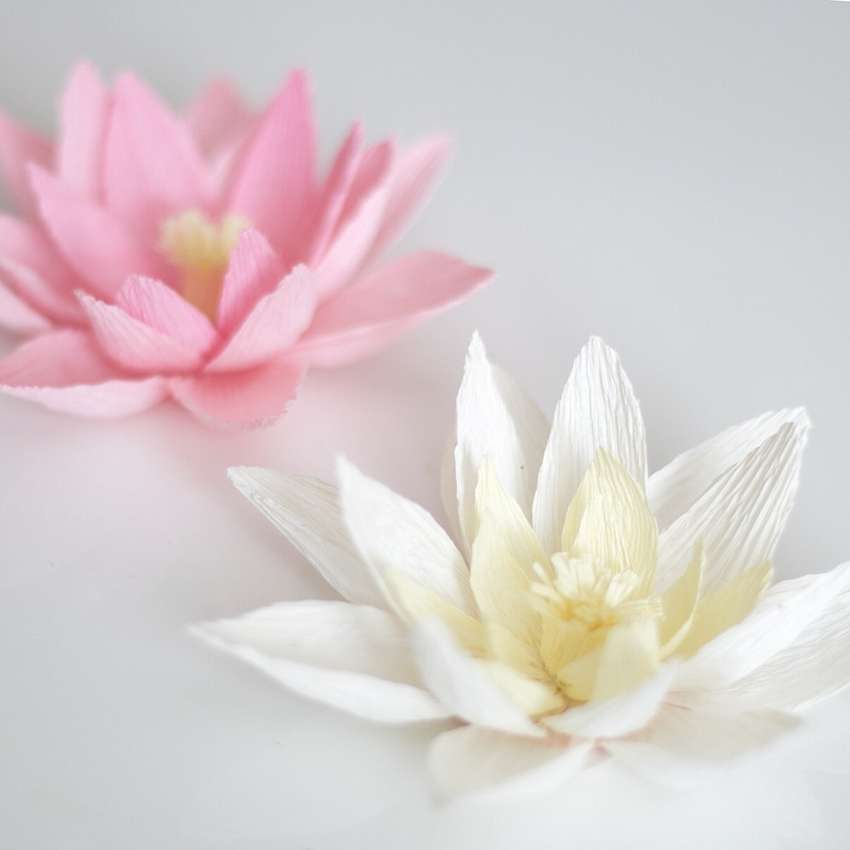 With your fingers, slightly curl the edge away from you. Then roll the strip of paper up and apply a little glue. Spread the edges to create a center, and then glue it to the flower. And watery corrugated paper lily ready! BONUS: Using the same method, you can also do corrugated paper lotus flower. You just need to trim the petals so that they are wider and shorter than the petals of a water lily. If you have any questions about step by step photo, full instructions can be read on the site.


https://i.expert-h.com/en/iz-bumagi/samye-legkie-tsvety#sigFreeId5d522b7e86
Colored paper hyacinth flowers
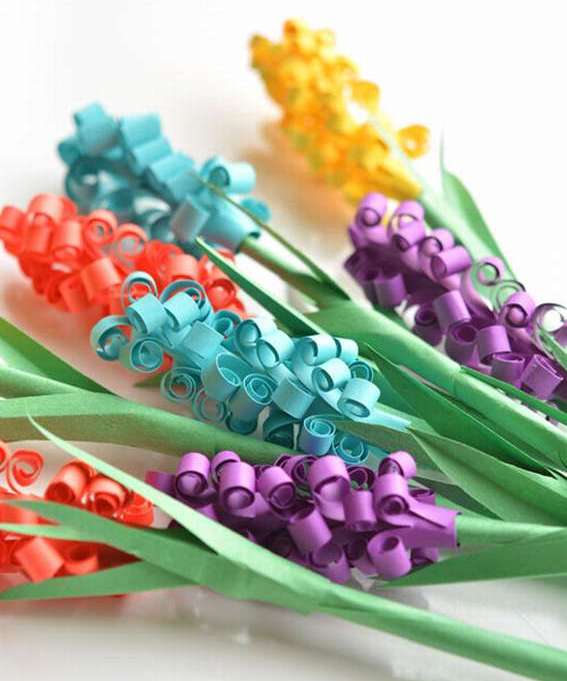 A good way to cheer up on cold autumn days is to do beautiful flowers from colored paper, eg, hyacinths! Not worse than roses or tulips. They look a little tiring, but make paper hyacinths not so difficult. By the time you make three pieces, then you will need only about 5 minutes per flower. And most importantly, these paper flowers look so bright and fun that it is definitely worth the effort! Master class look below on step by step photosIf you have questions, detailed instructions on the site are always at your disposal.


https://i.expert-h.com/en/iz-bumagi/samye-legkie-tsvety#sigFreeId5fef8fb1f4
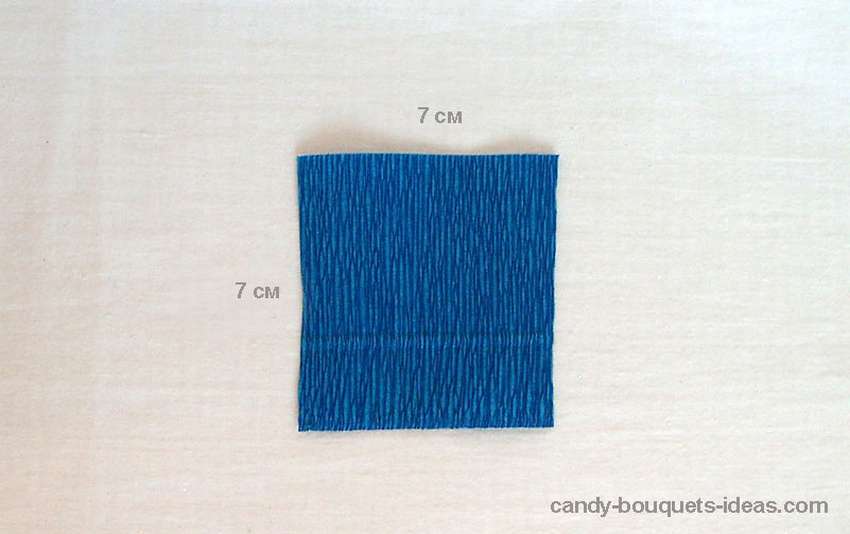
Cornflower with corrugated paper candy
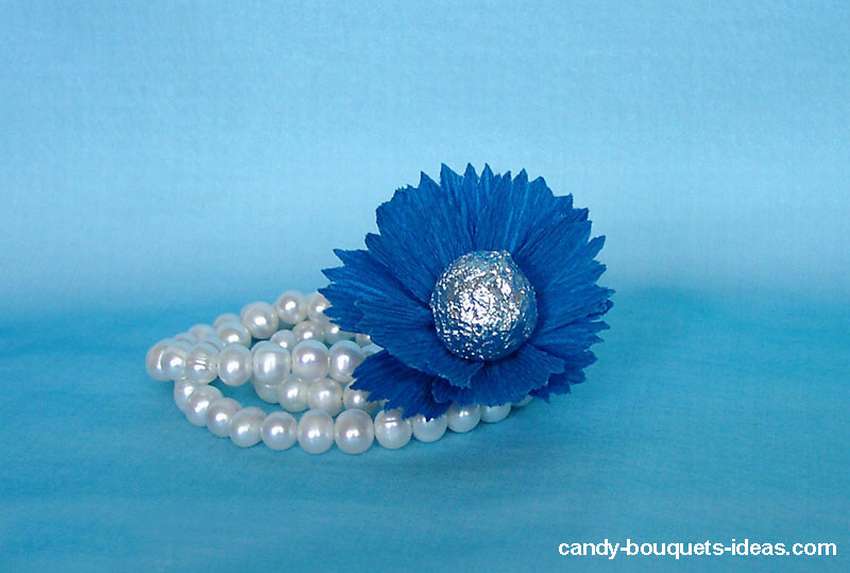 For a flower you will need: blue corrugated paper, silver paper with a metallic tint for candy. Cornflowers from paper can be done easily and quickly. Cut 3 blanks from blue corrugated petal paper (7 x 7 cm). Cut a beautiful hem along the top edge with nscissors for cuticles. Then make cuts as shown in the photo. Stretch the petals in the middle, give them boat shape.
 Make small cuts on each petal of approximately 5 mm. Make from wire candy blank. To wrap the candy, we need crumpled silver paper with a metallic tint. Cut the workpiece 10 x 10 cm and wrap the candy. Lock the first line of petals with thread. Then, in the second row, insert the petals between the petals of the first row. Your paper cornflower with candy ready. Enjoy it!


https://i.expert-h.com/en/iz-bumagi/samye-legkie-tsvety#sigFreeIdcaca903548
Flower from coffee filters
 Coffee Filter Flowers make no harder than ordinary paper. Here are the main things that you will need: coffee filters, scissors with several, scotch tape, thin wooden sticks or wire. Flower consists of two parts - pompom in the center and petals. Make a flower simple and inexpensive, look step by step photos, the site has instructions, so it’s in your hands and a successful craft.


https://i.expert-h.com/en/iz-bumagi/samye-legkie-tsvety#sigFreeIdb5bef9da68
Paper magnolia flowers
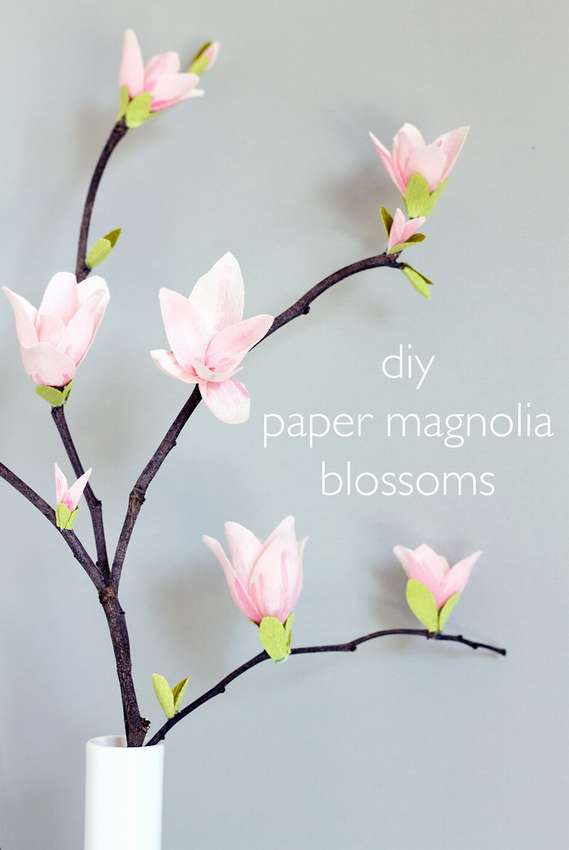 Flowering trees, this is the best that spring gives us. Their color announces that the winter is over and the bare branches are covered with beautiful flowers. Even after they have finished flowering, fallen petals adorn the ground. Unfortunately, flowering tree branches will not stand in a vase for a long time. This project is designed so that you can independently make simple flowers out of paper, in this case flowering branches of magnolia. They will bloom for you all spring, or even several years, if you want.
So, first cut two pieces from white and light pink crepe paper. Spray glue on each side (do it outdoors or in a well-ventilated place above the newspaper) Squeeze the two parts together, making sure the paper folds lie in one direction. Make a few strokes on the pink side of the crepe. This is to emphasize the base of the petals. Let it dry.
Cut out crepe paper petals with grain going upright. Each flower needs 6 petals. Gently pull out the center and squeeze the base of each.
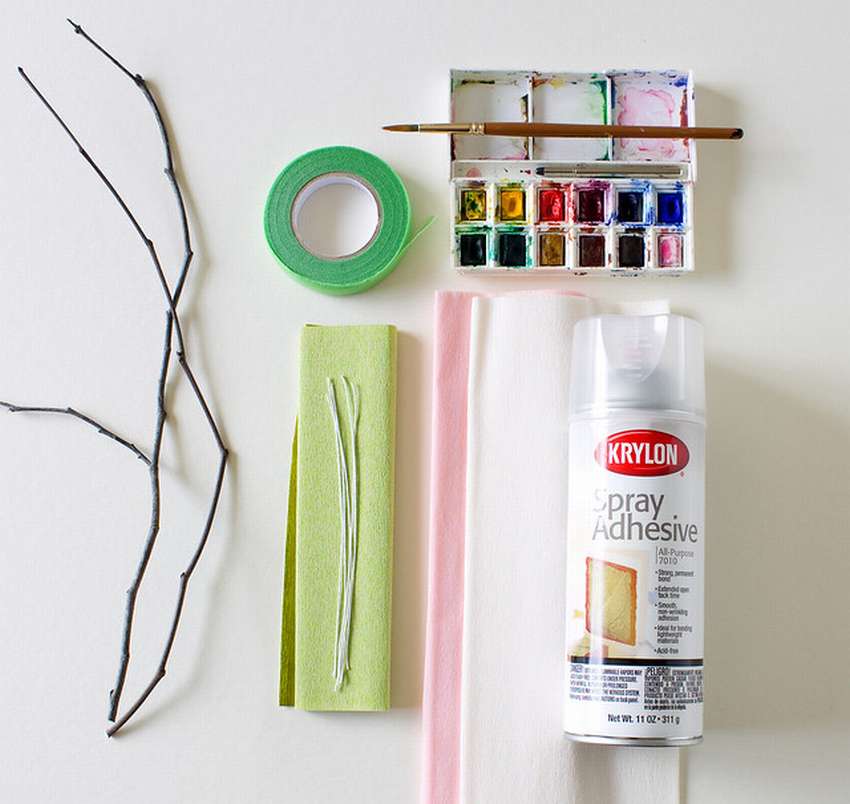 Bend the end of the wire more than a couple of times with pliers. Wrap the two petals around the wire, facing each other, with flower ribbon. Add two more petals facing each other, overlapping the first two, and then add two more. Gently fold the petals out. Wrap the wire around the branch and cut off the excess. For smaller flowers, bend the wire near the base of the flower and cut the wire. Apply hot glue to the branch. Cut a bunch of leaves, about 1.5 cm long. Hot glue the leaves around the base of each flower. Add a couple of little ones bunches of leaves and petals on a branchto make the buds. Arrange the branches in a simple vase and enjoy!


https://i.expert-h.com/en/iz-bumagi/samye-legkie-tsvety#sigFreeId5556a2e420
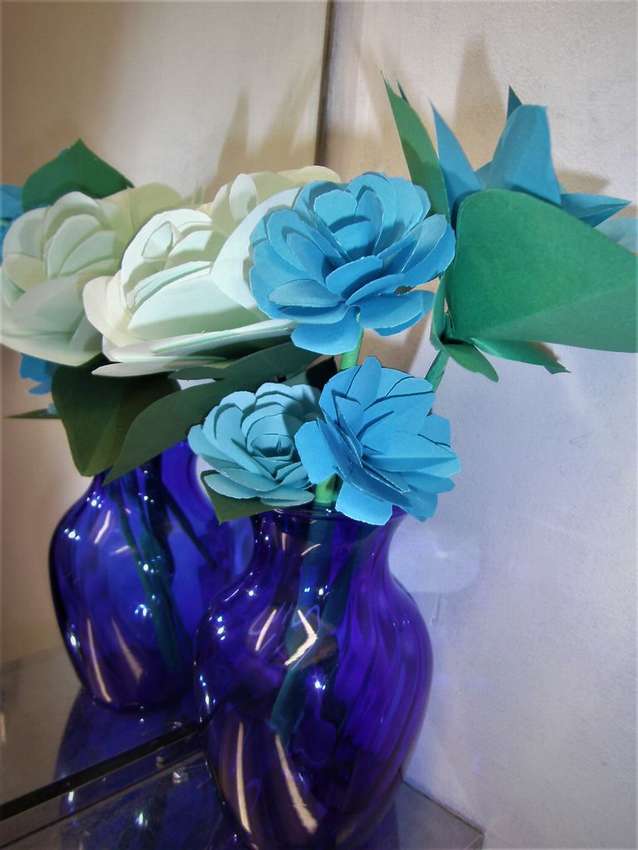
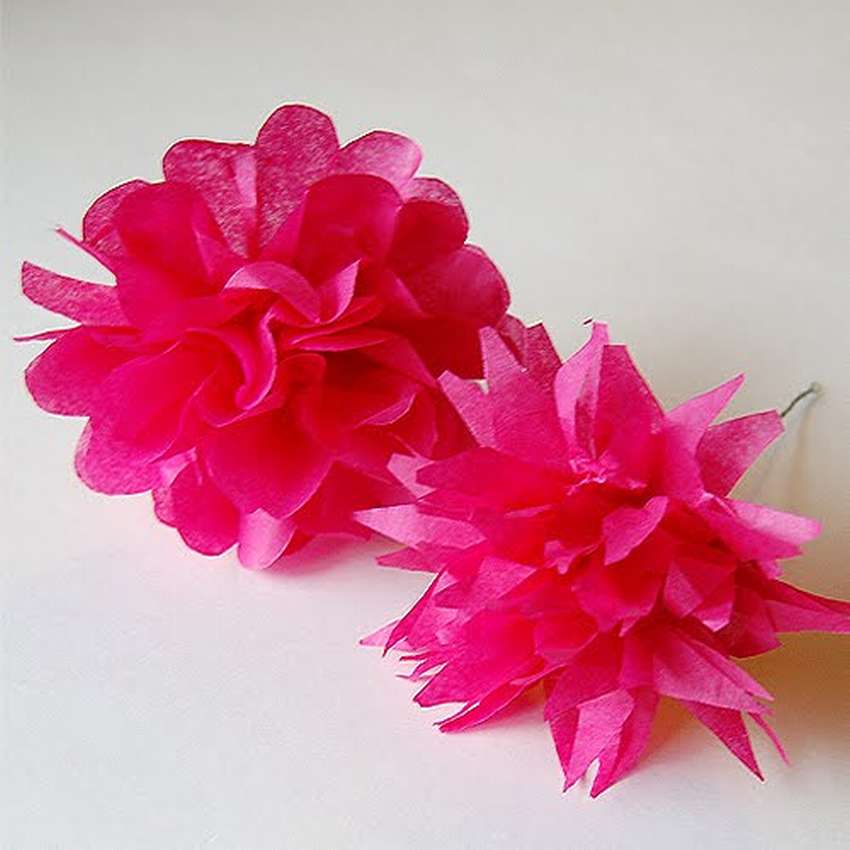
Here are a few more photos very light and simple colors of paper


https://i.expert-h.com/en/iz-bumagi/samye-legkie-tsvety#sigFreeIde10e46e1aa
Hello, I am the author of this article, so I look forward to asking questions for this article in the comments below, I will answer all !!!
If you have questions on another topic, ask them on our forum, we will answer you
- Two baskets of paper in 5 minutes (Master class)
- How to make a simple and compact table for a milling cutter from plywood
- How to make a soft headboard tile (Instructions + step by step photos)
- Cinder block benches: a convenient bench in 55 minutes
- How to make a bed with a niche: saving space (Master class)