Garden path made of stone slabs (step by step photo)
 Stone slab garden walkway
A beautiful path made of stones can be used to visually separate sectors in the courtyard or in the garden, and at its end you can create a small oval area in which there will be a fountain, gazebo or bench.
Before you begin, you should be well prepared for the chosen place - clean it of weeds, stones and pieces of wood, bring it in line with other paths in the garden. Concrete, gravel and stone can be placed directly on well-prepared soil - other types of materials need a stable base. This can be achieved using sand, but there is a risk that it can be washed off under the paving stones or bricks, which will affect the stability of the elements and the entire path. To reduce this risk, the sand is on a 5 cm layer of gravel.
Step by step: first, carry out preparatory work, then lay stones and fall asleep with a layer of gravel, perennial plants are planted along the track, which over time will smooth the boundaries of the track.
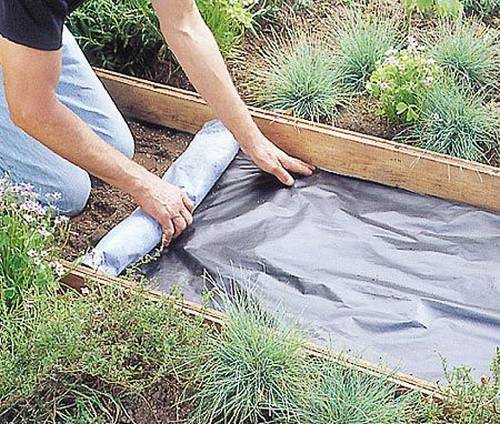
Step 1
First, you can specify the boundaries of the track by placing thin wooden slats along the edges. If desired, the lower layer of the track can be lined with a special cloth (you can find in specialized stores for home and garden) - this will help prevent sand from mixing with the soil. The ends of the lining should be tucked under the wooden battens.
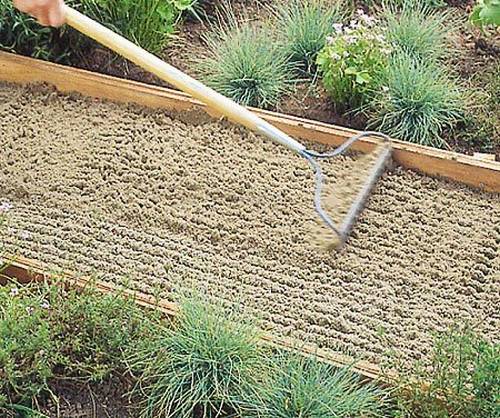
Step 2
Pour enough sand so that the mold is covered with a 5 cm layer. Level it with a rake or a plank. If you are afraid that the rain will wash the sand, sprinkle a pre-5 cm layer of gravel (on the lining).
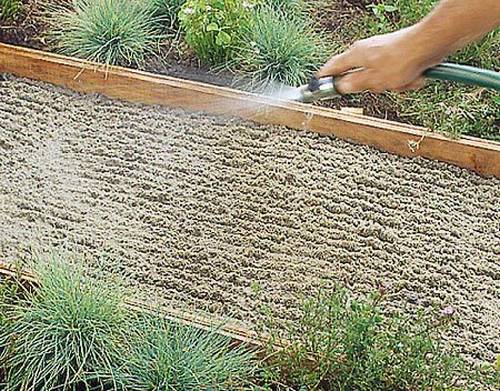
Step 3
Moisten an even layer of sand with water from a garden hose with a spray, so as not to wash out the sand.
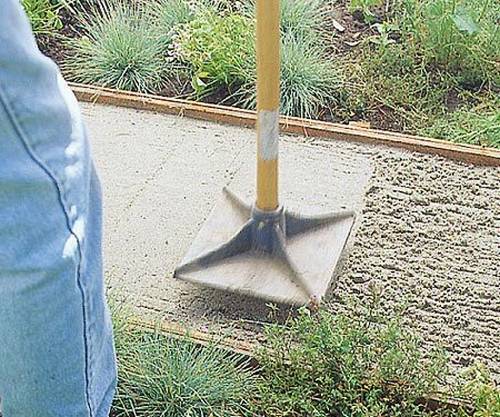
Step 4
When you have finished leveling the sand, start ramming it with a roller. To achieve the desired effect, you can walk on the wet sand several times to compress it well - so that you get a more stable and durable foundation for stone tiles.
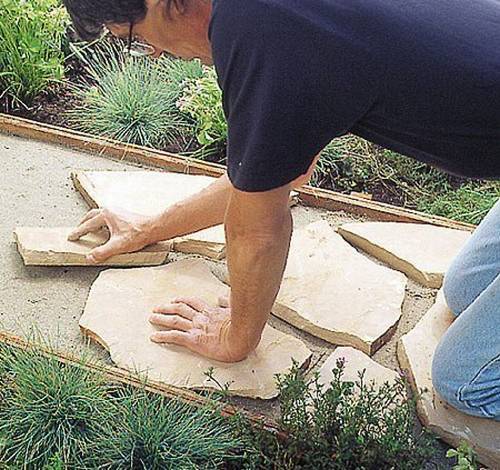
Step 5
On the already prepared track, begin to lay the stone, slightly pressing it into the sand so that they do not move when walking. Leave a few centimeters of clearance between the plates, but not too much for the track to be stable.
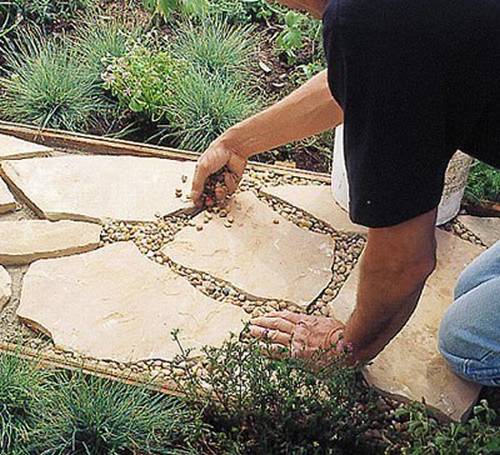
Step 6
To complete the track, fill the seams between the elements with fine gravel. If you want a harder surface, use concrete instead of gravel.
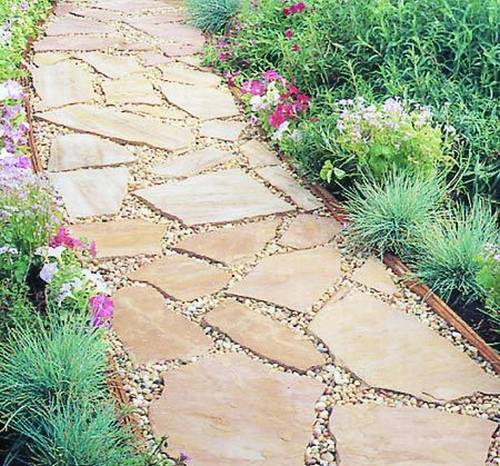
This is how our path will look when we all finish
Good luck !!!
- Brick grill: 44 drawings, 18 projects + photos
- Collapsible barbecue: 50 drawings, 20 master classes +300 DIY photos
- ✿ Flowerbeds:> 34 turn-based master classes + photos (248 ideas) - do-it-yourself
- DIY sauna in the apartment: bathroom, balcony, storage room. Projects and photos
- Shelves in the bath with your own hands: +200 photo. Drawings of bench benches in the steam room