How to make a wooden fence lattice Favorite
 how to make a wooden fence
Accessibility and environmental friendliness are the main advantages of a wooden fence. The ease of processing allows you to create different types and forms, so the fence plays not only a practical role, but also an aesthetic one. To make do-it-yourself wooden fence lattice not at all complicated and relatively cheap.
Of course, if you do not have practice in the manufacture of wooden fences, you can buy a finished product. But it’s worth trying to do it yourself, as special knowledge is not required, but experience is a matter of time.
But such a fence will look very nice, especially if you plant climbing plants along the fence, then around the site you will have a flowering hedge, which is much more beautiful than a dull picket fence.
You can fix the fence on separate posts or in a combined version, for example, make a solid foundation, and install trellises on top. Then the fence will turn out to be more capital, and also the wooden elements will be away from the ground, which will protect them from moisture. Of course, such a design will cost more, but then it will last much longer.
If you install it on separate supports, then any material is suitable for them - wooden poles or metal pipes of a small section. Lightweight construction and massive supports are not required, except for decorative purposes, for example, elegant brick columns.
In general, set up poles that suit you, concreting or ramming tightly.
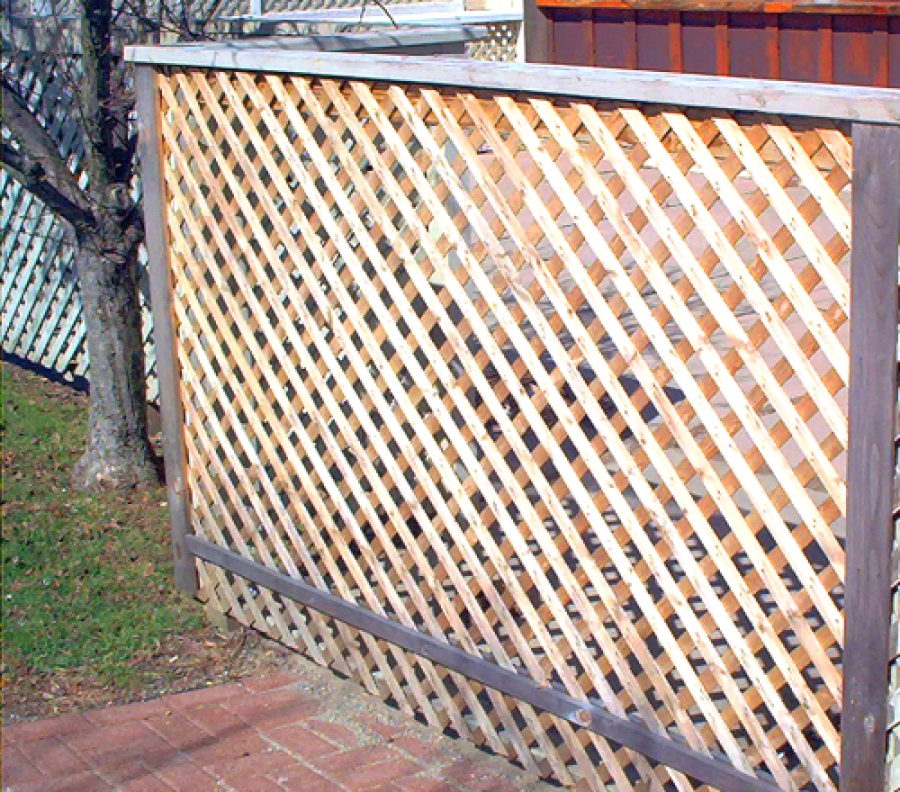
The fence grille can be made in sections or immediately attached to the supporting posts on the longitudinal crossbars. Fasten them to the supports with self-tapping screws or insert them into the prepared grooves. At an angle of 45 degrees, set one row of planks with a distance to the width of the plank, and the second row perpendicular to the first. Where they fit, hammer in nails. It is possible to fasten with self-tapping screws, only this is superfluous work, there is no load in this place, it will hold well on nails.
Planks can also be mounted vertically, this is how you like it more. It is better to nail in already prepared planks, treated with an antiseptic and painted.
Hello, I am the author of this article, so I look forward to asking questions for this article in the comments below, I will answer all !!!
If you have questions on another topic, ask them on our forum, we will answer you
- Two baskets of paper in 5 minutes (Master class)
- How to make a simple and compact table for a milling cutter from plywood
- How to make a soft headboard tile (Instructions + step by step photos)
- Cinder block benches: a convenient bench in 55 minutes
- How to make a bed with a niche: saving space (Master class)