Cages for rabbits in the country 36 photos Favorite
 rabbit cage
Rabbits in the country, they say, are convenient to keep: they do not require constant care, if only there was something to eat. These animals are neat, breed quickly and can bring good income.
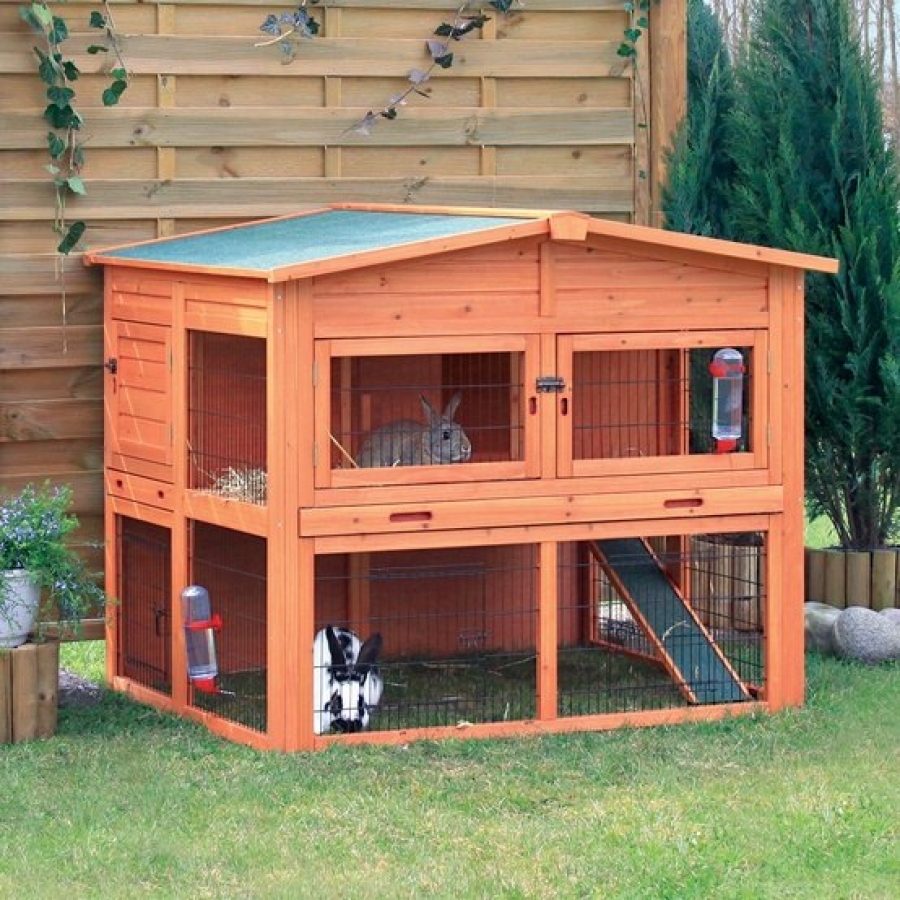
But these cute animals need housing, like the other inhabitants of the cottage. Farm stalls offer good rabbit cages. But the owners sometimes want the rabbit house, among other things, to be perceived as part of the landscape design of the cottage. Do-it-yourself rabbit construction can be a way out. One of the options in the photo is a whole small estate for rabbits, with the possibility of walking.
 In general, rabbits, although creatures are gentle, requiring special conditions, but it is a pleasure to breed them, in terms of positive emotions. Just need to remember, these fluffy animals in a box from under the TV or a dog kennel will not be able to live. Rabbits need a special aviary, made taking into account all the nuances. The design and size depends on the number of animals and whether you are going to breed young offspring.
If you make a cage for two adult rabbits, you can take this scheme as a basis, the dimensions sufficient for the content are indicated here.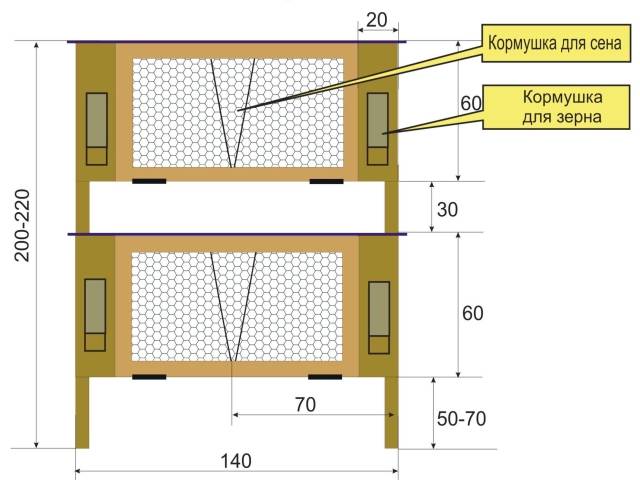
It is advantageous to make two-tier rabbitry, it saves space and it is easier to take care of animals.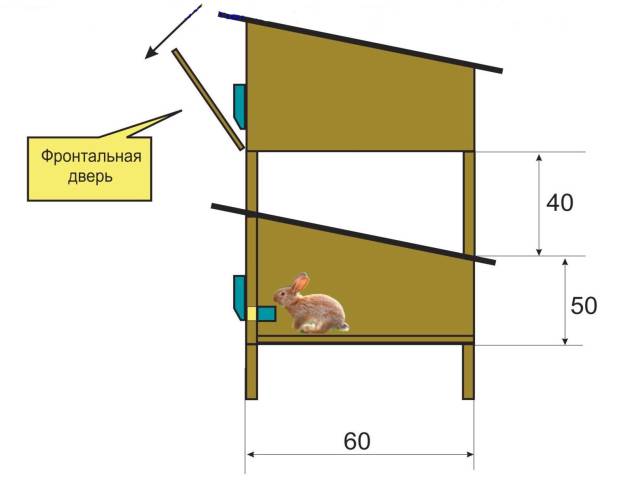
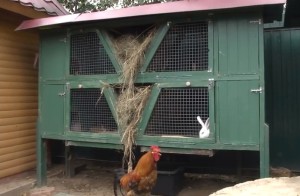
If your plans include group maintenance of young animals, then an appropriate design and size are needed. However, it is not so difficult to build a cage, although they are of different types: for fattening, for young animals, maternity, but for the first time, if you are not going to professionally engage in rabbit breeding tomorrow, you can make a universal cage, as in this photo.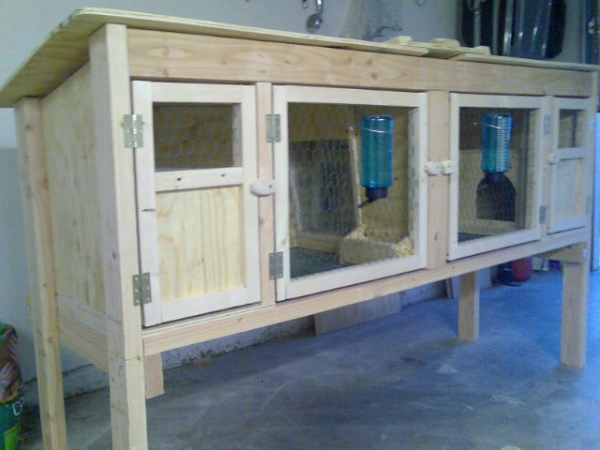
Of course, if necessary, you can buy a cage, but then you have to look for a place under it. And if you do it yourself, then you can do it under the existing place. And in general, what he made is the best, so get the tools and work.
We start with the selection of material, the main part is wooden, we also need an iron mesh with small cells, perhaps metal corners for fastening, but only on the outside. Inside, it is better not to use iron parts, and the wooden parts must be carefully sanded. Draw a diagram of the future aviary, you can take this as a basis.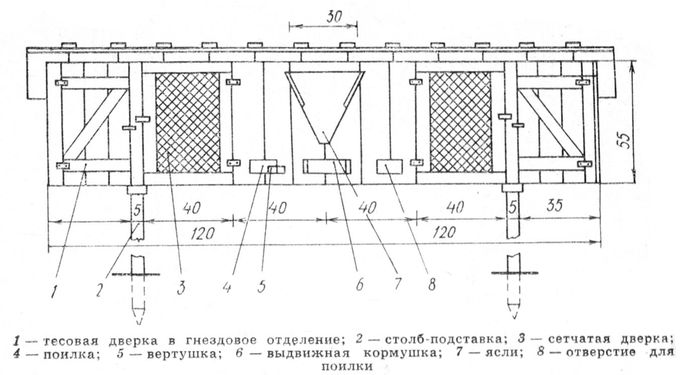
If we make this size, then we will need 10 three-meter bars, three meters of linear mesh, two plywood sheets of one and a half meters (it is better to take thicker, from 10 mm), self-tapping screws and the corresponding tool.
Operating procedure
- assemble the frame.
- we attach a metal mesh to the aviary floor
- from the plywood, we cut out the wall and fasten the screws to the frame.
- then inside the frame we install vertical bars, as in the photo and we attach plywood walls with a manhole to them
- fasten the bars to the wall under the lid of the box for the maternity ward;
- fasten all the details with screws.


https://i.expert-h.com/en/uchastok/kletki-dlya-krolikov-na-dache#sigFreeIdede5f7fab7
Now we need to install a feeder in the cage
- first you need to install the base, for which we fasten vertically the bar in the middle of the aviary;
- we make two trays, 30 centimeters wide and 7 high for granules and for hay;
- fasten the base of the trays across the bottom to the guides;
- we cut out the plywood frame for feeding;
- in size, the lower part should fit in the tray, the upper should lie between the guides (see photo)
- we make a hay feeder from metal rods and wooden planks
- we sew up free space with plywood.


https://i.expert-h.com/en/uchastok/kletki-dlya-krolikov-na-dache#sigFreeId816aa1dbd0
- cut out the lid for the cell with a lap;
- make a hole above the feeder with a special flap;
- according to the size of the cage, we make frames for the doors, we attach a grid to it and we surround it with slats;
- for the maternity ward, we make deaf doors with a window in the upper part.
- we install drinkers in the cells, fasten the locking bars, check, or all the screws of the screws are recessed.


https://i.expert-h.com/en/uchastok/kletki-dlya-krolikov-na-dache#sigFreeId8bfd3b1179
The cage made by us is suitable only for indoor premises, so that it can be located in the open air, a number of improvements must be made.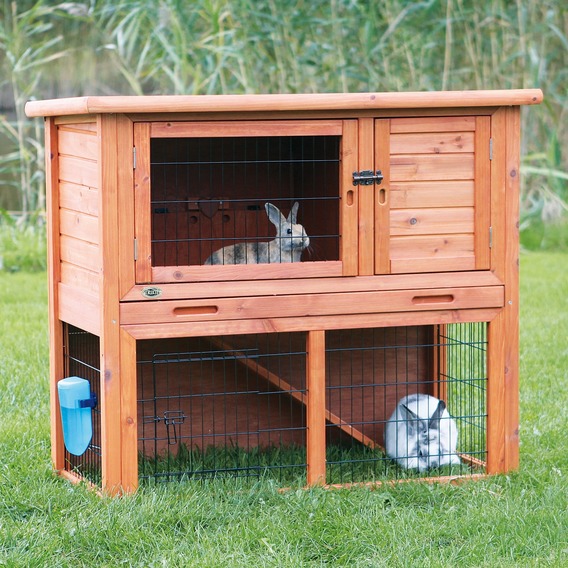 If you are not going to breed young animals for the first time, and you just keep several adults, you can make an ordinary cage. It can be placed indoors, in a barn or under a canopy, and can be outdoors.
The main thing is that the aviary meets the standard requirements:
- It should be spacious;
- the enclosure should have a shaded side and a spacious entrance;
- if the cage is in the open air, it must have a reliable roof, a dry room, this is the health of rabbits;
- the cage must be made of natural material, that is, wooden;
- all surfaces inside should be smoothed, holes for screws must be drilled in advance to avoid splitting of wood.
These step-by-step pictures show how to make a simple, portable small-sized aviary.
The order of assembly of the aviary (diagram)
- You make a basic frame, you can take other sizes, optimum proportions are simply given here to make it easier to navigate.
- Rabbits love to dig, so they can easily dig and run away, they are also partisans, so you need to make a wooden floor in the aviary. If you do not want to deprive animals of the pleasure of digging in the ground, you can make part of the floor open, and bury the net under the cage, at a depth of 30 centimeters, to avoid undermining.
- Cut the ramp and floor panel out of plywood in advance, secure the cross member and install it in the groove, as shown in the figure below.
- To install the grid and side walls, straps are attached to the frame. For the grid, you can make special hooks and also attach to the slats.
- Then install the internal partition with a hole.
- To close the edges of the cage, we install finishing strips.
- Install the door. Stainless steel hinges are mounted on the outside, also do not forget about the bolts. In the manufacture should take into account the possibility of swelling of the wood, especially if the cell will be on the street, so the dimensions should be subject to the compensation gap.
- We install the top cover, make sure that its size overlaps the walls, that is, there should be a visor, not less than 10 centimeters. The cover is attached to the frame by two hinges.
- A very important point is the waterproofness of the roof. You can use a special film or bitumen coating. The lid area is small, so you can use any waterproof material, even metal, it will just be inconvenient to use. It is best to take a self-adhesive bitumen coating and fix it on galvanized brackets. Remember to cover the edges of the roof with material.


https://i.expert-h.com/en/uchastok/kletki-dlya-krolikov-na-dache#sigFreeId4673dabed2
This is a standard version of a normal cage, which can be placed outdoors or indoors for one or more animals.
In this collection you can see what are the options for aviaries in general.


https://i.expert-h.com/en/uchastok/kletki-dlya-krolikov-na-dache#sigFreeId51c26e3bf3
The shapes may vary, but the design is basically the same
Hello, I am the author of this article, so I look forward to asking questions for this article in the comments below, I will answer all !!!
If you have questions on another topic, ask them on our forum, we will answer you
- Two baskets of paper in 5 minutes (Master class)
- How to make a simple and compact table for a milling cutter from plywood
- How to make a soft headboard tile (Instructions + step by step photos)
- Cinder block benches: a convenient bench in 55 minutes
- How to make a bed with a niche: saving space (Master class)