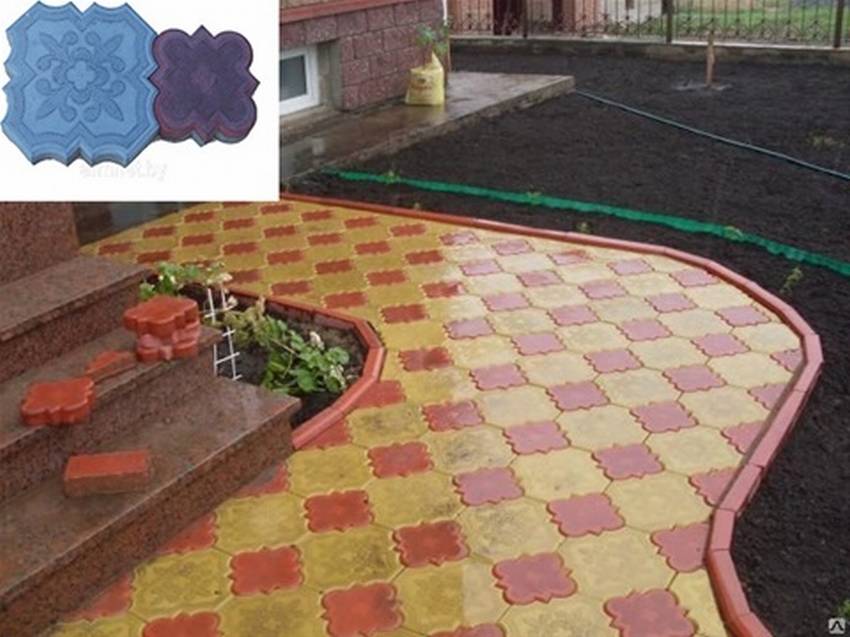
Paving slabs Clover Krakowski. Kinds. Styling photo
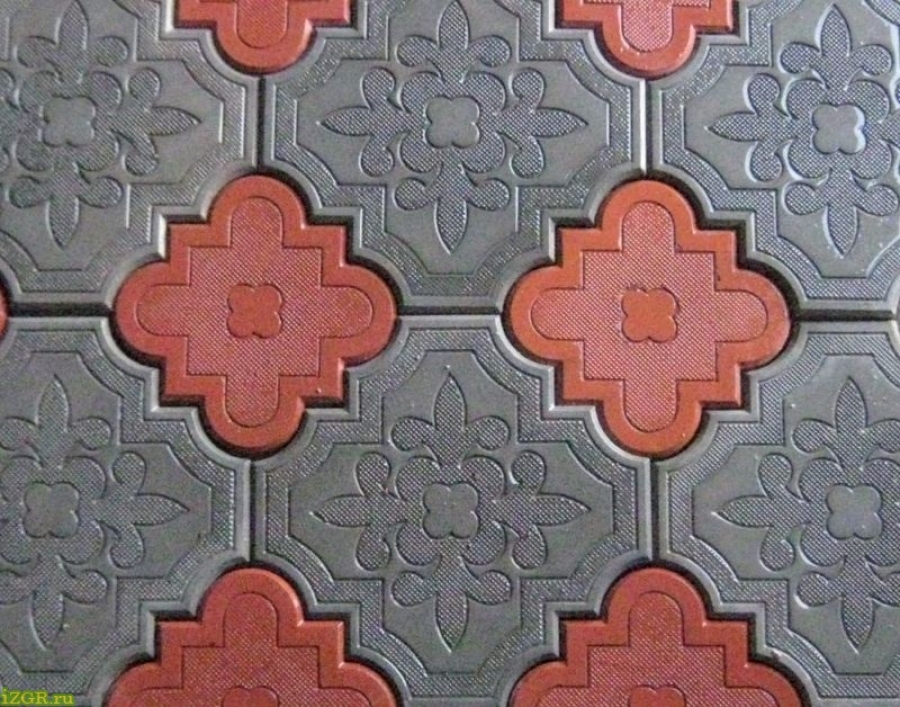 Paving slabs: Krakow clover (stacking photo)
Here we look at the types of paving slabs "Clover": smooth, karkovsky (gzhelka), embossed. Color, shapes, styling types. Everything will be accompanied by examples with photo galleries and diagrams. We will analyze the methods for making such tiles with our own hands, and also get acquainted with the laying methods (step by step). Let's look at 10 photo examples of laying tiles on steps, walkways, sidewalks, parking lots, in cottages and private homes. We will announce the average prices in Russia for finished tiles and forms for making.
Sizes of paving slabs "Clover"
Dimensions of paving slabs clover:
- large tile: length: 295 (mm), width: 295 (mm), height: 60 (mm);
- small tile: length: 210 (mm), width: 210 (mm), height: 60 (mm).
Sizes of other formats:
- length: 264 (mm), width: 220 (mm), height: 60 (mm);
- length: 295 (mm), width: 295 (mm), height: 30 (mm).
50 photos of stacking types of Kakovskoy Clover


https://i.expert-h.com/en/trotuarnaya-plitka/klever-krakovskij#sigFreeId0021f98e8f
4 (popular) clover tile options
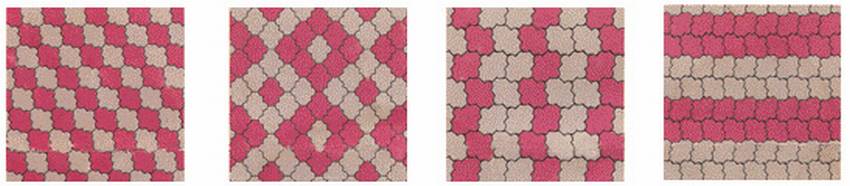
Clover


https://i.expert-h.com/en/trotuarnaya-plitka/klever-krakovskij#sigFreeId3438840300
Clover relief


https://i.expert-h.com/en/trotuarnaya-plitka/klever-krakovskij#sigFreeId610a937a8f
Color clover
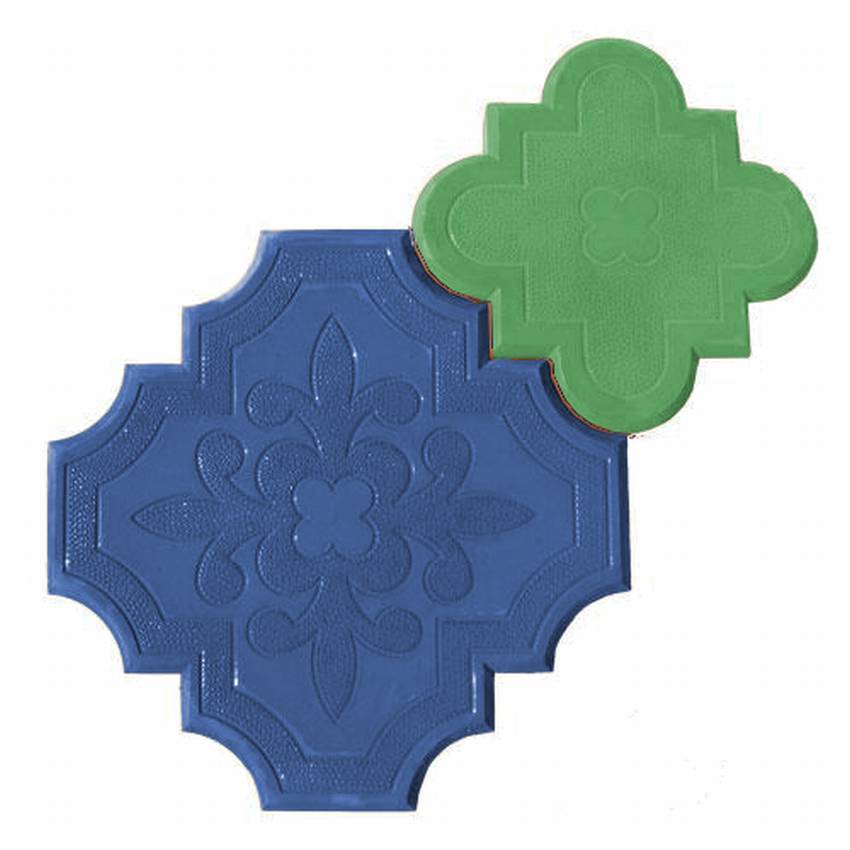
Photo colors


https://i.expert-h.com/en/trotuarnaya-plitka/klever-krakovskij#sigFreeId23ccf59895
Photo gallery with examples of laying tiles colored clover


https://i.expert-h.com/en/trotuarnaya-plitka/klever-krakovskij#sigFreeIdcbc71a27ff
Steps from paving slabs "Clover" (5 photos)
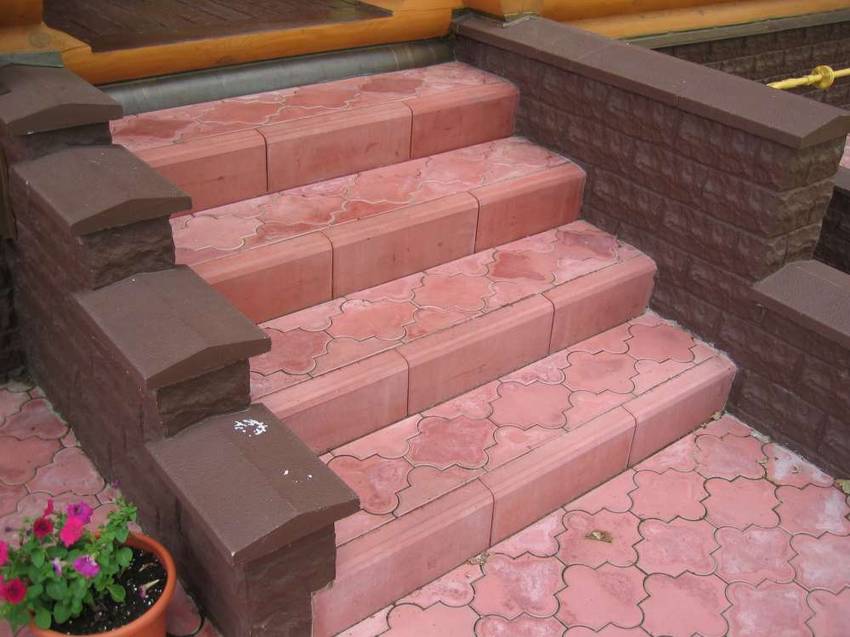
Here is a photo of the steps of the porch, lined with Krakow clover. As you can see, a whole tile is laid in the middle of the step, and at the edges there is a finished extension (factory halves of tiles), i.e. when choosing the size of the steps, it is advisable to make sure that you do not have to cut the tile (and use only whole).
Photo Gallery:


https://i.expert-h.com/en/trotuarnaya-plitka/klever-krakovskij#sigFreeId204a54e744
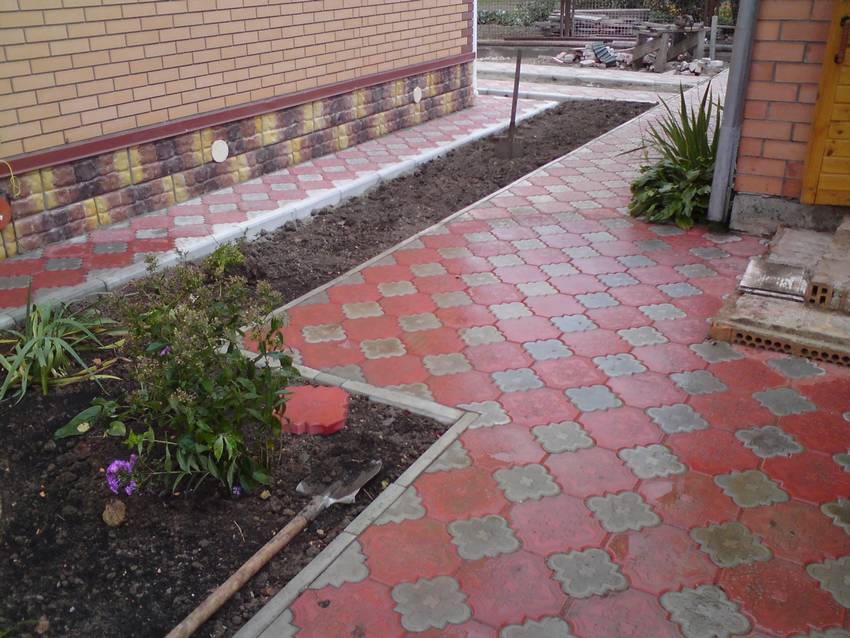
11 photos of pavement paths Clover
 Here you can evaluate how beautiful such paths look in cottages and in places of rest. There are interesting ways to lay colored tiles. See how the craftsmen made the curbs and beat the corners when paving.
See a collection of ideas from 11 photos


https://i.expert-h.com/en/trotuarnaya-plitka/klever-krakovskij#sigFreeIdb6c6cb001e
primary source)
Blind area from paving slabs clover (8 photos)
 From gzhelki you can cultivate any surface of your country house, even the blind area. Check out 8 interesting examples collected in the gallery below. Practical. Handsomely.
A selection of 8 best practices


https://i.expert-h.com/en/trotuarnaya-plitka/klever-krakovskij#sigFreeIddb6489a225
primary source):
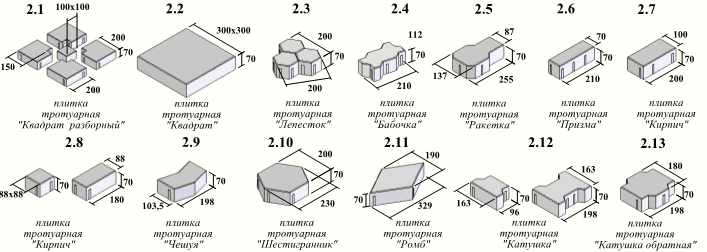
Types and sizes of paving slabs
How to make paving slabs
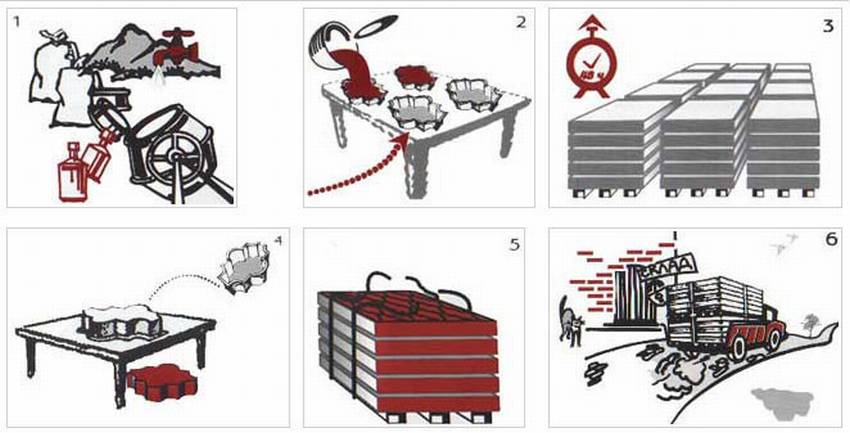
Tile Production Scheme:
- Mixing concrete mix.
- Composition: cement, sand, water
- It is better to choose cement M500 - for durability.
- Water and sand should be cleaned. Note: small pebbles in the sand do not play a big role in strength, they can be left (affects only the texture)
- Additives: to give stability to the tile, we recommend adding to the mixture plasticizers
- For uniformity of the mixture with stirring, use a perforator with a nozzle mixer or a concrete mixer
Kneading process- Turn on concrete mixer
- pour sand
- pour cement
- Only then start adding water
Caution: Excessive water makes concrete more fragile. - Add water-repellent and reinforcing components for strength.
- To add color, add inorganic color pigments.
- The mixture is ready if:
- lumps ceased to form
- the mixture has a uniform color
- Formation of tiles on a vibrating table.
- Forms should be greased with oil (can be machine)
- Tip: to make the tile stronger, add reinforcing elements (rods, metal wire or mesh) to it.
- Half fill the mold
- Lay the wire mesh
- Fill the remaining volume of the form so that the grid is in the middle.
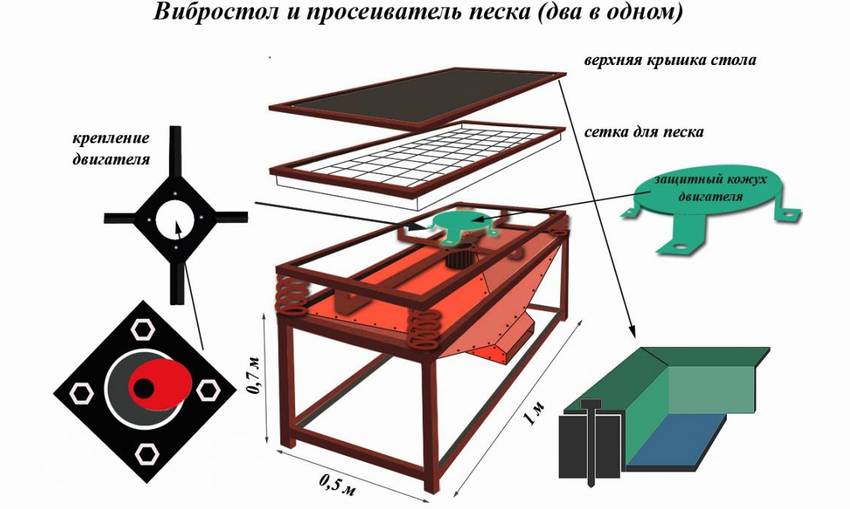
- Give the form a vibration
There are 3 ways !!!
- Use a proprietary vibrating table
- Vibrostol can be made independently (see video)
- If there is no vibrating table !!!
- Place the mold on a hanging shelf or rack
- Perform a rhythmic tap with a mallet on the design of the shelf.
- This will create a perfectly acceptable vibration for cement compaction.
- Aging products.
- Shelter forms with concrete polyethylene
- To sustain in this condition from 2 to 3 days
- Attention: to prevent cracking it is necessary to maintain high humidity, for this you should periodically water the already hardened solution in forms with water !!!
- Excavation of the finished tile.
- Pull the edges of the form
- Shake out contents
- Place the tiles for a couple of weeks on drying in the shade of the open air
- Tile packing.
- Shipment and sale (for large industries).
Where to get forms for tiles?
- You can make it yourself
- Purchase ready
- One form is enough for 200 tiles,
- Therefore, you should immediately buy a batch of 10 or more forms
- Average cost per form from 30 to 300 rubles (depends on size and complexity)
- You can reuse plastic containers
- Plastic food containers
- Plastic cans
Typically, these containers make beautiful bricks with rounded shapes.
Vibrating table for paving slabs + sand screener do it yourself
- Brick grill: 44 drawings, 18 projects + photos
- Collapsible barbecue: 50 drawings, 20 master classes +300 DIY photos
- ✿ Flowerbeds:> 34 turn-based master classes + photos (248 ideas) - do-it-yourself
- DIY sauna in the apartment: bathroom, balcony, storage room. Projects and photos
- Shelves in the bath with your own hands: +200 photo. Drawings of bench benches in the steam room