DIY wardrobe. 700 photos, step by step instructions
 do-it-yourself closet to the nursery
Need a new wardrobe in the nursery? Do not rush to the store, see 15 excellent examples of various models that can be easily done with your own hands. The design of children's furniture does not have the right or wrong decision, what you do yourself for your child will always be the best.
Children do not think that “my closet should match the color of the wallpaper”, they love the bright, colorful aspects that capture their imagination. Keep this in mind, and you will not be mistaken with the choice of which make a wardrobe for children. Of course, there are few examples in this article, but these instructions are more for inspiration. I hope you find some useful tips, and the drawings and step-by-step photos presented in the material will help you.
Children's wardrobe with open shelves
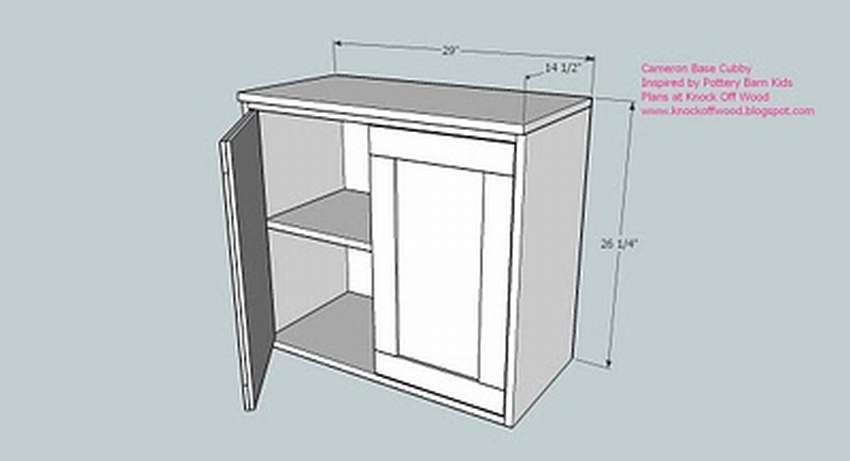
 Here is an example how to make simple wardrobe for kids room with open shelves and a metal door.
- Assemble the cabinet body as shown in the diagram.
- The lower, middle and upper shelves must be fixed, the rest can be adjusted or fixed at different heights.
- Attach the back using finish nails and glue.
- The lower lining is fastened on top with two finishing nails and glue. To cut a decorative pattern, you can use a jigsaw.
- Attach the edge of the middle shelf with screws.
- Fasten the crown.
- Make the door frames as shown in the diagram; if you have one, use Kreg Jig.
- Finally, fasten the metal plates with brackets.
The assembly order of the children's locker is shown schematically in step by step photos. To get more information, a link to the site is under the gallery.


https://i.expert-h.com/en/shkaf/detskij#sigFreeIdd78e83d602
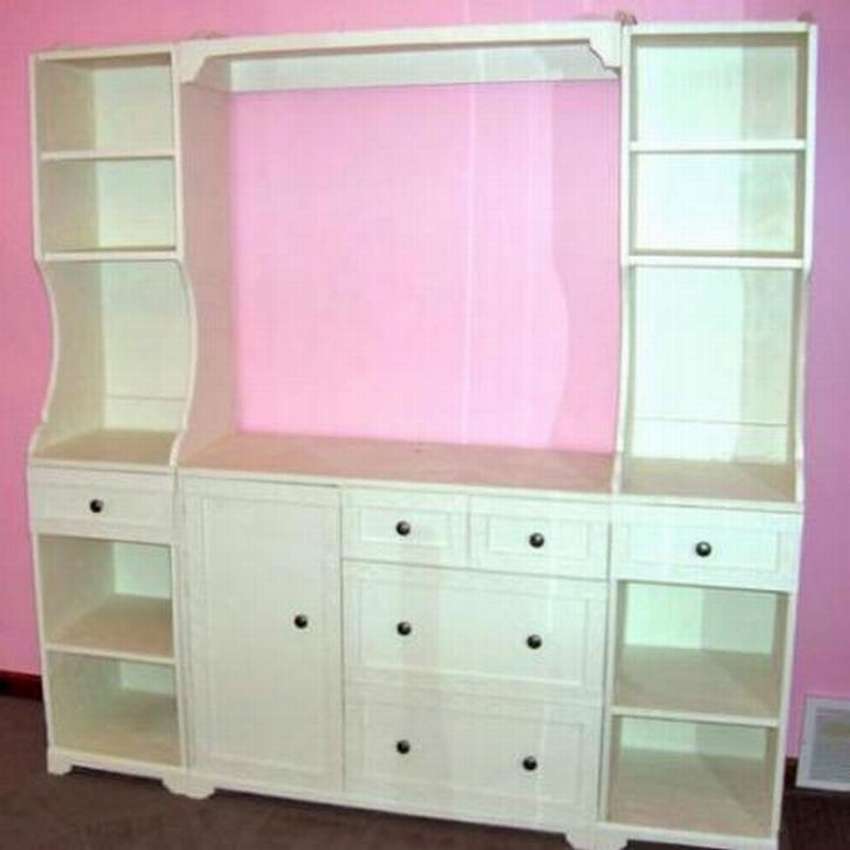
Wardrobe with drawer for children's room
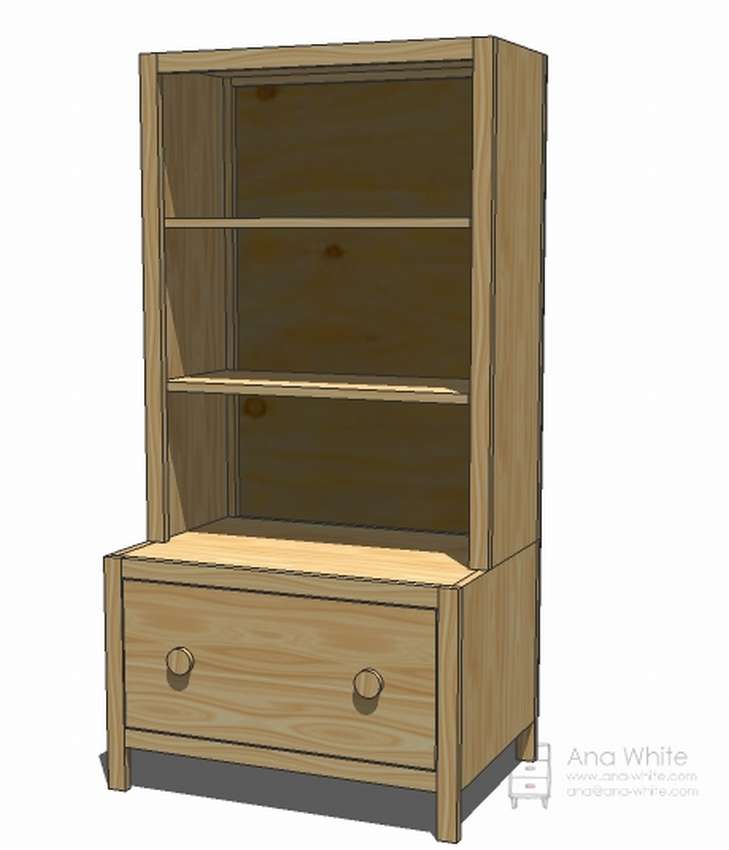 Practical wardrobe, everything is very simple and functional, a large capacious box is especially useful! Cabinet assembly and bottom drawer assembly shown on the diagrams.
In this case, the cabinet is made of boards, if it is unprofitable for you, you can replace some parts plywood. The bottom drawer is deep, you will need to use the slides of the side-mounted drawer.
List of materials and part sawing in size you can read on the site, the link is under the gallery.
Schemes in step-by-step photos with dimensions in inches, you just need Convert figures to centimeters. One inch is 2.54 cm.


https://i.expert-h.com/en/shkaf/detskij#sigFreeIdf380fac2c3
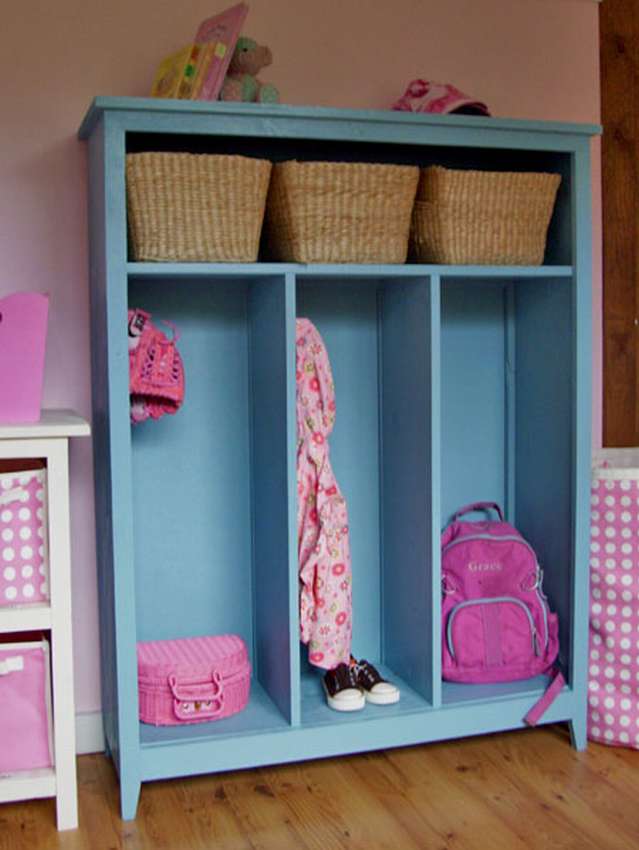
Wardrobe in the nursery with shelves
 How to do this do-it-yourself children's wardrobecan be found in the detailed instructions on the site.


https://i.expert-h.com/en/shkaf/detskij#sigFreeId12790c3a5d
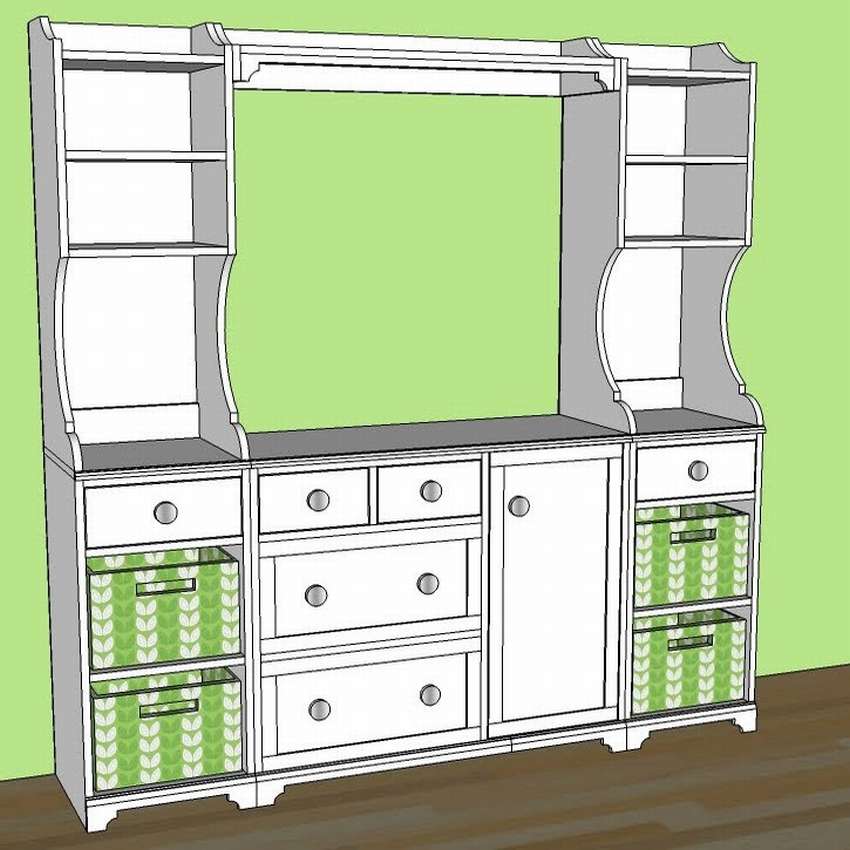
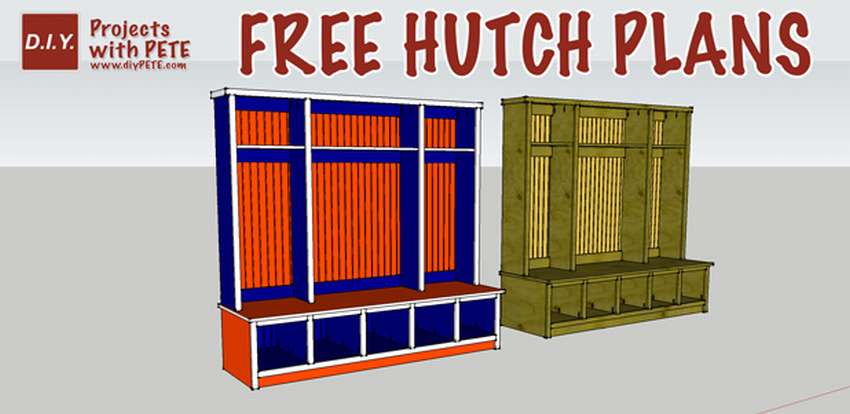
Original children's locker
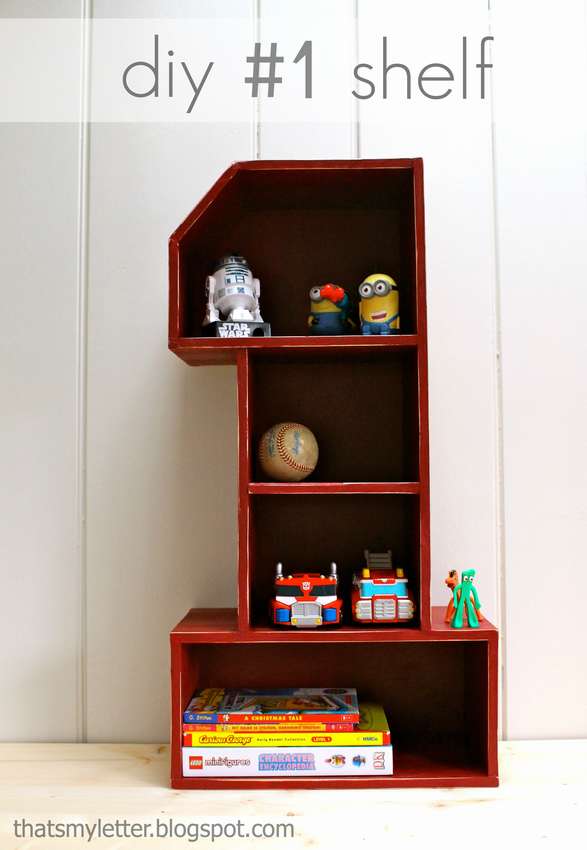 Look how to make an original closet in the nursery number one. There are many ways to assemble such a children's wardrobe with your own hands. It depends on whether the structure will stand on the floor or are going to hang on the wall. If you plan to place particularly heavy items like books, then of course it’s more suitable first option and then it’s better to use pocket hole screws. This plan involves the use of 1.5 cm plywood, but you can also use boards, it doesn’t matter in principle, just you may need to change some cuts. Start in the middle and gradually move to the edges, just remember that this plan assumes that your boards have 1.5 cm thick. Then from the middle part add rows of shelves.
Note. For a hanging shelf, it is recommended to add 1x2 rails on the underside, attached by the insert, flush on the back. Then simply screw this 1x2 rail into the suspension system. Fasten the frame on both sides.
Note. For a wall canopy, it is recommended to add another 1x2 mount between the two side parts, flush with the top and rear.
Finally add the bottom. Process can look at step by step photos.


https://i.expert-h.com/en/shkaf/detskij#sigFreeIdc5ca625ad4
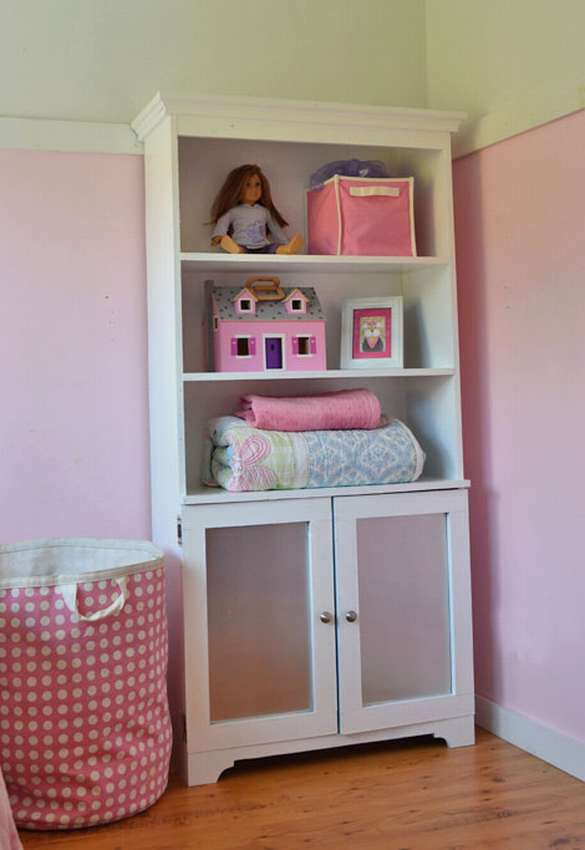
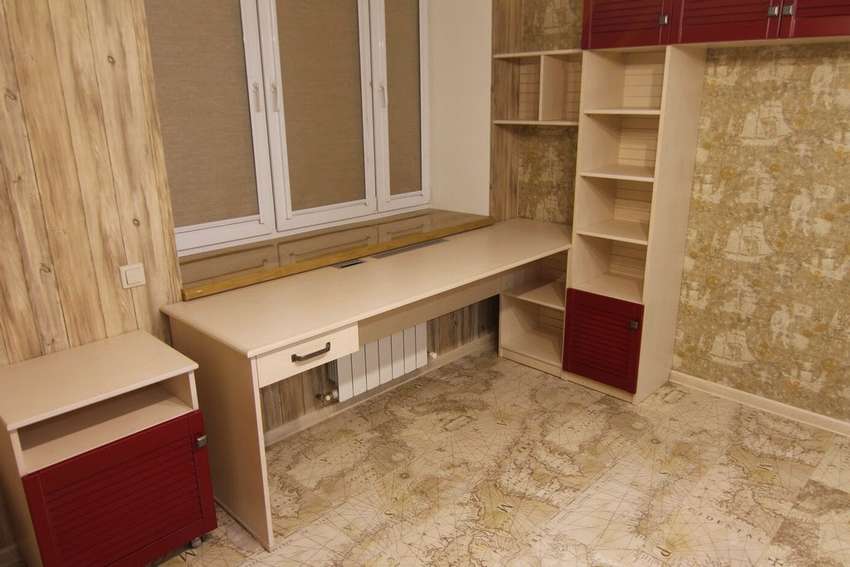
Built-in wardrobe in the nursery
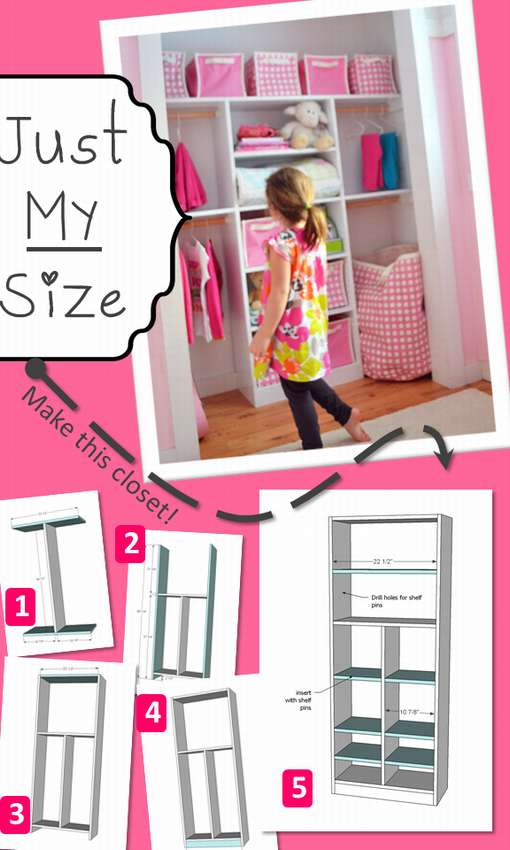 Make a closet in the nurserysimilar to this is ridiculously easy. You can change the design and dimensions to suit all your needs. In this case, most of the shelves are adjustable.
Notes. In this case, 1x12 boards were used, therefore this cabinet is 30 cm deep. You can easily make it deeper using larger material (for example, 1x16).
Here is not a list of cut parts for additional shelving on the sides. After your children's wardrobe will be installed, measure, cut and install racks that are suitable for your design.
- Before you begin, determine how you are going to work with the interior decoration. You can do something else, not as shown in the photo.
- Start by creating a center. You can use screws and glue. Nailing is not recommended because there is no back or front frame on this part.
- Then add sides ... TIP. If using shelf pins, it would be easier to drill them first. ,
- Add the top and then the bottom bar.
- Install the cabinet. For the rods, use the tabs screwed to the studs in the wall.
To know all the bolher in detail, go to a site where there is not only instruction with lists of materials and but also a detailed video.


https://i.expert-h.com/en/shkaf/detskij#sigFreeId251e72f148
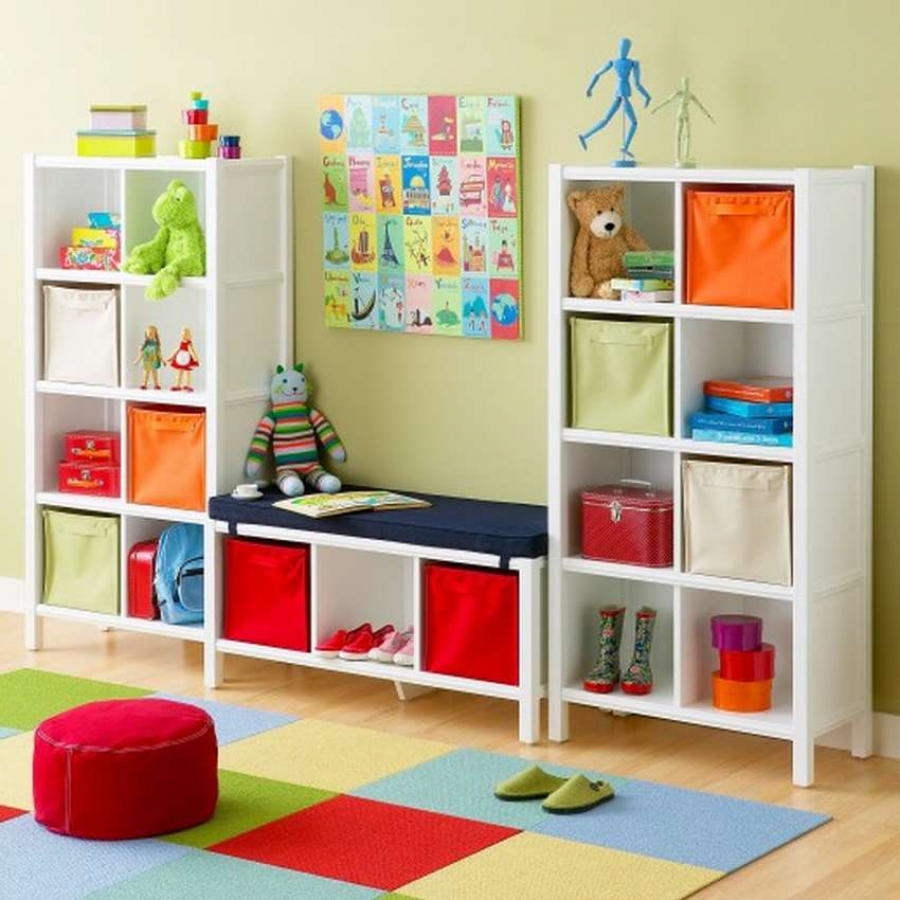
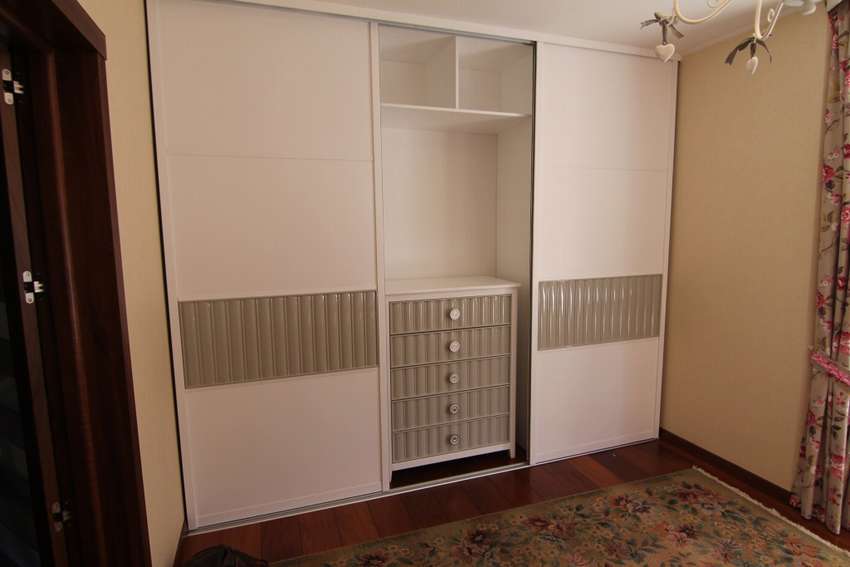
Built-in closet in the nursery
 This is an example built-in wardrobe for storing toys, shoes, clothes, etc. The design is designed in such a way as to have a large storage space, that is, as many shelves as possible. On the other hand, it is imperative that children can use the closet when they are older. Also, since it is wardrobe with sliding doors, you will have access to only one half at a time. So any built-in modulesthat you create should only make sense when you open one door. To make compartments, you first need to assemble three simple shelves. Fastening the shelf to the wall is very simple. All you need is inexpensive 1 × 2 boards. Press each support into the studs on the side of the cabinet, and then reinstall the shelves. (Remember to use the level!) If you make simple shelves, you will need to add wooden supports along the back of the cabinet. But since there are partitions in this case, then there will be a lot of vertical support, so this is not necessary.
More details about all the nuances do-it-yourself wardrobe assemblies, you can read the instructions on the website.


https://i.expert-h.com/en/shkaf/detskij#sigFreeIdb9b394a7fe
Wardrobe behind the door in the nursery
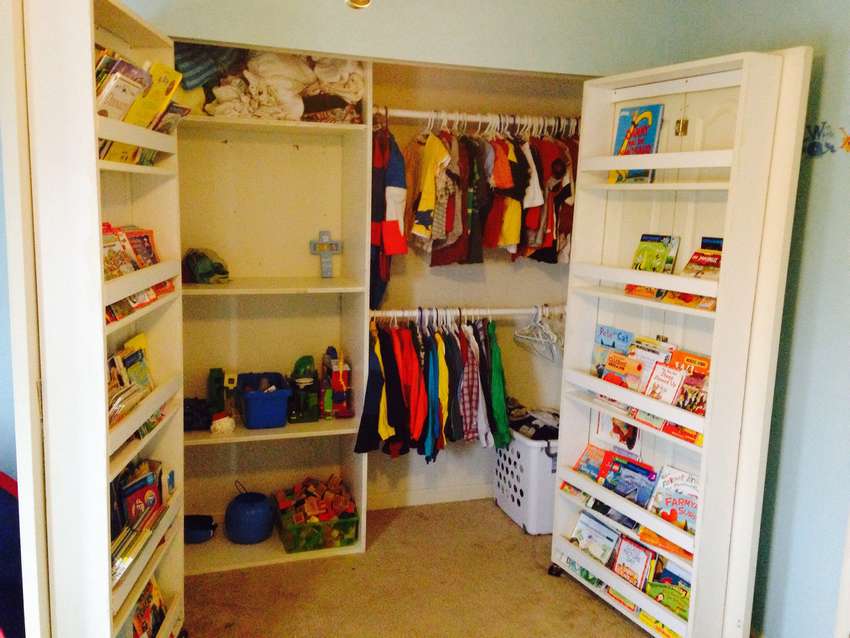 A great way to save some space in the kids room. Make a cupboard behind the door quite simply, make bookshelves, then fasten them to the inside of existing cabinet doors, install them on hinges and now you have a couple of additional square meters of storage space. Doors open fully, which gives more opportunities to access the inside of the cabinet. When they are closed, bookshelves sit in the door frame, occupying what used to be a completely lost space. Additional shelves are very easy to install. Simply remove the double-leaf door hardware and attach the double doors with standard hinges, as shown in the photo. The weight of the doors lies on wheelsso you can lift the doors. Instruction how to make additional lockers with your own handscan be read on the site.


https://i.expert-h.com/en/shkaf/detskij#sigFreeId0d3c9dd5c7
Children's locker hanger
If you are looking for ideas how to make outdoor children's lockersto for outerwear, you can consider this option.
 This simple project is suitable for masters with initial experience. Step by step photos, how to make a locker do it yourself See below in the gallery.


https://i.expert-h.com/en/shkaf/detskij#sigFreeIdd3b6d02776
 Here is another example. A small locker is ideal for outerwear.
Material List:
- 2 boards 1x12 254 cm long
- 1 board 1x12 310 cm long
- 1 block 1x2 245 cm long
- 1 board 1x3 430 cm long
- 1 sheet of plywood 6 mm
- 5 cm screws, nails
- Wood filler, glue
- sandpaper
- primer
- wood conditioner
How to make a do-it-yourself wardrobe, can be read in the detailed instructions on the site, see drawings and step-by-step diagrams below.


https://i.expert-h.com/en/shkaf/detskij#sigFreeIdccd7e9d4c8
Children's wall locker
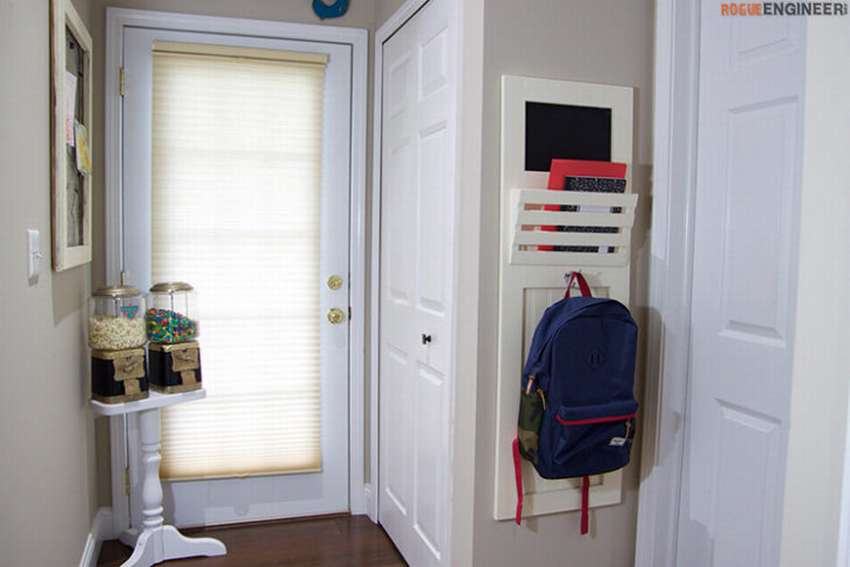 This wall locker, or rather the stand, was invented by the author when his child went to first grade. The idea is to make an individual place in the hallway for a backpack and school supplies. You can also add a blackboard to remind you of dates and upcoming school events! This locker is equipped for easy wall mounting anywhere with the ability to add multiple lockers when your child’s needs increase! Below in the gallery you can see drawings of this design and assembly order.


https://i.expert-h.com/en/shkaf/detskij#sigFreeId832491689c
Locker with doors to the nursery
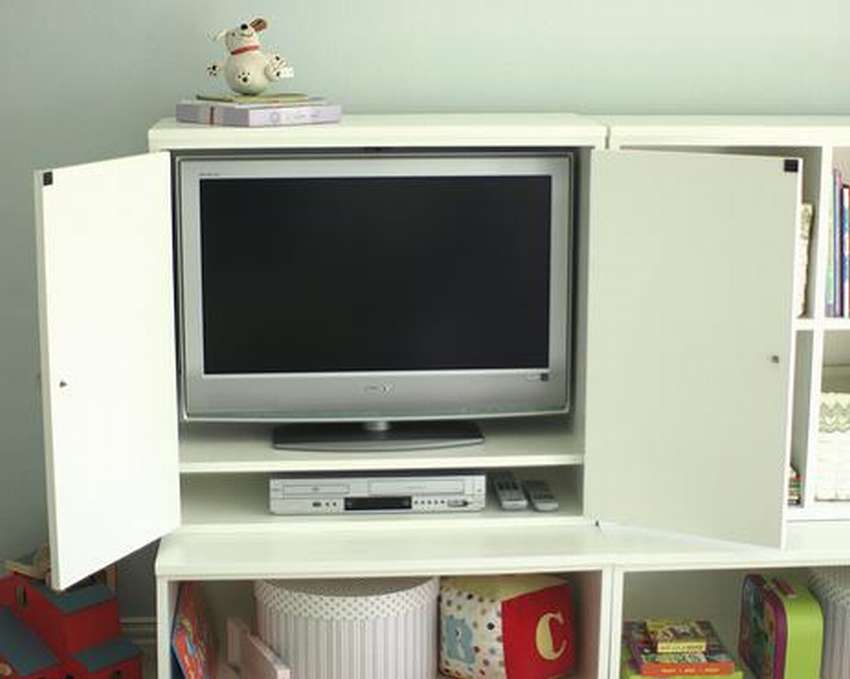 In this cute locker you can store anything, even a TV. Suitable not only for the nursery, but also in any other room. DIY locker not difficult.
Simply attach the sides to the base and shelf using the dimensions shown in the photo. Keep the rear edges flush. Attach the top while keeping the rear edges flush.
The front will protrude 1.5 cm.
Use nails and glue to secure the back as shown in the diagram.
Then add top cladding, use fasteners to attach the sides to the ends of the edges of the upper cladding.
 Check that the door has a clearance of approximately 3 mm. Secure with straps or nails. on the back of the dooras shown in the diagram. Make sure the edges are flush.
Glue and fasten in place as indicated in step 2. Lay the door on a flat surface to dry, lay on top lay heavy objects. The cabinet is almost ready, it remains to fix the doors and install the shelves.


https://i.expert-h.com/en/shkaf/detskij#sigFreeId57798cf674
Children's wardrobe with wheels
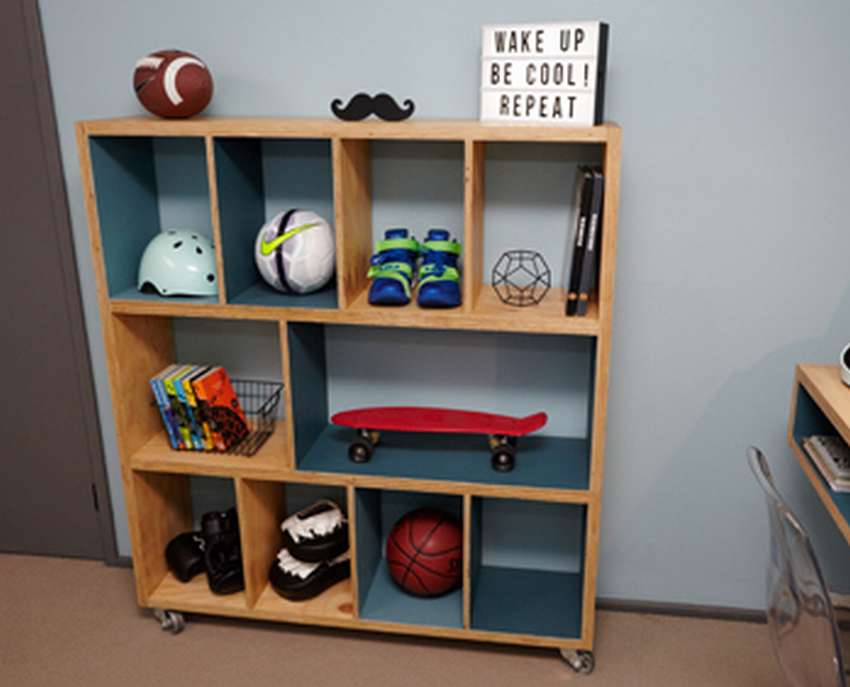 This convenient mobile block design looks great and can be designed to fit your space. Shown here how to make a do-it-yourself wardrobeas well as what tools and materials you will need. After choosing the size of the block that you are going to make, cut the plywood to the required size. For the frame, cut the wallpaper size 600 mm x 2250 mm in halfto make four pieces measuring 300 mm x 2250 mm. Then cut two of them into 1330 mm for the sides and two into 1200 mm for the top and bottom. For shelves and dividers, cut 2400 mm x 1200 mm x 17 mm layer into 300 mm pieces per2400 mm long to make eight pieces.
Then make a frame. Make sure all corners are flat and drill holes to connect the parts. Use 50 mm screws.
Fasten the first shelf and dividers. Starting from the bottom, install one of the 1200 mm shelves in the frame. Space should run evenly along the bottom of the frame.


https://i.expert-h.com/en/shkaf/detskij#sigFreeId2231bbc58a
Children's bedside table
Wooden bedside cabinet for children - The perfect way to keep your kids bedroom tidy.
 The children's locker not only looks great, but also has functional shelves and a convenient storage box that will help keep books and toys safe and sound. Take a look step by step photos and you will be surprised how easy it is to do it.


https://i.expert-h.com/en/shkaf/detskij#sigFreeId905ff83e39
How to assemble a locker in the nursery
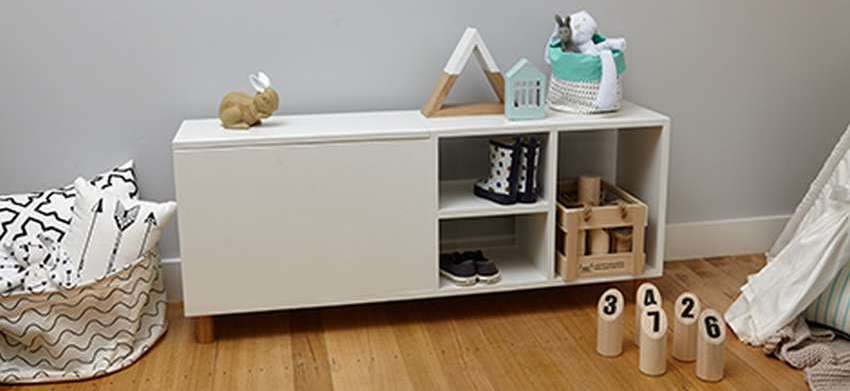
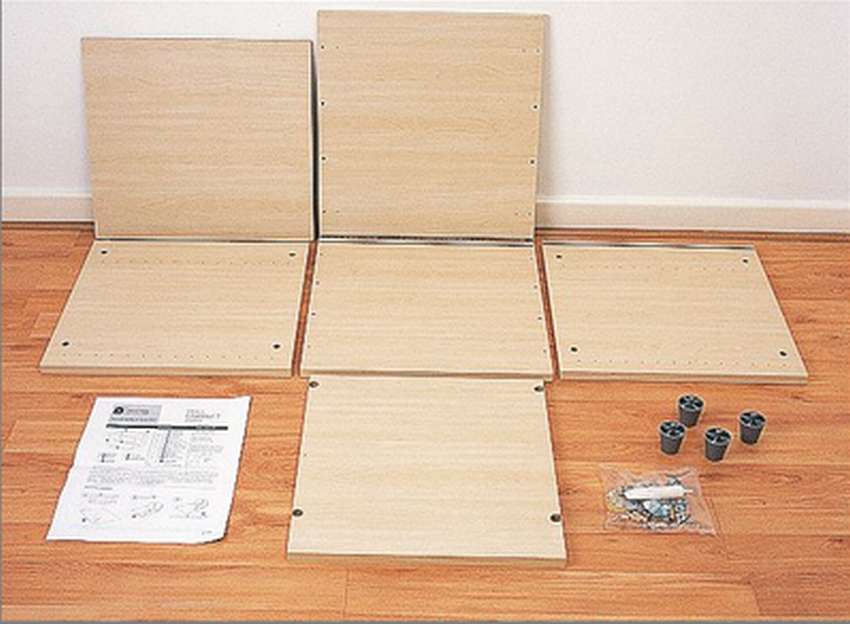 Assembly of ready-made panels, the easiest and most affordable way do-it-yourself children's locker. This compact cabinet is a typical building block in a flexible modular system storage. You can add drawers, a shelf or a door to fit into your closet as you wish. Convenient and economical in the sense that you can only buy as many shields as you need to assemble one unit.
Master class on how to assemble this simple locker, see below for step-by-step photos.


https://i.expert-h.com/en/shkaf/detskij#sigFreeId9c645404bd
Floor bookshelf for children
This children's wooden bookshelf allow you to post your child’s favorite books or toys.
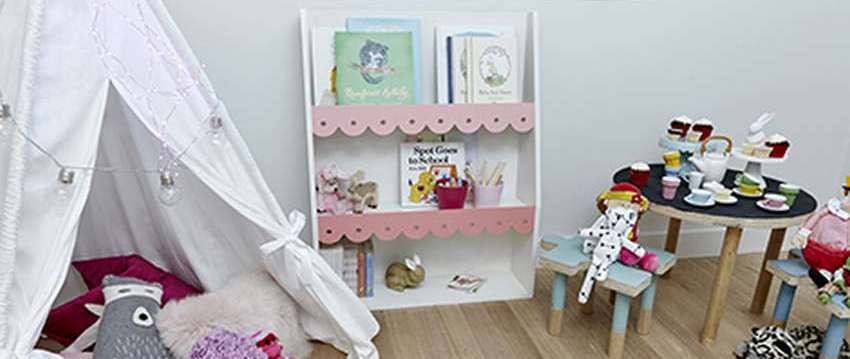 The shelf is really easy to make, and you can color it according to the design of the room and the tastes of the child. See below the master class on step by step photos..


https://i.expert-h.com/en/shkaf/detskij#sigFreeIdc52a40d8ac
How to make furniture in a nursery
 Here is a detailed photo report from the workshop. Marko studio, how to make a furniture set for a nursery. This, of course, is a complex project and requires both professional knowledge and appropriate equipment. But if you have your own home workshop and some experience, then perhaps this information will be useful to you. A 150 step-by-step photos of the master class will surely help you.


https://i.expert-h.com/en/shkaf/detskij#sigFreeIdc34d031ce9
Pirate style kids room
 Designing a children's room is always a unique process. Check out another project from Marko Studio, how to make a pirate style kids room. The furniture set includes children's cabinets, a table, a bedside table and a bed. Everything is very simple, beautiful and works without surprises. The entire furniture assembly process is shown in the photo report, this is 78 photosIf you are a master or designer, then there are several nuances that you will certainly be interested in and which are worth paying attention to. The description of the master class can be read on the site, a link under the gallery.


https://i.expert-h.com/en/shkaf/detskij#sigFreeId622ced6c1d
Pirate Style Decor very popular among boys, so look at a few more photos on how to make a "pirate" children's room for your fidgets.


https://i.expert-h.com/en/shkaf/detskij#sigFreeIdd2975fca06
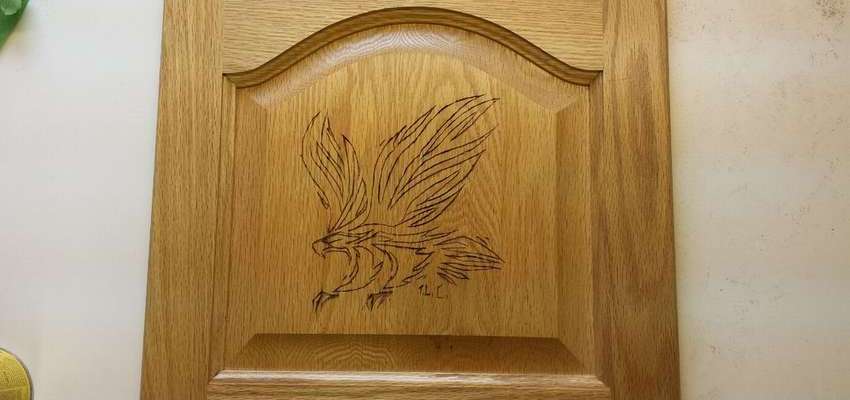
Carved Door
Wardrobe in the nursery should be not only practical, but also beautiful. Here are some tips for making beautiful wood carvings through Dremel
 Materials:
- Dremel
- Any type of wood cabinet door
- Patience
First you need to find a board of any type. For example, an old cabinet door or a sheet of plywood. Find a suitable image in Google.
 Then do pattern on paper and get to work. The instructions can be read on the site, it is not big. If you already have experience with Dremel, then there will be no particular difficulties.


https://i.expert-h.com/en/shkaf/detskij#sigFreeId56ecd3e028
Do-it-yourself decorative cabinet doors
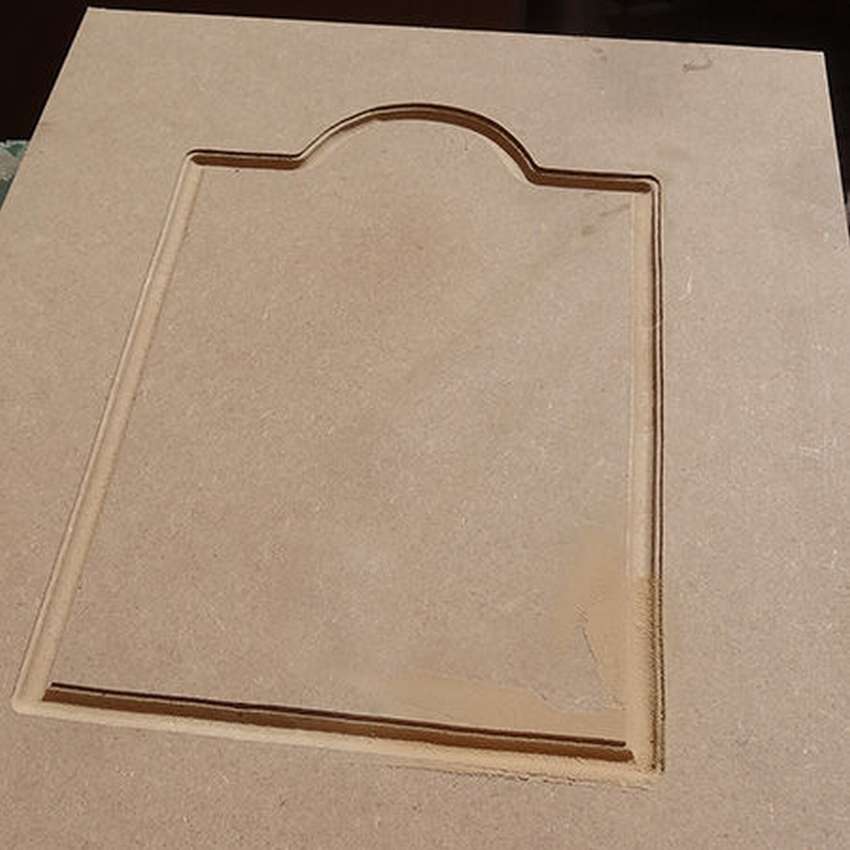 The possibility of using a router for manufacturing decorative cabinet doors allows you to replace the old with home-made doors of any size or design. An example is shown here as quickly and easily as possible. make cabinet doors through Bosch router and 16 mm MDF. When creating your own cabinet doors with a decorative design that repeats, you need a template. For this project, a piece of chipboard with a diameter of 16 mm was used. Of course, you can take other material, for example, plywood or MDF, to make your template, but the board should not be thinner than 8 mm or thicker than 16 mm. Ideally, the template should be the same size as the door. Read more about the process on the site, see below a few step by step photos.


https://i.expert-h.com/en/shkaf/detskij#sigFreeIdb2b66f0331
Drawings for children's closets


https://i.expert-h.com/en/shkaf/detskij#sigFreeId926d252a34
Sketches of furniture for a nursery


https://i.expert-h.com/en/shkaf/detskij#sigFreeIdc9eee86900
DIY cabinets 300 photos


https://i.expert-h.com/en/shkaf/detskij#sigFreeIda460075abf
Hello, I am the author of this article, so I look forward to asking questions for this article in the comments below, I will answer all !!!
If you have questions on another topic, ask them on our forum, we will answer you
- Two baskets of paper in 5 minutes (Master class)
- How to make a simple and compact table for a milling cutter from plywood
- How to make a soft headboard tile (Instructions + step by step photos)
- Cinder block benches: a convenient bench in 55 minutes
- How to make a bed with a niche: saving space (Master class)