✿ Flowerbeds:> 34 turn-based master classes + photos (248 ideas) - do-it-yourself
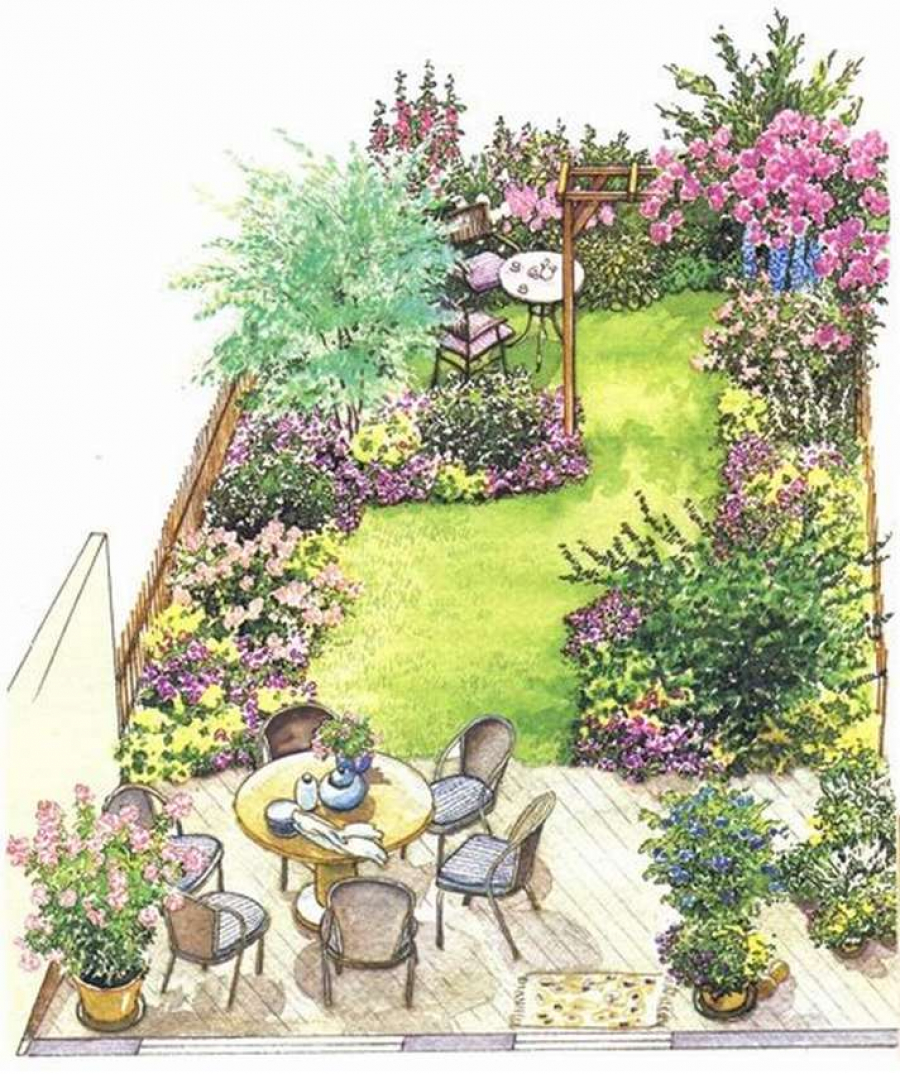 Design of a plot with flower beds
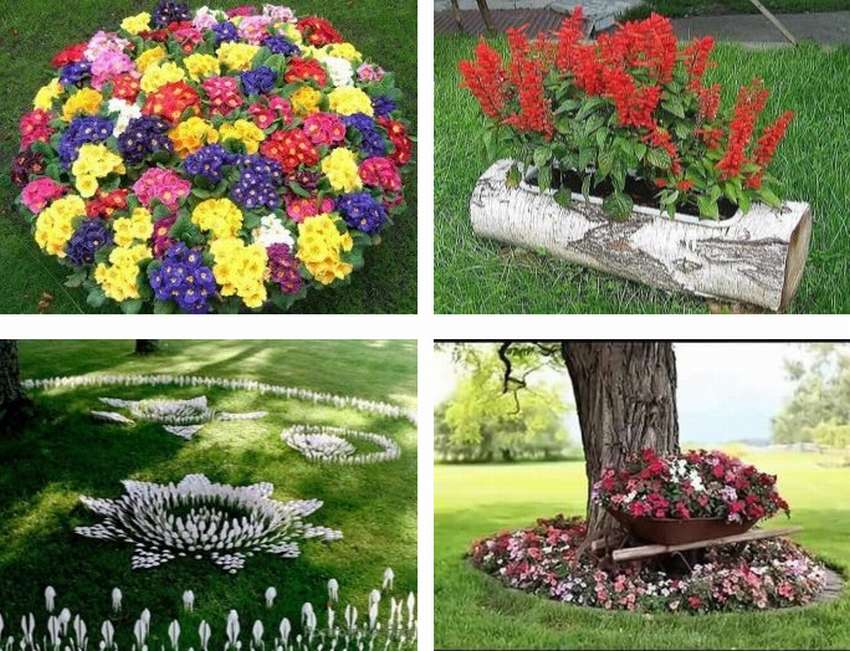
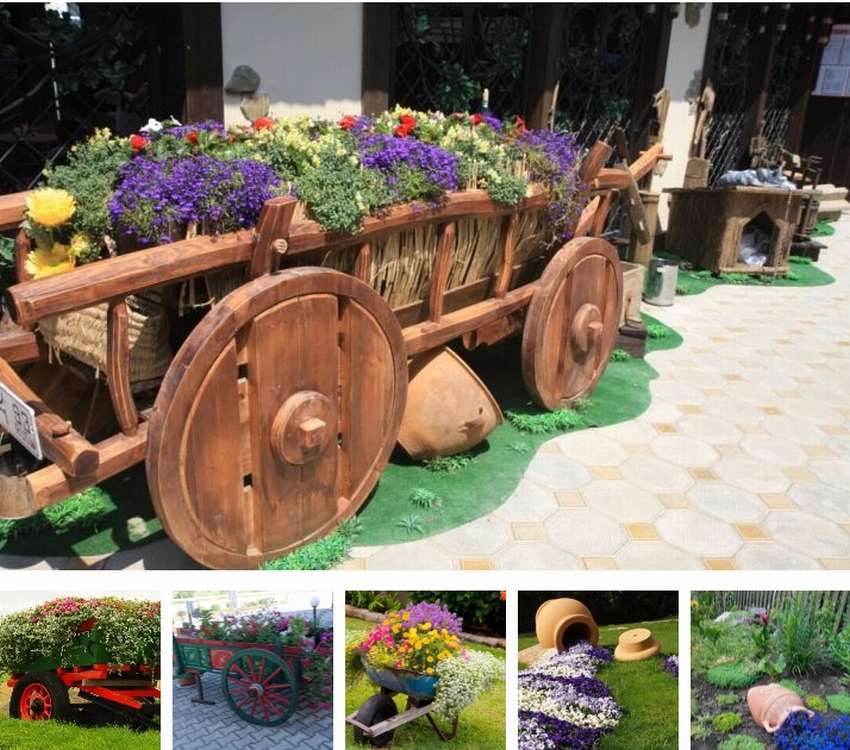
Let’s take a closer look today on how to make a beautiful flowerbed in your own country house or in the courtyard of a private house. Below you will find photos of the most beautiful and original, but at the same time simple flower beds, most of which can be made, you will not believe, from improvised materials: stones, bottles (both plastic and glass), tires and tires.
We will touch on the creation of flowerbeds made of bricks and wood (from boards), design ideas and ways to create borders and fences for flowers near the house. All of the listed flower beds are also suitable for kindergartens. Basically, these are very interesting models for both professionals in landscape design and beginner summer residents. See step-by-step guides in photo galleries, as well as a selection can be seen at the end of the article.
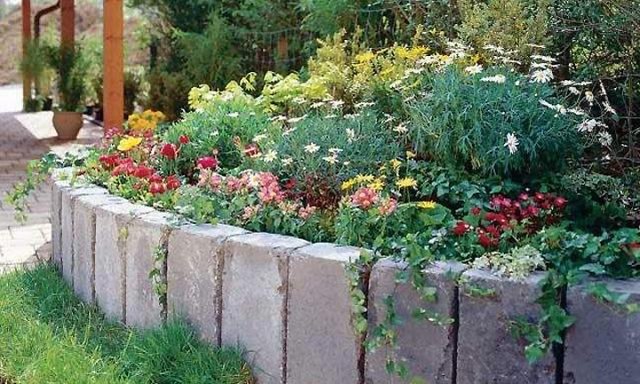
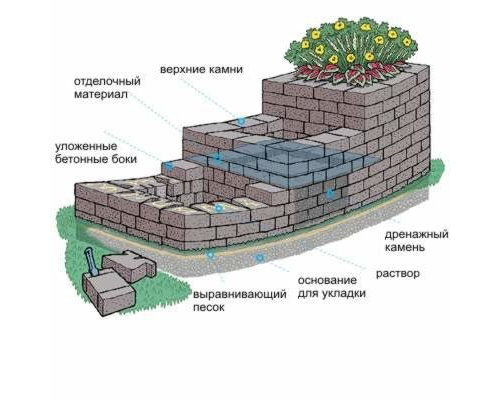
High bed of concrete blocks
This is what a flower bed looks like, which you can make yourself.
To do this, first of all, outline the contours of a future flowerbed on the ground and dig a groove.
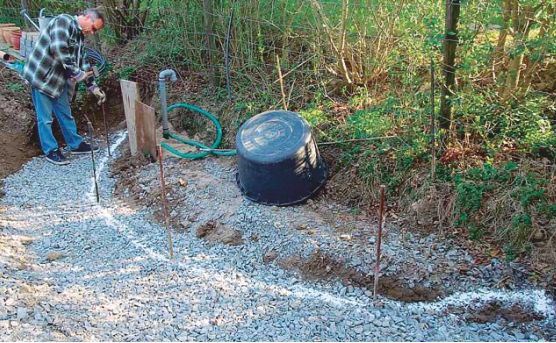
We install concrete blocks smoothly and accurately, checking from time to time the correct installation.
Concrete around the installed blocks and align well.
We expect the concrete to dry completely and fill up the prepared soil.
High flowerbed is ready, you can plant suitable plants. Due to the fact that it is tall, the flowerbed will be a clearly visible, bright decoration of the site.
Sloud show: the story of one flower bed
How the flower garden has changed in the city - through the eyes of a tenant of a high-rise building
Multi-tier flowerbed of mesh and stones
Tall flowerbeds are usually made to be noticeable, or, if necessary, when, for example, you need to hide height differences in the area.
 In this case, let's look at how to make just such a flowerbed, in the form of a serpentine. First, we will need a metal mesh. There are two options, you can buy a finished construction in the store, even together with stones, though not everywhere, but you can find it. The second option is to buy an aviary net with small cells and do it yourself. The plus is that then you can change the shapes and sizes at your discretion. Then you need to stock up on stones, in principle, you can use any, but for a beautiful flower bed you need to find beautiful decorative stones.
Step-by-step instruction (photo step by step).
(Click on any photo to view)


https://i.expert-h.com/en/klumb/1165#sigFreeId9dff727d51
Today flowerbeds made of netting and stones (gabions) are very popularwe list pros:
- The construction of the mesh and stones will not collapse with seasonal displacement of the soil.
- The mesh, the material is flexible and durable, so you can make flower beds of any configuration
- Stone flower beds in the grid are durable, due to shrinkage over time, they become only stronger
- Stone-flower bed does not need constant care
- For the construction of such a design, special knowledge and expensive equipment are not needed, they can be assembled quickly and with your own hands.
Photo selection: what can be done from a metal mesh and a pile of stones.


https://i.expert-h.com/en/klumb/1165#sigFreeIdc43ca403ff
Are you still furniture from a grid and stones did not see.
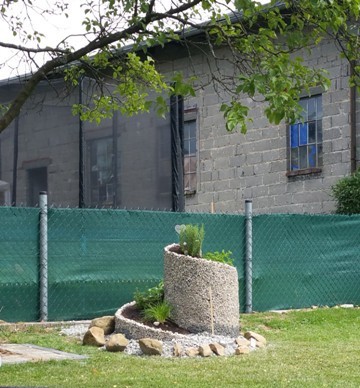
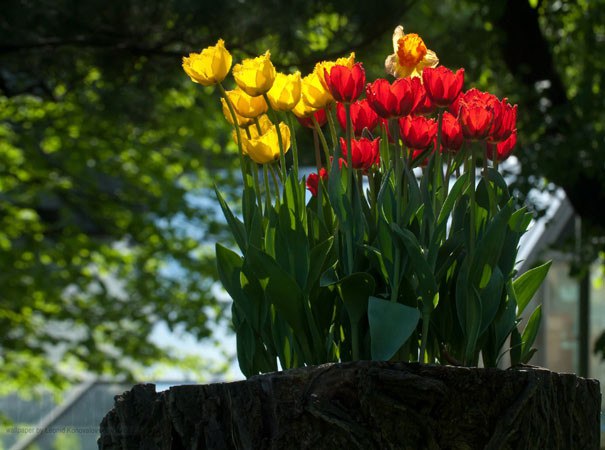
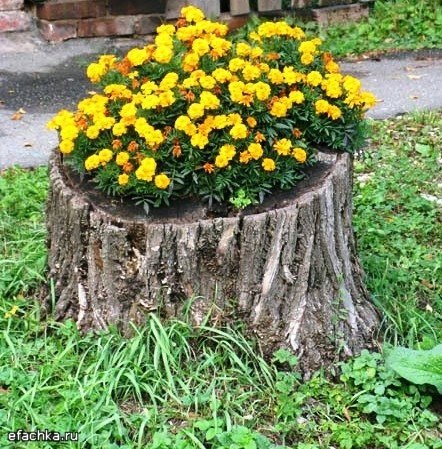
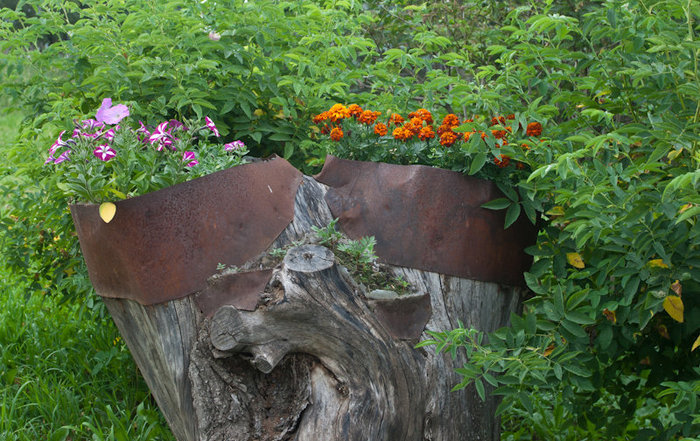
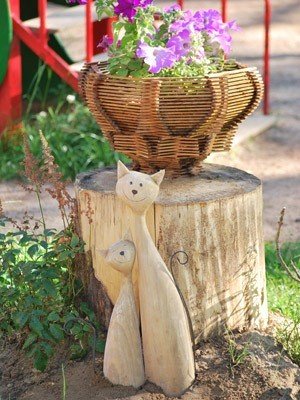
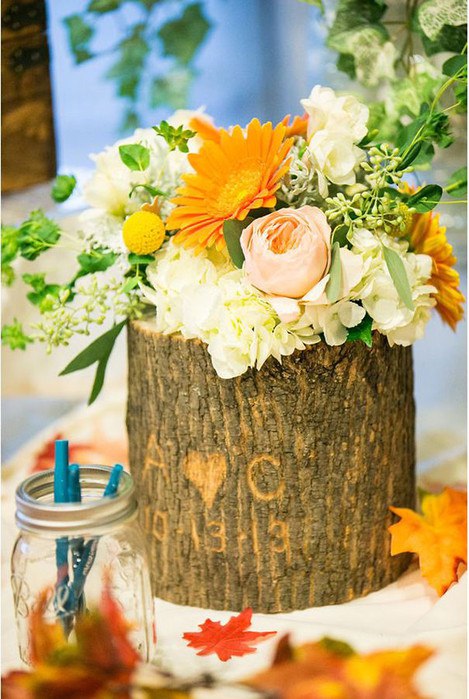
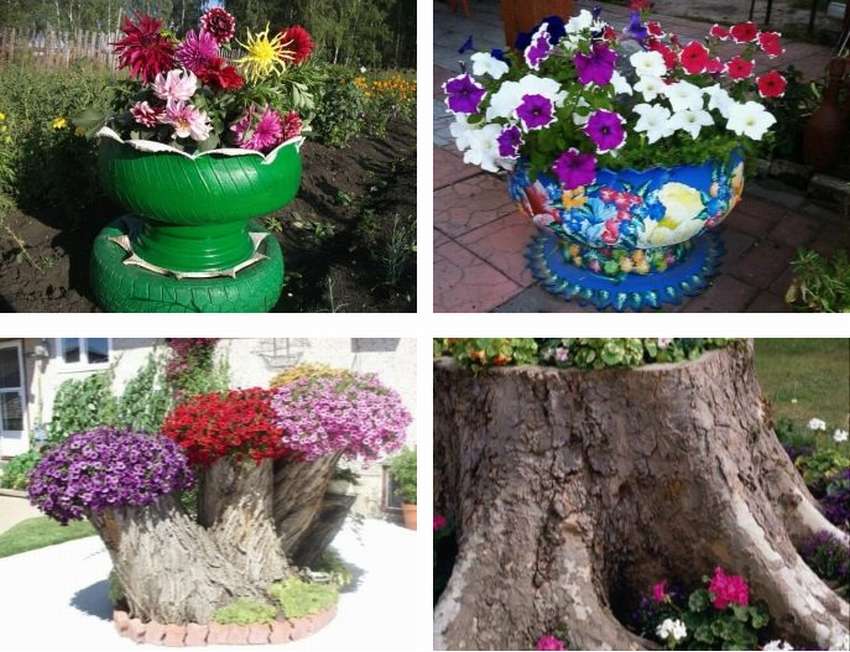
Flower beds from stumps
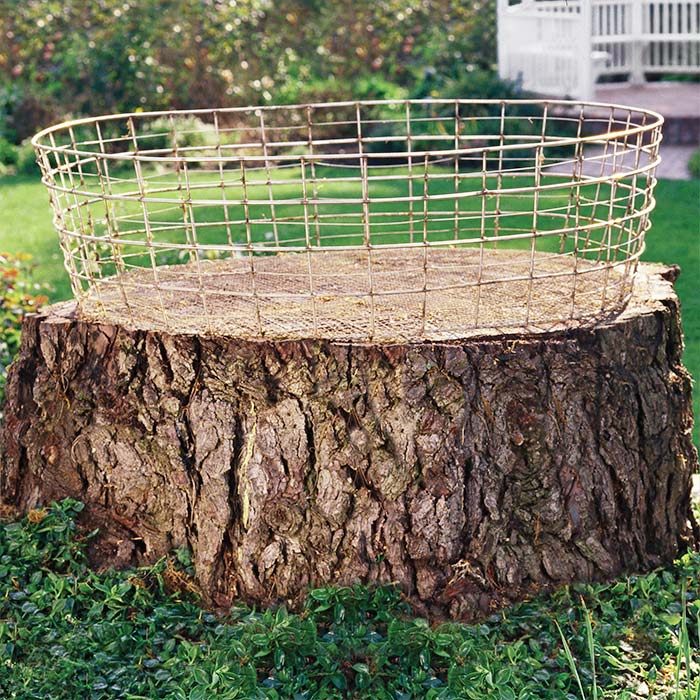 You can make a flower garden in different ways, for example this one, which in the photo above is made using a wire basket. Such a grid can be made independently, it may not be of perfect shape, it is still not visible under the flowers, the main thing is to be the size of a stump. It is better, of course, to find galvanized wire so that the structure does not rust quickly. Put the grid on the cut and secure with metal staples.
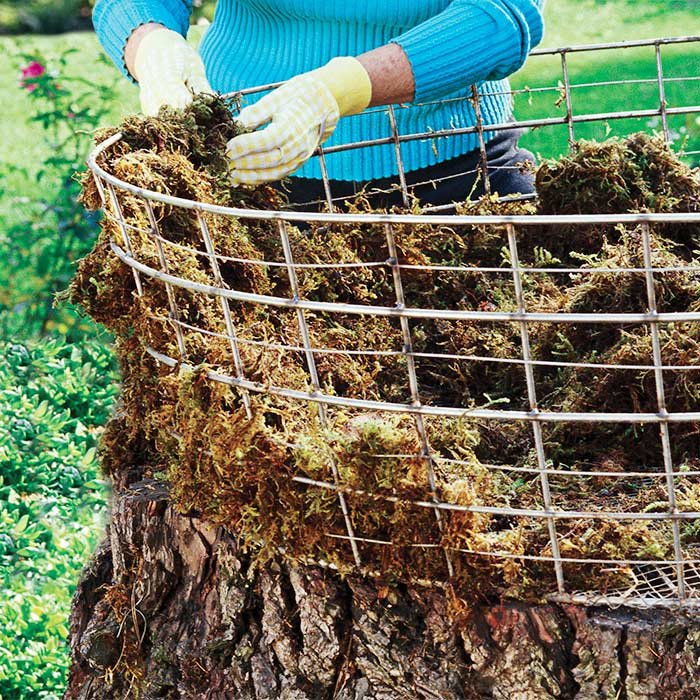 Buy moss sphagnum in a specialized store, who is engaged in floriculture, knows what this thing is. This moss is great for planting young plants, it is often used for growing flowers. Fill the basket along the walls, squeezing moss around the wire frame.
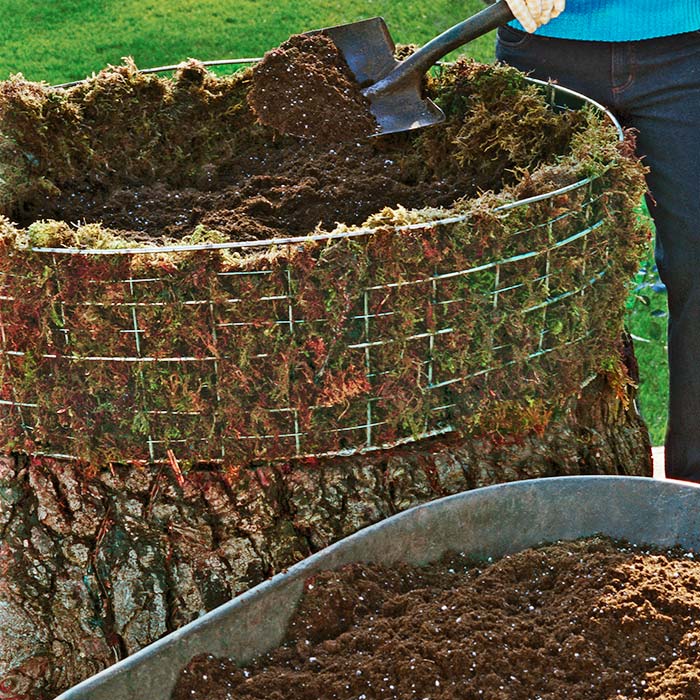
Then fill the interior with soil with fertilizers.
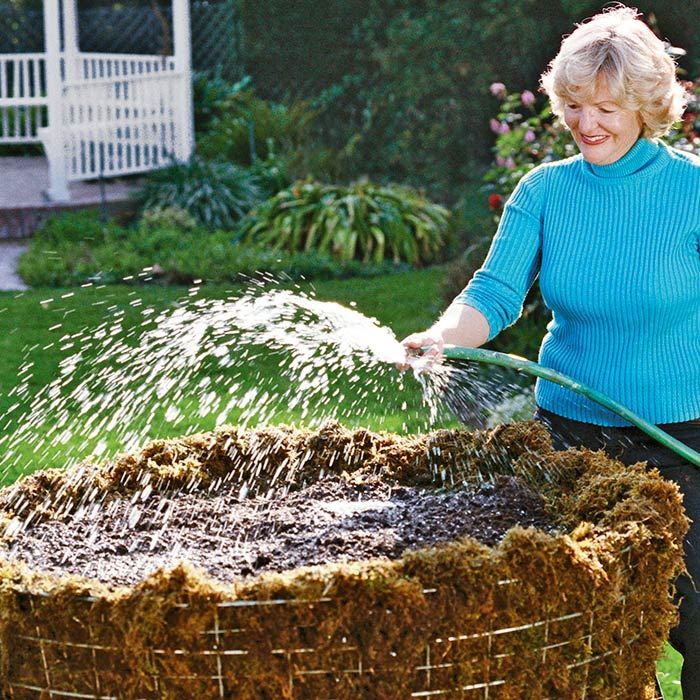 Moisten the contents of the basket. Tamp the soil carefully to remove air pockets and moisten. Add more soil to the rim level of the basket.
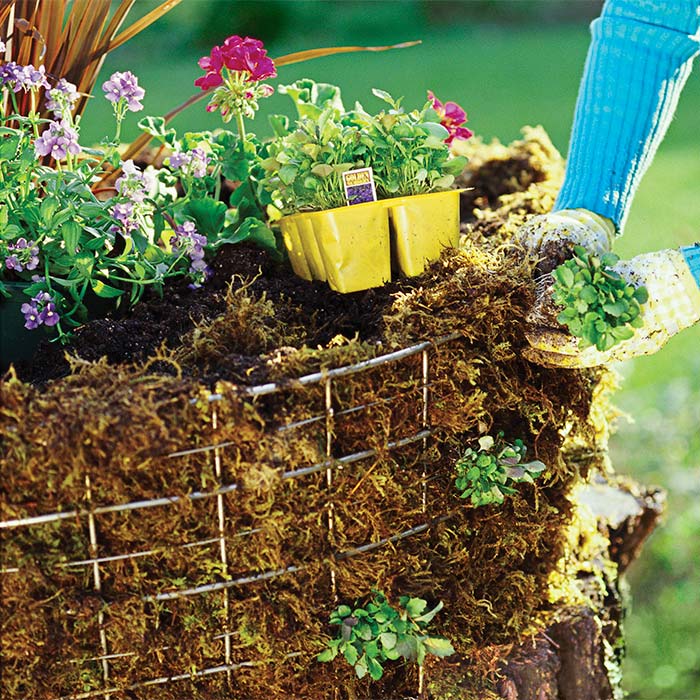 Plant flowers.In the middle you can place New Zealand flax, a perennial plant with xiphoid leaves, its roots are small, but they are ideal for flower beds on a stump. Geranium can be planted nearby, and along the edges of Helichrysum petiolare, although it is a decent water chowder, it has beautiful velvety leaves with soft nap. To fill the sides, carefully dig holes through the moss and press the roots of the plants through the gaps until contact is made with the soil mixture.
Water constantly during the growing season, and when the flowers harden, you can safely enjoy the look of the original flowerbed.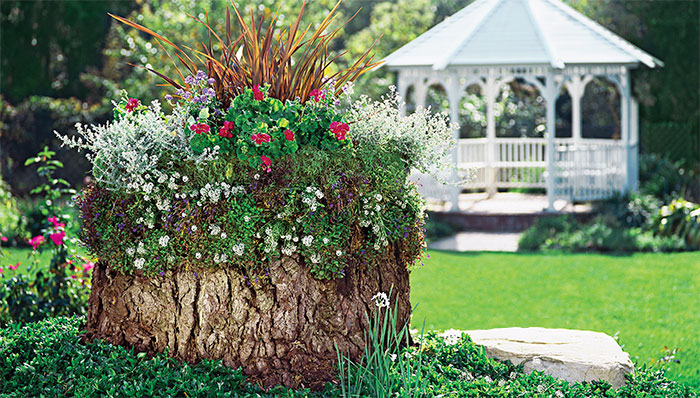
Photo from site lowes.com
This is one of the options, and then in the photo, you can see how you can arrange a flower bed.
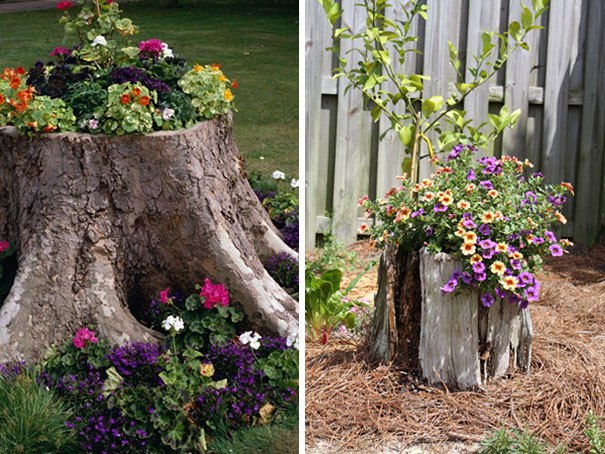

Or like that
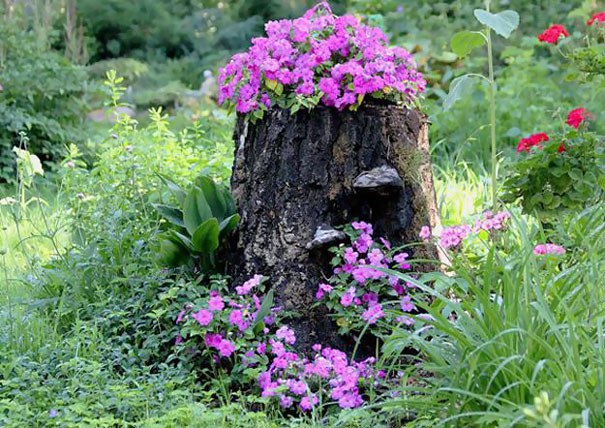
Very old stumps can be decorated a little
Or in this version
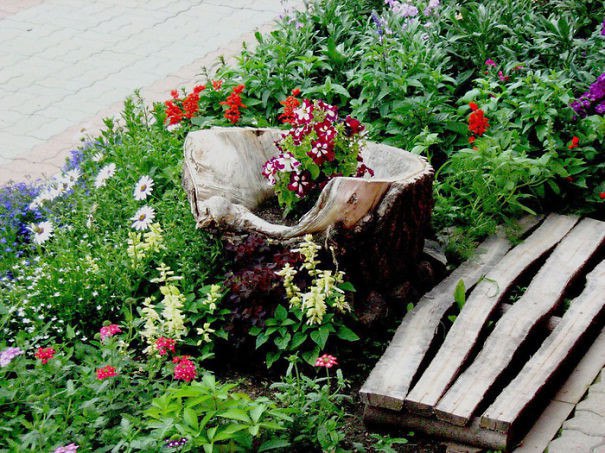
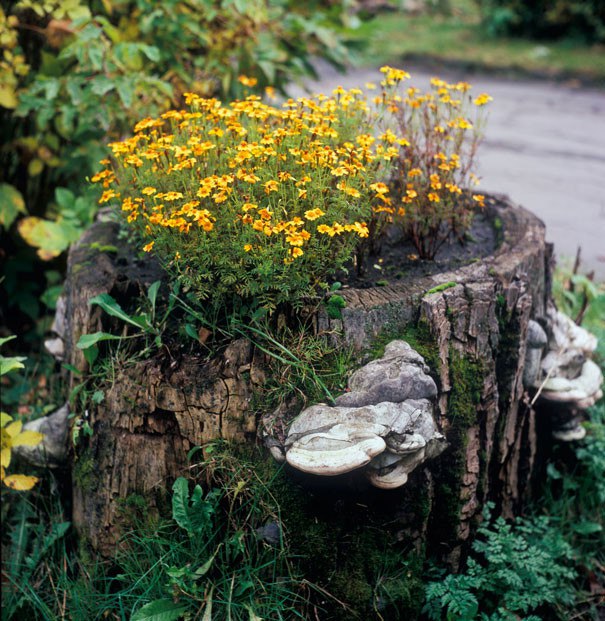
Another version of a flower bed from a stump
A stump can be the basis for the design of a large flower bed. Since the base is ready, you only need to remove part of the core to fill the space with soil. 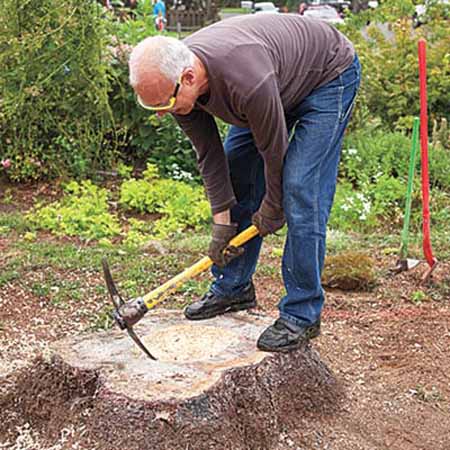 It’s better to do this with a gusset, or if the stump is large, then the pickaxe, all the same, it is necessary to hollow out the recess quite voluminous, so that the pickaxe will be handy.
 Deepening must be done with a margin to make a side, of course, a lot depends on the colors that you are going to plant, for some the root system is quite voluminous.
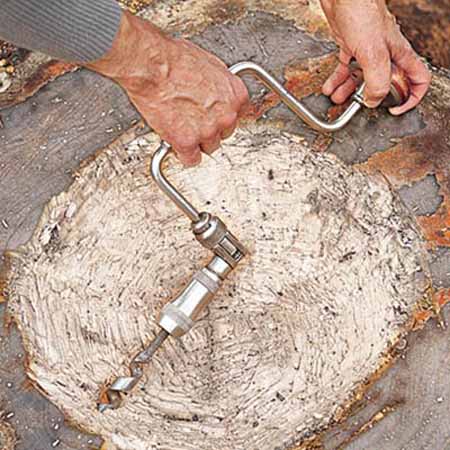 Do not miss such a moment as a hole for the stack, for this you need to check one or more holes on the edges of the walls of the bowl from below.
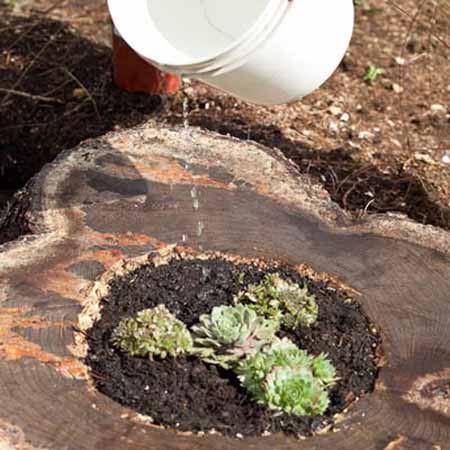 When the capacity in the hemp is ready, you can plant flowers
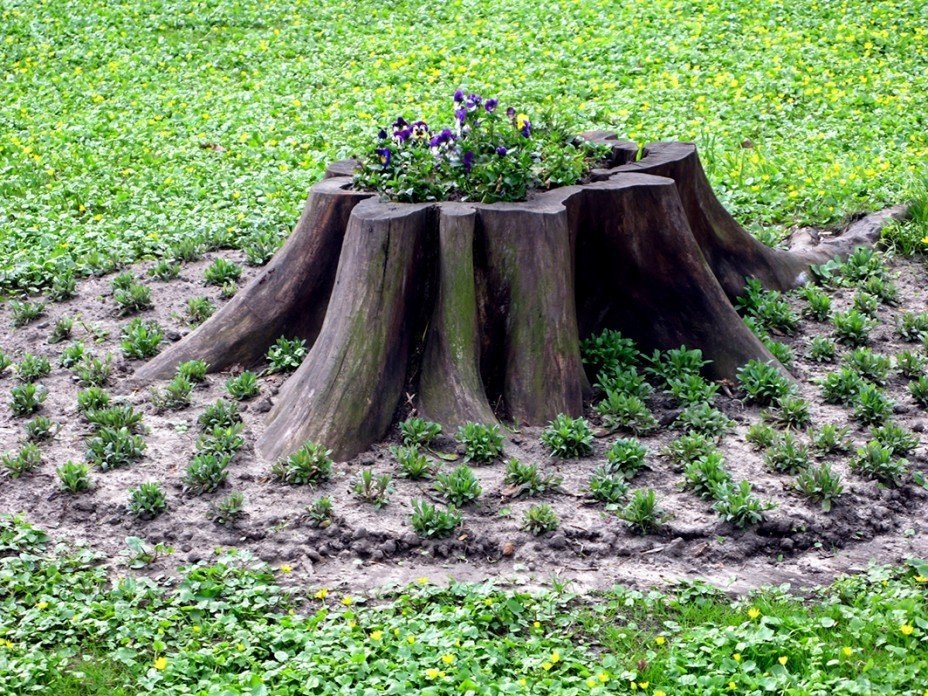
There is another option, a longer one, to insert a pot into the recess, then the wood will not deteriorate, and the flower bed will last much longer. True, you will have to tinker with the recess, it is quite difficult to fit it under the pot, except to use plastic, but this is not very useful for colors.
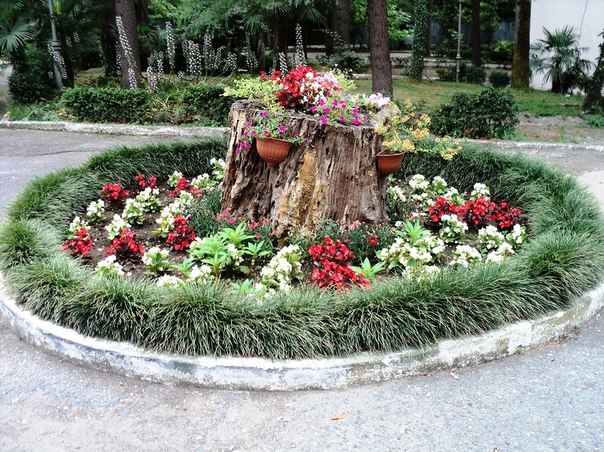
A combination of several stumps looks beautiful
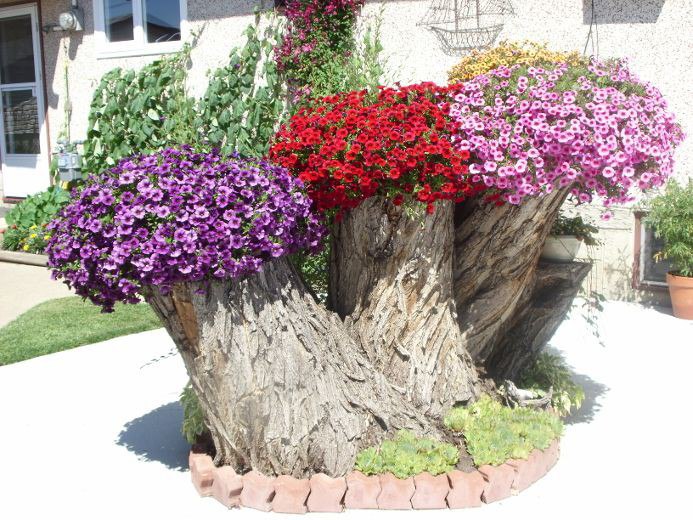
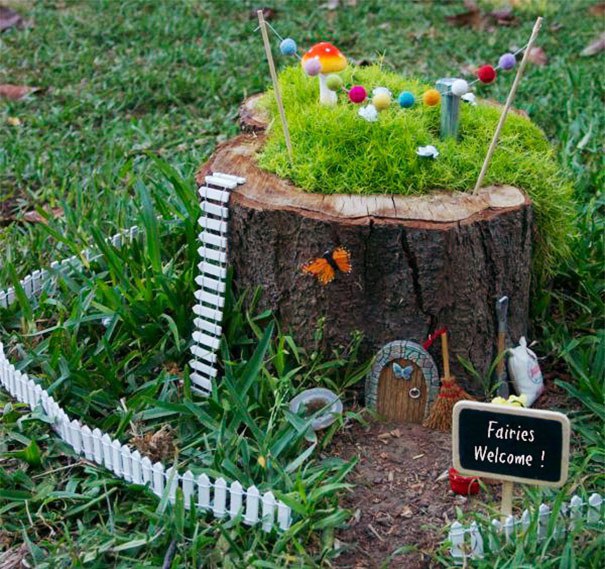
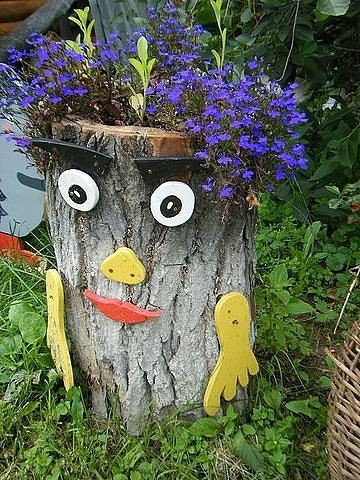
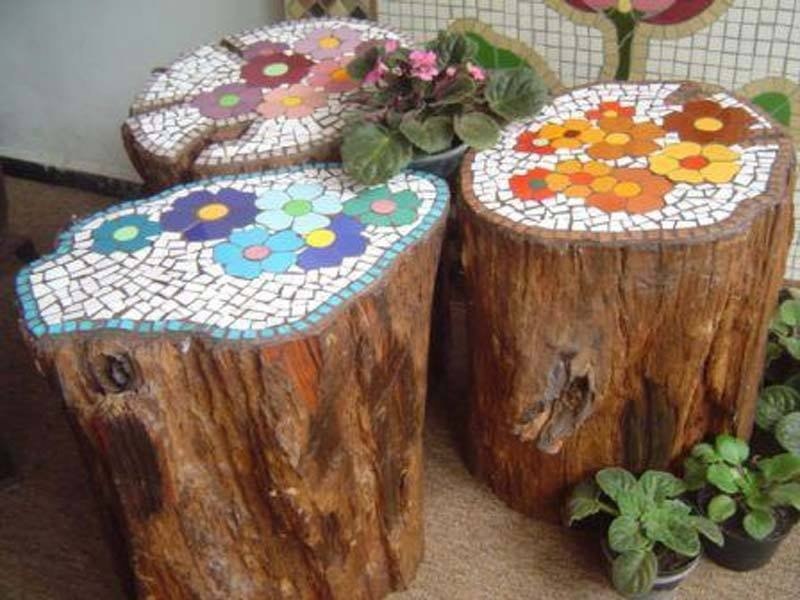
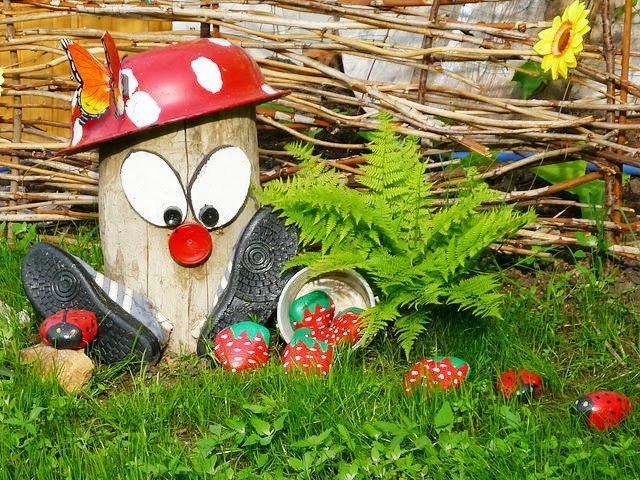
You can decorate hemp very beautifully, create unusual figures from them

If the stump is not suitable for a flower bed, it does not matter, a small snag can also become a decoration of the garden, if you work on it a little

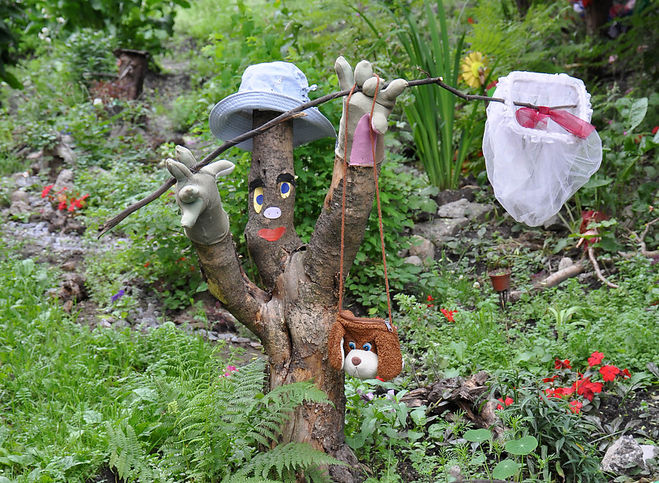
Photo gallery of flower beds on stumps
(pleasant viewing)


https://i.expert-h.com/en/klumb/1165#sigFreeIdd9b17ef972
Some more interesting options
Decorate with mosaics, or make something fun and funny
See the full article about flowerbeds from stumps here.https://i.expert-h.com/en/klumb/klumby-iz-pnej-na-dache
Watch the slideshow:
A selection of unusual flower beds
Vertical flower beds on trellises
- Thick foliage will protect the wall from dust;
- The home will not overheat in the sun so much;
- Oblique rain will water the plants, not damage the wall;
- A green curtain will hide the flaws of the building.
Here are some photos of how a vertical trellis is going.
And fasten to the wall.

As you can see, nothing complicated.
Wooden trellis
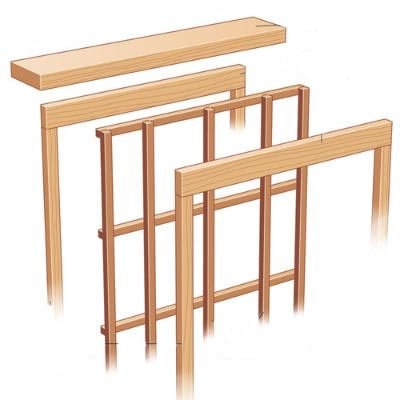
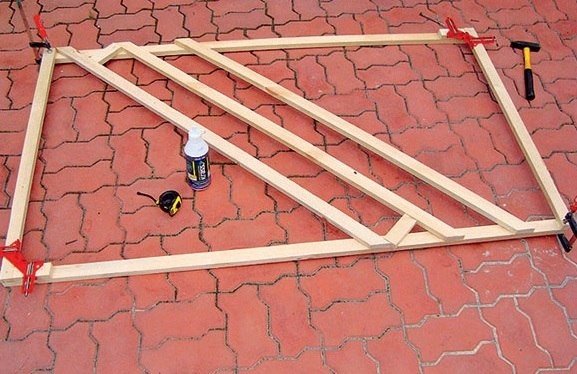
You can also make a wooden trellis for vertical gardening. This, in principle, is the same trellis, only consisting of several sections fastened together. Trellis trellises are best suited for climbing plants. They consist of supports and horizontal struts.
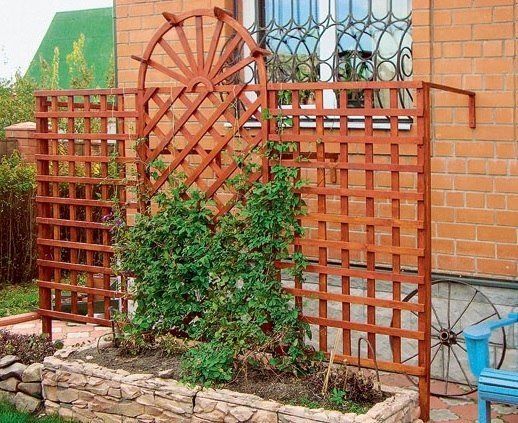
The photo shows a diagram of how it looks.
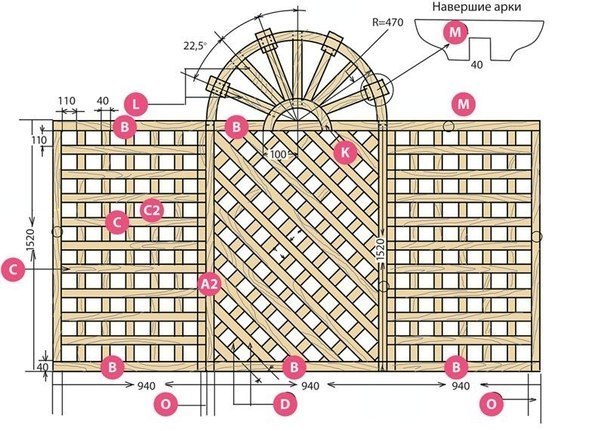
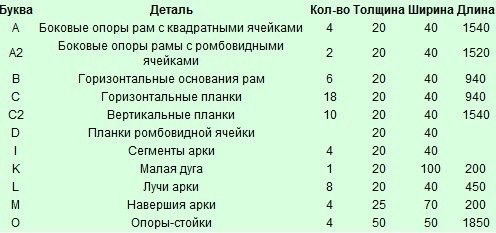
Here are the necessary details and sizes.
First, the central section frame is assembled. Horizontal slats are superimposed on vertical supports and fastened in a convenient way, it is better, of course, with self-tapping screws, but you can also put it on glue.
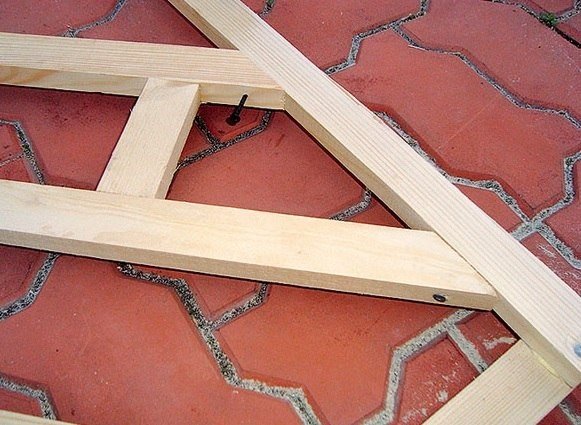
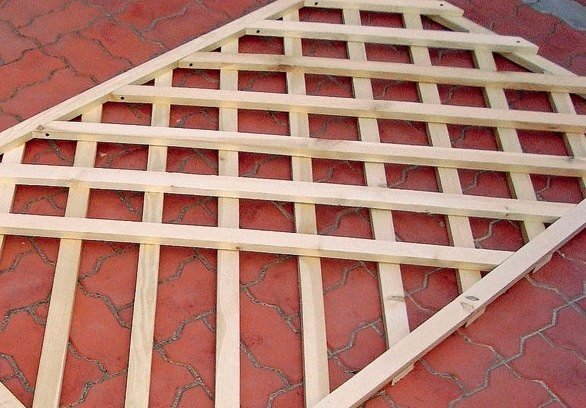
As you can see, there are several methods for vertical gardening and trellis; this is a good option.
Wall trellis
Another trellis option, which is not mounted as the previous one, but directly to the wall. Several tiers are formed from the rails, as we see in the picture, eight vertical and six horizontal, the size of the structure can be made any way, even in the entire wall.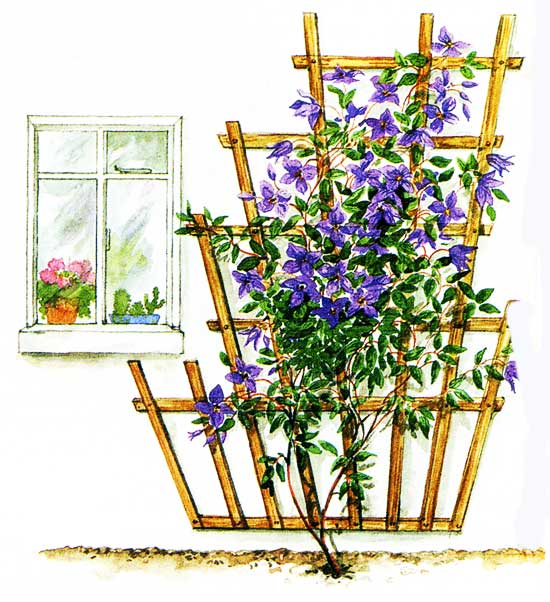
On the one hand, such a trellis is easier to do than trellis,the main thing is to firmly fix the frame on which the whole structure will be held. It will be necessary to make holes for the wall plugs in the wall, as shown in this diagram.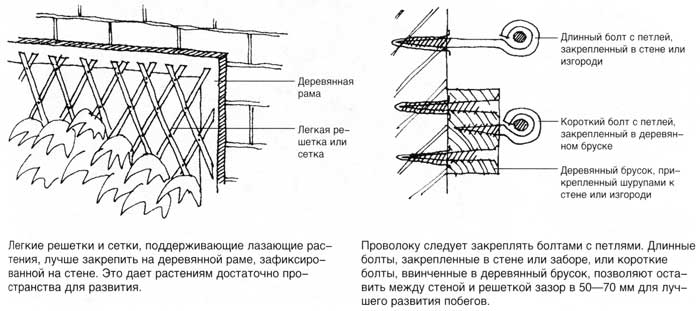
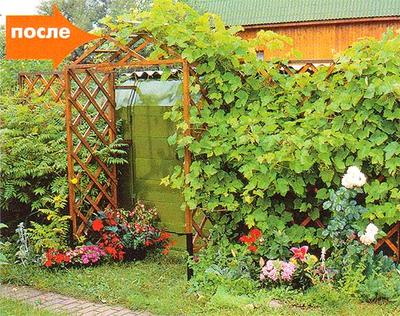
Grape Trellis
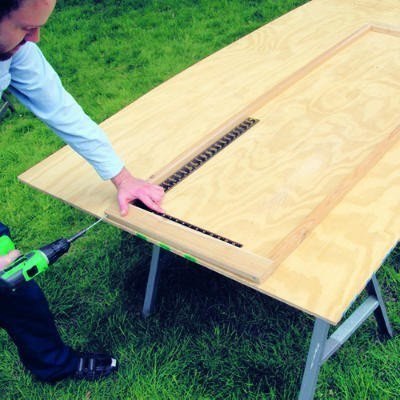
Decorating a wall of a house with a trellis, especially if it is not in the best condition, is convenient and profitable. But with the help of this simple construction, you can successfully hide other "problem" places on your site. For example, in these photographs you see how the owners of a small shed beautifully decorate it with vertical trellises.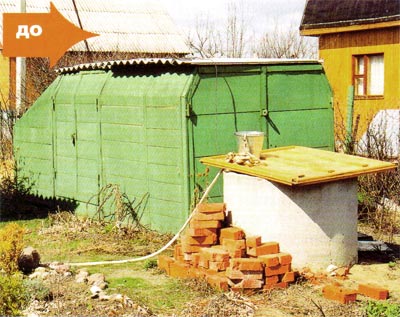
Operating procedure
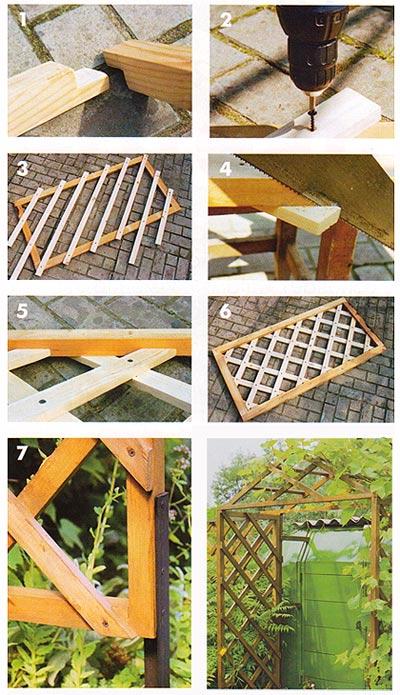
- In the corners, fasten the joints of the bars with screws;
- on the reverse side, screw the diagonal bars;
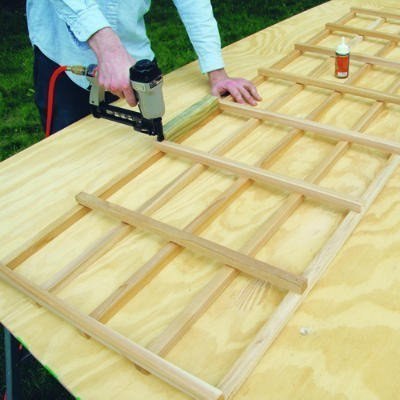
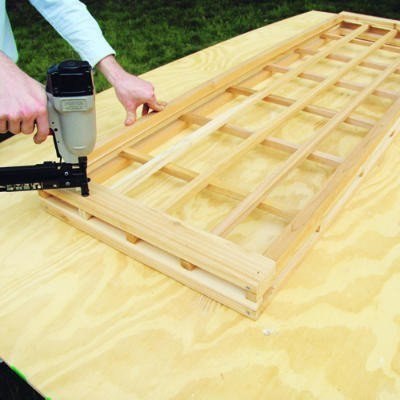
- remove the protruding parts of the strips;
- turn the structure over and fasten it at the intersection of the plank on the other side, so that they are inside the frame;
- treat the design with an antiseptic;
- fasten the trellis to steel corners that can be cemented, if it is a stationary fence, or simply driven into the ground, then the structure can be moved if necessary.
Photo selection: 46 photos of interesting trellises


https://i.expert-h.com/en/klumb/1165#sigFreeId55d248a0f3
Forged Trellis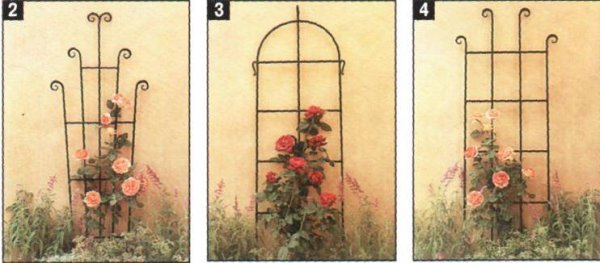
But you can also use thick metal wire, fittings, corners and other details. Of course, the art of forging looks very elegant - durable, but exquisite forms give the visual ease of construction. And forged trellis twined, for example, with roses, is a real admiration. A very interesting solution to combined trellis, when in a wooden fence there are art forging inserts. Check out a few examples of using metal trellis.


https://i.expert-h.com/en/klumb/1165#sigFreeId04339a469a
handsomely
Read the entire trellis article herehttps://i.expert-h.com/en/klumb/vertikalnoe-ozelenenie-dlya-ukrasheniya-steny
Watch the slideshow:
10 unusual ideas for your flowerbed
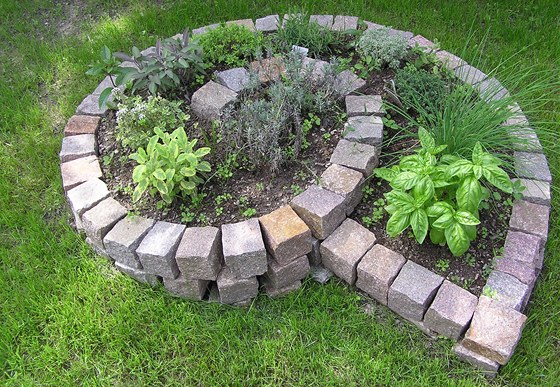
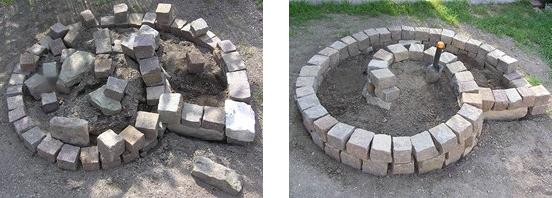
Flower beds spiral
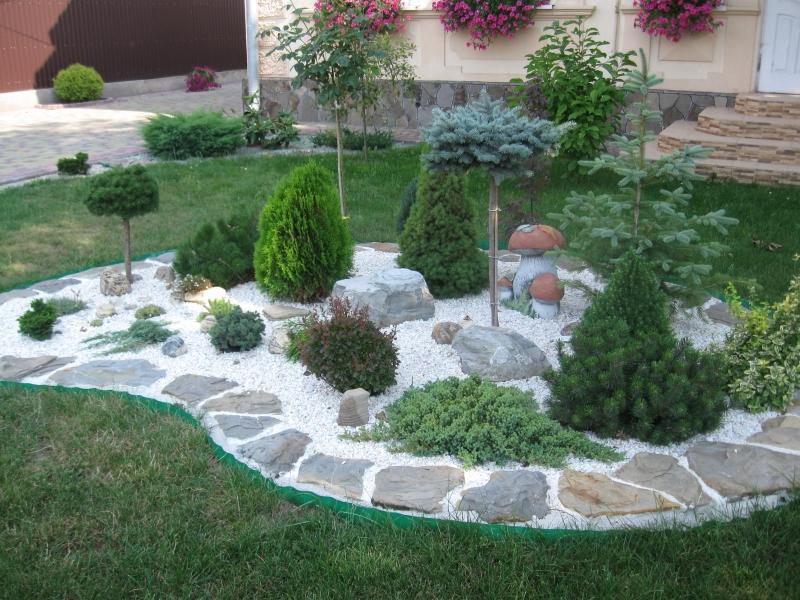
Fencing stones are laid out neatly around the flower beds. Dimensions should be considered so that the entire flower garden can be covered at a glance. Then this design will look even more spectacular.
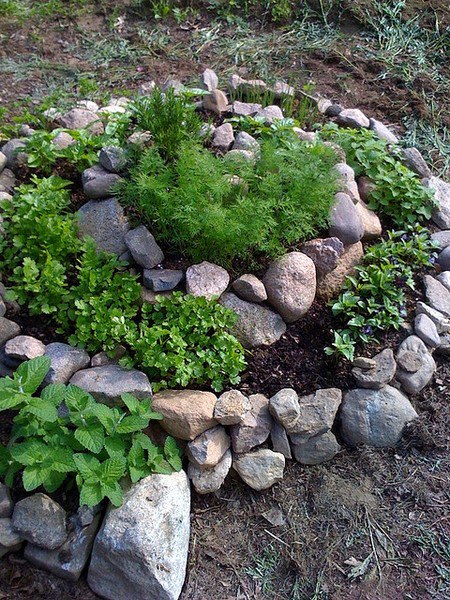
You can try to make such a flowerbed-spiral, or you can call a garden-bed and plant, say, not with flowers, but with herbs. A very convenient thing, if you choose the right plants. From above, the soil will be dry and more sun, from below the shadow and wet, so if you plant it where you need to, there will be a green garden for the whole season. Just do not be greedy and do not overdo the size, the radius should be no more than 1.5 meters so that they can reach the middle.
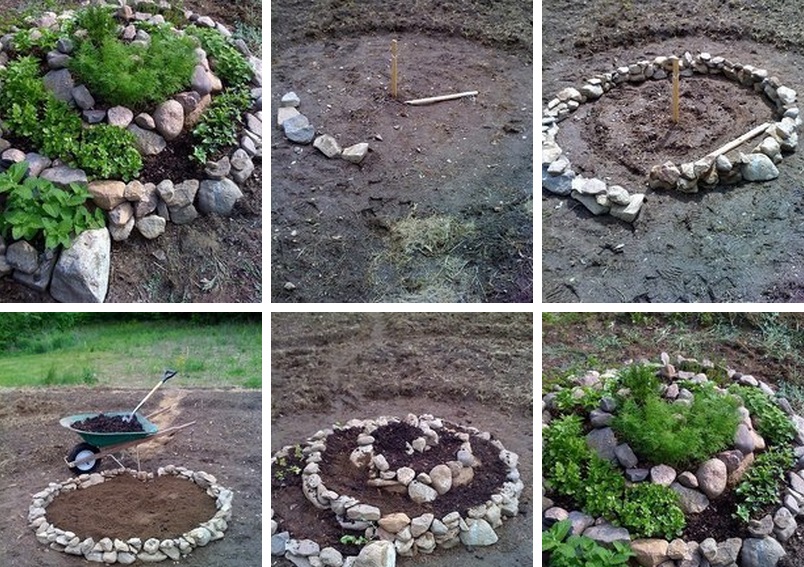
Let’s take a look at how to do it:
- Clear the area in size. Drive a peg in the middle, measure the distance of the future flowerbed from it along the radius, make a markup.
- Expose the stones along the border with a spiral, sprinkle them with soil.
- On the pre-compacted ground, lay out the next round.
- So lay the spirals to the very top.
Tall flowerbed spiral
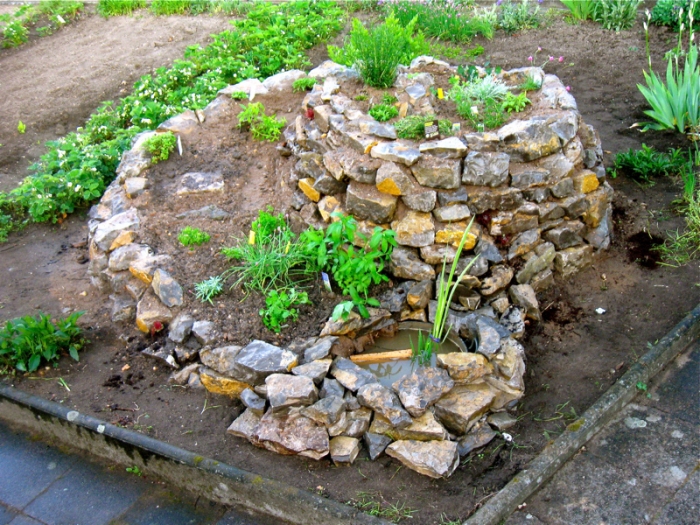
An even more beautiful flowerbed-spiral will turn out if you make it from natural stone or bricks. Then you can make the flower garden higher and even organize a small pond on the side. The process of building a bed of bricks or pavers is the same as described above. You will also need cardboard, gravel, sand, fertile soil and fertilizers.
See a step-by-step photo master class:


https://i.expert-h.com/en/klumb/1165#sigFreeId2c3c305aec
Small flowerbed spiral
You can also make a small flowerbed-spiral, slightly changing the configuration. It does not take up much space, you can always allocate a little space for it somewhere in the corner of the yard or on the site.
For a small flowerbed-spiral does not need such a thorough markup. Make a small hill and stone it with stones.
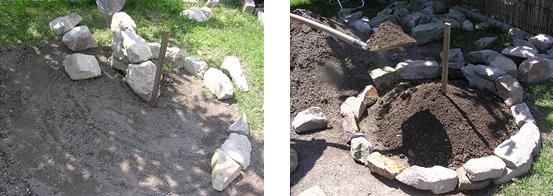
Then expose the outer spiral and fill the space with earth.
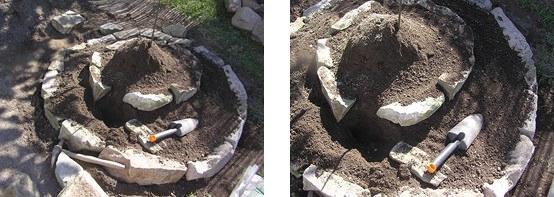
If you have paving stones, also good. You can bind them with a solution,but without it you can always dismantle, replace or correct stones. Draw the shape of the future "snail" and lay out the first row along the contour. Then the next, lay the bars as tight as possible.
Closer to the center, increase the height of the masonry. At the beginning of the curl we lay two rows of stones, and closer to the middle we increase the height by 3 or 4 rows, at our discretion. Fill the prepared “snail” with soil with fertilizer and fill it with water. Now you can plant plants.
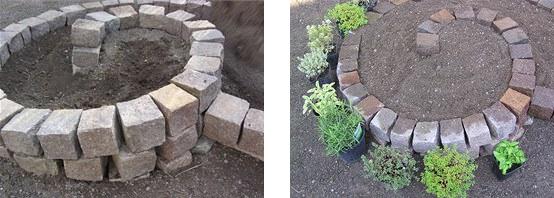
The flowerbed spiral is suitable for growing flowers and aromatic herbs, even greens for the table, which will save space in the garden. You can also combine, let’s say beautiful flowers from above, and in the lower tier, where useful herbs or greens for a salad easily reach. Here are some options that may suit you.
Spiral flower beds - photo gallery
(for inspiration)


https://i.expert-h.com/en/klumb/1165#sigFreeIdcdee9b71c0
See the whole article about spiral flower beds herehttps://i.expert-h.com/en/klumb/klumba-spiral
Brick flower beds
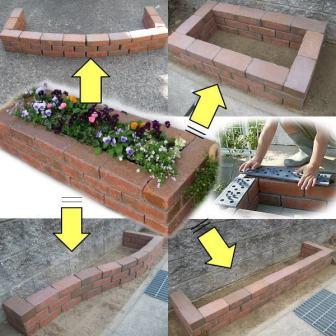
Do-it-yourself border for a flower bed made of bricks
Height doesn't really matter if there is room, You can make a border for a flower bed with brick yourself
Step by step photo sequence
- It is necessary to mark a place under the flowerbed
- Dig a deep trench, the height of the brick end
- We do the styling so that the bricks are placed at the width of a finger
- The next day, if the earth is not very damp, you need to carefully sweep the curb without swaying, so that the brick is better compacted
- Prepare boards from cardboard and lay bricks as in the photo in the gallery
- With a dry mixture (cement and completely silent fine sand) pour a small layer on the laid bricks
- Smooth the mixture with a brush so that all the cracks fill
- Take a hose and install a nozzle for a fog and slightly spray water on the top of a brick.
- Twenty minutes later, pick up the cardboard fence
- Carefully remove excess cement with a spatula until it is dry.
See photo master class:


https://i.expert-h.com/en/klumb/1165#sigFreeId16368c6a15
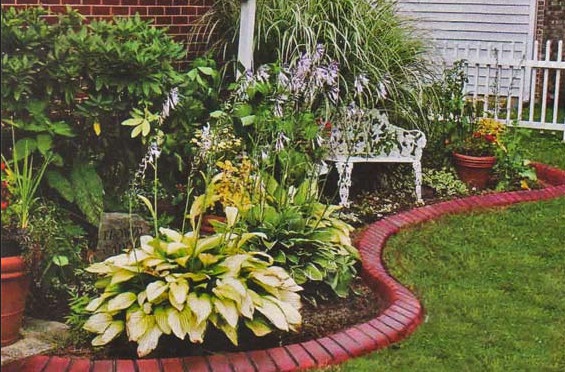
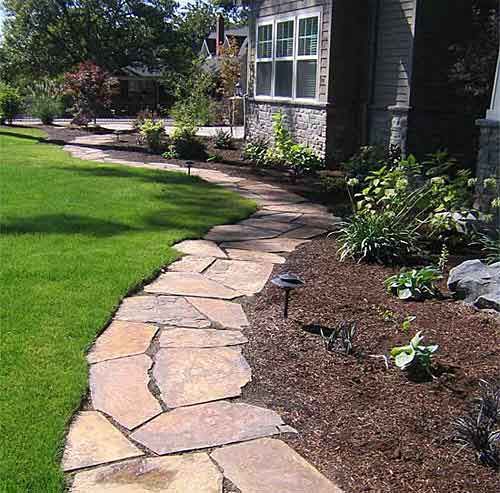
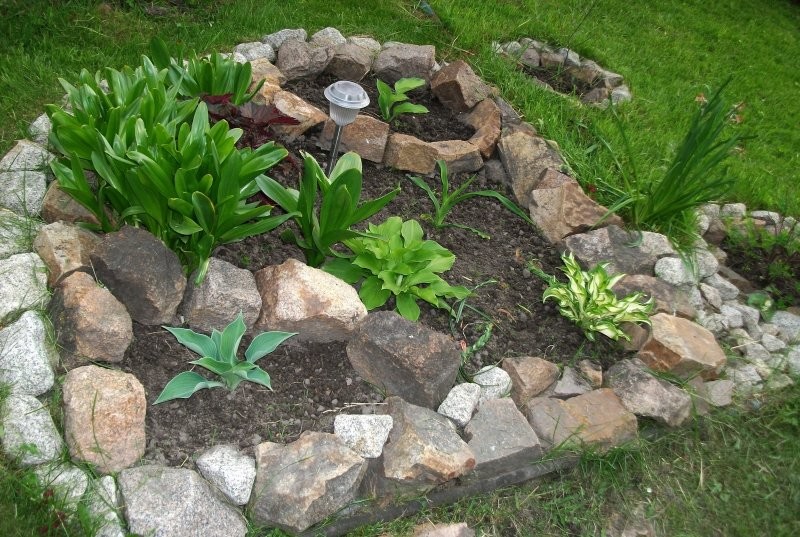
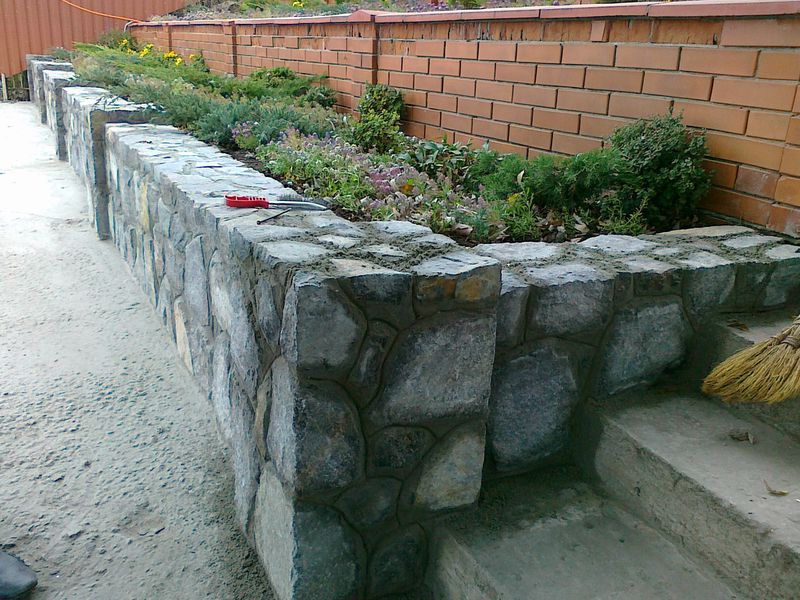
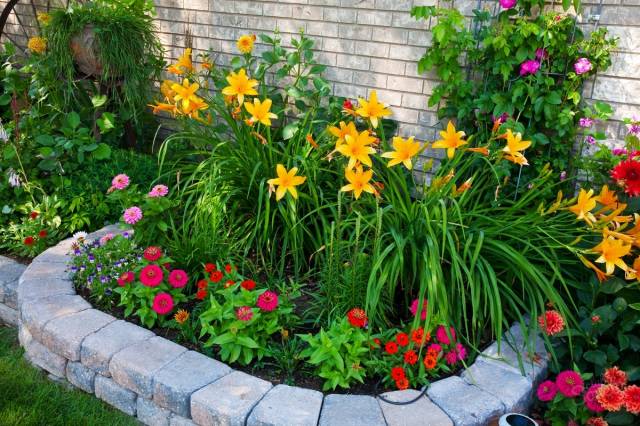
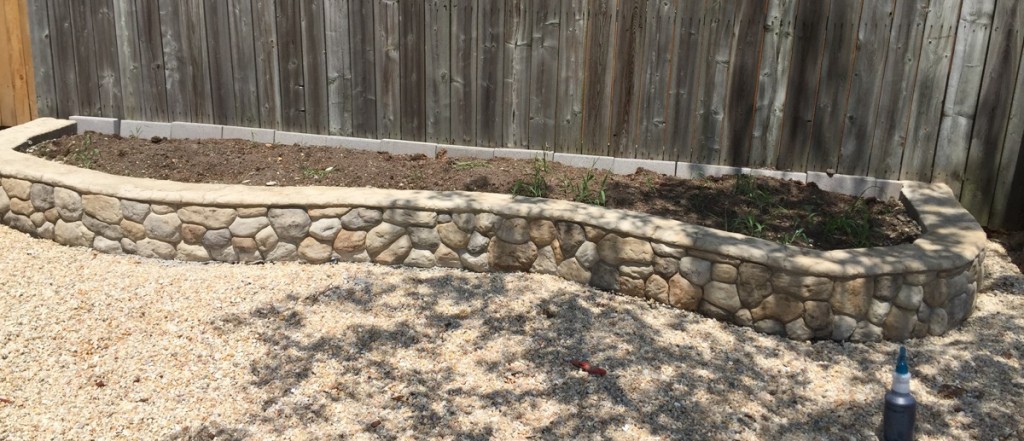
Do-it-yourself border for a flower bed made of stone
It is very beautiful and of course more durable to make a border for a flower bed of stone.
 Everything is simple here, no special instructions are needed. Simply:
- do not dig a deep trench around or around the perimeter of the flower bed;
- give a layer of small gravel, tamp;
- if you have all the stones of the correct form, you can make it as a foundation on a cement mortar;
- pick the right size stones
- if necessary, some stones can be adjusted using a conventional tool;
- stack the stones.
See step by step photos:


https://i.expert-h.com/en/klumb/1165#sigFreeId7f28b2bf1d
You can spread it as you like - for example, in the form of plates, and if the stones are different, then like a mountain landscape.
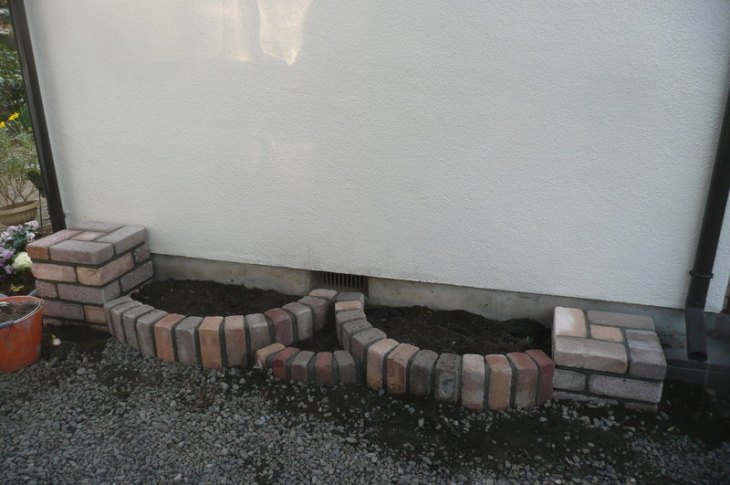
Flowerbed along the house
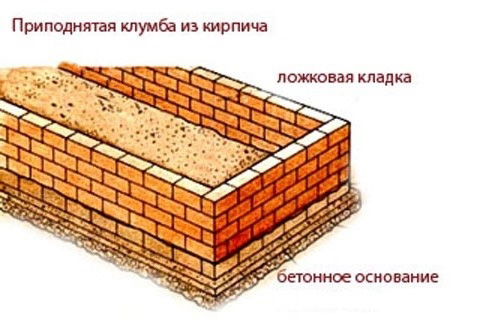
Classic version when a flower bed is broken along the house, or along the fence, as in this photo, in the form of steps. If you plant the flower garden close to the wall, it is important to observe the technology, that is, take care of waterproofing so that the foundation of the house is not damp.
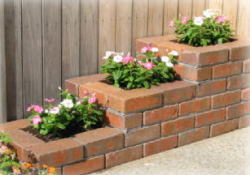
If you plant the flower garden close to the wall, it is important to observe the technology, that is, take care of waterproofing so that the foundation of the house is not damp. Flower beds along the wall can be of different options. You can see the classic brick flower bed in this photo. It is important to properly prepare the foundation. For a wall height of five bricks, a small depression of 15 centimeters will suffice. If the foundation is planned to be made long, from two meters, it is advisable to reinforce it.
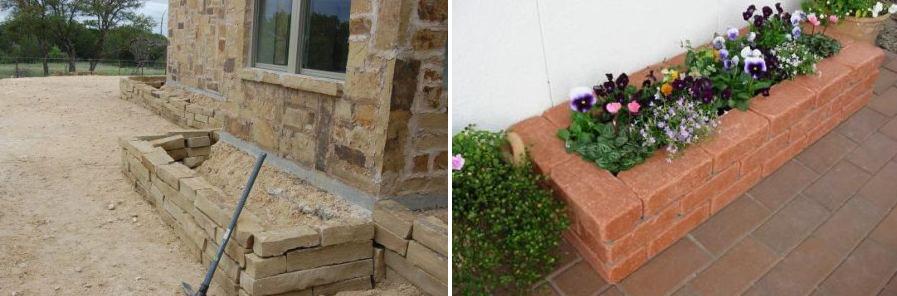
Masonry can be made of stone, blocks, bricks, any material is suitable if used correctly.
To make a classic flowerbednecessary:
- Mark the outline.
- Dig a small pit along the contour.
- Fill it with drainage (sand, pebbles, gravel, crumbs).
- Make a masonry, while the bottom row of the solution is not fastened, so that moisture does not accumulate under the wall, this is bad for the building and for plants.
- If the flower bed is high, we do the masonry a little with an inclination inward.
 You can make a more complex configuration, like this, for example. The principle is the same, only the way of laying the brick is different. This gallery shows how to do this..


https://i.expert-h.com/en/klumb/1165#sigFreeId9df28b9528
It remains to plant flowers. Semicircular flower beds along the wall houses look very beautiful.
Flowerbed of building blocks with decor
Can make a flower bed along the wall of blocksand then beautifully decorate, this option will be cheaper. Cinder blocks, although voluminous, but still the flower bed can be of any configuration.
How to do it (see photo step by step)


https://i.expert-h.com/en/klumb/1165#sigFreeIdb707c4bab8
Brick flowerbed in the yard
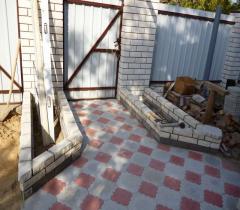
In the courtyard of the house you can come up with different options with flower beds, place not only along the wall of the house, but along the fence or near the gate. Configuration, of course, depends on the situation. Near the gate, the flower garden can be made as a continuation of the support pillars, they will look like a beautiful frame of the track. True, you have to equalize and cut the brick, you can do this with a simple grinder. Near the house, of course, more opportunity to do with the prospect.
Look at the options for arranging flower beds in the yard.


https://i.expert-h.com/en/klumb/1165#sigFreeId6f8b5fc7e2
DIY brick flowerbed
Brick flower bed near the house, a good solution for landscaping the yard. Make it yourself is not difficult, especially as small as in the photo. Although some skills, of course, you need to have. If you do a higher masonry, then you need to do everything correctly so that it does not fall apart. But even without the skills, you can try to lay out the masonry for the flowerbed using this instruction.
Before you get started
Choose bricks that tolerate moisture well, ordinary ones for the long term are not suitable. For decoration, facing bricks with a beautiful texture are best suited. For a small flowerbed as in the photo you will need about 50 bricks and 30 kg of mortar. If you want to do more, say in six rows, one and a half meters long and half a meter wide, then one hundred bricks and 80 kg should be enough. solution.
Do the masonry
Make a marking, drive in pegs with a tightened twine. Prepare a trench.
Step 1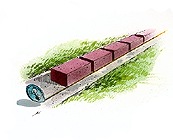
Lay bricks without mortar at even intervals. This will tell you if you need to insert a short brick at the end of the masonry. If necessary, you can increase the space between the bricks, in case you will miss quite a bit, so as not to insert a very small piece of brick. Mark the location of the first and last brick.
Step 2
Install the first bricks. Mix a small portion of the solution. Install the first two bricks, at the beginning and end of the future masonry. Check the level in both directions by tapping the spatula knob to make adjustments.
Step 3
Lay the first row. Grab a full mortar spatula and lay on a row of three bricks across the entire width, a layer thickness of approximately two centimeters. Smooth the solution from the front side up.
Step 4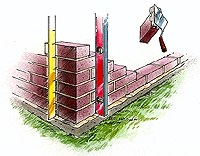
Level the corners and plumb them .. After completing the first row, start laying out the second lap over the first. Constantly check the level of the horizontal surface of the masonry, and the order of the thickness of the seams.
Step 5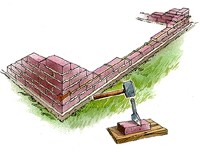
Fill each row to the end. Use twine to keep the line flush with the front side. If the necessary piece is not enough, you can cut it with a grinder, if not, then file the right size and then chop it off with a hammer on a wooden plank.
Step 6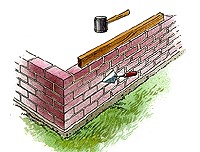
Check the masonry level again. To adjust the level continuously, tap with a hammer. As you move, remove excess mortar from the trowel. To form a beautiful seam, the excess can be removed with a piece of a garden hose.
 Do not miss such a moment as waterproofing flower beds. After the masonry dries, in dry weather it is about a day, treat the inner walls with a bitumen emulsion, then the bricks will not absorb moisture from the ground.
Also necessary provide drainage holes in the masonry, for this, do not fill the solution with three vertical gaps in the first row of bricks. At the base of the future flowerbed, remove five centimeters of earth and fill it with a layer of fine gravel. Lay on top the sod that you removed to cover the gravel. To sag the soil, let the flower bed stand in this form for ten days, after which you can fill up the fertile layer of soil and plant flowers or other plants.
Read more about how to make flower beds from brick here.https://i.expert-h.com/en/klumb/uglovye-klumby-iz-kirpicha-i-kamnya
Flower Gardens for Dubai
Slide show:
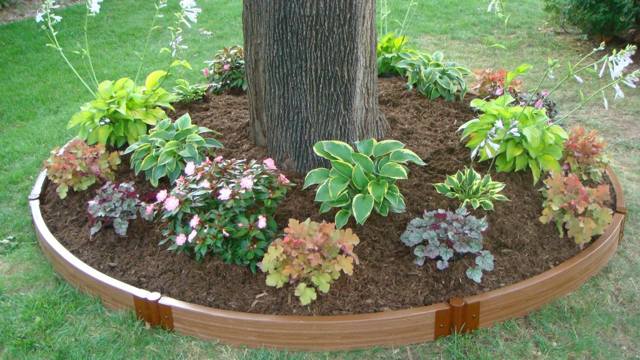
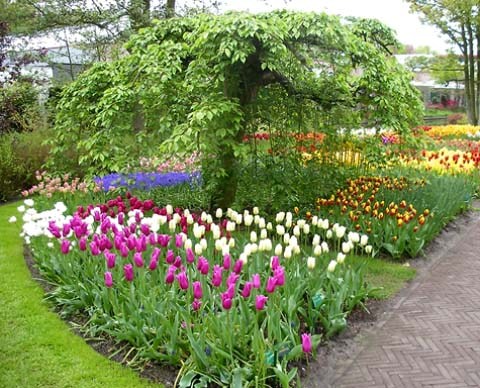
Flower beds under the tree
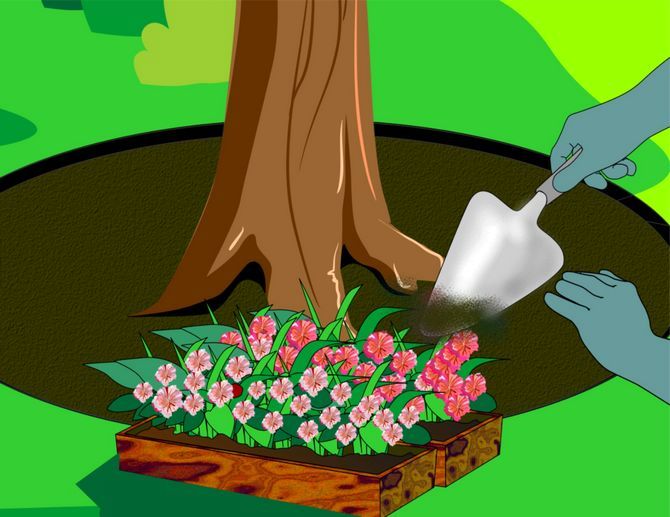
How to make a flowerbed under a tree
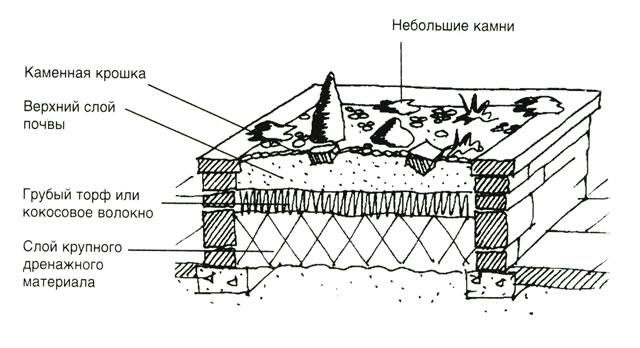
If there are trees in your area, a flower garden around the trunk will be a good solution to save space. Let's look at how to make a flowerbed under a tree, a classic version of a round flower garden, so to speak.. The whole process is graphically depicted in the pictures below. Photos, of course, from the bourgeois site, and they can draw beautifully, even if you shoot a cartoon.
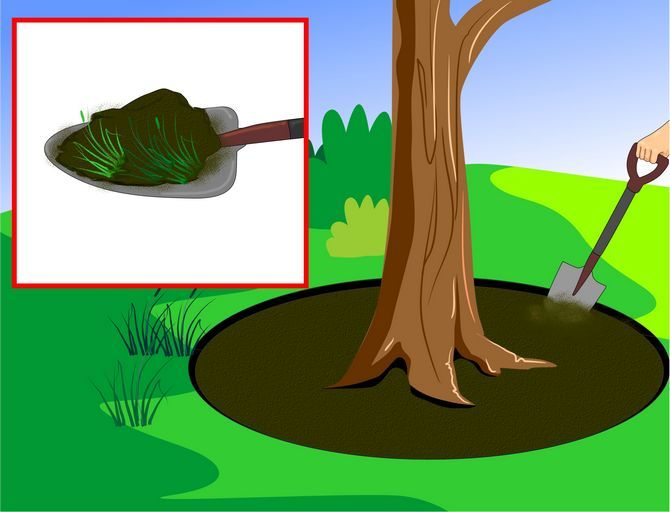 First, on the site around the tree, where you are going to break the flower bed, you need remove turf. Then it can be used for other purposes, for sure there will be a place on the site where the grass grows poorly.
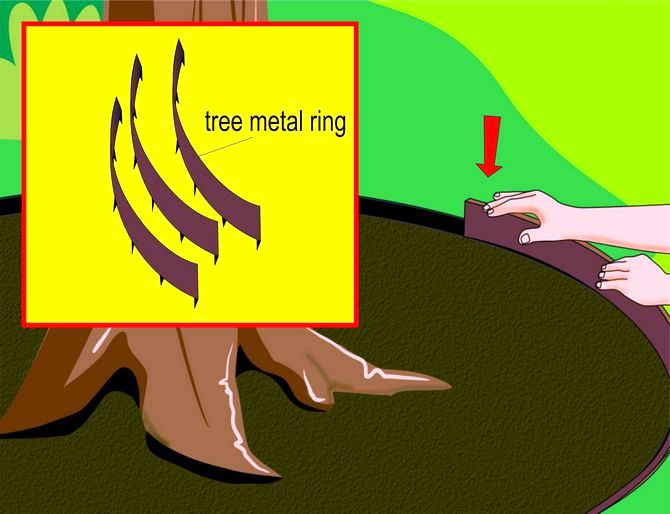 Buy at the store or make your own a metal strip with spikes to mark the edge of the flower bed with a side. In principle, for temporary fencing You can use anything, but with a strip more convenient.
 Fill the prepared area with soil eight centimeters high so that the upper roots do not protrude from the ground.
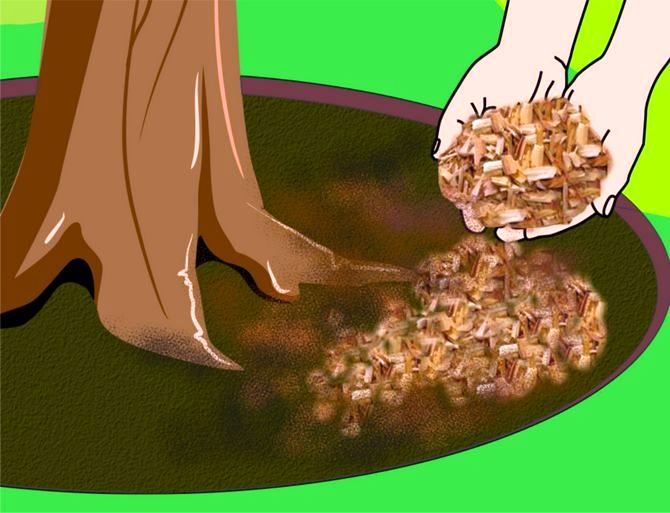 Level the topsoil and lay on it sawdust layer, so that the ground is completely covered.
 You can plant flowers first, and then add sawdust, but practice shows that it’s better after all sawdust first, and then planting.
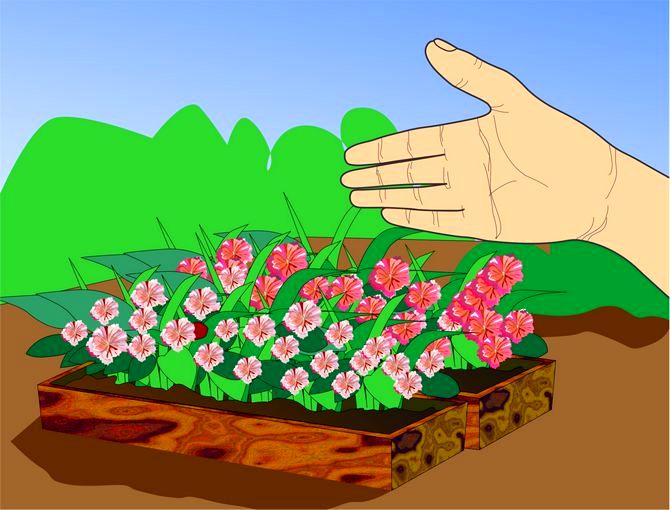
 Planting flowerswhich ones and how to plant depends on what you have chosen. This issue must be studied in advance, there are many nuances. Not all flowers can take root under a tree, while also looking under which tree.
 We make a border. There are also many options here. At the bottom of the article, in the gallery, you can see what types of flower beds are and how they are laid around. The easiest way is if you find paving stones, and since you have already installed a temporary fence, it’s easy to just lay paving stones or, say, brick, beautifully.
 Flowers planted, it remains to arrange regular watering, at least during the first month, and then look at the weather.
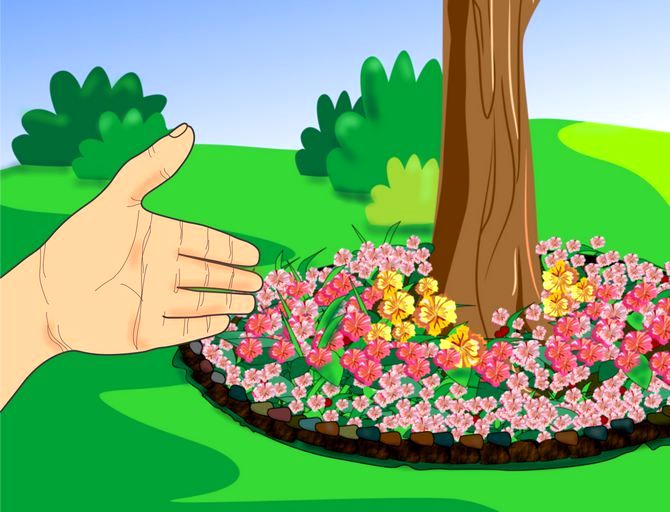 When the flowers grow, you can brag to your neighbors.
How to pick flowers for a flower bed under a tree
Typically, flower beds are broken in sunny areas, on elevations, so that it can be clearly seen. For flower beds under a tree, such conditions for flowers are not realistic to create, therefore, other approaches are used here. We must proceed from the fact that the place will be shaded and wet. 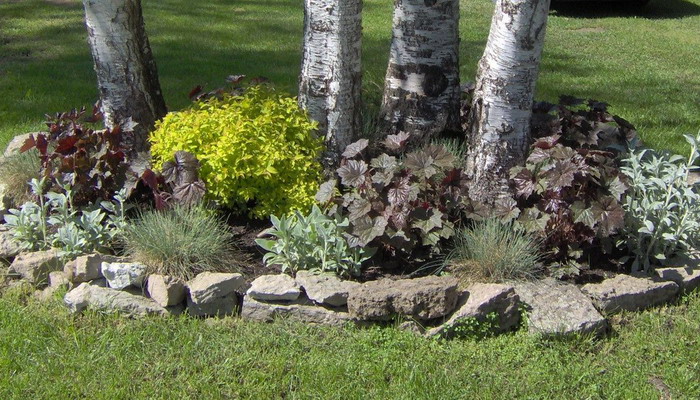
Of course, a lot depends on the tree, conifers - this is one thing, they create a special microclimate, oxidize the soil and generally create many problems for other plants. But under them various types of orchids, heather and similar species grow well. But ordinary garden flowers are unlikely to survive such a neighborhood.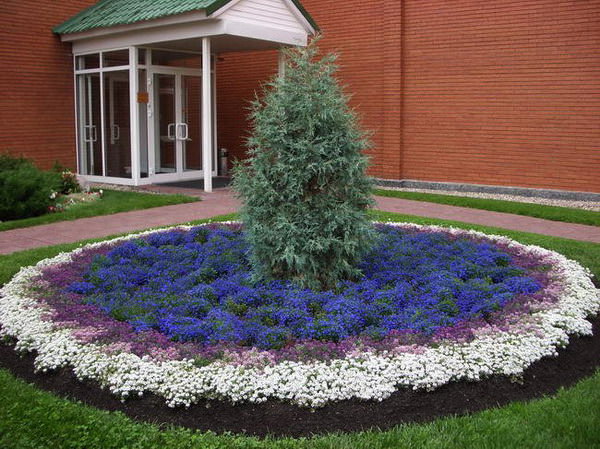
Deciduous trees, and most often in the fruit areas grow, this is different. They do not have such dense crowns and part of the world will fall on the flowerbed. In some cases, planting flowers under fruit trees is even beneficial.
For example, marigolds, calendula and nasturtium scare aphids and nematodes from apple trees, and lilies of the valley protect cherries and cherries from fruit rot.
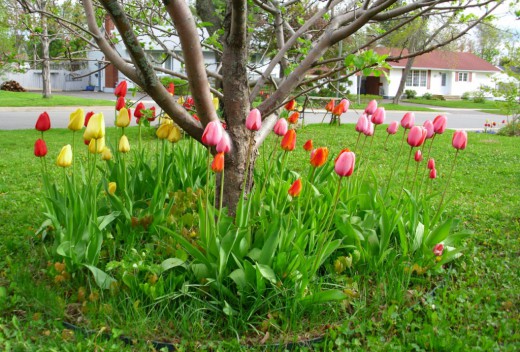 Generally for a flowerbed an apple tree is a very good tree, its crown gives a lot of diffused light and the soil under the apple tree is favorable for many plants. Under it, periwinkles, nasturtiums, pansies, bells, forget-me-nots, daffodils, daisies, crocuses grow well.
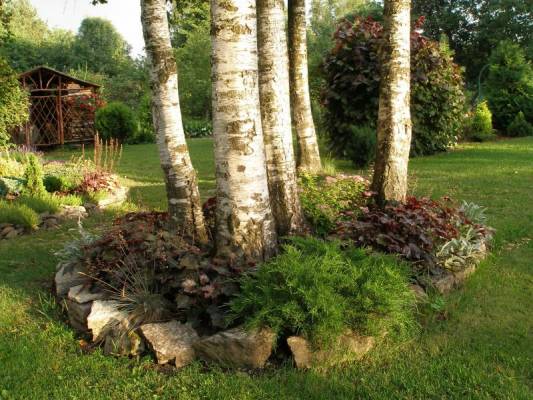
But not all trees are so supportive of neighbors, for example, under an oak tree you are unlikely to grow a lawn, and with birch except for the medunica, fern or lilies of the valley, they can get along. Some people find they come out planting flowers that bloom before the appearance of a dense crown - bluebills, daffodils, hyacinths, tulips.
Still as a design bosquets can be planted around the tree.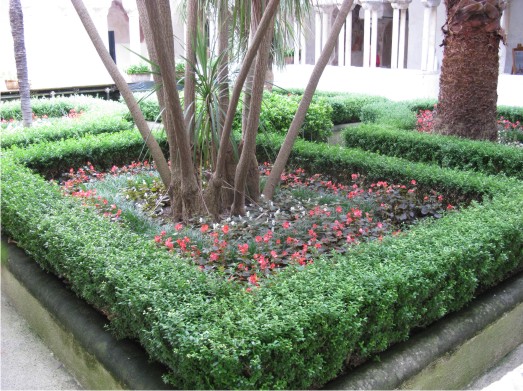
These are hedges from boxwood, they look very neat and beautiful, you can give them any shape, you get such an original border.
Read more about flowerbeds under the tree here.https://i.expert-h.com/en/klumb/klumba-pod-derevom
Wicker flower beds baskets
All materials for such a flower bed are under your feet. Even dry branches and bark can be used by soaking themdigest in water for a couple of days.
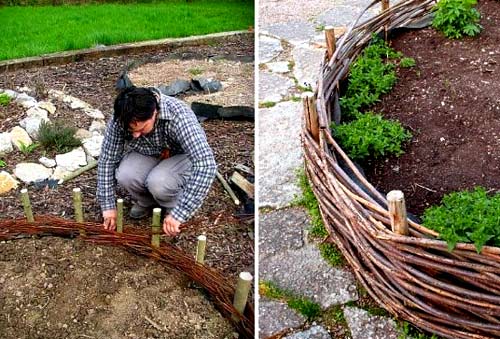
But best, of course, willow rods are suitable. Harvest the necessary quantity from spring and you will have excellent material for the flowerbed and not only.
We make a flower bed in this order.
- carefully remove the bark from the rods;
- cut along the length so that everything turns out the same;
- we designate a site and hammer pegs in a circle;
- the distance between the pegs is arbitrary, but the denser they are installed, the more reliable the fence will be .;
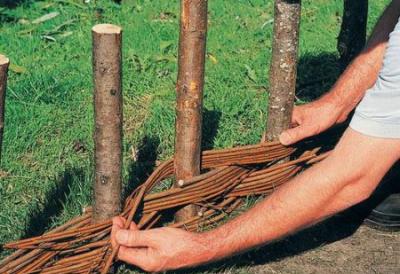
- then we pass the rods between the pegs, as in the picture;
- after the fifth row, tap to the right and left of the peg with a wooden hammer, this is for sealing;
- fasten the ends of the rods.
The flowerbed can be of any shape, for example square or rectangular. The principle of installation and weaving is the same as that of round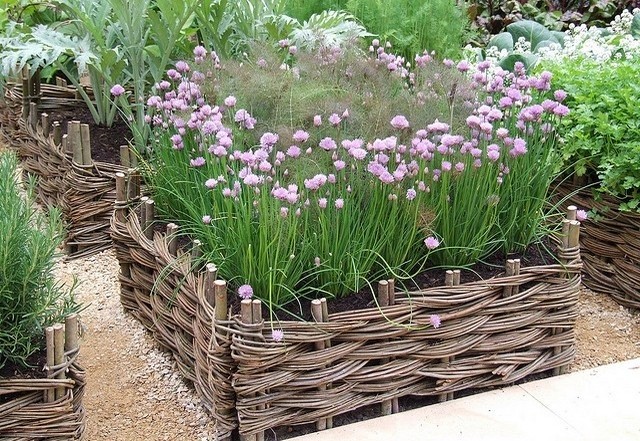
It is even easier to make such a flowerbed, just fill the pegs and on the slit side we start weaving the rods.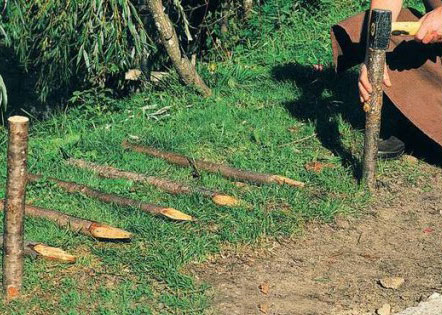
The rods should be laid tightly, tapping with a wooden hammer so that cracks do not form after drying. 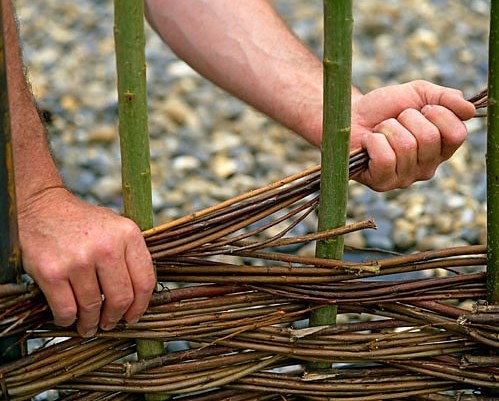
The difference with a round flowerbed is that in this case we weave each wall separately, and then fasten it at the joints. In principle, such sections can be made in advance and then driven into the ground, but there are some nuances here, because they will have to be dried first.
Flowerbed basket with support
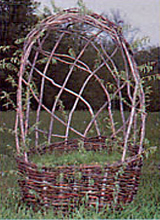 If you plan to plant a flowerbed basket with climbing plants, make support for them. Visually, it will be like a basket with a handle. The result will be a high wicker structure in human height, it will look very nice if you put it on the porch or gate at the entrance to the courtyard.
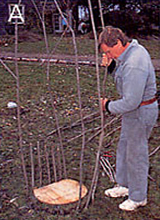 The manufacture of such a basket will not take much time, the main thing is to pre-prepare the bars of the required length. For our flowerbed, you will need twigs of up to two meters. Then make a template from plywood or thick cardboard. This will be the foundation around which we will build a flower bed. Since the basket will not be completely round, in this case there is a back support wall, make a cut from the side of the template on one side.
 Prepare the site, in the place where the flowerbed will be located, it is necessary to remove the turf and prepare a small depression in a circle, in a word, a small trench. We will insert thick bars into it, the future wall of the basket. The distance between the rods can be chosen arbitrarily, but not more than fifteen centimeters.
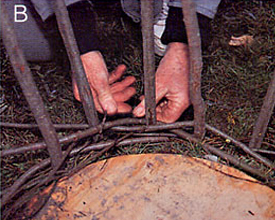
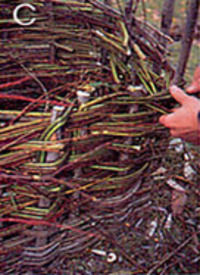 Then we begin to weave the basket, the first vine will lie on the ground, braid the pegs with several rods, moving one peg with each level. So that the tips do not stick out, they can be cut or neatly woven into the edge of the row. Each "tape" must be woven to the end.
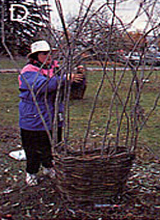 Where we have a wall, we marked it with a cropped pattern, the ends of the rods must be assembled and diagonally twisted with opposite ends. It should get such a high "handle" that can be fixed with wire. Then from the long rods of the wall we form a “lattice”. The work is finished on this, then the most pleasant part, we fill the soil and plant flowers. A combination of flowers and climbing plants will look very nice.
Flowerbed from an old basket
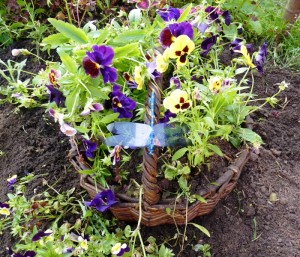 If you don’t know how to weave and don’t want to learn, although it’s simple, can make a flower bed from an old basket, although it is possible from a new one, if not sorry. There is nothing to do here at all, except to soak the basket with an antiseptic, otherwise it will become unusable in the ground very quickly.
There are two options, you can make a stationary flowerbed, remove the bottom from the basket and deepen it into the ground or use it as a portable flowerpot, and put, say, on the veranda. Or suspend, which is often done. But in this case, consider the first option, the photo shows how from two old baskets made a stationary flowerbeds, and one of them was laid on its side, is also beautiful. In this case, unpretentious summer flowers were used - nails and pansies. But if you install a flowerbed for a long time, you can plant seeds of perennial plants in the spring.


https://i.expert-h.com/en/klumb/1165#sigFreeIdcda1fc0662
Hanging pots from the basket
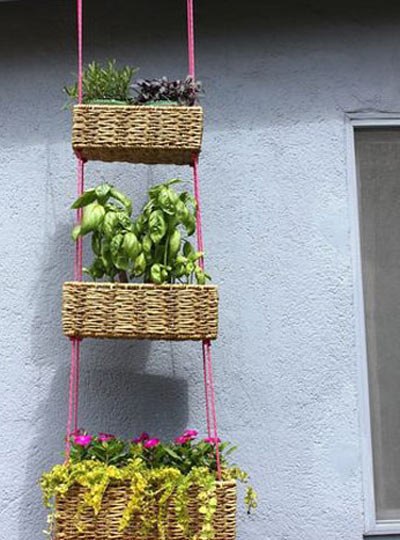 As mentioned above, you can make a wonderful hanging planter from the basket, for this you can use ordinary baskets, but to get beautiful, it is better to use special ones, for flowers, better than different sizes. In this case, a three-basket option is shown.
You can, of course, and more, if there is where to hang.
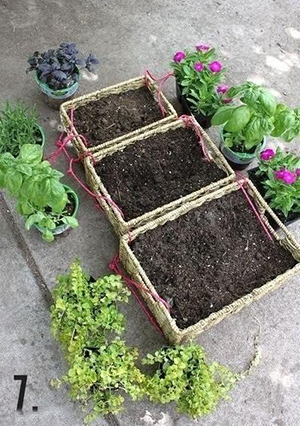
In general, we need to purchase baskets and find a strong rope.
First, I will distribute the flowers, depending on which composition we have in mind. In the upper part, you can plant plants that will hang beautifully, because the usual ones simply will not be visible, but something brighter below or vice versa, as in the photo, is also good.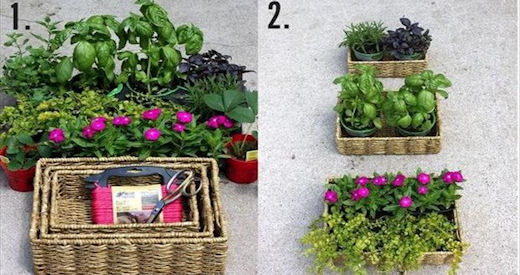
Then we assemble the structure, we need to make sure that the distance between the baskets is the same. You can put everything on the floor, as in the photo and carefully measure it. Next we thread the rope and fix the baskets with knots.
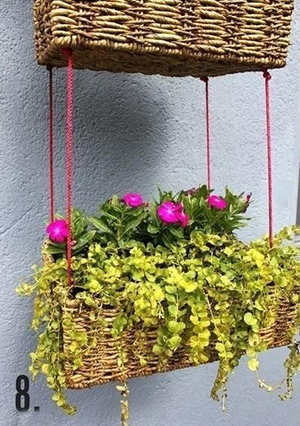
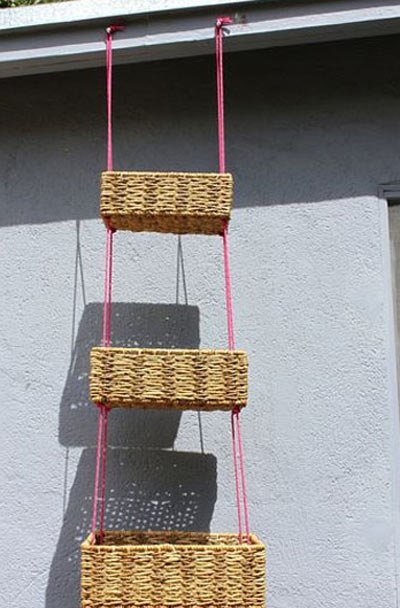 We hang and see how it will look.
You can adjust the distance between the baskets by weight, by the way, this is easier to do if you don’t tie knots, but make small wooden sticks, which can be threaded into a rope, although in this case it is better to use not an ordinary rope, but thin braided rope.
In my opinion, it’s even better this way, the structure is stronger and you don’t have to guess with the nodes, and if necessary, you can move the baskets to the desired distance.
Knots will need to be tied only under the bottom of the lowest basket.
That's all, it remains only to plant flowers.
A selection of photo flower beds baskets


https://i.expert-h.com/en/klumb/1165#sigFreeId86b896f780
Read about wicker flowerbed baskets in an articlehttps://i.expert-h.com/en/klumb/klumba-v-kozine-originalnay-idey-dly-cvetnika
Flower beds from blocks
Vertical bed of cinder blocks
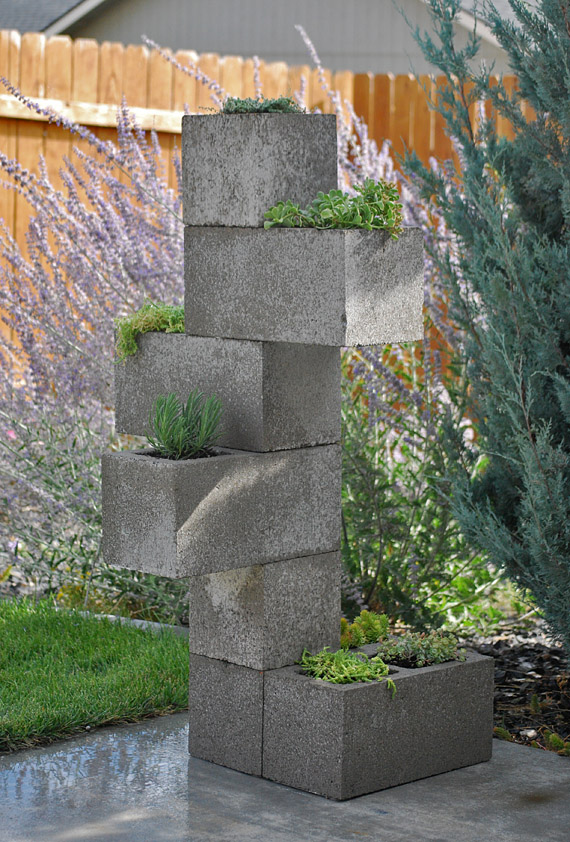
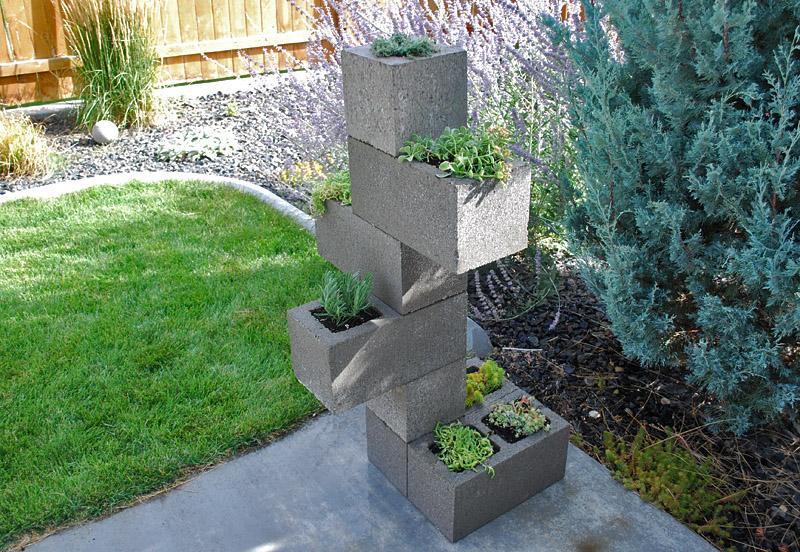
Cinder blocks universal material and from them you can make flower beds of various configurations. For example, as in this photo, such a vertical design.
A very comfortable flowerbed in all respects, practically does not take up space, but looks like a real work of art.
In this embodiment, you can use not only building blocks, any material that has a fairly spacious cavity is suitable. For example, hollow bricks or aerated concrete blocks.
The main thing is that there is great scope for creativity, you can deploy the blocks, as you wish, to make a suitable height and shape.
What do you need to cook? It’s clear the blocks themselves. As already mentioned, anyone will fit, so that there is only a cavity where you can pour soil to plant flowers. The space should be sufficient in volume.
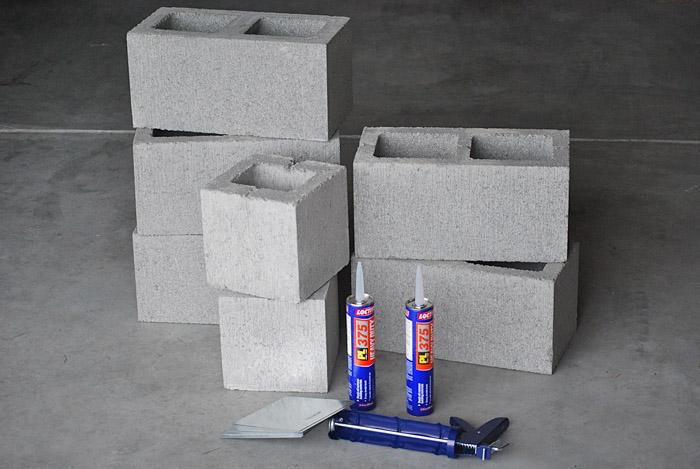
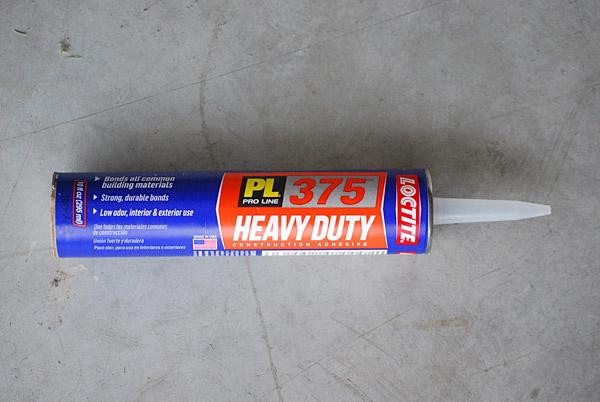
Construction glue
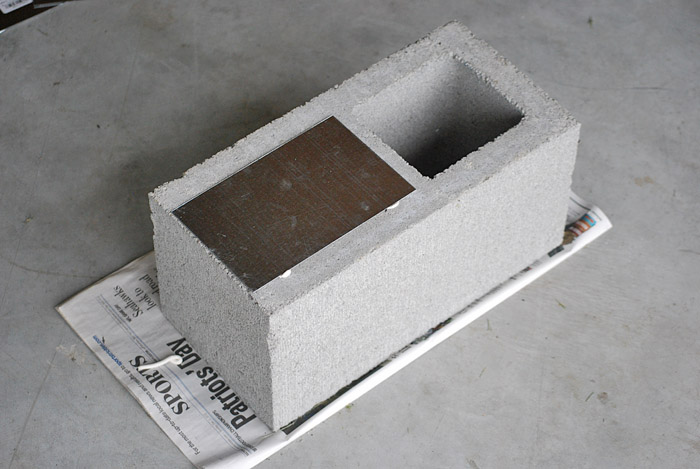
First, it is necessary to cut the plates of tin and stick them to the lower edge to close the through cavity. There are blocks where the holes are not through, then of course the task is simplified.
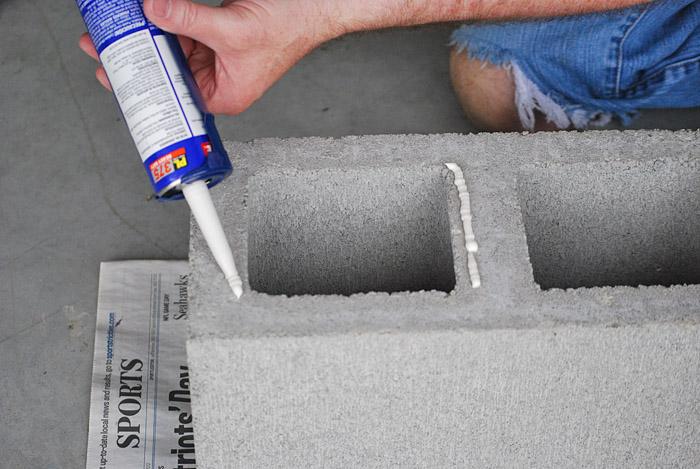

Having fixed the plate, it is necessary to make small holes in it so that water can drain. You can do it easier by leaving a narrow gap when sticking the plate on the block. But if the block has a through hole, holes for drainage will have to be drilled. After applying the glue, attach the plate and turn the block over onto the newspaper, under the press the glue will seize faster and will be more secure to hold.
Now that the glue has dried, you can collect the flowerbed. It is clear here, apply glue to the lower block, put the next one on it. The design must be balanced, so first you should collect it “dry”, without glue. In theory, the blocks should balance each other, if the structure does not fall apart, it can be fixed.
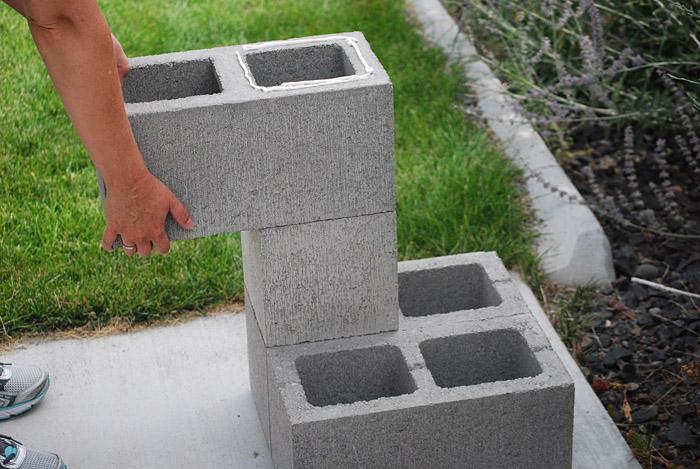
It remains to fill in the cavity of fertile soil and plants can be planted.
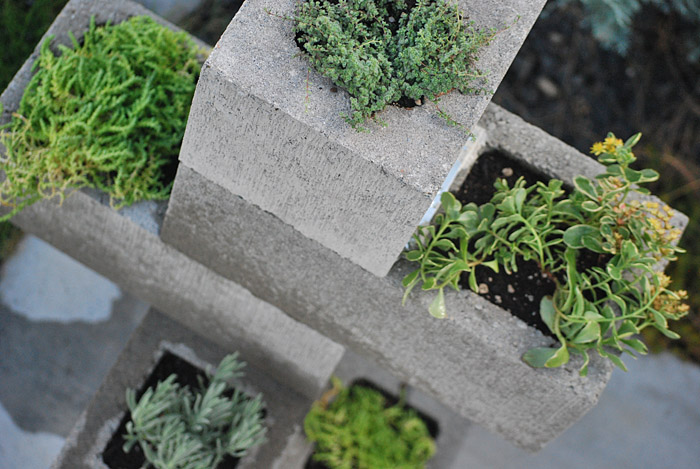
Well, how do you like such a vertical flowerbed of blocks. This is only one of the options, it can be higher and wider and a completely different configuration, at your discretion.
Block decor
To make it more fun, gray blocks can be decorated. You can do this in different ways, for example, simply paint with a special paint or stick relief patterns from some suitable material. Or as an option, apply a triangular stencil with a film and spray paintas in the photo.
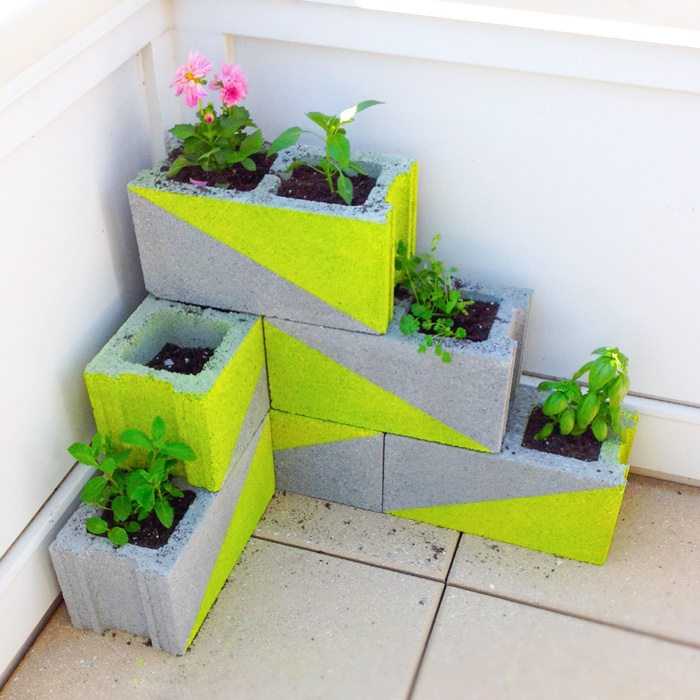
This is perhaps the easiest option, how to decorate blocks, look at the photo.


https://i.expert-h.com/en/klumb/1165#sigFreeIdafa8473e1d
Forms of flower beds from blocks
Compositions of blocks can be very diverse
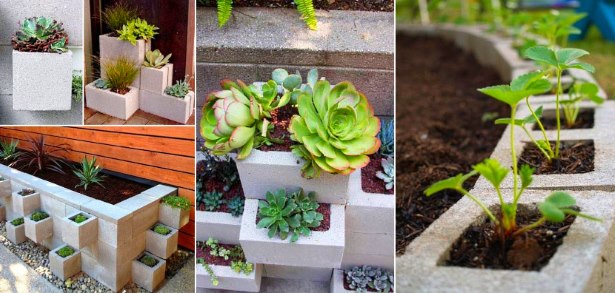
You can make a small mini-bed of 4 - 5 blocks
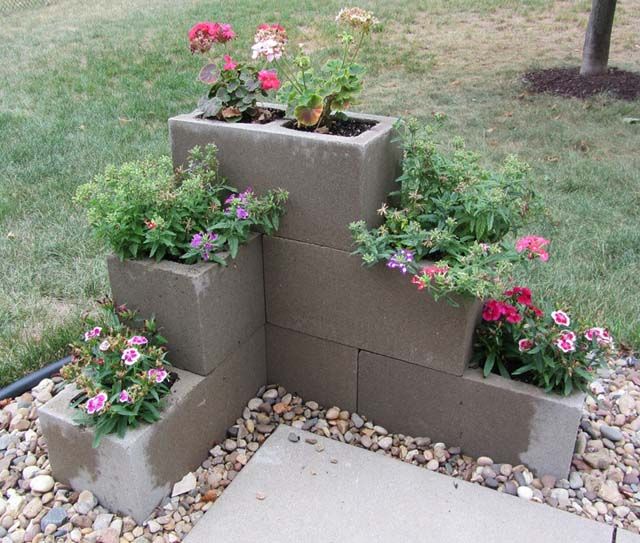
Or build an entire flowerbed wall.
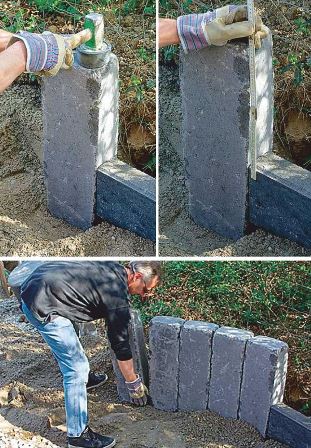
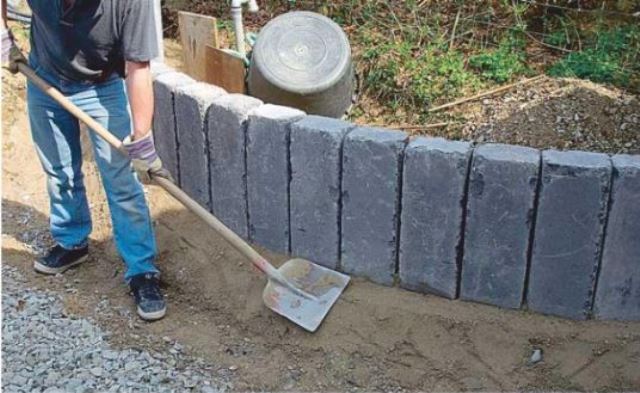
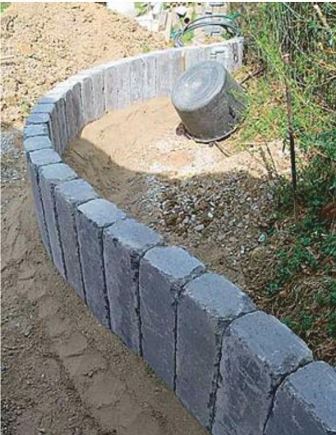
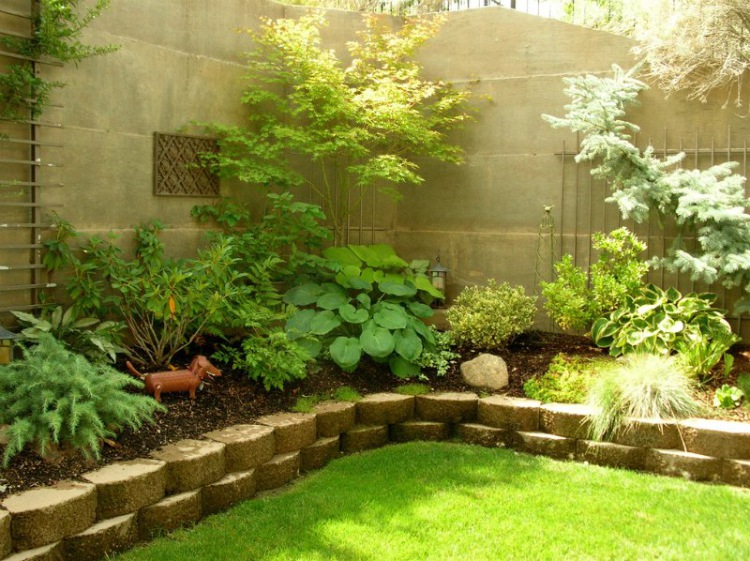
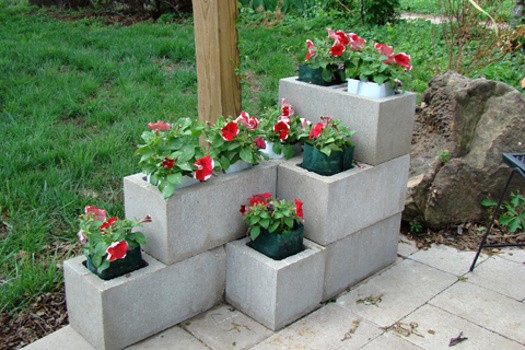
Block flowerbed fence
Small fences can be turned into a flower bed. Low walls are often built from blocks, for example, as a support for a site where there is a height difference. Or just as a fence at home or in separate areas of the plot. And if you turn such a wall into a vertical flower bed of cinder blocks? Look at the pictures, it can look very pretty.

The main advantage of such a wall is its simplicity. It is just necessary to find tongue-and-groove blocks, and to build a fence from them is no more difficult than to assemble a children's designer. In addition, the price of a wall made of blocks will be cheaper than the same construction of brick or stone.
Master Class:


https://i.expert-h.com/en/klumb/1165#sigFreeId72b0b79278
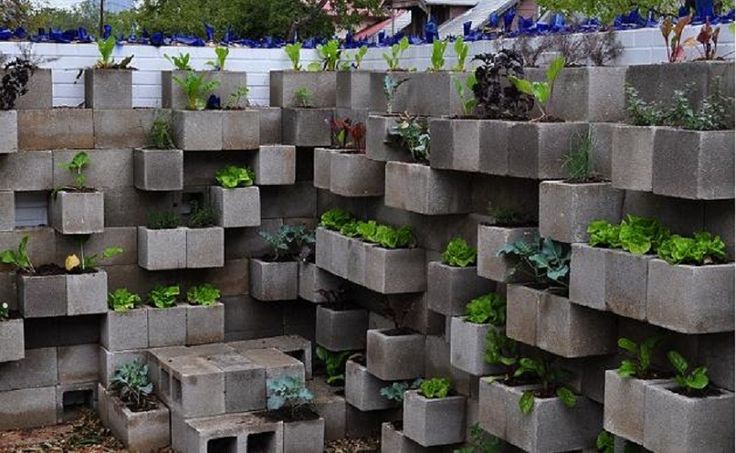
Blossom bed from blocks
Cinder blocks are often used for such flower beds, beds, so to speak, two in one. In the middle, plant vegetables, and use the cavity as a flower bed. Or vice versa.

An interesting photo selection of such flower beds:


https://i.expert-h.com/en/klumb/1165#sigFreeId03e8511dbe
Read more information about flowerblock beds in the articlehttps://i.expert-h.com/en/klumb/klumba-iz-blokov
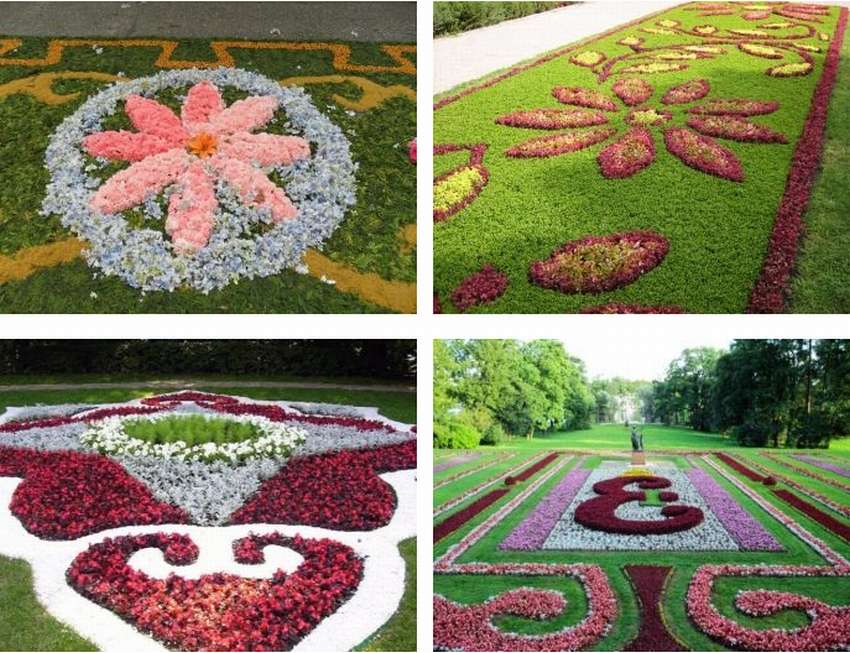
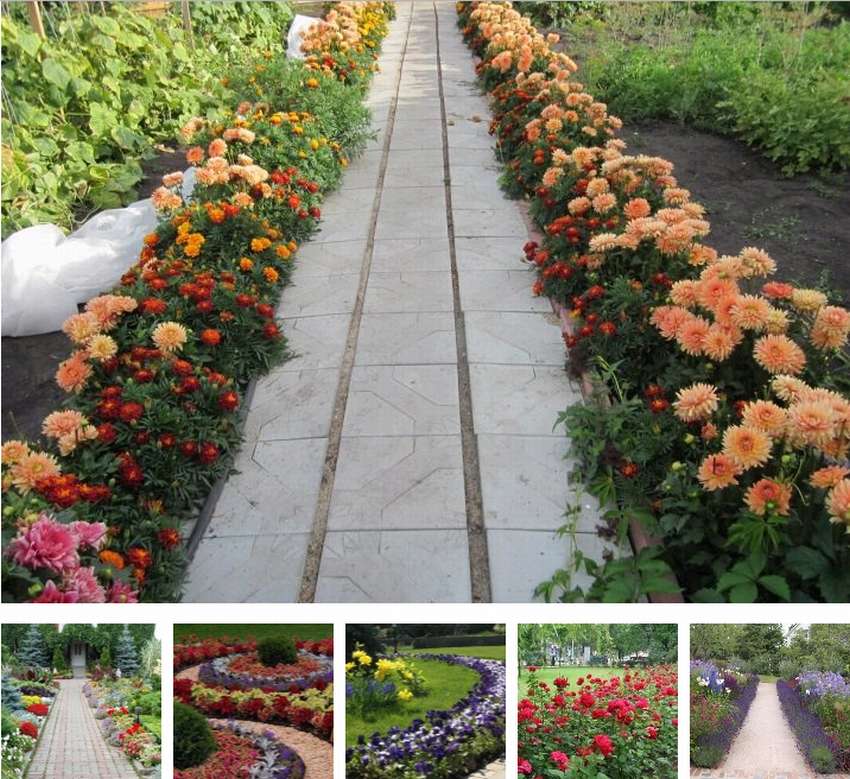
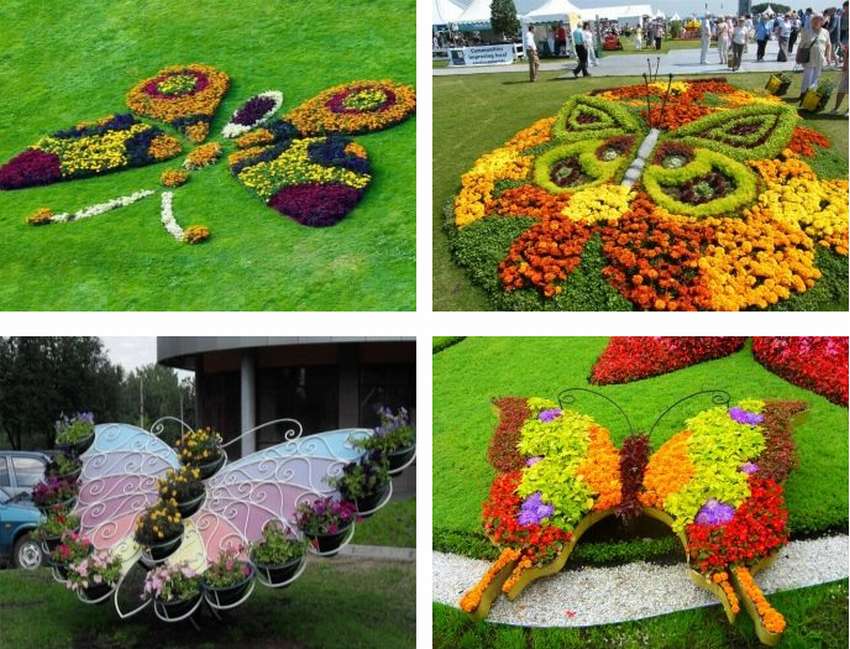
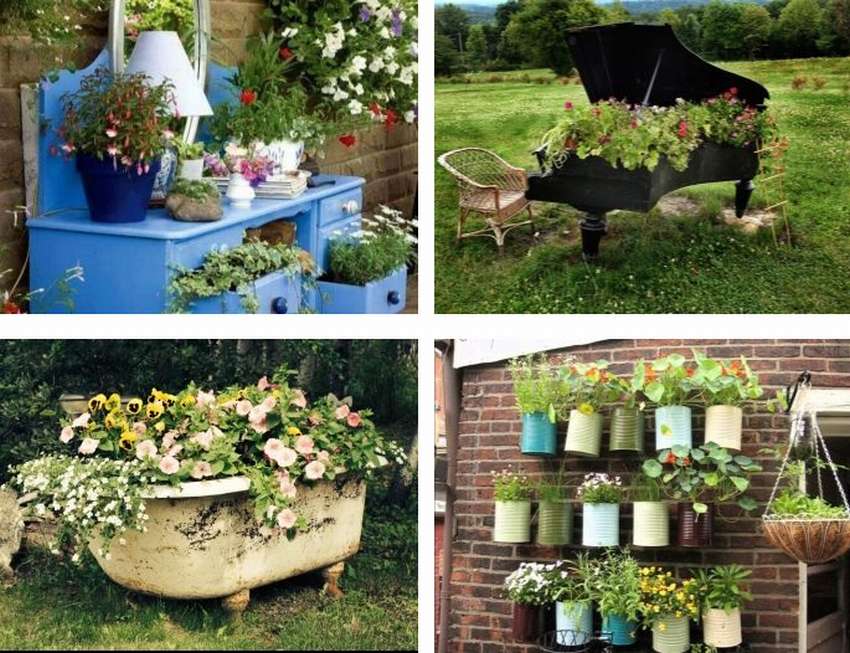
And a few more flower beds
A selection of beauty in your eyes
Video archive about flower beds:
- Brick grill: 44 drawings, 18 projects + photos
- Collapsible barbecue: 50 drawings, 20 master classes +300 DIY photos
- DIY sauna in the apartment: bathroom, balcony, storage room. Projects and photos
- Shelves in the bath with your own hands: +200 photo. Drawings of bench benches in the steam room
- Gazebos with barbecue grill (and stove) +240 photo do-it-yourself