Flower made of paper peony. Do it yourself, step by step instructions + 300 photos
 how to make peony from paper
Peonies are special flowers that leave few indifferent. If you want to learn how to do DIY paper peonies, check out this small selection of step by step photos. Paper flowers are great for decorating holidays and are much cheaper and more durable than real flowers.
The main disadvantage paper peonies - they cannot convey the incredible aroma of these beautiful flowers. But the plus is that beautiful a bouquet of peonies from paper can delight you constantly, regardless of the time of year! Not to mention what made do-it-yourself peonies from corrugated paperThese are the perfect flowers for a wedding. In addition, a good way to save money, especially if you need a large number of colors to decorate the room.
Content:
- How to make corrugated paper peonies
- Peonies from paper with a pattern
- Do-it-yourself big peony from paper
- DIY peonies from napkins
- Crepe Paper Peonies
- Cupcake peonies flowers
- Peonies from coffee filters
Corrugated paper peonies step by step
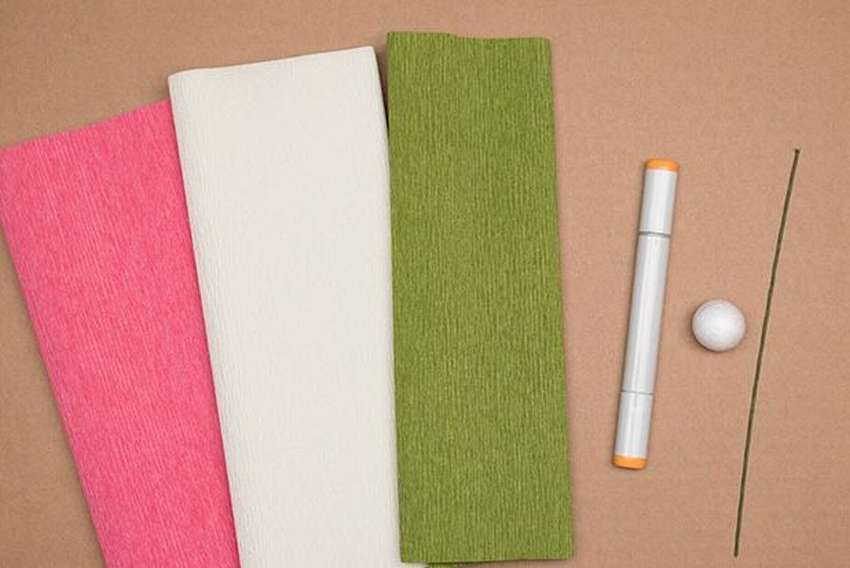
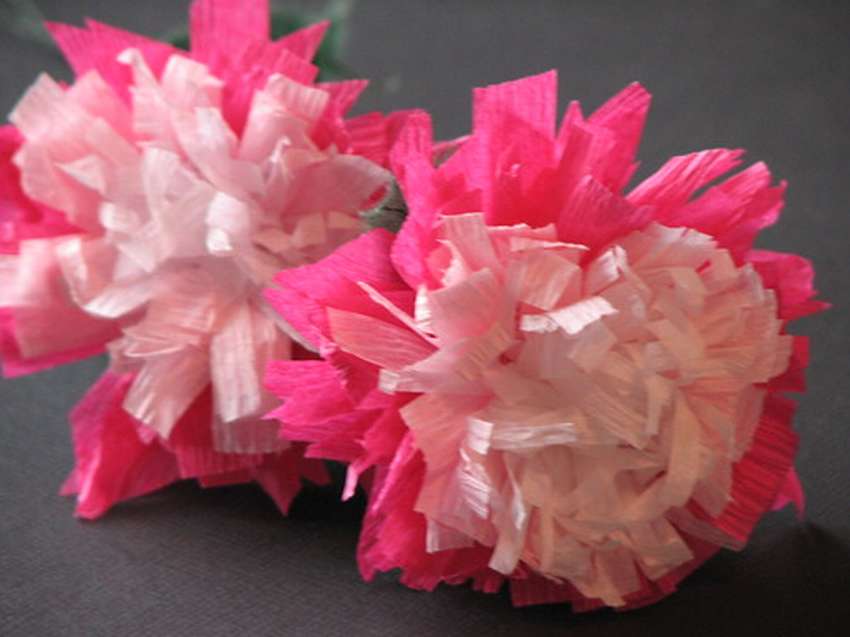 If you are looking for options to make paper flowers, here is a great example with step-by-step photos, available even for beginners. Corrugated Paper Peonies look just gorgeous. You can choose another material, but it’s corrugated paper perfectly conveys the fine structure of the flower petals. Feature of these peonies, two colored petalswhere white and pink paper was used. Master class look below in the gallery for step-by-step photos.


https://i.expert-h.com/en/iz-bumagi/tsvetok-pion#sigFreeId78496f1004
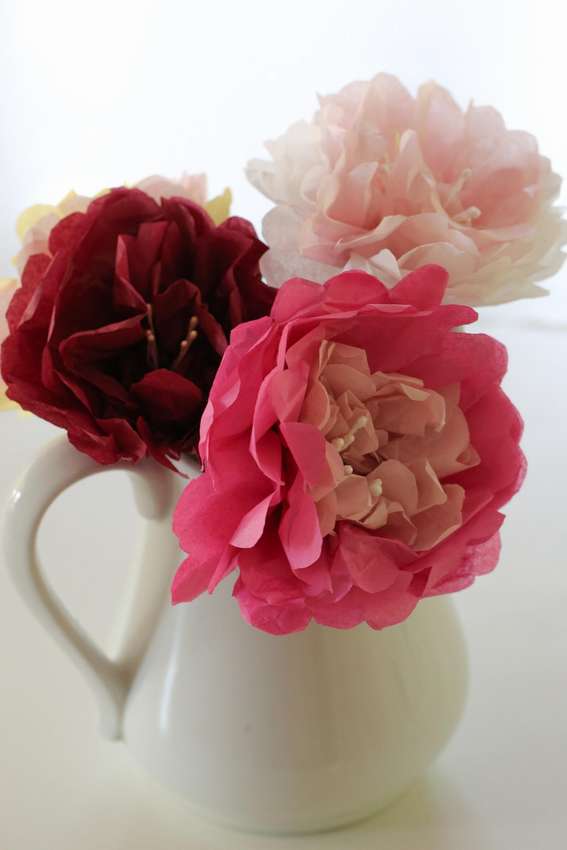
Bouquet of peonies from corrugated paper.
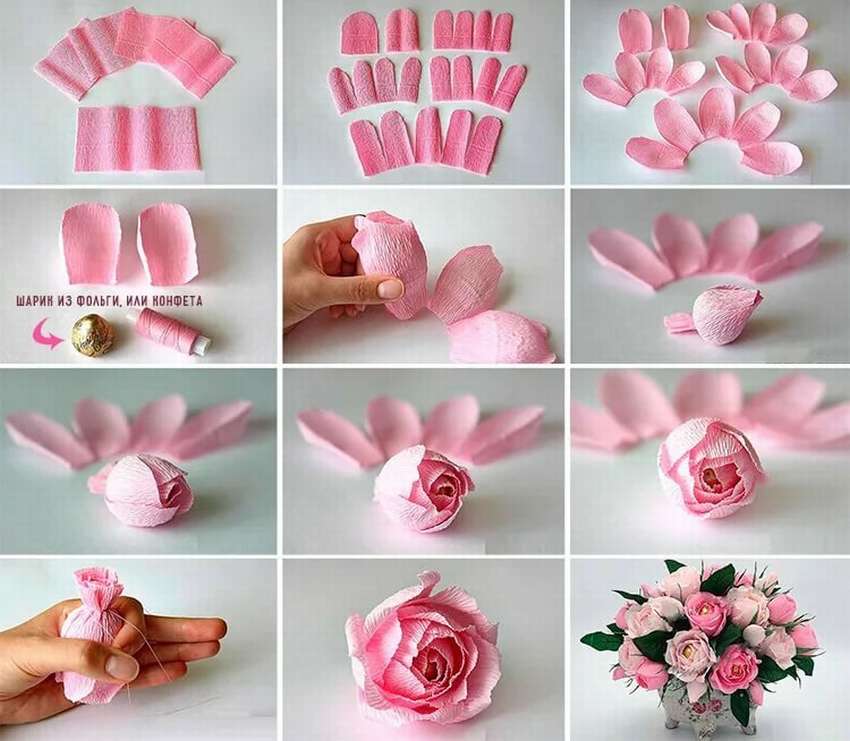
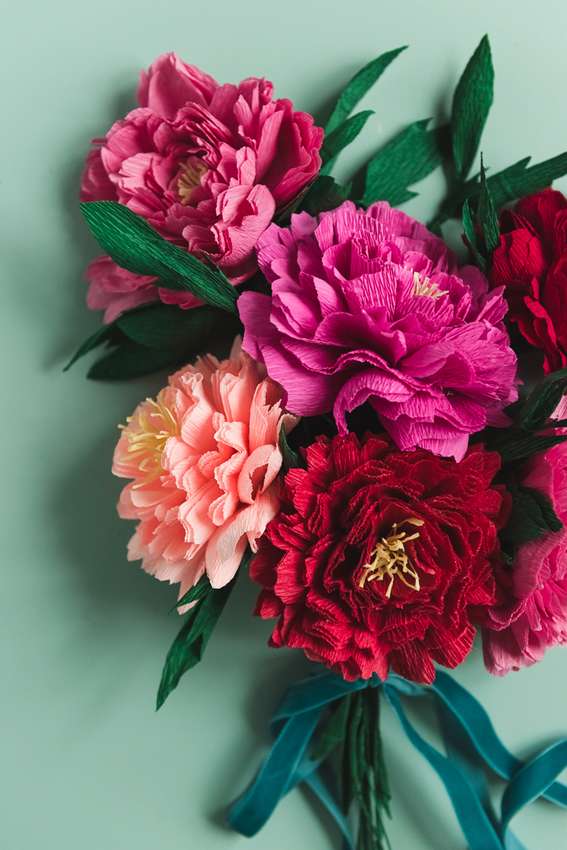 Peonies bloom slowly and not quite in high season, so take matters into your own hands and make this magnificent bouquet of peonies from corrugated paper by yourself. You will need corrugated paper in red and pink and a little yellow. Cut a lot of petals (the larger the larger the flower). Then cut out the yellow rectangle (about 5 x 2.5 cm), stretch corrugated paper to the edge and cut. Also cut a piece of wire of the required length. Glue the yellow paper to the wire and wrap to make a stamen. Stretch the petals and glue to the flower. Keep filling the flower with petals until it becomes beautiful and voluminous! Cut a long strip green corrugated paper, stretch and attach to the base of the peony to make the stem. Cut 6-9 leaves and two or three pieces of wire from 10 to 15 cm long from the template. Carefully stretch the leaves, twist the base and attach to the top of the wire with flower ribbon. Attach a wire with leaves to the stem using floral tape. Continue wrapping until you reach the base of the flower.


https://i.expert-h.com/en/iz-bumagi/tsvetok-pion#sigFreeId7ae75d468b
Corrugated peony paper instruction
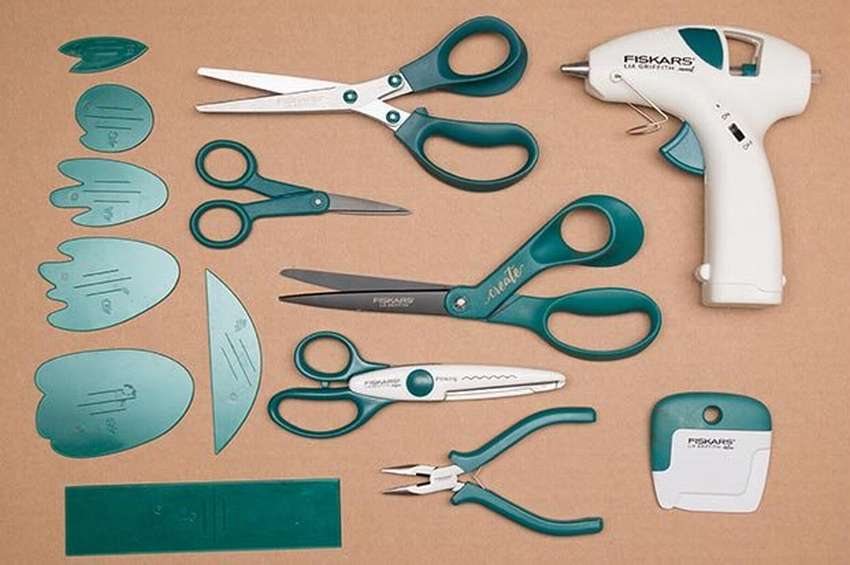
 These flowers are made of corrugated paper. The advantage of corrugated paper in comparison with plain paper or napkins in the manufacture of flowers is that you can create bends and sepals that are very reminiscent of natural forms real petals. Here accessories you need: flower wire, wire leg (if you don’t, you can make a stalk of flower wire), flower ribbon (alternatively you can cut strips of corrugated paper and use a little glue) corrugated paper.
 You will need: 10 strips of narrow paper for small petals — about 6 cm long and 2 cm wide for large petals — about 6 cm long and 1-2 strips wide green corrugated paper for leaves of different sizes. How to make do-it-yourself peony from corrugated paper can be read in the instructions on the website of the author of this project. Some step by step photos show the essence of the process.


https://i.expert-h.com/en/iz-bumagi/tsvetok-pion#sigFreeIdd8bce43cf8

Realistic corrugated paper peony
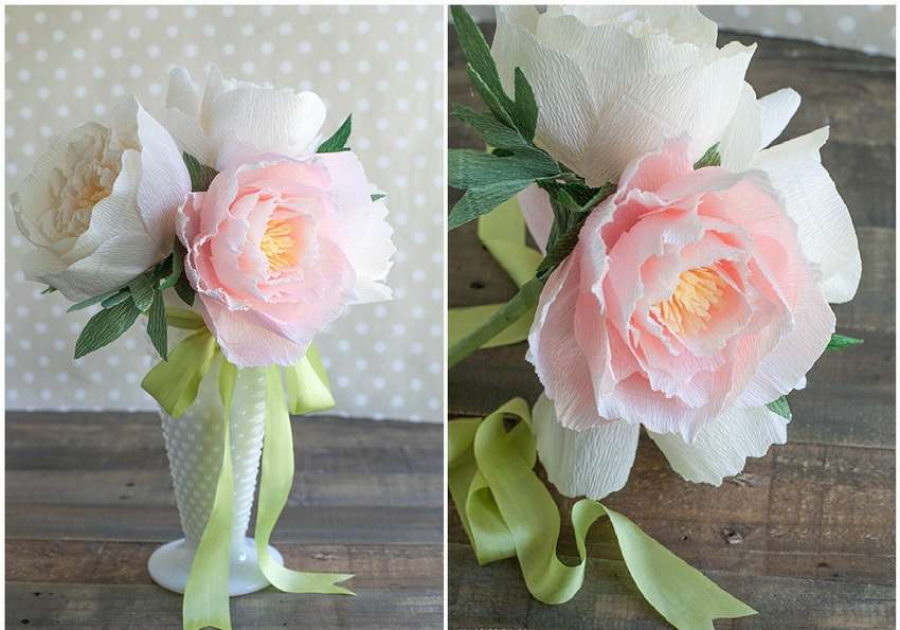
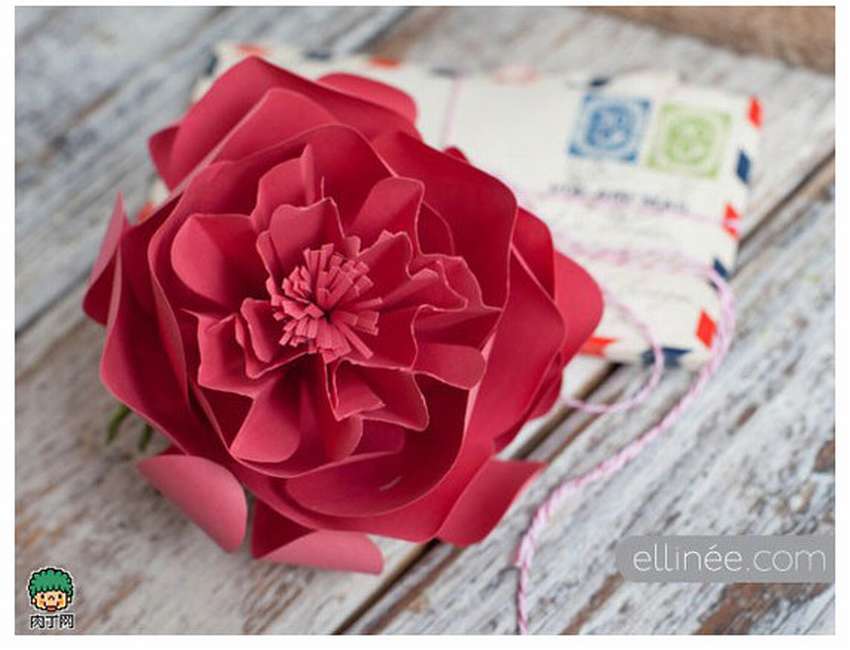
 Follow this template instructions do-it-yourself peony made of corrugated paperand you will not distinguish it from a real flower. In the photo on the left, one peony is real, and the other is made of corrugated paper. Can you say what is what? To achieve this result, the author of this project conducted a real research work, studying real peony structure. All the experience gained, how to make realistic paper peony flower You can read in a very detailed instructions on the site, but here you have the opportunity to see detailed step by step photos. Well, let's open the secret, the real peony flower in the main photo, the one on the left, on the right, from corrugated paper.


https://i.expert-h.com/en/iz-bumagi/tsvetok-pion#sigFreeIdad8b133418
Beautiful corrugated paper peonies
Instruction with the template, how to make peony flowers from corrugated paper.
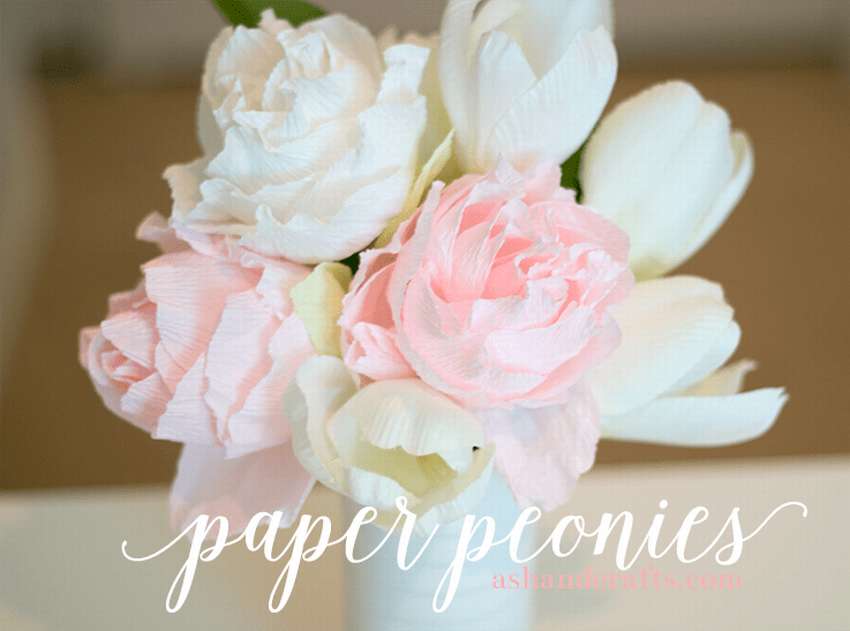
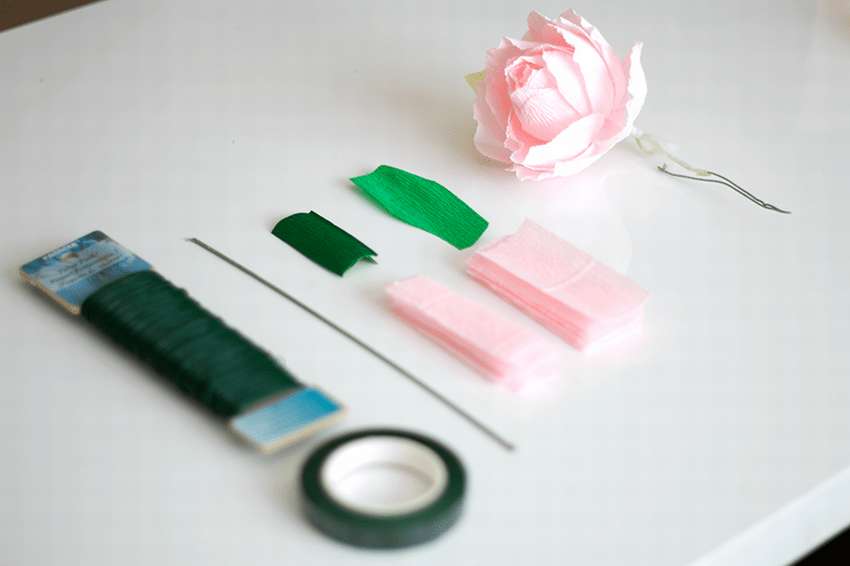
 Read the instructions on the site, see below master class on step by step photos and very soon such a vase with beautiful corrugated paper peonies. To start and finish this project, you will need paper, glue and everything that you see below in the photo.
 Good crafts.


https://i.expert-h.com/en/iz-bumagi/tsvetok-pion#sigFreeIdddafeb9046
Peony from paper on a pattern.
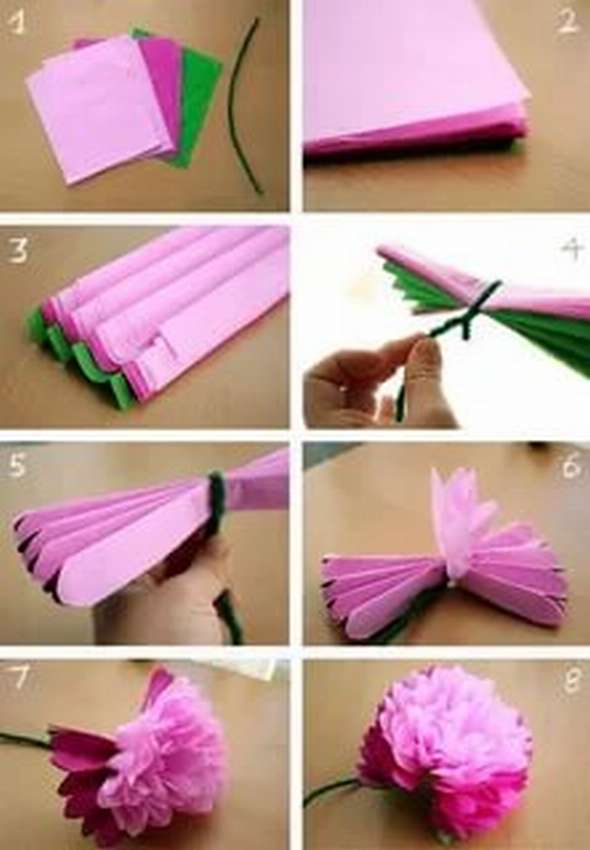
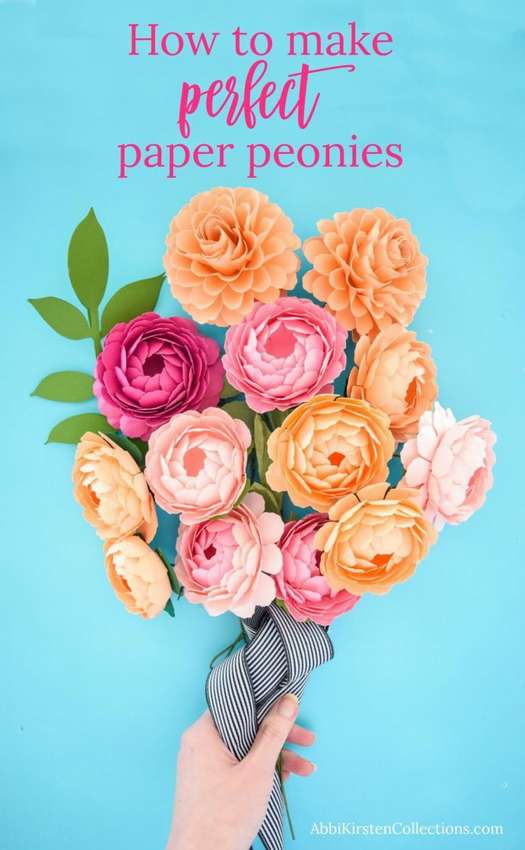 Peonies are very beautiful flowers, so it is not surprising that we want them to be party decorations and room decor. That's why this template was created and walkthroughso you can make peonies out of paper with your own hands. You will need a glue gun, thick paper and wire. Cut it all out 7 paper peony patterns. Here the dimensions are 9.5 cm. After you make a cup of petals, turn the center. Fingers slightly push and arrange the petals so that they are all located in one directionThen there will be a beautiful view of the spiral. Do this with all 8 layers of peony petals. When you reach the last 2 petals, leave them a little more open. These will be the base petals from which we will begin to add the peony. Glue one on top of the other, alternating between the petals so that they are not folded directly. Go to another piece of peony and glue over the last petal. Flatten the petals. Repeat with the next 3 layers. As soon as you reach the last two petals, glue them together firstand then fasten in the center. Click on the bud before inserting the center of the peony. Then glue the center part. If you want to add beautiful fern leaves, first cut out the elements, then glue on the stem. Step by step photo not much, but the site has a great videolink under the gallery.


https://i.expert-h.com/en/iz-bumagi/tsvetok-pion#sigFreeId45005440ef
Here is another example how to do peony from paper on a pattern do it yourself.
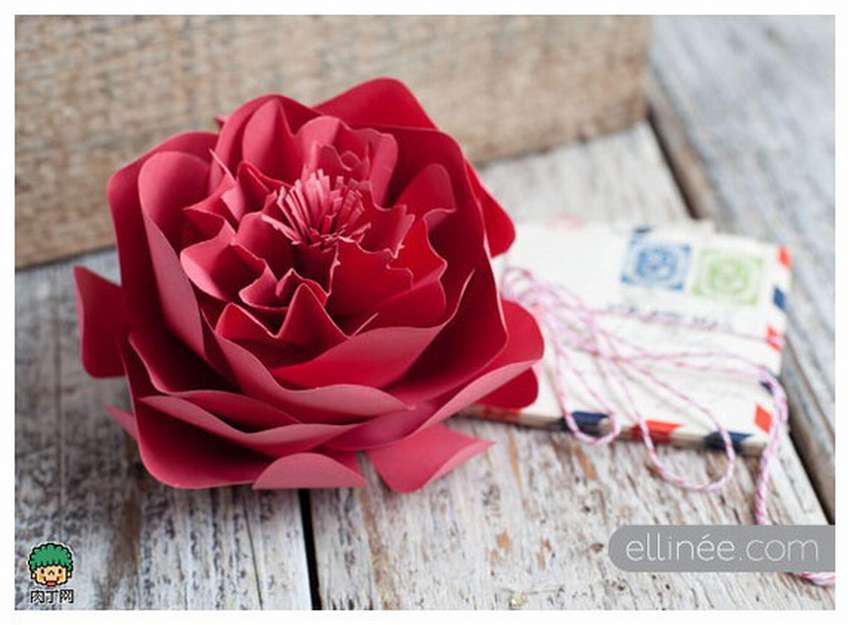 Just look step by step photos.


https://i.expert-h.com/en/iz-bumagi/tsvetok-pion#sigFreeIda76ad28a2f
Peony flower from napkins
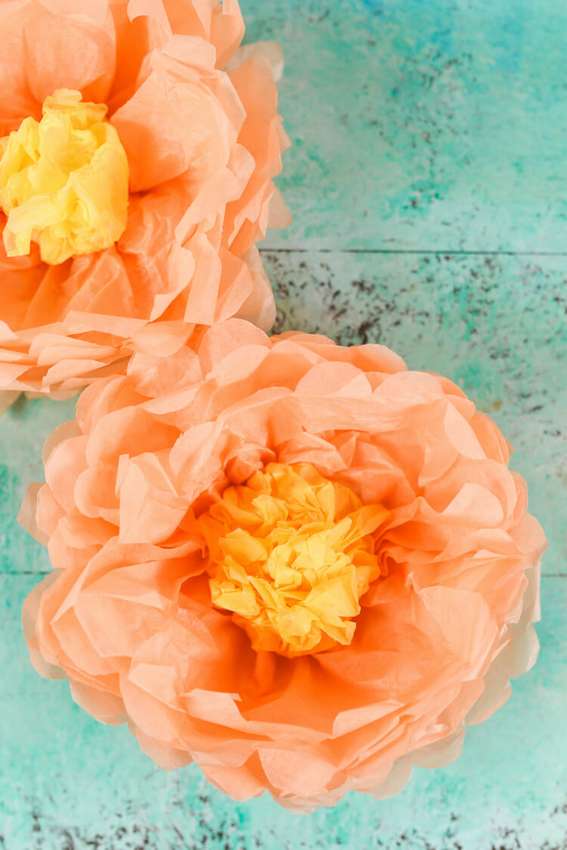 The best part is when you do do-it-yourself flowers from napkins, it is that they are inexpensive and easy to manufacture. Even if before you saw paper flowers only in pictures, you can do it! For crafts cook yellow and peach (or pink) napkins. You will need 6-8 squares of peach color and two yellow. Then fold two napkins two times in half. Take the corner and fold to make a triangle, cut the excess. Trim the edge as in the photo by inserting the scissors in the crease to separate all the pieces of paper. Essentially you eight separate squares need to be made. Fold the peach and yellow squares with an accordion. For this peony, it is necessary to fold from 8 to 10 folds. Fasten in the middle, with scissors round the ends of the accordion. Separate the layers carefully. Fluff the edges of the flower and the yellow pieces remember a littleto form a sepal. Fluff the petals around the center, holding it in the shape of a cup, like a real peony.


https://i.expert-h.com/en/iz-bumagi/tsvetok-pion#sigFreeIdc72a614144
DIY peony from napkins
Who does not know, paper napkins are excellent material for crafts. Shown here how to make peony flower from napkins, it’s not at all difficult, but it looks so beautiful and gentle.
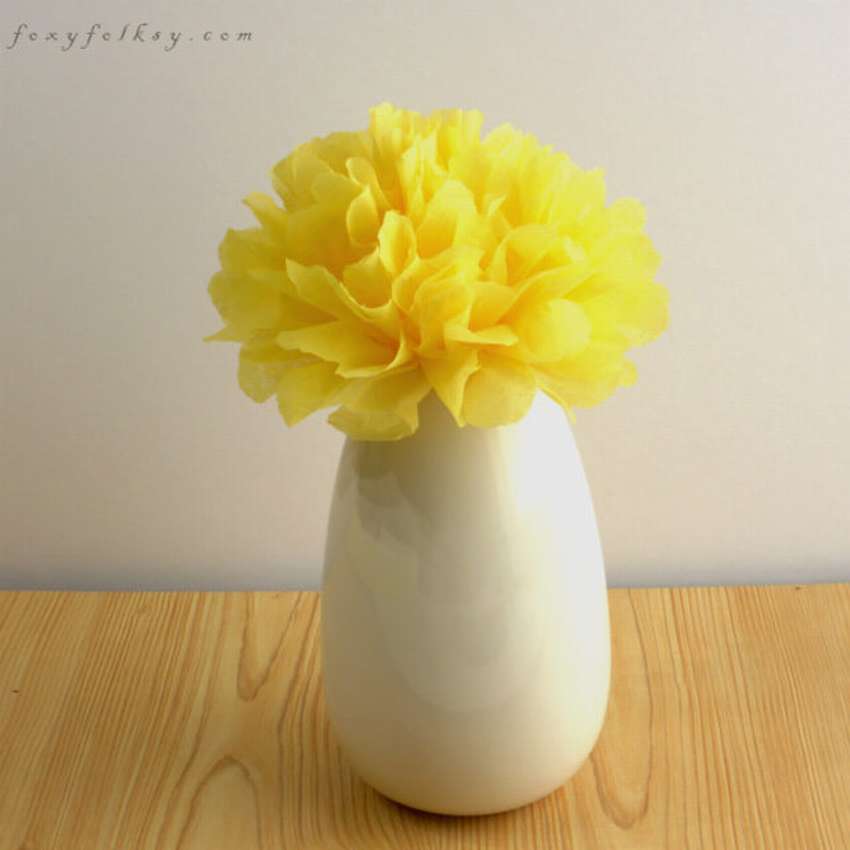 Only used here one thin napkin per flowerbut you can combine 2 tones of the same color. You will need paper napkins, stapler and scissors. First, unfold the napkin so that it is folded just one time. Then fold it at one end like an accordion. Fasten in the middle, then trim both corners. Separate the leaves at one end. This may take some time. Do the same with the other half. Then pull sheets towards the middle of one half, and then alternately the other, until you reach the last sheet. Peony from napkins is ready!

DIY peonies from napkins step by step
 Here is another example of how to quickly do do-it-yourself peony flower from napkins. Cut the napkin into four rectangles. Fold the rectangles from top to bottom, the fold should be approximately 1 cm wide. Then flip and fold back (zigzag). Fold the rest of the paper. Trim the ends so that they are bent like flower petals. Make cuts in the middle of the top and bottom, just not to the end of the paper. Make a loop of wire and attach the flower as shown in the photo. Gently unfold first on one side, then on the other and fluff. Align, shake and your peony from paper is ready.


https://i.expert-h.com/en/iz-bumagi/tsvetok-pion#sigFreeId8e28289003
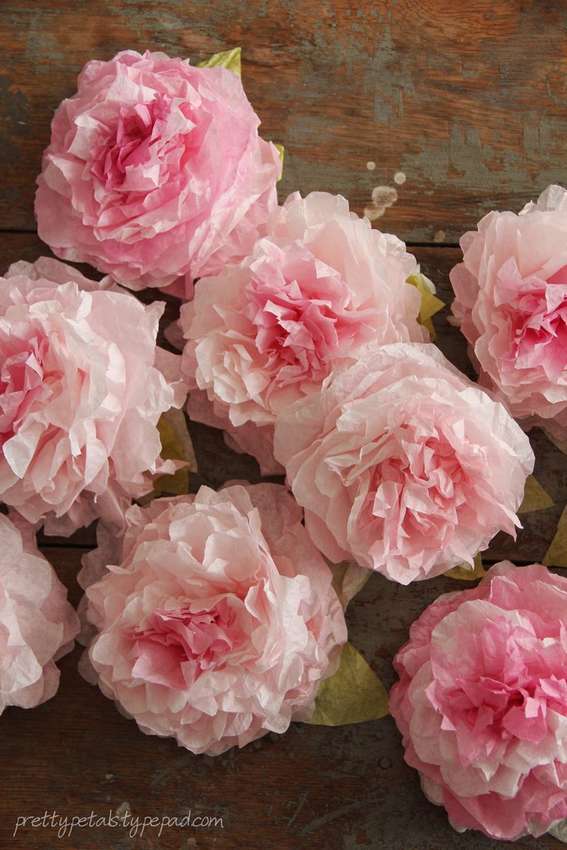
Peony flowers from napkins
 To make a bunch peonies from napkinsyou will need:
- multi-colored napkins
- scissors
- green chenille wire
- artificial stamens
Cut the napkin first. To make one flower, cut 5 napkins 15 cm squares. Then another 5 sheets per 7.5 cm squares.
Place small squares on top of large and fold accordion. The width of the fold should be approximately 3 cm. Then round the ends with scissors to make the petals. Then wrap the upper 8 cm of wire onto yourself and fasten 4 stamens in the fold. Insert the stamen wire into the center of the flower. Spread napkins in side of stamens.
Make as many flowers as you want. At a distance they can be mistaken for real flowers. The best part is that they will bloom all year round.


https://i.expert-h.com/en/iz-bumagi/tsvetok-pion#sigFreeId6b67ecf55b
How to make large peonies out of paper
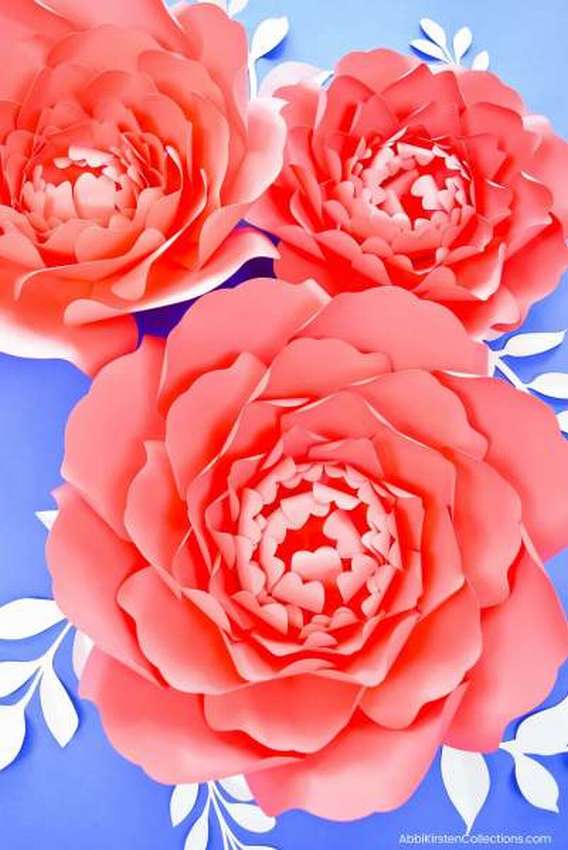 Large flowers are perfect for wedding decoration, children's party decor and party. To make large peonies out of paper, you will need
- thick paper
- templates (can be downloaded on the site)
- scissors or cutting machine (e.g. Cricut)
Detailed step by step instructions can be read on the site. Some useful tips.
- If you want to reduce the overall size of the flower, just exclude the largest size of the petal from the assembly, and you will get a peony from smaller paper.
- When you start twisting the petals of a smaller size, you may need an item smaller than the dowel, you can use a spare adhesive stick in an emergency!
- When you get to the last petal, trim the sides under the edge of the first petal. Thus, the petals look uniform and voluminous.


https://i.expert-h.com/en/iz-bumagi/tsvetok-pion#sigFreeId61dfbecbea
Crepe paper peonies. Master Class
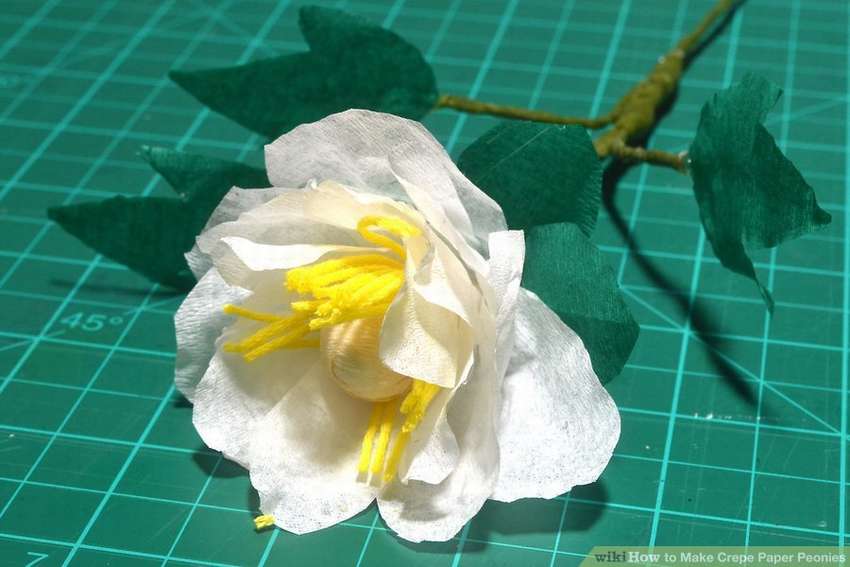 Although most paper flowers can be made from napkins or plain paper, peonies are best made from crepe paper (differs from corrugated by smaller folds and thickness). This is because crepe paper stretched out, which is important when reconstructing the fluffy tips of peony petals. These flowers seem very difficult to manufacture, but actually make them pretty easy. Master class see below in the gallery. There will be questions, instructions on the site.


https://i.expert-h.com/en/iz-bumagi/tsvetok-pion#sigFreeIdcc6446189e
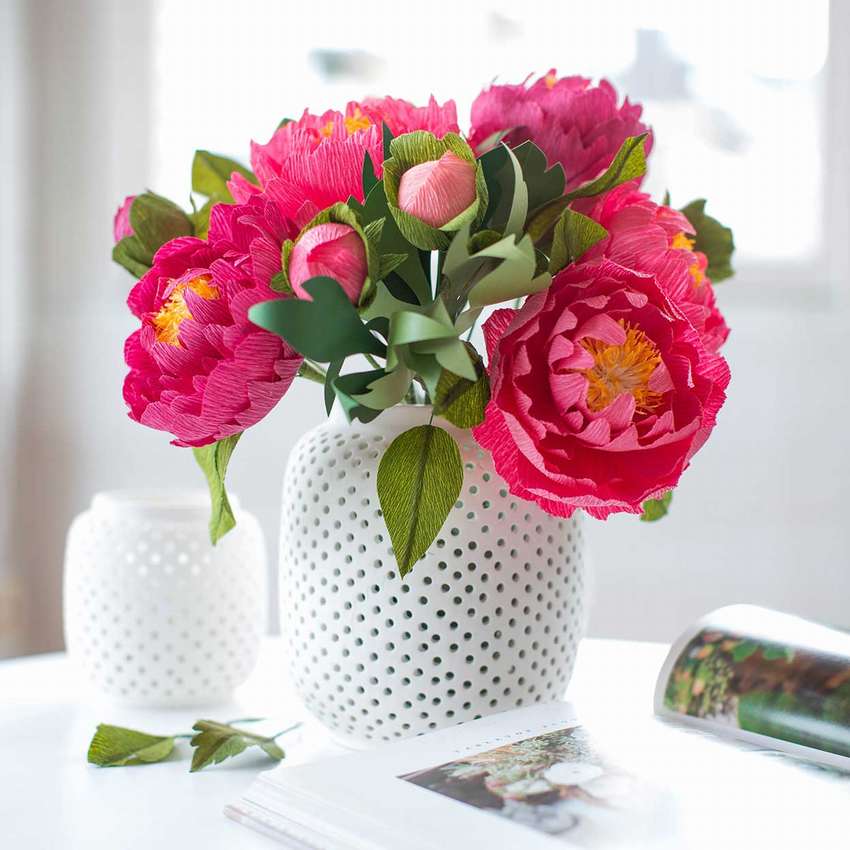
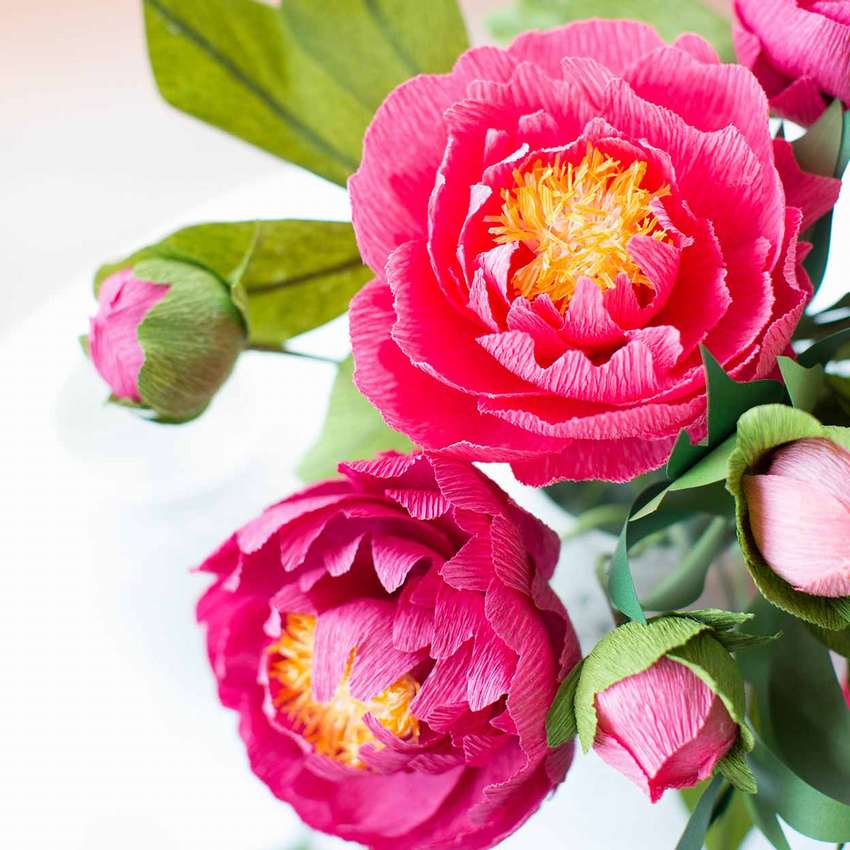
Crepe Paper Peonies
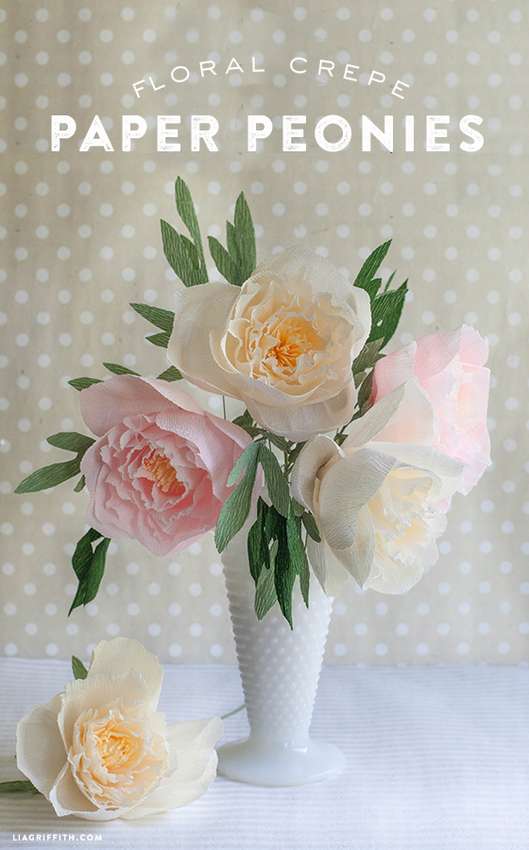 There are many varieties of colors and shapes, so you can make dozens of different crepe paper peonies. Crepe is pretty easy. Here are some tips..
- Firstly, there is a difference in the types of creped paper and, consequently, the degree of stretching. For peony petals, it is important that they can stretch enough to get the shape of a rounded cup.
- Second tip, cut along the grain.
- The third tip for making these crepe paper peonies is that since the flower head is very heavy, it’s important to use the extra support of the three leaves on the wire stems. Details of the fastening of the leaves shown in the master class.
Last tip on flower ribbon. It will be best if you stick the ends of the tiny leaves surrounding the base of the flower towoven and wrap over leaves green paper. You can even add some glue. See below several step by step photos.


https://i.expert-h.com/en/iz-bumagi/tsvetok-pion#sigFreeId996f52b83f
Peonies from coffee filters
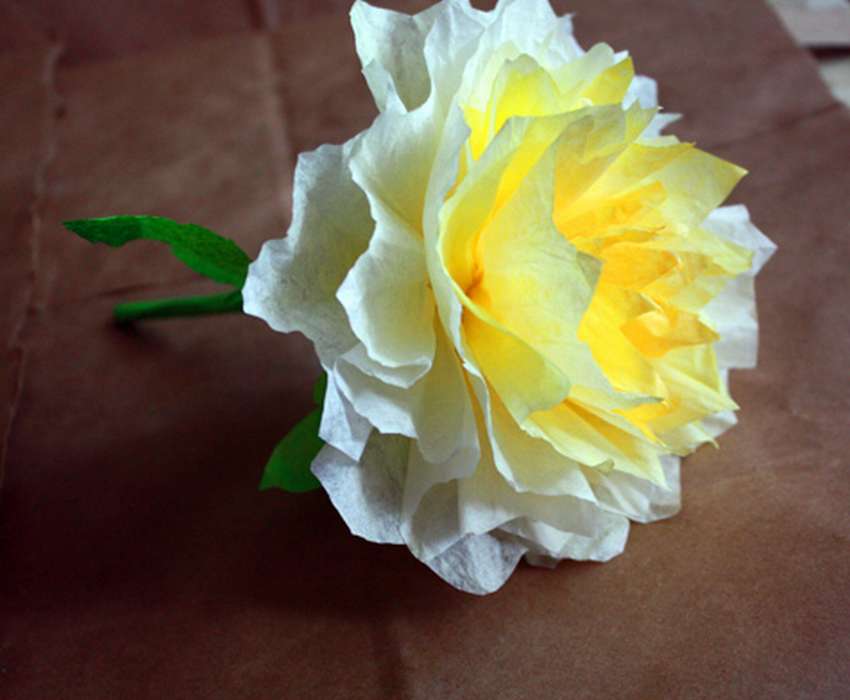 Turning humble materials into something beautiful - wonderful ability. Every time you think you have seen the most beautiful thing, you meet something else and it amazes you! These gorgeous flowers are similar to those made from napkins, but napkins cannot always be found in the full range of colors you want. A coffee filter peoniesIt’s practically free. Time - 1 hour for painting and assembly and 3 hours for drying, and you can make a flower quickly. Although tune in, that the first flower will take about ten minutes and will not look very good. The second will turn out better, and the third will take less than a minute. The main thing is to continue, and after lunch you will have a paper garden!


https://i.expert-h.com/en/iz-bumagi/tsvetok-pion#sigFreeId7de8d79ac5
How to make peony from coffee filters
 Here's a little lesson on how to make peony flowers from paper do it yourself. You will need 10 first stained coffee filters. In this case, they are painted with fabric paint. You can use koalaid, tea, coffee, food coloring. Just experiment with colors to get beautiful! Then take the 2 darkest colors and fold ... then crop the edges, as shown in the photo. Fold the remaining filters into four and cut the wavy line. As a result, you should have 2 sharp circles and 8 wavy circles. Stack them all on top of each other with the two darkest. Take a piece of wire and pierce through the center of each filter. Turn and twist. Continue to the middle until you have completed all the layers. Fluff the flower to make it look beautiful. Next, we cut 4 sheets of green coffee filters, a layer of glue and fix everything together on the wire. It is really easy.


https://i.expert-h.com/en/iz-bumagi/tsvetok-pion#sigFreeId07e1bd2f87
Beautiful peonies from cupcake tins
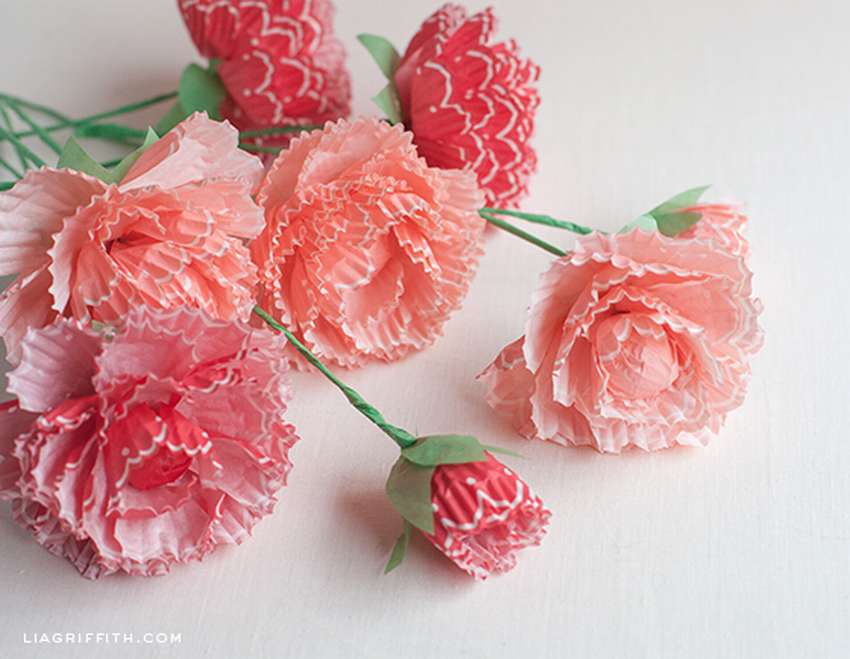 Scalloped cupcake makers can be a great material for making do-it-yourself beautiful paper flowers. In this case, these are peonies, although many different colors can be made from them. It looks nice and fresh, and if you like these peonies, master class with step by step photos can be viewed below in the gallery. It also shows what you will need to make these beautiful flowers with your own hands.


https://i.expert-h.com/en/iz-bumagi/tsvetok-pion#sigFreeIdb43e4524af
Peonies from paper photo


https://i.expert-h.com/en/iz-bumagi/tsvetok-pion#sigFreeId27e5258cea
Hello, I am the author of this article, so I look forward to asking questions for this article in the comments below, I will answer all !!!
If you have questions on another topic, ask them on our forum, we will answer you
- Two baskets of paper in 5 minutes (Master class)
- How to make a simple and compact table for a milling cutter from plywood
- How to make a soft headboard tile (Instructions + step by step photos)
- Cinder block benches: a convenient bench in 55 minutes
- How to make a bed with a niche: saving space (Master class)