Do it yourself paper vase. Step-by-step instructions + 300 photos
 how to make a vase out of paper
Even a paper craft can be a great gift if it is made with love. Do you want to know, how to make a vase out of paper do it yourself? Here are some creative examples.
Origami Vases or handmade crafts - this is not just an acceptable option for home decor, but also suitable gifts for your friends or family. But firstly, you have to do something, and one of the first things that you need is an idea. Many ideas. That is why this article is written and why you are here. The article presents different paper vasesthat everyone can do, regardless of skill level.
Content:
- Origami paper vases
- Origami vases scheme
- Modular Origami Vases
- Modular Origami Vases Assembly Schemes
- Crafts Paper Vases
- Paper tube vase
- Vases of paper with flowers
Origami vase step by step instructions
 These diagrams and step by step photos show how to make an origami vase Verdi. This model is known to be a traditional Chinese paper vase and was popularized by Verdi Adams. The origami technique that is used to make this model, includes z-fold, goal fold and squash. Z-fold - This is an interesting origami technique that is used when you need to fold paper of three parts of the same length. The name "Z" denotes the shape of the paper when applying the Z-fold. Gate fold, these are two folds of the valley. The name "Gates" is used for this technique, since its effect is similar to closing the gates.


https://i.expert-h.com/en/iz-bumagi/1182#sigFreeIdcfd9425cdb
Origami Volumetric Vase
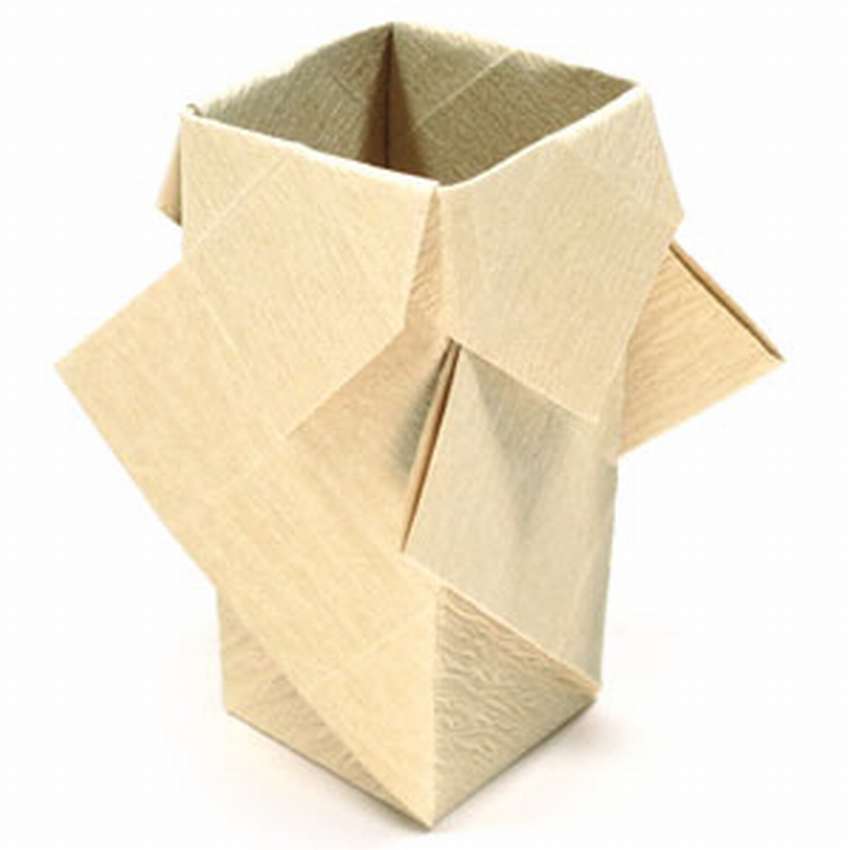
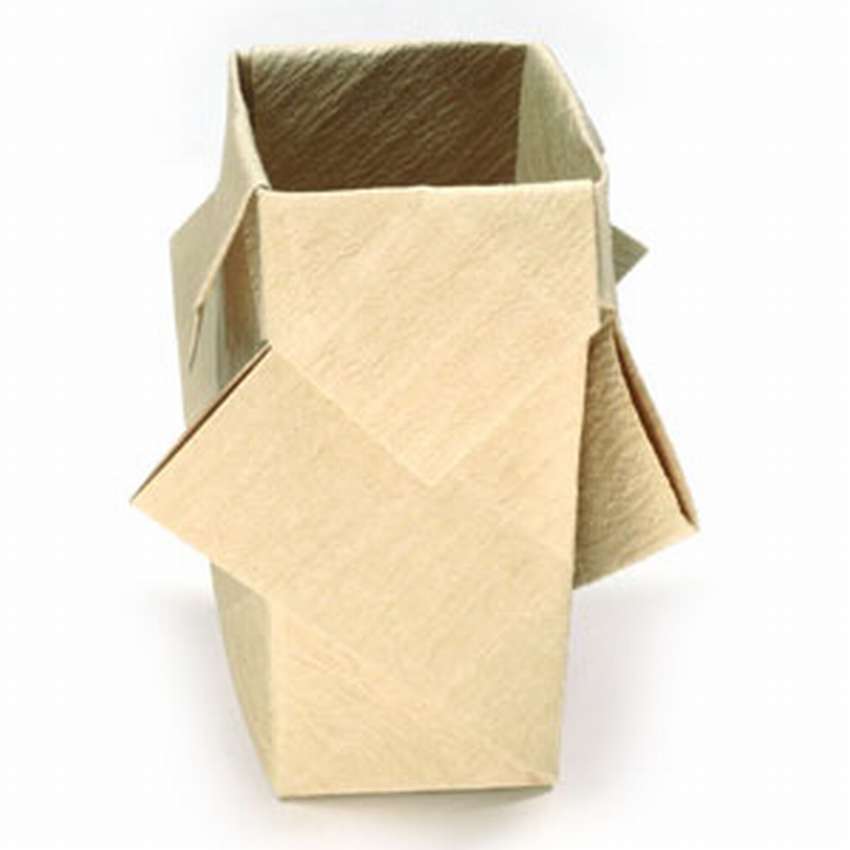
Here is another similar example of how to fold volumetric origami vase. It uses the same technique - pleated gate and squash.
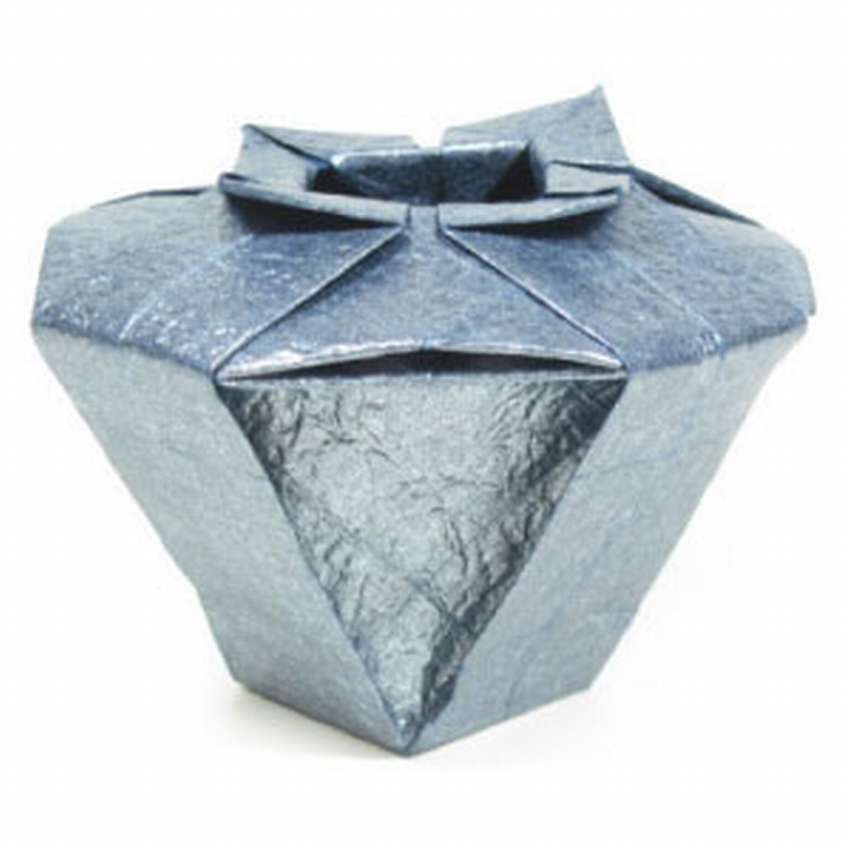 This model is a bit more complicated, see below 50 step by step photos, how to make an origami vase with your own hands.


https://i.expert-h.com/en/iz-bumagi/1182#sigFreeIdac21da41fa
Origami vase from paper scheme
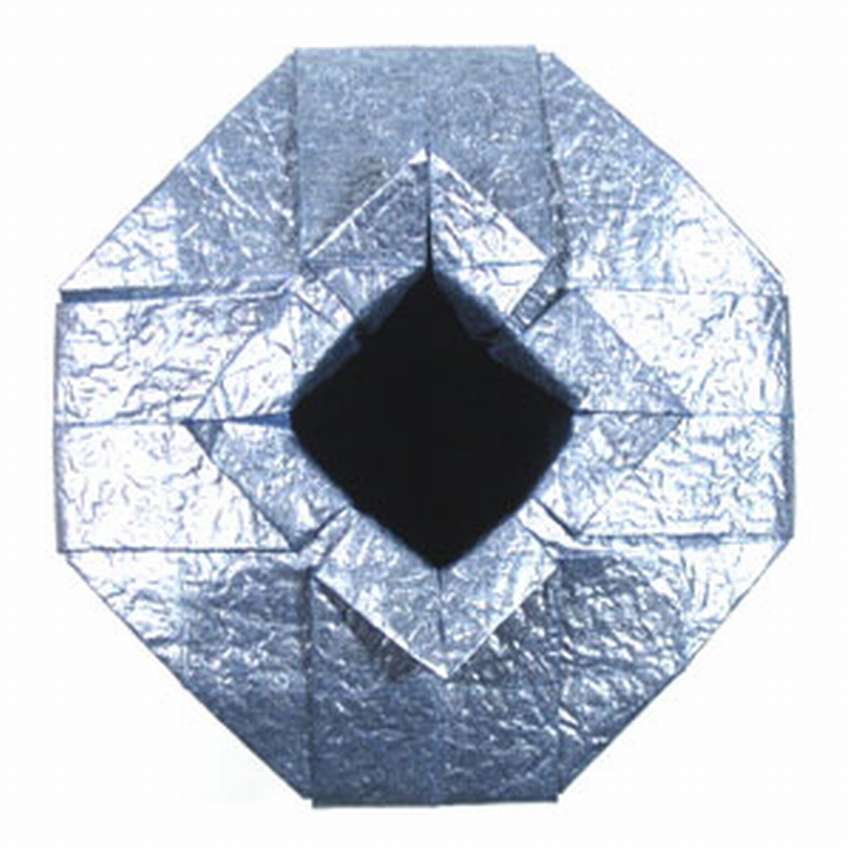
 Here is a diagram where you can make an elegant origami vase. In just 12 steps, you can make a beautiful craft for paper flowers or other small things, such as pencils or brushes. This one paper vase models clear lines and at first glance it might seem that folding this craft is very easy. But it should be noted that some back folds for a beginner in origami, it can be quite complicated.
- Start folding from a square sheet of paper with the white side up.
- Pre-bend, as shown in the diagram of the origami vase, then collapse to its original base form.
- Then you need to fold the front cover to the center of the vase, this can be a daunting task.
- The valve should cover the corners of the paper marked with green dots.
- Another very important pointDo not open the front valve when working with the rear valve.
- Since you are turning the page by the book, turn the upper right flap to the left. Behind the model, turn the cover from left to right.
- Another tricky part is the inner back fold along the four corners. Pay attention to the corner with a green dot: move this corner down, and then between the layers of paper.
be carefulso as not to reveal the creases made in the previous steps.


https://i.expert-h.com/en/iz-bumagi/1182#sigFreeIdd8e9b3bef8
Origami vase scheme


https://i.expert-h.com/en/iz-bumagi/1182#sigFreeId1add9a828c
Origami paper vase
 These paper vases to make is not difficult, if only there is minimal experience in the art of origami. If you are new to origami, be sure to check out three basic origami folds for beginners. The two most important and simplest folds in origami technique are fold valley and mountain. They form the basis of all origami patterns. Once you know these two folds, you can fold almost all simple origami patterns. And the third very important fold is squash fold, which is also very often used in various origami models. Materialsthat you will need to do do-it-yourself origami paper vaseThis is plain paper, but not too thick, glue, double-sided tape and a jar or glass. How to fold a vase is shown in master class on step by step photos. Once you understand the main idea, you can try experimenting with the number of folds to make origami vases of different sizes.


https://i.expert-h.com/en/iz-bumagi/1182#sigFreeId8c7443f34c
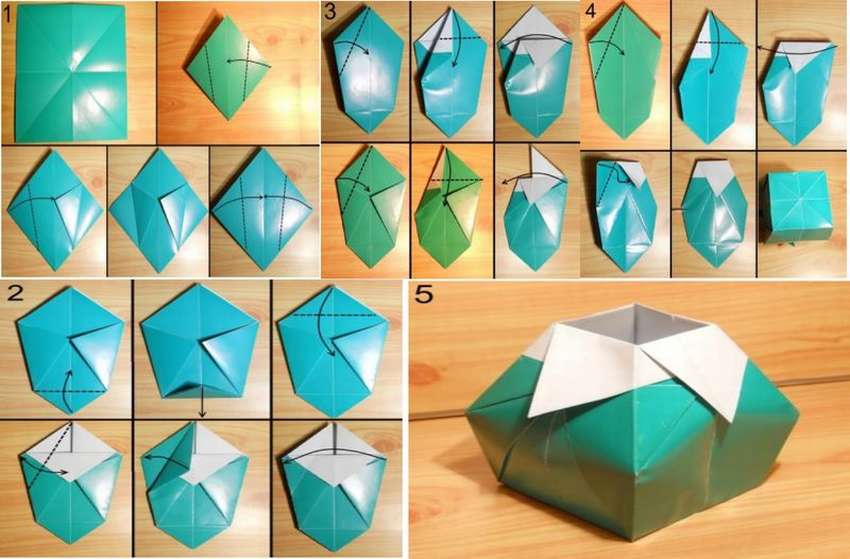
How to make an origami vase
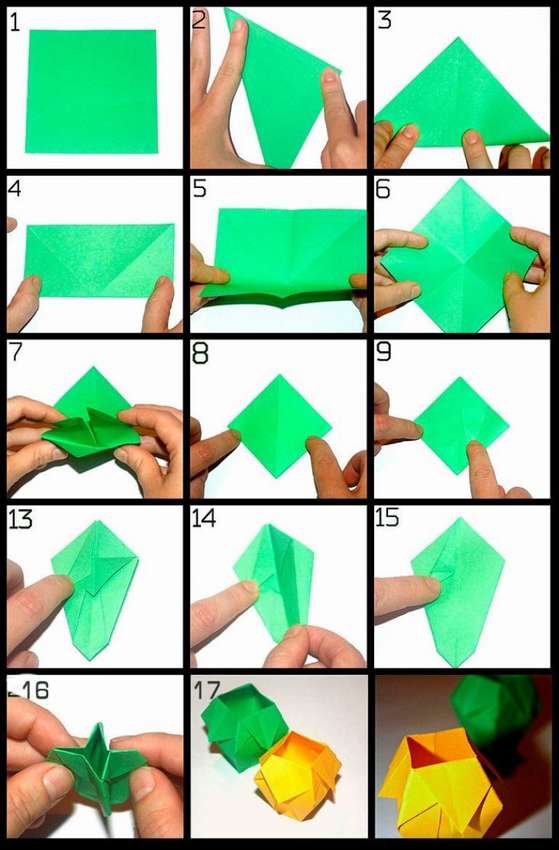
In this tutorial, with step-by-step photos and diagrams, you will learn how to make an origami vase from paper rectangular shape.
 Production of this model should begin with an 8x8 matrix. There is no special folding technique, just follow the step by step photo. If you have questions, a link to the site with instructions is located under the gallery.


https://i.expert-h.com/en/iz-bumagi/1182#sigFreeIdb0a9e8c78d
Origami vase photo


https://i.expert-h.com/en/iz-bumagi/1182#sigFreeIda93c34a4b2
Assembling a modular origami vase
 Paper vases can be made in many shapes and sizes. Origami modular vase, this is not the simplest model, there are also those that take up to 700 paper modules. But the one shown in the photo requires less time and is easy to manufacture. You will need everything for this vase 143 paper modules. 91 units of yellow and 52 units of white are what you will use. It is advisable to take thicker paperso that the model is strong and durable. Thick paper greatly simplifies model formation. See the master class below for step-by-step photos..


https://i.expert-h.com/en/iz-bumagi/1182#sigFreeId59d8aabbed
Origami modular vase step by step
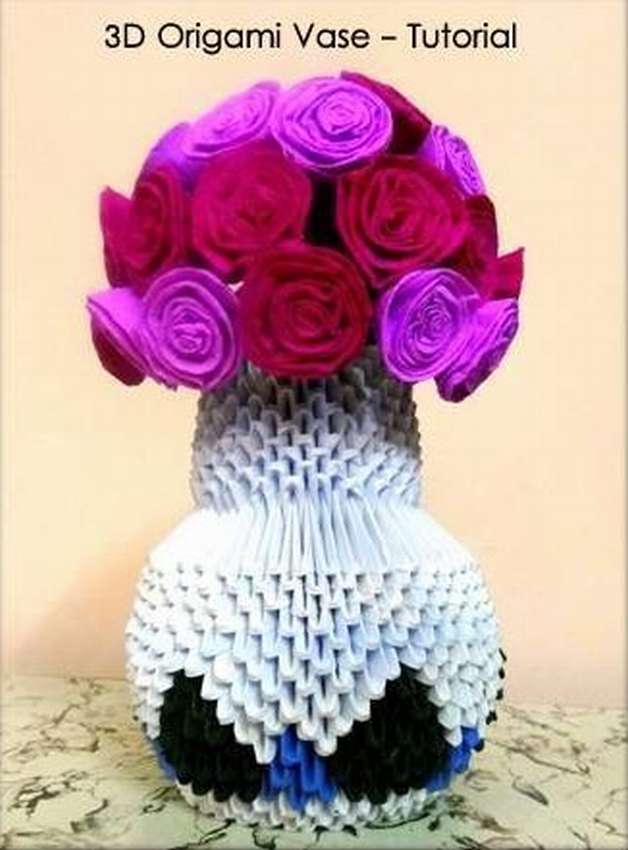 Here's another two exampleshow to assemble do-it-yourself modular vase of origami. As you can see, this model has a round design with a neck. Here we will use triangular modules in three colors. It will take a total of 894 units of paper modules = 744 white + 114 black + 36 blue. First, make the neck. To do this, we assemble a structure of 11 rows with 24 white units in each row. Now for the base, just as the neck was assembled, we collect the nodes. The bowl will have 15 rows with 42 units in each row. Rows 1 through 3 will only contain white modules. The 4th row is inserted by alternating between 4 black and 3 blue modules. Fill the rest of the lines with white units. Keep adding white modules to the rows until you have a total of 15 rows. Insert the neck into the base of the vase, glue is not needed, if inserted correctly, it will hold.


https://i.expert-h.com/en/iz-bumagi/1182#sigFreeIdf14d111c9d
Modular vase origami master class
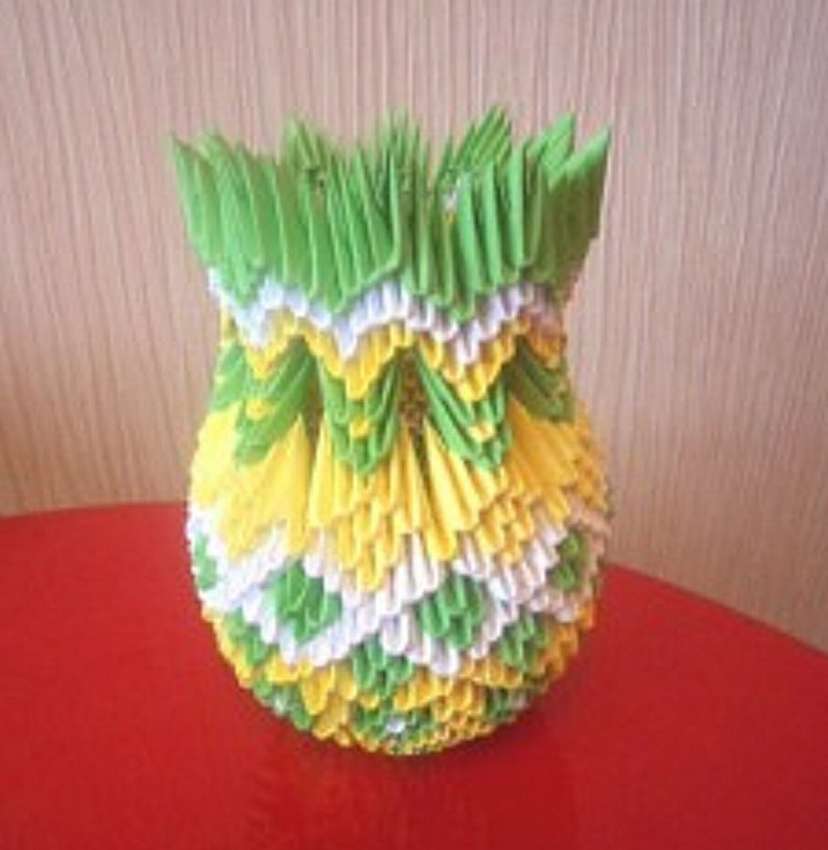 And the third example. To build this modular origami vases you will need 490 yellow, 310 green and 200 white modules. Prepare a chain of 50 yellow modules for the first and second rows. It should turn out: the first row of 25 yellow modules; the second - 25 yellow modules. From the third row it is divided into 5 corner parts.
The instruction is quite long, the full version can be read on the website, the link is under the gallery. The process is shown in step-by-step photos.but in this case it’s better to read than to look.
The scheme is simple, but where and how much to add paper modules, better read in the walkthrough on the site.


https://i.expert-h.com/en/iz-bumagi/1182#sigFreeIdbb3a8607e6
Modular Origami Vases Photo


https://i.expert-h.com/en/iz-bumagi/1182#sigFreeId0720bf9c57
Color paper vase
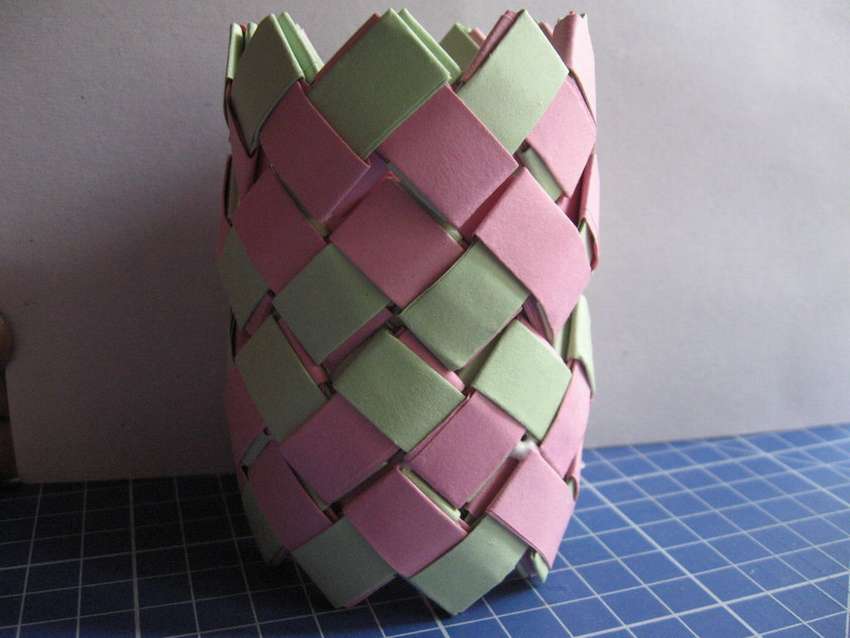 It's small paper vase made of paper in two different colors. The paper is cut into pieces, folded, and then connected to each other like a chain. You will need paper strips measuring 12.5 x 5 cm in 36 pieces of each color. (Only 72 pieces). Take A4 paper or any size of two different colors and cut the required number of strips to fit. Then act as shown in step by step photos. You can use a paper vase to store stationery or paper flowers. Simple, beautiful, comfortable.


https://i.expert-h.com/en/iz-bumagi/1182#sigFreeId21ee33c342
Vase of paper with flowers
If you are fond of arts and crafts and want to do something new, then here is an example, how to make a vase from paper with flowers.
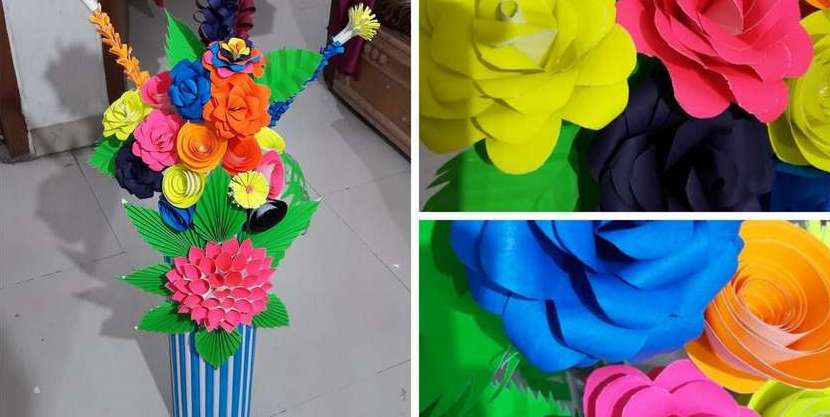 You can use this step by step instructions as an example, to develop our own design on this basis. Craftsmanship consists of three stages.
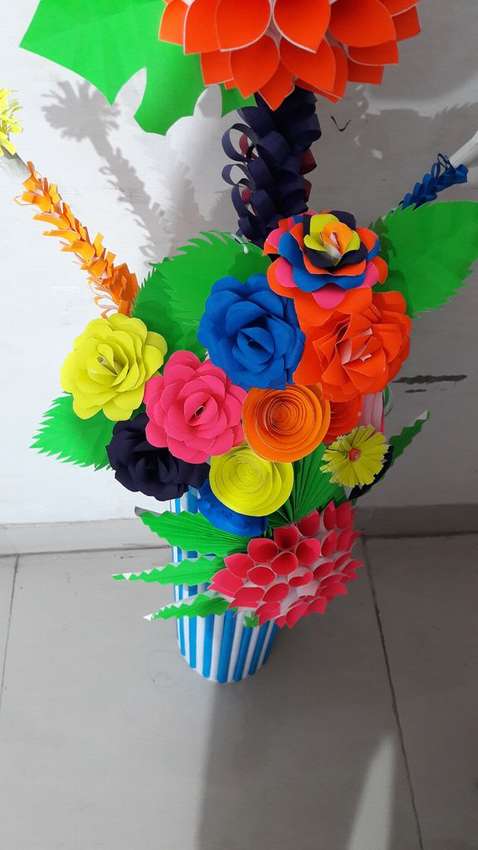 First we have to do paper sticksto make a paper vase attractive. To do this, simply turn the old newspapers into tubes and glue them with white paper. Then color the finished tubes as you like.
- In the second stage, it is necessary to make cardboard base. We turn the cardboard into a large cylinder, glue and fasten the bottom. Then carefully glue the colored tubes from the newspapers and the paper vase is ready.
- Now we have to make beautiful flowers and leavesusing fluorescent or colored paper to put them in a vase. How to make paper flowers, look at step by step photos.
- When everything is ready, it's time to put the flowers and leaves in a vase. For everything, about everything, the author took about 12 hours.
- After drying, our paper vase with flowers ready.
You can add your own decorative elements.


https://i.expert-h.com/en/iz-bumagi/1182#sigFreeId5642f56221
Do-it-yourself vase from paper tubes
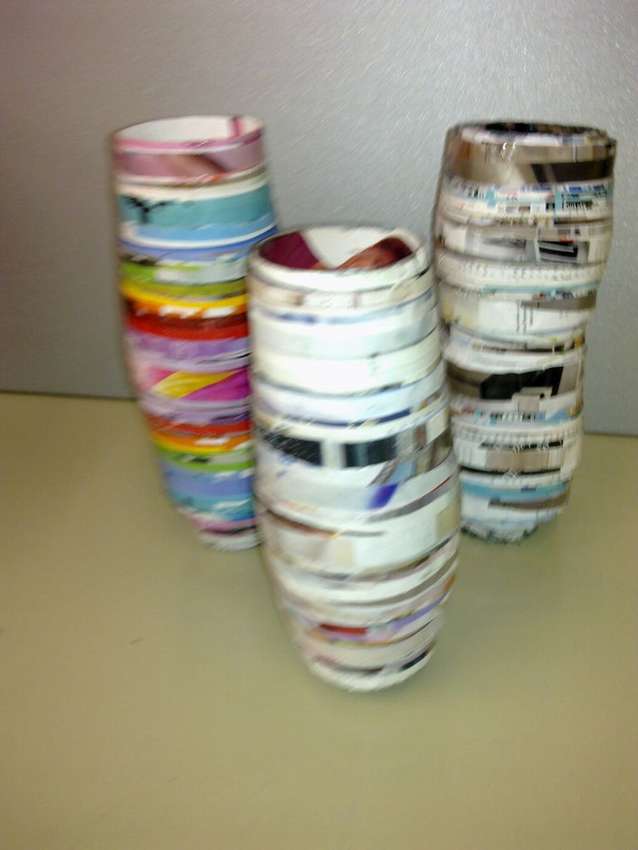
 To make paper tube vaseexpensive materials will not be needed, suitable old magazines or newspapers. This beautiful craft can be used as a table lamp, paper flower vase or like another creative idea. You can make various forms, everything that your imagination prompts. Only be carefulDo not use as a candlestick or any other object that could cause a fire. In fact, this hack is very simple, you will see this by carefully looking, master class on step by step photos.
Some comments. If you want to make the rolls longer, just apply a little glue to the tip of one of the rolls, and then pass it through the next. When the base is glued, the top may begin to fall apart, but this is normal! Just glue the parts on all sides.


https://i.expert-h.com/en/iz-bumagi/1182#sigFreeId09f6520548
Paper flower vase
Here's another great example of how to make a great paper flower vase from old magazines and packing boxes.
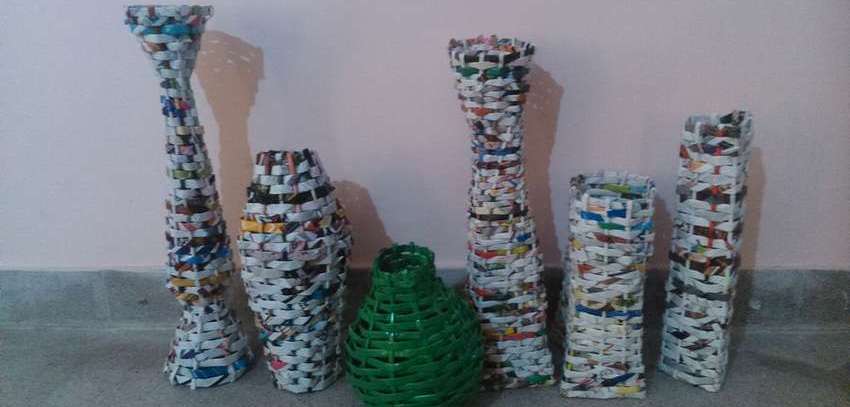 For the manufacture of paper vases for flowers no purchases required.
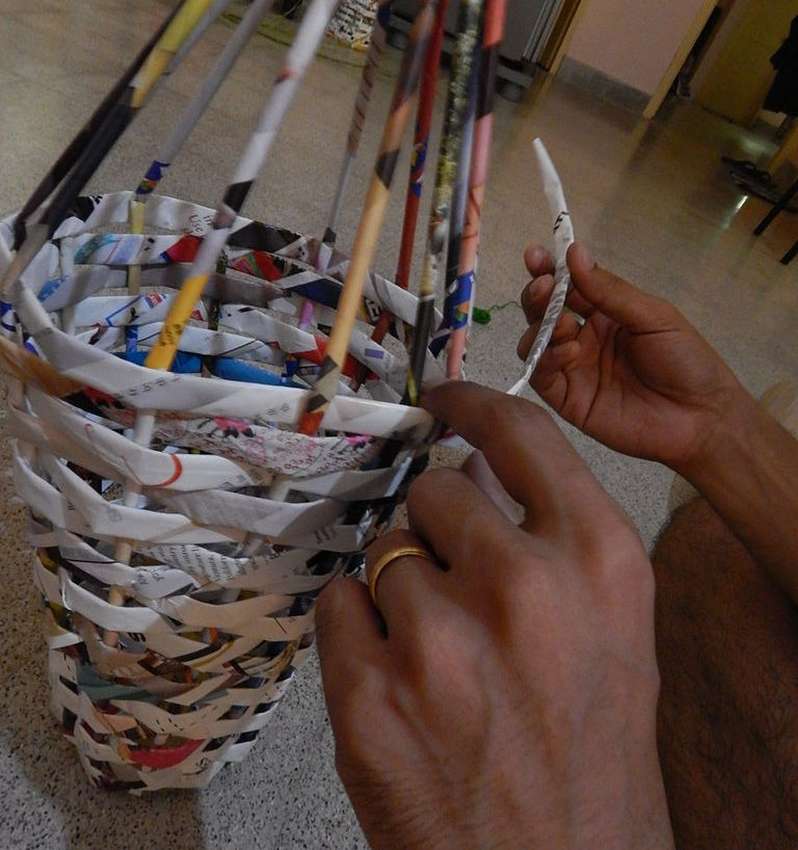 All we need is pages of old magazines and pieces of thick cardboard. Based on this method, you can try different forms or come up with your own original design. The way to make such a paper vase simple is to how to weave a basket. There are some nuances, so you can read the details in the instructions on the site. Just look master class on step by step photosIn principle, the whole process is shown in great detail. Apply spray paint if you want your paper vase to be colorful.


https://i.expert-h.com/en/iz-bumagi/1182#sigFreeIddc1c3fa701
DIY paper vase
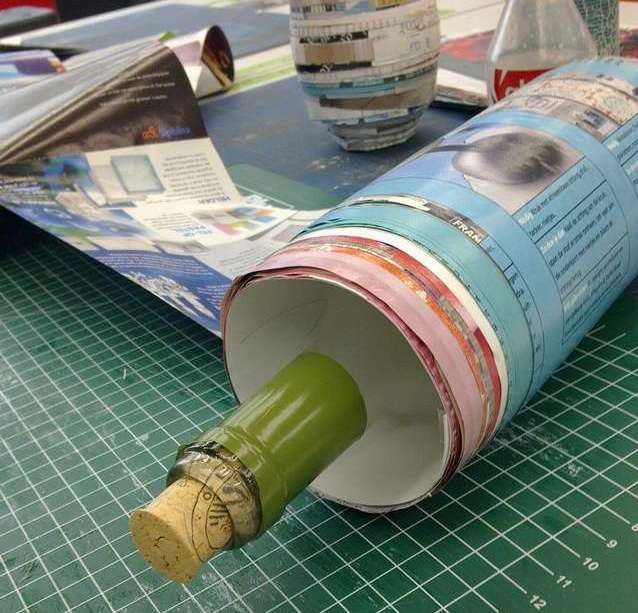
 Here is another example where to make do-it-yourself paper vases you can use old magazines, in addition, this model is also waterproof.
- Take 6 magazine sheets and cut.
- Apply a little glue and glue as shown in the photo.
- Then take another 6 sheets and cut them a centimeter shorter than the previous ones and glue them too.
- Repeat this until the blanks are 1 centimeter wide.
- You will get such a snake out of paper. Take the bottle and roll the paper. Yes, glue the paper wood glue (for durability and water resistance).
- When rolling out, be careful not to slip the paper. Now you have the first part of your vase, then you need to make a bottom.
Take half of the sheet, cut it in length and fold in a centimeter wide.
 You need to make about 20 of these sticks, glue them wood glue. Now your vase is ready, but if you want to make it waterproof, do the following. Apply layer of polyester resin. Take about 100 ml of resin and 2 ml of hardener. Mix and pour into a vase. Rotate until it spreads throughout the vase. Now you need to wait until it hardens, and then you can try how waterproof your paper vase is. If you want to make it waterproof outside, varnish the vase. Good luck with your paper vase!


https://i.expert-h.com/en/iz-bumagi/1182#sigFreeId4f24cb1dc6
Simple paper vase
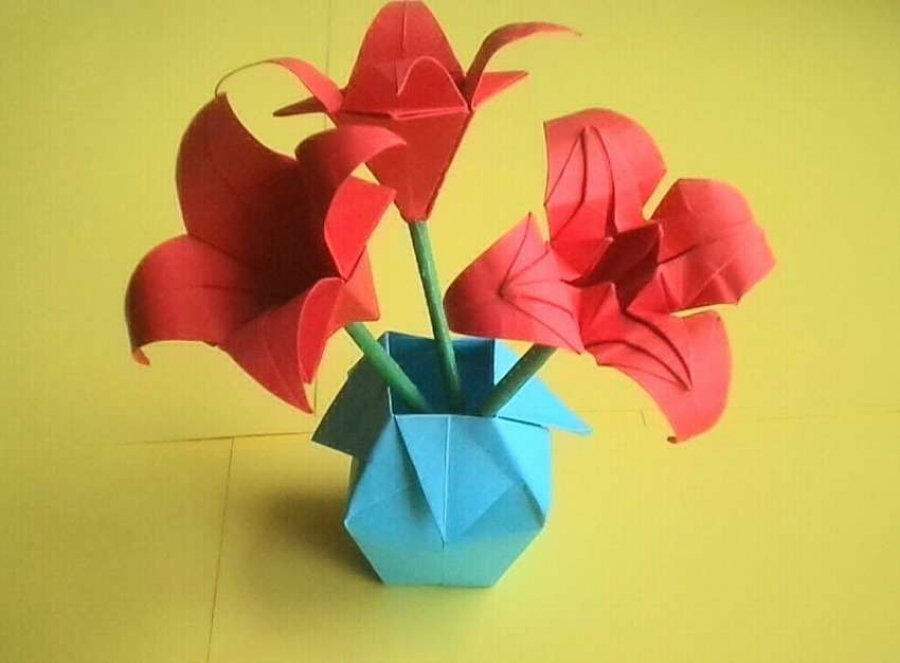
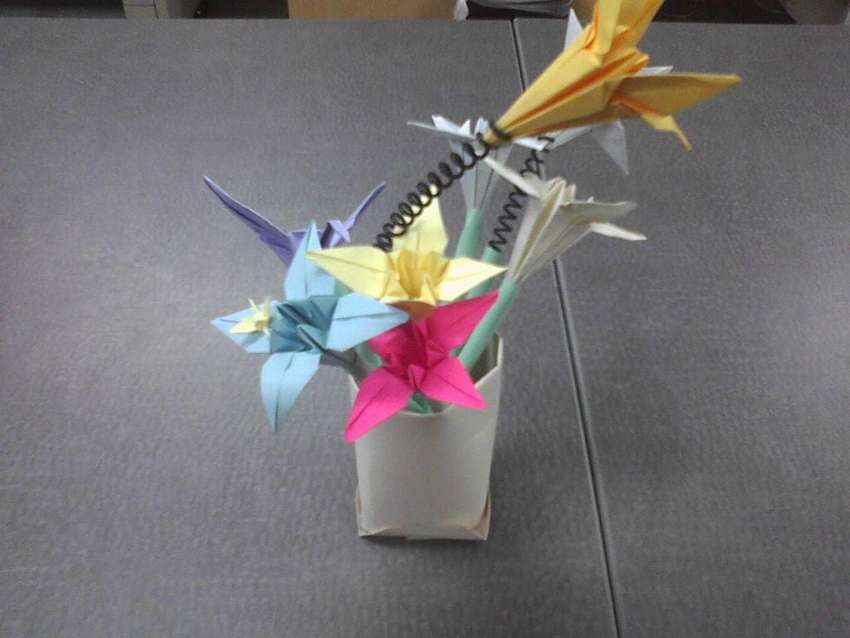 Here is an example how to make a simple paper vase and beautiful origami flowers on ordinary handles. To make a paper vase, take a piece of thick paper, fold one edge down, cut and glue. You can make a small base of cardboard and stick to the bottomher parts. You can add other fun touches. How to make paper flowers, not shown in detail here, but it can be viewed on the Internet.


https://i.expert-h.com/en/iz-bumagi/1182#sigFreeId9b0dbbcecd
Paper vases patterns
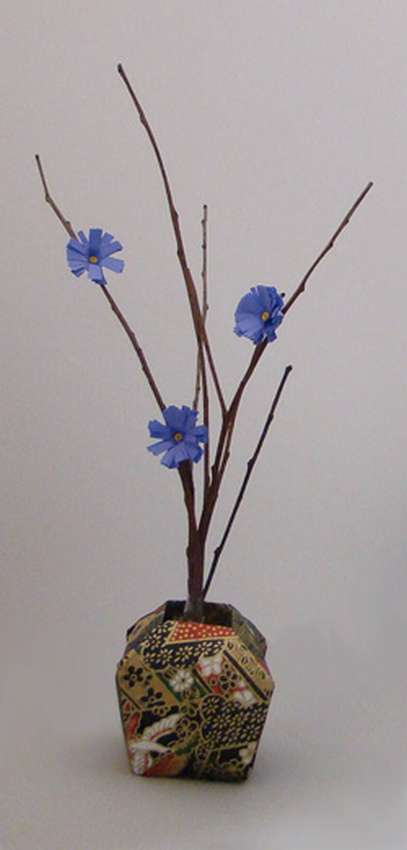
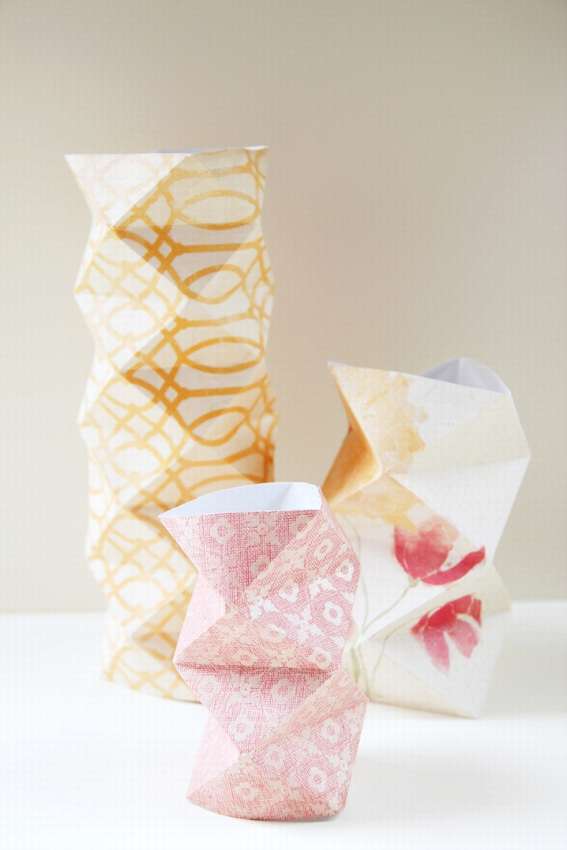
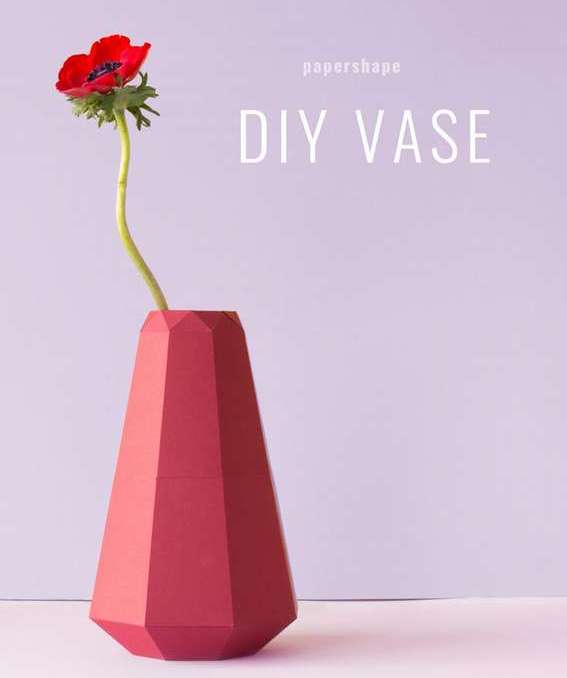 If you like geometric and straight lines, then this paper vase your project. For this craft, you just need to cut out patterns from paper. It looks like origami vase, only more than one sheet of paper is used here. The size: height 25 cm, 15 cm at the widest point, for the bottom hole diameter of 9.5 cm, for the top 5 cm. You can download the template on the website, link under the gallery or make it yourself. Folded paper vase very easy, it is shown in the master class, only five step by step photos. If this is not enough, watch the video on the site, then there will be no questions. For true colors, set in the middle of a paper vase set glass container (plastic will be too light).


https://i.expert-h.com/en/iz-bumagi/1182#sigFreeId062b872c7b
Craft paper vase with flowers
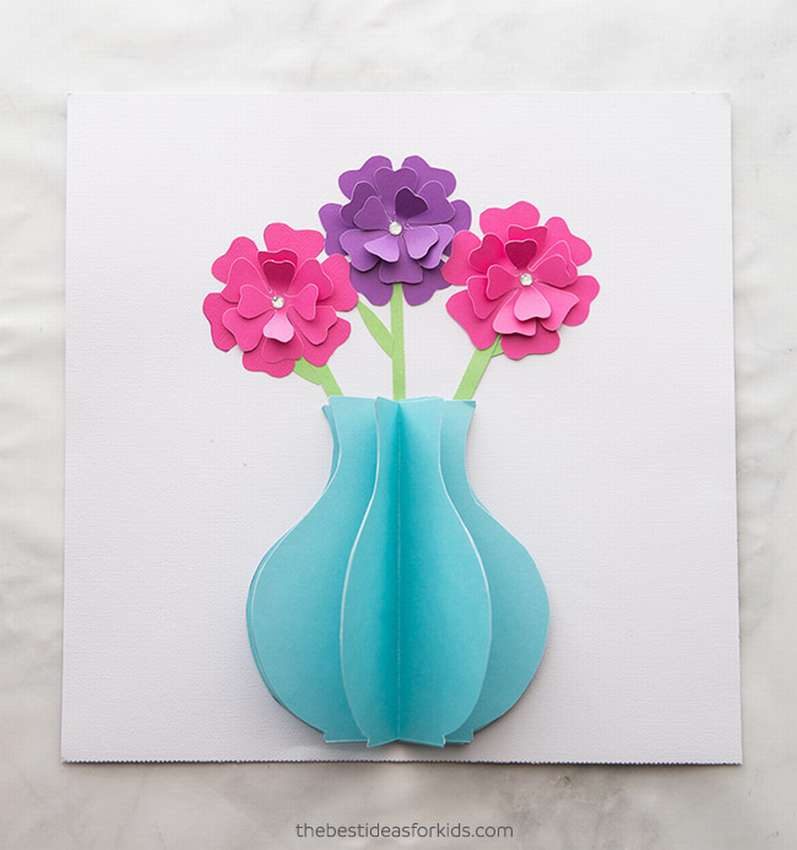 Here is an example of how to make simple paper vase with flowers. This composition is very easy to make. You can do it on canvas and hang it on the wall. Kids will especially enjoy doing do-it-yourself flowers and a vase of paperto give them for Mother's Day or as a birthday present. You can do template or just cut a vase from paper and circle the outline on the cardboard. Make 6 such blanks. Then fold in half and glue. After that, glue a piece of white cardboard. Now cut some flower stems and leaves and glue them to the white cardboard over the vase. Cut three flowers of each size. First stick the biggest flower, then add the remaining flowers from above. Glue them only in the center so that you can tighten the petals. Glue a small transparent sticker with rhinestones in the center of the flowers.


https://i.expert-h.com/en/iz-bumagi/1182#sigFreeIdb33c16bb24
Craft paper vase photo


https://i.expert-h.com/en/iz-bumagi/1182#sigFreeId50d60b311d
Hello, I am the author of this article, so I look forward to asking questions for this article in the comments below, I will answer all !!!
If you have questions on another topic, ask them on our forum, we will answer you
- Two baskets of paper in 5 minutes (Master class)
- How to make a simple and compact table for a milling cutter from plywood
- How to make a soft headboard tile (Instructions + step by step photos)
- Cinder block benches: a convenient bench in 55 minutes
- How to make a bed with a niche: saving space (Master class)