House of ... firewood!
 Eco-construction: a house made of ... firewood!
The amount of clay is approximately 20% of the volume of firewood. It is the basis of a solution that turns a simple woodpile into a solid wall of a wood house. In order for the clay to be warmer and not crack, it must be mixed with finely chopped straw, adding it in a volume of 10-15% of the clay volume and mixing thoroughly.
See all 5 photos below
The foundation design for a wood house is simple, for this it is enough to make a simple strip rubble foundation, layer by layer filling the stone with a liquid solution that penetrates well into all voids.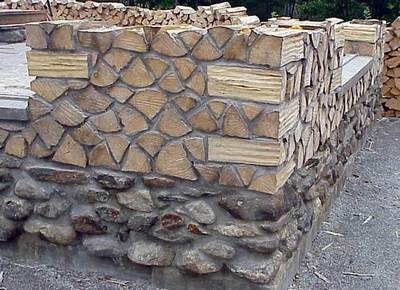
The depth of the foundation can be done no more than 1 meter, since the wood wall weighs much less than brick and is also very resistant to soil sediment.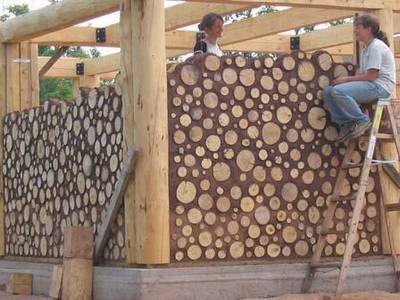
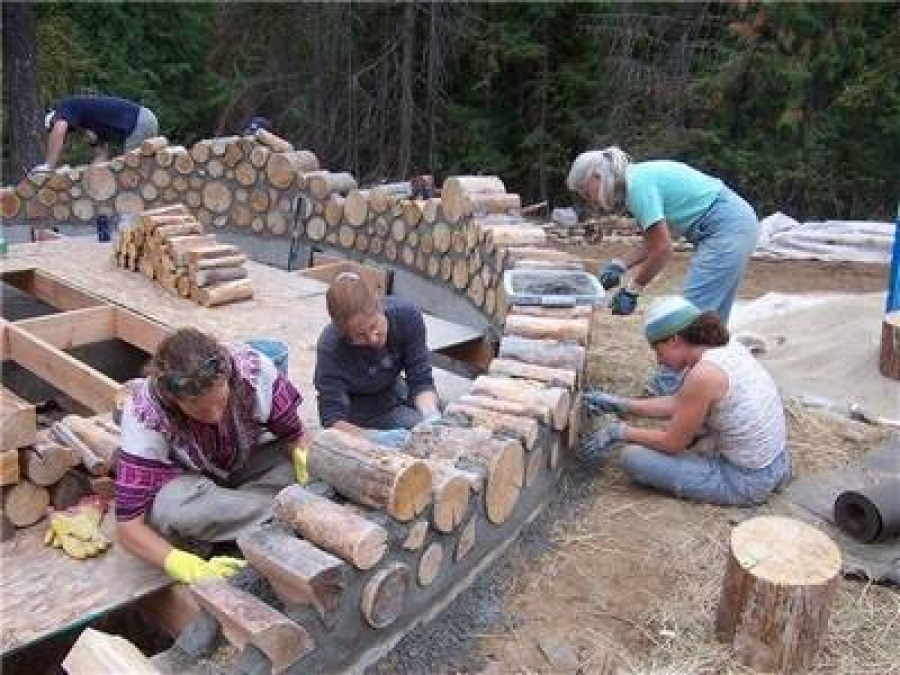
The optimal length is 40-50 centimeters, since it is enough to keep the house warm even in frosty winters. The technology of laying a wood wall is simple, but requires accuracy and careful laying of firewood in a solution with a minimum thickness of joints. In order to keep the wall warmer, there is a small secret to technology. It lies in the fact that the clay-straw solution should not be laid in a continuous layer, but in two parallel beds. This ensures that an air gap appears in the clay thickness, which does not allow the seams to freeze, forming cold bridges.
When laying corners to give greater strength to the whole structure, the technique of dressing the wood rows should be applied, as with conventional brickwork.
The house is 9x9 meters and a half floors. I stack it from logs 40 cm long. On clay. He laid out the walls like a raspberry, at the corners of each row overlapping with the rows of another wall.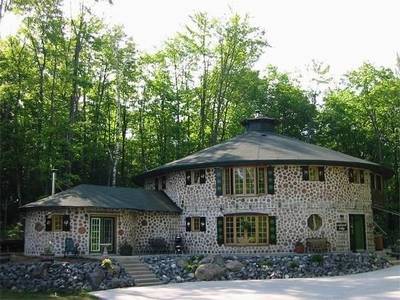
Through 50-70cm. made a strapping from an inch board. She served for leveling. Spread the wall turns out (at a time) in 3 rows of firewood. No more - the clay does not have time to dry out and the upper rows squeeze the logs from the lower ones. Nowhere was it written that when laying out the walls it is necessary to put together shields (formwork, something similar as in yew technology) Shields of 3 boards in the entire length of the wall both inside and out. They are mobile. Below, they are attached to the finished wall with screws. Above, there is a 41cm spacer so that you can withstand the thickness of the wall and discard logs longer than necessary. Using the same shields, the vertical walls are maintained.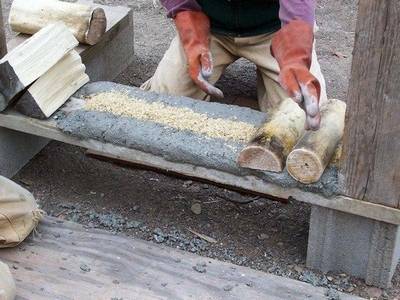
For windows and doors, he put together boxes along the width of the wall (board 200x100). They are exhibited on the masonry in place.
Since I have a wall of 9m. in the middle of the house I have the 5th wall (frame made of timber 150x150). The ends of the timber are walled into the walls. Overlap of the second floor (beam), one end of the beam lies on the frame of the 5th wall, the other on the wall. Of course, under the beam on the wall lies a board (the entire length of the wall) Everything is level.
This year I had to stop on the second floor. Frosts began - in the morning the water freezes up - you can’t put down the wall.
Eco-construction: a house made of ... firewood!
The amount of clay is approximately 20% of the volume of firewood. It is the basis of a solution that turns a simple woodpile into a solid wall of a wood house. In order for the clay to be warmer and not crack, it must be mixed with finely chopped straw, adding it in a volume of 10-15% of the clay volume and mixing thoroughly.
The construction of the foundation for a wood house is simple, for this it is enough to make a simple tape rubble foundation, layer by layer filling the stone with a liquid solution that penetrates well into all voids.
The depth of the foundation can be done no more than 1 meter, since the wood wall weighs much less than brick and is also very resistant to soil sediment.
The optimal length is 40-50 centimeters, since it is enough to keep the house warm even in frosty winters. The technology of laying a wood wall is simple, but requires accuracy and careful laying of firewood in a solution with a minimum thickness of joints. In order to keep the wall warmer, there is a small secret to technology.It lies in the fact that the clay-straw solution should not be laid in a continuous layer, but in two parallel beds. This ensures that an air gap appears in the clay thickness, which does not allow the seams to freeze, forming cold bridges.
When laying corners to give greater strength to the whole structure, the technique of dressing the wood rows should be applied, as with conventional brickwork.
The house is 9x9 meters and a half floors. I stack it from logs 40 cm long. On clay. He laid out the walls like a raspberry, at the corners of each row overlapping with the rows of another wall.
Through 50-70cm. made a strapping from an inch board. She served for leveling. Spread the wall turns out (at a time) in 3 rows of firewood. No more - the clay does not have time to dry out and the upper rows squeeze the logs from the lower ones. Nowhere was it written that when laying out the walls it is necessary to put together shields (formwork, something similar as in yew technology) Shields of 3 boards in the entire length of the wall both inside and out. They are mobile. Below, they are attached to the finished wall with screws. Above, there is a 41cm spacer so that you can withstand the thickness of the wall and discard logs longer than necessary. Using the same shields, the vertical walls are maintained.
For windows and doors, he put together boxes along the width of the wall (board 200x100). They are exhibited on the masonry in place.
Since I have a wall of 9m. in the middle of the house I have the 5th wall (frame made of timber 150x150). The ends of the timber are walled into the walls. Overlap of the second floor (beam), one end of the beam lies on the frame of the 5th wall, the other on the wall. Of course, under the beam on the wall lies a board (the entire length of the wall) Everything is level.
This year I had to stop on the second floor. Frosts began - in the morning the water freezes up - you can’t put down the wall.
150+ photos of unusual houses


https://i.expert-h.com/en/dom/dom-iz-drov#sigFreeIdf5af7208b4
- Brick grill: 44 drawings, 18 projects + photos
- Collapsible barbecue: 50 drawings, 20 master classes +300 DIY photos
- ✿ Flowerbeds:> 34 turn-based master classes + photos (248 ideas) - do-it-yourself
- DIY sauna in the apartment: bathroom, balcony, storage room. Projects and photos
- Shelves in the bath with your own hands: +200 photo. Drawings of bench benches in the steam room