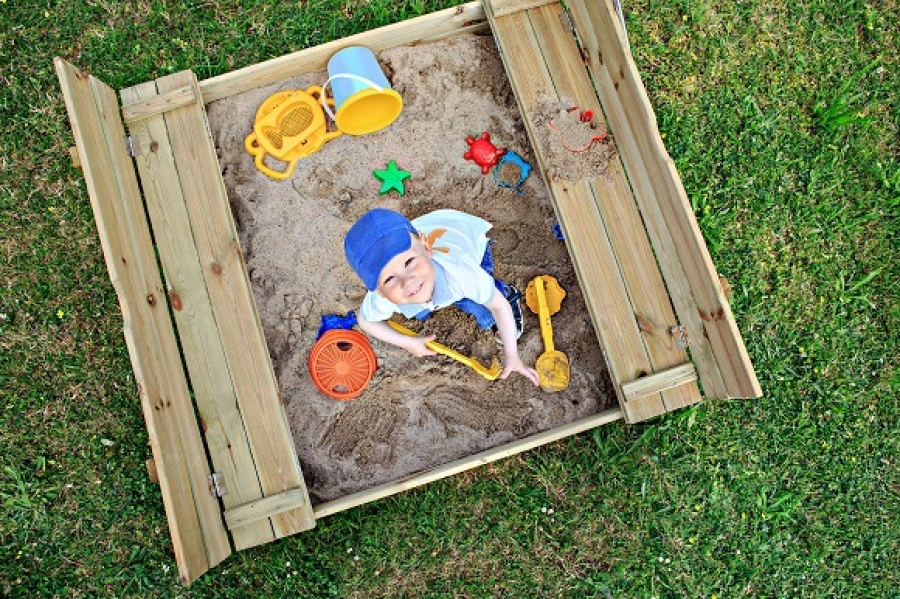
Convenient sandbox - bench with a box for toys: drawings, step by step photos + instructions
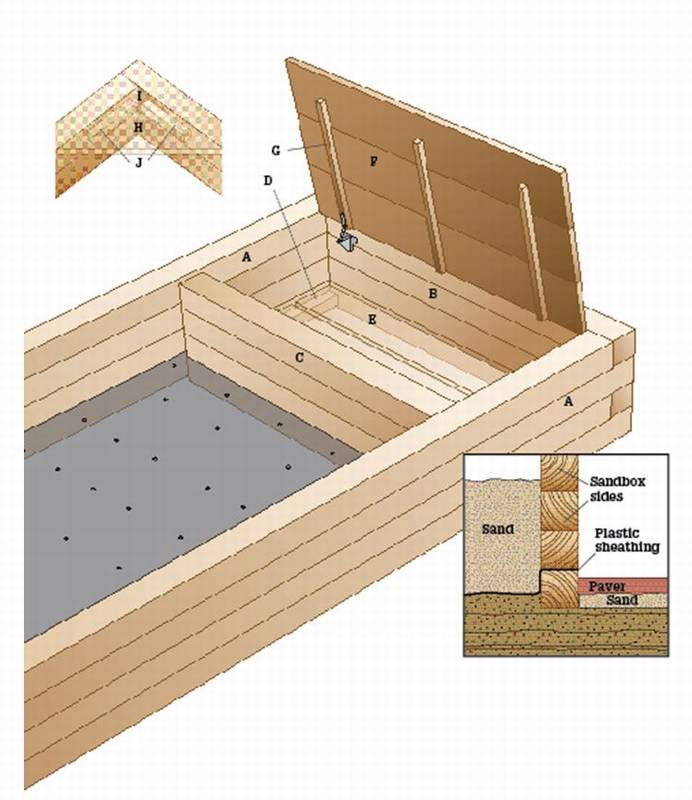
 sandbox bench
To make such do-it-yourself sandbox for children, it will take much more effort than just knocking down four boards and pouring a bunch of sand in the middle. Here, the wooden structure is durable and attractive. A box at one end provides children with a convenient place to store toys. The opposite end has built-in seats where children can sit while playing.
Gravel cushion and plastic cover provide a good foundation for the sandbox, which gives two advantages: weeds will not grow and water will not accumulate. Gravel and lining prevent sand from leaking out of the box. This is how it looks on the diagram.
How to make a sandbox yourself: step by step
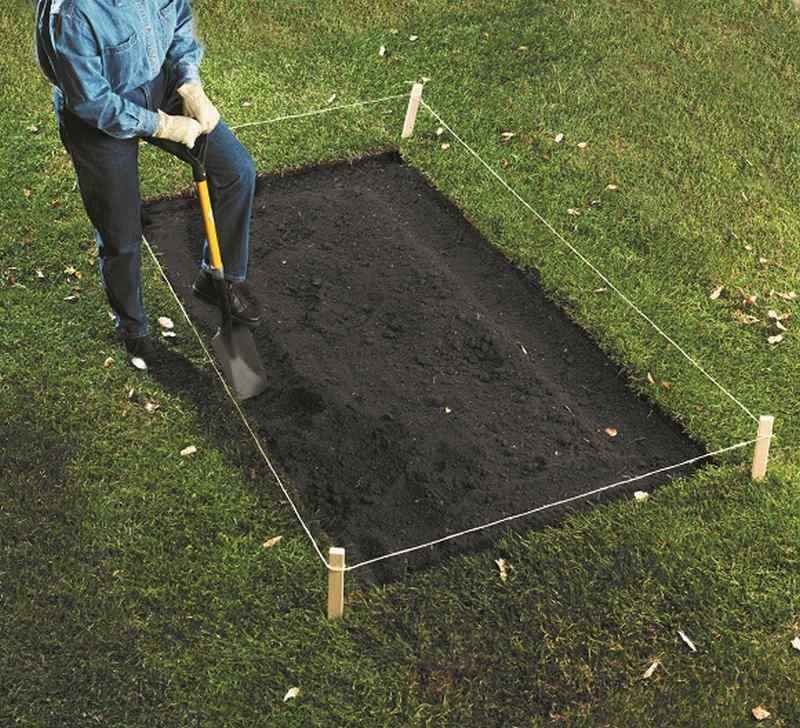
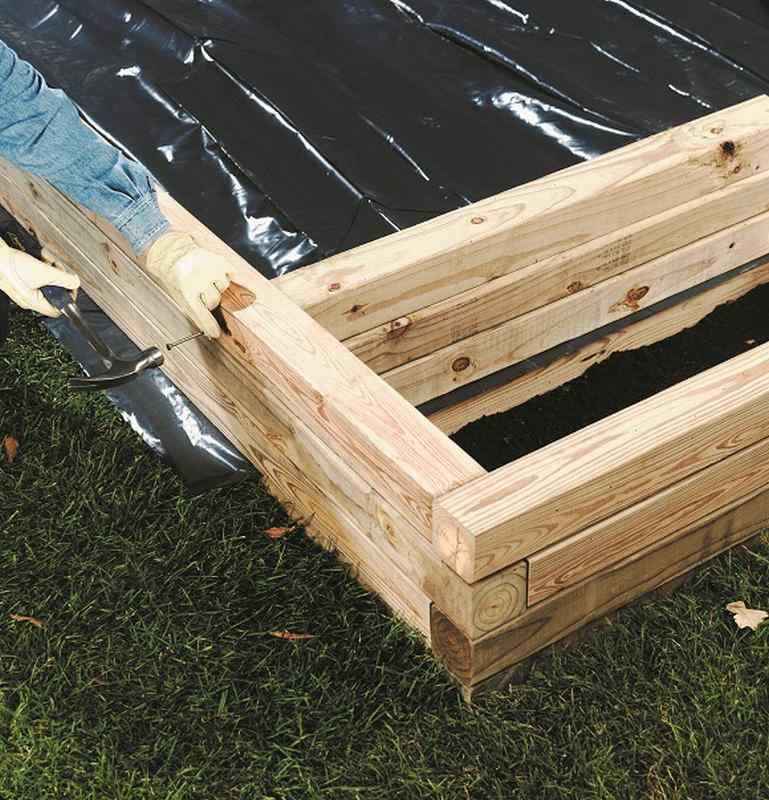
- Circle the area 122 x 244 cm using stakes and ropes. Remove all grass inside the pad. Dig a straight trench 5 × 10 cm wide around the perimeter of the area, right inside the stakes and rope.
- Install the first row of boards in the trench so that the corners on successive rows blocked each other. Add or remove soil to even out the corners. Drill two holes through the sides of the beam, hammer in nails. When measuring from the inside of one end, mark the inside edge of the box 45 cm on both sides. Align the wall of the box with the marks, then lay the soil on both sides.
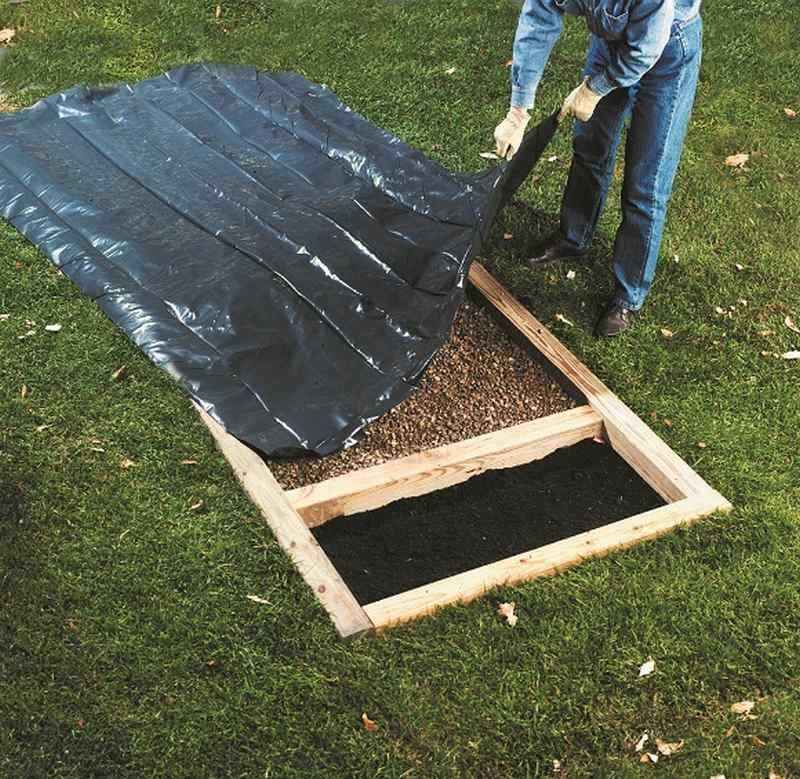
- Remove the tree and dig an 8 cm gutter at the marks. The top edge of the drawer should be 2 cm lowerthan the upper edge of the first tier of the sandbox wall. Add or remove soil until the box is at the correct height. Then fix the sides of the sandbox with nails. Fall asleep on 5 cm coarse gravel into the sandbox section and cover with a durable plastic wrap. Every 30 cm do drainage holes.
- Install the second layer of bars. Starting from the ends, nail the bars with nails. Lay the remaining boards of the box on top of the first and nail them too.
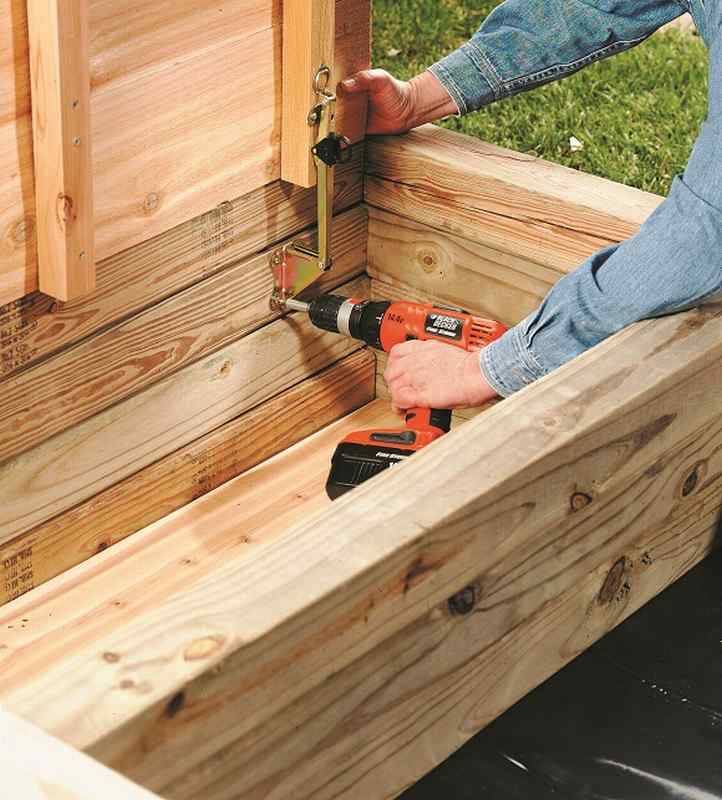
- Cut the floor clips and place one against each side wall along the bottom of the drawer. Attach galvanized wood screws. To ensure drainage, cut the floorboards and place them on the clamps at intervals of 3-5 cm between the boards. Attach with screws.
Saw off the boards of the covers and lay side by side so that the ends are flush. Cut the spikes into place across the cover, one at each end and one in the middle. Secure with galvanized screws. Attach the cover to the sandbox frame using child friendly friction loops. - Cut the stops. Mark 2 cm down from the top edge of the sandbox at two corners. Align the top edges of the bench spikes with the marks and secure with screws. Trim Corner Bench Boards length at an angle of 45 ° at each end. Set in a corner and attach to the spikes with screws. Trim the bench boards in length with a 45 ° angle at each end. Squeeze to the corner bench, and then attach to the spikes. Repeat this step for the second corner bench.
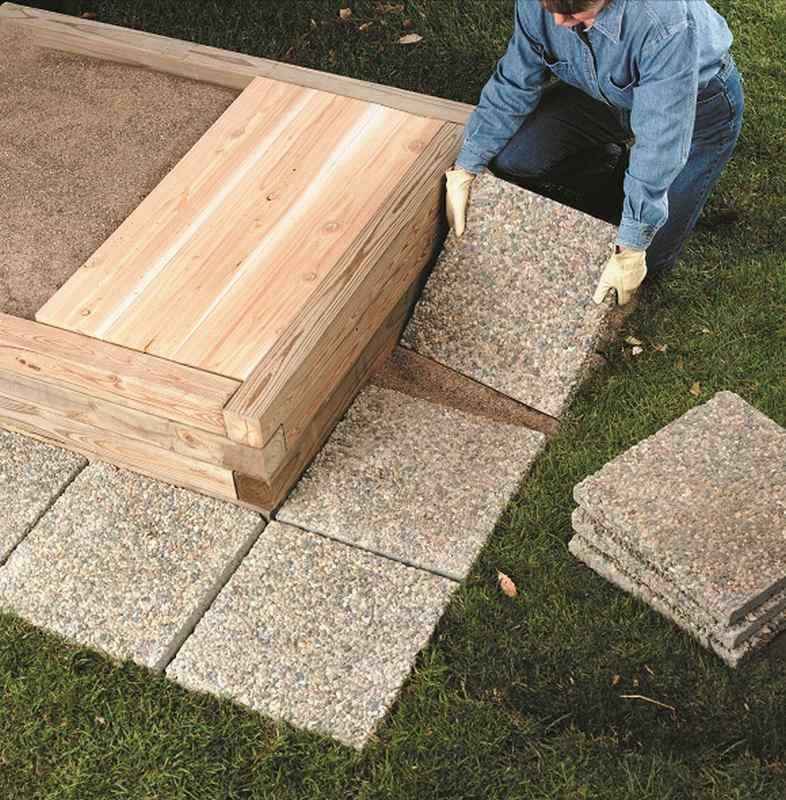
- Mark the area with the width of the tiles around the perimeter of the sandbox. Remove grass and soil to the depth of the tile, plus another 5 cm. Pour a layer of sand and level with a board. Lay the tile on a sandy base, starting at the corner of the sandbox.
It is clear that there are a lot of sandbox options. In this article "Do-it-yourself sandbox with a lid. Photo, drawing. With phased photos» https://i.expert-h.com/en/pesochnitsy/pesochnica-svoimi-rukami-s-kryshkoj You will find many interesting projects.
Hello, I am the author of this article, so I look forward to asking questions for this article in the comments below, I will answer all !!!
If you have questions on another topic, ask them on our forum, we will answer you
- Two baskets of paper in 5 minutes (Master class)
- How to make a simple and compact table for a milling cutter from plywood
- How to make a soft headboard tile (Instructions + step by step photos)
- Cinder block benches: a convenient bench in 55 minutes
- How to make a bed with a niche: saving space (Master class)