Table bench (transformer) for a summer residence: drawings + step-by-step instructions
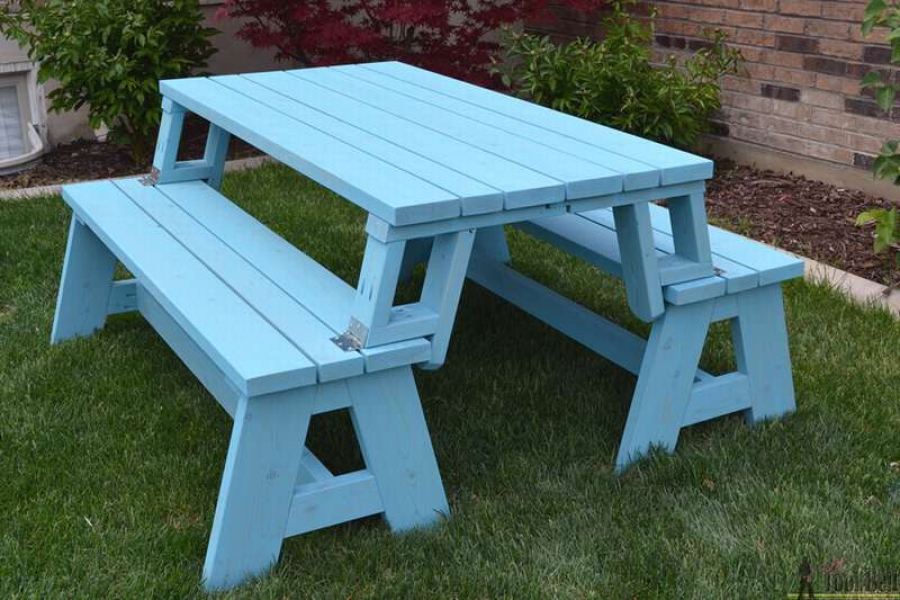 table-bench for a summer residence
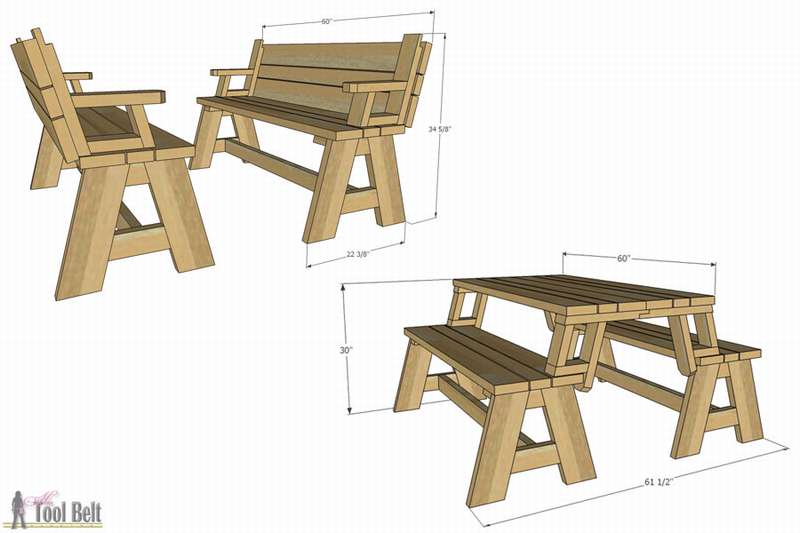
A great option for a summer cottage or a family picnic in the courtyard of a country house. Two benches with a flick of the wrist turn into a table with two benches. Then, on the contrary, the top of the table folds down to create the back of the bench, so that you can conveniently lean back and relax after a successful picnic. And with such a table, any picnic will be successful. And most importantly, make a table a bench for a summer residence easy to do with your own hands.
Necessary materials:
Boards:
- (4) 2x6, 120 "(305 cm)
- (2) 2x6, 96 "(244 cm)
- (3) 2x4, 120 "(305 cm)
- (3) 2x4, 96 ", (244 cm)
Equipment:
- (160) 2 1/2 "(6.5 cm) Kreg External Screws with Pocket Hole
- (4) 3-inch (7.62 cm) hinge
- (1) outdoor polyurethane
Instruction how to make a table a bench made of wood with your own hands
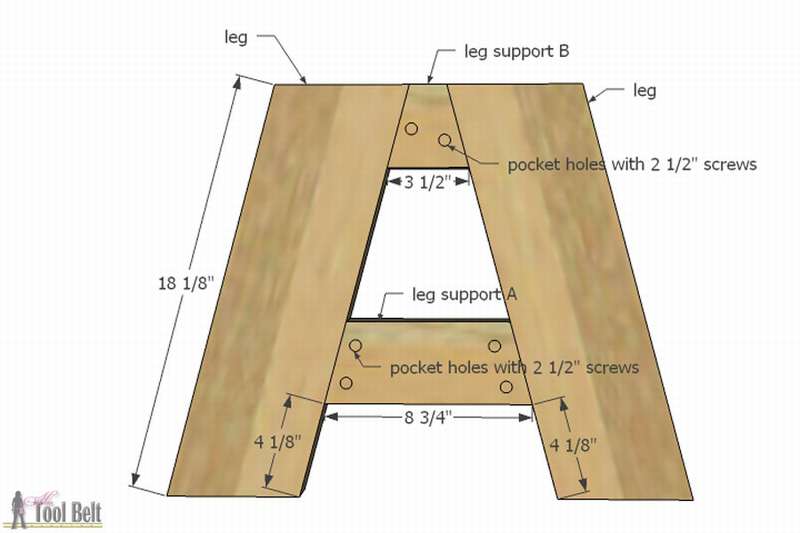
- Gather legs. Drill pocket holes in leg support A and B (letters are shown in the diagram). Mark 11 cm from the bottom of the legs to install the leg supports A. To attach the leg supports, use glue and screws. Make 4 of these sets.
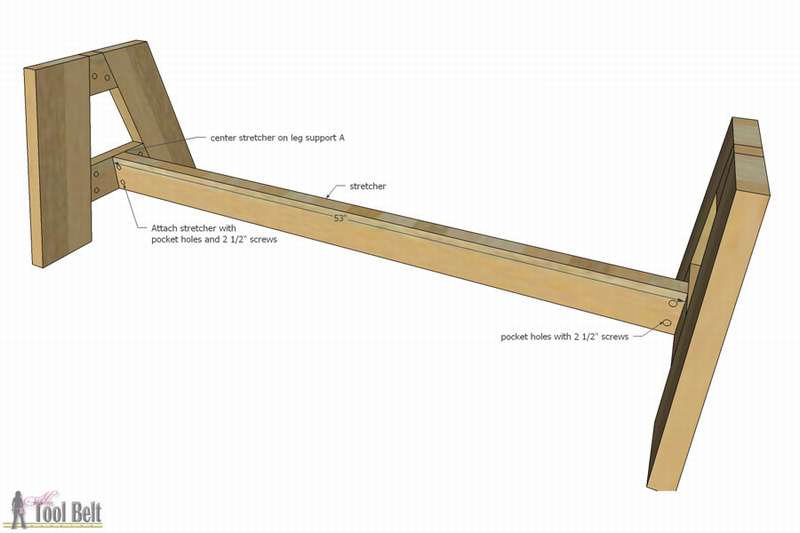
- Attach a stretcher. Drill holes at the two ends of the subframe. Mark the center of the leg tripod A. Attach the subframe to the centers of leg support A using glue and screws. Repeat for a different set of legs and stretchers.
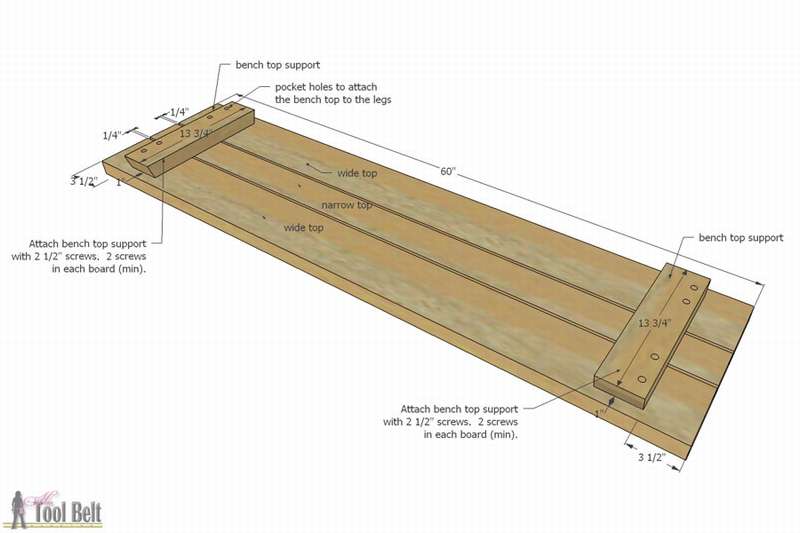
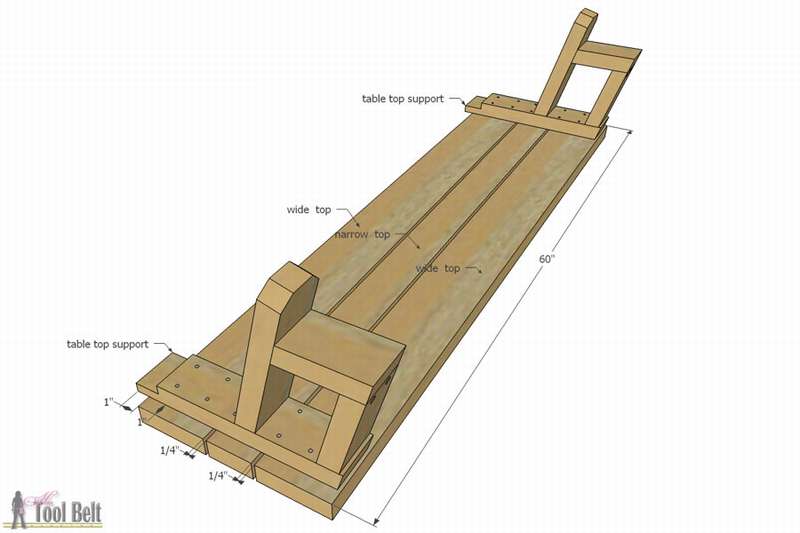
- Assemble the bench. Drill pocket holes in the supporting parts of the countertop, then attach to the legs. Lay out the wide top, narrow top and wide top boards with a gap of 5 mm. Mark 10 cm on each end and 2.5 cm on the side of the wide upper planks. Glue the supporting parts of the countertop (narrow side down) to the upper boards. Screw the table support elements to the upper boards with screws (2 screws for each board). Note: Saw 4 wooden pieces 5 mm wide for laying under the upper boards.
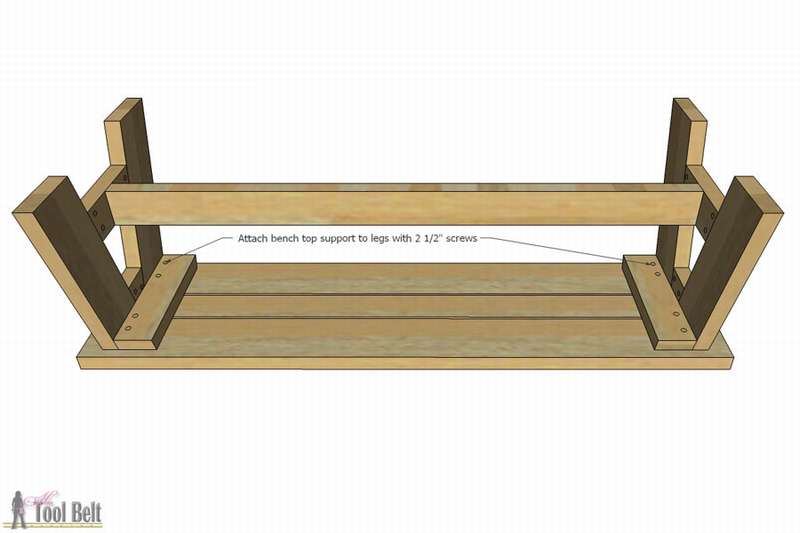
- Attach the table legs to the countertop. Turn the block upside down and attach the countertop. Repeat for the second bench.
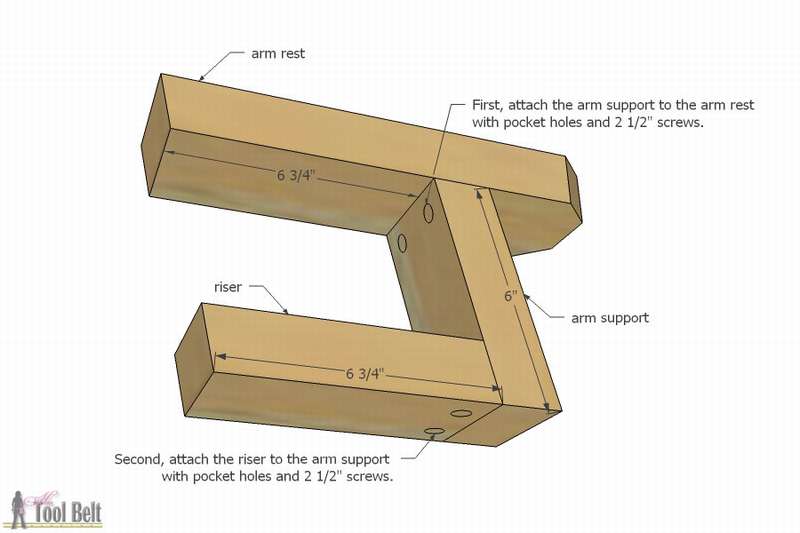
- Assemble the supports. Drill holes at one end lever supports and inserts. Mark 17 cm on the narrow side of the armrest parts. Fasten the support elements to the parts of the armrest with screws and glue. Also attach the riser parts to the bracket supports.
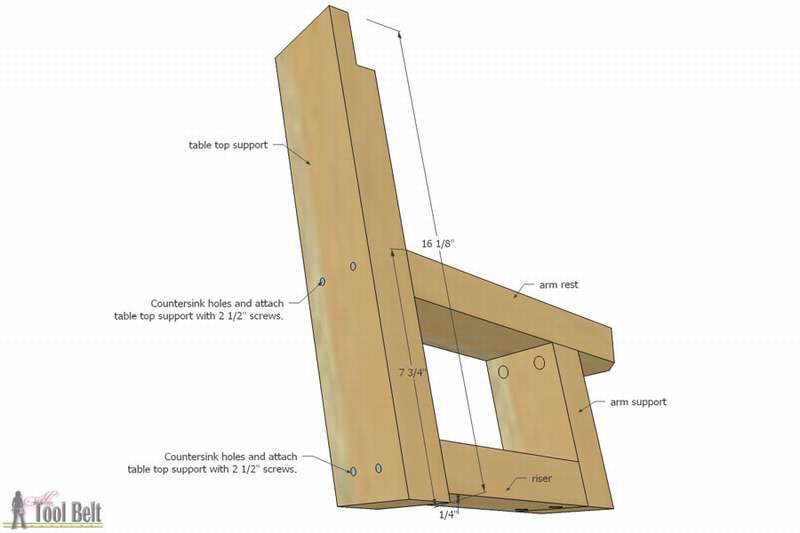
- Gather Support. On the long side of the table supporting parts, mark 5 mm and 20 cm from bottom to top. Pre-drill the countersink holes on the narrow side of the tabletop support elements to attach the riser and armrest. Repeat for each lever.
- Assemble Countertop. Lay out the top with a gap of 5 mm between the boards. Mark more than 2.5 cm from each end and 2.5 cm from the top of the tabletop support elements. Glue the supporting parts to the upper boards.
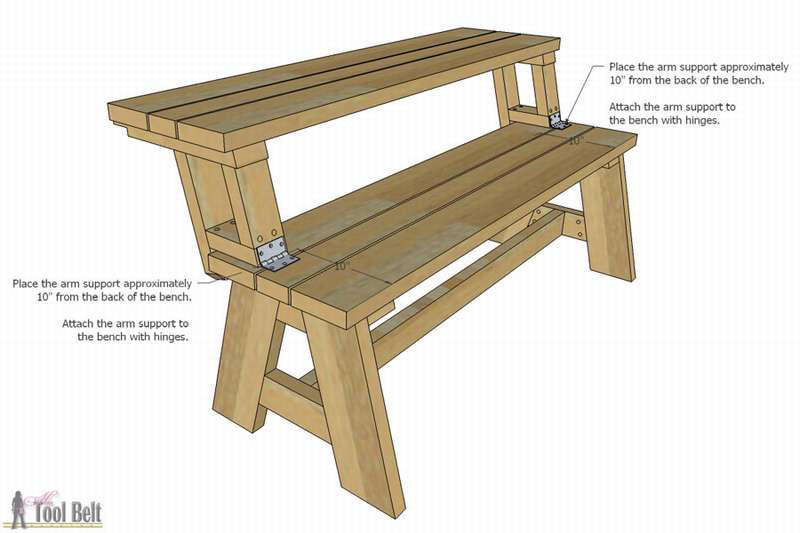
- Attach a worktop to a bench. Mark about 25 cm from the back of the bench. Set the countertop assembly on the bench to a mark of 25 cm. Mark the holes for the hinges after drilling the holes. Attach the hinges to the bench and supports. Sand, paint and the bench bench is ready.
If you want to find a more suitable option, read the large article “DIY bench table. 800 photos, drawings, step-by-step instructions» https://i.expert-h.com/en/lavki/stol-skamejka. Here are simple examples of outdoor furniture: garden tables and benches, benches with a table for two, picnic tables with benches - combined and separate designs. If you have the usual tools, a little experience and free time, most models can be assembled in one day. Will help you do table bench do it yourself drawings and step-by-step instructions presented in this article.
Hello, I am the author of this article, so I look forward to asking questions for this article in the comments below, I will answer all !!!
If you have questions on another topic, ask them on our forum, we will answer you
- Two baskets of paper in 5 minutes (Master class)
- How to make a simple and compact table for a milling cutter from plywood
- How to make a soft headboard tile (Instructions + step by step photos)
- Cinder block benches: a convenient bench in 55 minutes
- How to make a bed with a niche: saving space (Master class)