Original bookshelf: floating design for creative design
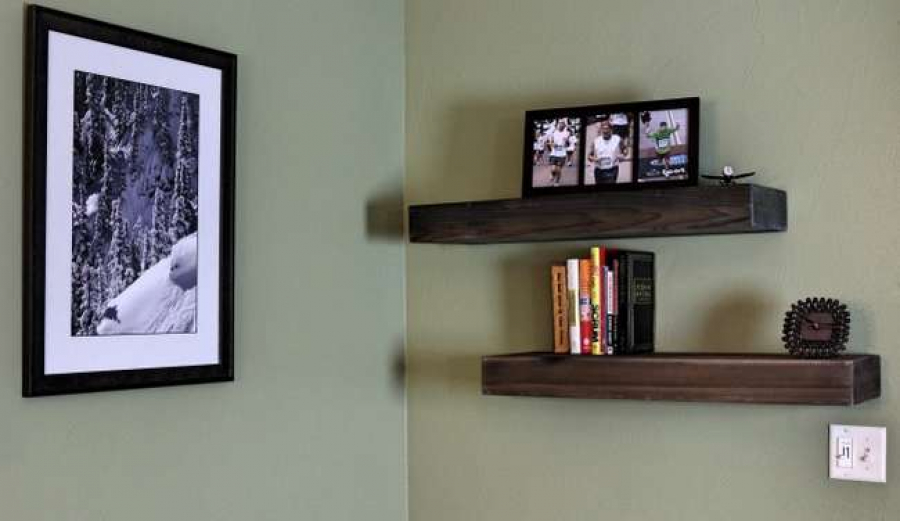 bookshelf on the wall
This project is suitable for the master of any level, including for beginners. A great option for fans of creative design, and most importantly do soaring do-it-yourself bookshelf It’s cheap and doesn’t take much time, but it will add a nice touch to any wall (“soaring” means the design with hidden fixtures). In general, there are many types of hovering (flying, floating, hidden), this is just one of the options.
Necessary tools:
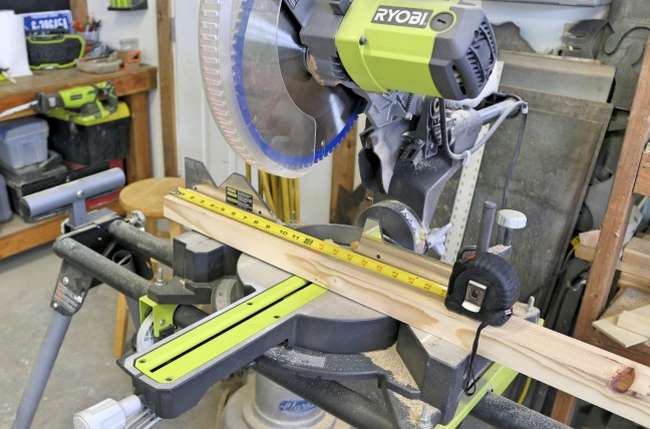
- Circular saw or miter saw
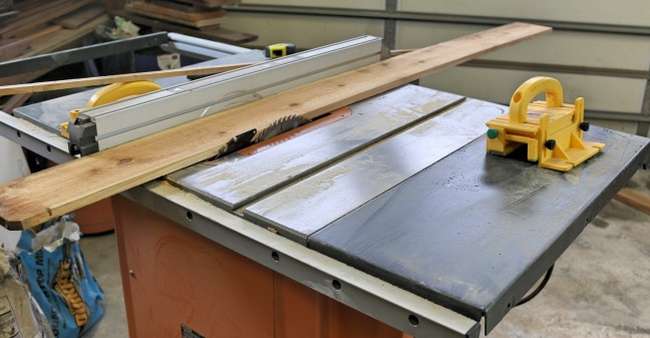
- Table saw
- Drill
- Craig Jig for Pocket Holes
- Roulette
- Sander
Materials:
- Lumber for the frame and shelf - see diagram with dimensions
- Wood impregnation
- Water Soluble Polyurethane Spray
- Screws for wood 7.5 cm
- Nails 3 cm
A wooden floating shelf can be made for about $ 10, this is the cost of wood, wood trim and other basic materials. Note: this does not include small things that you probably already have: glue, sandpaper, etc.
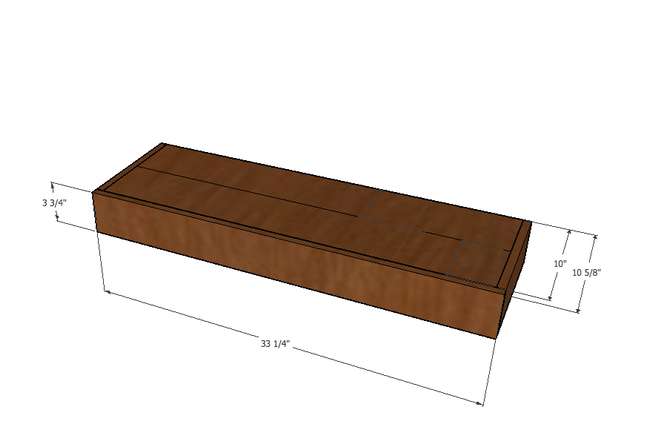
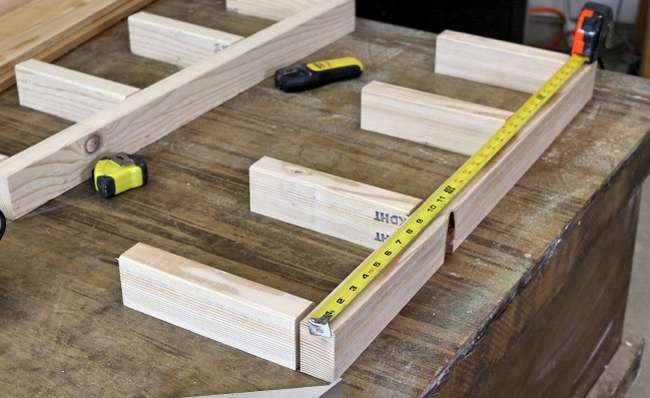
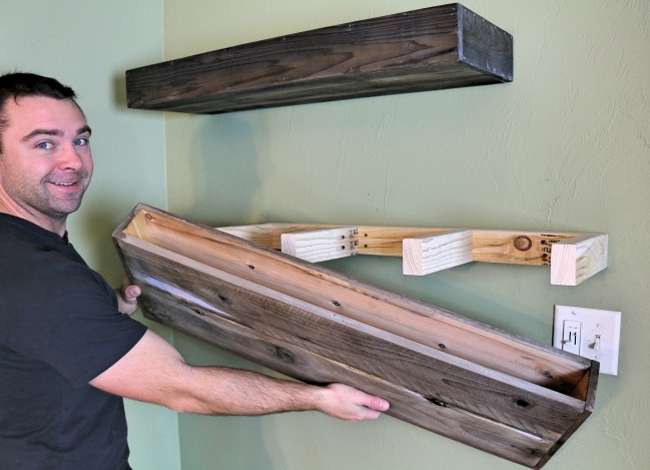
- First mark and make incisions for all parts of the wooden floating bookshelf. The design mainly consists of: a wooden frame of 2 × 4 bars, screwed into studs on the wall and shelves (boxes), which slides on the frame.
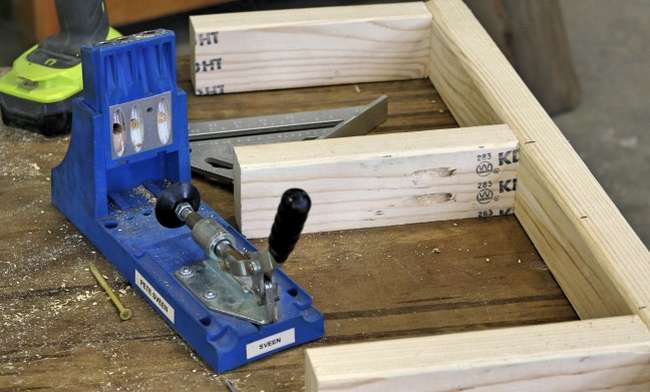
- Begin assembly by first making the frame. When you assemble all the parts, make a wooden frame and, for safety, tighten the long 7.5 cm screws on the opposite side. Frame will be completely hidden inside the box, therefore, when you do it, there is no need for processing, nothing will be visible anyway.
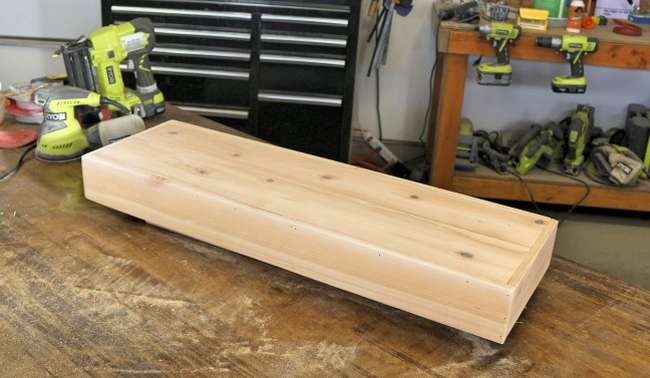
- Then assemble the box that slides around the frame. This will be the main shelf and the most visible part of the project. Dry all the pieces to make sure the cuts are made correctly, then add glue to the seams. Fasten everything with nails and then let the glue dry.
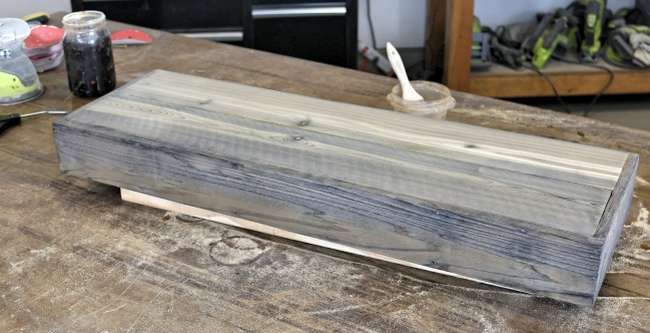
- Sand the box, seal it all water spray polyurethane. A water based sealant ensures that you do not change the patina and color of the solution.
- When the finishing process is completed and everything is dry, we can install the shelf! First we find the studs in the wall, which should be at a distance of approximately 40 cm from each other. Then fasten the frame to the wall with 2 screws for each connection to the stud. Put on the box and you're done!
Note. If you want to make the shelf safer (perhaps children can remove the box from the frame), you can simply screw the shelf to the frame from the bottom or top.

Of course floating shelves for books on the wall They look very stylish, but there are so many other options. In general, the topic is very extensive, if you are looking for interesting projects, be sure to read the big mega article “Do-it-yourself bookshelf 180 photos: drawings and step-by-step photos» https://i.expert-h.com/en/polki/knizhnaya-polkawhere you will find many original ideas and creative designs. For example, shelves for books made of cardboard and newspapers, shelves made of pipes, boxes, glass bottles, bricks and boards, floor, hanging, inverted and many other amazing projects.
Hello, I am the author of this article, so I look forward to asking questions for this article in the comments below, I will answer all !!!
If you have questions on another topic, ask them on our forum, we will answer you
- Two baskets of paper in 5 minutes (Master class)
- How to make a simple and compact table for a milling cutter from plywood
- How to make a soft headboard tile (Instructions + step by step photos)
- Cinder block benches: a convenient bench in 55 minutes
- How to make a bed with a niche: saving space (Master class)