How to make an adirondack chair. Instruction, drawing, master class
 garden chair adirondack
This version Adirondack stools has come a long way from early models with flat backs and seats. It looks complicated, but to make it do-it-yourself chair is quite real. Do not be alarmed by the curved bars and the number of objects in this project. Although there are several angles and curves that need to be cut, in fact there are not any unusual details - everything keeps perfectly on the screws.
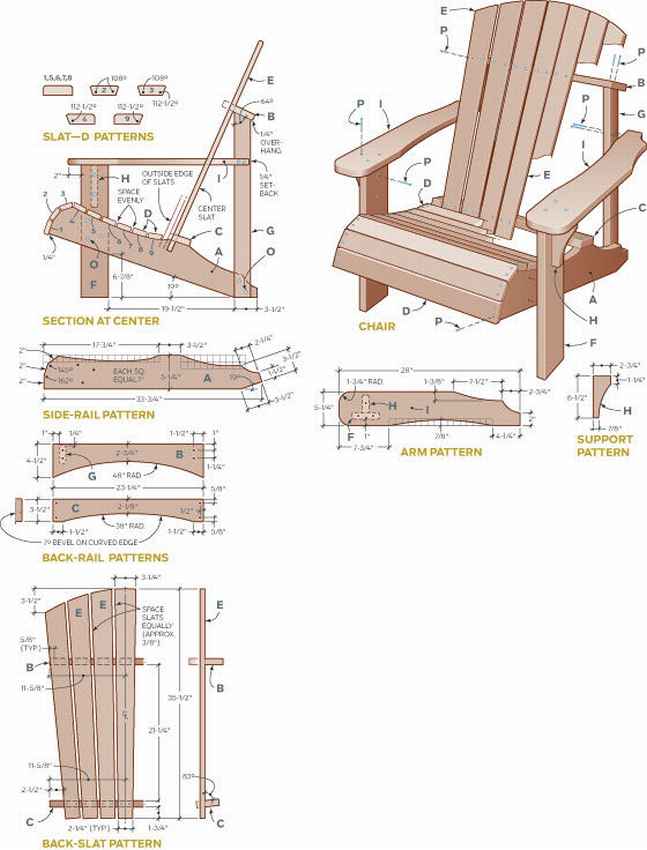
All details are marked letters in the drawingThis is the first photo above. By the way, the next one table drawingwhich you see in the photo. So you can make a kit. So what we need. Dimensions are in inches. Convert to centimeters, for example, a lateral rail 33 3/4 ". So 33" we multiply by 2.54 = 83.82 cm, 3/4 "is 1.9 cm. 83.82 + 1.9 = 85.72 cm.
- A. 2 1 x 5 1/4 x 33 3/4 "side rail
- B. 1 1 x 4 1/4 x 23 1/4 "Upper Rear Rail
- C. 1 1 x 3 1/2 x 23 1/4-inch rear handrail
- D. 9 3/4 x 2 1/4 x 23 1/4 "Seat Rack
- E. 7 3/4 x 3 1/4 x 35 1/2 "plank back
- F. 2 1 x 4 1/4 x 20 1/2 front leg
- G. 2 1 x 2 1/2 x 29 "back leg
- H. 2 1 x 2 3/4 x 6 1/2 "bracket
- I. 2 1 x 5 1/4 x 28 "
- J. 2 1 x 5 1/4 x 16 "foot
- K. 2 1 x 1 1/2 x 19 1/4 "foot
- L. 2 1 x 5 x 16 1/2 "foot
- M. 2 3/4 x 5 x 17 1/2 "subframes
- N. 5 1 x 3 3/4 x 24 "rail
How to make an adirondack chair step by step
- Lay out the shape of the side guide, cut along the lines with a jigsaw and sand the edges.
- Cut the seat strips to size and round the top edges. Then round open edges - those that do not abut other parts - the side and rear guides.
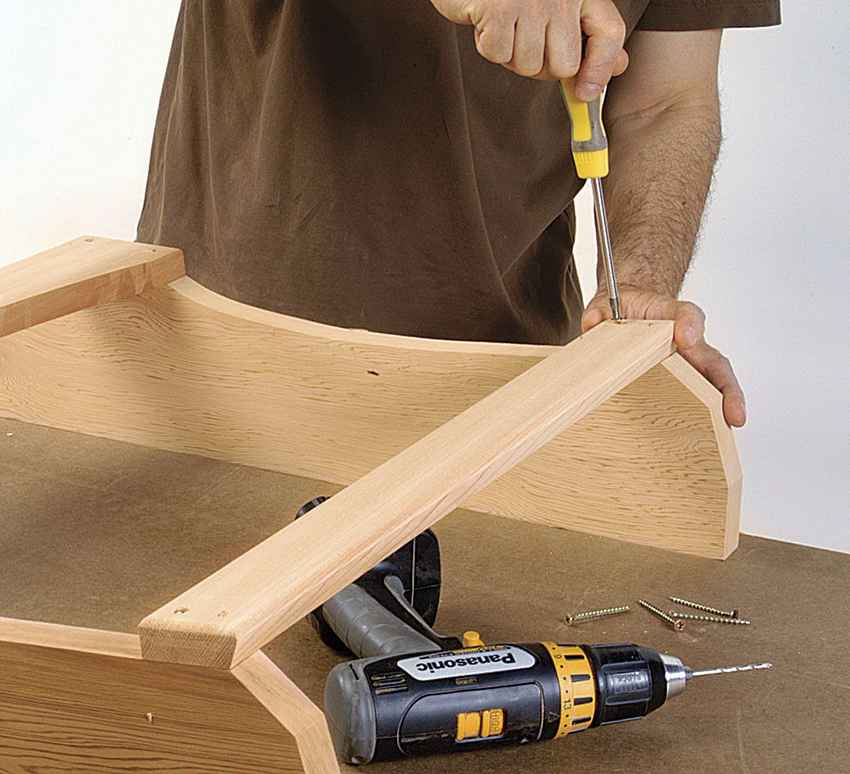
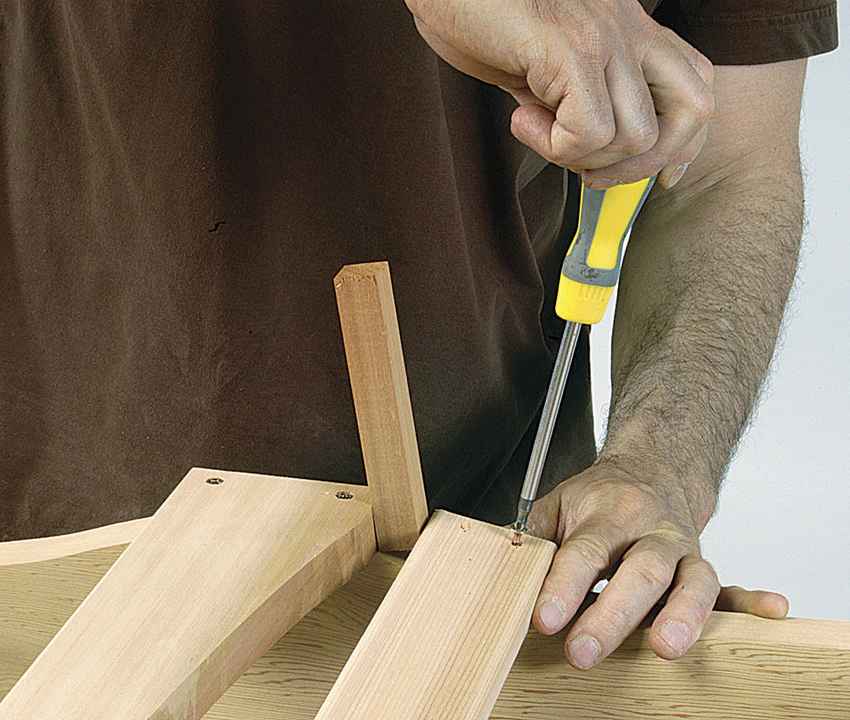
- Assemble the seat. Screw the lower rear rail to the sides of the seat using one screw at each end of the rail. Then add bar number 4, as shown in the drawing, with one screw at the end. Make a square and add a second screw.
- Install the remaining rails. Simply place the bars on the eyeso that they look even.
- Cut the front legs and round the long edges. Attach to the seat with screws.
- Rear slats narrow. Use a saw or jigsaw to cut each piece of the bar that is 35 1/2 inches (90 cm) long so that one end is 3 1/4 inches (8 cm) wide and the other 2 1/4 inches (6 cm) wide. Smooth surfaces, cut off the curved upper ends and round off the edges.
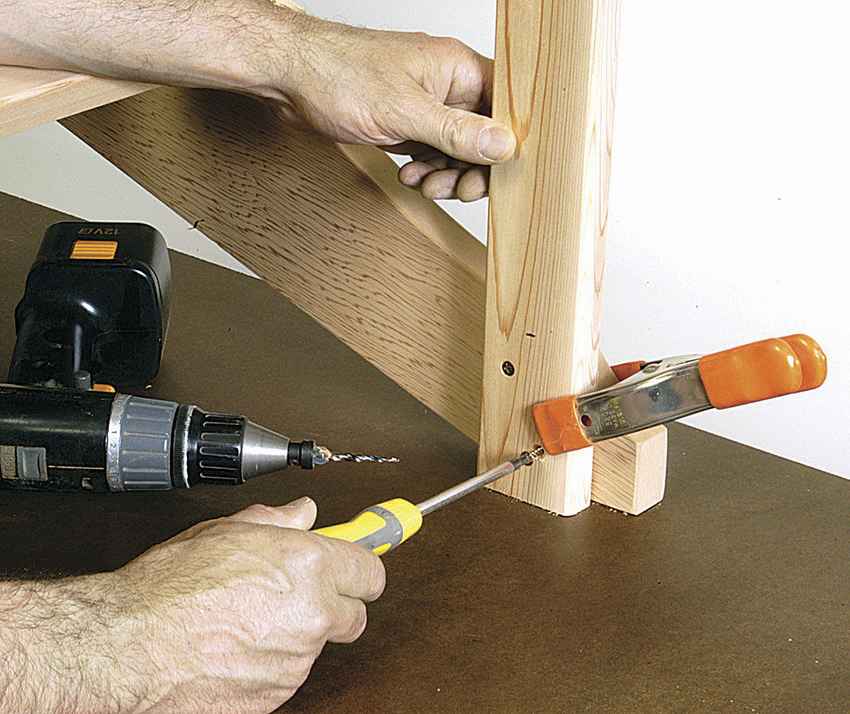
- Trim the rear legs to size by tilting the upper ends at an angle of 64 degrees. Attach to side rail and fasten with screws.
- Screw the upper rear rail to the upper ends of the rear legs and lay the chair on the back to set rear slats.
- Mark the centers of the upper and lower rear rails, align the center back rail with these marks and screw it into place.
- Install two external rails. Fix so that the upper curved ends are even. aligned and spaces were the same.
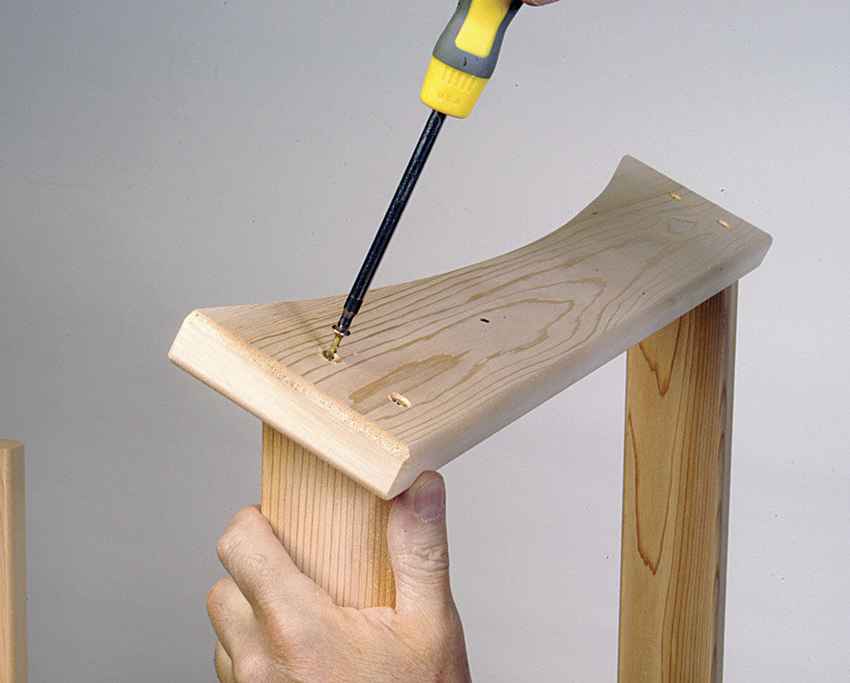
- Cut out armrests and supports. Round the edges. Fasten temporarily with screws.
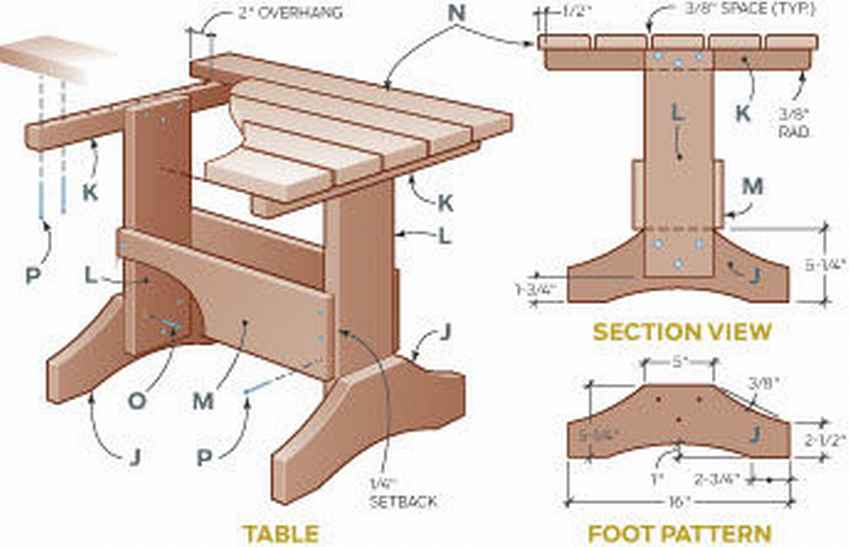
Attach the armrests to the front and rear legs. - The table is built in the same way as a chair - all protruding edges are rounded off by the milling cutter, and the parts are simply twisted together. Attach each leg with three screws.
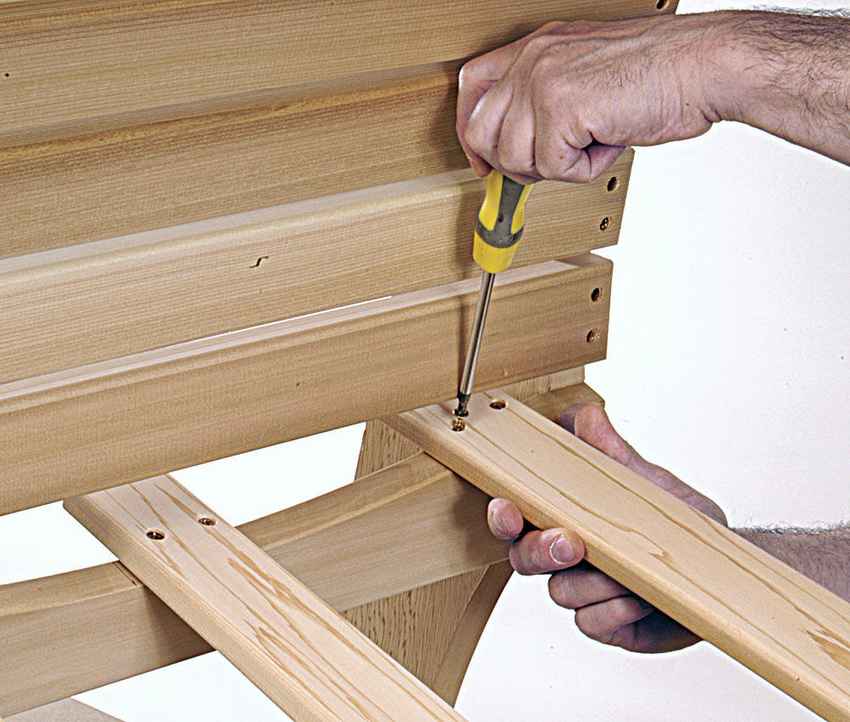
- Then drill through holes and screw the two subframes to the legs.
- To assemble the top, it is easiest to first clamp the parts together with the spacers located between the upper bars. Then attach the spikes.
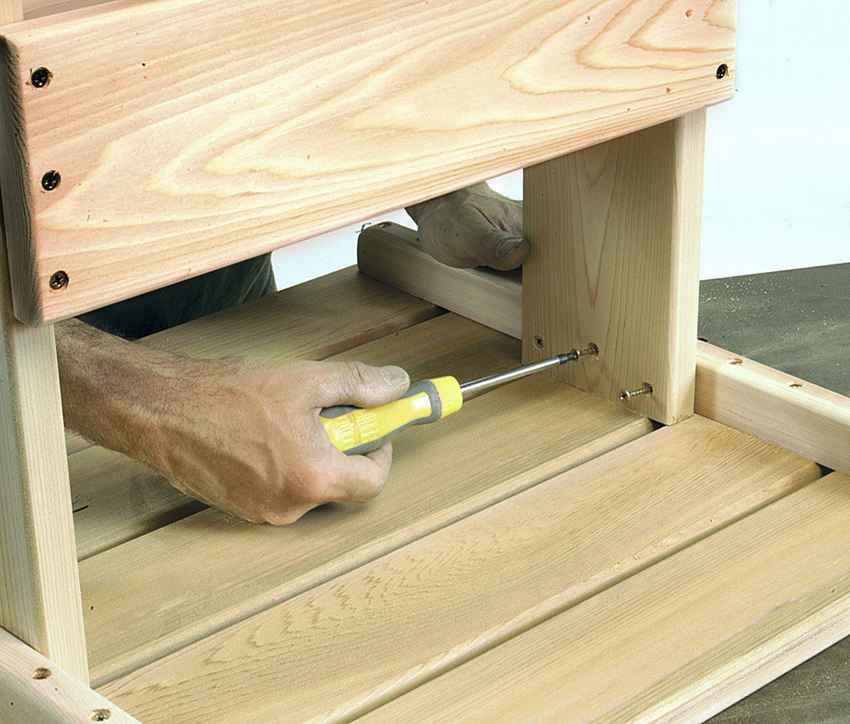
- Finally, screw the base onto the upper studs.
Want to know what types of chairs are and how to make them? Here is the article “Do-it-yourself chairs. 700 photos. Schemes, layouts, drawings and master classes» https://i.expert-h.com/en/stul/stul-svoimi-rukami-foto-shemy-makety-chertezhi-master-klass, where there are a lot of interesting ideas, concrete examples with master classes and step-by-step photos.
Hello, I am the author of this article, so I look forward to asking questions for this article in the comments below, I will answer all !!!
If you have questions on another topic, ask them on our forum, we will answer you
- Two baskets of paper in 5 minutes (Master class)
- How to make a simple and compact table for a milling cutter from plywood
- How to make a soft headboard tile (Instructions + step by step photos)
- Cinder block benches: a convenient bench in 55 minutes
- How to make a bed with a niche: saving space (Master class)